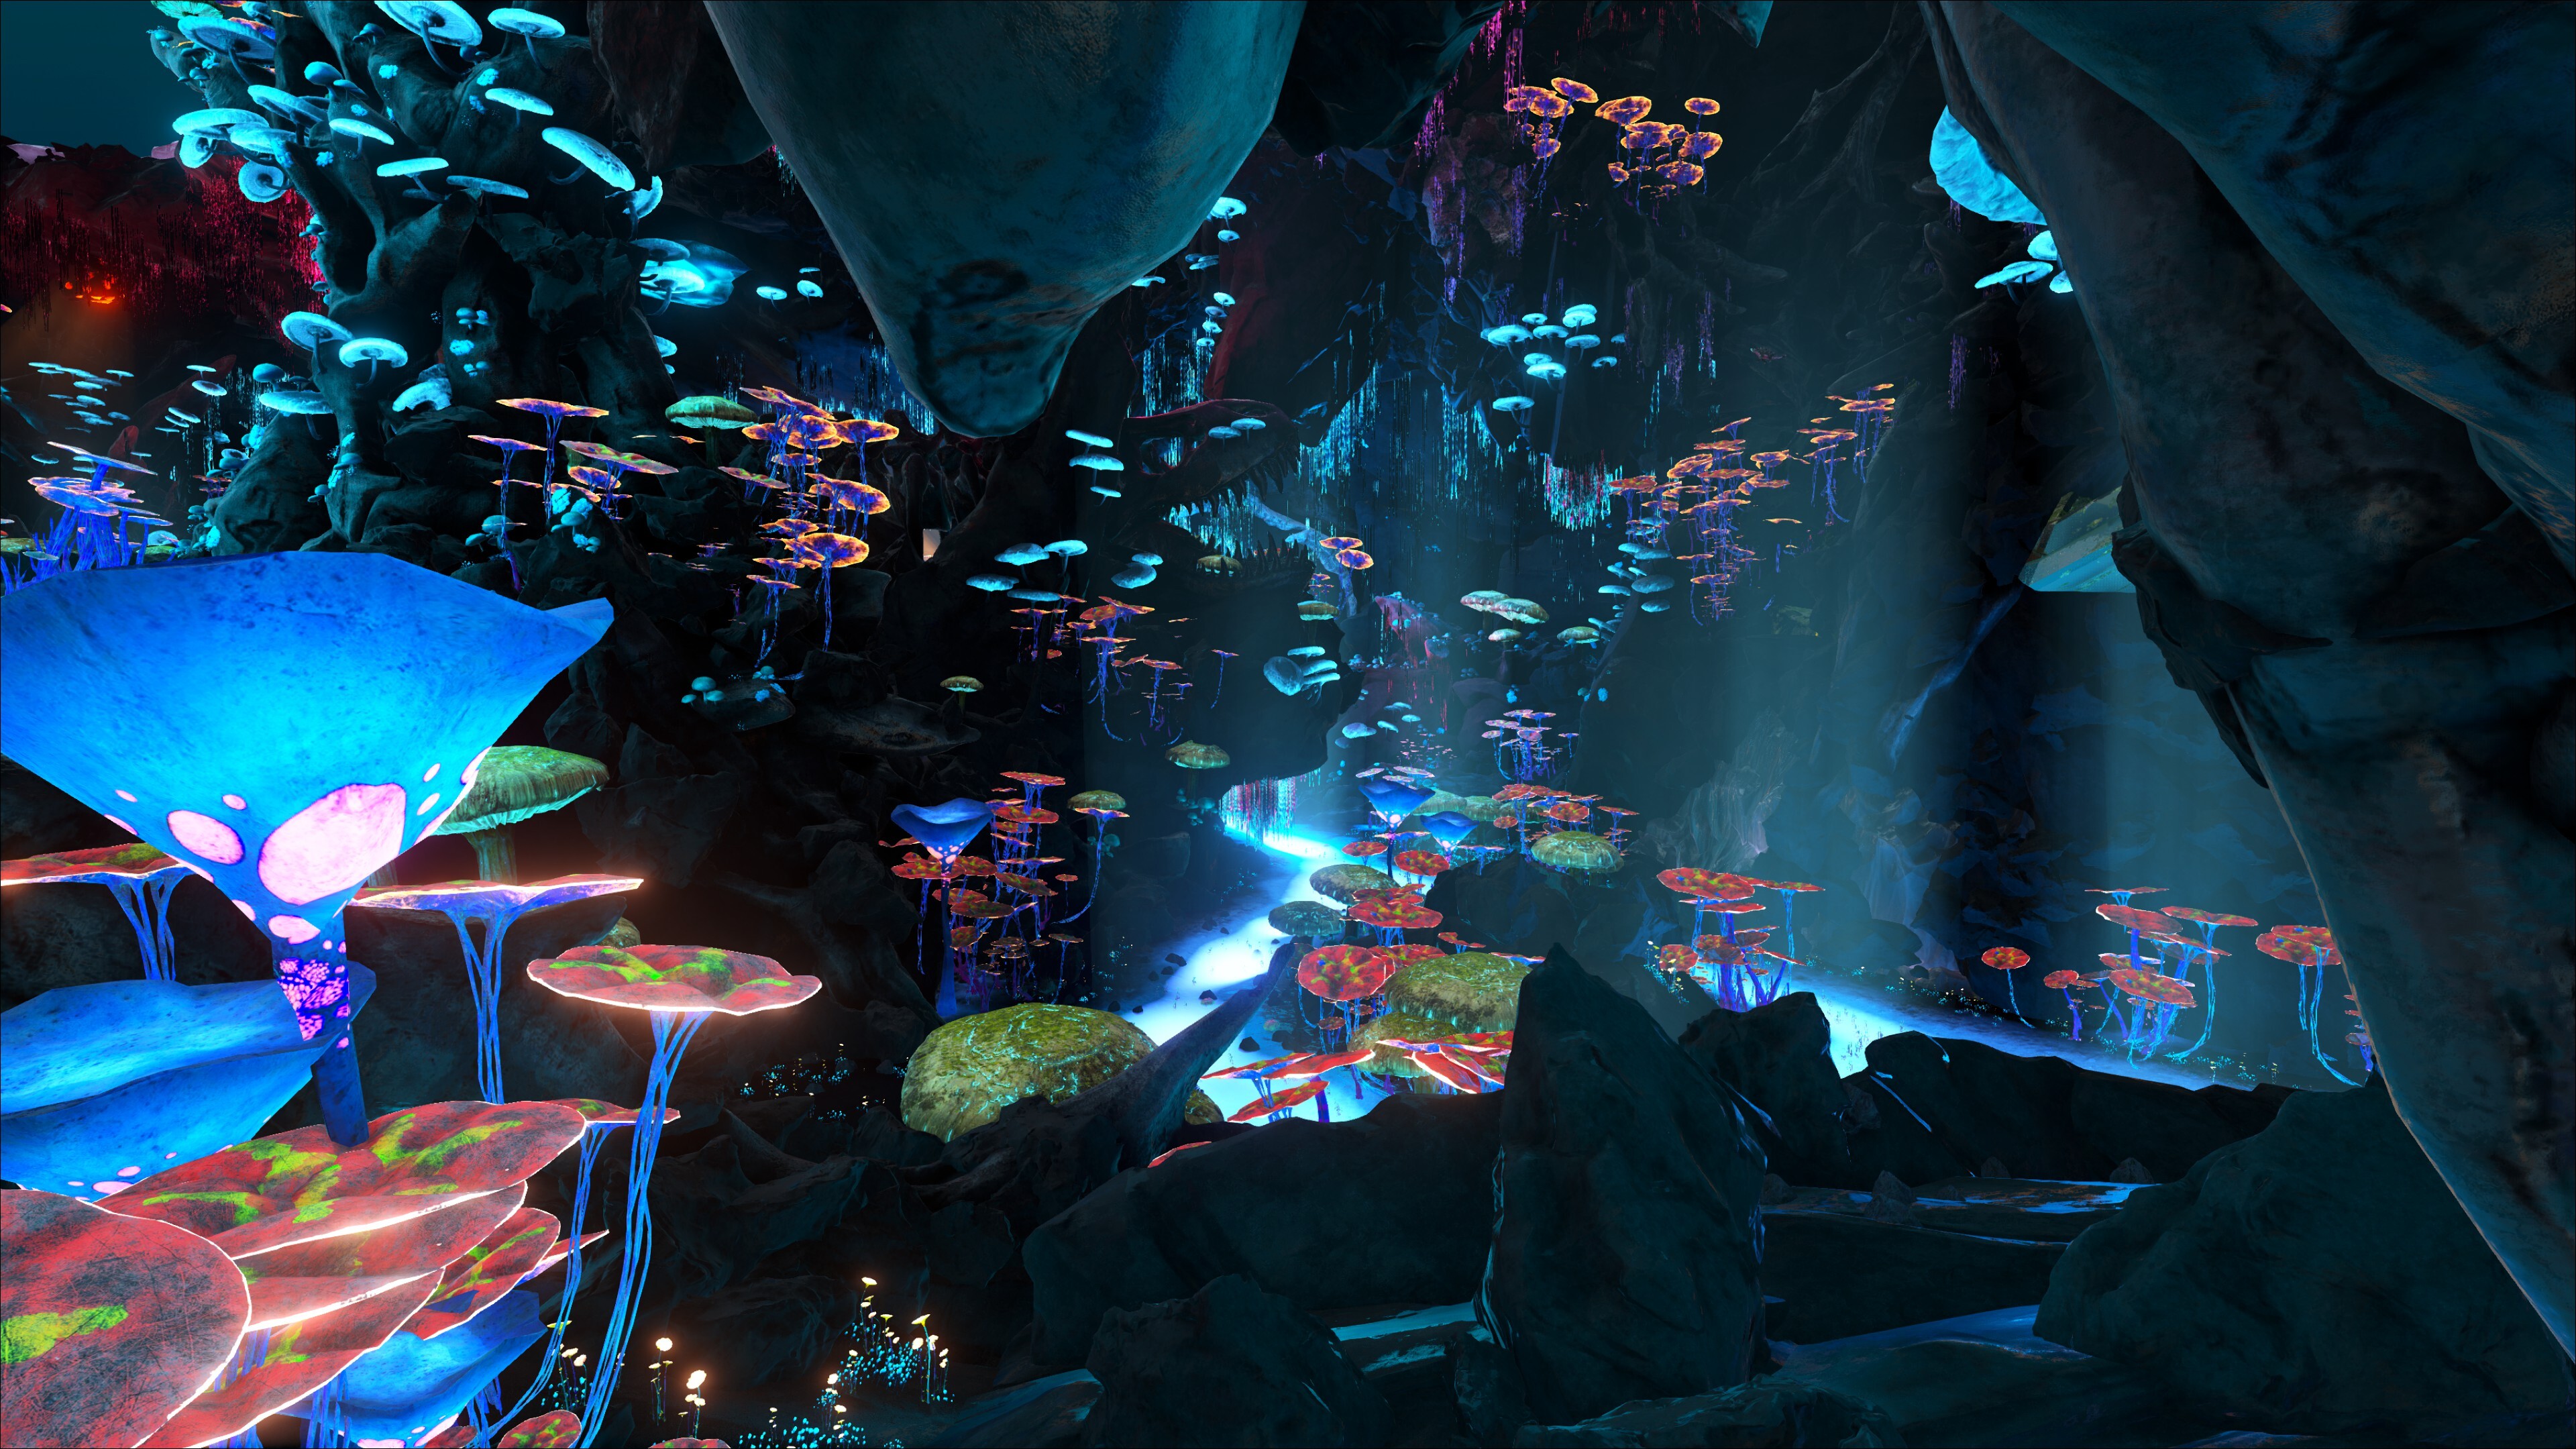
# The PACK Gaming!

We are an adult gaming community, and enjoy finding quality players to join our gaming adventures.

## **Navigation of Pages:**

<table data-view="cards"><thead><tr><th></th><th></th></tr></thead><tbody><tr><td><strong>Left side of the page</strong> <span data-gb-custom-inline data-tag="emoji" data-code="25c0">◀️</span></td><td>Use the <strong>></strong> to open any pages in that section when the Header shows a <strong>></strong>.</td></tr><tr><td><strong>Right Side</strong> of the page <span data-gb-custom-inline data-tag="emoji" data-code="25b6">▶️</span></td><td>Click a header to go to that section of this page.</td></tr><tr><td><strong>Features of the page.</strong></td><td>are in an <strong>expandable box</strong>, please click the <strong>></strong> to open the expandable dropdown.</td></tr><tr><td><strong>Hyperlink</strong>s are often in a <strong>card form</strong> in the website.</td><td>So <strong>clicking an image</strong> will often take you to a specific page for information. </td></tr><tr><td><strong>Steam-link</strong>s are often in a <strong>card form</strong> in the website.</td><td>So <strong>clicking on a server card</strong> will take you to the Server.</td></tr></tbody></table>

<figure><img src="https://772063455-files.gitbook.io/~/files/v0/b/gitbook-x-prod.appspot.com/o/spaces%2F-Lgje1lBxKKWXwqycB-v%2Fuploads%2FiJgWEkm6mEQjccWkmsZ3%2FThe%20Pack%20Website%20Main.png?alt=media&amp;token=bbe40537-e13d-4928-a509-7f508e09b9dd" alt=""><figcaption></figcaption></figure>

## ***Welcome*** to The Pack Gaming Group.&#x20;

Established in February 2019! Six years of Excellence!

### Owners Vision

**OUR MOTTO!** \
**ALL MAY ENTER HERE WITHOUT PREJUDICE!**\
**This applies to All Races, All Creeds, and All Genders.**\
**All are Welcome!!!**

We are an adult gaming community, and we are looking for quality players to join our adventures. All our servers are Beginner Friendly. We host PVE servers for Ark Evolved, Ark Ascended, Conan Exiles, Dark and Light, 7DTD, Valheim, Palworld, Soulmask. We also run limited run servers of new games. We have a unique and different gaming experience on our different gaming platforms. From Specialized mods that provide unique items and creatures on specific platforms to Player-made maps on other platforms. We use a structured rule package that enhances creation of a playing environment that fosters Community, and personal growth. We want to provide a laid back, but drama free experience to our gaming. We strive to provide the best environment to build the base of your dreams, but also balanced with the knowledge that load times are important too!

**Last of all, BE EXCELLENT TO EACH OTHER! We are all adults here and know how to act. Let's make a happy, safe place to enjoy the games we love to play!**

## The PACK Social Media and Information Links

#### Please use the links below to navigate to more details about our Social Media and Group information.

<table data-view="cards"><thead><tr><th></th><th></th><th align="center"></th><th data-hidden data-card-cover data-type="files"></th><th data-hidden data-card-target data-type="content-ref"></th></tr></thead><tbody><tr><td><strong>Supporting our Servers!</strong></td><td>With our supporter contributions, we currently run a data center of Seven different Game platforms all open to the public. </td><td align="center"></td><td><a href="https://772063455-files.gitbook.io/~/files/v0/b/gitbook-x-prod.appspot.com/o/spaces%2F-Lgje1lBxKKWXwqycB-v%2Fuploads%2FlocRcANkQfJEnnkgDY0C%2FPACK_CARDS_PATREON.png?alt=media&amp;token=b7966b2a-5fa0-4c8b-be5d-2a405c73badb">PACK_CARDS_PATREON.png</a></td><td><a href="https://faq.thepackgaming.com/patreon">https://faq.thepackgaming.com/patreon</a></td></tr><tr><td></td><td><strong>Steam Community Group</strong> <br>Please take a few to connect to our Group on Steam. </td><td align="center"></td><td><a href="https://772063455-files.gitbook.io/~/files/v0/b/gitbook-x-prod.appspot.com/o/spaces%2F-Lgje1lBxKKWXwqycB-v%2Fuploads%2F1JY7IwmTSgKTCaErUd00%2FPACK_CARDS_STEAM-COMMUNITY.png?alt=media&amp;token=cff12f7e-8a04-48ac-9c5a-d650001a66f3">PACK_CARDS_STEAM-COMMUNITY.png</a></td><td></td></tr><tr><td><strong>The PACK Gaming Discord</strong><br>Our home away from Home:</td><td></td><td align="center"></td><td><a href="https://772063455-files.gitbook.io/~/files/v0/b/gitbook-x-prod.appspot.com/o/spaces%2F-Lgje1lBxKKWXwqycB-v%2Fuploads%2FskUXl59ubOt6fXjILEss%2FPACK_CARDS_DISCORD.png?alt=media&amp;token=0249b6d0-f61b-4e97-9b2d-3c51e07a30df">PACK_CARDS_DISCORD.png</a></td><td><a href="https://discord.gg/RJVVraV">https://discord.gg/RJVVraV</a></td></tr><tr><td><strong>OUR CLUSTER EVENT CALENDAR!</strong></td><td>Our Calendar of Events for our different Games!</td><td align="center"></td><td><a href="https://772063455-files.gitbook.io/~/files/v0/b/gitbook-x-prod.appspot.com/o/spaces%2F-Lgje1lBxKKWXwqycB-v%2Fuploads%2FG57M2hPhxCvagvVgzssL%2FPACK_CARDS_EVENTS.png?alt=media&amp;token=ad059cfd-6d1e-4db5-92d3-94b407fca7c3">PACK_CARDS_EVENTS.png</a></td><td><a href="https://faq.thepackgaming.com/events">https://faq.thepackgaming.com/events</a></td></tr><tr><td><strong>RULES for our SERVERS</strong></td><td>Directory for the different Rule sets for each of the different Game platforms.</td><td align="center"></td><td><a href="https://772063455-files.gitbook.io/~/files/v0/b/gitbook-x-prod.appspot.com/o/spaces%2F-Lgje1lBxKKWXwqycB-v%2Fuploads%2FD55aCGD6HXimDUtdDTxE%2FPACK_CARDS_SERVER_RULES.png?alt=media&amp;token=37e5434f-cf75-47e6-aba7-418f8c9ec26a">PACK_CARDS_SERVER_RULES.png</a></td><td><a href="https://faq.thepackgaming.com/rules">https://faq.thepackgaming.com/rules</a></td></tr><tr><td><em><strong>ALPHY'S HELP DESK!</strong></em></td><td>Here you will find most of the many fixes for Computer Graphic Issues and Game Glitches.</td><td align="center"><em><strong>"Did you unplug it, then re-plug it in ?"</strong></em></td><td><a href="https://772063455-files.gitbook.io/~/files/v0/b/gitbook-x-prod.appspot.com/o/spaces%2F-Lgje1lBxKKWXwqycB-v%2Fuploads%2FtLYJUFHLjBwCwSD3ahrN%2FGaming%20Splash%20ALPHYS%20HELP%20DESK.png?alt=media&amp;token=3bf390e4-8536-4ec4-af9d-521f87124f22">Gaming Splash ALPHYS HELP DESK.png</a></td><td><a href="https://faq.thepackgaming.com/alphys-help-desk/directory">https://faq.thepackgaming.com/alphys-help-desk/directory</a></td></tr></tbody></table>

## The PACK Gaming Collection of Game Servers

#### Please use the links below to navigate to more details about our gaming servers.

<table data-view="cards"><thead><tr><th align="center"></th><th data-hidden data-card-cover data-type="files"></th><th data-hidden data-card-target data-type="content-ref"></th></tr></thead><tbody><tr><td align="center"><img src="https://772063455-files.gitbook.io/~/files/v0/b/gitbook-x-prod.appspot.com/o/spaces%2F-Lgje1lBxKKWXwqycB-v%2Fuploads%2FJtIlcxDXlv89Yz7IPf5g%2Fimage.png?alt=media&amp;token=b5738c95-3b45-4b07-9fcc-a4dfac99fc44" alt=""></td><td></td><td><a href="https://faq.thepackgaming.com/ark/ase-cluster">https://faq.thepackgaming.com/ark/ase-cluster</a></td></tr><tr><td align="center"><img src="https://772063455-files.gitbook.io/~/files/v0/b/gitbook-x-prod.appspot.com/o/spaces%2F-Lgje1lBxKKWXwqycB-v%2Fuploads%2Fxgdk7X37etylamfE0pP4%2Fimage.png?alt=media&amp;token=6cd6c096-fb56-4988-a9e0-1346b8f16540" alt=""></td><td></td><td><a href="https://faq.thepackgaming.com/ark/asa-cluster">https://faq.thepackgaming.com/ark/asa-cluster</a></td></tr><tr><td align="center"><img src="https://772063455-files.gitbook.io/~/files/v0/b/gitbook-x-prod.appspot.com/o/spaces%2F-Lgje1lBxKKWXwqycB-v%2Fuploads%2FzcD1Y0sobeZ8zGpRy9vF%2Fimage.png?alt=media&amp;token=4e63b682-a540-42b3-9ada-cb8ff8855839" alt="" data-size="original"></td><td></td><td><a href="https://faq.thepackgaming.com/conan/info">https://faq.thepackgaming.com/conan/info</a></td></tr><tr><td align="center"><img src="https://772063455-files.gitbook.io/~/files/v0/b/gitbook-x-prod.appspot.com/o/spaces%2F-Lgje1lBxKKWXwqycB-v%2Fuploads%2Fw04kKYc8vo0H67PvVd7s%2Fimage.png?alt=media&amp;token=32b3a25b-8623-4aea-8c9c-a6eed323ff8f" alt=""></td><td></td><td><a href="https://faq.thepackgaming.com/dark-and-light/info">https://faq.thepackgaming.com/dark-and-light/info</a></td></tr><tr><td align="center"><img src="https://772063455-files.gitbook.io/~/files/v0/b/gitbook-x-prod.appspot.com/o/spaces%2F-Lgje1lBxKKWXwqycB-v%2Fuploads%2F3f9wabixjkYmBLosr4Ih%2Fimage.png?alt=media&amp;token=e5543706-6f3b-49ef-9b09-396d1bc1cfe5" alt="" data-size="original"></td><td></td><td><a href="https://faq.thepackgaming.com/palworld/info">https://faq.thepackgaming.com/palworld/info</a></td></tr><tr><td align="center"><img src="https://772063455-files.gitbook.io/~/files/v0/b/gitbook-x-prod.appspot.com/o/spaces%2F-Lgje1lBxKKWXwqycB-v%2Fuploads%2FiJxe5VKdyS0RNp0vHyK5%2Fimage.png?alt=media&amp;token=fd11687e-08c0-4a08-8e6f-bacb4efbb21b" alt="" data-size="original"></td><td></td><td><a href="https://faq.thepackgaming.com/7dtd/info">https://faq.thepackgaming.com/7dtd/info</a></td></tr><tr><td align="center"><img src="https://772063455-files.gitbook.io/~/files/v0/b/gitbook-x-prod.appspot.com/o/spaces%2F-Lgje1lBxKKWXwqycB-v%2Fuploads%2FbAMuwUCdJyOaLB77qc03%2Fimage.png?alt=media&amp;token=3437e7ed-dd9f-48c2-9988-57cdbb7dfff1" alt="" data-size="original"></td><td></td><td><a href="https://faq.thepackgaming.com/soulmask/info">https://faq.thepackgaming.com/soulmask/info</a></td></tr><tr><td align="center"><img src="https://772063455-files.gitbook.io/~/files/v0/b/gitbook-x-prod.appspot.com/o/spaces%2F-Lgje1lBxKKWXwqycB-v%2Fuploads%2F2Ov5jycGWK2seq16mR9X%2Fimage.png?alt=media&amp;token=637def6d-5f49-41fb-b95e-627e22c9ce56" alt=""></td><td></td><td><a href="https://faq.thepackgaming.com/valheim/info">https://faq.thepackgaming.com/valheim/info</a></td></tr></tbody></table>

![](https://772063455-files.gitbook.io/~/files/v0/b/gitbook-x-prod.appspot.com/o/spaces%2F-Lgje1lBxKKWXwqycB-v%2Fuploads%2FrlqX4M9MCu6dVUfCnhWe%2FNEW-PAGE_GENERIC_BANNER.png?alt=media\&token=9d073148-393e-4dac-ae13-e88d3519e959)


# How to Support The PACK!

## **Navigation of Pages:**

<table data-view="cards"><thead><tr><th></th><th></th></tr></thead><tbody><tr><td><strong>Left side of the page</strong> <span data-gb-custom-inline data-tag="emoji" data-code="25c0">◀️</span></td><td>Use the <strong>></strong> to open any pages in that section when the Header shows a <strong>></strong>.</td></tr><tr><td><strong>Right Side</strong> of the page <span data-gb-custom-inline data-tag="emoji" data-code="25b6">▶️</span></td><td>Click a header to go to that section of this page.</td></tr><tr><td><strong>Features of the page.</strong></td><td>are in an <strong>expandable box</strong>, please click the <strong>></strong> to open the expandable dropdown.</td></tr><tr><td><strong>Hyperlink</strong>s are often in a <strong>card form</strong> in the website.</td><td>So <strong>clicking an image</strong> will often take you to a specific page for information. </td></tr><tr><td><strong>Steam-link</strong>s are often in a <strong>card form</strong> in the website.</td><td>So <strong>clicking on a server card</strong> will take you to the Server.</td></tr></tbody></table>

## &#x20;![:patreon:](https://cdn.discordapp.com/emojis/910657481728983100.png?size=44) Support our Community! ![:patreon:](https://cdn.discordapp.com/emojis/910657481728983100.png?size=44)  <a href="#docs-internal-guid-ccc7a62b-7fff-7fa9-b06a-d5619ef7d581" id="docs-internal-guid-ccc7a62b-7fff-7fa9-b06a-d5619ef7d581"></a>

**A Bit About Our Community!**  \
With our supporter contributions, we currently run a public cluster of Seven different Game platforms. An ASE Cluster; an ASA Cluster; a Group of Conan Exiles maps; 7DTD 1.0 Map; Dark and Light Cluster; Valheim, and Soulmask servers.

**You can support us by:**

* Playing on our servers and hanging around in our Discord! Without you there's no community, so thank you for being there!
* Donating a monthly amount to our Patreon page. You'll help us with covering monthly server costs and growing our community by reaching new goals. As a bonus you get rewards.

***Further support includes expanding the our data center for running gaming servers. Thank you so much for your support!***

<table data-view="cards" data-full-width="false"><thead><tr><th></th><th></th><th data-hidden data-card-target data-type="content-ref"></th><th data-hidden data-card-cover data-type="image">Cover image</th></tr></thead><tbody><tr><td>Alphynen Blackwolf - The PACK 2.0</td><td>Click here to Join our Patreon!</td><td><a href="https://www.patreon.com/c/alphynenblackwolf/posts">https://www.patreon.com/c/alphynenblackwolf/posts</a></td><td><a href="https://772063455-files.gitbook.io/~/files/v0/b/gitbook-x-prod.appspot.com/o/spaces%2F-Lgje1lBxKKWXwqycB-v%2Fuploads%2F4HMOWpZSUyJqlIulChbm%2FAlphynen%20_%20Patreon.png?alt=media&amp;token=54fcc92b-497b-4fd7-89c8-a779cff45720">Alphynen _ Patreon.png</a></td></tr><tr><td><h3 id="docs-internal-guid-ccc7a62b-7fff-7fa9-b06a-d5619ef7d581"> Support our Community!  </h3></td><td>Click here to go to Join our Discord!</td><td><a href="https://discord.com/invite/uvmXB2P">https://discord.com/invite/uvmXB2P</a></td><td><a href="https://772063455-files.gitbook.io/~/files/v0/b/gitbook-x-prod.appspot.com/o/spaces%2F-Lgje1lBxKKWXwqycB-v%2Fuploads%2FvRa2FfqPeX4kTfwd28iM%2FDISCORD_JOIN.png?alt=media&amp;token=58b401c9-ba48-4a6d-998d-fefdd9e4234e">DISCORD_JOIN.png</a></td></tr><tr><td><h3 id="docs-internal-guid-ccc7a62b-7fff-7fa9-b06a-d5619ef7d581"> Linking Discord to Patreon? </h3></td><td>Click here to go to Learn how to Link Discord to Patreon!</td><td><a href="https://support.patreon.com/hc/en-us/articles/212052266-Getting-Discord-access#:~:text=Log%20in%20to%20your%20Patreon,need%20to%20refresh%20the%20page">https://support.patreon.com/hc/en-us/articles/212052266-Getting-Discord-access#:~:text=Log%20in%20to%20your%20Patreon,need%20to%20refresh%20the%20page</a></td><td><a href="https://772063455-files.gitbook.io/~/files/v0/b/gitbook-x-prod.appspot.com/o/spaces%2F-Lgje1lBxKKWXwqycB-v%2Fuploads%2F6RJzO78kmPf5LWTfD6kF%2Fimage_2026-04-24_213535088.png?alt=media&amp;token=70c85136-3678-49a8-88da-94bd7bc5cd35">image_2026-04-24_213535088.png</a></td></tr></tbody></table>

## *How we handle your PERKS in game.*

### *New Patreons:*

Patreon perk requests can be filled on the day of your initial signup, please wait till you have the COLORED DISCORD tag! We will need a screenshot of your Patreon Receipt with your email clearly showing. Please attach photos via the ticket (Under your Discord Tag). In our Discord Patreon Section of the Discord.

<div><figure><img src="https://772063455-files.gitbook.io/~/files/v0/b/gitbook-x-prod.appspot.com/o/spaces%2F-Lgje1lBxKKWXwqycB-v%2Fuploads%2FccdyoO7La8XtHYQlqKaJ%2Fimage.png?alt=media&amp;token=d4cdf03d-3c9f-4de3-9b20-1897e44c21be" alt="" width="375"><figcaption></figcaption></figure> <figure><img src="https://772063455-files.gitbook.io/~/files/v0/b/gitbook-x-prod.appspot.com/o/spaces%2F-Lgje1lBxKKWXwqycB-v%2Fuploads%2Fjh1rqemsowyhonjZGccf%2Fmobile%20emali.png?alt=media&amp;token=3abc04bf-fa7c-46c6-b852-527ed9018850" alt="" width="276"><figcaption></figcaption></figure></div>

### *Returning Patreon's*

Patreons, can request perks, anytime after the 1st day of the consecutive month. Dependent on if your email is already listed in our system, You will not need to show proof of payment. We will ONLY need a screenshot of your Patreon Receipt If you have recently UPGRADED or DOWNGRADED your Patreon Tier. Any such info can be included in your new monthly ticket.

### Steps to Pay for Patreon with PayPal

1. **Use a Web Browser:** Open Patreon in a web browser (Chrome, Safari, etc.) rather than the app to ensure PayPal is an option.
2. **Navigate to Settings:** Log in, click on your profile photo, and select **Manage Memberships**.
3. **Add Payment Method:** Select **Payment Methods**, then click **Add PayPal**.
4. **Authorize PayPal:** Log in to your PayPal account to authorize it as a payment source for Patreon.&#x20;

### Patreon Support Tiers

<table data-view="cards"><thead><tr><th></th><th></th><th></th><th></th><th data-hidden data-card-cover data-type="image">Cover image</th></tr></thead><tbody><tr><td><strong>$1 - $5 / month Unlocks - General Support Tier only perks!</strong></td><td>This option is for the casual gamer that donates to support the Gaming Group. And provides a voice for the player to voice opinions</td><td><strong>Includes:</strong> <br>Get acknowledged with a special Patreon rank on Discord.<br></td><td>See your Game Platform for a chart of Specific Perks!</td><td><a href="https://772063455-files.gitbook.io/~/files/v0/b/gitbook-x-prod.appspot.com/o/spaces%2F-Lgje1lBxKKWXwqycB-v%2Fuploads%2FzbLvQOj2agJd4z1Zmw3v%2Fgeneral%20patreon%20logo.jpg?alt=media&amp;token=9ca2ad6a-3cea-48ff-b614-daaa8c15b1a2">general patreon logo.jpg</a></td></tr><tr><td><strong>$10 / month Unlocks Single Server Tier perks!</strong></td><td>This option is for the gamer that donates to support one specific map within our Gaming Group, for 3 months or more. And provides a voice for the player to voice opinions</td><td><strong>Includes:</strong> <br>Get acknowledged with a special Patreon rank on Discord.</td><td>See your Game Platform for a chart of Specific Perks!</td><td><a href="https://772063455-files.gitbook.io/~/files/v0/b/gitbook-x-prod.appspot.com/o/spaces%2F-Lgje1lBxKKWXwqycB-v%2Fuploads%2FEqmoJV3UasF2v4vYLal7%2Fpatreon%20_3.png?alt=media&amp;token=7f13a73c-4b17-4981-ab9c-3f0517067156">patreon _3.png</a></td></tr><tr><td><strong>$50 / month Unlocks Multiple Server Tier- only perks!</strong></td><td>This option is for the gamer that donates to support one full server unit,  within our Gaming Group, for 3 months or more. And provides a voice for the player to voice opinions</td><td><strong>Includes:</strong> <br>Get acknowledged with a special Patreon rank on Discord</td><td>See your Game Platform for a chart of Specific Perks!</td><td><a href="https://772063455-files.gitbook.io/~/files/v0/b/gitbook-x-prod.appspot.com/o/spaces%2F-Lgje1lBxKKWXwqycB-v%2Fuploads%2FMZvaTjSjHilADaDJeaXs%2Fgolden%20patreon%20logo.jpg?alt=media&amp;token=95fe2ae6-0a3b-4c01-b2f0-8fbfbd0d207e">golden patreon logo.jpg</a></td></tr><tr><td><strong>$100 / month Unlocks The Ultimate Server Tier- only perks!</strong></td><td>This option is for the gamer that donates to support our Gaming Group in any way, for 3 months or more. And provides a voice for the player to voice opinions</td><td><strong>Includes:</strong> <br>Get acknowledged with a special Patreon rank on Discord.</td><td>See your Game Platform for a chart of Specific Perks!</td><td><a href="https://772063455-files.gitbook.io/~/files/v0/b/gitbook-x-prod.appspot.com/o/spaces%2F-Lgje1lBxKKWXwqycB-v%2Fuploads%2FpaQvnpdQjOFwSKHQTi0n%2FUltimate%20Patreon%20Tier.png?alt=media&amp;token=1430f487-ff7a-4720-a2f8-5f1e6c1227f2">Ultimate Patreon Tier.png</a></td></tr></tbody></table>

## Our Patreon Perks!&#x20;

<figure><img src="https://772063455-files.gitbook.io/~/files/v0/b/gitbook-x-prod.appspot.com/o/spaces%2F-Lgje1lBxKKWXwqycB-v%2Fuploads%2Fi3BXMOWMm4Qg05TqND6k%2Fimage.png?alt=media&amp;token=2f5ae6f4-65e6-486b-a656-6bf35e15b188" alt="" width="375"><figcaption></figcaption></figure>

## ASE and ASA PATREON TIERS/PERKS

<figure><img src="https://772063455-files.gitbook.io/~/files/v0/b/gitbook-x-prod.appspot.com/o/spaces%2F-Lgje1lBxKKWXwqycB-v%2Fuploads%2FbTKw2AoktPXvoIettENh%2FARK10Year_Snail_Website_Banner_v2.webp?alt=media&amp;token=3424bc75-220d-48b3-a80c-59d274409e9b" alt=""><figcaption></figcaption></figure>

There will be differences between items given due to differences between the two games. *{Depending on platform, not all creatures or items may be available}*

### ASE Creature Specifics'&#x20;

{% tabs %}
{% tab title="ASE Prohibited creatures." %}
ASE And ASA Prohibited Dinos:

* [Alpha Creatures](https://ark.wiki.gg/wiki/Alpha_Creatures)&#x20;
* [Brute Creatures](https://ark.wiki.gg/wiki/Brute_Creatures)
* [Corrupted Creatures](https://ark.wiki.gg/wiki/Corrupted_Creatures)
* [Enraged Creatures](https://ark.wiki.gg/wiki/Enraged_Creatures)
* [Event Creatures](https://ark.wiki.gg/wiki/Event_Creatures)
* [Malfunctioned Tek Creatures](https://ark.wiki.gg/wiki/Malfunctioned_Tek_Creatures)
* [Titans](https://ark.wiki.gg/wiki/Titans)
* [VR Creatures](https://ark.wiki.gg/wiki/VR_Creatures)
* [Ammonite](https://ark.wiki.gg/wiki/Ammonite)
* [Cnidaria](https://ark.wiki.gg/wiki/Cnidaria)
* [Seeker](https://ark.wiki.gg/wiki/Seeker)
* [Large Ferox (Wild)](https://ark.wiki.gg/wiki/Ferox)
* [Meganeura](https://ark.gamepedia.com/Meganeura)
* [N](https://ark.gamepedia.com/Nameless)[ameless1](https://ark.gamepedia.com/Nameless)
* [Reaper Queen](https://ark.gamepedia.com/Reaper_Queen)
* [Titanomyrma](https://ark.gamepedia.com/Titanomyrma)
* Any specific dinosaur spawned in by the bosses.\
  [Exo Mek](https://ark.wiki.gg/wiki/Exo-Mek) is a Reward of the [Prime Rockwall Fight](https://ark.wiki.gg/wiki/Rockwell_Prime) and is not available as a perk.\
  [Fenrir](https://ark.wiki.gg/wiki/Fenrir) is a Reward of the [Alpha Fenrisulfr Fight](https://ark.wiki.gg/wiki/Fenris%C3%BAlfr) and is not available as a perk.
* Any dinosaur spawned within [Genesis-1 Missions](https://ark.wiki.gg/wiki/Genesis:_Part_1#Missions) or [Genesis-2 Missions](https://ark.wiki.gg/wiki/Genesis:_Part_2#Missions).
* Specific Non-tamable dinosaurs found in [Progression Caves](https://ark.wiki.gg/wiki/Caves#Progression_Caves) (Most cave dwelling dinos, are at a 2x base or higher. Therefore, unavailable as a patreon dino.)
  {% endtab %}

{% tab title="ASA Prohibited creatures." %}

* Newly added WC Additional Creatures have a ***four week***, delay from introduction to addition in the full bestiary.
* Creatures Gained Through Boss Fights are used as "RARE Creatures" for Patreon Perks.
  {% endtab %}
  {% endtabs %}

### ASA Creature Specifics'&#x20;

{% tabs %}
{% tab title="ASA ONLY Creatures" %}
\*

{% endtab %}
{% endtabs %}

### ARK Patreon Rewards

{% tabs %}
{% tab title="General Tier" %}

| <p>You may chose between these options below, for your monthly perk!<br>Substitutions can be made, ASK your admin!</p> |
| ---------------------------------------------------------------------------------------------------------------------- |
| <p>ARMOR Pack <br>• Set of Armor of your choice - quality of 7 or higher.</p>                                          |
| <p>Colorize Your Favorites! - 5 dinos.<br>• 5 re-colors of wild caught dinos, your choice</p>                          |
| {% endtab %}                                                                                                           |

{% tab title="Single Server Tier" %}

| <p>You may chose between these options below, for your monthly perk!<br>Substitutions can be made, ASK your admin!</p>                                                                   |
| ---------------------------------------------------------------------------------------------------------------------------------------------------------------------------------------- |
| <p><strong>Single Server Breeder Package - 1 breeder Pair.</strong><br>\* choose a map (Dinos are native to the map you choose)<br>\* choose a species<br>\* choose a color pattern.</p> |
| <p><strong>Single Server Resource</strong> <br>Element or some other resource admins can spawn<br>200 ct.</p>                                                                            |
|                                                                                                                                                                                          |
| {% endtab %}                                                                                                                                                                             |

{% tab title="Multiple Server Tier" %}

| <p>You may chose between these options below, for your monthly perk!<br>Substitutions can be made, ASK your admin!</p>                                                                        |
| --------------------------------------------------------------------------------------------------------------------------------------------------------------------------------------------- |
| <p><strong>Multiple Server Breeder Package - 4 breeder Pair.</strong><br>\* choose a map (Dinos are native to the map you choose)<br>\* choose your species<br>\* choose a color pattern.</p> |
| <p><strong>Multiple Server Resource</strong> <br>Element or some other resource admins can spawn<br>500 ct.</p>                                                                               |
| {% endtab %}                                                                                                                                                                                  |

{% tab title="Ultimate Server Tier" %}

| <p>You may chose between these options below, for your monthly perk!<br>Substitutions can be made, ASK your admin!</p>                                                                   |
| ---------------------------------------------------------------------------------------------------------------------------------------------------------------------------------------- |
| <p><strong>Ultimate Breeder Package - 5 breeder Pair.</strong><br>\* choose a map (Dinos are native to the map you choose)<br>\* choose your species<br>\* choose a color pattern.</p>   |
| <p><strong>Ultimate Creature Package - 5 Rare Creatures</strong><br>\* hard to tame<br>\* Titan class<br>\* Reward creatures Like exo mek or the Gigadesmondus (presented as an egg)</p> |
| <p><strong>Ultimate Server Resource</strong> <br>Element or some other resource admins can spawn<br>1000 ct.</p>                                                                         |

{% endtab %}
{% endtabs %}

<figure><img src="https://772063455-files.gitbook.io/~/files/v0/b/gitbook-x-prod.appspot.com/o/spaces%2F-Lgje1lBxKKWXwqycB-v%2Fuploads%2FU9sTGJDGI5Jnd42O2Nwg%2FGeneric%20Conan.png?alt=media&amp;token=8a677fb7-badf-40f2-9420-0321a43ae2f2" alt="" width="375"><figcaption></figcaption></figure>

### **Conan Exiles**&#x20;

**In Game perks** must be toggled on by a Conan Admin "IN-GAME" We will need your in-game name and your steam ID for this. Your tier defines what set of packages you can choose from.&#x20;

{% tabs %}
{% tab title="Conan Exiles Prohibited Thralls and Pets." %}

* No Mini Bosses;  No NPC Merchants; No NPC Standard Thralls
* No AOC Mini bosses, No AOC NPC characters.
  {% endtab %}
  {% endtabs %}

{% tabs %}
{% tab title="General Tier" %}

{% endtab %}

{% tab title="Single Server Tier" %}

{% endtab %}

{% tab title="Multiple Server Tier" %}

{% endtab %}

{% tab title="Ultimate Server Tier" %}

{% endtab %}
{% endtabs %}

### All Our other games do not support Patreon Perks.

## Pack Patreon FAQ's

***All Patreon Perks can be collected by your main game account in all games you play.***

<table data-view="cards"><thead><tr><th></th><th></th><th data-hidden data-card-cover data-type="files"></th></tr></thead><tbody><tr><td><strong>Your tier rewards starts the day you pay your first payment, and connect your Discord with Patreon.</strong></td><td>Within an hour your <em>Special status name tag</em> will appear. Once that happens we can assist you with your rewards. <em>(For the Special Tag in Conan, and admin has to toggle that for you. Please drop us a support ticket in Discord)</em></td><td><a href="https://772063455-files.gitbook.io/~/files/v0/b/gitbook-x-prod.appspot.com/o/spaces%2F-Lgje1lBxKKWXwqycB-v%2Fuploads%2FPWjT36nuiKd3Ce5fc5Jx%2Fimage_2025-01-09_023905248.png?alt=media&amp;token=d2b36cf8-1117-4281-a7f8-5af433abbdbd">image_2025-01-09_023905248.png</a></td></tr><tr><td><em><strong>Yes you can up your level.</strong></em></td><td>Just go to the tier you want, and it will only take what you owe in difference till the 1st. of the next month. </td><td><a href="https://772063455-files.gitbook.io/~/files/v0/b/gitbook-x-prod.appspot.com/o/spaces%2F-Lgje1lBxKKWXwqycB-v%2Fuploads%2Fk0PXhB4vNJHaQHd6SSRC%2Fimage_2025-01-09_023419351.png?alt=media&amp;token=c9761a9c-6bf5-45eb-8114-43f5504fa274">image_2025-01-09_023419351.png</a></td></tr><tr><td><em><strong>Patreon's may select any game platform they play on for their monthly perk.</strong></em> </td><td><em>You may also get it in any other game besides your main game if you choose to.</em> </td><td><a href="https://772063455-files.gitbook.io/~/files/v0/b/gitbook-x-prod.appspot.com/o/spaces%2F-Lgje1lBxKKWXwqycB-v%2Fuploads%2FcRtPPyDLklxvAql8d70i%2Fimage_2025-01-09_023213561.png?alt=media&amp;token=400e7af2-bf46-4b6b-ab71-f1c36253e65e">image_2025-01-09_023213561.png</a></td></tr></tbody></table>

![](https://772063455-files.gitbook.io/~/files/v0/b/gitbook-x-prod.appspot.com/o/spaces%2F-Lgje1lBxKKWXwqycB-v%2Fuploads%2FrlqX4M9MCu6dVUfCnhWe%2FNEW-PAGE_GENERIC_BANNER.png?alt=media\&token=9d073148-393e-4dac-ae13-e88d3519e959)


# Steam Join Links

Steam Links that are available for our servers, and other log in information.

## **Navigation of Pages:**

<table data-view="cards"><thead><tr><th></th><th></th></tr></thead><tbody><tr><td><strong>Left side of the page</strong> <span data-gb-custom-inline data-tag="emoji" data-code="25c0">◀️</span></td><td>Use the <strong>></strong> to open any pages in that section when the Header shows a <strong>></strong>.</td></tr><tr><td><strong>Right Side</strong> of the page <span data-gb-custom-inline data-tag="emoji" data-code="25b6">▶️</span></td><td>Click a header to go to that section of this page.</td></tr><tr><td><strong>Features of the page.</strong></td><td>are in an <strong>expandable box</strong>, please click the <strong>></strong> to open the expandable dropdown.</td></tr><tr><td><strong>Hyperlink</strong>s are often in a <strong>card form</strong> in the website.</td><td>So <strong>clicking an image</strong> will often take you to a specific page for information. </td></tr><tr><td><strong>Steam-link</strong>s are often in a <strong>card form</strong> in the website.</td><td>So <strong>clicking on a server card</strong> will take you to the Server.</td></tr></tbody></table>

## STEAM LINKS TO OUR SERVERS

**Steam links are no longer working for the ARK Games, so please see specific instructions for the ARK servers.**

## ARK Franchise SERVERS

**𝐇𝐨𝐰 𝐭𝐨 𝐉𝐨𝐢𝐧 𝐚𝐧 𝐀𝐒𝐀 𝐒𝐞𝐫𝐯𝐞𝐫**

1. At the main screen when Ark opens follow these steps to join the map that your character is on:

<figure><img src="https://772063455-files.gitbook.io/~/files/v0/b/gitbook-x-prod.appspot.com/o/spaces%2F-Lgje1lBxKKWXwqycB-v%2Fuploads%2FM2zpwOHsNl0R1MKGb039%2FARK%20ASCENDED%20LOGIN%20PROCEDURE.png?alt=media&amp;token=7718c6dd-714d-410e-a419-5b602b7aabd2" alt=""><figcaption></figcaption></figure>

### ARK ASCENDED PVE CLUSTER

<table data-view="cards"><thead><tr><th align="center"></th><th align="center"></th><th align="center"></th><th></th><th data-hidden data-card-cover data-type="image">Cover image</th><th data-hidden data-card-target data-type="content-ref"></th></tr></thead><tbody><tr><td align="center">𝐓𝐡𝐞 𝐏𝐀𝐂𝐊 𝐈𝐬𝐥𝐚𝐧𝐝 </td><td align="center">Server Name: 𝐓𝐡𝐞 𝐏𝐀𝐂𝐊 𝐈𝐬𝐥𝐚𝐧𝐝 𝐏𝐯𝐄(𝟑𝐱𝐇, 𝟒𝐱𝐗𝐏, 𝟏𝟓𝐓/𝐁) <br></td><td align="center">IP: 66.153.149.147:7977</td><td><code>open 66.153.149.147:7977</code></td><td><a href="https://772063455-files.gitbook.io/~/files/v0/b/gitbook-x-prod.appspot.com/o/spaces%2F-Lgje1lBxKKWXwqycB-v%2Fuploads%2Fo1MXkybzZuVBc3PD9xWT%2Fimage.png?alt=media&amp;token=21f8c9b3-2699-4bac-966e-298c16457a31">image.png</a></td><td></td></tr><tr><td align="center">𝐓𝐡𝐞 𝐏𝐀𝐂𝐊 𝐒𝐜𝐨𝐫𝐜𝐡𝐞𝐝 𝐄𝐚𝐫𝐭𝐡 </td><td align="center">Server Name: 𝐓𝐡𝐞 𝐏𝐀𝐂𝐊 𝐒𝐜𝐨𝐫𝐜𝐡𝐞𝐝 𝐄𝐚𝐫𝐭𝐡 𝐏𝐯𝐄(𝟑𝐱𝐇, 𝟒𝐱𝐗𝐏, 𝟏𝟓𝐓/𝐁)  </td><td align="center">IP: 66.153.149.147:7677</td><td><code>open IP: 66.153.149.147:7677</code></td><td><a href="https://772063455-files.gitbook.io/~/files/v0/b/gitbook-x-prod.appspot.com/o/spaces%2F-Lgje1lBxKKWXwqycB-v%2Fuploads%2FfedqIExE4NgK8TjGEAGk%2FASA_SPLASH_S%20E.png?alt=media&amp;token=0cb9d8b6-7687-4b4f-953e-8cd871cdc095">ASA_SPLASH_S E.png</a></td><td></td></tr><tr><td align="center">𝐓𝐡𝐞 𝐏𝐀𝐂𝐊 𝐂𝐞𝐧𝐭𝐞𝐫 </td><td align="center">Server Name: 𝐓𝐡𝐞 𝐏𝐀𝐂𝐊 𝐂𝐞𝐧𝐭𝐞𝐫 𝐏𝐯𝐄(𝟑𝐱𝐇, 𝟒𝐱𝐗𝐏, 𝟏𝟓𝐓/𝐁) </td><td align="center">IP: 66.153.149.147:7679</td><td><code>open 66.153.149.147:7679</code></td><td><a href="https://772063455-files.gitbook.io/~/files/v0/b/gitbook-x-prod.appspot.com/o/spaces%2F-Lgje1lBxKKWXwqycB-v%2Fuploads%2Fy34rj7Q974dVQOu4Nam1%2FASA_SPLASH_CENTER.png?alt=media&amp;token=18a4587f-919c-4328-879d-d0a1ee327155">ASA_SPLASH_CENTER.png</a></td><td></td></tr><tr><td align="center">𝐓𝐡𝐞 𝐏𝐀𝐂𝐊 𝐀𝐛𝐞𝐫𝐫𝐚𝐭𝐢𝐨𝐧 </td><td align="center">Server Name: 𝐓𝐡𝐞 𝐏𝐀𝐂𝐊 𝐀𝐛𝐞𝐫𝐫𝐚𝐭𝐢𝐨𝐧 𝐏𝐕𝐄(𝟑𝐱𝐇, 𝟒𝐱𝐗𝐏, 𝟏𝟓𝐓/𝐁) </td><td align="center">IP: 66.153.149.147:7681</td><td><code>open 66.153.149.147:7681</code></td><td><a href="https://772063455-files.gitbook.io/~/files/v0/b/gitbook-x-prod.appspot.com/o/spaces%2F-Lgje1lBxKKWXwqycB-v%2Fuploads%2FURBLWlBxnNrPZn2bIDcI%2FASA_Aberration_launch_date.png?alt=media&amp;token=f7dd1bcf-0c3f-4f43-8f56-f0bb94c2acf8">ASA_Aberration_launch_date.png</a></td><td><a href="https://faq.thepackgaming.com/asa/cluster/aberration">https://faq.thepackgaming.com/asa/cluster/aberration</a></td></tr><tr><td align="center">𝐓𝐡𝐞 𝐏𝐀𝐂𝐊 𝐄𝐱𝐭𝐢𝐧𝐜𝐭𝐢𝐨𝐧</td><td align="center">Server Name: 𝐓𝐡𝐞 𝐏𝐀𝐂𝐊 𝐄𝐱𝐭𝐢𝐧𝐜𝐭𝐢𝐨𝐧 𝐏𝐯𝐄(𝟑𝐱𝐇, 𝟒𝐱𝐗𝐏, 𝟏𝟓𝐓/𝐁)</td><td align="center">IP: 66.153.149.147:7979</td><td><code>open 66.153.149.147:7979</code></td><td><a href="https://772063455-files.gitbook.io/~/files/v0/b/gitbook-x-prod.appspot.com/o/spaces%2F-Lgje1lBxKKWXwqycB-v%2Fuploads%2F8CEuPlghf0KB8867178T%2FASA_Extinction_Main.png?alt=media&amp;token=a522ce6a-2384-41cc-aa15-fceec0a3096f">ASA_Extinction_Main.png</a></td><td><a href="https://faq.thepackgaming.com/asa/cluster/extinction">https://faq.thepackgaming.com/asa/cluster/extinction</a></td></tr><tr><td align="center">𝐓𝐡𝐞 𝐏𝐀𝐂𝐊 𝐀𝐬𝐭𝐫𝐚𝐞𝐨𝐬</td><td align="center">Server Name: 𝐓𝐡𝐞 𝐏𝐀𝐂𝐊 𝐀𝐬𝐭𝐫𝐚𝐞𝐨𝐬 𝐏𝐕𝐄 (𝟑𝐱𝐇, 𝟒𝐱𝐗𝐏, 𝟏𝟓𝐓/𝐁)</td><td align="center">IP: 66.153.149.147:7981</td><td><code>open 66.153.149.147:7981</code></td><td><a href="https://772063455-files.gitbook.io/~/files/v0/b/gitbook-x-prod.appspot.com/o/spaces%2F-Lgje1lBxKKWXwqycB-v%2Fuploads%2F9aY7sLkVPKfAbv6JyTnc%2FASTRAEOS_Card.png?alt=media&amp;token=09858510-7617-4d42-819f-4c4f78d248ad">ASTRAEOS_Card.png</a></td><td></td></tr><tr><td align="center">𝐓𝐡𝐞 𝐏𝐀𝐂𝐊 𝐑𝐚𝐠𝐧𝐚𝐫𝐨𝐤</td><td align="center">Server Name: 𝐓𝐡𝐞 𝐏𝐀𝐂𝐊 𝐑𝐚𝐠𝐧𝐚𝐫𝐨𝐤 𝐏𝐕𝐄(𝟑𝐱𝐇, 𝟒𝐱𝐗𝐏, 𝟏𝟓𝐓/𝐁)</td><td align="center">IP: 66.153.149.147:7401</td><td><code>open 66.153.149.147:7401</code> </td><td><a href="https://772063455-files.gitbook.io/~/files/v0/b/gitbook-x-prod.appspot.com/o/spaces%2F-Lgje1lBxKKWXwqycB-v%2Fuploads%2FoAnHig0ZpmD87gOsuwbX%2FASA_RAG_CARD.png?alt=media&amp;token=70dd7808-2e0c-4b36-91c9-bbee3193dd7e">ASA_RAG_CARD.png</a></td><td></td></tr><tr><td align="center"></td><td align="center"></td><td align="center"></td><td></td><td></td><td></td></tr></tbody></table>

<figure><img src="https://772063455-files.gitbook.io/~/files/v0/b/gitbook-x-prod.appspot.com/o/spaces%2F-Lgje1lBxKKWXwqycB-v%2Fuploads%2FMbM02Gcyz3x2VrifLG4l%2FHow_to_add_An_IP_to_your_ark.png?alt=media&amp;token=6d9622e3-1d92-4360-9ef5-40fe908fa65e" alt=""><figcaption></figcaption></figure>

### 𝐇𝐨𝐰 𝐭𝐨 𝐉𝐨𝐢𝐧 𝐚𝐧 𝐀𝐒𝐄 𝐒𝐞𝐫𝐯𝐞𝐫:

* Click view at top&#x20;
* Click Show servers&#x20;
* Click the tab on top that says FAVORITES&#x20;
* Click the BOX with the + at the bottom right hand side&#x20;
* In the window that opens add the new IP address.&#x20;
* Click save.

## ASE PVE CLUSTER

<table data-view="cards" data-full-width="false"><thead><tr><th align="center"></th><th></th><th data-hidden data-card-target data-type="content-ref"></th><th data-hidden data-card-cover data-type="files"></th></tr></thead><tbody><tr><td align="center">IP: 66.153.149.147:7793</td><td>Click here for Steam Link</td><td><a href="steam://connect/66.153.149.147:27031">steam://connect/66.153.149.147:27031</a></td><td><a href="https://772063455-files.gitbook.io/~/files/v0/b/gitbook-x-prod.appspot.com/o/spaces%2F-Lgje1lBxKKWXwqycB-v%2Fuploads%2F6KaeJfafxoqVFJ4oWXfv%2FABERRATION.jpg?alt=media&amp;token=5755c6de-2a4b-417e-8721-ba1d5a962cc3">ABERRATION.jpg</a></td></tr><tr><td align="center">IP: 66.153.149.147:7779</td><td>Click here for Steam Link</td><td><a href="steam://connect/66.153.149.147:27017">steam://connect/66.153.149.147:27017</a></td><td><a href="https://772063455-files.gitbook.io/~/files/v0/b/gitbook-x-prod.appspot.com/o/spaces%2F-Lgje1lBxKKWXwqycB-v%2Fuploads%2FiPMjAAE4O7r4EwohoSTw%2FEXT%202.jpg?alt=media&amp;token=b489342f-c6a7-4022-a97f-de1f918ac13b">EXT 2.jpg</a></td></tr><tr><td align="center">IP: 66.153.149.147:7807</td><td>Click here for Steam Link</td><td><a href="steam://connect/66.153.149.147:27045">steam://connect/66.153.149.147:27045</a></td><td><a href="https://772063455-files.gitbook.io/~/files/v0/b/gitbook-x-prod.appspot.com/o/spaces%2F-Lgje1lBxKKWXwqycB-v%2Fuploads%2FWKnCUq8shGKau6iwqog6%2FFjordur_DLC.jpg?alt=media&amp;token=459474a2-1583-4efc-9deb-275d3b2d792a">Fjordur_DLC.jpg</a></td></tr><tr><td align="center">IP: 66.153.149.147:7809</td><td>Click here for Steam Link</td><td><a href="steam://connect/66.153.149.147:27047">steam://connect/66.153.149.147:27047</a></td><td><a href="https://772063455-files.gitbook.io/~/files/v0/b/gitbook-x-prod.appspot.com/o/spaces%2F-Lgje1lBxKKWXwqycB-v%2Fuploads%2F4YCXxP1RvxjKK1mHk0M0%2FGENESIS2.jpg?alt=media&amp;token=a1a7ab89-69d2-4780-928f-e543e202b9a1">GENESIS2.jpg</a></td></tr><tr><td align="center">IP: 66.153.149.147:7795</td><td>Click here for Steam Link</td><td><a href="steam://connect/66.153.149.147:27033">steam://connect/66.153.149.147:27033</a></td><td><a href="https://772063455-files.gitbook.io/~/files/v0/b/gitbook-x-prod.appspot.com/o/spaces%2F-Lgje1lBxKKWXwqycB-v%2Fuploads%2FJWeal2CL6WMMhIcTP6yy%2Fark-survival-evolved-game.jpg?alt=media&amp;token=df86ee62-a9e5-4511-9a1a-c50f6b4decc3">ark-survival-evolved-game.jpg</a></td></tr><tr><td align="center">IP: 66.153.149.147:7789</td><td>Click here for Steam Link</td><td><a href="steam://connect/66.153.149.147:27027">steam://connect/66.153.149.147:27027</a></td><td><a href="https://772063455-files.gitbook.io/~/files/v0/b/gitbook-x-prod.appspot.com/o/spaces%2F-Lgje1lBxKKWXwqycB-v%2Fuploads%2FL9YeEn5mk0bapA8PWv3H%2Fmaxresdefault.jpg?alt=media&amp;token=6458d010-2cd4-4f92-8dec-2942f7c7826f">maxresdefault.jpg</a></td></tr><tr><td align="center">IP: TBA</td><td>Click here for Steam Link</td><td></td><td><a href="https://772063455-files.gitbook.io/~/files/v0/b/gitbook-x-prod.appspot.com/o/spaces%2F-Lgje1lBxKKWXwqycB-v%2Fuploads%2FJlUG7GZOcwyZxV9mAPs3%2FARK%20Aquatica.jpg?alt=media&amp;token=5c468795-e66f-4a15-90b5-0a0cf10fbe82">ARK Aquatica.jpg</a></td></tr></tbody></table>

## OTHER GAME PLATFORMS WE SUPPORT

Single servers for 7DTD 1.0, Valheim, Palworld, and Soulmask!

<table data-card-size="large" data-view="cards" data-full-width="false"><thead><tr><th align="center"></th><th></th><th align="center"></th><th data-hidden data-card-cover data-type="files"></th><th data-hidden data-card-target data-type="content-ref"></th></tr></thead><tbody><tr><td align="center"><strong>The Pack PVE | 150% XP | 150% Loot | 1.0 | QOL MODS</strong></td><td>Internet IP: 66.153.149.147:26910</td><td align="center">Click to Join Server !!</td><td><a href="https://772063455-files.gitbook.io/~/files/v0/b/gitbook-x-prod.appspot.com/o/spaces%2F-Lgje1lBxKKWXwqycB-v%2Fuploads%2FUGBIRO2s13C5KaoA0nYn%2F7DTD_1.png?alt=media&amp;token=18ce7dee-2bc5-4cdf-98eb-2b7d8211a349">7DTD_1.png</a></td><td><a href="steam://connect/66.153.149.147:26910">steam://connect/66.153.149.147:26910</a></td></tr><tr><td align="center"><strong>Valheim PVE-P Server</strong></td><td>server to join: valheim.thepackgaming.com:2466 </td><td align="center"><br>password to join: thepackgaming</td><td><a href="https://772063455-files.gitbook.io/~/files/v0/b/gitbook-x-prod.appspot.com/o/spaces%2F-Lgje1lBxKKWXwqycB-v%2Fuploads%2Fndb9SdbP2wHgesB4xdk8%2FVAL_1_SPLASH_2023.png?alt=media&amp;token=4dafe9ec-5965-4d50-b5bc-5b2398315ac2">VAL_1_SPLASH_2023.png</a></td><td></td></tr><tr><td align="center"><h2><strong>𝐓𝐡𝐞 𝐏𝐀𝐂𝐊 𝐏𝐚𝐥𝐖𝐨𝐫𝐥𝐝 𝐏𝐯𝐄</strong></h2></td><td>Please join our Discord and see #Steam-Links to receive the IP and Password.</td><td align="center"><img src="https://772063455-files.gitbook.io/~/files/v0/b/gitbook-x-prod.appspot.com/o/spaces%2F-Lgje1lBxKKWXwqycB-v%2Fuploads%2FlaIes71MRsfrLmspJpTW%2Fimage.png?alt=media&amp;token=9b21f704-9e81-4dd6-9caa-e2672d7d2046" alt="" data-size="original"></td><td><a href="https://772063455-files.gitbook.io/~/files/v0/b/gitbook-x-prod.appspot.com/o/spaces%2F-Lgje1lBxKKWXwqycB-v%2Fuploads%2FHzeZby7X0MgKkdT9qdOn%2FSERVER_BANNERS_PALWORLD.png?alt=media&amp;token=c2f74dcf-15bd-4114-aad3-569dc6669869">SERVER_BANNERS_PALWORLD.png</a></td><td><a href="https://discord.gg/EjXsVfgY">https://discord.gg/EjXsVfgY</a></td></tr><tr><td align="center"><h2>𝐒𝐎𝐔𝐋𝐌𝐀𝐒𝐊 𝐏𝐕𝐄 𝐒𝐄𝐑𝐕𝐄𝐑</h2></td><td>Please join our Discord and see #Steam-Links to receive the IP and Password.</td><td align="center"><img src="https://772063455-files.gitbook.io/~/files/v0/b/gitbook-x-prod.appspot.com/o/spaces%2F-Lgje1lBxKKWXwqycB-v%2Fuploads%2FArMvhARdhxoVdnyezH5S%2Fimage.png?alt=media&amp;token=d65f8bf3-2b87-4463-a718-58d3be04cdba" alt="" data-size="original"></td><td><a href="https://772063455-files.gitbook.io/~/files/v0/b/gitbook-x-prod.appspot.com/o/spaces%2F-Lgje1lBxKKWXwqycB-v%2Fuploads%2FNeb1U6b6qSWPEct3OILa%2FPACK_soulmask_flash.png?alt=media&amp;token=c79b69dc-386d-439e-9d5e-012f3a7931e7">PACK_soulmask_flash.png</a></td><td><a href="https://discord.gg/EjXsVfgY">https://discord.gg/EjXsVfgY</a></td></tr></tbody></table>

### Conan Exiles PVE Servers:

<table data-view="cards" data-full-width="false"><thead><tr><th align="center"></th><th></th><th></th><th data-hidden data-card-cover data-type="files"></th></tr></thead><tbody><tr><td align="center"><strong>The PACK AOC PvE 18+(3xXP 3xH)</strong></td><td>Connect to the server by using the 'Direct Connect' button in the in-game server browser, and providing the following address: </td><td>66.153.149.147:7777</td><td><a href="https://772063455-files.gitbook.io/~/files/v0/b/gitbook-x-prod.appspot.com/o/spaces%2F-Lgje1lBxKKWXwqycB-v%2Fuploads%2F7dOIKIkOifH4dU2WO07A%2Fimage.png?alt=media&amp;token=d34dcc56-d5ed-4cd5-9072-c8c3ed1b7d99">image.png</a></td></tr><tr><td align="center"><strong>The PACK QOL PVE 18+(1.5xXP 1.5xH)</strong></td><td>Connect to the server by using the 'Direct Connect' button in the in-game server browser, and providing the following address: </td><td>66.153.149.147:7775</td><td><a href="https://772063455-files.gitbook.io/~/files/v0/b/gitbook-x-prod.appspot.com/o/spaces%2F-Lgje1lBxKKWXwqycB-v%2Fuploads%2FiA6SdwAFqQR6ZYcx53zN%2Fimage.png?alt=media&amp;token=74be2b2d-d783-41f4-95e0-1907dd415fb4">image.png</a></td></tr><tr><td align="center"><strong>The PACK Savage Wilds PvE 18+ (3xXP 3xH)</strong></td><td>Connect to the server by using the 'Direct Connect' button in the in-game server browser, and providing the following address: </td><td>66.153.149.147:7773</td><td><a href="https://772063455-files.gitbook.io/~/files/v0/b/gitbook-x-prod.appspot.com/o/spaces%2F-Lgje1lBxKKWXwqycB-v%2Fuploads%2FyaIjdLlm4FeGw5oJOjLW%2FSAVAGE_WILDS_FLASH_Splash.png?alt=media&amp;token=9190c24b-dfb6-449b-a3a5-0a1ad63dbd12">SAVAGE_WILDS_FLASH_Splash.png</a></td></tr></tbody></table>

### Dark and Light PvE Servers:

<table data-card-size="large" data-view="cards" data-full-width="false"><thead><tr><th align="center"></th><th align="center"></th><th align="center"></th><th data-hidden data-card-cover data-type="files"></th><th data-hidden data-card-target data-type="content-ref"></th></tr></thead><tbody><tr><td align="center"><strong>ɢᴀɪᴀ (ᴛʜᴇ sʜᴀʀᴅ)</strong> </td><td align="center">66.153.149.147:25015</td><td align="center">Click to Join Server !!</td><td><a href="https://772063455-files.gitbook.io/~/files/v0/b/gitbook-legacy-files/o/assets%2F-Lgje1lBxKKWXwqycB-v%2F-Lz9-cxjoc0HjAtkdEcS%2F-Lz90R_AVM0PlE9Icj86%2FThe%20Shard%20of%20faith.png?alt=media&amp;token=343dc3ab-abb7-44ab-9bf6-f4fb105f967e">The Shard of faith.png</a></td><td><a href="steam://connect/66.153.149.147:25015">steam://connect/66.153.149.147:25015</a></td></tr><tr><td align="center"><strong>ᴀʀᴄʜᴏs (ᴛʜᴇ ᴘᴀᴛʜ)</strong> </td><td align="center">66.153.149.147:25017</td><td align="center">Click to Join Server !!</td><td><a href="https://772063455-files.gitbook.io/~/files/v0/b/gitbook-legacy-files/o/assets%2F-Lgje1lBxKKWXwqycB-v%2F-MB2PJL7as7YXKnFUBFT%2F-MB2eRcIt9Wk3XCY2C8_%2FDNL%20The%20Path.png?alt=media&amp;token=4ac1b853-b85f-4697-b6cb-8a65515e831e">DNL The Path.png</a></td><td><a href="steam://connect/66.153.149.147:25017">steam://connect/66.153.149.147:25017</a></td></tr></tbody></table>

![](https://772063455-files.gitbook.io/~/files/v0/b/gitbook-x-prod.appspot.com/o/spaces%2F-Lgje1lBxKKWXwqycB-v%2Fuploads%2FrlqX4M9MCu6dVUfCnhWe%2FNEW-PAGE_GENERIC_BANNER.png?alt=media\&token=9d073148-393e-4dac-ae13-e88d3519e959)


# The PACK Events Schedule

**Navigation of Pages:**

<table data-view="cards"><thead><tr><th></th><th></th></tr></thead><tbody><tr><td><strong>Left side of the page</strong> <span data-gb-custom-inline data-tag="emoji" data-code="25c0">◀️</span></td><td>Use the <strong>></strong> to open any pages in that section when the Header shows a <strong>></strong>.</td></tr><tr><td><strong>Right Side</strong> of the page <span data-gb-custom-inline data-tag="emoji" data-code="25b6">▶️</span></td><td>Click a header to go to that section of this page.</td></tr><tr><td><strong>Features of the page.</strong></td><td>are in an <strong>expandable box</strong>, please click the <strong>></strong> to open the expandable dropdown.</td></tr><tr><td><strong>Hyperlink</strong>s are often in a <strong>card form</strong> in the website.</td><td>So <strong>clicking an image</strong> will often take you to a specific page for information. </td></tr><tr><td><strong>Steam-link</strong>s are often in a <strong>card form</strong> in the website.</td><td>So <strong>clicking on a server card</strong> will take you to the Server.</td></tr></tbody></table>

<figure><img src="https://772063455-files.gitbook.io/~/files/v0/b/gitbook-x-prod.appspot.com/o/spaces%2F-Lgje1lBxKKWXwqycB-v%2Fuploads%2FRIoRKmS36s8LQv49D7ju%2FThe_Pack_Upcoming_events.png?alt=media&amp;token=7dd6718d-a191-4a70-820f-f20870b046c4" alt=""><figcaption></figcaption></figure>

<figure><img src="https://772063455-files.gitbook.io/~/files/v0/b/gitbook-legacy-files/o/assets%2F-Lgje1lBxKKWXwqycB-v%2F-Min4wYORtPNxN2X9maa%2F-Min7xL25fEf0cmYTX-j%2Fhello%20nov.png?alt=media&amp;token=68bd68c9-a2eb-472d-875e-25abfa6a208c" alt="" width="375"><figcaption></figcaption></figure>

## 𝐍𝐨𝐯𝐞𝐦𝐛𝐞𝐫 𝐄𝐯𝐞𝐧𝐭 𝐒𝐜𝐡𝐞𝐝𝐮𝐥𝐞 𝟐𝟎𝟐𝟓

<figure><img src="https://772063455-files.gitbook.io/~/files/v0/b/gitbook-x-prod.appspot.com/o/spaces%2F-Lgje1lBxKKWXwqycB-v%2Fuploads%2FJpDCQ2CeK4C4GcHxxiNR%2Fimage.png?alt=media&amp;token=181e1fb4-3176-4989-9bce-53e805c5ddbb" alt="" width="375"><figcaption></figcaption></figure>

### **Nov. 8th, 2025 9:00 PM EAST till 11:00 PM EAST**

𝐅𝐄𝐀𝐑 𝐄𝐕𝐎𝐋𝐕𝐄𝐃/𝐀𝐒𝐂𝐄𝐍𝐃𝐄𝐃 𝟐𝟎𝟐𝟓 𝐛𝐨𝐭𝐡 𝐀𝐑𝐊 𝐜𝐥𝐮𝐬𝐭𝐞𝐫𝐬. - \
Fun, Fishing, Fireworks, Mega Boss Battle, REAPER BABIES, RHYNIO BABIES and Admins passing out candy and event items.  \
Meet at the RAGNAROK Community centers.  Results of the Decor contest will be posted and Admins will pass out prizes.

𝐀𝐒𝐀 - 𝐑𝐚𝐠𝐧𝐚𝐫𝐨𝐤 Thunderdome 𝐂𝐞𝐧𝐭𝐞𝐫. Rhynios and Spooky Dinos\
10pm East till 11 pm East.  Mega boss battle in the Event Center.

**Nov. 9th, 2025 9:00 PM EAST till 11:00 PM EAST**\
𝐀𝐒𝐄 - 𝐑𝐚𝐠𝐧𝐚𝐫𝐨𝐤 Blooddome 𝐂𝐞𝐧𝐭𝐞𝐫. Reapers and Spooky Dinos.\
&#x20;9pm East till 10 pm East.  Mega boss battle in the Event Center.

### **Saturday, November 15th, 2025 8:00 PM EAST till 11:00 PM EAST**

### 𝐀𝐒𝐀 - 𝐁𝐞𝐭𝐚 𝐊𝐢𝐧𝐠 𝐭𝐢𝐭𝐚𝐧&#x20;

<figure><img src="https://772063455-files.gitbook.io/~/files/v0/b/gitbook-x-prod.appspot.com/o/spaces%2F-Lgje1lBxKKWXwqycB-v%2Fuploads%2FbiX1i3ox55ImWsBh2AIh%2Fking%20titan.jpg?alt=media&amp;token=20357fe2-1d86-4c74-977a-b4f10517af5b" alt="" width="375"><figcaption></figcaption></figure>

Admins will be sponsoring an King Titan Event tonight. \
Meet at the Community Center on ASA - Extinction Map. We will start set up about an hour before the event begins.

* Bring anything you are WILLING to LOOSE to the battle.
* Breed up and bring up to 20 pets per TRIBE or Solo Player.
* Admins will have some extra gear, sleeping bags and food and beverages for the battle.
* Donations of teams of up to 20 dinos from breeders are welcome, just make sure they are Clipped before hand. They will be used for those that need a dino to get back to the battle or for the solo players that do not have good enough stock.
* MEKS  \
  Bring any MEKS you are WILLING to LOOSE to the battle.
* Titans will be provided by the ADMIN team.  \
  REWARDS: NO HEADS will be shared from this battle. Players are getting the kill and the ascension or implants only, and the decor pieces. Names will be taken so they can be listed in the LEGIT BATTLE ROSTER.

<figure><img src="https://772063455-files.gitbook.io/~/files/v0/b/gitbook-x-prod.appspot.com/o/spaces%2F-Lgje1lBxKKWXwqycB-v%2Fuploads%2Ft8PdB9uoh602J4YvMmZh%2FManticore_Arena.jpg?alt=media&amp;token=78a2b612-ed60-4899-83a4-be6191162615" alt=""><figcaption></figcaption></figure>

### **Saturday, November 22nd, 2025 8:00 PM EAST till 11:00 PM EAST**

### 𝐀𝐒𝐄 - 𝐒𝐄 𝐌𝐚𝐧𝐭𝐢𝐜𝐨𝐫𝐞 𝐀𝐬𝐜𝐞𝐧𝐬𝐢𝐨𝐧

Admins will be sponsoring an Manticore Ascension Event tonight. \
Meet at the ASE Ragnarok Blooddome Center. We will start set up a quarter hour before the event begins.

* &#x20;**Bring anything you are WILLING to LOOSE to the battle.** \
  **Breed up and bring up to 3 tames per TRIBE or Solo Player.**
* Admins will have some extra gear, sleeping bags and food and beverages for the battle.
* **Donations of teams of up to 5 dinos** from breeders are welcome, just make sure they are Clipped before hand. They will be used for those that need a dino to get back to the battle or for the solo players that do not have good enough stock.
* Players will need to Join a BATTLE ALLIANCE for this event, be sure you have the rights in your tribe to join Alliances.

## 𝐃𝐞𝐜𝐞𝐦𝐛𝐞𝐫 𝐄𝐯𝐞𝐧𝐭 𝐒𝐜𝐡𝐞𝐝𝐮𝐥𝐞 𝟐𝟎𝟐𝟓

<figure><img src="https://772063455-files.gitbook.io/~/files/v0/b/gitbook-x-prod.appspot.com/o/spaces%2F-Lgje1lBxKKWXwqycB-v%2Fuploads%2FeVAASmUdc283QZlWNdvF%2FHello-December-Hello-Winter.jpg?alt=media&amp;token=24f89d54-f63c-4b7d-841c-5a4bcc1188b9" alt=""><figcaption></figcaption></figure>

### 𝐇𝐨𝐥𝐢𝐝𝐚𝐲 𝐁𝐫𝐞𝐚𝐤 𝐟𝐫𝐨𝐦 𝐄𝐯𝐞𝐧𝐭𝐬.

During the month of December The Pack Admins take a Break from running events, due to the crush of holiday events and shopping.  We want to wish all of our Players a very Merry Christmas!

<figure><img src="https://772063455-files.gitbook.io/~/files/v0/b/gitbook-x-prod.appspot.com/o/spaces%2F-Lgje1lBxKKWXwqycB-v%2Fuploads%2FgOAEMYC8n6WXrB2OX3uY%2Fhappy-holidays-2024.jpeg?alt=media&amp;token=ca06ccfd-8822-47a9-9a4a-35b7a00a234b" alt=""><figcaption></figcaption></figure>

## **Time Zone Converter**

{% embed url="<https://www.timeanddate.com/worldclock/converter.html?&p1=179>" %}

{% embed url="<https://www.epochconverter.com/>" %}

![](https://772063455-files.gitbook.io/~/files/v0/b/gitbook-x-prod.appspot.com/o/spaces%2F-Lgje1lBxKKWXwqycB-v%2Fuploads%2FrlqX4M9MCu6dVUfCnhWe%2FNEW-PAGE_GENERIC_BANNER.png?alt=media\&token=9d073148-393e-4dac-ae13-e88d3519e959)


# ALL Platform Rules!

Directory for all the different Rule sets for each of the different platforms.

## **Navigation of Pages:**

<table data-view="cards"><thead><tr><th></th><th></th></tr></thead><tbody><tr><td><strong>Left side of the page</strong> <span data-gb-custom-inline data-tag="emoji" data-code="25c0">◀️</span></td><td>Use the <strong>></strong> to open any pages in that section when the Header shows a <strong>></strong>.</td></tr><tr><td><strong>Right Side</strong> of the page <span data-gb-custom-inline data-tag="emoji" data-code="25b6">▶️</span></td><td>Click a header to go to that section of this page.</td></tr><tr><td><strong>Features of the page.</strong></td><td>are in an <strong>expandable box</strong>, please click the <strong>></strong> to open the expandable dropdown.</td></tr><tr><td><strong>Hyperlink</strong>s are often in a <strong>card form</strong> in the website.</td><td>So <strong>clicking an image</strong> will often take you to a specific page for information. </td></tr><tr><td><strong>Steam-link</strong>s are often in a <strong>card form</strong> in the website.</td><td>So <strong>clicking on a server card</strong> will take you to the Server.</td></tr></tbody></table>

## **Introduction**

#### **OUR MOTTO!**

#### **ALL MAY ENTER HERE WITHOUT PREJUDICE!**

* This applies to All Races, All Creeds, and All Genders.
* All are Welcome!!!

## **Greetings Players,**

The PACK Gaming has several different game platforms and servers. \
These come as a free service to all our players but come with certain rules and strict enforcement. By playing on any of our servers you are asked to follow the rules that follow. Please read through and consider the spirit of the rules, not just the specific wording.

![](https://772063455-files.gitbook.io/~/files/v0/b/gitbook-x-prod.appspot.com/o/spaces%2F-Lgje1lBxKKWXwqycB-v%2Fuploads%2FAB1OrapsOP39NP9kBSjO%2FRULES%20for%20our%20DISCORD.png?alt=media\&token=e169d29f-027e-429a-a0a3-c91a1d781630)

### OUR DISCORD RULES

<details>

<summary><strong>Be respectful!</strong></summary>

This means no mean, rude, or harassing comments. Treat others the way you want to be treated.

</details>

<details>

<summary><strong>Do not Block or Mute any Moderator, Admin, or Owner in our discord!</strong></summary>

If things become heated, please step out of voice, or "take five" from responding in a channel. Admins also have specific rules they must follow about confrontation.

</details>

<details>

<summary><strong>No inappropriate language!</strong></summary>

Any derogatory language deemed racial, overtly sexual, hateful, illicit, towards any user is prohibited. Discussions about Terrorist and/or criminal glorification in the open text channels is prohibited.&#x20;

Swearing is permitted in casual channels only, while the official help channels should be kept free of any profane language if at all possible.

</details>

<details>

<summary><strong>No spamming!</strong></summary>

Do not send a lot of small messages right after each other. These disrupt chat and make it hard to scroll through the server. Please keep your messages at least 5 words long while chatting.

</details>

<details>

<summary><strong>ALL pornographic/adult/other NSFW material, MUST BE IN THE specified Channel #nsfw-🍆🍑!</strong></summary>

Discord has rules about the content of the discord server, and this is our way of Providing a safe adult place for this type of content, while keeping the other channels safe for those that do not wish to partake of such things.

</details>

<details>

<summary><strong>No Invasive advertisements!</strong></summary>

No invasive advertising, such as spam advertising or click bait. You can post your media or game server content in the appropriate media channel if it's relevant and provides actual value for the community.

</details>

<details>

<summary><strong>Threats are forbidden!</strong></summary>

Threats are prohibited and disallowed. Our Moderation team takes this seriously and you can be banned.

</details>

<details>

<summary><strong>Do not join voice chat channels without permission of the people already in the channel!</strong></summary>

If you see that they have a free spot it is alright to join and ask whether they have an open spot but leave if your presence is not wanted by whoever was there first.

</details>

<details>

<summary><strong>Do not join voice chat channels and be disruptive.</strong></summary>

If others allow you to stay in the chat, do not repeatedly ask for help, or other disruptive behavior while in the voice chat room. Please excuse yourself to eat or mute yourself if you're in a noisy environment.

</details>

<details>

<summary><strong>Discord Griefing</strong></summary>

Discord Griefing can be based on spamming channels with memes or remarks, spamming scam ads, using reply or "Tagging" individuals too often (MAD PING Emoji here) and other annoying behaviors that Mods, and Admins deem hurtful to our Discord.&#x20;

These can be simple "timeouts", or "muting", up to banning you from the Discord. So please be mindful of how you are coming across to the other person.&#x20;

We all strive to be polite as we can, but still have fun!

</details>

<details>

<summary><em>The Admins and Moderators will Mute/Kick/Ban per discretion.</em> </summary>

*If you feel mistreated DM an Owner and we will resolve the issue.*

</details>

<details>

<summary><em><strong>All Channels</strong></em> will have pinned messages explaining what they are there for and how everything works. </summary>

If you don't understand something, feel free to ask!

</details>

<details>

<summary><strong>Your presence in this server implies accepting these rules, including all further changes.</strong> </summary>

</details>

<details>

<summary><strong>We reserve the right to modify these rules in any way we deem necessary and at any moment, at our own discretion, it is your responsibility to check for them.</strong> </summary>

</details>

![](https://772063455-files.gitbook.io/~/files/v0/b/gitbook-x-prod.appspot.com/o/spaces%2F-Lgje1lBxKKWXwqycB-v%2Fuploads%2FgpjJLTVVs6klGyZcGTCN%2FDISCORD%20ETIQUETTE.png?alt=media\&token=1f0888d7-c301-4cd0-aaa4-d9fd421a80b3)

### DISCORD ETIQUETTE

<details>

<summary>USE MENTIONS MINDFULLY</summary>

* **“REPLY or @DISCORD-TAG”** - Discord will notify users every time they get mentioned (using REPLY or @DISCORD-TAG). Please don’t draw attention, just because you can. It can become quite irritating when you get notification for non-urgent matters or when you are not directly involved.
* **“@HERE”** - Discord will notify those currently active in discord or not on “DO NOT DISTURB” or “INVISIBLE” when an (@HERE) is used.
* **“@EVERYONE”** - Discord will notify ALL the MEMBERS of a DISCORD GROUP when an(@EVERYONE) is used. The Pack actively discourages use of this particular command unless the Owners, Admins, or Moderators use it.
* **All messages, or DM’s** - You should not expect an immediate answer when you message someone, you don’t know the schedule of someone else. Maybe that person is in another time zone.

</details>

<details>

<summary>DON'T SPAM!</summary>

This is quite an obvious one. Or at least should be.&#x20;

Spamming, or ‘bombing’, is when you send multiple short messages in a row that don’t convey any information.

**Example:** \
*Hey (2 sec ago)* \
*Please help. (2 sec ago)* \
*Are you there? (2 sec ago)* \
Especially when sending a DM, the other user will receive notifications for every message. Remember, you don’t know the schedule of other people. They might be in the middle of something or need to focus, for whatever reason.&#x20;

**Send one message instead.** \
**Example:** \
*Hey, I am looking for this article in the regulations. Can you point me in the right direction?*

</details>

<details>

<summary>PAY ATTENTION TO A PLAYER'S STATUS</summary>

There are Icons by all our Profile pics. These colored icons stand for our online presence. Please be respectful of what these icons mean.

**DO NOT PING anyone that is DO NOT DISTURB, or INVISIBLE.**

:green\_circle: Means the person is online and active in a game or other online activity. You may ping a person with this status, as long as you do not spam them.

:yellow\_circle: Means the person is online and is idle, or may be doing something else, while the discord is open. You may ping a person with this status, as long as you do not spam them.

:red\_circle: Means the person is not available to accept Pings. In this case a single DM is acceptable to send. It's very RUDE to continue to DM or PING a person that has marked DO NOT DISTURB!

:white\_circle: Means the person is OFFLINE and will not respond till they are back online, and available. They may be online but are otherwise occupied and do not want any PINGS or unnecessary DM’s.

</details>

<details>

<summary>DISCORD or STEAM Friends Request</summary>

If you want to add an Owner, Admin, Moderator, or Player from our discord, please remember to Send a DM prior to sending the request. This way those of us who do not accept all requests can identify which of the requests may be yours.

</details>

## LINKS to our GAME PLATFORM RULE PAGES:

<table data-card-size="large" data-view="cards"><thead><tr><th align="center"></th><th data-hidden data-card-cover data-type="files"></th><th data-hidden data-card-target data-type="content-ref"></th></tr></thead><tbody><tr><td align="center">ARK Survival Evolved PVE Rules</td><td><a href="https://772063455-files.gitbook.io/~/files/v0/b/gitbook-x-prod.appspot.com/o/spaces%2F-Lgje1lBxKKWXwqycB-v%2Fuploads%2FCI51ahZxwNMfhJmFRSnr%2FTHE_PACK_ASE_Rules_2023.png?alt=media&amp;token=caa9fb4d-43f1-4c2f-8940-9a437c90d233">THE_PACK_ASE_Rules_2023.png</a></td><td><a href="https://faq.thepackgaming.com/rules/ark">https://faq.thepackgaming.com/rules/ark</a></td></tr><tr><td align="center">ARK: Survival Ascended PvE Rules</td><td><a href="https://772063455-files.gitbook.io/~/files/v0/b/gitbook-x-prod.appspot.com/o/spaces%2F-Lgje1lBxKKWXwqycB-v%2Fuploads%2F3Zl28xHXej7kPj5yDolF%2FTHE_PACK_ASA_Rules_2023.png?alt=media&amp;token=d3f3bddd-b340-45e4-93a0-938342b2526f">THE_PACK_ASA_Rules_2023.png</a></td><td><a href="https://faq.thepackgaming.com/rules/asa">https://faq.thepackgaming.com/rules/asa</a></td></tr><tr><td align="center">Conan Exiles PvE Rules</td><td><a href="https://772063455-files.gitbook.io/~/files/v0/b/gitbook-x-prod.appspot.com/o/spaces%2F-Lgje1lBxKKWXwqycB-v%2Fuploads%2FOHTh67iHXTbJFqE2U7vy%2FTHE_PACK_CONAN_Rules_2023.png?alt=media&amp;token=de774f61-bea7-41c3-808d-d23f99819bab">THE_PACK_CONAN_Rules_2023.png</a></td><td><a href="https://faq.thepackgaming.com/rules/conan-exiles">https://faq.thepackgaming.com/rules/conan-exiles</a></td></tr><tr><td align="center">7DTD PVE Rules</td><td><a href="https://772063455-files.gitbook.io/~/files/v0/b/gitbook-x-prod.appspot.com/o/spaces%2F-Lgje1lBxKKWXwqycB-v%2Fuploads%2FTQepvbP7USOMY3Rfy9en%2FTHE_PACK_7DTD20_Rules_2023.png?alt=media&amp;token=e8cb9a5f-3874-48e8-8d9a-049586a8ea37">THE_PACK_7DTD20_Rules_2023.png</a></td><td><a href="https://faq.thepackgaming.com/rules/7dtd">https://faq.thepackgaming.com/rules/7dtd</a></td></tr><tr><td align="center">Palworld Rules</td><td><a href="https://772063455-files.gitbook.io/~/files/v0/b/gitbook-x-prod.appspot.com/o/spaces%2F-Lgje1lBxKKWXwqycB-v%2Fuploads%2F6gNOzIZ1Xh7fwFz88onZ%2FWEBSITE_CARDS_PALWORLD_2023.png?alt=media&amp;token=2f007b8f-ea5f-46da-bc46-76d97d8bdd9e">WEBSITE_CARDS_PALWORLD_2023.png</a></td><td><a href="https://faq.thepackgaming.com/rules/palworld">https://faq.thepackgaming.com/rules/palworld</a></td></tr><tr><td align="center">Soulmask Rules</td><td><a href="https://772063455-files.gitbook.io/~/files/v0/b/gitbook-x-prod.appspot.com/o/spaces%2F-Lgje1lBxKKWXwqycB-v%2Fuploads%2F3FSug6uLXUcc07CSgdjx%2FSOULMASK_WEBSITE_CARDS_2024.png?alt=media&amp;token=0dec9129-c611-441e-954f-84d4ee5258d8">SOULMASK_WEBSITE_CARDS_2024.png</a></td><td><a href="https://faq.thepackgaming.com/rules/soulmask">https://faq.thepackgaming.com/rules/soulmask</a></td></tr><tr><td align="center">Valheim PvE-P Rules</td><td><a href="https://772063455-files.gitbook.io/~/files/v0/b/gitbook-x-prod.appspot.com/o/spaces%2F-Lgje1lBxKKWXwqycB-v%2Fuploads%2Fuk5izeqB6hlyjISyi4Lz%2FTHE_PACK_Valheim_Rules_2023.png?alt=media&amp;token=06fd7960-6329-4504-8e1f-49fdc2b87adc">THE_PACK_Valheim_Rules_2023.png</a></td><td><a href="https://faq.thepackgaming.com/rules/valheim">https://faq.thepackgaming.com/rules/valheim</a></td></tr><tr><td align="center">Dark and Light PVE Rules</td><td><a href="https://772063455-files.gitbook.io/~/files/v0/b/gitbook-x-prod.appspot.com/o/spaces%2F-Lgje1lBxKKWXwqycB-v%2Fuploads%2FUwGmbi0Ne7wH8cwsqgrs%2FTHE_PACK_DnL_Rules_2023.png?alt=media&amp;token=34a897f1-4c5f-4f0a-a088-aae44e0e30d5">THE_PACK_DnL_Rules_2023.png</a></td><td><a href="https://faq.thepackgaming.com/rules/dnl">https://faq.thepackgaming.com/rules/dnl</a></td></tr></tbody></table>

![](https://772063455-files.gitbook.io/~/files/v0/b/gitbook-x-prod.appspot.com/o/spaces%2F-Lgje1lBxKKWXwqycB-v%2Fuploads%2FrlqX4M9MCu6dVUfCnhWe%2FNEW-PAGE_GENERIC_BANNER.png?alt=media\&token=9d073148-393e-4dac-ae13-e88d3519e959)


# ASE: PvE Server Rules.

All rules found here will pertain to all of our current and future ARK Servers. Please read and familiarize yourself with them. UPDATED 5/1/2025

## **Navigation of Page:**

<table data-view="cards"><thead><tr><th></th><th></th></tr></thead><tbody><tr><td><strong>Left side of the page</strong> <span data-gb-custom-inline data-tag="emoji" data-code="25c0">◀️</span></td><td>Use the <strong>></strong> to open any pages in that section when the Header shows a <strong>></strong>.</td></tr><tr><td><strong>Right Side</strong> of the page <span data-gb-custom-inline data-tag="emoji" data-code="25b6">▶️</span></td><td>Click a header to go to that section of this page.</td></tr><tr><td><strong>Features of the page.</strong></td><td>are in an <strong>expandable box</strong>, please click the <strong>></strong> to open the expandable dropdown.</td></tr><tr><td><strong>Hyperlink</strong>s are often in a <strong>card form</strong> in the website.</td><td>So <strong>clicking an image</strong> will often take you to a specific page for information. </td></tr><tr><td><strong>Steam-link</strong>s are often in a <strong>card form</strong> in the website.</td><td>So <strong>clicking on a server card</strong> will take you to the Server.</td></tr></tbody></table>

## 1. General Server Guidelines!

### The PACK Disclaimer and Players Responsibility NOTICE:

*❝Your presence in this server implies accepting these rules, including all further changes. We reserve the right to modify these rules in any way we deem necessary and at any moment, at our own discretion, it is your responsibility to check for them.❞*&#x20;

These rules are not comprehensive and use of loopholes to violate the spirit of these rules is subject to enforcement. Failure to follow these rules will result in being removed from the community! Furthermore, If someone is a participant of our Discord, and/or a Player on our Servers, A ban on Discord may also be pursued on the Server Cluster. Please follow all of the RULES found here! &#x20;

*We are unable to provide any refunds to persons or clans for loss of items, resources, in-game properties and so on, regardless of the reason. The Pack Gaming is not responsible for replacing items or Dinos due to ASE Glitches, Steam Cloud Errors, or Corrupted Players Clients.*

### We work on a "3 Strikes Method"

Please read through and consider the spirit of the rules, not just the specific wording. And make sure your clanmates are also aware of them as their actions can affect you. Any infraction by a player will most likely have repercussions for the entire clan. Other than this official post of rules, we do not issue warnings ahead of Admin intervention.&#x20;

1. You and your Tribe/Clan get a warning. Such as a sign in your base or a message to talk with an admin.
2. You and your Tribe/Clan get a second warning. Same as above but Tames are confiscated, or buildings removed. Written note added to the Admins Log recording your player name and Tribe.
3. You and your Tribe/Clan get a third warning. As verified by our Admins Log. We are done, and you are Perm Banned.

### Reporting Infractions:

Please contact us through our Discord, (<https://discord.gg/RJVVraV>), and fill out a ticket in our Discord ([#Support-Tickets](https://discord.com/channels/459473503939198978/728115631228190802/992571617110671476))

## 2. Infractions&#x20;

### Hacks and Exploits

Hacking, or using Exploits and other situations deemed as extreme will be met with a permanent ban on the first offense. Included in this category are: Real-Money Trading (RMT), use of third-party programs that inject code and modify aspects of the game to provide unfair advantage against other players. And abuses of game mechanics to obtain an unfair advantage over other players including creating a detrimental play experience through reduced server or game performance.

### Harassment - Griefing

We allow coarse humor, rough language, and or content. If this is not for you, Thank you for your interest, but we may not be the BEST FIT for you. There are some offensive and defamatory chat and user-created content DEEMED NOT PERMITTED. Personal threats, doxing, stalking. This rule also extends to character names, guild names, in-game signs, any other type of communication in Server. Our admin team considers all the above action types of harassment . If reported to admins, you will receive up to a 5 day Temp - ban . Continued Harassment of this type will lead to a Perma-Ban.

If you experience Harassment / Griefing / or observe inappropriate content in-game, please fill out a ticket in our Discord ([#Support-Tickets](https://discord.com/channels/459473503939198978/728115631228190802/992571617110671476))

## 3. Auto-decay and Claiming

**DO NOT destroy/claim/or remove parts of bases, NAMED any of the following variations:**&#x20;

\<name> (ADMIN);  \<name> (OWNER);  \<name> {Owner/Admin}; "The PACK"\*\*Admin {Community Buildings} .  **You will be banned!**

The PACK uses extended rates (12 RL Days for Dinos), all structures and tamed dinosaurs WILL auto-decay. This means that if nobody in your tribe logs into the game every 7-10 days, your structures and dinosaurs may disappear. In general, higher-tier structures will last longer than lower-tier structures.

It is the responsibility of the Player to make sure they refresh all timers on the servers they play on. You must RENDER the items to actually prevent the decay of the item this can take up to 15 min. interval in your base moving about to properly render in all sections of the build in your players render radius. To show your own auto-decay timer. Face the structure and press the H button to see the auto-decay timer. This represents the next time you or someone in your tribe must log in, or the structure will be destroyed.

Any tribe that is fully inactive (24 days of no log ins) will be dino/structure wiped by admins. Please advise the admin team of prolonged (over 12 days) absences if you are not abandoning your base.

### ASE Auto Decay timers:

<table><thead><tr><th width="234.33333333333331">Auto Decay 0-20 Days</th><th>Auto Decay 20-30 Days</th><th>Auto Decay over 30 Days</th></tr></thead><tbody><tr><td><em><strong>DINO's are CLAIMABLE in 12 Days.</strong></em></td><td>S+ Greenhouse building pieces timeout in 15 days, auto decays in 23 </td><td>S+ WOOD items (boxes, Storage cabinets, Smithy, Stone forge) timeout in 16 days, auto decays in 35 days.</td></tr><tr><td>S+ Thatch building pieces timeout in 4 days, auto decays in 6.</td><td>S+ Metal building pieces timeout in 16 days, auto decays in 24. </td><td>S+ METAL items (boxes, vaults, Fab, chem bench) timeout in 32 days, auto decays in 48 days.</td></tr><tr><td>S+ Adobe building pieces timeout in 8 days, auto decays in 12. </td><td>S+ Tek building pieces timeout in 20 days, auto decays in 30. </td><td>S+ TEK items (any tek machinery) timeout in 60 days, auto decays in 75 days. </td></tr><tr><td>S+ Wood building pieces timeout in 8 days, auto decays in 12. </td><td></td><td>S+ TEK items not on a built surface, timeout in 75 days</td></tr><tr><td>S+ Stone building pieces timeout in 12 days, auto decays in 18. </td><td></td><td></td></tr></tbody></table>

### Unique Auto Decay timers:

Isolated (non-connected) foundations or pillars less than 24  hours. Dinosaur in a trap/cryopod: is as long as the lifetime of the container it's stored in. Vaults and Tek Dedicated Storage will last longer than the foundation they sit on. The decay timer for a vault will reset whenever it falls. All other structures will be destroyed when the foundation they sit on is destroyed.

## 4. Dino Rules:

### DINO CAPS: PER TRIBE - PER MAP

Tribal Cap limit = 500 Un-Stasis dinos.\
Tribal Stored Dino Cap limit = 2000 Trapped/Cryoed Dinos.\
Our cluster has set the normal Server Dino Cap = 8000.\
(Smaller Dino Cap Maps may impose a different Tribal Cap Arrangement)

### WANDER RULES:

Beetles, snails, oviraptors, Dodos may be on “wander” while tethered to a hitching post. Limit the same gender to stop overpopulation explosions. ALL "WANDERING DINOS" should be **"Tagged"** for fast retrieval if they escape. **Outside of these acceptable use guidelines, NO OTHER DINOS can be set to wandering!  Wandering Dinos that escape, and are not retrieved within a decay cycle (12 days) will be Deleted at The Pack Admins discretion. With no recompense!**&#x20;

### DEFENSE DINOS RULES:

***ALL DINOS NOT ENCUMBERED and on AGGRESSIVE, running loose outside base walls, will be SHOT ON SIGHT. NO EXCEPTIONS and no RECOMPENSE.***\
Defensive settings allowed = Neutral, and attack my target. No other setting is approved for Defensive Dinos. The Defensive Dino must be encumbered to the point it cannot walk in any direction. "Turret" dinos are acceptable. ALL DEFENSE DINOS should be "Tagged" for fast retrieval if they escape.&#x20;

Do not use a hitching post for this setting (it stops the Dino from defending). Do Not Set any Defensive Dino on WANDER! These will sometimes go rouge on resets or server crashes, and phase your walls. &#x20;

### SCATTERED DINOS:

Do NOT leave Tamed /Claimed Dinos all over the map! These will be Deleted at The Pack Admins discretion. With no recompense!  NO UNCLAIMING DINOS at the CC's, trap and place in the donations bin.  Do not un-claim dinos in the wild to circumvent the Tribal dino cap in breeding!

### BREEDING RULES:

Dino Storage terminals space allows \[300 slots] only.  Soulpods can be stored in any container. ***Please limit to 250 Pods per container outside of the DS Terminals.*** \
**All male animals that you do NOT want to breed** with others need to be clipped/cryoed, or kept out of the range of the female breeders. Overpopulations will be met with Deletion of all juveniles found. We ask that high level breeders please clip dinos, so abuse of your bloodlines does not occur. **Cloning of Clones, and Neutered Dinos is prohibited. This is a Banning OFFENSE.**

### EXT Titans:

Titans (Kaiju's) are NOT to be transferred off of the map they were captured on, and must be left on passive when not in use.

## 5. Server Building Restrictions&#x20;

Please remember that there are other players sharing the server with you. NO MASSIVE BUILDS of 4000+ tiles. All Building rules are designed around a Solo Player Or a multiplayer tribe. No personal bases if you are part of a tribe on the same MAP.  Building tile = a tile is any building piece, or object you can "Place" in your base.

### BUILDING SIZES:

* ONE Main base per map, ONE Outpost per map per clan/tribe. Except where NOTED.
* Building tile counts should be under 3000 tiles for a Main BASE.
* **DO NOT BUILD a box that encompasses the full 80x80x24. Instead use a Fence line of Gates to reduce the lag. Build inside such gates.**&#x20;
* **MAIN BASE** - a maximum of 80x80x24 Building tiles. THIS allotment includes all FENCE LINES and the Buildings that form the Base inside that FENCE LINE.&#x20;
* **OUTPOSTS:** a maximum of 30x30x24. THIS allotment includes all FENCE LINES and the Buildings that form the Outpost inside that FENCE LINE. (NOTE: Not Applicable to SE.)

### BI-LEVEL BUILDS: - including Ocean Bases and Tree Platforms.&#x20;

* The Maximum possible height from bottom tile to top tile is 32 building tiles.&#x20;
* One staircase build is allowed on the outside of the base walls.
* Ocean Bases - max possible footprint is 30x30x32 building tiles.&#x20;
* Aerial Tree Platforms- max possible footprint is 30x30x32 building tiles.
* Unique Tall bases in Extinction City. -Max possible footprint is 40x40x32 Building tiles.

### MOBILE BASES: - (Water Craft, Platform saddles.)&#x20;

* 20x20x12. Maximum size without a Special Exception (Some ship builds can be made into an Exception.)
* When NOT in use they need to be parked near the Clan/Tribes Main base or Outpost.
* Platform Saddles have specific build limits built in. And when built on, count as multiple tames in your base count.&#x20;

### RUINS: -&#x20;

Follow all building restrictions put forth in the above rules, and follow the Prohibitive Build Areas for your map.

* Please do not block any entrance to artifacts.&#x20;
* Stay within Main Base Size of at maximum of 80x80x24 Building tiles

### CAVE BUILDS: - (includes: sea, land, and nooks)

Follow all building restrictions put forth in the above rules, and follow the Prohibitive Build Areas for your map.

* Caves that are less than 30 x 30 building tiles are Outpost Sized at a maximum of 30x30x24 Building tiles&#x20;
* Caves over 60 x60 building tiles are Main Base Sized at a maximum of 80x80x24 Building tiles.&#x20;
* Recommended that you just Gate up the cave entrance IF YOU ARE the only occupant. And Do not build a giant box in the cave.&#x20;

### SMALL ISLAND BUILDS: - (includes: aerial, atoll, & space)

Follow all building restrictions put forth in the above rules, and follow the Prohibitive Build Areas for your map.

* Islands that are less than 30 x 30 building tiles are Outpost Sized at a maximum of 30x30x24 Building tiles&#x20;
* Islands over 60 x 60 building tiles are Main Base Sized at maximum of 80x80x24 Building tiles.

### ENCLOSED VALLEY BUILDS: -

Follow all building restrictions put forth in the above rules, and follow the Prohibitive Build Areas for your map.

* Enclosed Valleys that are less than 30 x 30 building tiles are Outpost Sized at a maximum of 30x30x24 Building tiles.&#x20;
* Enclosed Valleys over 60 x 60 building tiles are Main Base Sized at maximum of 80x80x24 Building tiles.

### TELEPORT PADS: (All versions) -&#x20;

* All versions of teleporters are restricted to 3 of each per tribe.
* Follow any rule that states no tribal teleports allowed near this POI.

### TAMING PENS/SPIKE FENCE WALLS: -&#x20;

* Any taming pen outside your base walls (not attached to base) has 48 hours MIN before admins remove it.

### AUTOMATION FARMS: -&#x20;

* Gacha Breeding is limited to 50 Animals per tribe out of stasis. And not in the Gavagers.
* S+ Gavagers are limited to 10 gavagers per tribe/per map. Limited in the mod INI.
* Crop plots - ALL KINDS - are limited to a total of 50 per TRIBE.&#x20;
* Please enclose your plant y stacks so we don't have so many aerial graphic artifacts.
* S+ Ded. Storage - Please do not have multiple dedicated units per resource item!

## 6. BUILDING RESTRICTIONS:

### Abuse Of The Claim System

* NO building tiles placed/spammed to prevent other players’ access to the POI, or a base location.&#x20;
* Render Distance Rule - Space between NON Allianced Bases is 75 building tiles.&#x20;

### Obelisks&#x20;

* Do not build on the Obelisk Platform or attach a base to the Obelisk itself.&#x20;
* Do not leave dinos on obelisk platforms over 48 hours.&#x20;

### Resources and Protected Resource Areas.

* Do not build on groups of 5 nodes or more, or mixed resource nodes of 7 nodes or more.&#x20;
* No building/tribal teleporters within 75 Building tiles of any Protected Resource Area.&#x20;
* No building/tribal teleporters inside Resource Caves that supply a unique resource including special dino spawns.

### Supply Drops/Loot Crates -&#x20;

* No building/tribal teleporters near any LOOT resource.
* All players must have a way to the supply drop area on foot with unlocked gates.&#x20;
* Respect others when doing a loot run and if you see a person landed next to one, fly to the next.&#x20;
* Stealing a drop out from others is considered Griefing and will be met with disciplinary actions.
* Cave Loot crates are a first come first serve opportunity.
* Artifact caves No building/tribal teleporters inside the cave.&#x20;
* Do not leave tames in loot caves.&#x20;

### Unique POI (Points of Interest):&#x20;

* Lore notes / Extinction City Terminals - All players must have a way to the POI on foot with unlocked gates.&#x20;
* Waterways deep enough for a raft - All players must have a way to around your base on foot with unlocked gates.
* Walkways, and Aerial Ramps - All players must have a way to around your base on foot with unlocked gates.
* Aberration Waterfalls into the other zones. Please Do Not Block these.

## 7. Prohibited Areas per ASE Map

<details>

<summary>Aberration Prohibited Areas: <img src="https://772063455-files.gitbook.io/~/files/v0/b/gitbook-x-prod.appspot.com/o/spaces%2F-Lgje1lBxKKWXwqycB-v%2Fuploads%2FOiy0X5PN0o9qH9DNvvvY%2Fimage.png?alt=media&amp;token=86c9ace4-a91b-440a-9765-859ed81da071" alt=""></summary>

* Keep the waterways clear for Boat traffic.&#x20;
* Do not lock Gas collectors.&#x20;
* No building within 200 foundations of any Public Refinery area.
* ANY Cave or Ruin that has an artifact, lore note, rune stone, Do NOT Block the way to the item.
* All Caves on AB have building prevention enabled.
* Do not block Resource nodes (groups of 5 or more or including Metal, OBS, and Crystal nodes)

</details>

<details>

<summary>Extinction Prohibited Areas: <img src="https://772063455-files.gitbook.io/~/files/v0/b/gitbook-x-prod.appspot.com/o/spaces%2F-Lgje1lBxKKWXwqycB-v%2Fuploads%2FQOufRLptAvCthmnkXJ8v%2Fimage.png?alt=media&amp;token=14728e9c-cb3d-41b2-b8df-fe661b9cc350" alt=""></summary>

* Sunken Forest Beaver Lake- do not block the spawns in the middle of the lake. Build back from the water's edge.&#x20;
* Any city terminal must be treated like a public transmitter, you may be enclosed within a base, but that area must remain accessible to the public via a gate system.&#x20;
* All Oil or Water wells should be UNLOCKED or in an admin's tribe.
* No building within 200 foundations of any Public Refinery area.
* ANY Cave or Ruin that has an artifact, lore note, rune stone, Do NOT Block the way to the item.
* Specific Caves that have artifacts in them have building prevention enabled. Those that do not are free to build in.&#x20;
* If a Cave Falls into the following Resource node rule, or has special Dino Spawns you MAY NOT build in it.
* Do not block Resource nodes (groups of 5 or more or including Metal, OBS, and Crystal nodes)

</details>

<details>

<summary>Fjordur Prohibited Areas: <img src="https://772063455-files.gitbook.io/~/files/v0/b/gitbook-x-prod.appspot.com/o/spaces%2F-Lgje1lBxKKWXwqycB-v%2Fuploads%2FsQZP9FPoVabPBpI4BadD%2Fimage.png?alt=media&amp;token=adda0e87-7042-407a-a164-4cb7706bd3bc" alt=""></summary>

* Broken Meadows Waterfall Cave- \[\[Desmodus Spawn]] 38.2|74.8&#x20;
* Fjordur Public Resources -03.87|73.97 Metal Crystal and Gems\[Do NOT Build area]&#x20;
* Drengrheimr (The Old Grave Cave) Behind a destructible rock. " 03.41|32.79 \[Do NOT Build area \[\[Artifact of the Hunter]]&#x20;
* Bear Caverns" 10.12|84.47 "\[Do NOT Build area] \[\[Artifact of the Shadow]]&#x20;
* Vanaheim Wyvern's Cave 12.77|65.06 \[Do NOT Build Area] \[\[Poison Wyvern spawn]]&#x20;
* Asgard Terminal 20.5|37.2 "\[Do Not Build Area]\[\[Hati & Skol Dungeon]]&#x20;
* " The Snowglobe 20.60|8.74 \[Do Not Build Area – \[\[Ferox Spawns]]&#x20;
* "Molten Caverns" 20.90|57.37"\[Do Not Build Area - \[\[Artifact of the Clever]]\[\[Artifact of the Massive]]\[\[Artifact of the Pack ]]"\[\[Desmondus Spawns]]&#x20;
* "Secret Terminal(Asgard)" 25.0|10.8 \[Do NOT Build area \[\[Artifact of the Chaos]]&#x20;
* Asgard Wyvern's Cave 29.71|8.31 "\[Do NOT Build area]\[\[Lightning Wyvern spawn]]"&#x20;
* "Marianna Caverns UNDERWATER"3.71|04.08"\[Do NOT Build area \[\[Artifact of the Brute]]\[\[Artifact of the Depths]]\[\[Artifact of the Devourer ]]&#x20;
* " Fjordur Public Metal Mtn-2 30.38|52.89 "Metal, OBS, & Runestones\[Do NOT Build area]"&#x20;
* "Forburg (Helms Deep) " 32.0|66.1\[Fjordur Community Center] Fjordur Public Crystal 32.11|69.02 Below Helms Deep in a cavern, Crystal.&#x20;
* Fjordur Public Metal, Oil, Obs. 32.2 | 67.4 "Above Helms Deep with OIL, OBS, Metal\[Do NOT Build area]&#x20;
* " Fjordur Public OIL, Metal and Obs. 36.86|95.76 "Cave with OIL, Metal and Obs.\[Do NOT Build area]"&#x20;
* "Lindbjord Forest Cave" 4.52|47.32"\[Do NOT Build Area]\[\[ Beyla Dungeon]]"&#x20;
* "The Hidden Worlds"40.90|57.40 Holds terminals used to teleport to other realms \[Do not Build area] \[\[POI]]&#x20;
* Asgard Drake Nest 42.04|49.21 "\[Do NOT Build Area] \[\[Rockdrakes spawn area]]&#x20;
* " Fjordur Public Crystal & Oil 44.82|42.44 "Crystal and Oil\[Do NOT Build area]"&#x20;
* "The Golden Caverns (Hall of Fame Rm and LOOT boxes)" 45.66|60.69"Patreon Gratitude Cave\[Do not Build area \[\[POI]]&#x20;
* " Living Lake Public Beaver Pond 46.94|73.18 "Beaver Pond & dams(Vardiland Beaver Lake)\[Do NOT Build area]&#x20;
* " The Snakepit 49.4|14.2 "\[Do NOT Build Area] \[\[Artifact of the Brute]]&#x20;
* " Beiygjaheimr- 56.74|84.69 "\[Do NOT Build Area]\[\[Megapithecus Dungeon]]\[\[Artifact of the Stalker]]&#x20;
* " The Over Grown Grave 57.31|65.77 \[Do Not Build Area] - \[\[Broodmother Dungeon]]&#x20;
* Fjordur Public OIL, Metal and Obs. 58.38|78.39 "Cave with Metal, OIL, Obs, and Crys.\[Do NOT Build area]"&#x20;
* "Nideshem Depths(labyrinth with puzzles and several traps)(UNDERWATER)" 71.8|01.2"\[Do NOT Build area]\[\[Artifact of the Massive]]&#x20;
* " Sulfur Pools Public Area 72.64|91.35 "Gigantic Sulfur Pool area.\[Do NOT Build area]"&#x20;
* "Djuprjord The Forgotten Caverns(Pirate ship cave)" 76.83|65.60"\[Do NOT Build area] \[\[Artifact of the Cunning]]&#x20;
* " Jotunheim Cave - 77.69|30.82"\[\[Steinbjorn Dungeon]] \[\[Artifact of the Void]] "&#x20;
* Fjordur Public Metal Mtn. 79.26|36.46 "Side of a MTN covered in metal nodes\[Do NOT Build area]&#x20;
* " The Frozen Fortress 8.69|24.48 "\[Do NOT Build area \[\[Artifact of the Skylord]]\[\[Artifact of the Strong]]&#x20;
* " Balheimr Tar Pits. 80.46|80.80 "Balheimr Volcanic Isle stone pathway above the tar pits.\[Do NOT Build Area]"&#x20;
* "Dvergheimr(The Old Kingdom)" 86.2|5.3"\[Do NOT Build Area]\[\[Dragon Dungeon]]"&#x20;
* "Caverns of Time - Lunar cave UNDERWATER "86.28|98.17" Red, Blue, Green Gems\[Do NOT Build area]\[\[AB Dinos Spawn]&#x20;
* "Faheimr (Biolum Chamber)" 86.8|12.8"Red, Blue, Green Gems\[Do NOT Build area]\[\[AB Dinos Spawn]]&#x20;
* " Fjordur Public Metal & Oil 90.02|45.14 "Metal and Oil\[Do NOT Build area]&#x20;
* " Mount Doom Caverns 90.73|78.52 \[Do NOT Build area \[\[Artifact of the Immune]] \[\[Desmondus Spawns]]&#x20;
* Quiet Pond Public Beaver Pond 93.06|32.74 "Beaver Pond & dams(Vanaland Beaver Lake)\[Do NOT Build area]&#x20;
* " The Throat of Flames 95.88|80.64 "\[Do NOT Build area] \[\[Magmasaur]] spawn]
* " All Oil or Water wells should be UNLOCKED or in an admin's tribe.&#x20;
* No building within 200 foundations of any Public Refinery area. ANY Cave or Ruin that has an artifact, lore note, rune stone, Do NOT Block the way to the item.&#x20;
* Specific Caves that have artifacts in them have building prevention enabled. Those that do not are free to build in.&#x20;
* If a Cave Falls into the following Resource node rule, or has special Dino Spawns you MAY NOT build in it.&#x20;
* Do not block Resource nodes (groups of 5 or more or including Metal, OBS, and Crystal nodes)

</details>

<details>

<summary>  Genesis - 2 Prohibited Areas: <img src="https://772063455-files.gitbook.io/~/files/v0/b/gitbook-x-prod.appspot.com/o/spaces%2F-Lgje1lBxKKWXwqycB-v%2Fuploads%2FaXJHjjLf5OmZPm8Cnf5n%2Fimage.png?alt=media&amp;token=082004a7-4ca2-48e2-b330-1278f0918fca" alt=""></summary>

* No building ON Mission DISC areas or within 50 foundations in an arc around the Mission Disc areas.&#x20;
* No building on a bare spot or a structure with a Lore Cache, IF HLNA activates over a spot, do not build there.&#x20;
* No building on the Upper most bridges that span the TRENCHES. This includes the natural rock spans. Do NOT block these with Gates.&#x20;
* No building in the Tunnels that lead to SPACE. Do NOT block these with Gates.&#x20;
* No building in the Tunnels that lead to the UNDERSEA Area known as the SUMP. Do NOT block these with Gates. &#x20;
* Only one Admin approved TP within the render of the Rockwell Prime Dias.&#x20;
* Do NOT place S+ Harvester's in the Mutagen Field in Rockwell's Innards. ​
* All Oil or Water wells should be UNLOCKED or in an admin's tribe.
* No building within 200 foundations of any Public Refinery area.
* ANY Cave or Ruin that has an artifact, lore note, rune stone, Do NOT Block the way to the item.
* Specific Caves that have artifacts in them have building prevention enabled. Those that do not are free to build in.&#x20;
* If a Cave Falls into the following Resource node rule, or has special Dino Spawns you MAY NOT build in it.
* Do not block Resource nodes (groups of 5 or more or including Metal, OBS, and Crystal nodes)

</details>

<details>

<summary> Island Prohibited Areas: <img src="https://772063455-files.gitbook.io/~/files/v0/b/gitbook-x-prod.appspot.com/o/spaces%2F-Lgje1lBxKKWXwqycB-v%2Fuploads%2F90vh2csUNsULwUuCjHaS%2Fimage.png?alt=media&amp;token=5efbeff8-c9a7-4fce-be76-0ef73e78153d" alt=""></summary>

* Penguin Island\[\[Organic Polymer Farming]]&#x20;
* Hidden Lake\[\[Protected Beaver Spawn]]&#x20;
* Underwater Resource Caves \[\[Resource Area]] ​
* Oil Fields area \[\[Resource Area]]
* Silica Pearls lake \[\[Resource Area]]
* No building within 200 foundations of any Public Refinery area.
* ANY Cave or Ruin that has an artifact, lore note, rune stone, Do NOT Block the way to the item.
* All Caves on Island have building prevention enabled.
* Do not block Resource nodes (groups of 5 or more or including Metal, OBS, and Crystal nodes)

</details>

<details>

<summary> Ragnarök Prohibited Areas: <img src="https://772063455-files.gitbook.io/~/files/v0/b/gitbook-x-prod.appspot.com/o/spaces%2F-Lgje1lBxKKWXwqycB-v%2Fuploads%2F7ZG04HQlH2qWRRhs9jUF%2Fimage.png?alt=media&amp;token=2cc350a5-f4ad-48b7-98ff-e0201ffd0253" alt=""></summary>

(Other than specified metal node areas, Metal nodes are not included in this map as there are so many.)

* The giant beaver dams&#x20;
* The Metal cave in the Canyons.&#x20;
* All Oil or Water wells should be UNLOCKED or in an admin's tribe.
* No building within 200 foundations of any Public Refinery area.
* ANY Cave or Ruin that has an artifact, lore note, rune stone, Do NOT Block the way to the item.
* Specific Caves that have artifacts in them have building prevention enabled. Those that do not are free to build in.&#x20;
* If a Cave Falls into the following Resource node rule, or has special Dino Spawns you MAY NOT build in it.
* Do not block Resource nodes (groups of 5 or more or including Metal, OBS, and Crystal nodes)

</details>

## 8.  Unexplained Deaths, Client Crashes, and Server Issues.

**We are unable to provide any refunds to persons or clans for loss of items, resources, in-game properties and so on, regardless of the reason. The Pack Gaming is not responsible for replacing items or Dinos due to ARK Glitches, Steam Cloud Errors, or Corrupted Players Clients.**&#x20;

### Boss Battles

To be teleported into a Boss arena AND out of the arena, you MUST be dismounted. Teleportation to the Titan summoned area or bosses does not require you to dismount.\
All Tek gears and Tek saddles are banned (WC setting) from the island Boss arena (Excluding Tek Cave/Overseer Arena) and Manticore Arena, and attempting to wear it inside when entering will either force unequip it, or drop at where the boss was summoned).

After beating an ascension boss (e.g: Manticore in Manticore Arena in Scorched Earth), you will lose any item not allowed to be uploaded into ARK Data (e.g.:trophies, tributes, Element). To avoid this, put such items inside a creature inventory before ascension happens.\
Unfortunately we can not recover dinos, or items lost this way, they are often treated like they were sent into mesh and hit an anti mesh barrier.

### Player Deaths:

**Merging into Anti Meshing Barriers (Skybox - Ground mesh layer-etc.)**\
This includes the deaths while using a teleporter.  Some caves now have the Ground Mesh protection turned on and trying to teleport into a cave will cause a Player Client Crash. And usually a death. \
**Deaths while AFK.**\
Are not always explained in the tribal logs. Most times we can not define what happened. Occasionally some Deaths will be recoverable in the Death Recovery mods, unless you pass the 60 min Death cache decay limit.\
**Deaths while logged out.**  \
Are not always explained in the tribal logs. Most times we can not define what happened. Occasionally some Deaths will be recoverable in the Awesome Death Recovery on the teleport pad, unless you pass the 30 min Death cache decay limit.\
**To Prevent Player loss of items.**\
*Store all inventory in a storage chest near your log out point. Store Gear and hotbar items in a "Loadout Mannequin". Log out in a sleeping pod or locked onto a bed.  If you need to AFK, make sure to set your settings for at least 30 mins AFK, and again store items and log out on a bed of some sort.*

### Client Side Crashes:

Any type of Client Side Crash can create a loss of saved data for the player. As well as Player deaths and dino deaths while you were handling the crash. These incidents will not produce a bag or recoverable items in the death recovery system. Admins have no access to the Servers ARKData.sav files and can not replace a players file in the server.&#x20;

### Server Crashes and Restarts:

Server Crashes will have a 5 to 14 min. Rollback to the save Prior to the restart, or to the last save before the Crash. All Data collected between the Save timestamp and the restart / Crash will be erased. \
Server Restarts will have a save 3 mins prior to a Restart. If you do not log out before the 3 min. Mark, you can lose some game data to the server resetting. Please always try to get to a safe stopping point before the 5 min Restart warning!

### Transfer Errors:

Characters/Dinos/Items uploaded to ARK cloud have a 24-hour time limit in multiplayer. Ensure you are set to download them into another server before the timer runs out, or else your items will decay in your upload when the timer goes past 0.

Steam Cloud Errors involve Characters/Dinos/Items uploaded to the ARK cloud. If this upload is corrupted, Admins and Owners can NOT Access the data stored in the Steam cloud and your information is lost. &#x20;

![](https://772063455-files.gitbook.io/~/files/v0/b/gitbook-x-prod.appspot.com/o/spaces%2F-Lgje1lBxKKWXwqycB-v%2Fuploads%2FrlqX4M9MCu6dVUfCnhWe%2FNEW-PAGE_GENERIC_BANNER.png?alt=media\&token=9d073148-393e-4dac-ae13-e88d3519e959)


# ASA: PvE Servers Rules.

All rules found here will pertain to all of our current and future ARK Servers. Please read and familiarize yourself with them. UPDATED 5/1/2025

Navigation of the page.

<table data-view="cards"><thead><tr><th></th><th></th></tr></thead><tbody><tr><td><strong>Left side of the page</strong> <span data-gb-custom-inline data-tag="emoji" data-code="25c0">◀️</span></td><td>Use the <strong>></strong> to open any pages in that section when the Header shows a <strong>></strong>.</td></tr><tr><td><strong>Right Side</strong> of the page <span data-gb-custom-inline data-tag="emoji" data-code="25b6">▶️</span></td><td>Click a header to go to that section of this page.</td></tr><tr><td><strong>Features of the page.</strong></td><td>are in an <strong>expandable box</strong>, please click the <strong>></strong> to open the expandable dropdown.</td></tr><tr><td><strong>Hyperlink</strong>s are often in a <strong>card form</strong> in the website.</td><td>So <strong>clicking an image</strong> will often take you to a specific page for information. </td></tr><tr><td><strong>Steam-link</strong>s are often in a <strong>card form</strong> in the website.</td><td>So <strong>clicking on a server card</strong> will take you to the Server.</td></tr></tbody></table>

## 1. General Server Guidelines!

### The PACK Disclaimer and Players Responsibility NOTICE:

*❝Your presence in this server implies accepting these rules, including all further changes. We reserve the right to modify these rules in any way we deem necessary and at any moment, at our own discretion, it is your responsibility to check for them.❞*&#x20;

*We are unable to provide any refunds to persons or clans for **loss of items, resources, in-game properties** and so on, regardless of the reason. The Pack Gaming is not responsible for replacing items or Dinos due to Normal ARK Glitches, Steam Cloud Errors, Corrupted Players Clients or Curseforge mod errors.*

These rules are not comprehensive and use of loopholes to violate the spirit of these rules is subject to enforcement. Failure to follow these rules will result in being removed from the community!

### We work on a "3 Strikes Method"

Please read through and consider the spirit of the rules, not just the specific wording. And make sure your clanmates are also aware of them as their actions can affect you. Any infraction by a player will most likely have repercussions for the entire clan. Other than this official post of rules, we do not issue warnings ahead of Admin intervention.&#x20;

1. You and your Tribe/Clan get a warning. Such as a sign in your base or a message to talk with an admin.
2. You and your Tribe/Clan get a second warning. Same as above but Tames are confiscated, or buildings removed. Written note added to the Admins Log recording your player name and Tribe.
3. You and your Tribe/Clan get a third warning. As verified by our Admins Log. We are done, and you are Perm Banned.

### Reporting Infractions:

Please contact us through our Discord, (<https://discord.gg/RJVVraV>), and fill out a ticket in our Discord ([#Support-Tickets](https://discord.com/channels/459473503939198978/728115631228190802/992571617110671476))

## 2. Infractions&#x20;

### Hacks and Exploits

Hacking, or using Exploits and other situations deemed as extreme will be met with a permanent ban on the first offense. Included in this category are: Real-Money Trading (RMT), use of third-party programs that inject code and modify aspects of the game to provide unfair advantage against other players. And abuses of game mechanics to obtain an unfair advantage over other players including creating a detrimental play experience through reduced server or game performance.

### Harassment - Griefing

We allow coarse humor, rough language, and or content. If this is not for you, Thank you for your interest, but we may not be the BEST FIT for you. There are some offensive and defamatory chat and user-created content DEEMED NOT PERMITTED. Personal threats, doxing, stalking. This rule also extends to character names, guild names, in-game signs, any other type of communication in Server. Our admin team considers all the above action types of harassment . If reported to admins, you will receive up to a 5 day Temp - ban . Continued Harassment of this type will lead to a Perma-Ban.

If you experience Harassment / Griefing / or observe inappropriate content in-game, please fill out a ticket in our Discord ([#Support-Tickets](https://discord.com/channels/459473503939198978/728115631228190802/992571617110671476))

## 3. Auto-decay and Claiming

**DO NOT destroy/claim/or remove parts of bases, NAMED any of the following variations:**&#x20;

\<name> (ADMIN);  \<name> (OWNER);  \<name> {Owner/Admin}; "The PACK"\*\*Admin {Community Buildings} .  **You will be banned!**

The PACK uses extended rates (12 RL Days for Dinos), all structures and tamed dinosaurs WILL auto-decay. This means that if nobody in your tribe logs into the game every 7-10 days, your structures and dinosaurs may disappear. In general, higher-tier structures will last longer than lower-tier structures.

It is the responsibility of the Player to make sure they refresh all timers on the servers they play on. You must RENDER the items to actually prevent the decay of the item this can take up to 15 min. interval in your base moving about to properly render in all sections of the build in your players render radius. To show your own auto-decay timer. Face the structure and press the H button to see the auto-decay timer. This represents the next time you or someone in your tribe must log in, or the structure will be destroyed.

Any tribe that is fully inactive (24 days of no log ins) will be dino/structure wiped by admins. Please advise the admin team of prolonged (over 12 days) absences if you are not abandoning your base.

### ASA Auto Decay timers:

<table><thead><tr><th width="234.33333333333331">Auto Decay 0-20 Days</th><th>Auto Decay 20-30 Days</th><th>Auto Decay over 30 Days</th></tr></thead><tbody><tr><td>Tamed Dinosaur (including Raft, Motorboat, Skiff, Zeppelin, Sir-5rM8): <br><em><strong>Upon reaching full decay timer(13 days) the server will delete them.</strong></em></td><td><strong>Tamed Dinosaur in a cryopod: as long as the lifetime of the cryopod and the container it's stored in.</strong></td><td> B+ Tek building pieces<br>30 days decay, 35 Auto Destroy.  </td></tr><tr><td>B+ Thatch building pieces <br>4 days decay, 7 Auto Destroy.</td><td><p>B+ Stone building pieces</p><p>18 days decay, 21 Auto Destroy.</p></td><td>B+ TEK "Utilities" on the ground : 60 Days</td></tr><tr><td>B+ Adobe building pieces <br>12 days decay,  14 Auto Destroy.</td><td>B+ Greenhouse building pieces<br>24 days decay, 28 Auto Destroy. </td><td>B+ Tek Dedicated Storage: 80 days</td></tr><tr><td>B+ Wood building pieces <br>12 days decay, 14 Auto Destroy.</td><td>B+ Metal building pieces <br>24 days decay, 28 Auto Destroy. </td><td></td></tr><tr><td></td><td>B+ "Utilities": 24 days decay, 28 Auto Destroy.</td><td></td></tr></tbody></table>

### Unique Auto Decay timers:

Isolated (non-connected) foundations or pillars less than 24  hours. Dinosaur in a trap/cryopod: is as long as the lifetime of the container it's stored in. Vaults and Tek Dedicated Storage will last longer than the foundation they sit on. The decay timer for a vault will reset whenever it falls. All other structures will be destroyed when the foundation they sit on is destroyed.

## 4. Dino Rules:

### DINO CAPS: PER TRIBE - PER MAP

Tribal Cap limit = 500 Un-Stasis dinos.\
Tribal Stored Dino Cap limit = 2000 Trapped/Cryoed Dinos.\
Our cluster has set the normal Server Dino Cap = 8000.\
(Smaller Dino Cap Maps may impose a different Tribal Cap Arrangement)

### WANDER RULES:

Beetles, snails, oviraptors, Dodos may be on “wander” while tethered to a hitching post. Limit the same gender to stop overpopulation explosions. ALL "WANDERING DINOS" should be **"Tagged"** for fast retrieval if they escape. **Outside of these acceptable use guidelines, NO OTHER DINOS can be set to wandering!  Wandering Dinos that escape, and are not retrieved within a decay cycle (12 days) will be Deleted at The Pack Admins discretion. With no recompense!**&#x20;

### DEFENSE DINOS RULES:

***ALL DINOS NOT ENCUMBERED and on AGGRESSIVE, running loose outside base walls, will be SHOT ON SIGHT. NO EXCEPTIONS and no RECOMPENSE.***\
Defensive settings allowed = Neutral, and attack my target. No other setting is approved for Defensive Dinos. The Defensive Dino must be encumbered to the point it cannot walk in any direction. "Turret" dinos are acceptable. ALL DEFENSE DINOS should be "Tagged" for fast retrieval if they escape.&#x20;

Do not use a hitching post for this setting (it stops the Dino from defending). Do Not Set any Defensive Dino on WANDER! These will sometimes go rouge on resets or server crashes, and phase your walls. &#x20;

### SCATTERED DINOS:

Do NOT leave Tamed /Claimed Dinos all over the map! These will be Deleted at The Pack Admins discretion. With no recompense!  NO UNCLAIMING DINOS at the CC's, trap and place in the donations bin.  Do not un-claim dinos in the wild to circumvent the Tribal dino cap in breeding!

### BREEDING RULES:

Dino Storage terminals space allows \[300 slots] only.  Soulpods can be stored in any container. ***Please limit to 250 Pods per container outside of the DS Terminals.*** \
**All male animals that you do NOT want to breed** with others need to be clipped/cryoed, or kept out of the range of the female breeders. Overpopulations will be met with Deletion of all juveniles found. We ask that high level breeders please clip dinos, so abuse of your bloodlines does not occur. **Cloning of Clones, and Neutered Dinos is prohibited. This is a Banning OFFENSE.**

### EXT Titans:

Titans (Kaiju's) are NOT to be transferred off of the map they were captured on, and must be left on passive when not in use.

## 5. Server Building Restrictions&#x20;

Please remember that there are other players sharing the server with you. NO MASSIVE BUILDS of 4000+ tiles. All Building rules are designed around a Solo Player Or a multiplayer tribe. No personal bases if you are part of a tribe on the same MAP.  Building tile = a tile is any building piece, or object you can "Place" in your base.

### BUILDING SIZES:

* ONE Main base per map, ONE Outpost per map. Except where NOTED.
* Building tile counts should be under 3000 tiles for a Main BASE.
* **DO NOT BUILD a box that encompasses the full 80x80x24. Instead use a Fence line of Gates to reduce the lag. Build inside such gates.**&#x20;
* MAIN BASE - a maximum of 80x80x24 Building tiles. THIS allotment includes all FENCE LINES and the Buildings that form the Base inside that FENCE LINE.&#x20;
* OUTPOSTS: a maximum of 30x30x24. THIS allotment includes all FENCE LINES and the Buildings that form the Outpost inside that FENCE LINE. (NOTE: Not Applicable to SE.)

### BI-LEVEL BUILDS: - including Ocean Bases and Tree Platforms.&#x20;

* The Maximum possible height from bottom tile to top tile is 32 building tiles.&#x20;
* One staircase build is allowed on the outside of the base walls.
* Ocean Bases - max possible footprint is 30x30x32 building tiles.&#x20;
* Aerial Tree Platforms- max possible footprint is 30x30x32 building tiles.
* Unique Tall bases in Extinction City. -Max possible footprint is 40x40x32 Building tiles.

### MOBILE BASES: - (Water Craft, Platform saddles.)&#x20;

* 20x20x12. Maximum size without a Special Exception (Some ship builds can be made into an Exception.)
* When NOT in use they need to be parked near the Tribes Main base.&#x20;
* Platform Saddles have specific build limits built in. And when built on, count as multiple tames in your base count.&#x20;

### RUINS: -&#x20;

Follow all building restrictions put forth in the above rules, and follow the Prohibitive Build Areas for your map.

* Please do not block any entrance to artifacts.&#x20;
* Stay within Main Base Size of at maximum of 80x80x24 Building tiles

### CAVE BUILDS: - (includes: sea, land, and nooks)

Follow all building restrictions put forth in the above rules, and follow the Prohibitive Build Areas for your map.

* Caves that are less than 30 x 30 building tiles are Outpost Sized at a maximum of 30x30x24 Building tiles&#x20;
* Caves over 60 x60 building tiles are Main Base Sized at a maximum of 80x80x24 Building tiles

### SMALL ISLAND BUILDS: - (includes: aerial, atoll, & space)

Follow all building restrictions put forth in the above rules, and follow the Prohibitive Build Areas for your map.

* Islands that are less than 30 x 30 building tiles are Outpost Sized at a maximum of 30x30x24 Building tiles&#x20;
* Islands over 60 x 60 building tiles are Main Base Sized at maximum of 80x80x24 Building tiles.

### ENCLOSED VALLEY BUILDS: -

Follow all building restrictions put forth in the above rules, and follow the Prohibitive Build Areas for your map.

* Enclosed Valleys that are less than 30 x 30 building tiles are Outpost Sized at a maximum of 30x30x24 Building tiles.&#x20;
* Enclosed Valleys over 60 x 60 building tiles are Main Base Sized at maximum of 80x80x24 Building tiles.

### TELEPORT PADS: (All versions) -&#x20;

* All versions of teleporters are restricted to 3 of each per tribe.
* Follow any rule that states no tribal teleports allowed near this POI.

### TAMING PENS/SPIKE FENCE WALLS: -&#x20;

* Any taming pen outside your base walls (not attached to base) has 48 hours MIN before admins remove it.

### AUTOMATION FARMS: -&#x20;

* Gacha Breeding is limited to 50 Animals per tribe out of stasis. And not in the Gavagers.
* B+ Gavagers are limited to 10 gavagers per tribe/per map. Limited in the mod INI.
* SCS Terminal Gacha Farm is allowed one full terminal per map.
* Crop plots - ALL KINDS - are limited to a total of 50 per TRIBE.&#x20;
* Please enclose your plant y stacks so we don't have so many aerial graphic artifacts.
* B+ Ded. Storage - Please do not have multiple dedicated units per resource item!

## 6. BUILDING RESTRICTIONS:

### Abuse Of The Claim System

* NO building tiles placed/spammed to prevent other players’ access to the POI, or a base location.&#x20;
* Render Distance Rule - Space between NON Allianced Bases is 75 building tiles.&#x20;

### Obelisks&#x20;

* Do not build on the Obelisk Platform or attach a base to the Obelisk itself.&#x20;
* Do not leave dinos on obelisk platforms over 48 hours.&#x20;

### Resources and Protected Resource Areas.

* Do not build on groups of 5 nodes or more, or mixed resource nodes of 7 nodes or more.&#x20;
* No building/tribal teleporters within 75 Building tiles of any Protected Resource Area.&#x20;
* No building/tribal teleporters inside Resource Caves that supply a unique resource including special dino spawns.

### Supply Drops/Loot Crates -&#x20;

* No building/tribal teleporters near any LOOT resource.
* All players must have a way to the supply drop area on foot with unlocked gates.&#x20;
* Respect others when doing a loot run and if you see a person landed next to one, fly to the next.&#x20;
* Stealing a drop out from others is considered Griefing and will be met with disciplinary actions.
* Cave Loot crates are a first come first serve opportunity.
* Artifact caves No building/tribal teleporters inside the cave.&#x20;
* Do not leave tames in loot caves.&#x20;

### Unique POI (Points of Interest):&#x20;

* Lore notes / Extinction City Terminals - All players must have a way to the POI on foot with unlocked gates.&#x20;
* Waterways deep enough for a raft - All players must have a way to around your base on foot with unlocked gates.
* Walkways, and Aerial Ramps - All players must have a way to around your base on foot with unlocked gates.
* Aberration Waterfalls into the other zones. Please Do Not Block these.

### OSDs on Astraeos and Extinction

**If you’ve built near potential OSD drop zones, we strongly recommend relocating your base before the patch goes live on July 15th. 2025.**

Wild Card is making a key adjustment to OSDs on **Astraeos** to address a bug. **Starting July 15th**, 2025, when an OSD lands, it will now destroy any nearby player-built structures within its impact radius. This will be the same radius used for OSDs on **Extinction**.

## 7. PER ASA MAP Restricted Build Areas.

<details>

<summary>Island <strong>Protected Resource</strong> Areas: </summary>

:no\_entry:No building within 100 building units of any  **Protected Resource Area**.

* Penguin Island\[\[Organic Polymer Farming]]&#x20;
* Hidden Lake\[\[Protected Beaver Spawn]]&#x20;
* Underwater Resource Caves \[\[Resource Area]] ​
* Oil Fields area \[\[Resource Area]]
* Silica Pearls lake \[\[Resource Area]] (Subject to change)

:no\_entry:**The Volcano foundry** at 41/36 and the surrounding resource nodes. No building within 100 building units of any Public Refinery area.

:no\_entry:Do not build on the Obelisk Platforms.&#x20;

</details>

<details>

<summary>SE <strong>Protected Resource</strong> Areas: </summary>

:no\_entry:No building near Resources in groups of 5 nodes or more, or mixed resource nodes of 7 nodes or more.

:no\_entry:No building within 100 building units of any  **Protected Resource Area**.

* **Silica Pearl Protected Resource Area**. Red OBE Water at 70/39.&#x20;
* **Oasis Crystal Cave** 73.63/40.15 (Near Red Obe){{No Building}}
* **Trench Cave** 59.10/16.21 {{No Building Resource Area}}
* :no\_entry:Do not lock Gas collectors.&#x20;
* **All Oil or Water wells** should be **UNLOCKED.**&#x20;

:no\_entry:Do not build on the **Obelisk Platforms**. You may build on the surrounding Plateaus for easy water access.\
:no\_entry: **SE CC** at 49.08|12.69 Includes Wyvern trap, Hatchery, & TP / Transmitter.  <br>

</details>

<details>

<summary>Aberration <strong>Protected Resource</strong> Areas: </summary>

:no\_entry: **Protected Resource Areas:**\
No building within 100 building units of any  **Protected Resource Area**.\
◉AB Refinery 46.7|61.8 (OPEN TRANSMITTER HERE)\
◉Public Drake Teleport at 46.97|46.65 (OPEN TRANSMITTER HERE)\
◉Public Reaper Trap at 81.1|58.6 (OPEN TRANSMITTER HERE)

* :no\_entry: Do not block Charge stations.&#x20;
* :no\_entry:Aberration CC at 44.6|24.4 (OPEN TRANSMITTER HERE)
* :no\_entry:No building near Resources in groups of 5 nodes or more, or mixed resource nodes of 7 nodes or more.
* :no\_entry:ANY Cave or Ruin that has an artifact, lore note, rune stone, Do NOT Block the way to the item.\
  ◉Artifact Of The Depths "Old Railway Cave" (Entrance) 48.3|27.2\
  ◉Artifact Of The Shadows "Hidden Grotto" (Entrance) 54.2|65.7\
  ◉Artifact Of The Stalker "Elemental Vault" (Entrance) 81.0|47.0

Subject to change daily as we discover the newly redone Aberration map.

</details>

<details>

<summary>Extinction <strong>Protected Resource</strong> Areas: </summary>

:no\_entry: **Protected Resource Areas:**\
No building within 100 cubits of any  **Protected Resource Area**.\
◉Extinction Refinery 70.8|11.19 OPEN TRANSMITTER HERE\
◉Sludge Basin 81.3|31.0 OPEN TRANSMITTER HERE\
◉Extinction CC at 52.5|47.7 (OPEN TRANSMITTER HERE)

:no\_entry: **Restricted Areas:**

* :no\_entry: **Do not block Resource nodes (groups of 5 or more)**
* :no\_entry: Do not block the Extinction City Terminals! All players must have a way to the City Terminal area on foot with unlocked gates.
* :no\_entry: Walkways/Aerial Ramps that provide the only means to travel to other areas of the map, Base perimeters need to leave a dino gate width passage around the outside of an base or outpost.&#x20;
* :no\_entry: All Oil or Water wells should be UNLOCKED! These are Public Access.
* :no\_entry: Specific Caves that have artifacts in them, will have building prevention enabled. Those that do not are free to build in.&#x20;
  * ◉Artifact Of Growth &  Forest Titan Terminal "Forest Cave"(Entrance) 48.3|27.2\
    ◉Artifact Of Chaos &  Desert Titan Terminal "Desert Cave"(Entrance) 97.2|90.2\
    ◉Artifact Of Void  &  Ice Titan Terminal "Ice Cave"(Entrance) 6.7|85.9
* :no\_entry: If a Cave Falls into the Resource node rule, or has special Dino Spawns you MAY NOT build in it.&#x20;

Subject to change daily as we discover the newly redone map.

</details>

<details>

<summary>Astraeos Map <strong>Protected Resource</strong> Areas:</summary>

Other than specified Metal and Crystal node areas, Metal and Crystal nodes are not included in this map as there are so many.&#x20;

* :no\_entry: **Restricted Areas:**
* :no\_entry: All Oil or Water wells should be UNLOCKED These are Public Access.
* :no\_entry: ANY Cave or Ruin that has an artifact, lore note, Do NOT Block the way to the item.
* :no\_entry: If a Cave Falls into the following Resource node rule, or has special Dino Spawns you MAY NOT build in it.
* :no\_entry: Do not block Resource nodes (groups of 5 or more or including Metal, OBS, and Crystal nodes)

&#x20;:no\_entry: **Protected Resource Areas:**

**Protected Resource Area denoted by ℗*****P.R.Areas***

| Name                          | Lat/Lon      | Notes:                        |
| ----------------------------- | ------------ | ----------------------------- |
| ℗PR. Area - Bee Cave          | 46.0\|11.3   | NO BUILD - #P.R. Area         |
| ℗PR. Area - Black Pearls      | 63.62\|61.82 | NO BUILD - #P.R. Area         |
| ℗PR. Area - Clam Cave         | 25.12\|15.35 | NO BUILD - #P.R. Area         |
| ℗PR. Area - Crystal Cave      | 56.65\|26.10 | NO BUILD - #P.R. Area         |
| ℗PR. Area - Giant Beaver Dams | 41.06\|08.78 | NO BUILD - #P.R. Area         |
| ℗PR. Area - Metal Cave        | 34.49\|18.04 | NO BUILD - #P.R. Area         |
| ℗PR. Area - Obsidian          | 80.05\|30.55 | NO BUILD - #P.R. Area         |
| ℗PR. Area - Oil               | 15.64\|23.14 | NO BUILD - #P.R. Area         |
| ℗PR. Area - Ovis Island       | 40.0\|52.0   | NO BUILD - Mini Boss Habitat. |
| ℗PR. Area - Wyvern Scar Cave  | 12.38\|45.46 | NO BUILD - Wyvern Habitat     |

</details>

<details>

<summary> 🆕Ragnarök <strong>Protected Resource</strong> Areas:</summary>

:no\_entry: **Restricted Areas:**

* :no\_entry: Do not block Resource nodes of 10 or more or of Silica, Blk Pearls, Obsidian, and Sulfur nodes. (This map is resource heavy and most areas that are not marked as PR are fine to build in.)
* :no\_entry: All Oil or Water wells should be UNLOCKED or in an admin's tribe.
* :no\_entry: If a Cave Falls into the Resource node rule, or has special Dino Spawns you MAY NOT build in it.
* :no\_entry: Specific Caves that have artifacts in them, will have building prevention enabled. Those that do not are free to build in.&#x20;
  * "Fallen Redwood Cave Entrance" 36.0|77.0&#x20;
  * "Life's Labyrinth Cave Entrance" 51.6|77.5&#x20;
  * "Carnivorous Caverns Cave Entrance" 17.7|42.4&#x20;
  * "Pirate Ship Wreck" Underwater! 47.4|2.3&#x20;
  * "Jungle Dungeon Cave Entrance" 18.2|28.4&#x20;
  * "Frozen Dungeon Cave Entrance" 31.3|33.7
  * "The Monkey's Puzzle Cave Entrance" 24.6|25.0

:no\_entry:Community build sites.\
◉ Ragnarok Community Center 22.0|33.8 OPEN TRANSMITTER HERE\
◉RAGNAROK FOUNDRY 57.6|19.1 OPEN TRANSMITTER HERE\
◉RAGNAROK WYVERN TOWER 21.7|71.5 OPEN TRANSMITTER HERE\
◉Rockwell Event Area 67.7|71.4 OPEN TRANSMITTER HERE

&#x20;:no\_entry: **Protected Resource Areas:**\
No building within 75 Tiles of any **Protected Resource Area**.\
◉#P.R.Areas - Oil Well Field 80.37|60.07 Hot! Other Resources Nearby! DANGEOUS Wildlife! Telepad and Transmitter here.\
◉#P.R.Areas - Ragnarok Refinery 80.2|61.8 Hot! Other Resources Nearby! DANGEOUS Wildlife! Telepad and Transmitter here.\\

◉#P.R. Area - Volcano Beach - Chitin/Poly 16.7|57.0 Telepad\
◉#P.R.Areas - Blk.Pearls 71.0|21.3 UNDER WATER Telepad and Transmitter here\
◉#P.R.Areas - Giant Beaver Lake 23.3|45.2 Telepad and Transmitter here\
◉#P.R.Areas - Castilio de Gatos (Cat Spawn) Telepad\
◉#P.R.Areas - Bison Valley (Bison Spawn)  Bison Trap here With Observation tower. Telepad.

Subject to change daily as we discover the newly redone map.

</details>

<details>

<summary>🆕Valguero <strong>Protected Resource</strong> Areas: </summary>

* :no\_entry:Do not build on the Obelisk Platforms.
* :no\_entry:Valquero Community Center 37.4|91.5&#x20;
* :no\_entry:No building near Resources in groups of 5 nodes or more, or mixed resource nodes of 7 nodes or more.
* :no\_entry:No building within 100 building units of any Protected Resource Area.\
  ◉P.R.Areas - Valguero Refinery 75.1|72.1 Other Resources Nearby! DANGEOUS Wildlife!\
  ◉P.R. Area - Aberration Entrance 33.8|83.7\
  Note: The AB Area of Valguero seems to be a "No Teleport Zone" telepads will not fucnction right. You may use your AWE Teleport Remote to Teleport out to any NON AB area Telepad.\
  ◉P.R.Areas - Valguero Wyvern Scar 11.9|69.8\
  ◉P.R.Areas - Ascended Memorial Site 34.7|88.9 (PlayersONLY) Telepad here  \
  P.R.Areas - Beaver Lake 53.6|73.3 Telepad here  \
  P.R.Areas - Black Pearl Bay 45.0|33.0 UNDERWATER! Telepad here  \
  P.R.Areas - Crystal Cave 32.2|8.9 Telepad here  \
  P.R.Areas - Deep Sea TP 44.8|24.7 (Water) Telepad here  \
  P.R.Areas - White Cliffs 90.1| 88.7 Telepad here  \
  P.R.Areas - Ice Cave Entrance 15.9|27.5 Telepad here  \
  P.R.Areas - Oil Island 48.4|63.5 Telepad and Transmitter here  \
  P.R.Areas - Silica Pearls 22.13|62.19 UNDERWATER Telepad here  \
  P.R.Areas - Swamp Cave 74.4|43.5 (BroodMother) Telepad here
* :no\_entry:No building in Artifact Caves

  {Brute & Devourer} The Lost Temple Entrance 46.9|87.5 Telepad here  \
  {Crag} Boreal Forest Entrance 34.3|51.4 Telepad here  \
  {Cunning} Snow Mountains Cave Entrance 15.5|27.3 Telepad here  \
  {Destroyer} Jungle Entrance 67.0|89.1 Telepad here  \
  {Gatekeeper} The Unknown Cave Entrance "37.9|57.4  \
  Second entrance 32.2|92.4" Telepad here  \
  {Immune, Pack, Strong} The Lair Cave Entrance 73.1|40.6 Broodmother Found here  \
  {Skylord} The Great Trench {Fire Wyvern Trench} "8.9|78.8  \
  Second entrance 9.3|71.0" Telepad here

</details>

## 8. ASA different Crashes and Glitches.

***REFUNDS or REPLACEMENTS***

***We are unable to provide any refunds to persons or clans for loss of items, resources, in-game properties and so on, regardless of the reason. The Pack Gaming is not responsible for replacing items or Dinos due to Normal ARK Glitches, or Curseforge mod errors.***&#x20;

### ***Normal ARK Glitches***

#### Boss Battles

**Unfortunately we can not recover dinos, or items lost participating in a boss battle, they are often treated like they were sent into mesh and hit an anti mesh barrier.**

All Tek gears and Tek saddles are banned (WC setting) from the ***Island Boss arena*** (Excluding Tek Cave/Overseer Arena) and ***Manticore Arena***, and attempting to wear it inside when entering will either force unequip it, or **drop at where the boss was summoned**.

After beating an **Ascension boss (e.g. Overseer; Manticore; Rockwell Aberration, King Kaiju**), you will lose any item not allowed to be uploaded into **ARK Data** (e.g. trophies, tributes, Element). To avoid this, put such items inside a creature inventory before ascension happens.

### Player Deaths:

* **Merging into Anti Meshing Barriers (Skybox - Ground mesh layer-etc.)**\
  This includes the deaths while using a teleporter.  Some caves now have the Ground Mesh protection turned on and trying to teleport into a cave will cause a Player Client Crash. And usually a death.&#x20;
* **Deaths while AFK. Or while logged out.**\
  Are not always explained in the tribal logs. Most times we can not define what happened. Occasionally some Deaths will be recoverable in the Death Recovery mods, unless you pass the 30 min Death cache decay limit.
* **To Prevent Player loss of items.**\
  *Store all inventory in a storage chest near your log out point. Store Gear and hotbar items in a "Loadout Mannequin". Log out in a sleeping pod or locked onto a bed.  If you need to AFK, make sure to set your settings for at least 30 mins AFK, and again store items and log out on a bed of some sort.*

### Client Side Crashes:

Any type of **Client Side Crash can create a loss of saved data** for the player. As well as Player deaths and dino deaths while you were handling the crash. **These incidents will not produce a bag or recoverable items in the death recovery system.** Admins have no access to the Servers ARKData.sav files and can not replace a players file in the server.&#x20;

### Server Crashes and Restarts:

* **Server Crashes** will have a 5 to 14 min. Rollback to the save Prior to the restart, or to the last save before the Crash. **All Data collected between the Save timestamp and the restart / Crash will be erased.**&#x20;
* Server Restarts will have a save 3 mins prior to a Restart. If you do not log out before the 3 min. Mark, you can lose some game data to the server resetting. Please always try to get to a safe stopping point before the 5 min Restart warning!

### Transfer Errors:

* Steam Cloud Errors involve Characters/Dinos/Items uploaded to the ARK cloud. If this upload is corrupted, Admins and Owners can NOT Access the data stored in the Steam cloud **and your information is lost.**
* Characters/Dinos/Items uploaded to ARK cloud have a 24-hour time limit in multiplayer. Ensure you are set to download them into another server before the timer runs out, **or else your items will decay in your upload** when the timer goes past 0.

![](https://772063455-files.gitbook.io/~/files/v0/b/gitbook-x-prod.appspot.com/o/spaces%2F-Lgje1lBxKKWXwqycB-v%2Fuploads%2FrlqX4M9MCu6dVUfCnhWe%2FNEW-PAGE_GENERIC_BANNER.png?alt=media\&token=9d073148-393e-4dac-ae13-e88d3519e959)


# Conan Exiles PvE Server Rules

All rules found here will pertain to all of our current and future Dark and Light Servers. Please read and familiarize yourself with them. UPDATED 5/1/2025

## **Navigation of Page:**

<table data-view="cards"><thead><tr><th></th><th></th></tr></thead><tbody><tr><td><strong>Left side of the page</strong> <span data-gb-custom-inline data-tag="emoji" data-code="25c0">◀️</span></td><td>Use the <strong>></strong> to open any pages in that section when the Header shows a <strong>></strong>.</td></tr><tr><td><strong>Right Side</strong> of the page <span data-gb-custom-inline data-tag="emoji" data-code="25b6">▶️</span></td><td>Click a header to go to that section of this page.</td></tr><tr><td><strong>Features of the page.</strong></td><td>are in an <strong>expandable box</strong>, please click the <strong>></strong> to open the expandable dropdown.</td></tr><tr><td><strong>Hyperlink</strong>s are often in a <strong>card form</strong> in the website.</td><td>So <strong>clicking an image</strong> will often take you to a specific page for information. </td></tr><tr><td><strong>Steam-link</strong>s are often in a <strong>card form</strong> in the website.</td><td>So <strong>clicking on a server card</strong> will take you to the Server.</td></tr></tbody></table>

## 1. General Server Guidelines!

### The PACK Disclaimer and Players Responsibility NOTICE:

*❝Your presence in this server implies accepting these rules, including all further changes. We reserve the right to modify these rules in any way we deem necessary and at any moment, at our own discretion, it is your responsibility to check for them.❞*&#x20;

These rules are not comprehensive and use of loopholes to violate the spirit of these rules is subject to enforcement. Failure to follow these rules will result in being removed from the community! Furthermore, If someone is a participant of our Discord, and/or a Player on our Servers, A ban on Discord may also be pursued on the Server Cluster. Please follow all of the RULES found here! &#x20;

*We are unable to provide any refunds to persons or clans for loss of items, resources, in-game properties and so on, regardless of the reason.*&#x20;

### We work on a "3 Strikes Method"

Please read through and consider the spirit of the rules, not just the specific wording. And make sure your clanmates are also aware of them as their actions can affect you. Any infraction by a player will most likely have repercussions for the entire clan. Other than this official post of rules, we do not issue warnings ahead of Admin intervention.&#x20;

1. You and your Tribe/Clan get a warning. Such as a sign in your base or a message to talk with an admin.
2. You and your Tribe/Clan get a second warning. Same as above but Tames are confiscated, or buildings removed. Written note added to the Admins Log recording your player name and Tribe.
3. You and your Tribe/Clan get a third warning. As verified by our Admins Log. We are done, and you are Perm Banned.

### Reporting Infractions:

Please contact us through our Discord, (<https://discord.gg/RJVVraV>), and fill out a ticket in our Discord ([#Support-Tickets](https://discord.com/channels/459473503939198978/728115631228190802/992571617110671476))

## 2. Infractions&#x20;

### Hacks and Exploits

Hacking, or using Exploits and other situations deemed as extreme will be met with a permanent ban on the first offense. Included in this category are: Real-Money Trading (RMT), use of third-party programs that inject code and modify aspects of the game to provide unfair advantage against other players. And abuses of game mechanics to obtain an unfair advantage over other players including creating a detrimental play experience through reduced server or game performance.

### Harassment - Griefing

We allow coarse humor, rough language, and or content. If this is not for you, Thank you for your interest, but we may not be the BEST FIT for you. There are some offensive and defamatory chat and user-created content DEEMED NOT PERMITTED. Personal threats, doxing, stalking. This rule also extends to character names, guild names, in-game signs, any other type of communication in Server. Our admin team considers all the above action types of harassment . If reported to admins, you will receive up to a 5 day Temp - ban . Continued Harassment of this type will lead to a Perma-Ban.

If you experience Harassment / Griefing / or observe inappropriate content in-game, please fill out a ticket in our Discord ([#Support-Tickets](https://discord.com/channels/459473503939198978/728115631228190802/992571617110671476))

## 3. Auto-decay and Claiming

**DO NOT destroy/claim/or remove parts of bases, NAMED any of the following variations:**&#x20;

\<name> (ADMIN);  \<name> (OWNER);  \<name> {Owner/Admin}; "The PACK"\*\*Admin {Community Buildings} .  **You will be banned!**

The PACK uses Funcom rates (15 RL Days), for all structures and thralls/pets. This means that if nobody in your tribe logs into the game every 10-15 days, your structures and thralls/pets may disappear. In general, higher-tier structures will last longer than lower-tier structures.

It is the responsibility of the Player to make sure they refresh all timers on the servers they play on. You must RENDER the items to actually prevent the decay of the item this can take up to 15 min. interval in your base moving about to properly render in all sections of the build in your players render radius. Equipping a repair hammer or pressing Tab will allow a player to view the remaining decay time on a structure. (360 hours divided by 24 hours = 15 days \[this is Real LIFE time])

***Please follow the above rules as we use a Admin's Heatmap to remove those clans that show no activity for 30 days or more.***

#### Currently Known Decay Glitches

***NOTE:*** Since 3.0 Decay timers can reset on server restarts. Meaning you can log into a server that has no bases etc.  Please LOG OUT and notify an admin post haste! We will have the server Restarted.

### Sweeps

All Servers are "SWEPT" (our term for the mod/Admin cleaning) in a rough schedule of every six weeks. Keeping our maps mostly clean and ready for new players.

**Any tribe that is fully inactive (30 days of no log ins)** will be structure wiped by admins. Please advise the admin team of prolonged (over 15 days) absences if you are not abandoning your base.

### Wipe's

Wipes are only done when a save is corrupted or a mod errors and requires a full server wipe. Instead of wipes, our admin team relies on Pippi (a mod) that allows our Conan Admin team to completely refresh a map in roughly four to six hours. &#x20;

## 4. Server Building Restrictions&#x20;

Please remember that there are other players sharing the server with you. Restricting others’ access to content is not allowed beyond of course grabbing a spot for your base. This includes using building items to provide yourself with an unfair advantage at claiming loot, and thralls. *If you wish to reign supreme on the map and hog all the resources and enemies, please consider single player.*&#x20;

### Building Regulations:&#x20;

***Building tile*** = a tile is any building piece, or object you can "Place" in your base.

***All Building Regulations:** Are per the whole tribe, not a member of a tribe playing as a solo player. This does not impact those players that play in a solo tribe.*

***No Massive constructions** or over-use of memory intensive items leading to loss of performance both on client and server-sid&#x65;**.*** Exp. - builds of over 3000 building tiles or with more than 150 followers and pets can be memory intensive.

***No building within RENDER** range of another players build. All claims must be at least 100 tiles apart.*

### Building Specifics Allowed:&#x20;

***ONE Main Base Build per Conan Map, per clan, or solo player:** You are allowed an area of 100 x 100 tiles. (this does not count stacked foundations used to make a level floor) Including all FENCE LINES and outside the Buildings to the walls enclosing the MAIN BASE. If you don't need the full area please make it smaller.*&#x20;

***ONE outpost base per Conan Map, per clan, or solo player:** You are allowed to use an area of 25 x 25 tiles. We are counting the square footage of your base. Including all FENCE LINES and outside the Buildings to the walls enclosing the OUTPOST.*&#x20;

***TWO Transportory Stones or MAP ROOMS*** per clan, or solo player.&#x20;

***Limit of 150 followers and pets** placed in world. You may have as many as you want in storage in case current followers are killed by aggro.*

***Easements** can be given for unusually shaped bases on our server. Please see an Admin concerning Easements.*

### *PROHIBITED BUILD AREA&#x53;**:***&#x20;

* ***No Blocking of content in the game**, such as caves, dungeons, obelisks, resources, Mini and World Boss spawns, and other areas of the game such as lore notes, ghosts, and Mod's Lore areas.* &#x20;
* ***No Abuse of the claim system** where blocks are placed for no other purpose than to prevent other players’ access to resources and building spots. Core game respawn radius is now 5 foundation stones away.*
* ***Do NOT REMOVE or block from spawning, any type of NPC,** including Story Line Actors (MOD Thespians), and Pack Thespians. Core game respawn radius is now 5 foundation stones away.*
* ***Do not block Resource nodes*** (groups of 5 NODES in an area)

#### **AoC and QoL Server Special rules:**

* **Do NOT Build ON, IN, or Block the way to these caves:** The Shattered Basin, Scuttler's Shortcut, Weaver's Hollow, Shaleback Hollow, Skittering Cavern, Cavern of Fiends, Sinner's Refuge, Gallaman's Tomb, Executioners Entrance, Hanuman's Grotto; Jhil's Race Caves.

#### **Savage Wilds Server Special rules:**

* **Inside any of these POI:** Some POI are too small and full of lore. \
  The Volcano POI, Ruins of Xun'Sha POI, Last Refuge POI, No Man's Land POI.&#x20;

## &#x20;5. Special Server rules:

### POI Instances Timer

***Timed Instances (Dungeons)*****&#x20;- EXIT THE INSTANCE BY THE VANILLA EXIT, DO NOT USE /HOME.** TIMED instances all have timers (cooldowns) that are internal to the core games operation. BYPASSING the Proper Vanilla exit, therefore allows the Instance to run the full allotted time and then enter the Cooldown. Creating an extra hour to two hours on some INSTANCES.  ***PLEASE be kind and exit by the DOOR***

### Client Side Crashes

Any type of Client Side Crash can create a loss of saved data for the player. As well as Player deaths and loss of thralls and pets while you were handling the crash. These will not produce a death cache.

**To Prevent Player loss of items.**\
*Store all inventory in a storage chest near your log out point. Store Gear and hotbar items in a separate chest. Log out in a sleeping bag or locked onto a bed.  If you need to AFK, make sure to set your settings for at least 30 mins AFK, and again store items and log out on a bed of some sort.*

### Server Crashes and Restarts:

Server Crashes will have a 5 to 14 min. Rollback to the save Prior to the restart, or the last save before the Restart / Crash. All Data collected between the Save time stamp and the restart / Crash will be erased.&#x20;

Server Restarts will have a save 3 mins prior to a Restart. If you do not log out before the 3 min. Mark, you can lose some game data to the server resetting. Please always try to get to a safe stopping point before the 5 min Restart warning!

## Exiles Character Transfer - Information and Tutorial for PC

Before proceeding with the transfer of your character from one server to another, please consider all the information listed below.

### **General information:**

* The PACK Does not support transfers between our two Exiles maps and Savage Wilds (using the mod Anumets). You may use the Official transfer at your own RISK
* You can transfer between Unofficial servers but it will be dependent on the settings of each specific server and we can’t guarantee the reliability of this operation in Unofficial servers so it will have to be done at your own risk.
* You can't transfer a character to a server on which you already have a character.
* You can only transfer one character at a time. If you have already exported a character it must be imported before another character can be exported.
* After you successfully import a character, there is a cool down period during in which you are unable to transfer another character- 24 hours for PvE and 7 days for PvP.
* You can’t transfer a character if they are over-encumbered or if they are a Clan Leader.
* You can transfer from Official servers to Unofficial but **never** from Unofficial servers to Official.

**When transferring your character to another server you will keep the following:**

* Character Name
* Character Appearance (the choices made in character creation that define the visual of the character)
* Feats (the ones you do not get automatically)
* Level (XP) and attribute point information
* Journey steps
* All equipped items, all items in the character's backpack (main inventory) and all items in the Hotbar

**When transferring your character to another server you will lose the following:**

* **All** buildings/placeables that belonged to the character will be abandoned and decay
* The association with **all** thralls that belonged to the character

### **Rules regarding Official server transfer:**

* You can transfer on servers within Exile Lands and Siptah, but also between Exile Lands and Siptah (To note that you will need to have acquired the ‘Isle of Siptah’ DLC to be able to transfer your character to Siptah servers).
* You can transfer between Official servers (Official to Official) with the following rules:
  * From PvP you can transfer to other PvP servers and also PvEC or PvE;
  * From PvEC you can transfer to other PvEC servers and also PvE;
  * From PvE you can only transfer to other PvE servers.

## **Step-by-Step process:**

1. Enter the server where you have the character that you want to transfer.
2. Press the 'ESC' key on your keyboard to bring up the options menu and select the option 'Server Transfer'.
3. The 'Character Upload' menu will open and you will need to press the 'Upload Character' button which will prompt the confirmation.
4. Type "Transfer" (or the equivalent depending on the localization) in the text field to enable the upload of your character.
5. After this is done correctly you will be redirected to the Main Menu.
6. Access the Server Browser menu.
7. Select a server in which you want to transfer your character and in which you don't have a character already created (please consider the rules regarding server transfer and look out for the icon in the server browser indicating so).
8. After entering the server and accessing the character creation menu, press the 'Import Character' button.
9. After pressing the 'Import' button, if the character import process was successful you should be able to start playing with your character.

![](https://772063455-files.gitbook.io/~/files/v0/b/gitbook-x-prod.appspot.com/o/spaces%2F-Lgje1lBxKKWXwqycB-v%2Fuploads%2FrlqX4M9MCu6dVUfCnhWe%2FNEW-PAGE_GENERIC_BANNER.png?alt=media\&token=9d073148-393e-4dac-ae13-e88d3519e959)


# 7DTD PvE Server Rules.

All rules found here will pertain to all of our current and future Servers. Please read and familiarize yourself with them. UPDATED 5/1/2025

## **Navigation of Page:**

<table data-view="cards"><thead><tr><th></th><th></th></tr></thead><tbody><tr><td><strong>Left side of the page</strong> <span data-gb-custom-inline data-tag="emoji" data-code="25c0">◀️</span></td><td>Use the <strong>></strong> to open any pages in that section when the Header shows a <strong>></strong>.</td></tr><tr><td><strong>Right Side</strong> of the page <span data-gb-custom-inline data-tag="emoji" data-code="25b6">▶️</span></td><td>Click a header to go to that section of this page.</td></tr><tr><td><strong>Features of the page.</strong></td><td>are in an <strong>expandable box</strong>, please click the <strong>></strong> to open the expandable dropdown.</td></tr><tr><td><strong>Hyperlink</strong>s are often in a <strong>card form</strong> in the website.</td><td>So <strong>clicking an image</strong> will often take you to a specific page for information. </td></tr><tr><td><strong>Steam-link</strong>s are often in a <strong>card form</strong> in the website.</td><td>So <strong>clicking on a server card</strong> will take you to the Server.</td></tr></tbody></table>

## 1. General Server Guidelines!

### **7DTD - Dictionary**

LCB - Land Claim Blocks\
Block - any building tile\
Deadzone - Area around a players build that prevents new spawns of resources.\
Collective - Group of Players in an Alliance that all play out of one crafting base.\
Alliance - Group of Players Allianced as friends that play in a loose group.

### The PACK Disclaimer and Players Responsibility NOTICE:

*❝Your presence in this server implies accepting these rules, including all further changes. We reserve the right to modify these rules in any way we deem necessary and at any moment, at our own discretion, it is your responsibility to check for them.❞*&#x20;

These rules are not comprehensive and use of loopholes to violate the spirit of these rules is subject to enforcement. Failure to follow these rules will result in being removed from the community! Furthermore, If someone is a participant of our Discord, and/or a Player on our Servers, A ban on Discord may also be pursued on the Server Cluster. Please follow all of the RULES found here! &#x20;

*We are unable to provide any refunds to persons or clans for loss of items, resources, in-game properties and so on, regardless of the reason. The Pack Gaming is not responsible for replacing items due to Glitches, Steam Cloud Errors, or Corrupted Players Clients.*

### We work on a "3 Strikes Method"

Please read through and consider the spirit of the rules, not just the specific wording. And make sure your clanmates are also aware of them as their actions can affect you. Any infraction by a player will most likely have repercussions for the entire clan. Other than this official post of rules, we do not issue warnings ahead of Admin intervention.&#x20;

1. You and your Tribe/Clan get a warning. Such as a sign in your base or a message to talk with an admin.
2. You and your Tribe/Clan get a second warning. Same as above but Tames are confiscated, or buildings removed. Written note added to the Admins Log recording your player name and Tribe.
3. You and your Tribe/Clan get a third warning. As verified by our Admins Log. We are done, and you are Perm Banned.

### Reporting Infractions:

Please contact us through our Discord, (<https://discord.gg/RJVVraV>), and fill out a ticket in our Discord ([#Support-Tickets](https://discord.com/channels/459473503939198978/728115631228190802/992571617110671476))

## 2. Infractions&#x20;

### Hacks and Exploits

Hacking, or using Exploits and other situations deemed as extreme will be met with a permanent ban on the first offense. Included in this category are: Real-Money Trading (RMT), use of third-party programs that inject code and modify aspects of the game to provide unfair advantage against other players. And abuses of game mechanics to obtain an unfair advantage over other players including creating a detrimental play experience through reduced server or game performance.

### Harassment - Griefing

We allow coarse humor, rough language, and or content. If this is not for you, Thank you for your interest, but we may not be the BEST FIT for you. There are some offensive and defamatory chat and user-created content DEEMED NOT PERMITTED. Personal threats, doxing, stalking. This rule also extends to character names, guild names, in-game signs, any other type of communication in Server. Our admin team considers all the above action types of harassment . If reported to admins, you will receive up to a 5 day Temp - ban . Continued Harassment of this type will lead to a Perma-Ban.

If you experience Harassment / Griefing / or observe inappropriate content in-game, please fill out a ticket in our Discord ([#Support-Tickets](https://discord.com/channels/459473503939198978/728115631228190802/992571617110671476))

## 3. Auto-decay&#x20;

### **DO NOT destroy/claim/or remove parts of bases, NAMED any of the following variations:**&#x20;

\<name> (ADMIN);  \<name> (OWNER);  \<name> {Owner/Admin}; "The PACK"\*\*Admin {Community Buildings} .  **You will be banned!**

### Auto-decay Rates

**The PACK PVE | A21 | Servers.** Land Claims last for 21 Days and are fully protected during those 21 days, At 21 days the claims are unprotected, and can be looted by anyone, or removed by Admins.&#x20;

***Bedrolls:***\
Bedrolls have a 15 block Dead zone around them and the bedroll will last for 45 days, before decay. Please refresh your bedrolls or remove then when done with an area.

**You must RENDER the items to actually prevent the decay of the item** this can take up to a 15 min. interval in your base moving about to properly render in all sections of the build in your players render radius. (Render radius 15 meters in a circle) In general, higher-tier structures will last longer than lower-tier structures.   It is the responsibility of the Player to make sure they refresh all timers on the servers they play on.&#x20;

### Sweeps

**All Servers are "SWEPT"** (our term for the mod/Admin cleaning) in a rough schedule of every six weeks. Keeping our maps mostly clean and ready for new players. \
**Any tribe that is fully inactive (45 days of no log ins)** will be structure wiped by admins. Please advise the admin team of prolonged (over 21 days) absences if you are not abandoning your base.

### Wipe's

Wipes are only done when a save is corrupted or a mod errors and requires a full server wipe. Instead of wipes, our admin team relies on CSMN (a mod) that allows our 7DTD Admin team to set up reset quadrants so that POI are refreshed. &#x20;

## 4. Server Building Restrictions&#x20;

Please remember that there are other players sharing the server with you. Restricting others’ access to content is not allowed beyond of course grabbing a spot for your base. This includes using building items to provide yourself with an unfair advantage at claiming loot. *If you wish to reign supreme on the map and hog all the resources and enemies, please consider single player.*&#x20;

### Building Regulations:&#x20;

***No Blocking of content in the game**,  NO building in the POI's, or within the POI range of area in the game.  No blocking streets and/or parts of towns or Cities.*&#x20;

***No Abuse of the claim system** where LCB or blocks are placed for no other purpose than to prevent other players’ access to resources and building spots.*

***No building within the Deadzone** range of another players build. All LCB must be at least 40 blocks apart unless players are in Alliances.*&#x20;

***No Massive constructions or over-use of memory intensive items** leading to loss of performance both on client and server-side. **IE: TREES** - Please limit placing tree plots so as to not create huge FPS Drop areas.*

### Building Specifics Allowed:

***You may have Only one (1) Crafting home base on the map.** Players may only place one (1) land claim block (Afterwards called LCB). Which will claim 121 blocks. (that's huge!)* \
*Players may have an alliance of more than yourself. But only one LCB for the Collective's Crafting base.*\
***A HORDE base** may be built for use of the Player/Collective. PLEASE Do not use an LCB. This must be refreshed every 21 days unless you move it for the next Bloodmoon.*

## 6. NO Build Specifics

The map shown below has **"NO BUILD AREAS marked in RED"**.&#x20;

***PLEASE BE AWARE!*** -Land Claim Blocks that are placed in City Regions or Any Prefabs (POI) on the map will be removed! ***NOT ALL POI's ARE IN CITY REGIONS***, and those that are outside the cities are ***STILL OFF LIMITS to BUILD IN.***

### The PACK PVE | 150% XP | 150% Loot | A21 | QOL MODS

<figure><img src="https://772063455-files.gitbook.io/~/files/v0/b/gitbook-x-prod.appspot.com/o/spaces%2F-Lgje1lBxKKWXwqycB-v%2Fuploads%2FEJGwY9QGWTb4kyRL90Q8%2Fimage.png?alt=media&amp;token=d35ef626-28c7-4b3e-82c8-18de86df5339" alt=""><figcaption></figcaption></figure>

## 7. Specific Rules:&#x20;

<details>

<summary>Client Side Crashes</summary>

Any type of Client Side Crash can create a loss of saved data for the player. As well as Player deaths and loss of inventory or vehicles while you were handling the crash. These will not produce a death cache.

**The Pack Gaming is not responsible for replacing items. Client Crashes that result in death. In most cases will be recoverable, unless you pass the 30 min Death cache decay limit. We are unable to provide any refunds to persons or clans for loss of items, resources, in-game properties and so on, regardless of the reason.**&#x20;

</details>

<details>

<summary>Server Crashes</summary>

Server Crashes will have a 5 to 14 min. Rollback to the save Prior to the restart, or the last save before the Restart / Crash. All Data collected between the Save time stamp and the restart / Crash will be erased.&#x20;

**We are unable to provide any refunds to persons or clans for loss of items, resources, in-game properties and so on, regardless of the reason. The Pack Gaming is not responsible for replacing items, because of Game Glitches, Steam Cloud Errors, or Corrupted Players Clients.**

</details>

![](https://772063455-files.gitbook.io/~/files/v0/b/gitbook-x-prod.appspot.com/o/spaces%2F-Lgje1lBxKKWXwqycB-v%2Fuploads%2FrlqX4M9MCu6dVUfCnhWe%2FNEW-PAGE_GENERIC_BANNER.png?alt=media\&token=9d073148-393e-4dac-ae13-e88d3519e959)


# Palworld Server Rules

All rules found here will pertain to all of our current and future Servers. Please read and familiarize yourself with them. UPDATED 5/1/2025

## **Navigation of Page:**

<table data-view="cards"><thead><tr><th></th><th></th></tr></thead><tbody><tr><td><strong>Left side of the page</strong> <span data-gb-custom-inline data-tag="emoji" data-code="25c0">◀️</span></td><td>Use the <strong>></strong> to open any pages in that section when the Header shows a <strong>></strong>.</td></tr><tr><td><strong>Right Side</strong> of the page <span data-gb-custom-inline data-tag="emoji" data-code="25b6">▶️</span></td><td>Click a header to go to that section of this page.</td></tr><tr><td><strong>Features of the page.</strong></td><td>are in an <strong>expandable box</strong>, please click the <strong>></strong> to open the expandable dropdown.</td></tr><tr><td><strong>Hyperlink</strong>s are often in a <strong>card form</strong> in the website.</td><td>So <strong>clicking an image</strong> will often take you to a specific page for information. </td></tr><tr><td><strong>Steam-link</strong>s are often in a <strong>card form</strong> in the website.</td><td>So <strong>clicking on a server card</strong> will take you to the Server.</td></tr></tbody></table>

## 1. General Server Guidelines!

Do NOT leave/kick members from a guild with other guildmates offline. This will cause the “world save” to corrupt. Note that even though it corrupts the world save, it only appears to affect the members who were offline.

### The PACK Disclaimer and Players Responsibility NOTICE:

❝Your presence in this server implies accepting these rules, including all further changes. We reserve the right to modify these rules in any way we deem necessary and at any moment, at our own discretion, it is your responsibility to check for them.❞

These rules are not comprehensive and use of loopholes to violate the spirit of these rules is subject to enforcement. Failure to follow these rules will result in being removed from the community! Furthermore, If someone is a participant of our Discord, and/or a Player on our Servers, A ban on Discord may also be pursued on the Server Cluster. Please follow all of the RULES found here!

We are unable to provide any refunds to persons or clans for loss of items, resources, in-game properties and so on, regardless of the reason. The Pack Gaming is not responsible for replacing items due to Glitches, Steam Cloud Errors, or Corrupted Players Clients.

### We work on a "3 Strikes Method"

Please read through and consider the spirit of the rules, not just the specific wording. And make sure your clanmates are also aware of them as their actions can affect you. Any infraction by a player will most likely have repercussions for the entire clan. Other than this official post of rules, we do not issue warnings ahead of Admin intervention.

You and your Tribe/Clan get a warning. Such as a sign in your base or a message to talk with an admin.

You and your Tribe/Clan get a second warning. Same as above but Tames are confiscated, or buildings removed. Written note added to the Admins Log recording your player name and Tribe.

You and your Tribe/Clan get a third warning. As verified by our Admins Log. We are done, and you are Perm Banned.

### Reporting Infractions:

Please contact us through our Discord, (<https://discord.gg/RJVVraV>), and fill out a ticket in our Discord (#Support-Tickets)

## 2. Infractions

### Hacks and Exploits

Hacking, or using Exploits and other situations deemed as extreme will be met with a permanent ban on the first offense. Included in this category are: Real-Money Trading (RMT), use of third-party programs that inject code and modify aspects of the game to provide unfair advantage against other players. And abuses of game mechanics to obtain an unfair advantage over other players including creating a detrimental play experience through reduced server or game performance.

### Harassment - Griefing

We allow coarse humor, rough language, and or content. If this is not for you, Thank you for your interest, but we may not be the BEST FIT for you. There are some offensive and defamatory chat and user-created content DEEMED NOT PERMITTED. Personal threats, doxing, stalking. This rule also extends to character names, guild names, in-game signs, any other type of communication in Server. Our admin team considers all the above action types of harassment . If reported to admins, you will receive up to a 5 day Temp - ban . Continued Harassment of this type will lead to a Perma-Ban.

If you experience Harassment / Griefing / or observe inappropriate content in-game, please fill out a ticket in our Discord (#Support-Tickets)

## 3. Auto-decay

DO NOT destroy/claim/or remove parts of bases, NAMED any of the following variations:

\<name> (ADMIN); \<name> (OWNER); \<name> {Owner/Admin}; "The PACK"\*\*Admin {Community Buildings} . You will be banned!

### Auto-decay Rates

If a Guild is offline for over 10 days, or not rendering an object for 10 days, the guild will have those building tiles auto decay. Building tiles outside the edge of your PalBox Blue line Radius have a decay limit of 24 hours or less.&#x20;

You must RENDER the items to actually prevent the decay of the item this can take up to a 15 min. interval in your base moving about to properly render in all sections of the build in your players render radius. (Render radius 15 meters in a circle) It is the responsibility of the Player to make sure they refresh all timers on the servers they play on.

#### Wipe's

Wipes are only done when a save is corrupted and requires a full server wipe. We will do our best to communicate in Advance about such events.

## 4. Pal Limits

### PALBOX/SPHERE CAPS:

Guild Pal Cap limit = 2000 Sphered Pals, total per Guild in PalBox Storage. Per GUILD not player. A guild member will share in their guild's limit.

Servers have a limit of 7000 captured pals per server. This is being done to cut back on the "ram" usage of our server and help with the instances of crash loops. So asking all Pal-Citizens to do your part!&#x20;

## 5. Server Building Restrictions

### Building Regulations:

No Blocking of content in the game, NO building in the POI's, or within the POI range of area in the game.&#x20;

No Abuse of the claim system where blocks are placed for no other purpose than to prevent other players’ access to resources and building spots.

No building within the render range of another player's build. All bases must be at least 40 blocks apart unless players are in playing in a team.

No Massive constructions or over-use of memory intensive items leading to loss of performance both on client and server-side. (over 10 walls high or over 50 x 50 foundations). Creates a chance for a memory leak that can crash the server until the build is removed.

All Building rules are designed around a Solo Player Or a multi-player Guild.  (solo players are considered a guild for these rules) Solo Players follow size/height, and allotment rules. Multi-player Guild - Personal Homes can be built inside one of the Guild's Palbox sites.

This is being done to cut back on the "ram" usage of our server and help with the instances of crash loops. So asking all Pal-Citizens to do your part!

### Building Specifics Allowed:

Two Main Palbox sites. For breeding or production. 40L x 40W x 10H&#x20;

One Mining Outpost - Auto-mining is allowed. Small 10x10x3 building with storage, pal beds, and food for pals. No larger operation than 4-6 nodes. Take ore home to smelt.  Do not encompass node fields of mixed ores. {ore and coal, coal and sulfur, etc}

## 6. Blocking content/ Hoarding

Please remember that there are other players sharing the server with you. Restricting others’ access to content is not allowed beyond of course grabbing a spot for your base. This includes using building items to provide yourself with an unfair advantage at claiming loot crates, artifacts and OSD's. If you wish to reign supreme on the map and hog all the resources and enemies, please consider single player.

### Blocking content/Hoarding

* No Blocking of content in the game, such as caves, dungeons, or boss areas.
* Do not enclose in a fence any known Loot chest spawn, or the Fast Travel Statues. Please leave a passage to known loot chest sites.
* Do not enclose in a fence more than four nodes of rare resources. You may put a Palbox near the Rare Resource and a storage box, but do not have pals actively working the nodes without your supervision.
* Do not camp dungeons, or other group hunt instances. Your Guild can que up, and wait for the smaller 1 or 2 man instances.
* Please don't hoard resources! A single box of each resource is enough for a large Guild! Plan accordingly.&#x20;
* If you have pals that are unused or not needed anymore, consider making essences out of them, selling them to the Trader NPC. Or Gifting them to New players.

<figure><img src="https://772063455-files.gitbook.io/~/files/v0/b/gitbook-x-prod.appspot.com/o/spaces%2F-Lgje1lBxKKWXwqycB-v%2Fuploads%2Fk7tLu94BoscA4GDYhOWm%2Fimage.png?alt=media&amp;token=e4f81974-bc34-4d5d-93c0-96775d5cbb84" alt=""><figcaption></figcaption></figure>


# Soulmask Server Rules

All rules found here will pertain to all of our current and future Servers. Please read and familiarize yourself with them. UPDATED 5/1/2025

## **Navigation of Page:**

<table data-view="cards"><thead><tr><th></th><th></th></tr></thead><tbody><tr><td><strong>Left side of the page</strong> <span data-gb-custom-inline data-tag="emoji" data-code="25c0">◀️</span></td><td>Use the <strong>></strong> to open any pages in that section when the Header shows a <strong>></strong>.</td></tr><tr><td><strong>Right Side</strong> of the page <span data-gb-custom-inline data-tag="emoji" data-code="25b6">▶️</span></td><td>Click a header to go to that section of this page.</td></tr><tr><td><strong>Features of the page.</strong></td><td>are in an <strong>expandable box</strong>, please click the <strong>></strong> to open the expandable dropdown.</td></tr><tr><td><strong>Hyperlink</strong>s are often in a <strong>card form</strong> in the website.</td><td>So <strong>clicking an image</strong> will often take you to a specific page for information. </td></tr><tr><td><strong>Steam-link</strong>s are often in a <strong>card form</strong> in the website.</td><td>So <strong>clicking on a server card</strong> will take you to the Server.</td></tr></tbody></table>

## 1. General Server Guidelines!

### The PACK Disclaimer and Players Responsibility NOTICE:

❝Your presence in this server implies accepting these rules, including all further changes. We reserve the right to modify these rules in any way we deem necessary and at any moment, at our own discretion, it is your responsibility to check for them.❞

These rules are not comprehensive and use of loopholes to violate the spirit of these rules is subject to enforcement. Failure to follow these rules will result in being removed from the community! Furthermore, If someone is a participant of our Discord, and/or a Player on our Servers, A ban on Discord may also be pursued on the Server Cluster. Please follow all of the RULES found here!

We are unable to provide any refunds to persons or clans for loss of items, resources, in-game properties and so on, regardless of the reason. The Pack Gaming is not responsible for replacing items due to Glitches, Steam Cloud Errors, or Corrupted Players Clients.

### We work on a "3 Strikes Method"

Please read through and consider the spirit of the rules, not just the specific wording. And make sure your clanmates are also aware of them as their actions can affect you. Any infraction by a player will most likely have repercussions for the entire clan. Other than this official post of rules, we do not issue warnings ahead of Admin intervention.

You and your Tribe/Clan get a warning. Such as a sign in your base or a message to talk with an admin.

You and your Tribe/Clan get a second warning. Same as above but Tames are confiscated, or buildings removed. Written note added to the Admins Log recording your player name and Tribe.

You and your Tribe/Clan get a third warning. As verified by our Admins Log. We are done, and you are Perm Banned.

### Reporting Infractions:

Please contact us through our Discord, (<https://discord.gg/RJVVraV>), and fill out a ticket in our Discord (#Support-Tickets)

## 2. Infractions&#x20;

### Hacks and Exploits

Hacking, or using Exploits and other situations deemed as extreme will be met with a permanent ban on the first offense. Included in this category are: Real-Money Trading (RMT), use of third-party programs that inject code and modify aspects of the game to provide unfair advantage against other players. And abuses of game mechanics to obtain an unfair advantage over other players including creating a detrimental play experience through reduced server or game performance.

### Harassment - Griefing

We allow coarse humor, rough language, and or content. If this is not for you, Thank you for your interest, but we may not be the BEST FIT for you. There are some offensive and defamatory chat and user-created content DEEMED NOT PERMITTED. Personal threats, doxing, stalking. This rule also extends to character names, guild names, in-game signs, any other type of communication in Server. Our admin team considers all the above action types of harassment . If reported to admins, you will receive up to a 5 day Temp - ban . Continued Harassment of this type will lead to a Perma-Ban.

If you experience Harassment / Griefing / or observe inappropriate content in-game, please fill out a ticket in our Discord (#Support-Tickets)

## 3. Auto-decay&#x20;

### Auto-decay Rates

The Pack maintains the server with a Decay rate that lasts x10 longer than normal, and decay is slowed by x10.

**A Guild's Auto Decay rate will depend on the Maintenance of your Bonfire.** \
Bonfires stay lit with fuel, and there are six different types of materials that serve as fuel: Thatch, Branches, Bark, Logs, Hardwood, and Premium Hardwood. These materials differ severely in both how abundant they are in the world around you and how long they keep a bonfire going.

Each material provides a certain amount of fuel per 300 stack:

* Thatch: 14 minutes
* Branch: 1.28 hours&#x20;
* Bark: 1.28 hours
* Log: 3.75 hours
* Hardwood: 35.45 hours
* Premium Hardwood: 35.45 hours

Bark, while it doesn’t provide the most fuel time, is one of the better options for fuel because unlike the other items, it isn’t used in many other recipes. Both types of Hardwood provide the most fuel time, but Hardwood is also a very important crafting material. Do not use Thatch in a bonfire; it provides almost nothing to the fuel time and it’s way more useful in other crafting recipes.

You must maintain the Bonfire. It is the responsibility of the Player to make sure they refresh all timers on the servers they play on.

#### Wipe's

Wipes are only done when a save is corrupted or a mod errors and requires a full server wipe. We will endeavor to give Advance Notice of any Wipe upcoming.

## 4. Server Building Restrictions&#x20;

Please remember that there are other players sharing the server with you. Restricting others’ access to content is not allowed beyond of course grabbing a spot for your base. This includes using building items to provide yourself with an unfair advantage at claiming loot, and thralls. *If you wish to reign supreme on the map and hog all the resources and enemies, please consider single player.*&#x20;

### Building Regulations:

All Building Regulations are per the whole tribe. This does not impact those players that play in a solo tribe.&#x20;

**Multiplayer Clans** may have up to 6 Bonfires. Your clan can decide how they implement those bonfires. With the understanding they will need to have “FOB” bases in other Portal Regions.

**Solo Tribes** also have up to 6 Bonfires, but should attempt to make only one large main Base, with several small “FOB” bases in other Portal Regions.

**No Massive constructions** or over-use of memory intensive items leading to loss of performance both on client and server-side. Exp. - builds of over 2000 tiles or with more than 50 followers can be memory intensive.

**No building within the RENDER** range of another player's build. All claims must be at least 100 blocks apart.

**No Blocking of content in the game**, such as caves, dungeons, obelisks, resources, Mini and World Boss spawns, and other areas of the game such as lore notes, ghosts, and Mod's Lore areas.  No Abuse of the claim system where blocks are placed for no other purpose than to prevent other players’ access to resources and building spots.&#x20;

*Core game respawn radius is now 20 foundation stones away.*

## 6. Specific Rules:&#x20;

**We are unable to provide any refunds to persons or clans for loss of items, resources, in-game properties and so on, regardless of the reason. The Pack Gaming is not responsible for replacing items Game Glitches, or Corrupted Players Clients.**

### Client Side Crashes:

Any type of Client Side Crash can create a loss of saved data for the player. As well as Player deaths and tame/tribe member deaths while you were handling the crash. These incidents will not produce a bag or recoverable items in the death recovery system. Admins have no access to the Data.sav files and can not replace a players file in the server.&#x20;

### Server Crashes and Restarts:

Server Crashes will have a 5 to 14 min. Rollback to the save Prior to the restart, or to the last save before the Crash. All Data collected between the Save timestamp and the restart / Crash will be erased. \
Server Restarts will have a save 3 mins prior to a Restart. If you do not log out before the 3 min. Mark, you can lose some game data to the server resetting. Please always try to get to a safe stopping point before the 5 min Restart warning!

![](https://772063455-files.gitbook.io/~/files/v0/b/gitbook-x-prod.appspot.com/o/spaces%2F-Lgje1lBxKKWXwqycB-v%2Fuploads%2FrlqX4M9MCu6dVUfCnhWe%2FNEW-PAGE_GENERIC_BANNER.png?alt=media\&token=9d073148-393e-4dac-ae13-e88d3519e959)


# Valheim PvE-P Server Rules

All rules found here will pertain to all of our current and future Servers. Please read and familiarize yourself with them. UPDATED 5/1/2025

## **Navigation of Page:**

<table data-view="cards"><thead><tr><th></th><th></th></tr></thead><tbody><tr><td><strong>Left side of the page</strong> <span data-gb-custom-inline data-tag="emoji" data-code="25c0">◀️</span></td><td>Use the <strong>></strong> to open any pages in that section when the Header shows a <strong>></strong>.</td></tr><tr><td><strong>Right Side</strong> of the page <span data-gb-custom-inline data-tag="emoji" data-code="25b6">▶️</span></td><td>Click a header to go to that section of this page.</td></tr><tr><td><strong>Features of the page.</strong></td><td>are in an <strong>expandable box</strong>, please click the <strong>></strong> to open the expandable dropdown.</td></tr><tr><td><strong>Hyperlink</strong>s are often in a <strong>card form</strong> in the website.</td><td>So <strong>clicking an image</strong> will often take you to a specific page for information. </td></tr><tr><td><strong>Steam-link</strong>s are often in a <strong>card form</strong> in the website.</td><td>So <strong>clicking on a server card</strong> will take you to the Server.</td></tr></tbody></table>

## 1. General Server Guidelines!

## 2. Infractions&#x20;

## 3. Auto-decay&#x20;

It is the responsibility of the Player to make sure they refresh all timers on the servers they play on. If wooden building sections are not covered during rain, are not linked to a roof, or are submerged in water, they will decay to a maximum of 50% durability and will seem rotting until fixed. When exposed to rain, defensive structures do not rot decay. Stone, black marble, and crystal structures will not decay when wet or submerged.

Building the desired structure's roof first, with the appropriate supports and foundation in place, will aid with constructions lasting days or weeks if rain is a worry.

## 5. Server Building Restrictions&#x20;

**Please remember that there are other players sharing the server with you.** Restricting others’ access to content is not allowed beyond of course grabbing a spot for your base. This includes using building items to provide yourself with an unfair advantage at claiming loot crates, artifacts and OSD's. ***If you wish to reign supreme on the map and hog all the resources and enemies, please consider single player.***&#x20;

Building Regulations:

**All Building rules are designed around a Solo Player Or a multi-player tribe.** \
No personal bases to those that are tribe members allowed. Unless you are a solo player, and they must abide by the next two rules.

***One MAIN Land Claim of no more than 80 x 80 foundations.*** Portals and such may be built in a building outside your claim block, no larger than a 25 x 25 block area.&#x20;

***Up to 4 Outpost Claims of an area of 30 x 30*** *Foundations will be allowed.*&#x20;

### Building Specifics Allowed:&#x20;

**Building in/on Ruins** IS allowed but do not block any entrance to other Areas. Please stay as close to the allowed base/outpost size as possible. Please do not kill every Ruin you come across, others are playing the map with you!

**Cave building** - IS allowed but do not block any entrance to other Areas. Please stay as close to the allowed base/outpost size as possible. Please do not kill every Ruin you come across, others are playing the map with you!&#x20;

### Blocking content/ Hoarding

**No Blocking of content in the game,** such as caves, dungeons, resource rich areas, or boss areas. **Do not enclose in a fence more than three nodes of ORE, or any known Loot chest spawn.** Please leave a passage to the Chests, Obelisks, and Shrines.

**No Abuse of the claim system** where blocks are placed for no other purpose than to prevent other players’ access to resources and building spots.

**Do not camp dungeons, or other group hunt instances.** Groups may wait to get in if it is a one or two man instance.

***Please don't hoard resources**! A large storage of each resource is enough for a large Guild!. Plan accordingly.* &#x20;

**No Massive constructions** (lets not build the Tower of Babel so something like that) or over-use of memory intensive items leading to loss of performance both on client and server-side. *Please don't overuse the hoe or pick, and create huge lag spots of disturbed terrain.*

## 6. Valheim Server Specific rules

**LOOT FROM SINGLE PLAYER -**\
As the game allows for the use of loot from Single player transferred into our Server. Owners would like to ask you to please keep this withing your own guild please. We don't mind sharing between guilds but Lets attempt to let different guilds get to endgame at their pace. ***Thank you from the Owners.***

**GAME PROGRESSION** **-**

Please be considerate of other players and do not rush through the Bosses. **Game progression is tied to ALL players of a server. Not just you.** Please see the below infographic for understanding.

**We ask that players do** [**Yagluth**](https://valheim.fandom.com/wiki/Yagluth) **on thier own worlds, and gather the items there for progress in the MISTLANDS, as defeating Yagluth unlocks** [**Fulings**](https://valheim.fandom.com/wiki/Fuling) **to spawn at night in the** [**Meadows**](https://valheim.fandom.com/wiki/Meadows)**,** [**Black Forest**](https://valheim.fandom.com/wiki/Black_Forest)**, and** [**Mountain**](https://valheim.fandom.com/wiki/Mountain)**.**

### Events and Bosses they are tied to

<table data-full-width="true"><thead><tr><th width="159">Event Name</th><th>Start message</th><th width="133">End message</th><th>Creatures</th><th width="110">Enabled by</th><th>Biome(s)</th></tr></thead><tbody><tr><td>army_eikthyr</td><td>Eikthyr rallies the creatures of the forest.</td><td>The creatures are calming down.</td><td>Boars and Necks</td><td>Start of the world</td><td>Meadows or Black Forest</td></tr><tr><td>army_theelder</td><td>The forest is moving...</td><td>The forest rests again.</td><td>Greydwarfs, Greydwarf brutes and Greydwarf shamans</td><td>Eikthyr</td><td>Meadows, Black Forest, Swamp, or Plains</td></tr><tr><td>army_bonemass</td><td>A foul smell from the swamp...</td><td>The smell is gone.</td><td>Draugr and Skeletons</td><td>The Elder</td><td>Meadows, Black Forest, Swamp, Mountain, or Plains</td></tr><tr><td>army_moder</td><td>A cold wind blows from the mountains.</td><td>The cold wind is gone.</td><td>Drakes<br>(Also applies Freezing on the area)</td><td>Bonemass</td><td>Meadows, Black Forest, Swamp, Mountain, or Plains</td></tr><tr><td>army_goblin</td><td>The horde is attacking!</td><td>The horde is retreating.</td><td>Fulings, Fuling Berserkers and Fuling shamans</td><td>Moder</td><td>Meadows, Black Forest, or Plains</td></tr><tr><td>army_gjall</td><td>What's up, Gjall?!</td><td>Good bye Gjall.</td><td>Gjall and Ticks</td><td>Yagluth</td><td>Mistlands</td></tr><tr><td>army_seekers</td><td>They sought you out.</td><td>The search is over.</td><td>Seekers and Seeker Broods</td><td>Yagluth</td><td>Black Forest, Plains, Mistlands, Ashlands, or Deep North</td></tr><tr><td>army_charred</td><td>The undead army marches.</td><td>The army retreats.</td><td>Charred Twitchers, Charred Marksmen and Charred Warriors</td><td>The Queen</td><td>Any</td></tr><tr><td>army_charredspawners</td><td>The dead have been summoned.</td><td>The dead lie still once more.</td><td>Monument of Torments (won't despawn even after the raid is over)</td><td>The Queen</td><td>Any</td></tr><tr><td>foresttrolls</td><td>The ground is shaking.</td><td>The shakes starts to fade.</td><td>Trolls</td><td>Troll and The Elder</td><td>Meadows, Black Forest, Swamp, or Plains</td></tr><tr><td>blobs</td><td>A foul smell from the swamp...</td><td>The smell is gone.</td><td>Blobs and Oozers</td><td>Bonemass</td><td>Meadows, Black Forest, Swamp, or Plains</td></tr><tr><td>ghosts</td><td>You feel a chill down your spine...</td><td>They have been banished, for now...</td><td>Ghosts and Wraiths</td><td>Bonemass</td><td>Meadows, Black Forest, Swamp, Mountain, or Plains</td></tr><tr><td>skeletons</td><td>A skeleton surprise!</td><td>Skeletons are tired of fighting.</td><td>Skeletons and Rancid remains</td><td>Bonemass</td><td>Meadows, Black Forest, Swamp, Plains, or Mistlands</td></tr><tr><td>surtlings</td><td>There's a smell of sulfur in the air...</td><td>The smell is fading.</td><td>Surtlings</td><td>Surtling and Bonemass</td><td>Meadows, Black Forest, Swamp, or Plains</td></tr><tr><td>wolves</td><td>You are being hunted...</td><td>The hunt is over.</td><td>Wolves</td><td>Bonemass</td><td>Mountain or Plains</td></tr><tr><td>bats</td><td>You stirred the cauldron.</td><td>The cauldron calms.</td><td>Bats</td><td>Bat and Bonemass</td><td>Any</td></tr><tr><td>hildirboss1</td><td>She's hot on your tail!</td><td>She got burnt.</td><td>Brenna, Skeletons, and Rancid remains</td><td>Brass Chest returned to Hildir</td><td>Any</td></tr><tr><td>hildirboss2</td><td>You get the chills...</td><td>You can chill out.</td><td>Geirrhafa, Fenrings, and Cultists</td><td>Silver Chest returned to Hildir</td><td>Any</td></tr><tr><td>hildirboss3</td><td>They were bros, man.</td><td>You broke the code... again.</td><td>Zil and Thungr, Fulings, and Fuling Berserkers</td><td>Bronze Chest returned to Hildir</td><td>Any</td></tr></tbody></table>

## **7. #PVE-P.** <a href="#fc3whqjuzsg8" id="fc3whqjuzsg8"></a>

We play as an alliance of several small tribes. With a Mutual Aggression Pact (See #Mutual Aggression Pact) Currently player damage is toggled in your inventory screen with the **Straight/Crossed Swords**, so please don't attack each other if you have ***not*** mutually agreed to Aggression!, (ORP).

## 8. MUTUAL AGGRESSION PACT

Mutual Aggression is where two or more clans have officially agreed to WAR. ***HOW WE ARE DOING THIS:*** Two or more tribes agree to WAR, they will make a written agreement in the Global or Discord channel. If in Global they need to SCREENSHOT the agreement and post in the DISCORD #valheim-chat Channel.

1. YOU MUST SCREENSHOT OR PASTE THIS INTO THE #Valheim-chat Channel in our Discord.
2. Your clans are allowed 24hours for war.
3. Clans will receive a 24 hour period of ORP where NO other Clan can propose war with you

<figure><img src="https://772063455-files.gitbook.io/~/files/v0/b/gitbook-x-prod.appspot.com/o/spaces%2F-Lgje1lBxKKWXwqycB-v%2Fuploads%2Fk7tLu94BoscA4GDYhOWm%2Fimage.png?alt=media&amp;token=e4f81974-bc34-4d5d-93c0-96775d5cbb84" alt=""><figcaption></figcaption></figure>


# Dark and Light PvE Server Rules

All rules found here will pertain to all of our current and future Servers. Please read and familiarize yourself with them. UPDATED 5/1/2025

## **Navigation of Page:**

<table data-view="cards"><thead><tr><th></th><th></th></tr></thead><tbody><tr><td><strong>Left side of the page</strong> <span data-gb-custom-inline data-tag="emoji" data-code="25c0">◀️</span></td><td>Use the <strong>></strong> to open any pages in that section when the Header shows a <strong>></strong>.</td></tr><tr><td><strong>Right Side</strong> of the page <span data-gb-custom-inline data-tag="emoji" data-code="25b6">▶️</span></td><td>Click a header to go to that section of this page.</td></tr><tr><td><strong>Features of the page.</strong></td><td>are in an <strong>expandable box</strong>, please click the <strong>></strong> to open the expandable dropdown.</td></tr><tr><td><strong>Hyperlink</strong>s are often in a <strong>card form</strong> in the website.</td><td>So <strong>clicking an image</strong> will often take you to a specific page for information. </td></tr><tr><td><strong>Steam-link</strong>s are often in a <strong>card form</strong> in the website.</td><td>So <strong>clicking on a server card</strong> will take you to the Server.</td></tr></tbody></table>

## 1. General Server Guidelines!

### The PACK Disclaimer and Players Responsibility NOTICE:

*❝Your presence in this server implies accepting these rules, including all further changes. We reserve the right to modify these rules in any way we deem necessary and at any moment, at our own discretion, it is your responsibility to check for them.❞*&#x20;

These rules are not comprehensive and use of loopholes to violate the spirit of these rules is subject to enforcement. Failure to follow these rules will result in being removed from the community! Furthermore, If someone is a participant of our Discord, and/or a Player on our Servers, A ban on Discord may also be pursued on the Server Cluster. Please follow all of the RULES found here! &#x20;

*We are unable to provide any refunds to persons or clans for loss of items, resources, in-game properties and so on, regardless of the reason. The Pack Gaming is not responsible for replacing items or Dinos due to ASE Glitches, Steam Cloud Errors, or Corrupted Players Clients.*

### We work on a "3 Strikes Method"

Please read through and consider the spirit of the rules, not just the specific wording. And make sure your clanmates are also aware of them as their actions can affect you. Any infraction by a player will most likely have repercussions for the entire clan. Other than this official post of rules, we do not issue warnings ahead of Admin intervention.&#x20;

1. You and your Tribe/Clan get a warning. Such as a sign in your base or a message to talk with an admin.
2. You and your Tribe/Clan get a second warning. Same as above but Tames are confiscated, or buildings removed. Written note added to the Admins Log recording your player name and Tribe.
3. You and your Tribe/Clan get a third warning. As verified by our Admins Log. We are done, and you are Perm Banned.

### Reporting Infractions:

Please contact us through our Discord, (<https://discord.gg/RJVVraV>), and fill out a ticket in our Discord ([#Support-Tickets](https://discord.com/channels/459473503939198978/728115631228190802/992571617110671476))

## 2. Infractions&#x20;

### Hacks and Exploits

Hacking, or using Exploits and other situations deemed as extreme will be met with a permanent ban on the first offense. Included in this category are: Real-Money Trading (RMT), use of third-party programs that inject code and modify aspects of the game to provide unfair advantage against other players. And abuses of game mechanics to obtain an unfair advantage over other players including creating a detrimental play experience through reduced server or game performance.

### Harassment - Griefing

We allow coarse humor, rough language, and or content. If this is not for you, Thank you for your interest, but we may not be the BEST FIT for you. There are some offensive and defamatory chat and user-created content DEEMED NOT PERMITTED. Personal threats, doxing, stalking. This rule also extends to character names, guild names, in-game signs, any other type of communication in Server. Our admin team considers all the above action types of harassment . If reported to admins, you will receive up to a 5 day Temp - ban . Continued Harassment of this type will lead to a Perma-Ban.

If you experience Harassment / Griefing / or observe inappropriate content in-game, please fill out a ticket in our Discord ([#Support-Tickets](https://discord.com/channels/459473503939198978/728115631228190802/992571617110671476))

## 3. Auto-decay and Claiming

**DO NOT destroy/claim/or remove parts of bases, NAMED any of the following variations:**&#x20;

\<name> (ADMIN);  \<name> (OWNER);  \<name> {Owner/Admin}; "The PACK"\*\*Admin {Community Buildings} .  **You will be banned!**

The PACK uses extended rates (12 RL Days for Tames), all structures and tamed creatures WILL auto-decay. This means that if nobody in your tribe logs into the game every 7-10 days, your structures and dinosaurs may disappear. In general, higher-tier structures will last longer than lower-tier structures.

It is the responsibility of the Player to make sure they refresh all timers on the servers they play on. You must RENDER the items to actually prevent the decay of the item this can take up to 15 min. interval in your base moving about to properly render in all sections of the build in your players render radius.&#x20;

Any tribe that is fully inactive (24 days of no log ins) will be dino/structure wiped by admins. Please advise the admin team of prolonged (over 12 days) absences if you are not abandoning your base.

### Schedule of item decay and auto-decay periods.

| Auto Decay 0-3 Days            | Auto Decay 3-5 Days          | Auto Decay over 5 Days                    |
| ------------------------------ | ---------------------------- | ----------------------------------------- |
| Framework - 3 days or 72 hours | Wood - 4 days or 96 Hours.   | ***Creatures are CLAIMABLE in 12 Days.*** |
| Straw - 3 days or 72 hours.    | Stone - 5 days or 120 Hours. | Iron - 7 days or 168 Hours.               |
|                                |                              | Manor - 15 days or 360 Hours.             |

## 4. Creature Rules:

### SCATTERED Tames:

Do NOT leave Tamed creatures all over the map! These will be Deleted at The Pack Admins discretion. With no recompense!&#x20;

### DEFENSE Tame RULES:

***Defensive settings allowed =*** **Neutral, and attack my target.** \
***No other setting is approved for Defensive Dinos.***

***The Defensive Creatures must be encumbered to the point it cannot walk in any direction. Do Not Set any Defensive Creatures on WANDER!***  These will sometimes go rouge on resets or server crashes, and phase your walls. &#x20;

***ALL Creatures NOT ENCUMBERED and on AGGRESSIVE, running loose outside base walls, will be SHOT ON SIGHT. NO EXCEPTIONS and no RECOMPENSE.***

## 5. Server Building Restrictions&#x20;

**Please remember that there are other players sharing the server with you.** Restricting others’ access to content is not allowed beyond of course grabbing a spot for your base. This includes using building items to provide yourself with an unfair advantage at claiming loot crates, artifacts and OSD's. ***If you wish to reign supreme on the map and hog all the resources and enemies, please consider single player.***&#x20;

### BUILDING SIZES:

* ONE Main base per map, ONE Outpost per map per clan/tribe. Except where NOTED.
* Building tile counts should be under 3000 tiles for a Main BASE.
* **DO NOT BUILD a box that encompasses the full 80x80x24. Instead use a Fence line of Gates to reduce the lag. Build inside such gates.**&#x20;
* **MAIN BASE** - a maximum of 80x80x24 Building tiles. THIS allotment includes all FENCE LINES and the Buildings that form the Base inside that FENCE LINE.&#x20;
* **OUTPOSTS:** a maximum of 30x30x24. THIS allotment includes all FENCE LINES and the Buildings that form the Outpost inside that FENCE LINE. (NOTE: Not Applicable to SE.)

### Building Specifics Allowed:&#x20;

**Mobile Bases (Platform Saddles & Rafts)** are acceptable to use for farming and other tribal needs but when NOT in use they need to be parked near the Tribes Main base or Outpost.&#x20;

**Building in/on Ruins** ARE allowed but do not block any entrance to other Areas. Please stay as close to the allowed base/outpost size as possible.

**Cave building** - Do not build in any cave with restrictions put forth in the Prohibitive Build Areas for your map.&#x20;

***You may make a temporary taming place.** This may be a 15 x 15 normal foundation area with a logout area. This is a temporary site and should be removed as soon as the tame/s have been processed.* **PLEASE CLEAN UP AFTER YOURSELVES!**

### BUILDING RESTRICTIONS:

* **Render Distance Rule** - Space between NON Allianced Bases is 75 building tiles.&#x20;
* **No Blocking of content in the game,** such as caves, dungeons, resource rich areas, or boss areas.&#x20;
* **Do not enclose in a fence more than three nodes of ORE, or any known Loot chest spawn.** Please leave a passage to the Chests, Obelisks, and Shrines.
* **Do not camp dungeons, or other group hunt instances.** Groups may wait to get in if it is a one or two man instance.
* **Do not leave tames in loot caves.**&#x20;
* ***Please don't hoard resources**! A large storage of each resource is enough for a large Guild!. Plan accordingly.* &#x20;
* **No Massive constructions** *(lets not build the Tower of Dragons so something like that). Creates a chance for a memory leak that can crash the server until the build is removed.*

### Prohibited Build Areas:

<details>

<summary><img src="https://772063455-files.gitbook.io/~/files/v0/b/gitbook-x-prod.appspot.com/o/spaces%2F-Lgje1lBxKKWXwqycB-v%2Fuploads%2F1sDewHhd6ScAA6F6V026%2Fimage.png?alt=media&amp;token=f8dffcb7-1253-4ffe-b14f-a40e0ae3ffcf" alt="">   <strong>The Path:</strong></summary>

Do not build on the Floating Islands.

</details>

<details>

<summary><img src="https://772063455-files.gitbook.io/~/files/v0/b/gitbook-x-prod.appspot.com/o/spaces%2F-Lgje1lBxKKWXwqycB-v%2Fuploads%2FmdjTMyxJ8pdGZEUgyJUD%2Fimage.png?alt=media&amp;token=4774e917-74cc-4176-8578-5e092b21bf98" alt="">   <strong>The Shard:</strong></summary>

Do not Block the Walkways with builds.

</details>

## 6.  Server, Client Crashes, and Unexplained Deaths.

### Client Side Crashes

Any type of Client Side Crash can create a loss of saved data for the player. As well as Player deaths and Creature deaths while you were handling the crash. These incidents will not produce a Death cache bag.&#x20;

### Server Crashes /Server Restarts/Transfer Errors

Server Crashes will have a 5 to 14 min. Rollback to the save Prior to the restart, or to the last save before the Crash. All Data collected between the Save time stamp and the restart / Crash will be erased.&#x20;

Server Restarts will have a save 3 mins prior to a Restart. If you do not log out before that 3 min. Mark, you can loose some game data to the server resetting. Please always try to get to a safe stopping point before the 5 min Restart warning!

Characters/Creatures/Items uploaded to the Steam cloud have a 24-hour time limit in multiplayer. Ensure you are set to download them into another server before the timer runs out, or else your items will decay in your upload when the timer goes past 0.

Steam Cloud Errors involve Characters/Creatures/Items uploaded to the Steam cloud. If this upload is corrupted, Admins and Owners can NOT Access the data stored in the Steam cloud and your information is lost. &#x20;

Unexplained Deaths:

**Deaths while AFK or logged out.**\
Are not always explained in the tribal logs. Most times we can not define what happened. Thirst, Hunger, or wild creature aggression can all cause unexplained deaths.\
Death cache decay is 30 mins.\
**To Prevent Player loss of items.**\
*Store all inventory in a storage chest near your log out point. Log out in a sleeping room (4x4 enclosed room) or locked onto a bed.  If you need to AFK, make sure to set your settings for at least 30 mins AFK, and again store items and log out on a bed of some sort.*

![](https://772063455-files.gitbook.io/~/files/v0/b/gitbook-x-prod.appspot.com/o/spaces%2F-Lgje1lBxKKWXwqycB-v%2Fuploads%2FrlqX4M9MCu6dVUfCnhWe%2FNEW-PAGE_GENERIC_BANNER.png?alt=media\&token=9d073148-393e-4dac-ae13-e88d3519e959)


# ASE PvE Cluster

We offer a cluster of 6 maps Of Varying styles all for your ARK Play style.

## **Navigation of Pages:**

<table data-view="cards"><thead><tr><th></th><th></th></tr></thead><tbody><tr><td><strong>Left side of the page</strong> <span data-gb-custom-inline data-tag="emoji" data-code="25c0">◀️</span></td><td>Use the <strong>></strong> to open any pages in that section when the Header shows a <strong>></strong>.</td></tr><tr><td><strong>Right Side</strong> of the page <span data-gb-custom-inline data-tag="emoji" data-code="25b6">▶️</span></td><td>Click a header to go to that section of this page.</td></tr><tr><td><strong>Features of the page.</strong></td><td>are in an <strong>expandable box</strong>, please click the <strong>></strong> to open the expandable dropdown.</td></tr><tr><td><strong>Hyperlink</strong>s are often in a <strong>card form</strong> in the website.</td><td>So <strong>clicking an image</strong> will often take you to a specific page for information. </td></tr><tr><td><strong>Steam-link</strong>s are often in a <strong>card form</strong> in the website.</td><td>So <strong>clicking on a server card</strong> will take you to the Server.</td></tr></tbody></table>

## Our PVE ARK: Survival Cluster

<figure><img src="https://772063455-files.gitbook.io/~/files/v0/b/gitbook-x-prod.appspot.com/o/spaces%2F-Lgje1lBxKKWXwqycB-v%2Fuploads%2FroEOqiNUgGPX1hScvz2N%2FASE_CLUSTER_FLASH_PAGE_2025.png?alt=media&amp;token=d95884f5-023c-48f1-a68d-8372db21e930" alt=""><figcaption></figcaption></figure>

### Owners Vision&#x20;

**OUR MOTTO! ALL MAY ENTER HERE WITHOUT PREJUDICE! This applies to All Races, All Creeds, and All Genders. All are Welcome!!!**

We are an adult gaming community, and we are looking for quality players to join our adventures. We host an ASE PvE cluster of 6 maps, with Aquatica 🔜. Our Cluster is Beginner friendly, with a Helpful and active admin team! We are PVE, and actively discourage PVP style "Raiding and Claiming” within our community. We have chosen a limited but satisfactory grouping of QoL mods that provide the best overall playing experience for your ARK experience, and a structured rule package that enhances Quality of life, and breeding.&#x20;

**Last of all, BE EXCELLENT TO EACH OTHER! We are all adults here, and know how to act. Let's make a happy, safe place to enjoy the games we love to play!**

### MINIMUM SYSTEM REQUIREMENTS:

<table data-card-size="large" data-view="cards" data-full-width="true"><thead><tr><th align="center"></th><th></th><th></th></tr></thead><tbody><tr><td align="center"><strong>Windows:</strong></td><td><strong>OS:</strong> Windows 7/8.1/10 (64-bit versions)<br><strong>Processor:</strong> Intel Core i5-2400/AMD FX-8320 or better<br><strong>Memory:</strong> 8 GB RAM<br><strong>Graphics:</strong> NVIDIA GTX 670 2GB/AMD Radeon HD 7870 2GB or better<br><strong>DirectX:</strong> Version 10<br><strong>Storage:</strong> 60 GB available space<br><strong>Additional Notes:</strong> Requires broadband internet connection for multiplayer</td><td></td></tr><tr><td align="center"><strong>Mac OS X:</strong></td><td><strong>OS:</strong> OSX 10.9 or Higher<br><strong>Processor:</strong> 2 GHz Equivalent CPU<br><strong>Memory:</strong> 4000 MB RAM<br><strong>Graphics:</strong> OpenGL 3 Compatible GPU with 1GB Video RAM<br><strong>Storage:</strong> 20000 MB available space</td><td></td></tr></tbody></table>

<figure><img src="https://772063455-files.gitbook.io/~/files/v0/b/gitbook-x-prod.appspot.com/o/spaces%2F-Lgje1lBxKKWXwqycB-v%2Fuploads%2F9GYo5WsnZqruSjhOHsQr%2Fimage.png?alt=media&amp;token=24e51e7d-64e5-422f-b8b0-6363869a7a7f" alt=""><figcaption><p>Ode to Ark: Survival Evolved 2016 - 2023</p></figcaption></figure>

***

<figure><img src="https://772063455-files.gitbook.io/~/files/v0/b/gitbook-x-prod.appspot.com/o/spaces%2F-Lgje1lBxKKWXwqycB-v%2Fuploads%2FvVW5iVQ9w2qY9d3KjuEb%2Fimage.png?alt=media&amp;token=13b024e5-0c97-4b3f-9185-bf3c2f2c118a" alt=""><figcaption></figcaption></figure>

## INDEX of our Current ASE PVE Cluster

<table data-view="cards"><thead><tr><th align="center"></th><th align="center"></th><th align="center"></th><th data-hidden data-card-cover data-type="files"></th><th data-hidden data-card-target data-type="content-ref"></th></tr></thead><tbody><tr><td align="center"><strong>ABERRATION</strong></td><td align="center"><strong>Cannon</strong></td><td align="center"><strong>Click Here !!</strong></td><td><a href="https://772063455-files.gitbook.io/~/files/v0/b/gitbook-x-prod.appspot.com/o/spaces%2F-Lgje1lBxKKWXwqycB-v%2Fuploads%2FD2wTdO3mjQk7EG0YWCSk%2FASE_AB.png?alt=media&amp;token=0a60dceb-0462-4e2b-9568-887ec5fa78de">ASE_AB.png</a></td><td><a href="broken://pages/-LlpVjTR98bVxjF5U5ka">Broken link</a></td></tr><tr><td align="center"><strong>EXTINCTION</strong></td><td align="center"><strong>Canon</strong></td><td align="center"><strong>Click Here !!</strong></td><td><a href="https://772063455-files.gitbook.io/~/files/v0/b/gitbook-x-prod.appspot.com/o/spaces%2F-Lgje1lBxKKWXwqycB-v%2Fuploads%2FgrDVGGkcqiHXxlSDSV2E%2FASE_EXT.png?alt=media&amp;token=bfe6dd83-a61e-4f5b-ac91-1354df1ed46b">ASE_EXT.png</a></td><td><a href="/ark/ase-cluster/extinction">EXTINCTION</a></td></tr><tr><td align="center"><strong>FJORDUR</strong></td><td align="center"><strong>DLC</strong></td><td align="center"><strong>Click Here !!</strong></td><td><a href="https://772063455-files.gitbook.io/~/files/v0/b/gitbook-x-prod.appspot.com/o/spaces%2F-Lgje1lBxKKWXwqycB-v%2Fuploads%2FB8589OZy5JQ4nmfmEnJh%2FASE_FJO.png?alt=media&amp;token=22c170ee-03d0-49cb-97d0-2fb4f63398f6">ASE_FJO.png</a></td><td><a href="/ark/ase-cluster/fjordur">FJŐRDUR</a></td></tr><tr><td align="center"><strong>GENESIS 2</strong></td><td align="center"><strong>Canon</strong></td><td align="center"><strong>Click Here !!</strong></td><td><a href="https://772063455-files.gitbook.io/~/files/v0/b/gitbook-x-prod.appspot.com/o/spaces%2F-Lgje1lBxKKWXwqycB-v%2Fuploads%2F4Er2omQTnOzC8PO1BmXG%2FASE_GEN2.png?alt=media&amp;token=a34da634-0dbd-41d4-a99b-1a1db0184c23">ASE_GEN2.png</a></td><td><a href="/ark/ase-cluster/gen2">GENESIS - 2</a></td></tr><tr><td align="center"><strong>The ISLAND</strong></td><td align="center"><strong>Canon</strong></td><td align="center"><strong>Click Here !!</strong></td><td><a href="https://772063455-files.gitbook.io/~/files/v0/b/gitbook-x-prod.appspot.com/o/spaces%2F-Lgje1lBxKKWXwqycB-v%2Fuploads%2FJywGZiJHjLe3R9XbV3IH%2FASE_ISL.png?alt=media&amp;token=c9aa3245-ccd3-4b07-913e-7db0d641e956">ASE_ISL.png</a></td><td><a href="https://faq.thepackgaming.com/ark/ase-cluster/island">https://faq.thepackgaming.com/ark/ase-cluster/island</a></td></tr><tr><td align="center"><strong>RAGNAROK</strong></td><td align="center"><strong>DLC</strong></td><td align="center"><strong>Click Here !!</strong></td><td><a href="https://772063455-files.gitbook.io/~/files/v0/b/gitbook-x-prod.appspot.com/o/spaces%2F-Lgje1lBxKKWXwqycB-v%2Fuploads%2Fk0WaWbSu4Fe0g178u9v3%2FASE_RAG.png?alt=media&amp;token=40fc2ac1-22ed-4efb-8050-a3bea1ab4857">ASE_RAG.png</a></td><td><a href="/ark/ase-cluster/ragnarok">RAGNAROK</a></td></tr></tbody></table>

## CrossARK Transfers

There are limitations as to how items, creatures and survivors can be transferred through the normal mechanism: They can only be transferred within the same server cluster. 50 stacks in the Data tab, 30 Dinos in the Dino tab and only **250 in your inventory if you transfer (INCLUDING your Custom Cosmetics tab items).**

<figure><img src="https://772063455-files.gitbook.io/~/files/v0/b/gitbook-x-prod.appspot.com/o/spaces%2F-Lgje1lBxKKWXwqycB-v%2Fuploads%2FdM52FN0aATmmkxy7FfGu%2Fark-headbanner.jpg?alt=media&amp;token=c8e3596c-ce5f-46ca-8c4d-9900483b3efd" alt=""><figcaption></figcaption></figure>

## Helpful Guides to ASE Play

<table data-view="cards"><thead><tr><th></th><th></th><th></th><th data-hidden data-card-cover data-type="files"></th><th data-hidden data-card-target data-type="content-ref"></th></tr></thead><tbody><tr><td>The PACK ASE: Breeding Guide</td><td></td><td>Click to go to the Guide!</td><td><a href="https://772063455-files.gitbook.io/~/files/v0/b/gitbook-x-prod.appspot.com/o/spaces%2F-Lgje1lBxKKWXwqycB-v%2Fuploads%2FMYkXNQqx48nRBRvGn37Q%2FBreeding%20basics.jpg?alt=media&amp;token=78a9c3bc-2f26-4e92-a265-7949757f6ac0">Breeding basics.jpg</a></td><td><a href="https://faq.thepackgaming.com/ase/breeding">https://faq.thepackgaming.com/ase/breeding</a></td></tr><tr><td>ASE Explorer Notes</td><td></td><td>Click to go to the Guide!</td><td><a href="https://772063455-files.gitbook.io/~/files/v0/b/gitbook-x-prod.appspot.com/o/spaces%2F-Lgje1lBxKKWXwqycB-v%2Fuploads%2Fg4Tzg5qb6gfNeNBdS8fQ%2Fimage.png?alt=media&amp;token=d4732316-3a51-40cc-b871-2b84b232524e">image.png</a></td><td><a href="https://faq.thepackgaming.com/ase/notes">https://faq.thepackgaming.com/ase/notes</a></td></tr><tr><td><strong>ASE &#x26; ASA Community Wiki</strong></td><td></td><td>Click to go to the Guide!</td><td><a href="https://772063455-files.gitbook.io/~/files/v0/b/gitbook-x-prod.appspot.com/o/spaces%2F-Lgje1lBxKKWXwqycB-v%2Fuploads%2FlMP73eJ9z7NHZFqjWE6k%2FASA%20WIKI.png?alt=media&amp;token=e80cd1b0-3d0a-44cc-abe1-048c48b1e320">ASA WIKI.png</a></td><td><a href="https://ark.wiki.gg/wiki/ARK_Wiki">https://ark.wiki.gg/wiki/ARK_Wiki</a></td></tr></tbody></table>

<figure><img src="https://772063455-files.gitbook.io/~/files/v0/b/gitbook-x-prod.appspot.com/o/spaces%2F-Lgje1lBxKKWXwqycB-v%2Fuploads%2FUOI3DAvlqXZWwuU3FqcG%2FARK_2022_Header.jpeg?alt=media&amp;token=10b8a4cf-45ae-4bb2-b3ea-5f1ec35d3bfc" alt=""><figcaption></figcaption></figure>

## ***Our Patreon's***&#x20;

![](https://772063455-files.gitbook.io/~/files/v0/b/gitbook-x-prod.appspot.com/o/spaces%2F-Lgje1lBxKKWXwqycB-v%2Fuploads%2FKFiZHHlgN1QM69t5DejF%2FPACK_PATREON.png?alt=media\&token=d8b84080-d3a0-4bcf-903f-ec3c9cebe9e3)

*Will receive generous perks in our ARKS Servers.*

Please see the Patreon Role listings to see just what you can get as an IN GAME PERK!

{% embed url="<https://faq.thepackgaming.com/patreon#our-patreon-perks>" %}

<figure><img src="https://772063455-files.gitbook.io/~/files/v0/b/gitbook-x-prod.appspot.com/o/spaces%2F-Lgje1lBxKKWXwqycB-v%2Fuploads%2FzU1zzT7g4UEZ1c9jvqlW%2Fimage.png?alt=media&amp;token=202a4c78-50f7-4e70-a904-a899b428e99d" alt=""><figcaption></figcaption></figure>


# ASE Cluster Settings

## ***ASE Cluster Settings:***

| Server Difficulty = 10 | Harvest = 3x                                   | Taming = 8x                                                            |
| ---------------------- | ---------------------------------------------- | ---------------------------------------------------------------------- |
| Experience gained = 4x | Loot crate quality = 2x                        | Fishing quality = 3x                                                   |
| Breeding = 15x         | Egg Hatch = 15x                                | Baby Mature = 15x                                                      |
| Server Dino Cap = 5k   | Tribal Dino Cap = 500 AWAKE Per Tribe Per Map. | Tribal Dino Cap in Storage = 2000 Stored Per Tribe Per Map. (soultrap) |

*You will find your tribal Dino cap in the center of your inventory screen. (Your total soultrap count will not show in any screens. You will have to keep track via folders and checking your storage inventories)*

### ***Other Server Settings***

#### Character Levels

In [![](https://ark.wiki.gg/images/thumb/ARK_no_text.png/20px-ARK_no_text.png?23a351)](https://ark.wiki.gg/wiki/ARK:_Survival_Evolved) [ARK: Survival Evolved](https://ark.wiki.gg/wiki/ARK:_Survival_Evolved), as of July 2025, the maximum player level is 220 (205 on [preaquatica](https://ark.wiki.gg/wiki/Preaquatica)): survivors start at level 1, 104 levels can be gained normally, 90 gained (75 on preaquatica) by defeating end-game [Ascension](https://ark.wiki.gg/wiki/Ascension) bosses, 10 gained from collecting all [Explorer Notes](https://ark.wiki.gg/wiki/Explorer_Notes) on every map, 5 acquired by levelling up a [Chibi](https://ark.wiki.gg/wiki/Chibi) (a cosmetic event pet), and a total of 10 levels for collecting all [Fjordur](https://ark.wiki.gg/wiki/Fjordur) [![](https://ark.wiki.gg/images/thumb/Runes.png/20px-Runes.png?7690e6)](https://ark.wiki.gg/wiki/Runes) [Runes](https://ark.wiki.gg/wiki/Runes). Once you have reached this limit, you will not be able to level up anymore.

#### Creature Levels:

**Dinos/Creatures spawn with a level of 5 to 210 in our arks.**\
The following dino/creatures are an exception:\
(Other levels apply like every other dino based on difficulty setting however.)

| Normal Spawns = 315                        | Magmasaur = 315                                       | Normal Wyverns = 267  |
| ------------------------------------------ | ----------------------------------------------------- | --------------------- |
| Jerboa = 315                               | Rock Drake = 267                                      | Crystal wyverns = 315 |
| Dinopithecus = 315 (May need to Mature it) | All Tek Creatures except Stryder = 315 + 30% WC bonus | Crystal Heirs =315    |
| Reaper Kings = 285                         | Enforcers, and Scouts = 315                           | Void Wyrms = 315      |
| Deinonychus = 315                          | Stryder = 210                                         | Zombie Wyverns = 315  |
| Rhyniognatha W/Out a Donor Tame = 266      |                                                       |                       |

**The max dino level (without breeding)** after taming and leveling is 372 on our servers. (i.e. 210 wild level + 74 level taming bonus + 88 domesticated level ups). There are a few exceptions to this rule:

* Tek creatures - As stated above, they can naturally spawn up to 253 with a maximum taming efficiency of +89 levels and up to 88 levels after taming, making their max possible level 430 outside of breeding.
* Reaper Kings - Queens spawn at a maximum level of 210, but their offspring can receive up to 75 additional levels during pregnancy and another 88 once matured, making their max level 372.
* Enforcers and Scouts - Spawn naturally up to level 210 and can receive an additional 88 levels after being assembled, making their max level 298.
* &#x20;Deinonychus Egg - naturally spawn up to 210 and can receive an additional 88 levels after maturation, making their max level 298 outside of breeding.
* &#x20;Crystal Wyvern Egg, Wyvern Egg, and  Rock Drake Egg- can spawn naturally up to 266 and can receive an additional 88 levels after maturation, making their max level 354.
* &#x20;Magmasaur Egg - naturally spawn up to 210 and can receive an additional 88 levels after maturation, making their max level 298 outside of breeding.

**Breeding Level Caps:** On our servers, Creatures have NO hard-capped limit on breeding. Levels of 1750 to 1800 is possible (maxing all stats at 254 x 7 +1 =Maxed out dino of 1750) .

PLEASE NOTE: Once you have reached a Dino with 255 in each stat value. You realistically cannot add any more domestication level points into that specific stat. If done, the stat will revert to a LEVEL ONE DINO value in that stat. And you will lose all the value of months of breeding.

Tamable creatures introduced in the Genesis DLCs\
R-Creatures, X-Creatures, and Lost Island's Dinopithecus are the only exception, they can go over the 1750 up to 1800.

<figure><img src="https://772063455-files.gitbook.io/~/files/v0/b/gitbook-x-prod.appspot.com/o/spaces%2F-Lgje1lBxKKWXwqycB-v%2Fuploads%2FI4NlxXWuZFJrLe18fdF9%2Fimage.png?alt=media&amp;token=fdd99b0e-54d0-4df3-9de9-76b040706849" alt=""><figcaption></figcaption></figure>

### Unique Settings&#x20;

**MINDWIPES:**

Mindwipes have a 60 second cooldown. Allowing a 1 min. Reuse of the next mindwipe.

**S+ Unique Configurations:**\
**Floating Ceilings:** Ceilings will float with out support in the game.&#x20;

**No Endless Pipe or Wire systems:** Just put your water piping together in your base, no clip an S+ intake to the end piece (NO IT DOES NOT NEED WATER) and you will be fully irrigated. \
Use the Built in S+ Wires by clipping them onto your building tiles.&#x20;

**Ladders act as Elevators:** Our S+ ladders will teleport you to the top of the section they are attached to.

**Dropped Fertile eggs,** do not interfere with any egg laying mechanics of the wild creatures! When the egg enters your or your dino's inventory the blueprint path changes from wild egg code to a new one which includes the name of the entity that dropped it, and when dropped it no longer creates an impediment for the wild dinos to spawn eggs

<figure><img src="https://772063455-files.gitbook.io/~/files/v0/b/gitbook-x-prod.appspot.com/o/spaces%2F-Lgje1lBxKKWXwqycB-v%2Fuploads%2FG8wVYS9TUSK04cG4N9o4%2Fimage.png?alt=media&amp;token=7e20dc86-dbb7-4b66-ba5f-f450d4366cf0" alt=""><figcaption></figcaption></figure>

***

## **SUBSCRIBED MODS**&#x20;

#### Quick list of our Mods Pack

S+ - #731604991 (building) \
HazeStacks - #1645346094 (stacking mod) \
Eco Rp mod - #741203089 (Decor mod) \
Dino storage -  #1609138312 (Cryo storage mod) \
Simple Spawners -  #3422223845 (Admin only mod for dino spawning) \
Awesome Teleport -  #889745138 (Old Fav. Teleport mod) \
Awesome Spyglass -  #1404697612 (Upgraded spyglass) \
Ascender -  #2795952040 (Admin only mod for player Ascension) \
Planting Mod 1.3 -  #1115844828 (Decor mod) \
MarniiMods: Wildlife -  #31984936918 (Unique wild creatures) \
Crystal Isles Dino Addition -  #2135314513 (Unique wild creatures) \
MarniiMods: Horse -  #1696957410 (Unique wild creatures)

#### Click here to subscribe to all the mods at once.

<table data-card-size="large" data-view="cards" data-full-width="true"><thead><tr><th></th><th></th><th></th><th data-hidden data-card-cover data-type="files"></th><th data-hidden data-card-target data-type="content-ref"></th></tr></thead><tbody><tr><td><strong>The PACK Gaming Ark Cluster Presents: Cannon Servers Mod Package</strong> </td><td>This is for use on all the Canon and DLC maps. </td><td><strong>To Subscribe to this mod package, please click the picture above ⬆️!</strong> </td><td><a href="https://772063455-files.gitbook.io/~/files/v0/b/gitbook-x-prod.appspot.com/o/spaces%2F-Lgje1lBxKKWXwqycB-v%2Fuploads%2F95K8ZzmoCr0iX6do64B8%2FASE_Mod-Pack_CARDS_2025.png?alt=media&amp;token=f3633242-c927-408c-818f-3aacab24bf23">ASE_Mod-Pack_CARDS_2025.png</a></td><td><a href="https://steamcommunity.com/sharedfiles/filedetails/?id=1829354252">https://steamcommunity.com/sharedfiles/filedetails/?id=1829354252</a></td></tr></tbody></table>

***

## ASE Dinos, and Where they Spawn!&#x20;

We have set up spawners that move the Unique Map dinos to our different Cluster maps. \
You will find dinos from the missing maps in the ARK Series on different maps where they fit in.

We also offer **Unique Modded Creatures** that spawn specified maps.  \
Crystal Isles Dinos mod: These dinos are selectivity spread over the whole cluster.\
Marni Horses Mod: \
Courser ;Destrier ;Dray ;Garron ;Kehilan ;Pony ;Rouncey ;Siglavy ;\
Marni Wildlife:\
Camels; Cats; Cows and Bulls; Elephants; Exotic birds; Frogs; Geckos; Hares; Lions and Lionesses; Mountain Goats; Owls; Rats; Ravens; Roosters and hens; Shadowcats; Snakes; Snow leopards; Wolves

🚫= Boss Obelisk or Alpha/Apex dinos that are un-tamable.

| Island                                  | Abberation                              | Extinction                              | Ragnarok                                |
| --------------------------------------- | --------------------------------------- | --------------------------------------- | --------------------------------------- |
| All the creatures from Marnii: Horses   | All the creatures from Marnii: Horses   | All the creatures from Marnii: Horses   | All the creatures from Marnii: Horses   |
| All the creatures from Marnii: Wildlife | All the creatures from Marnii: Wildlife | All the creatures from Marnii: Wildlife | All the creatures from Marnii: Wildlife |
| Amargasaurus                            | Ankylosaurus Crystal 💎CIDinos          | Brontosaurus Liquefied 💎CIDinos        | Alpha Blood Crystal Wyvern 🚫           |
| Argentavis Crystal 💎CIDinos            | Basilisk Crystal 💎CIDinos              | Giga Liquefied 💎CIDinos                | Alpha Deathworm 🚫                      |
| Dinopithecus                            | Doedicurus Crystal 💎CIDinos            | Griffin Liquefied 💎CIDinos             | Blood Crystal Wyvern                    |
| Ember Pegasus 💎CIDinos                 | Ferox                                   | Indominus Rex Liquefied 💎CIDinos       | Chalk Golem                             |
| Sinomacrops                             | Magamasaur Crystal 💎CIDinos            | Jerboa Liquefied 💎 💎CIDinos           | Crystal Unka Dragon 💎CIDinos           |
| Tek Triceratops                         | Magmasaur                               | Liquefied Element Orb 💎CIDinos🚫       | Crystal Whelp 💎CIDinos                 |
| Tropeognathus                           | Otter Crystal Crowned💎CIDinos          | Quetzal Liquefied 💎CIDinos             | Desert Elemental 💎CIDinos 🚫           |
| X-Allosaurus                            | Otter Crystal Spine💎CIDinos            | Raptor Liquefied 💎CIDinos              | Ember Crystal Wyvern                    |
| X-Ankylosaurus                          | Paraceratherium Crystal 💎CIDinos       | Rex Liquefied 💎CIDinos                 | Ember Pegasus 💎CIDinos                 |
| X-Argentavis                            | Stygimoloch Crystal 💎CIDinos           | Snow Owl Crystal 💎CIDinos              | Golem Crystal 💎CIDinos                 |
| X-Paraceratherium                       | Tek Triceratops                         | Spinosaur Liquefied 💎CIDinos           | Griffin Crystal 💎CIDinos               |
| X-Parasaur                              | Therizinosaurus Crystal 💎CIDinos       | Stegosaurus Liquefied 💎CIDinos         | Ice Golem                               |
| X-Raptor                                | X-Otter                                 | Tek Giga                                | Lymantria Crystal Moth 💎CIDinos        |
| X-Rex                                   |                                         | Tek Triceratops                         | Phoenix                                 |
| X-Sabertooth                            |                                         | Thylacoleo Liquefied 💎CIDinos          | Phoenix Grand Embertross 💎CIDinos      |
| X-Spino                                 |                                         | Triceratops Liquefied 💎CIDinos         | Rubble Golem 🚫                         |
| X-Tapejara                              |                                         | Wyvern Liquefied 💎CIDinos              | Tropical Crystal Wyvern                 |
| X-Triceratops                           |                                         |                                         | X-Rock Elemental                        |
| X-Woolly Rhino                          |                                         |                                         |                                         |
| X-Yutyrannus                            |                                         |                                         |                                         |

<table><thead><tr><th>Genesis 2</th><th>Fjordur</th><th></th><th data-hidden>Aquatica</th></tr></thead><tbody><tr><td>All the creatures from Marnii: Horses</td><td>All the creatures from Marnii: Horses</td><td></td><td>Golden Striped Megalodon 🚫</td></tr><tr><td>All the creatures from Marnii: Wildlife</td><td>All the creatures from Marnii: Wildlife</td><td></td><td>Megachelon</td></tr><tr><td>Argentavis Crystal 💎CIDinos</td><td>Argentavis Crystal 💎CIDinos</td><td></td><td>Megachelon Crystal 💎CIDinos</td></tr><tr><td>Astrocetus</td><td>Deinonychus</td><td></td><td>Parakeet Fish School 🚫</td></tr><tr><td>Bloodstalker</td><td>Deinonychus Crystal 💎CIDinos</td><td></td><td>X-Basilosaurus</td></tr><tr><td>Ember Pegasus 💎CIDinos</td><td>Deinonychus Nightshade 💎</td><td></td><td>X-Dunkleosteus</td></tr><tr><td>Paraceratherium Crystal💎CIDinos</td><td>Ember Pegasus 💎CIDinos</td><td></td><td>X-Ichthyosaurus</td></tr><tr><td>Sheildhorn 💎CIDinos</td><td>Otter Crystal Crowned 💎CIDinos</td><td></td><td>X-Megalodon</td></tr><tr><td>Stygimoloch Crystal💎CIDinos</td><td>Otter Crystal Spine 💎CIDinos</td><td></td><td>X-Mosasaurus</td></tr><tr><td>Tek Giga</td><td>Paraceratherium Crystal 💎CIDinos</td><td></td><td>X-Sabertooth Salmon</td></tr><tr><td>Tek Triceratops</td><td>Sinomacrops</td><td></td><td></td></tr><tr><td>Therizinosaurus Crystal💎CIDinos</td><td>Therizinosaurus Crystal 💎CIDinos</td><td></td><td></td></tr><tr><td>Woolly Mammoth Crystal 💎CIDinos</td><td>Woolly Mammoth Crystal 💎CIDinos</td><td></td><td></td></tr><tr><td>Yutyrannus Ember 💎CIDinos</td><td>Yutyrannus Ember 💎CIDinos</td><td></td><td></td></tr></tbody></table>

***

<figure><img src="https://lh7-rt.googleusercontent.com/docsz/AD_4nXeN-ooW4HLRMm0VUuJhggu7pGAA182adNaKvKVgM4Jx5MD51vJT3EYQkwblETC7ggY96Yz1D5lSwQQY0XMREpugDsTDJXy2fYcyLU-5OSXvJ43Tslyukwnb6Z6U-fXtzqbbj29n4Q?key=GlTRPaxhvh8su6YjSiXOAg" alt=""><figcaption></figcaption></figure>

All content on this page has been accumulated from several places including the Wiki, The PACK Admin Team, and Players from The Pack cluster.


# The ISLAND

The Island is the map included with the base game. It is the first known ARK and is the first map that follows with the Conical storyline.

### Joining The Island: <a href="#joining-ebenus-astrum" id="joining-ebenus-astrum"></a>

<table data-view="cards"><thead><tr><th align="center"></th><th align="center"></th><th align="center"></th><th data-hidden data-card-target data-type="content-ref"></th><th data-hidden data-card-cover data-type="files"></th></tr></thead><tbody><tr><td align="center"><img src="https://772063455-files.gitbook.io/~/files/v0/b/gitbook-x-prod.appspot.com/o/spaces%2F-Lgje1lBxKKWXwqycB-v%2Fuploads%2FO3dBZF8E7W0BPX2mj77F%2Fimage.png?alt=media&amp;token=3391b1e1-56dc-4edc-a9db-2af742020fc6" alt=""></td><td align="center"><p><em><strong>Steam Workshop</strong></em></p><p><em><strong>The PACK Gaming</strong></em></p><p><em><strong>Canon Servers Mod Package</strong></em></p></td><td align="center"><strong>Please download the mod package prior to joining the server!</strong></td><td><a href="https://steamcommunity.com/sharedfiles/filedetails?id=1829354252">https://steamcommunity.com/sharedfiles/filedetails?id=1829354252</a></td><td></td></tr><tr><td align="center">     <img src="https://772063455-files.gitbook.io/~/files/v0/b/gitbook-x-prod.appspot.com/o/spaces%2F-Lgje1lBxKKWXwqycB-v%2Fuploads%2FguvVUVsiq6O4QlsbEiZG%2Fimage.png?alt=media&amp;token=c629b19e-ab66-4836-8aa6-7a6e22aa4498" alt=""><br><em><strong>THE ISLAND</strong></em></td><td align="center"><em><strong>STEAM JOIN LINK</strong></em> </td><td align="center"><em><strong>CLICK HERE TO JOIN  NOW!</strong></em></td><td><a href="steam://connect/45.92.39.92:27033">steam://connect/45.92.39.92:27033</a></td><td></td></tr><tr><td align="center"><img src="https://772063455-files.gitbook.io/~/files/v0/b/gitbook-x-prod.appspot.com/o/spaces%2F-Lgje1lBxKKWXwqycB-v%2Fuploads%2F5Zs5oTNjKGO7t1dbRsrZ%2Fimage.png?alt=media&amp;token=695bb699-6ac1-4af4-8e84-ad48f401dc57" alt=""></td><td align="center"><strong>Ark: Survival Evolved PvE Rules</strong></td><td align="center"><strong>Click here to go to our    ARK:Survival Evolved Rules!</strong></td><td><a href="https://faq.thepackgaming.com/rules/ark">https://faq.thepackgaming.com/rules/ark</a></td><td></td></tr><tr><td align="center"><img src="https://772063455-files.gitbook.io/~/files/v0/b/gitbook-x-prod.appspot.com/o/spaces%2F-Lgje1lBxKKWXwqycB-v%2Fuploads%2F0mAQajB7D5aZzZzztUJ7%2Fimage.png?alt=media&amp;token=d1ff7d61-82d5-43cc-a8ce-dc83b1d63bd0" alt=""></td><td align="center"><em><strong>The Island</strong></em></td><td align="center"><em><strong>Landmarks and Resources!</strong></em></td><td><a href="https://faq.thepackgaming.com/ark/ase-cluster/island#the-island-landmarks">https://faq.thepackgaming.com/ark/ase-cluster/island#the-island-landmarks</a></td><td></td></tr><tr><td align="center"><img src="https://772063455-files.gitbook.io/~/files/v0/b/gitbook-x-prod.appspot.com/o/spaces%2F-Lgje1lBxKKWXwqycB-v%2Fuploads%2FoE2lVTuhCTUL2RKNJf2g%2Fimage.png?alt=media&amp;token=66160b92-3c7f-4f39-a699-64b8b4986e03" alt=""></td><td align="center"><em><strong>The Island</strong></em></td><td align="center"><strong>ARK Survival Evolved Wiki</strong> </td><td><a href="https://ark.wiki.gg/wiki/The_Island">https://ark.wiki.gg/wiki/The_Island</a></td><td></td></tr><tr><td align="center"><img src="https://772063455-files.gitbook.io/~/files/v0/b/gitbook-x-prod.appspot.com/o/spaces%2F-Lgje1lBxKKWXwqycB-v%2Fuploads%2Fn00rZPX4SOnpmUvr9F3P%2Fimage.png?alt=media&amp;token=ee386e35-f208-4686-ba20-90c210da086b" alt=""></td><td align="center"><em><strong>The Island</strong></em></td><td align="center"><em><strong>Explorer Notes</strong></em> </td><td><a href="https://ark.wiki.gg/wiki/Explorer_Map/The_Island">https://ark.wiki.gg/wiki/Explorer_Map/The_Island</a></td><td></td></tr></tbody></table>

<figure><img src="https://772063455-files.gitbook.io/~/files/v0/b/gitbook-x-prod.appspot.com/o/spaces%2F-Lgje1lBxKKWXwqycB-v%2Fuploads%2FA2rPi07oFCXUZM6NNxUr%2FASE_ISL.png?alt=media&amp;token=3c72d1f7-e513-4e82-94d8-b3b881834a28" alt=""><figcaption></figcaption></figure>

### The Island

The Island is the first known ***ARK***. **The Island** consists of multiple climatic and geological regions. There are five larger mountains in the north and plains in the south. Three large Obelisks form a triangle on the Island.

**The Island** is a large landmass with several smaller islands surrounding the central island. Resources become more common as one travels farther inland, but so do the dangers. Some areas are higher in temperature while others are lower which can be life threatening. On the Island there are two types of weather, rain and fog. When it rains, you will hydrate and can fill your drinking source with rainwater. When fog rolls in, it is hard to see very far.

## The ISLAND Landmarks

<figure><img src="https://772063455-files.gitbook.io/~/files/v0/b/gitbook-x-prod.appspot.com/o/spaces%2F-Lgje1lBxKKWXwqycB-v%2Fuploads%2FFg5UwjsRq8Q0TsW0Qmqb%2FASA_Web_Card_GENERIC_2.png?alt=media&amp;token=9b01d0a5-44a2-473b-a5d2-bf6f7bb69449" alt=""><figcaption></figcaption></figure>

## Your Community Landmarks

Note: The CCC is included for those accessing this data for SP or other Clusters. Please Use the command Setplayerpos in SP and Preface with cheat if you are on a Multiplayer map.

{% tabs %}
{% tab title=" Community Builds" %}
Here you will find Places Like the Community Center, and refinery locations. Those noted have Open Transmitters, and all are part of the Teleport System.

<table><thead><tr><th width="257">Name</th><th width="150">Lat/Lon</th><th width="242">Notes:</th><th data-hidden>CCC</th></tr></thead><tbody><tr><td>Island Community Center</td><td>72.2|70.2</td><td>OPEN TRANSMITTER HERE</td><td>Cheat setplayerpos 161807 177657 -11035 52.38 -70.29</td></tr><tr><td>Volcano Public Refinery</td><td>39.8|38.</td><td>OPEN TRANSMITTER HERE</td><td>Cheat setplayerpos -95548 -81998 35728 62.03 -4.99</td></tr></tbody></table>
{% endtab %}

{% tab title="Teleporter System" %}
The PACK Admins upkeep a network of Teleporters for the use of our Players.

<table><thead><tr><th>Name</th><th width="150">Lat|Lon</th><th width="258">Notes</th><th data-hidden>CCC</th></tr></thead><tbody><tr><td>Island Community Center</td><td>72.2|70.2</td><td>OPEN TRANSMITTER HERE</td><td>161807 177657 -11035 52.38 -70.29</td></tr><tr><td>Claw Peak Resource Node</td><td></td><td>OPEN TRANSMITTER HERE</td><td>72397 -109288 24230 13.91 -25.28</td></tr><tr><td>Fars Peak Resorce Node</td><td>34.7|79.6</td><td>OPEN TRANSMITTER HERE</td><td>236813 -127903 22870 -10.53 -10.61</td></tr><tr><td>Hidden Lake Beaver Preserve</td><td>23.2|69.5</td><td></td><td></td></tr><tr><td>Penguin Island Preserve</td><td>22.4|9.6</td><td></td><td>-323492 -220729 -14208 4.55 0.83</td></tr><tr><td>Silica Pearl Preserve</td><td>37.8|18.</td><td></td><td>-255910 -97846 -14151 -170.06 -7.85</td></tr><tr><td>Volcano Public Refinery</td><td>39.8|38.</td><td>OPEN TRANSMITTER HERE</td><td>-95548 -81998 35728 62.03 -4.99</td></tr><tr><td>(Brute)Caverns of Lost Faith</td><td>53.7|10.3</td><td>(Underwater)</td><td>-317381 29416 -42799 0.43 7.06</td></tr><tr><td>(Clever)Central Cave</td><td>41.6|46.9</td><td></td><td>-24772 -67544 113 -3.48 0.00</td></tr><tr><td>(Cunning)Caverns of Lost Hope</td><td>46.0|88.6</td><td>(Underwater)</td><td>309253 -32313 -32723 -3.86 22.30</td></tr><tr><td>(Devourer)North East Cave</td><td>14.8|85.4</td><td></td><td>283223 -281450 -13411 157.34 -12.43</td></tr><tr><td>(Hunter)Lower South Cave</td><td>80.1|53.6</td><td></td><td>29173 240448 -13270 106.47 0.29</td></tr><tr><td>(Immune)Swamp Cave</td><td>62.7|37.3</td><td></td><td>-101458 101693 -5119 -0.78 -5.53</td></tr><tr><td>(Massive)Lava Cave</td><td>70.5|86.0</td><td></td><td>288253 163967 -14181 -101.70 2.45</td></tr><tr><td>(Pack)Upper South Cave</td><td>68.2|56.2</td><td></td><td>49639 145910 -13384 -69.87 4.87</td></tr><tr><td>(Skylord)North West Cave</td><td>19.2|19.1</td><td></td><td>-247475 -246495 -11056 100.54 -2.02</td></tr><tr><td>(Strong)Snow Cave</td><td>29.4|31.9</td><td></td><td>-144406 -164956 79 -124.53 10.30</td></tr></tbody></table>
{% endtab %}

{% tab title="Artifacts " %}
Note: The CCC is included for those accessing this data for SP or other Clusters. Please Use the command Setplayerpos in SP and Preface with cheat if you are on a Multiplayer map.

<table><thead><tr><th width="222">Name</th><th width="252">Lat|Lon</th><th width="162">Notes</th><th data-hidden>CCC</th></tr></thead><tbody><tr><td>1. Artifact Of The Brute Caverns of Lost Faith Entrance</td><td>53.7°|10.4°</td><td>(Underwater)</td><td>cheat setplayerpos -316800 29600 -40000</td></tr><tr><td>2. Artifact of the Clever Cave Entrance CENTRAL CAVE</td><td>41.5° Lat, 46.9° Lon</td><td></td><td>cheat setplayerpos -23900 -67300 0</td></tr><tr><td>3. Artifact of the Cunning Caverns of Lost Hope Entrance</td><td>45.9° Lat, 88.9° Lon</td><td>(Underwater)</td><td>cheat setplayerpos 311200 -32800 -31000</td></tr><tr><td>4. Artifact of the Devourer Cave Entrance NORTH EAST CAVE</td><td>14.7° Lat, 85.4° Lon</td><td></td><td>cheat setplayerpos 283100 -281400 -13400</td></tr><tr><td>5. Artifact of the Hunter Cave Entrance LOWER SOUTH CAVE</td><td>80.3° Lat, 53.5° Lon</td><td></td><td>cheat setplayerpos 28600 242300 -13200</td></tr><tr><td>6. Artifact of the Immune Cave Entrance SWAMP CAVE</td><td>67.1° Lat, 86.0° Lon</td><td></td><td>cheat setplayerpos -101400 101700 -4300</td></tr><tr><td>7. Artifact of the Massive Cave Entrance LAVA CAVE</td><td>70.6° Lat, 86.1° Lon</td><td></td><td>cheat setplayerpos 289100 165000 -14100</td></tr><tr><td>8. Artifact of the Pack Cave Entrance UPPER SOUTH CAVE</td><td>62.2° Lat, 39.6° Lon</td><td></td><td>cheat setplayerpos 49500 146100 -13400</td></tr><tr><td>9. Artifact of the Skylord Cave Entrance NORTH WEST CAVE</td><td>19.3° Lat, 19.0° Lon</td><td></td><td>cheat setplayerpos -247500 -246200 -11100</td></tr><tr><td>10. Artifact of the Strong Cave Entrance SNOW CAVE</td><td>29.1° Lat, 31.8° Lon</td><td></td><td>cheat setplayerpos -144500 -165000 200</td></tr></tbody></table>
{% endtab %}
{% endtabs %}

### Common Landmarks and Places of Interest

{% tabs %}
{% tab title="Resource Node Areas" %}
Some of the Resource Rich Nodes that have been Discovered on The Island

<table><thead><tr><th width="155">Name</th><th width="150">Lat|Lon</th><th>Notes</th><th data-hidden>CCC</th></tr></thead><tbody><tr><td>FARS PEAK </td><td>34.7|79.6</td><td>The Top of Fars Peak is covered in Metal and Crystal nodes.</td><td>cheat setplayerpos 229964 -129350 25234.9</td></tr><tr><td>OBSIDIAN FEILD:</td><td></td><td>On the East Side of Fars Peak</td><td>cheat setplayerpos 258606 -129991 5031</td></tr><tr><td>OIL FIELDS</td><td></td><td>Area rich in Oil Rocks along the North Shore of The Island</td><td>cheat setplayerpos -133218 -269850 -14074 105.97 -26.23</td></tr><tr><td>OIL ICEBERG:</td><td></td><td>Iceberg in the North West corner of the map.</td><td>cheat setplayerpos -320904 -150005 -13451.6</td></tr><tr><td> Hill above the Swamps</td><td></td><td>CRYSTAL&#x26; METAL ON TOP OF HILL</td><td>cheat setplayerpos 86296.8 115832 -431.49</td></tr><tr><td> S. Isles Hilltop</td><td></td><td>Crystal&#x26; Metal on top of hill</td><td>cheat setplayerpos -23253.8 204409 1718.26</td></tr><tr><td>Penguin Island </td><td>22.4|9.6</td><td>Organic Poly and Oil</td><td>Cheat SetPlayerPos -323287 -220733 -14200</td></tr><tr><td>Hidden Lake Beaver Sanctuary</td><td>23.2|69.5</td><td>Lake Sanctuary for Beavers.</td><td>cheat setplayerpos cheat setplayerpos 174824 -199201 -13578</td></tr><tr><td>Silica Pearl Harvest grounds </td><td>37.8|18.</td><td>silica pearls in the river around the area.</td><td>cheat setplayerpos -255831 -97856 -14138 -166.70 -67.64</td></tr></tbody></table>
{% endtab %}

{% tab title="Underwater Caves:" %}
These Caves are rich in Crystal, Oil, Metal and Obsidian and Silica Pearls. Please do not Build in these caves. (SCUBA SUIT REQUIRED FOR ALL THE FOLLOWING)

<table><thead><tr><th>Name</th><th width="150">Lat|Lon</th><th data-hidden>Notes</th><th data-hidden>CCC</th></tr></thead><tbody><tr><td>NW Underwater Cave Entrance (Underwater)</td><td>16.0° Lat, 10.1° Lon.</td><td></td><td>cheat setplayerpos -312000 -271000 -35500</td></tr><tr><td>NW Underwater Cave</td><td></td><td></td><td>cheat setplayerpos -319200 -272000 -37000</td></tr><tr><td>NNW Underwater Cave Entrance (Underwater)</td><td>10.0° Lat, 21.5° Lon.</td><td></td><td>cheat setplayerpos -226800 -314500 -40000</td></tr><tr><td>NNW Underwater Cave</td><td></td><td></td><td>cheat setplayerpos -228000 -320000 -40700</td></tr><tr><td>North Underwater Cave Entrance (Underwater)</td><td>10.4° Lat, 39.5° Lon.</td><td></td><td>cheat setplayerpos -77000 -315000 -40400</td></tr><tr><td>North Underwater Cave</td><td></td><td></td><td>cheat setplayerpos -82000 -316000 -41800</td></tr><tr><td>NE Underwater Cave Entrance (Underwater)</td><td>07.9° Lat, 90.1° Lon.</td><td></td><td>cheat setplayerpos 324000 -332800 -43800</td></tr><tr><td>NE Underwater Cave</td><td></td><td></td><td>cheat setplayerpos 318400 -336800 -44000</td></tr><tr><td>East Upper Central Underwater Cave Entrance (Underwater)</td><td>36.3° Lat, 91.5° Lon.</td><td></td><td>cheat setplayerpos 333600 -110400 -44000</td></tr><tr><td>East Upper Central Underwater Cave</td><td></td><td></td><td>cheat setplayerpos 332000 -109600 -45000</td></tr><tr><td>East Upper South Underwater Cave Entrance (Underwater)</td><td>50.5° Lat, 11.2° Lon.</td><td></td><td>cheat setplayerpos 338400 23200 -44400</td></tr><tr><td>East Upper South Underwater Cave</td><td></td><td></td><td>cheat setplayerpos 333600 21600 -44500</td></tr><tr><td>SE Underwater Cave Entrance (Underwater)</td><td>52.7° Lat, 91.9° Lon.</td><td></td><td>cheat setplayerpos 325500 300000 -44000</td></tr><tr><td>SE Underwater Cave</td><td></td><td></td><td>cheat setplayerpos 320800 301600 -45000</td></tr><tr><td>SSE Underwater Cave Entrance (Underwater)</td><td>83.0° Lat, 09.9° Lon.</td><td></td><td>cheat setplayerpos 172000 330400 -43600</td></tr><tr><td>SSE Underwater Cave</td><td></td><td></td><td>cheat setplayerpos 170400 324800 -44000</td></tr><tr><td>SSW Underwater Cave Entrance (Underwater)</td><td>90.8° Lat, 13.0° Lon.</td><td></td><td>cheat setplayerpos -109600 324800 -44000</td></tr><tr><td>SSW Underwater Cave</td><td></td><td></td><td>cheat setplayerpos -106400 320000 -44000</td></tr><tr><td>SW Underwater Cave Entrance (Underwater)</td><td>89.8° Lat, 36.8° Lon.</td><td></td><td>cheat setplayerpos -295200 325600 -44500</td></tr><tr><td>SW Underwater Cave</td><td></td><td></td><td>cheat setplayerpos -291200 327200 -45300</td></tr><tr><td>SW Lower South Underwater Cave Entrance (Underwater)</td><td>90.3° Lat, 71.3° Lon.</td><td></td><td>cheat setplayerpos -318400 270400 -40000</td></tr><tr><td>SW Lower South Underwater Cave</td><td></td><td></td><td>cheat setplayerpos -317600 264800 -40000</td></tr><tr><td>West Central Underwater Cave Entrance (Underwater)</td><td>87.1° Lat, 90.2° Lon.</td><td></td><td>cheat setplayerpos -312800 -4000 -40000</td></tr><tr><td>West Central Underwater Cave</td><td></td><td></td><td>cheat setplayerpos -311200 800 -42000</td></tr></tbody></table>
{% endtab %}
{% endtabs %}

![Map of the Island with areas Labeled](https://772063455-files.gitbook.io/~/files/v0/b/gitbook-legacy-files/o/assets%2F-Lgje1lBxKKWXwqycB-v%2F-Lm9Pvh6efRc2iH0n0sT%2F-Lm9TmzYJ2KxqCod8EJp%2FThe_Island_Topographic_Map.png?alt=media\&token=be850442-b78f-4a48-8c13-6a5dd7daa8bf)

<figure><img src="https://772063455-files.gitbook.io/~/files/v0/b/gitbook-x-prod.appspot.com/o/spaces%2F-Lgje1lBxKKWXwqycB-v%2Fuploads%2F8Mrjs5a4lEQwX52RGOGC%2Fimage.png?alt=media&amp;token=56956fa0-c4d0-4439-be22-7cae4caf4542" alt=""><figcaption></figcaption></figure>

*All content on this page has been accumulated from several places including the Wiki, The PACK Admin Team, the DomiNATION Admin Team, and Players from both clusters.*


# ABERRATION

<figure><img src="https://772063455-files.gitbook.io/~/files/v0/b/gitbook-x-prod.appspot.com/o/spaces%2F-Lgje1lBxKKWXwqycB-v%2Fuploads%2FncAYWPsXFdCAs1Nehkrf%2Fimage.png?alt=media&amp;token=1f04b3c4-10bc-47dc-9a92-31db65eb522d" alt=""><figcaption></figcaption></figure>

## Joining Aberration

<table data-view="cards"><thead><tr><th align="center"></th><th align="center"></th><th align="center"></th><th data-hidden data-card-target data-type="content-ref"></th><th data-hidden data-card-cover data-type="files"></th></tr></thead><tbody><tr><td align="center"><img src="https://772063455-files.gitbook.io/~/files/v0/b/gitbook-x-prod.appspot.com/o/spaces%2F-Lgje1lBxKKWXwqycB-v%2Fuploads%2FO3dBZF8E7W0BPX2mj77F%2Fimage.png?alt=media&amp;token=3391b1e1-56dc-4edc-a9db-2af742020fc6" alt=""></td><td align="center"><p><em><strong>Steam Workshop</strong></em></p><p><em><strong>The PACK Gaming</strong></em></p><p><em><strong>Canon Servers Mod Package</strong></em></p></td><td align="center"><strong>Please download the mod package prior to joining the server!</strong></td><td><a href="https://steamcommunity.com/sharedfiles/filedetails?id=1829354252">https://steamcommunity.com/sharedfiles/filedetails?id=1829354252</a></td><td></td></tr><tr><td align="center">     <br><img src="https://772063455-files.gitbook.io/~/files/v0/b/gitbook-x-prod.appspot.com/o/spaces%2F-Lgje1lBxKKWXwqycB-v%2Fuploads%2FLv1uWhQBlXi6SSqZxmgH%2Fimage.png?alt=media&amp;token=7923eca4-ed14-40e8-956a-0085d337be0a" alt=""></td><td align="center"><em><strong>JOIN LINK'S</strong></em></td><td align="center">USE DIRECT CONNECT IN STEAM AND IP: 66.153.149.147:27031 <br>OR <a href="https://www.battlemetrics.com/servers/ark/5667758">https://www.battlemetrics.com/servers/ark/5667758</a> FIND THE JOIN SERVER BUTTON.</td><td></td><td></td></tr><tr><td align="center"><img src="https://772063455-files.gitbook.io/~/files/v0/b/gitbook-x-prod.appspot.com/o/spaces%2F-Lgje1lBxKKWXwqycB-v%2Fuploads%2F8T7lkGhYLD6d9f6qvQ4Y%2Fimage.png?alt=media&amp;token=acfcb1da-de4b-494d-b233-8343f6799dfe" alt=""></td><td align="center"><strong>Ark: Survival Evolved PvE Rules</strong></td><td align="center"><strong>Click here to go to our    ARK:Survival Evolved Rules!</strong></td><td><a href="https://faq.thepackgaming.com/rules/ark">https://faq.thepackgaming.com/rules/ark</a></td><td></td></tr><tr><td align="center"><img src="https://772063455-files.gitbook.io/~/files/v0/b/gitbook-x-prod.appspot.com/o/spaces%2F-Lgje1lBxKKWXwqycB-v%2Fuploads%2FGzh0MqcJshVvYkAXAI3S%2Fimage.png?alt=media&amp;token=d10f143e-d62f-436b-b068-46416d6b29c1" alt="" data-size="original"></td><td align="center"><em><strong>Aberration</strong></em></td><td align="center"><em><strong>Landmarks and Resources!</strong></em></td><td><a href="https://ark.wiki.gg/wiki/Resource_Map/Aberration">https://ark.wiki.gg/wiki/Resource_Map/Aberration</a></td><td></td></tr><tr><td align="center"><img src="https://772063455-files.gitbook.io/~/files/v0/b/gitbook-x-prod.appspot.com/o/spaces%2F-Lgje1lBxKKWXwqycB-v%2Fuploads%2Fp4DUwVegArlRMswptfgH%2Fimage.png?alt=media&amp;token=ad6288ce-81bd-48c8-a93e-3c6b832416bb" alt="" data-size="original"></td><td align="center"><em><strong>Aberration</strong></em></td><td align="center"><strong>ARK Survival Evolved Wiki</strong> </td><td><a href="https://ark.wiki.gg/wiki/Aberration">https://ark.wiki.gg/wiki/Aberration</a></td><td></td></tr><tr><td align="center"></td><td align="center"></td><td align="center"></td><td></td><td></td></tr></tbody></table>

## Landmarks and Places of Interest

<figure><img src="https://772063455-files.gitbook.io/~/files/v0/b/gitbook-x-prod.appspot.com/o/spaces%2F-Lgje1lBxKKWXwqycB-v%2Fuploads%2Fe7GAjvb5o9GEO4YPvbX0%2FABR_CC-Base_2023.png?alt=media&amp;token=e07e2e8e-df7c-4f29-bc01-631c08d2b580" alt=""><figcaption><p>COMMUNITY CENTER ABERRATION</p></figcaption></figure>

Landmarks with GPS and ADMIN Teleport Locators. All Ark Map Residents should pick up an Awesome Teleport Remote at a Comm

{% tabs %}
{% tab title="Community Builds:" %}
Here you will find Places Like the Community Center, and refinery locations. Those noted have Open Transmitters, and all are part of the Teleport System.
{% endtab %}

{% tab title="Teleporter System" %}
The PACK Admins upkeep a network of Teleporters for the use of our Players.
{% endtab %}

{% tab title="Artifact Caves" %}

{% endtab %}
{% endtabs %}

{% tabs %}
{% tab title="NO BUILD AREAS" %}

{% endtab %}

{% tab title="RESOURCES" %}

{% endtab %}

{% tab title="Points of Interest " %}
Caves, Ruins and other Interesting Places on Aberration.
{% endtab %}
{% endtabs %}

***

<figure><img src="https://lh7-rt.googleusercontent.com/docsz/AD_4nXeN-ooW4HLRMm0VUuJhggu7pGAA182adNaKvKVgM4Jx5MD51vJT3EYQkwblETC7ggY96Yz1D5lSwQQY0XMREpugDsTDJXy2fYcyLU-5OSXvJ43Tslyukwnb6Z6U-fXtzqbbj29n4Q?key=GlTRPaxhvh8su6YjSiXOAg" alt=""><figcaption></figcaption></figure>

All content on this page has been accumulated from several places including the Wiki, The PACK Admin Team, and Players from The Pack cluster.


# EXTINCTION

Extinction is the third paid Expansion Pack for ARK: Survival Evolved. Extinction was released on November 6th, 2018 for PC.

### Joining Extinction:

<table data-view="cards"><thead><tr><th align="center"></th><th align="center"></th><th align="center"></th><th data-hidden data-card-target data-type="content-ref"></th><th data-hidden data-card-cover data-type="files"></th></tr></thead><tbody><tr><td align="center"><img src="https://772063455-files.gitbook.io/~/files/v0/b/gitbook-x-prod.appspot.com/o/spaces%2F-Lgje1lBxKKWXwqycB-v%2Fuploads%2FO3dBZF8E7W0BPX2mj77F%2Fimage.png?alt=media&amp;token=3391b1e1-56dc-4edc-a9db-2af742020fc6" alt=""></td><td align="center"><p><em><strong>Steam Workshop</strong></em></p><p><em><strong>The PACK Gaming</strong></em></p><p><em><strong>Canon Servers Mod Package</strong></em></p></td><td align="center"><strong>Please download the mod package prior to joining the server!</strong></td><td><a href="https://steamcommunity.com/sharedfiles/filedetails?id=1829354252">https://steamcommunity.com/sharedfiles/filedetails?id=1829354252</a></td><td></td></tr><tr><td align="center">   <img src="https://772063455-files.gitbook.io/~/files/v0/b/gitbook-x-prod.appspot.com/o/spaces%2F-Lgje1lBxKKWXwqycB-v%2Fuploads%2FCvDAUzB5KoRpzQ8XwgJt%2Fimage.png?alt=media&amp;token=0d4bf58a-a6dd-49bf-9fdc-20170a3182a6" alt="">  <br><em><strong>Extinction</strong></em></td><td align="center"><em><strong>STEAM JOIN LINK</strong></em> </td><td align="center"><em><strong>CLICK HERE TO JOIN  NOW!</strong></em></td><td><a href="steam://connect/45.92.39.91:27017">steam://connect/45.92.39.91:27017</a></td><td></td></tr><tr><td align="center"><img src="https://772063455-files.gitbook.io/~/files/v0/b/gitbook-x-prod.appspot.com/o/spaces%2F-Lgje1lBxKKWXwqycB-v%2Fuploads%2FFDDanrCTGiq4abd0570K%2Fimage.png?alt=media&amp;token=aaa43c92-4a3e-4eba-b7d6-3848cb52980e" alt=""></td><td align="center"><strong>Ark: Survival Evolved PvE Rules</strong></td><td align="center"><strong>Click here to go to our    ARK:Survival Evolved Rules!</strong></td><td><a href="https://faq.thepackgaming.com/rules/ark">https://faq.thepackgaming.com/rules/ark</a></td><td></td></tr><tr><td align="center"><img src="https://772063455-files.gitbook.io/~/files/v0/b/gitbook-x-prod.appspot.com/o/spaces%2F-Lgje1lBxKKWXwqycB-v%2Fuploads%2FVxCeiEVBdRrYYYw6p9gb%2Fimage.png?alt=media&amp;token=cf5e12fa-ff64-400e-a77f-d949698a9ef0" alt=""></td><td align="center"><em><strong>Extinction</strong></em></td><td align="center"><em><strong>Landmarks and Resources!</strong></em></td><td><a href="https://faq.thepackgaming.com/ark/ase-cluster/aberration#aberration-landmarks">https://faq.thepackgaming.com/ark/ase-cluster/aberration#aberration-landmarks</a></td><td></td></tr><tr><td align="center"><img src="https://772063455-files.gitbook.io/~/files/v0/b/gitbook-x-prod.appspot.com/o/spaces%2F-Lgje1lBxKKWXwqycB-v%2Fuploads%2FwtgzreTFcPfYlA9ZWsMK%2Fimage.png?alt=media&amp;token=f090548f-0ae3-4c7d-a83c-034f087f2a97" alt=""></td><td align="center"><em><strong>Extinction</strong></em></td><td align="center"><strong>ARK Survival Evolved Wiki</strong> </td><td><a href="https://ark.wiki.gg/wiki/Aberration">https://ark.wiki.gg/wiki/Aberration</a></td><td></td></tr><tr><td align="center"><img src="https://772063455-files.gitbook.io/~/files/v0/b/gitbook-x-prod.appspot.com/o/spaces%2F-Lgje1lBxKKWXwqycB-v%2Fuploads%2Fn00rZPX4SOnpmUvr9F3P%2Fimage.png?alt=media&amp;token=ee386e35-f208-4686-ba20-90c210da086b" alt=""></td><td align="center"><em><strong>Extinction</strong></em></td><td align="center"><em><strong>Explorer Notes</strong></em></td><td><a href="https://ark.wiki.gg/wiki/Explorer_Map/Extinction">https://ark.wiki.gg/wiki/Explorer_Map/Extinction</a></td><td></td></tr></tbody></table>

<figure><img src="https://772063455-files.gitbook.io/~/files/v0/b/gitbook-x-prod.appspot.com/o/spaces%2F-Lgje1lBxKKWXwqycB-v%2Fuploads%2FF4Z8ixPzt0gjEgkixlCt%2FASE_EXT.png?alt=media&amp;token=de035bda-1b75-4392-b8c3-7ad59bad37cd" alt=""><figcaption></figcaption></figure>

### Extinction

Extinction places survivors on an Element-infested, ravaged planet filled with fantastical creatures both organic and technological. Earth holds both the secrets of the past and the keys to its salvation.

#### The Corrupted Earth Map

This map, set on **Ravaged Earth** rather than an ARK up in space, forces players to survive *an Earth unfamiliar to us:* one of strange features and stranger creatures.&#x20;

In the center of the map lies an abandoned city, usually referred to as the *Great City or Sanctuary*. It is the remains of some great technologically advanced civilization, the same one that built the ARKs.&#x20;

Outside of the city borders, pockets of life can be hard to find among the corrupted wasteland. They are still there, however, in the protective borders of the Proto-ARKs. To the southeast, the *Desert Proto-ARK* exists. To the north, the *Snow Dome*, a second Proto-ARK. Another exists to the northwest, called the *Sunken Forest*, which was supposed to be another ARK but failed when it collapsed into the ground, presumably due to there being a large sinkhole underneath it.&#x20;

Toward the bottom left of the map lie the *Sulfur Fields*. Despite containing acid in place of water, and being harsh, dry and rocky, it is one of the more livable areas of the wasteland. *The Forbidden Zone*, considered by some players to be the most dangerous part of the wasteland, makes up the northern center of the map. The central south of the wasteland holds the *Sweeping Spires* and the *Sludge Basin*. Both harsh and uninviting, but good places for resource gathering.

*"Despite being called 'dead' this Earth may be more alive than we first thought, but with life we don't understand."*

***

## Your Community Landmarks <a href="#your-community-landmarks" id="your-community-landmarks"></a>

<figure><img src="https://772063455-files.gitbook.io/~/files/v0/b/gitbook-x-prod.appspot.com/o/spaces%2F-Lgje1lBxKKWXwqycB-v%2Fuploads%2F11YzjnvFTJduk3L7drkN%2FEXT_CC-BASE_2023_CLOSEUP.png?alt=media&amp;token=8ff6cf3f-2f2a-4dad-a637-32cea77be7a9" alt=""><figcaption><p>THE PACK EXTINCTION COMMUNITY CENTER SERVER BASE - 2023</p></figcaption></figure>

Note: The CCC is included for those accessing this data for SP or other Clusters. Please Use the command Setplayerpos in SP and Preface with cheat if you are on a Multiplayer map.

{% tabs %}
{% tab title="Community Builds:" %}
Here you will find Places Like the Community Center, and refinery locations. Those noted have Open Transmitters, and all are part of the Teleport System.

| Name                        | Lat/Lon    | Notes                 | CCC                                                 |
| --------------------------- | ---------- | --------------------- | --------------------------------------------------- |
| Extinction Community Center | 52.0\|48.1 | OPEN TRANSMITTER HERE | cheat setplayerpos -14919 15713 -23714 -138.00 2.79 |
| Extinction Refinery         | 52.6\|40.4 | OPEN TRANSMITTER HERE | cheat setplayerpos -76548 20622 -34661 136.49 -3.59 |
| {% endtab %}                |            |                       |                                                     |

{% tab title="Teleporter System:" %}
The PACK Admins upkeep a network of Teleporters for the use of our Players.

| Name                                        | Lat/Lon    | Notes                                   | CCC                                                     |
| ------------------------------------------- | ---------- | --------------------------------------- | ------------------------------------------------------- |
| (Chaos)(Desert Titan) Desert Cave Entrance  | 97.2\|90.2 | Desert Titan Terminal & Chaos Artifact  | cheat setplayerpos 321458 377459 -60197 148.43 -8.36    |
| (Growth)(Forest Titan) Forest Cave Entrance | 15.9\|50.5 | Forest Titan Terminal & Growth Artifact | cheat setplayerpos 4091 -272752 -146084 -1.61 -11.08    |
| (Void)(Ice Titan) Ice Cave Entrance         | 6.7\|85.9  | Ice Titan Terminal & Void Artifact      | cheat setplayerpos 286675 -346210 -40786 6.02 -29.58    |
| Desert Biome                                | 81.4\|90.3 |                                         | cheat setplayerpos 322354 251438 -27125 -97.65 -0.34    |
| Extinction Community Center                 | 52.0\|48.1 | OPEN TRANSMITTER HERE                   | cheat setplayerpos -14919 15713 -23714 -138.00 2.79     |
| Extinction Refinery                         | 52.6\|40.4 | OPEN TRANSMITTER HERE                   | cheat setplayerpos -76548 20622 -34661 136.49 -3.59     |
| Forest Biome                                | 18.8\|25.1 |                                         | cheat setplayerpos -199487 -249767 -120590 105.40 27.11 |
| King Titan Return                           | 5.7\|46.4  |                                         | cheat setplayerpos -28625 -354419 27494 171.74 0.00     |
| King Titan Terminal                         | 3.5\|49.2  |                                         | cheat setplayerpos -6319 -372071 36795 66.11 -26.86     |
| Sludge Basin                                | 81.3\|31.0 | OPEN TRANSMITTER HERE                   | cheat setplayerpos -152306 250574 -44998 7.29 -0.69     |
| Snow Biome                                  | 17.3\|87.9 |                                         | cheat setplayerpos 303257 -261643 31508 -110.40 -0.26   |
| {% endtab %}                                |            |                                         |                                                         |

{% tab title="Artifact Caves" %}

<table><thead><tr><th>Name</th><th>Lat/Lon</th><th>Notes</th><th data-hidden>CCC</th></tr></thead><tbody><tr><td>Artifact of the Chaos Desert Cave Entrance</td><td>86.4|71.7</td><td></td><td>cheat SetPlayerPos 162457 299532 -39681</td></tr><tr><td>Artifact of the Chaos</td><td>93.9|88.0</td><td></td><td>cheat SetPlayerPos 304100 351137 -61008</td></tr><tr><td>Artifact of the Growth Forest Cave Entrance</td><td>11.8|38.1</td><td></td><td>cheat SetPlayerPos -86793 -305496 -132371</td></tr><tr><td>Artifact of the Growth</td><td>13.5|49.2</td><td></td><td>cheat SetPlayerPos -5816 -292372 -142660</td></tr><tr><td>Artifact of the Void Ice Cave Entrance</td><td>20.1|59.7</td><td></td><td>cheat SetPlayerPos 97604 -236945 -11472</td></tr><tr><td>Artifact of the Void</td><td>13.5|84.0</td><td></td><td>cheat SetPlayerPos 272301 -291753 -38641</td></tr></tbody></table>
{% endtab %}
{% endtabs %}

### Common Landmarks and Places of Interest <a href="#common-landmarks-and-places-of-interest" id="common-landmarks-and-places-of-interest"></a>

{% tabs %}
{% tab title="NO Build Areas" %}

{% endtab %}

{% tab title="Resource Node Areas" %}
Some of the Resource Rich Nodes that have been Discovered on Extinction

| Name                | Lat/Lon    | Notes                 | CCC                                                 |
| ------------------- | ---------- | --------------------- | --------------------------------------------------- |
| Oil                 |            |                       | Cheat SetPlayerPos -152573 248966 -44410            |
| Sulphur             |            |                       |                                                     |
| Obsidian            |            |                       | Cheat SetPlayerPos -262260 304268 -45494            |
| Extinction Refinery | 52.6\|40.4 | OPEN TRANSMITTER HERE | cheat setplayerpos -76548 20622 -34661 136.49 -3.59 |
| Sludge Basin        | 81.3\|31.0 | OPEN TRANSMITTER HERE | cheat setplayerpos -152306 250574 -44998 7.29 -0.69 |
| {% endtab %}        |            |                       |                                                     |

{% tab title="Places of Interest:" %}
Caves, Ruins and other Interesting Places on Extinction

| Name                                                  | Lat/Lon    | Notes | CCC                                                 |
| ----------------------------------------------------- | ---------- | ----- | --------------------------------------------------- |
| Control Center                                        |            |       | Cheat SetPlayerPos -269965 -15271 -14630            |
| Delta Tower                                           |            |       | Cheat SetPlayerPos -268739 102157 -25940            |
| Sanctuary City (Downtown Hub)                         |            |       | cheat SetPlayerPos 48430 -30832 -20564              |
| Sanctuary City (Memorial Park)                        |            |       | cheat SetPlayerPos 82505 -1811 -24794               |
| Sanctuary City (Potential Base)                       |            |       | cheat SetPlayerPos -27445 91990 -34551              |
| Sanctuary City (Potential Base)                       |            |       | cheat SetPlayerPos -120682 -28659 6759              |
| Sanctuary City (Sanctuary Park)                       |            |       | cheat SetPlayerPos -47938 3048 -23932               |
| Sanctuary City (Sanctuary Parkway Arch North)         |            |       | cheat SetPlayerPos -49941 -89659 -20484             |
| Sanctuary City (Sanctuary Parkway Arch South)         |            |       | cheat SetPlayerPos -51264 91750 -34536              |
| Sanctuary City Central Tower Balcony (Potential Base) |            |       | cheat SetPlayerPos -50057 -9968 58449               |
| Sanctuary City Central Tower Cove                     |            |       | cheat SetPlayerPos -50207 1446 99735                |
| Sanctuary City Central Tower Tip Top                  |            |       | cheat SetPlayerPos -50337 4725 127596               |
| Sanctuary City Forth Level                            |            |       | cheat SetPlayerPos -104240 -24735 -3923             |
| Sanctuary City Fountain                               |            |       | cheat SetPlayerPos -86694 72644 -35809              |
| Sanctuary City Ground Level                           | 52.0\|48.1 |       | cheat SetPlayerPos -14919 15713 -23714 -138.00 2.79 |
| Sanctuary City Second Level                           |            |       | cheat SetPlayerPos -65393 26892 -22327              |
| Sanctuary City Third Level                            |            |       | cheat SetPlayerPos -49257 -15597 -9440              |
| Sanctuary City Tower Balcony 2 (Potential Base)       |            |       | cheat SetPlayerPos -30228 -39021 16419              |
| The Barracks                                          |            |       | Cheat SetPlayerPos -284411 -96057 -23280            |
| The Forbidden Zone                                    |            |       | Cheat SetPlayerPos -64000 -387200 11087             |
| The Trench                                            |            |       | Cheat SetPlayerPos 159805 16895 -44178              |
| {% endtab %}                                          |            |       |                                                     |
| {% endtabs %}                                         |            |       |                                                     |

![Extinction Topographical Map.](https://772063455-files.gitbook.io/~/files/v0/b/gitbook-legacy-files/o/assets%2F-Lgje1lBxKKWXwqycB-v%2F-Lm9cuBZ-1ouUdirzocz%2F-Lm9dFa-RQrDfoqzb3iO%2FExtinction_Topographic_Map.png?alt=media\&token=5a8c01c5-ffb0-4c60-bc92-bb2b62b26ce2)

<figure><img src="https://772063455-files.gitbook.io/~/files/v0/b/gitbook-x-prod.appspot.com/o/spaces%2F-Lgje1lBxKKWXwqycB-v%2Fuploads%2FCuxebhCo1pbkPW4ttrwT%2Fimage.png?alt=media&amp;token=1c5797b9-1592-4128-b35d-8290b87fc7a4" alt=""><figcaption></figcaption></figure>

*All content on this page has been accumulated from several places including the Wiki, The PACK Admin Team, the DomiNATION Admin Team, and Players from both clusters.*


# RAGNAROK

Ragnarok is a free, official, non-canonical DLC expansion map for ARK: Survival Evolved. Ragnarok was released on June 12, 2017 for the PC. At the time it was only 75% complete.

### Joining Ragnarok

<table data-view="cards"><thead><tr><th align="center"></th><th align="center"></th><th align="center"></th><th data-hidden data-card-target data-type="content-ref"></th><th data-hidden data-card-cover data-type="files"></th></tr></thead><tbody><tr><td align="center"><img src="https://772063455-files.gitbook.io/~/files/v0/b/gitbook-x-prod.appspot.com/o/spaces%2F-Lgje1lBxKKWXwqycB-v%2Fuploads%2FO3dBZF8E7W0BPX2mj77F%2Fimage.png?alt=media&amp;token=3391b1e1-56dc-4edc-a9db-2af742020fc6" alt=""></td><td align="center"><p><em><strong>Steam Workshop</strong></em></p><p><em><strong>The PACK Gaming</strong></em></p><p><em><strong>Canon Servers Mod Package</strong></em></p></td><td align="center"><strong>Please download the mod package prior to joining the server!</strong></td><td><a href="https://steamcommunity.com/sharedfiles/filedetails?id=1829354252">https://steamcommunity.com/sharedfiles/filedetails?id=1829354252</a></td><td></td></tr><tr><td align="center"><img src="https://772063455-files.gitbook.io/~/files/v0/b/gitbook-x-prod.appspot.com/o/spaces%2F-Lgje1lBxKKWXwqycB-v%2Fuploads%2FOh9jxz8b1V9B1YNVQeyR%2Fimage.png?alt=media&amp;token=2ca7ec0a-6287-4228-9590-4d46508f5fe8" alt=""><br><em><strong>RAGNAROK</strong></em>     </td><td align="center"><em><strong>STEAM JOIN LINK</strong></em> </td><td align="center"><em><strong>CLICK HERE TO JOIN  NOW!</strong></em></td><td><a href="steam://connect/45.92.39.91:27027">steam://connect/45.92.39.91:27027</a></td><td></td></tr><tr><td align="center"><img src="https://772063455-files.gitbook.io/~/files/v0/b/gitbook-x-prod.appspot.com/o/spaces%2F-Lgje1lBxKKWXwqycB-v%2Fuploads%2FZ75zCkMIaz2Wfp8o4APl%2Fimage.png?alt=media&amp;token=a72ed271-fc6e-47fd-a025-792f14846cf1" alt=""></td><td align="center"><strong>Ark: Survival Evolved PvE Rules</strong></td><td align="center"><strong>Click here to go to our    ARK:Survival Evolved Rules!</strong></td><td><a href="https://faq.thepackgaming.com/rules/ark">https://faq.thepackgaming.com/rules/ark</a></td><td></td></tr><tr><td align="center"><img src="https://772063455-files.gitbook.io/~/files/v0/b/gitbook-x-prod.appspot.com/o/spaces%2F-Lgje1lBxKKWXwqycB-v%2Fuploads%2F61nFiIuG3NH4RTa1Y2iW%2Fimage.png?alt=media&amp;token=a4bab940-5394-4620-9262-66eae3165a3c" alt=""></td><td align="center"><em><strong>Ragnarok</strong></em></td><td align="center"><em><strong>Landmarks and Resources!</strong></em></td><td></td><td></td></tr><tr><td align="center"><img src="https://772063455-files.gitbook.io/~/files/v0/b/gitbook-x-prod.appspot.com/o/spaces%2F-Lgje1lBxKKWXwqycB-v%2Fuploads%2F520IJYLCQH9KgQuyg5FK%2Fimage.png?alt=media&amp;token=8c672653-59e9-484c-8460-a75a2120608d" alt=""></td><td align="center"><em><strong>Ragnarok</strong></em></td><td align="center"><strong>ARK Survival Evolved Wiki</strong> </td><td><a href="https://ark.wiki.gg/wiki/Ragnarok">https://ark.wiki.gg/wiki/Ragnarok</a></td><td></td></tr></tbody></table>

<figure><img src="https://772063455-files.gitbook.io/~/files/v0/b/gitbook-x-prod.appspot.com/o/spaces%2F-Lgje1lBxKKWXwqycB-v%2Fuploads%2FXDjM6EkSZ1dATTNcJ4dO%2FASE_RAG.png?alt=media&amp;token=25087b21-ab48-4c2e-aaae-3c5d3d348cfb" alt=""><figcaption></figcaption></figure>

### Ragnarok

Also called **The Norse Map**.

It's a whole new map that boasts an expansive 144 sq. kilometer environment, an active volcano, species from DLC Scorched Earth, and higher than average spawn rates of Megalania and Ovis (creatures that are harder to find on other maps). On Ragnarok there are unique Beaver Dams; they are bigger and look more like beaver dams in real life. Beavers can live in the Dams, too. There are Basilosaurus corpses scattered along the beaches which provide some hard to find resources. Ruins and sunken Viking boats scattered around the map including a castle overlooking Viking Bay. Along with various Easter Eggs such as a "Shrek hut" and "Jats face" scattered around the map.

Ragnarok has unique weather patterns with Occasional Wind Storms and Sandstorms in the Desert Section. There are Hot springs with stone benches on which you can sit and get the useless "rested" buff.

Creatures tamed and items received on our Ragnarok server can be brought to any of the other ARK maps, except for **Polar Bears**.

## Ragnarok Resources:

<figure><img src="https://772063455-files.gitbook.io/~/files/v0/b/gitbook-x-prod.appspot.com/o/spaces%2F-Lgje1lBxKKWXwqycB-v%2Fuploads%2F1TTR4z73TkFcRvQDLHaf%2FRAG.png?alt=media&amp;token=8c2e92ce-00cb-48a9-bf05-d942751c8662" alt="" width="320"><figcaption></figcaption></figure>

## Your Community Landmarks

Landmarks with GPS and ADMIN Teleport Locators. All Ark Map Residents should pick up an Awesome Teleport Remote at a Community Center or make one in your Inventory.

{% tabs %}
{% tab title="Community Builds:" %}
Here you will find Places Like the Community Center, and refinery locations. Those noted have Open Transmitters, and all are part of the Teleport System.

| Name                               | Lat/Lon      | Notes                                                                         |
| ---------------------------------- | ------------ | ----------------------------------------------------------------------------- |
| ◉ Ragnarok Community Center        | 22.0\|33.8   | Telepad and Transmitter here                                                  |
| ◉ The PACK \*\*Admins Base         | 21.0\|17.1   | Telepad and Transmitter here                                                  |
| ◉The PACK Event Area               | 67.7\|71.4   | Telepad and Transmitter here                                                  |
| ◉ Rockwell Battle Site             | 67.90\|74.71 | Telepad                                                                       |
| ◉#P.R.Areas - OIl Well Field       | 80.37\|60.07 | Hot! Other Resources Nearby! DANGEOUS Wildlife! Telepad and Transmitter here. |
| ◉#P.R.Areas - Ragnarok Refinery    | 80.2\|61.8   | Hot! Other Resources Nearby! DANGEOUS Wildlife! Telepad and Transmitter here. |
| ◉#P.R.Areas - Ragnarok Wyvern Trap | 19.7\|70.2   | Telepad and Transmitter here                                                  |
| {% endtab %}                       |              |                                                                               |

{% tab title="Teleporter System:" %}
The PACK Admins upkeep a network of Teleporters for the use of our Players.

| Name                                       | Lat/Lon      | Notes                                                                         |
| ------------------------------------------ | ------------ | ----------------------------------------------------------------------------- |
| ◉ Ragnarok Community Center                | 22.0\|33.8   | Telepad and Transmitter here                                                  |
| ◉ The PACK \*\*Admins Base                 | 21.0\|17.1   | Telepad and Transmitter here                                                  |
| ◉The PACK Event Area                       | 67.7\|71.4   | Telepad and Transmitter here                                                  |
| ◉ Rockwell Battle Site                     | 67.90\|74.71 | Telepad                                                                       |
| ◉#P.R.Areas - OIl Well Field               | 80.37\|60.07 | Hot! Other Resources Nearby! DANGEOUS Wildlife! Telepad and Transmitter here. |
| ◉#P.R.Areas - Ragnarok Refinery            | 80.2\|61.8   | Hot! Other Resources Nearby! DANGEOUS Wildlife! Telepad and Transmitter here. |
| ◉#P.R.Areas - Ragnarok Wyvern Trap         | 19.7\|70.2   | DANGEOUS Wildlife! Telepad and Transmitter here                               |
| #P.R. Area - Volcano Beach - Chitin/Poly   | 16.7\|57.0   | Telepad                                                                       |
| #P.R.Areas - Blk.Pearls                    | 71.0\|21.3   | UNDER WATER Telepad and Transmitter here                                      |
| #P.R.Areas - Crystal Cave                  | 19.09\|45.18 | Telepad                                                                       |
| #P.R.Areas - Giant Beaver Lake             | 23.3\|45.2   | Telepad and Transmitter here                                                  |
| #P.R.Areas - Silica Pearls                 | 79.1\|22.2   | Telepad                                                                       |
| 🗽Blue Obelisk Return                      | 18.8\|17.9   | Telepad                                                                       |
| 🗽Green Obelisk Return                     | 57.1\|38.9   | Telepad                                                                       |
| 🗽Red Obelisk Return                       | 34.6\|86.4   | Telepad                                                                       |
| Carnivorous Caverns Cave (Cunning)(Immune) | 17.7\|42.4   | Telepad at cave entrance!                                                     |
| Fallen Redwood Cave (Brute)                | 36.0\|77.0   | Telepad at cave entrance!                                                     |
| Frozen Dungeon Cave (Pack)(ICE QUEEN)      | 31.3\|33.7   | Telepad at cave entrance!                                                     |
| Jungle Dungeon Cave (Hunter)               | 18.2\|28.4   | Telepad at cave entrance!                                                     |
| Life's Labyrinth Cave (4 ARTIFACTS HERE)   | 51.6\|77.5   | Telepad at cave entrance!                                                     |
| Monkey's Puzzle Cave (Strong)              | 24.6\|25.0   | Telepad at cave entrance!                                                     |
| Pirate Ship Wreck(Devourer)                | 47.4\|2.3    | (Underwater, lots of squids) Telepad at cave entrance!                        |
| {% endtab %}                               |              |                                                                               |

{% tab title="Artifact Caves" %}
Artifacts are unique progression items that are typically located within caves around the ARKs, but occasionally are located in other remote or unique locations, such as deep oceans and Wyvern lairs.

| Name                                                         | Lat        | Notes                                 |
| ------------------------------------------------------------ | ---------- | ------------------------------------- |
| 1. Artifact Of The Brute Fallen Redwood Cave Entrance        | 36.0\|77.0 |                                       |
| 1A. Artifact Of The Brute                                    | 35.2\|78.2 |                                       |
| 2. Artifact of the Clever Life's Labyrinth Cave Entrance     | 51.6\|77.5 | (4 Artifacts) Lifes Labryinth Dungeon |
| 2A. Artifact of the Clever                                   | 48.0\|78.6 |                                       |
| 3. Artifact Of The Cunning Carnivorous Caverns Cave Entrance | 17.7\|42.4 |                                       |
| 3A. Artifact Of The Cunning                                  | 20.3\|45.9 |                                       |
| 4. Artifact of the Devious Life's Labyrinth Cave Entrance    | 51.6\|77.5 | (4 Artifacts) Lifes Labryinth Dungeon |
| 4A. Artifact of the Devious                                  | 49.0\|79.4 |                                       |
| 5. Artifact of the Devourer Pirate Ship Wreck                | 47.4\|2.3  |                                       |
| 5A. Artifact of the Devourer                                 | 47.4\|2.3  |                                       |
| 6. Artifact of the Hunter Jungle Dungeon Cave Entrance       | 18.2\|28.4 |                                       |
| 6A. Artifact of the Hunter                                   | 21.5\|27.2 |                                       |
| 7. Artifact of the Immune Carnivorous Caverns Cave Entrance  | 21.7\|41.9 |                                       |
| 7A. Artifact of the Immune                                   | 23.6\|44.5 |                                       |
| 8. Artifact of the Massive Life's Labyrinth Cave Entrance    | 51.6\|77.5 | (4 Artifacts) Lifes Labryinth Dungeon |
| 8A. Artifact of the Massive                                  | 48.9\|79.4 |                                       |
| 9. Artifact of the Pack Frozen Dungeon Cave Entrance         | 31.3\|33.7 |                                       |
| 9A. Artifact of the Pack                                     | 33.5\|43.4 |                                       |
| 10. Artifact of the Skylord Life's Labyrinth Cave Entrance   | 51.6\|77.5 | (4 Artifacts) Lifes Labryinth Dungeon |
| 10A. Artifact of the Skylord                                 | 47.7\|78.9 |                                       |
| 11. Artifact of the Strong The Monkey's Puzzle Cave Entrance | 24.6\|25.0 |                                       |
| 11A. Artifact of the Strong                                  | 24.8\|24.7 |                                       |
| {% endtab %}                                                 |            |                                       |
| {% endtabs %}                                                |            |                                       |

### Common Landmarks and Places of Interest

{% tabs %}
{% tab title="NO Build Areas!" %}
Other than specified metal node areas, Metal nodes are not included in this map as there are so many. **Protected Resource Area denoted by&#x20;*****#P.R.Areas***

* :no\_entry: All Oil or Water wells should be UNLOCKED These are Public Access.
* :no\_entry: ANY Cave or Ruin that has an artifact, lore note, Do NOT Block the way to the item.
* :no\_entry: If a Cave Falls into the following Resource node rule, or has special Dino Spawns you MAY NOT build in it.
* :no\_entry: Do not block Resource nodes (groups of 5 or more or including Metal, OBS, and Crystal nodes)
* :no\_entry:No building within 75 tiles of any  **Protected Resource Area**.
* ◉#P.R.Areas - OIl Well Field 80.37|60.07 Hot! Other Resources Nearby! DANGEOUS Wildlife! Telepad and Transmitter here.
* ◉#P.R.Areas - Ragnarok Refinery 80.2|61.8 Hot! Other Resources Nearby! DANGEOUS Wildlife! Telepad and Transmitter here.
* ◉#P.R.Areas - Ragnarok Wyvern Trap 19.7|70.2 Telepad and Transmitter here
* \#P.R. Area - Volcano Beach - Chitin/Poly 16.7|57.0 Telepad
* \#P.R.Areas - Blk.Pearls 71.0|21.3 UNDER WATER Telepad and Transmitter here
* \#P.R.Areas - Crystal Cave 19.09|45.18 Telepad
* \#P.R.Areas - Giant Beaver Lake 23.3|45.2 Telepad and Transmitter here
  {% endtab %}

{% tab title="Resource Node Areas" %}
Some of the Resource Rich Nodes that have been Discovered on Ragnarok

| Name                                     | Lat/Lon      | Notes                                                                         |
| ---------------------------------------- | ------------ | ----------------------------------------------------------------------------- |
| ◉#P.R.Areas - OIl Well Field             | 80.37\|60.07 | Hot! Other Resources Nearby! DANGEOUS Wildlife! Telepad and Transmitter here. |
| ◉#P.R.Areas - Ragnarok Refinery          | 80.2\|61.8   | Hot! Other Resources Nearby! DANGEOUS Wildlife! Telepad and Transmitter here. |
| ◉#P.R.Areas - Ragnarok Wyvern Trap       | 19.7\|70.2   | DANGEOUS Wildlife! Telepad and Transmitter here                               |
| #P.R. Area - Volcano Beach - Chitin/Poly | 16.7\|57.0   | Telepad                                                                       |
| #P.R.Areas - Blk.Pearls                  | 71.0\|21.3   | UNDER WATER Telepad and Transmitter here                                      |
| #P.R.Areas - Crystal Cave                | 19.09\|45.18 | Telepad                                                                       |
| #P.R.Areas - Giant Beaver Lake           | 23.3\|45.2   | Telepad and Transmitter here                                                  |
| {% endtab %}                             |              |                                                                               |

{% tab title="Places of Interest:" %}
Caves, Ruins and other Interesting Places on Ragnarok

| Name                          | Lat/Lon      | Notes           |
| ----------------------------- | ------------ | --------------- |
| Abandoned Lighthouse          |              |                 |
| Castle Of The Swamp           |              |                 |
| Character Creation Background |              |                 |
| Life Labyrinth (Entrance)     | 51.6\|77.5   |                 |
| Life Labyrinth (Exit)         | 51.99\|79.69 |                 |
| Forbidden Desert              |              |                 |
| Pirate Cave                   | 21.18\|24.42 | Oluf Jungle     |
| Ruined Bridge                 |              |                 |
| Ruins Northern Islands        |              |                 |
| Ruins Northern Swamps         |              |                 |
| Scorched Desert Ruins         |              |                 |
| Scotland Plains:              | 25.45\|76.46 | Upper Highlands |
| {% endtab %}                  |              |                 |
| {% endtabs %}                 |              |                 |

![Topographical Map of Ragnarok](https://772063455-files.gitbook.io/~/files/v0/b/gitbook-legacy-files/o/assets%2F-Lgje1lBxKKWXwqycB-v%2F-Lm9aQpZ673gSzek84YW%2F-Lm9aggA_k8QjAF0Dphw%2FRagnarok_Topographic_Map.png?alt=media\&token=d98ef9fb-3f9f-45d8-a282-43a75a2df38d)

<figure><img src="https://772063455-files.gitbook.io/~/files/v0/b/gitbook-x-prod.appspot.com/o/spaces%2F-Lgje1lBxKKWXwqycB-v%2Fuploads%2F8Mrjs5a4lEQwX52RGOGC%2Fimage.png?alt=media&amp;token=56956fa0-c4d0-4439-be22-7cae4caf4542" alt=""><figcaption></figcaption></figure>

*All content on this page has been accumulated from several places including the Wiki, The PACK Admin Team, and Players from The Pack cluster.*


# GENESIS - 2

Genesis: Part 2 is the fifth and final paid DLC Expansion Pack for ARK: Survival Evolved and is available for purchase through the Genesis Season Pass.

## Joining Genesis - 2:&#x20;

<table data-view="cards"><thead><tr><th align="center"></th><th align="center"></th><th align="center"></th><th data-hidden data-card-target data-type="content-ref"></th><th data-hidden data-card-cover data-type="files"></th></tr></thead><tbody><tr><td align="center"><img src="https://772063455-files.gitbook.io/~/files/v0/b/gitbook-x-prod.appspot.com/o/spaces%2F-Lgje1lBxKKWXwqycB-v%2Fuploads%2FO3dBZF8E7W0BPX2mj77F%2Fimage.png?alt=media&amp;token=3391b1e1-56dc-4edc-a9db-2af742020fc6" alt=""></td><td align="center"><p><em><strong>Steam Workshop</strong></em></p><p><em><strong>The PACK Gaming</strong></em></p><p><em><strong>Canon Servers Mod Package</strong></em></p></td><td align="center"><strong>Please download the mod package prior to joining the server!</strong></td><td><a href="https://steamcommunity.com/sharedfiles/filedetails?id=1829354252">https://steamcommunity.com/sharedfiles/filedetails?id=1829354252</a></td><td></td></tr><tr><td align="center"><img src="https://772063455-files.gitbook.io/~/files/v0/b/gitbook-x-prod.appspot.com/o/spaces%2F-Lgje1lBxKKWXwqycB-v%2Fuploads%2FKkGBubbiuaQIfJc1tAbp%2Fimage.png?alt=media&amp;token=286bef2c-fd1b-4661-b888-17f3d026b93c" alt=""> <br><em><strong>GENESIS 2</strong></em>    </td><td align="center"><em><strong>STEAM JOIN LINK</strong></em> </td><td align="center"><em><strong>CLICK HERE TO JOIN  NOW!</strong></em></td><td><a href="steam://connect/45.92.39.91:27047">steam://connect/45.92.39.91:27047</a></td><td></td></tr><tr><td align="center"><img src="https://772063455-files.gitbook.io/~/files/v0/b/gitbook-x-prod.appspot.com/o/spaces%2F-Lgje1lBxKKWXwqycB-v%2Fuploads%2FxfsR4woCuPrvpn8tYh9V%2Fimage.png?alt=media&amp;token=d791fc31-5642-46fe-9d83-285d9c21c8d2" alt=""></td><td align="center"><strong>Ark: Survival Evolved PvE Rules</strong></td><td align="center"><strong>Click here to go to our    ARK:Survival Evolved Rules!</strong></td><td><a href="https://faq.thepackgaming.com/rules/ark">https://faq.thepackgaming.com/rules/ark</a></td><td></td></tr><tr><td align="center"><img src="https://772063455-files.gitbook.io/~/files/v0/b/gitbook-x-prod.appspot.com/o/spaces%2F-Lgje1lBxKKWXwqycB-v%2Fuploads%2FrCMVDGdV1NQsm1zxyps2%2Fimage.png?alt=media&amp;token=d2936074-baa4-415f-a457-9162190a47ca" alt=""></td><td align="center"><em><strong>Genesis2</strong></em></td><td align="center"><em><strong>Landmarks and Resources!</strong></em></td><td><a href="https://faq.thepackgaming.com/ark/ase-cluster/gen2#genesis-2-landmarks-and-resources">https://faq.thepackgaming.com/ark/ase-cluster/gen2#genesis-2-landmarks-and-resources</a></td><td></td></tr><tr><td align="center"><img src="https://772063455-files.gitbook.io/~/files/v0/b/gitbook-x-prod.appspot.com/o/spaces%2F-Lgje1lBxKKWXwqycB-v%2Fuploads%2FRdRPscRFKZqjYwkrTOZO%2Fimage.png?alt=media&amp;token=ceb7ef6d-de34-405e-9288-4ae513db892a" alt=""></td><td align="center"><em><strong>Genesis2</strong></em></td><td align="center"><strong>ARK Survival Evolved Wiki</strong> </td><td><a href="https://ark.wiki.gg/wiki/Genesis:_Part_2">https://ark.wiki.gg/wiki/Genesis:_Part_2</a></td><td></td></tr><tr><td align="center"><img src="https://772063455-files.gitbook.io/~/files/v0/b/gitbook-x-prod.appspot.com/o/spaces%2F-Lgje1lBxKKWXwqycB-v%2Fuploads%2Fn00rZPX4SOnpmUvr9F3P%2Fimage.png?alt=media&amp;token=ee386e35-f208-4686-ba20-90c210da086b" alt=""></td><td align="center"><em><strong>Genesis2</strong></em></td><td align="center"><em><strong>Explorer Notes and Glitches</strong></em></td><td><a href="https://ark.wiki.gg/wiki/Explorer_Map/Genesis:_Part_2">https://ark.wiki.gg/wiki/Explorer_Map/Genesis:_Part_2</a></td><td></td></tr></tbody></table>

<figure><img src="https://772063455-files.gitbook.io/~/files/v0/b/gitbook-x-prod.appspot.com/o/spaces%2F-Lgje1lBxKKWXwqycB-v%2Fuploads%2FqfQ386B30AZNNYmGyX9K%2FASE_GEN2.png?alt=media&amp;token=71fecb3b-edc3-4a08-b74b-0954012d1dea" alt=""><figcaption></figcaption></figure>

## THE PACK GAMING Genesis - 2 SERVER

### The Colony Ship Map

&#x20;Genesis: Part 2 has survivors exploring a vast world filled with strange new biomes, story missions, and exotic creatures. The map is set aboard the massive Genesis-Ship with two rings: on the right side is a regular ring with green terrain as well as normal creatures and the left side is a corrupted ring full of purple terrain and horrifying creatures. The ship is traveling through deep space looking for a habitable planet.

<details>

<summary>Plant Species R Seed (Genesis: Part 2)</summary>

The Plant Species R Seed is a seed used to grow the  Plant Species R. It is a mutated seed designed by Rockwell. The appearance of a fully grown R species resembles that of a smaller variant of the tentacles he sports. Fully grown Species R can be harvested for various type of meat sources depending on what kind of designated R seed was planted.&#x20; The seeds can be obtained from Mutagen Bulbs, along with  Mutagen, but a wave of multiple  Summoner is triggered upon harvesting.

There are 5 types of R Seeds:\
Name	Veins Appearance	Harvested Meat	Chance for this seed&#x20;from Mutagen Bulb

R-1	        Regular reddish	        Raw Meat	        32%

R-2	        Bluish	                        Raw Fish Meat	32%

R-3	        Rotten greenish	        Spoiled Meat	20%

R-4	        Tenderized purple	 Raw Prime Meat	8%

R-5	        Bluish	                         Raw Prime Fish Meat	8%

</details>

<details>

<summary>Mission Common Sense.</summary>

**PLEASE BE CONSIDERATE! THE MISSION ARE BUGGY AND AFFECT THE WHOLE SERVER POPULATION WITH CRASHES AND MEMORY LOSS EVENTS.**&#x20;

[**From Funtimes our Hardware owner!**\
What do I mean by buggy? Let me show you a server says when you run the mission. Every wave that spawns, the mission tries to call up code to spawn in the Dinos, which spits out an error, `" SubmissionModule for spawning is missing"`. This error has been present since the mission's release. Each wave is numbered, 1-100. Each wave doubles the Dinos from the previous wave. The more Dinos to be spawned, the more errors rack up and overflow the servers RAM. ](#user-content-fn-1)[^1] [**Factors:** the more people online, code heavy usage of the server IE Hatching/Births. Compiled with how many waves you trigger, the more likely it is to crash the server. All our servers have a cutoff limit for ram use scripted in that shuts the server down before it crashes the whole set in that blade. Ergo that server - Gen2 crashes. And sometimes takes all 4 servers on that blade down. So the whole blade can reset the ram.](#user-content-fn-1)[^1]  [Other code oddities in these missions: **Hitting the exit button can crash the server.** What does this mean? The exit button seems to not end the waves in the mission. It just ejects you from the simulator and runs till it hits a stopping mark. All the while spewing errors. The changes made recently by WC, did not seem to alleviate the memory leak. ](#user-content-fn-1)[^1]

#### COMMON SENSE STEPS

* When doing a mission. If "feet '' goes into a base, PLEASE automatically back out of the mission at that terminal, to protect the persons base. Go to another OPEN terminal and start the mission over. A minor inconvenience of changing terminals is worth it to protect a person's tames.&#x20;
* "Survive the ARK", Do not exit the mission with the button that shows up after the first wave, go speak to the terminal again.&#x20;
* "Survive the ARK", may reset after 10 waves, if so please take off gear and carry it in inventory and let the mobs destroy you.  You will have a 50/50 chance of recovering gear at a death recovery item then.
* DO NOT USE EXPLOSIVES IN "SURVIVE THE ARK" OR "STAR-DOLPHIN" THIS CAUSES A CRASH!.&#x20;
* If you think you're about to D/C in any of the missions, Immediately log out of the game. This will save your inventory in most cases. NOT ALL.&#x20;
* **Genesis 2 Missions are all buggy,** and while they do work better for a while, they have never actually fixed any of the missions right.&#x20;
* **All of these steps will give you and your team a good stab at completing the missions, AND preventing any potential Server crash! THANK you from ALL the residents of the GEN 2 Server.**&#x20;

</details>

## Genesis - 2 Landmarks & Resources

<figure><img src="https://772063455-files.gitbook.io/~/files/v0/b/gitbook-x-prod.appspot.com/o/spaces%2F-Lgje1lBxKKWXwqycB-v%2Fuploads%2FKL2WDaWS7owkDxH5tMX8%2FGEN2_CC-BASE_2023.png?alt=media&amp;token=c2f05779-e010-4f30-adc3-59861ff20583" alt=""><figcaption></figcaption></figure>

#### Drop colors indicate Asteroid resources which cycle in the Void each hour.

![](https://cdn.discordapp.com/attachments/567441031277314048/851589245394616371/unknown.png)

![](https://cdn.discordapp.com/attachments/567441031277314048/860253655899176960/ce3qjoh1qg471.png)

## Your Community Landmarks <a href="#your-community-landmarks" id="your-community-landmarks"></a>

Note: The CCC is included for those accessing this data for SP or other Clusters. Please Use the command Setplayerpos in SP and Preface with cheat if you are on a Multiplayer map.

{% tabs %}
{% tab title="Community Builds:" %}
Here you will find Places Like the Community Center, and refinery locations. Those noted have Open Transmitters, and all are part of the Teleport System.

| Name             | Lat/Lon   | Notes                                               |
| ---------------- | --------- | --------------------------------------------------- |
| Community Center | 47.9/64.8 | Community Center with Open machines and Transmitter |
| {% endtab %}     |           |                                                     |

{% tab title="Teleporter System:" %}
The PACK Admins upkeep a network of Teleporters for the use of our Players.

| Name                     | Lat/Lon | Notes                 |
| ------------------------ | ------- | --------------------- |
| Corrupted Gardens        |         |                       |
| Eden Zone                |         |                       |
| Rockwell's Innards       |         |                       |
| Rockwell's Proliferation |         |                       |
| S.U.M.P                  |         | Lovely place to build |
| Space                    |         |                       |
| Space Bridge             |         |                       |
| {% endtab %}             |         |                       |

{% tab title="Mission Terminals" %}

| Name            | Lat/Lon    | Notes |
| --------------- | ---------- | ----- |
| Eden #1         | 18.8\|89.5 |       |
| Eden #2         | 23.8\|61.8 |       |
| Eden #3         | 32.9\|90.7 |       |
| Eden #4         | 33.7\|79.1 |       |
| Eden #5         | 38.2\|66.2 |       |
| Eden #6         | 38.4\|83.8 |       |
| Eden #7         | 40.8\|76.8 |       |
| Eden #8         | 41.1\|60.5 |       |
| Eden #9         | 41.8\|80.9 |       |
| Eden #10        | 55.4\|76.7 |       |
| Eden #11        | 56.8\|90.8 |       |
| Eden #12        | 57.5\|69.3 |       |
| Eden #13        | 63.0\|63.8 |       |
| Eden #14        | 69.9\|60.1 |       |
| Eden #15        | 79.5\|90.2 |       |
| Cor. Garden #1  | 19.3\|31.9 |       |
| Cor. Garden #2  | 24.4\|27.6 |       |
| Cor. Garden #3  | 26.4\|9.3  |       |
| Cor. Garden #4  | 40.1\|30.2 |       |
| Cor. Garden #5  | 40.5\|9.8  |       |
| Cor. Garden #6  | 42.1\|24.7 |       |
| Cor. Garden #7  | 42.4\|37.1 |       |
| Cor. Garden #8  | 56.2\|15.4 |       |
| Cor. Garden #9  | 56.4\|36.6 |       |
| Cor. Garden #10 | 56.5\|24.4 |       |
| Cor. Garden #11 | 72.9\|22.6 |       |
| Cor. Garden #12 | 74.3\|32.4 |       |
| Cor. Garden #13 | 80.7\|7.5  |       |
| {% endtab %}    |            |       |
| {% endtabs %}   |            |       |

### Common Landmarks and Places of Interest <a href="#common-landmarks-and-places-of-interest" id="common-landmarks-and-places-of-interest"></a>

{% tabs %}
{% tab title="Places of Interest:" %}
Caves, Ruins and other Interesting Places

| Name                     | Lat/Lon | Notes                 |
| ------------------------ | ------- | --------------------- |
| Corrupted Gardens        |         |                       |
| Eden Zone                |         |                       |
| Rockwell's Innards       |         |                       |
| Rockwell's Proliferation |         |                       |
| S.U.M.P                  |         | Lovely place to build |
| Space                    |         |                       |
| Space Bridge             |         |                       |
| {% endtab %}             |         |                       |

{% tab title="Untitled" %}

{% endtab %}
{% endtabs %}

![](https://772063455-files.gitbook.io/~/files/v0/b/gitbook-legacy-files/o/assets%2F-Lgje1lBxKKWXwqycB-v%2F-MbIuHrc7AGfYLaz4iGG%2F-MbIvSRtB01pW0sNsxIi%2FGenesis_Part_2_Map.jpg?alt=media\&token=a6ba10b4-7631-4171-9276-ae9c34c6c925)

<figure><img src="https://772063455-files.gitbook.io/~/files/v0/b/gitbook-x-prod.appspot.com/o/spaces%2F-Lgje1lBxKKWXwqycB-v%2Fuploads%2FYuSkkgd3U7BI6PIZsXTO%2Fimage.png?alt=media&amp;token=66809aa7-4e89-432f-902e-42af9a1eb4ea" alt=""><figcaption></figcaption></figure>

All content on this page has been accumulated from several places including the Wiki, The PACK Admin Team, and Players from The Pack cluster.

[^1]:


# FJŐRDUR

ARK Survival Evolved DLC June 12th. 2022

## Joining Fjördur

<table data-view="cards"><thead><tr><th align="center"></th><th align="center"></th><th align="center"></th><th data-hidden data-card-target data-type="content-ref"></th><th data-hidden data-card-cover data-type="files"></th></tr></thead><tbody><tr><td align="center"><img src="https://772063455-files.gitbook.io/~/files/v0/b/gitbook-x-prod.appspot.com/o/spaces%2F-Lgje1lBxKKWXwqycB-v%2Fuploads%2FO3dBZF8E7W0BPX2mj77F%2Fimage.png?alt=media&amp;token=3391b1e1-56dc-4edc-a9db-2af742020fc6" alt=""></td><td align="center"><p><em><strong>Steam Workshop</strong></em></p><p><em><strong>The PACK Gaming</strong></em></p><p><em><strong>Canon Servers Mod Package</strong></em></p></td><td align="center"><strong>Please download the mod package prior to joining the server!</strong></td><td><a href="https://steamcommunity.com/sharedfiles/filedetails?id=1829354252">https://steamcommunity.com/sharedfiles/filedetails?id=1829354252</a></td><td></td></tr><tr><td align="center">   <img src="https://772063455-files.gitbook.io/~/files/v0/b/gitbook-x-prod.appspot.com/o/spaces%2F-Lgje1lBxKKWXwqycB-v%2Fuploads%2FwLOIaX2L5p56UmJvpIEw%2Fimage.png?alt=media&amp;token=06d8c6d7-843a-4a45-b495-1290597b9261" alt="">  <br><em><strong>Fjördur</strong></em></td><td align="center"><em><strong>STEAM JOIN LINK</strong></em> </td><td align="center"><em><strong>CLICK HERE TO JOIN  NOW!</strong></em></td><td><a href="steam://connect/45.92.39.92:27045">steam://connect/45.92.39.92:27045</a></td><td></td></tr><tr><td align="center"><img src="https://772063455-files.gitbook.io/~/files/v0/b/gitbook-x-prod.appspot.com/o/spaces%2F-Lgje1lBxKKWXwqycB-v%2Fuploads%2FmjpKMntdlPj9xD9ajLeK%2Fimage.png?alt=media&amp;token=69957060-7563-4dca-b318-1f1b58d00945" alt=""></td><td align="center"><strong>Ark: Survival Evolved PvE Rules</strong></td><td align="center"><strong>Click here to go to our    ARK:Survival Evolved Rules!</strong></td><td><a href="https://faq.thepackgaming.com/rules/ark">https://faq.thepackgaming.com/rules/ark</a></td><td></td></tr><tr><td align="center"><img src="https://772063455-files.gitbook.io/~/files/v0/b/gitbook-x-prod.appspot.com/o/spaces%2F-Lgje1lBxKKWXwqycB-v%2Fuploads%2FItWpoye53MKtdxCWTxbn%2Fimage.png?alt=media&amp;token=c4d9933f-f1ff-428b-bd8d-a34fa996089e" alt=""></td><td align="center"><em><strong>Fjördur</strong></em></td><td align="center"><em><strong>Landmarks and Resources!</strong></em></td><td><a href="https://faq.thepackgaming.com/ark/ase-cluster/fjordur#fjordur-landmarks-and-resources">https://faq.thepackgaming.com/ark/ase-cluster/fjordur#fjordur-landmarks-and-resources</a></td><td></td></tr><tr><td align="center"><img src="https://772063455-files.gitbook.io/~/files/v0/b/gitbook-x-prod.appspot.com/o/spaces%2F-Lgje1lBxKKWXwqycB-v%2Fuploads%2FKpRsR2jQ7cCAeSkXUN0i%2Fimage.png?alt=media&amp;token=bf2e44cf-060d-457a-b772-cdf5e0d25e97" alt=""></td><td align="center"><em><strong>Fjördur</strong></em></td><td align="center"><strong>ARK Survival Evolved Wiki</strong> </td><td><a href="https://ark.wiki.gg/wiki/Fjordur">https://ark.wiki.gg/wiki/Fjordur</a></td><td></td></tr><tr><td align="center"><img src="https://772063455-files.gitbook.io/~/files/v0/b/gitbook-x-prod.appspot.com/o/spaces%2F-Lgje1lBxKKWXwqycB-v%2Fuploads%2Fn00rZPX4SOnpmUvr9F3P%2Fimage.png?alt=media&amp;token=ee386e35-f208-4686-ba20-90c210da086b" alt=""></td><td align="center"><em><strong>Fjördur</strong></em></td><td align="center"><em><strong>Rune Stones</strong></em></td><td><a href="https://faq.thepackgaming.com/ark/ase-guides/notes#fjordur-rune-stones-by-biome">https://faq.thepackgaming.com/ark/ase-guides/notes#fjordur-rune-stones-by-biome</a></td><td></td></tr></tbody></table>

<figure><img src="https://772063455-files.gitbook.io/~/files/v0/b/gitbook-x-prod.appspot.com/o/spaces%2F-Lgje1lBxKKWXwqycB-v%2Fuploads%2FgKH2XbhmTDALSw3ZC1vH%2FASE_FJO.png?alt=media&amp;token=0c9ca0ed-14b1-445c-afd7-1e68df09a0d0" alt=""><figcaption></figcaption></figure>

## **Welcome to** Fjördu&#x72;**!**

Explore a cold and hostile Norse-inspired archipelago in ARK's newest official community map, featuring four new creatures for you to collect! Fjordur contains over 140 square kilometers of new biomes, new challenges, and rewarding discoveries!

Traverse a fantastical multi-layered wonderland with a frosty Nordic theme. Four unique islands, Vardiland, Vannaland, Bolbjord and Balheimr, and the mystical realms; Jotunheim, Vanaheim, and Asgard, offer elaborate cave systems resplendent with Scandinavian ruins and vast monolithic entrances. Take a well-trodden hallowed path to pay respects at the immense and sacred world tree, Yggdrasil. Vestiges of ancient dwarven kingdoms harken to a lost era, the remnants of which lend an awe-inspiring history to the world of Fjordur. This beautiful and mythic world invites Survivors to a deeply forested land of bygone wonder and exploration!

[![mjolnirsub.png](https://cdn.survivetheark.com/uploads/monthly_2022_06/mjolnirsub.png.8b597060642e3de85cb407cfd49c562f.png)](https://cdn.survivetheark.com/uploads/monthly_2022_06/mjolnirsub.png.8b597060642e3de85cb407cfd49c562f.png)![](https://772063455-files.gitbook.io/~/files/v0/b/gitbook-x-prod.appspot.com/o/spaces%2F-Lgje1lBxKKWXwqycB-v%2Fuploads%2FhfoLDolE0wTyrbVG7buW%2Fimage.png?alt=media\&token=a75b48a9-03c6-48aa-8b93-8c4e5afe3b55)

Only survivors worthy enough to surpass the ultimate test and defeat the mighty Fenrir are able to wield the lightning-imbued hammer, Mjolnir. This first of its kind skin includes additional abilities worthy of Thor, himself!&#x20;

<div align="left"><img src="https://772063455-files.gitbook.io/~/files/v0/b/gitbook-x-prod.appspot.com/o/spaces%2F-Lgje1lBxKKWXwqycB-v%2Fuploads%2F5cbb6y60DhUPfDP7mdVR%2FFJORDUR_CREATURES.gif?alt=media&amp;token=468a5ade-eb37-466e-a32c-3eb9f8cd016e" alt=""></div>

### Unique Creatures

* &#x20;[***Andrewsarchus***](https://ark.wiki.gg/wiki/Andrewsarchus)
* &#x20;[<mark style="color:blue;">**Desmodu**</mark>](https://ark.wiki.gg/wiki/Desmodus)<mark style="color:blue;">**s**</mark>&#x20;
* [**Fjordhawk**](https://ark.wiki.gg/wiki/Fjordhawk)
* [ **Fenrir**](https://ark.wiki.gg/wiki/Fenrir#Basic_Info)

### World Bosses

* [***Steinbjörn*** ](https://ark.wiki.gg/wiki/Steinbj%C3%B6rn)***& Minion*** [***Rubble Bear***](https://ark.wiki.gg/wiki/Rubble_Bear)
* &#x20;[***Hati***](https://ark.wiki.gg/wiki/Hati?action=edit\&redlink=1) ***&*** [***Sköll***](https://ark.wiki.gg/wiki/Sk%C3%B6ll?action=edit\&redlink=1) Also Called the "Wolf Twins".
* &#x20;[***Fenrisúlfr***](https://ark.wiki.gg/wiki/Fenris%C3%BAlfr)
* [***Beyla***](https://ark.wiki.gg/wiki/Beyla) ***&*** [**Beyla Spawn**](https://ark.wiki.gg/wiki/Beyla_Spawn)

### **Cool Facts about FJORDUR.**

* Frostmourne reference can be found in Jotunheim cave
* Gollum reference can be found in mount doom and redwood cave
* Jormungandr reference can be found in deep sea area
* Helms Deep reference can be found on Vannaland
* White Tree of Gondor reference can be found in a castle near the Skadifjord
* Dvergheimr is a reference to Moria
* Shimmering Halls are a reference to Erebor
* Fjordur has custom supply drop optics
* Fjordur has 3 realms which can be visited via the Portal Cave
* Fjordur has custom made boss arenas
* Thylacoleo's on Fjordur does spawn on the ground in the redwoods instead on trees. Fjordur has custom redwoods
* Elder Scrolls reference can be found in Drengrheimr (looks nearly identical to Bleak Falls Barrow)
* Fjordur has a single explorer note from EXT Chronicles on SE in the Manticore Arena
* Fjordur shares many features with Genesis 1:
  * Both are simulations
  * Both have separated biomes
  * Both have a Skyrim reference
* Aberrant Megalania, unlike other unique Fjordur content can be transferred to other maps.
* The abb artifacts can be used to hijack the tek cave in Asgard and gain access to Mjolnir, Asgard Shield and desert titan terminal for a day (week on a server).
* **How do you get to the alternate realms?** By teleporting via the Portal Cavern located at 40/57
* **Where do you find blue gems not in the radiation?** In the Frozen Fortress (Yeti) snow cave
* **Where do you find gas for making Hazmat suits?** On Volcano Island (Sulfur Pools) or Biolum Caverns&#x20;

<div align="left"><img src="https://772063455-files.gitbook.io/~/files/v0/b/gitbook-x-prod.appspot.com/o/spaces%2F-Lgje1lBxKKWXwqycB-v%2Fuploads%2FtmIkFxZy5b0zTbHm0jzD%2FDwarven_cave.gif?alt=media&amp;token=570b2186-db8d-469a-ba75-4e6a11b9f0d2" alt=""></div>

## FJŐRDUR Landmarks & Resources

### Fjordur Players Map.

{% embed url="<https://ark-unity.com/ark-survival-ascended/maps/fjordur/>" %}

### Your Community Landmarks

{% tabs %}
{% tab title="COMMUNITY BUILDS" %}

<table><thead><tr><th width="177">◉FJORDUR COMMUNITY CENTER</th><th width="150">32.0|66.1</th><th width="299">[Fjordur Community Center] Moving here from Redwoods ruins. Makes sense.</th><th data-hidden>cheat setplayerpos 115759 -128304 11491 -160.88 -7.46</th></tr></thead><tbody><tr><td>◉#1 Fjordur Public Metal, Oil, Obs.</td><td>32.2 | 67.4</td><td>Above Helmsdeep with OIL, OBS, Metal</td><td>cheat setplayerpos 130653 -132185 24555 91.20 -58.22</td></tr><tr><td>#2 Fjordur Public Crystal</td><td>32.11|69.02</td><td>Below Helmsdeep in a cavern Crystal and Cave dinos.</td><td>cheat setplayerpos 135798 -127786 11338 14.27 -70.41</td></tr><tr><td>◉#3 Fjordur Public OIL, Metal and Obs.</td><td>36.86|95.76</td><td>Cave with OIL, Metal and Obs.</td><td>Cheat setplayerpos 325054 -89757 9081 100.05 -75.97</td></tr><tr><td>◉#4 Fjordur Public OIL, Metal and Obs.</td><td>58.38|78.39</td><td>Cave with Metal, OIL, Obs, and Crys.</td><td>Cheat setplayerpos 202286 58022 4248 -132.25 -11.43</td></tr><tr><td>#5 Fjordur Public Metal Mtn.</td><td>79.26|36.46</td><td>Side of a MTN covered in metal nodes</td><td>Cheat setplayerpos -96695 208944 12669 87.37 -70.61</td></tr><tr><td>◉#6 Fjordur Public Metal &#x26; Oil</td><td>90.02|45.14</td><td>Metal and Oil</td><td>Cheat setplayerpos -34715 285797 2126 99.34 -55.02</td></tr><tr><td>#7 Fjordur Public Crystal &#x26; Oil</td><td>44.82|42.44</td><td>Crystal and Oil</td><td>cheat setplayerpos -96710 208884 12669 -129.30 0.00</td></tr><tr><td>#8 Fjordur Public Metal, Crystal, Gems</td><td>-03.87|73.97</td><td>Metal Crystal and Gems</td><td>cheat setplayerpos 171147 -384721 -160602 134.09 -71.98</td></tr><tr><td>#9 Fjordur Public Metal Mtn-2</td><td>30.38|52.89</td><td>Metal, OBS, &#x26; Runestones</td><td>Cheat setplayerpos 20637 -140078 21401 -129.30 -50.54</td></tr><tr><td>◉#10 Living Lake - Public Beaver Pond</td><td>93.06|32.74</td><td>Beaver Pond &#x26; dams<br>(Vardiland Beaver Lake)</td><td>Cheat setplayerpos -123254 307503 14986 162.11 -4.65</td></tr><tr><td>◉#11 Quiet Lake Public Beaver Pond</td><td>46.94|73.18</td><td>Beaver Pond &#x26; dams<br>(Vannaland Beaver Pond)</td><td>Cheat Setplayerpos 165524 -21841 26167 -72.22 1.54</td></tr></tbody></table>
{% endtab %}

{% tab title="" %}

{% endtab %}

{% tab title="ARTIFACTS" %}

<table><thead><tr><th width="282">Name</th><th width="148">Lat/Lon</th><th width="318">Notes:</th><th data-hidden>CCC</th></tr></thead><tbody><tr><td>Bear Caverns<br>(Redwoods)<br>[Strong]</td><td>10.0 |84.5</td><td>Strong<br>10.0 |84.5<br>cheat setplayerpos<br>Artifact - 18.8 | 83.7</td><td>Cheat setplayerpos 246488 -284039 11365 67.37 -11.75 - entrance</td></tr><tr><td>Beiygjaheimr<br>[Stalker]</td><td>56.7 | 84.7</td><td>Stalker<br>Entrance 56.7 | 84.7<br>cheat setplayerpos</td><td>cheat setplayerpos 246416 45156 4080 -108.57 -77.23</td></tr><tr><td>Djuprjord<br>The Forgotten Caverns<br>(Pirate ship cave)<br>(Artifact is underwater)<br>[Cunning]</td><td>76.7|65.5 (underwater entrance)</td><td>Cunning<br>Entrance Lat 76.7 | Lon 65.5<br><br>Artifact - 72.7 | 70.8</td><td>cheat setplayerpos 109274 192780 -10860 156.09 -46.11 - entrance The Forgotten Caverns ||WATER||</td></tr><tr><td>Drengrheimr<br>(The Overgrown Grave)<br>Hidden Wall, Deep Dive<br>[Hunter]</td><td>07.5|39.5</td><td>Hunter<br>Entrance Lat 7.5 | Lon 39.5<br><br>Artifact - 07.3 | 32.9</td><td>Cheat setplayerpos -76290 -302726 31685 155.50 -70.91 - entrance</td></tr><tr><td>Mariana Caverns<br>[Devourer]</td><td>02.5|03.2</td><td>Devourer<br>Entrance Lat 3.8 | Lon 4.3<br>Cheat setplayerpos -121685 -304595 14508 -168.82 4.57</td><td>Cheat setplayerpos -76290 -302726 31685 155.50 -70.91 - entrance</td></tr><tr><td>Molten Caverns<br>[Clever &#x26; Pack]</td><td>21.0 |57.3</td><td>Clever<br>Artifact - 18.1 | 65.6<br><br>----------<br>Pack<br>Artifact - 15.5 | 60.8<br>cheat setplayerpos 241237 -222447 6028 4.57 -33.00</td><td>Cheat setplayerpos 148833 162218 -18342 -60.75 -55.79 Entrance</td></tr><tr><td>Mount Doom cave<br>(walk into/swim thru damage free lava)<br>[Immune]</td><td>91.0 | 77.0</td><td>Immune<br>Entrance Lat 91.0 | Lon 77.0<br><br></td><td>cheat setplayerpos 53913 -205342 11828 171.25 -32.17 - entrance</td></tr><tr><td>Nideshem Depths<br>(labyrinth with puzzles and several traps)<br>(UNDERWATER)<br>[Massive]</td><td>71.8|01.2</td><td>Massive<br>Entrance 71.8|01.2<br>Cheat Setplayerpos</td><td></td></tr><tr><td>The Frozen Fortress<br>(intensely cold)<br>[Skylord]<br></td><td>08.4 |24.3</td><td>Skylord<br>Entrance Lat 8.4 | Lon 24.3<br>cheat setplayerpos 246416 45156 4080 -108.57 -77.23<br></td><td>cheat setplayerpos 246416 45156 4080 -108.57 -77.23</td></tr><tr><td>The Snakepit<br></td><td>49.4|14.2 (Underwater entrance)</td><td>Brute<br>47.61|08.09<br>cheat setplayerpos -299181 -17076 -8026 97.64 -11.17<br></td><td>Cheat Setplayerpos -254278 -4215 1901 50.29 7.19</td></tr></tbody></table>
{% endtab %}
{% endtabs %}

{% tabs %}
{% tab title="Untitled" %}

{% endtab %}

{% tab title="CAVES " %}

<table><thead><tr><th>Name</th><th width="150">Lat/Lon</th><th width="317">Notes:</th><th data-hidden>CCC</th></tr></thead><tbody><tr><td>Penguin Shrine Cave</td><td>05.8|06.5</td><td></td><td></td></tr><tr><td>Mysterious Grotto<br>Vanaheim<br>Hidden behind a waterfall</td><td>01.18|89.48</td><td></td><td></td></tr><tr><td>Drengrheimr<br>(The Over Grown Grave)<br>Behind a destructable rock.<br></td><td>03.41|32.79</td><td>[Do NOT Build area]<br>[[Artifact of the Hunter]]<br>[[Broodmother Dungeon]]</td><td>Cheat setplayerpos -76290 -302726 31685 155.50 -70.91 - entrance</td></tr><tr><td>Large Bridge Cave</td><td>09.9|62.6.</td><td></td><td></td></tr><tr><td>Bear Caverns -</td><td>10.12|84.47</td><td>Redwoods area<br>[Do NOT Build area]<br>[[Artifact of the Shadow]]</td><td>Cheat setplayerpos 246488 -284039 11365 67.37 -11.75 - entrance</td></tr><tr><td>The Shimmering Halls</td><td>11.02|62.7</td><td>[Do NOT Build area]</td><td>Cheat Setplayerpos 90481 -276979 5064 93.19 17.18</td></tr><tr><td>Midgard Runes Cave -<br>Unnamed</td><td>11.58|75.22</td><td>Builders welcome<br>[DO NOT BLOCK RUNESTONES]</td><td></td></tr><tr><td>Vanaheim Wyvern's Cave</td><td>12.77|65.06</td><td>[Do NOT Build Area]<br>[[Poison Wyvern spawn inside]]</td><td></td></tr><tr><td>Lindbjord Forest cave -</td><td>14.10|50.30</td><td>Builders welcome<br>[DO NOT BLOCK RUNESTONES]</td><td></td></tr><tr><td>Fornland Cave -</td><td>17.21|60.36</td><td>Builders welcome<br>[DO NOT BLOCK RUNESTONES]</td><td></td></tr><tr><td>Runheimr Mountains Cave<br>Hidden behind waterfall</td><td>17.90|92.05</td><td>Builders welcome<br>[DO NOT BLOCK RUNESTONES]</td><td></td></tr><tr><td>Hidden Snowcave</td><td>20.00|19.06</td><td>Builders welcome<br>[DO NOT BLOCK RUNESTONES]</td><td></td></tr><tr><td>The Snowglobe</td><td>20.60|8.74</td><td>[Do Not Build Area]<br>[[Ferox Spawns inside]]</td><td>Cheat setplayerpos -294874 -209833 24128 133.39 -24.03</td></tr><tr><td>Molten Caverns<br>(Hyrrhel)</td><td>20.90|57.37</td><td>[Do Not Build Area] -<br>[[Artifact of the Clever]]<br>[[Artifact of the Massive]] [[Artifact of the Pack ]]</td><td>Cheat setplayerpos 53662 -205427 11849 57.26 -58.07</td></tr><tr><td>Dung Beetle Cave -<br>Runheimr Forest Cave</td><td>25.02|93.08</td><td>Builders welcome<br>[DO NOT BLOCK RUNESTONES]</td><td>cheat setplayerpos 308118 -177774 17632 -97.68 -8.68 - entrance</td></tr><tr><td>Waterfall Bridge cave<br>Midgard Valley</td><td>27.00|49.80</td><td></td><td></td></tr><tr><td>Snaerheimr Mountains Cave<br>(Snowy Mountains around Skadifjord)</td><td>28.15|34.62</td><td>Builders welcome<br>[DO NOT BLOCK RUNESTONES]</td><td></td></tr><tr><td>Fall Biome Cave</td><td>28.8|39.5</td><td>Builders welcome<br>[DO NOT BLOCK RUNESTONES]<br>(Dire bear spawns, equus spawns)</td><td>Cheat setplayerpos -72886 -151550 15102 -81.39 -1.66 - entrance</td></tr><tr><td>Midgard Runes Valley Cave -<br>Unnamed</td><td>29.12|50.58</td><td>Builders welcome<br>[DO NOT BLOCK RUNESTONES]</td><td></td></tr><tr><td>Asgard Wyvern's Cave</td><td>29.71|8.31</td><td>[Do NOT Build area]<br>[[Lightning Wyvern spawn]]</td><td>cheat setplayerpos -296461 -142775 -330890 97.80 -0.58</td></tr><tr><td>Snaerheimr Mountains Cave<br>(Snowy Mountains around Skadifjord)</td><td>29.90|22.62</td><td>Builders welcome<br>[DO NOT BLOCK RUNESTONES]</td><td></td></tr><tr><td>Runheimhr Stronghold Cave</td><td>32|66</td><td>Builders welcome<br>[DO NOT BLOCK RUNESTONES]</td><td>cheat setplayerpos 115759 -128304 11491 -160.88 -7.46</td></tr><tr><td>Midgard Runes Cave -<br>Unnamed</td><td>36.02|95.60</td><td>Builders welcome<br>[DO NOT BLOCK RUNESTONES]</td><td></td></tr><tr><td>Broken Meadowns Cave -<br>Hidden behind waterfall</td><td>37.68|74.98</td><td>[DO NOT BUILD]                 [Desmodus Spawn]<br>[DO NOT BLOCK RUNESTONES]<br>(Canyon Area on Big Island)</td><td></td></tr><tr><td>Hidden Grotto</td><td>39.56|31.63</td><td>Builders welcome<br>[DO NOT BLOCK RUNESTONES]</td><td></td></tr><tr><td>Mariana Caverns</td><td>4.21|4.54</td><td>[Do NOT Build area]<br>[[Artifact of the Brute]]<br>[[Artifact of the Depths]]<br>[[Artifact of the Devourer]]</td><td>Cheat setplayerpos -324585 -326919 -17871 -51.95 -12.41</td></tr><tr><td>Spider Cavern</td><td>4.3|47.3</td><td></td><td></td></tr><tr><td>Lindbjord Forest Cave -</td><td>4.52|47.32</td><td>[Do NOT Build Area] -               [[Beyla Dungeon]]</td><td>cheat setplayerpos -36577 -305065 17431 148.65 -2.53</td></tr><tr><td>The Hidden Worlds</td><td>40.90|57.40</td><td>Holds terminals used to teleport to other realms<br>[Do not Build area] [[POI]]</td><td>cheat setplayerpos 77488 -81733 7828 -11.11 -14.99</td></tr><tr><td>Underwater Bubble<br>Unnamed</td><td>41.91|24.84</td><td>Builders welcome<br>[DO NOT BLOCK RUNESTONES]</td><td></td></tr><tr><td>Asgard Drake Nest</td><td>42.04|49.21</td><td>[Do NOT Build Area]        [[Rockdrakes spawn area]]</td><td>cheat setplayerpos -5444 -55799 -321525 116.43 -28.39</td></tr><tr><td>The Golden Caverns<br>(Hall of Fame Rm and LOOT boxes)</td><td>45.68|60.71</td><td>[Do not Build area [[POI]]</td><td>cheat setplayerpos 74756 -31800 12736 30.43 -11.60</td></tr><tr><td>Crystaline Ceiling<br>Underwater Bubble</td><td>46.39|35.08</td><td>Builders welcome<br>[DO NOT BLOCK RUNESTONES]</td><td>cheat setplayerpos 332854 18809 -17732 74.27 -77.57 - entrance</td></tr><tr><td>Underwater Cave<br>Unnamed</td><td>47.04|42.42</td><td>Builders welcome<br>[DO NOT BLOCK RUNESTONES]</td><td></td></tr><tr><td>The Snakepit</td><td>49.4|14.2</td><td>[Do NOT Build Area]            [Desmodus Spawns]<br>[[Artifact of the Brute]]</td><td>cheat setplayerpos -299181 -17076 -8026 97.64 -11.17</td></tr><tr><td>Abyssal Depths</td><td>51.5|17.5</td><td>Deep Ocean Trench (Underwater)</td><td>cheat setplayerpos -237950 16415 -16931 59.52 -62.30</td></tr><tr><td>Crystal Builders Cave<br>Underwater Cave</td><td>51.54|44.59</td><td>Builders welcome<br>[DO NOT BLOCK RUNESTONES]</td><td>cheat setplayerpos -58143 -31219 -13642 -131.46 -61.36 - entrance</td></tr><tr><td>Crystal Underwater Cave<br>Underwater Cave</td><td>52.87|96.93</td><td>Builders welcome<br>[DO NOT BLOCK RUNESTONES]</td><td>cheat setplayerpos 332854 18809 -17732 74.27 -77.57 - entrance</td></tr><tr><td>Beiygjaheimr-<br></td><td>56.74|84.69</td><td>[Do NOT Build Area]<br>[[Megapithecus Dungeon]]<br>[[Artifact of the Stalker]]<br>cheat setplayerpos 250067 51949 5972 -114.56 -6.91</td><td>cheat setplayerpos 246416 45156 4080 -108.57 -77.23<br>entrance to cave.</td></tr><tr><td>Stonehenge Cave</td><td>57.3|66</td><td></td><td></td></tr><tr><td>Snowy mountain cave</td><td>66.0 |41.5</td><td></td><td></td></tr><tr><td>Nideshem Depths<br>(labyrinth with puzzles and several traps)<br>(UNDERWATER)<br>[Massive]</td><td>71.8|01.2</td><td>[Do NOT Build area]<br>[[Artifact of the Massive]]</td><td></td></tr><tr><td>Djuprjord<br>The Forgotten Caverns<br>(Pirate ship cave)</td><td>76.83|65.60</td><td>[Do NOT Build area]<br>[[Artifact of the Cunning]]</td><td>cheat setplayerpos 109274 192780 -10860 156.09 -46.11 - entrance ||WATER||</td></tr><tr><td>Jotunheim Cave</td><td>77.69|30.82</td><td>[Do Not Build Area]<br>[[Steinbjorn Dungeon]]<br>[[Artifact of the Void]]</td><td>cheat setplayerpos -136389 197574 -148101 -71.88 -0.09</td></tr><tr><td>Chitin Cave</td><td>78.1|29.0</td><td></td><td></td></tr><tr><td>Dvergheimr -<br>(The Old Kingdom)<br>(Moria)<br></td><td>86.2|5.3</td><td>[Do NOT Build Area]<br>[[Dragon Dungeon]]</td><td>cheat setplayerpos -319033 258885 2135 -168.38 -13.51</td></tr><tr><td>Caverns of Time -<br>Lunar cave<br>UNDERWATER</td><td>86.28|98.17</td><td>Red, Blue, Green Gems<br>[Do NOT Build area]<br>[[AB Dinos Spawn]<br></td><td>cheat setplayerpos 340286 260226 -11842 151.87 -68.00 - entrance</td></tr><tr><td>Moria Metal Cave</td><td>86.5 and Lon 3.7.</td><td></td><td></td></tr><tr><td>Balheimr Fire Dragon Temple</td><td>88.2| 84.7</td><td>Balheimr Fire Dragon Temple</td><td>cheat setplayerpos 248367 273334 43238 41.47 2.21</td></tr><tr><td>Vanaheim Cave</td><td>9.3 |84.7</td><td></td><td></td></tr><tr><td>Mount Doom Caverns<br>(walk into/swim thru damage free lava)</td><td>90.73|78.52</td><td>[Do NOT Build area] [Desmodus Spawn]<br>[[Artifact of the Immune]]</td><td>cheat setplayerpos 53913 -205342 11828 171.25 -32.17<br></td></tr><tr><td>Underwater Cave - Unnamed</td><td>91.73|41.7</td><td>Builders welcome<br>[DO NOT BLOCK RUNESTONES]</td><td></td></tr><tr><td>The Throat of Flames</td><td>95.88|80.64</td><td>[Do NOT Build area]<br>[[Magmasaur spawn]]</td><td>cheat setplayerpos 222706 329157 -6733 -170.55 -44.05</td></tr></tbody></table>
{% endtab %}

{% tab title="POI" %}
POI's will be updated over the next few weeks as we explore the map.

<table><thead><tr><th>Name</th><th width="150">Lat/Lon</th><th width="242">Notes:</th><th data-hidden>CCC</th></tr></thead><tbody><tr><td>Village</td><td>05.00|52.00</td><td></td><td></td></tr><tr><td>Dwarven Dam</td><td>07.20|54.90</td><td></td><td>cheat setplayerpos 46499 -312036 12590 100.41 -25.90</td></tr><tr><td>Broken Bridge</td><td>09.40|81.10</td><td></td><td></td></tr><tr><td>Dwarven Stairs</td><td>09.50|67.00</td><td></td><td></td></tr><tr><td>Otter Shrine</td><td>18.30|91.10</td><td></td><td></td></tr><tr><td>Whiterun Village<br>(Asgard)</td><td>20.0|25.0</td><td></td><td></td></tr><tr><td>Asgard Terminal</td><td>20.5|37.2</td><td>[Do Not Build Area]<br>[[Hati &#x26; Skol Dungeon]]</td><td>cheat setplayerpos -91667 -210359 -320731 -178.58 -44.34</td></tr><tr><td>Fyrkaburg<br>(Fjord Castle)</td><td>21.58|18.59</td><td>Builders welcome<br>[DO NOT BLOCK RUNESTONES]</td><td>Cheat Setplayerpos -224329 -202922 37659 -179.59 6.51</td></tr><tr><td>Snowy Mountain Bridge Ruins<br>(Snowy Mountains around Skadifjord)</td><td>22.4|19.2</td><td></td><td>cheat setplayerpos -219253 -196473 37612 146.70 -4.24</td></tr><tr><td>Fortress</td><td>23.50|82.70</td><td></td><td></td></tr><tr><td>Secret Terminal<br>(Asgard)</td><td>25.0|10.8</td><td>[Do NOT Build area]<br>[[Artifact of the Chaos]]</td><td>cheat setplayerpos -279933 -178734 -332797 -131.68 -33.12</td></tr><tr><td>Village</td><td>28.30|43.50</td><td></td><td></td></tr><tr><td>Village</td><td>30.50|56.80</td><td></td><td></td></tr><tr><td>Bridge</td><td>30.90|52.50</td><td></td><td></td></tr><tr><td>Forburg<br>(Helms Deep)</td><td>32.0|66.1</td><td>[Fjordur Community Center]</td><td>Cheat setplayerpos 115759 -128304 11491 -160.88 -7.46</td></tr><tr><td>Runheimhr Stronghold<br>Ruins (Redwood Castle)<br></td><td>32.0|66.1</td><td>Builders welcome<br>[DO NOT BLOCK RUNESTONES]</td><td>cheat setplayerpos 115759 -128304 11491 -160.88 -7.46</td></tr><tr><td>Bolbjord Castle<br>(Swamp Biome)</td><td>40.97|04.60</td><td>Builders welcome<br>[DO NOT BLOCK RUNESTONES]</td><td>Cheat setplayerpos -324190 -64490 10982 -132.01 2.86</td></tr><tr><td>Village</td><td>42.40|73.60</td><td></td><td></td></tr><tr><td>Bolbjord Swamp Village</td><td>44.60|07.20</td><td></td><td></td></tr><tr><td>Bolbjord Swamp Village</td><td>45.80|11.60</td><td></td><td></td></tr><tr><td>Quiet Lake Public Beaver Pond</td><td>46.94|73.18</td><td>Beaver Pond &#x26; dams<br>(Vannaland Beaver Lake)<br>[Do NOT Build area]</td><td>Cheat Setplayerpos 165524 -21841 26167 -72.22 1.54</td></tr><tr><td>Aggersburg<br>(Highland Castle)</td><td>54.71|73.68</td><td>Builders welcome<br>[DO NOT BLOCK RUNESTONES]</td><td>cheat setplayerpos 169093 33652 30582 -76.77 -1.89</td></tr><tr><td>Stonehenge Ruins</td><td>57.3|66</td><td></td><td>cheat setplayerpos 105562 -165308 26409 -105.62 -30.68</td></tr><tr><td>Red Forest Village<br>(Vardilland)</td><td>63.0|35.0</td><td></td><td></td></tr><tr><td>Village</td><td>64.01|93.5</td><td></td><td></td></tr><tr><td>Lonely Island</td><td>64.6 | 93.1</td><td>(Small Island between Balheimr and Vannaland)</td><td>cheat setplayerpos 308130 104617 1768 -82.15 1.55</td></tr><tr><td>Vardiland Village<br>(Vardiland)</td><td>69.0|05.0</td><td></td><td></td></tr><tr><td>Balheimr Trench<br>(Wyvern Trench)</td><td>85.8 | 72.5 84.6|69.9</td><td></td><td>cheat setplayerpos 160692 255335 8656 -151.26 -24.36<br>cheat setplayerpos 149997 245935 6118 109.12 -28.75</td></tr><tr><td>Faheimr<br>(Biolum Chamber)</td><td>86.8|12.8</td><td>Red, Blue, Green Gems<br>[Do NOT Build area]<br>[[AB Dinos Spawn]]</td><td>Cheat setplayerpos -284179 250578 -5757 170.58 -80.00 - entrance</td></tr><tr><td>Living Lake - Public Beaver Pond</td><td>93.06|32.74</td><td>Beaver Pond &#x26; dams<br>(Vardiland Beaver Lake)<br>[Do NOT Build area]</td><td>Cheat setplayerpos -123254 307503 14986 162.11 -4.65</td></tr><tr><td></td><td></td><td></td><td></td></tr><tr><td>Blossom Paradise<br>(Redwood bay)</td><td></td><td></td><td></td></tr><tr><td>Cherry Tree Lake (Redwood lake)</td><td></td><td></td><td></td></tr><tr><td>Fornland Lake<br>(Fjord on Big Island)</td><td></td><td></td><td></td></tr><tr><td>Helhiem</td><td></td><td></td><td>cheat setplayerpos 52724 -209233 12199 -95.05 -22.73</td></tr><tr><td>Myr Islands<br>(Vannaland Twin Islands)</td><td></td><td></td><td></td></tr><tr><td>Old Castle</td><td></td><td></td><td>cheat setplayerpos 167159 37494 32776 -51.88 -29.29</td></tr><tr><td>Rustic Shanty Town</td><td></td><td></td><td>cheat setplayerpos 160561 -48471 34616 -14.47 -38.60</td></tr><tr><td>Skaland (Island between Vardiland and Vannaland)</td><td></td><td></td><td></td></tr><tr><td>Vardiland Village<br>Husnar</td><td></td><td></td><td>cheat setplayerpos 160561 -48471 34616 -14.47 -38.60</td></tr></tbody></table>
{% endtab %}

{% tab title="RESOURCE AREAS: " %}

<table data-header-hidden><thead><tr><th width="164"></th><th width="150"></th><th></th><th data-hidden></th></tr></thead><tbody><tr><td>Fjordur Public Resources</td><td>-03.87|73.97</td><td>Metal Crystal and Gems<br>[Do NOT Build area]</td><td>cheat setplayerpos 171147 -384721 -160602 134.09 -71.98</td></tr><tr><td>Fjordur Public Metal Mtn-2</td><td>30.38|52.89</td><td>Metal, OBS, &#x26; Runestones<br>[Do NOT Build area]</td><td>Cheat setplayerpos 20637 -140078 21401 -129.30 -50.54</td></tr><tr><td>Fjordur Public Crystal</td><td>32.11|69.02</td><td>Below Helmsdeep in a cavern Crystal and Cave dinos.</td><td>cheat setplayerpos 135798 -127786 11338 14.27 -70.41</td></tr><tr><td>◉Fjordur Public Metal, Oil, Obs.</td><td>32.2 | 67.4</td><td>Above Helmsdeep with OIL, OBS, Metal<br>[Do NOT Build area]</td><td>cheat setplayerpos 130653 -132185 24555 91.20 -58.22</td></tr><tr><td>◉Fjordur Public OIL, Metal and Obs.</td><td>36.86|95.76</td><td>Cave with OIL, Metal and Obs.<br>[Do NOT Build area]</td><td>Cheat setplayerpos 325054 -89757 9081 100.05 -75.97</td></tr><tr><td>Fjordur Public Crystal &#x26; Oil</td><td>44.82|42.44</td><td>Crystal and Oil<br>[Do NOT Build area]</td><td>cheat setplayerpos -96710 208884 12669 -129.30 0.00</td></tr><tr><td>Living Lake Public Beaver Pond</td><td>46.94|73.18</td><td>Beaver Pond &#x26; dams<br>(Vardiland Beaver Lake)<br>[Do NOT Build area]</td><td>Cheat Setplayerpos 165524 -21841 26167 -72.22 1.54</td></tr><tr><td>◉Fjordur Public OIL, Metal and Obs.</td><td>58.38|78.39</td><td>Cave with Metal, OIL, Obs, and Crys.<br>[Do NOT Build area]</td><td>Cheat setplayerpos 202286 58022 4248 -132.25 -11.43</td></tr><tr><td>Sulfur Pools Public Area</td><td>72.64|91.35</td><td>Gigantic Sulfur Pool area.<br>[Do NOT Build area]</td><td>cheat setplayerpos 295283 161687 3651 3.86 -70.34</td></tr><tr><td>Fjordur Public Metal Mtn.</td><td>79.26|36.46</td><td>Side of a MTN covered in metal nodes<br>[Do NOT Build area]</td><td>Cheat setplayerpos -96695 208944 12669 87.37 -70.61</td></tr><tr><td>Balheimr Tar Pits.</td><td>80.46|80.80</td><td>Balheimr Volcanic Isle<br>stone pathway above the tar pits.<br>[Do NOT Build Area]</td><td>Cheat setplayerpos cheat setplayerpos 295283 161687 3651 3.86 -70.34</td></tr><tr><td>Caverns of Time -<br>Lunar cave<br>UNDERWATER</td><td>86.28|98.17</td><td>Red, Blue, Green Gems<br>[Do NOT Build area]<br>[[AB Dinos Spawn]<br></td><td>cheat setplayerpos 340286 260226 -11842 151.87 -68.00 - entrance</td></tr><tr><td>Faheimr<br>(Biolum Chamber)</td><td>86.8|12.8</td><td>Red, Blue, Green Gems<br>[Do NOT Build area]<br>[[AB Dinos Spawn]]</td><td>Cheat setplayerpos -284179 250578 -5757 170.58 -80.00 - entrance</td></tr><tr><td>◉ Fjordur Public Metal &#x26; Oil</td><td>90.02|45.14</td><td>Metal and Oil<br>[Do NOT Build area]</td><td>Cheat setplayerpos -34715 285797 2126 99.34 -55.02</td></tr><tr><td>Quiet Pond Public Beaver Pond</td><td>93.06|32.74</td><td>Beaver Pond &#x26; dams<br>(Vanaland Beaver Lake)<br>[Do NOT Build area]</td><td>Cheat setplayerpos -123254 307503 14986 162.11 -4.65</td></tr></tbody></table>
{% endtab %}
{% endtabs %}

Spawns For MIDGARD. (The small insert of the dots represent the whole map, but show as the AREA when you are in other REALMS)

![](https://772063455-files.gitbook.io/~/files/v0/b/gitbook-x-prod.appspot.com/o/spaces%2F-Lgje1lBxKKWXwqycB-v%2Fuploads%2FFqzjaxSDj5amXwBsicq7%2FFJORDUR_MIDGARD_SPAWNS%20IN%20RELATION%20TO%20MAP.jpg.png?alt=media\&token=8ced9f59-c605-42a7-a34f-31f909f8cbeb)

Spawns For ASGARD. (The small insert of the dots represent the whole map, but show as the AREA when you are in other REALMS)

![](https://772063455-files.gitbook.io/~/files/v0/b/gitbook-x-prod.appspot.com/o/spaces%2F-Lgje1lBxKKWXwqycB-v%2Fuploads%2FIkidERpO4I1aKLboMC98%2FFJORDUR_ASGARD_SPAWNS%20IN%20RELATION%20TO%20MAP.jpg?alt=media\&token=ca288bee-a5f4-4bad-95b1-72808d949ee7)

Spawns For JOTENHEIM. (The small insert of the dots represent the whole map, but show as the AREA when you are in other REALMS)

![](https://772063455-files.gitbook.io/~/files/v0/b/gitbook-x-prod.appspot.com/o/spaces%2F-Lgje1lBxKKWXwqycB-v%2Fuploads%2FWEW3aWK7YPygIFjgiIcX%2FFJORDUR_JOTENHEIM_SPAWNS%20IN%20RELATION%20TO%20MAP.jpg?alt=media\&token=bf911a48-c962-4e71-a524-0dca77aab57d)

Spawns For VANNAHEIM. (The small insert of the dots represent the whole map, but show as the AREA when you are in other REALMS)

![](https://772063455-files.gitbook.io/~/files/v0/b/gitbook-x-prod.appspot.com/o/spaces%2F-Lgje1lBxKKWXwqycB-v%2Fuploads%2FR3O8pFWggYLEPjAi8gJh%2FFJORDUR_VANNAHEIM_SPAWNS%20IN%20RELATION%20TO%20MAP.jpg?alt=media\&token=81aa0d35-29c0-430d-8f29-3a37a9676280)

![](https://772063455-files.gitbook.io/~/files/v0/b/gitbook-x-prod.appspot.com/o/spaces%2F-Lgje1lBxKKWXwqycB-v%2Fuploads%2FrlqX4M9MCu6dVUfCnhWe%2FNEW-PAGE_GENERIC_BANNER.png?alt=media\&token=9d073148-393e-4dac-ae13-e88d3519e959)

*All content on this page has been accumulated from several places including the Wiki, The PACK Admin Team, and Players from The Pack cluster.*


# AQUATICA

Aquatica is an official, non-canonical DLC expansion map for ARK: Survival Evolved. Aquatica has  a release date of July 2025 for the PC.

<figure><img src="https://772063455-files.gitbook.io/~/files/v0/b/gitbook-x-prod.appspot.com/o/spaces%2F-Lgje1lBxKKWXwqycB-v%2Fuploads%2Ff30mf1X9PHYRcQ6mQKd1%2FAquatica_Header_Capsule.png?alt=media&amp;token=9a119b94-e5a6-461b-9c48-8e1e7bec3448" alt=""><figcaption></figcaption></figure>

Survivors, are you ready to take on an all-new challenge in the depths? Launching on July 15, ARK: Aquatica arrives as a special ARK: Survival Evolved DLC to celebrate the franchise’s 10th anniversary.

{% embed url="<https://youtu.be/OWTdUtQHRSg>" %}

## Joining Aquatica

<table data-view="cards"><thead><tr><th align="center"></th><th align="center"></th><th align="center"></th><th data-hidden data-card-target data-type="content-ref"></th><th data-hidden data-card-cover data-type="files"></th></tr></thead><tbody><tr><td align="center"></td><td align="center"><p><em><strong>Steam Workshop</strong></em></p><p><em><strong>The PACK Gaming</strong></em></p><p><em><strong>Canon Servers Mod Package</strong></em></p></td><td align="center"><strong>Please download the mod package prior to joining the server!</strong></td><td><a href="https://steamcommunity.com/sharedfiles/filedetails?id=1829354252">https://steamcommunity.com/sharedfiles/filedetails?id=1829354252</a></td><td><a href="https://772063455-files.gitbook.io/~/files/v0/b/gitbook-x-prod.appspot.com/o/spaces%2F-Lgje1lBxKKWXwqycB-v%2Fuploads%2FpF4qr3pZmA1wowcx93ev%2FASE_Mod-Pack_CARDS_2025.png?alt=media&amp;token=4120bf82-61cd-4b43-86d7-f2cd17bcbfce">ASE_Mod-Pack_CARDS_2025.png</a></td></tr><tr><td align="center"><br><em><strong>Aquatica</strong></em>     </td><td align="center"><em><strong>STEAM JOIN LINK</strong></em> </td><td align="center"><em><strong>CLICK HERE TO JOIN  NOW!</strong></em></td><td><a href="steam://connect/45.92.39.91:27027">steam://connect/45.92.39.91:27027</a></td><td><a href="https://772063455-files.gitbook.io/~/files/v0/b/gitbook-x-prod.appspot.com/o/spaces%2F-Lgje1lBxKKWXwqycB-v%2Fuploads%2F7NHabT6Q1jp1Ur5KQu9o%2FASE_AQUATICA_SPASH.png?alt=media&amp;token=dc705520-f825-4ed5-9a5e-296ce5bf8ac3">ASE_AQUATICA_SPASH.png</a></td></tr><tr><td align="center"></td><td align="center"><strong>Ark: Survival Evolved PvE Rules</strong></td><td align="center"><strong>Click here to go to our    ARK:Survival Evolved Rules!</strong></td><td><a href="https://faq.thepackgaming.com/rules/ark">https://faq.thepackgaming.com/rules/ark</a></td><td><a href="https://772063455-files.gitbook.io/~/files/v0/b/gitbook-x-prod.appspot.com/o/spaces%2F-Lgje1lBxKKWXwqycB-v%2Fuploads%2Fx9tp1YZBxnZxOABDQyiC%2FASE_rules_2025.png?alt=media&amp;token=b7f5fd76-148a-459b-a23c-642e0f488aaa">ASE_rules_2025.png</a></td></tr><tr><td align="center">Map TBA</td><td align="center"><em><strong>Aquatica</strong></em></td><td align="center"><em><strong>Landmarks and Resources!</strong></em></td><td></td><td></td></tr><tr><td align="center"></td><td align="center"><em><strong>Aquatica</strong></em></td><td align="center"><strong>ARK Survival Evolved Wiki</strong> </td><td><a href="https://ark.wiki.gg/wiki/Ragnarok">https://ark.wiki.gg/wiki/Ragnarok</a></td><td><a href="https://772063455-files.gitbook.io/~/files/v0/b/gitbook-x-prod.appspot.com/o/spaces%2F-Lgje1lBxKKWXwqycB-v%2Fuploads%2FUHO82d4vi96dPHkVcq6b%2FARK%20Aquatica.jpg?alt=media&amp;token=d269be9d-4c3f-4ff6-9ded-d10236f4924a">ARK Aquatica.jpg</a></td></tr></tbody></table>

***

<figure><img src="https://772063455-files.gitbook.io/~/files/v0/b/gitbook-x-prod.appspot.com/o/spaces%2F-Lgje1lBxKKWXwqycB-v%2Fuploads%2F7NHabT6Q1jp1Ur5KQu9o%2FASE_AQUATICA_SPASH.png?alt=media&amp;token=dc705520-f825-4ed5-9a5e-296ce5bf8ac3" alt=""><figcaption></figcaption></figure>

## Aquatica - ARK Expansion Map

**DEVELOPER**: Snail Games USA\
**RELEASE DATE:** July 15 2025\
**PRICE:** Regularly $14.99 USDA\
**SPECIAL Launch Promotion** $8.99 for July 15 - July 29th. 2025\
**STEAM PAGE LINK:** [Aquatica - ARK Expansion Map](https://store.steampowered.com/app/3537070/Aquatica__ARK_Expansion_Map/)

### **About this Expansion DLC**

Aquatica is the first official DLC to tell a side story, expanding the ARK universe into new dimensions of survival.  Aquatica is the special 10-year anniversary DLC for ARK: Survival Evolved, initially releasing on PC in July 2025.  Exclusive ASE Official Server Support: Limited-time support for official servers, enhancing the multiplayer experience.

“Aquatica” is a sunken ARK lying within a vast underwater ecosystem. Survivors will be pushed to their limits as they face unprecedented challenges: crushing deep-sea pressure, powerful currents, drastic environmental shifts, and strange life forms lurking in the abyss.

<figure><img src="https://772063455-files.gitbook.io/~/files/v0/b/gitbook-x-prod.appspot.com/o/spaces%2F-Lgje1lBxKKWXwqycB-v%2Fuploads%2F87JUsCXscBGTj1GK5QVp%2FScreenshot_1.png?alt=media&amp;token=9893b471-64d4-40e8-b144-dc2a6adc2e63" alt=""><figcaption></figcaption></figure>

Aquatica introduces five unique deep-sea biomes, born from ARK’s system malfunctions and elemental mutations. The 5 biomes are as follows: Shallows; Crystal Caverns; Boiling Sea; Depths; Abyss. Together, they form a sprawling underwater labyrinth. These zones exist at varying depths, and what seems like the ocean floor may, in fact, be the surface of yet another deeper zone.

<figure><img src="https://clan.fastly.steamstatic.com/images//8729288/426ac95d9c68914f7f78dc107d01d213f0187789.jpg" alt=""><figcaption></figcaption></figure>

Pictured here is the Shallows biome. the introductory biome in the world of Aquatica. A gorgeous and friendly biome teeming with colorful corals, happy beasts, and mystical plants that somehow allow humans to breathe underwater.

<figure><img src="https://clan.fastly.steamstatic.com/images//8729288/c8fbd3461005bf9f2b98861853d7f6f50c14add4.jpg" alt=""><figcaption></figcaption></figure>

Pictured here is the opposite end of the biome spectrum, the Abyss, residing below the Depths, this biome looks like another world at the bottom of the ocean. Aquatic in nature but somehow twisted, like it doesn't quite belong in this reality.

Prepare to face the terrifying forces lurking in the abyss as you unravel the origin story of Element. Encounter two brand new characters and immerse yourself in a narrative that bridges multiple ARKs, expanding the lore of ARK: Survival Evolved like never before.

<figure><img src="https://772063455-files.gitbook.io/~/files/v0/b/gitbook-x-prod.appspot.com/o/spaces%2F-Lgje1lBxKKWXwqycB-v%2Fuploads%2FA0BnmZrB0Q0cjP7Hb73I%2FDossier%20header.png?alt=media&amp;token=3fdd6629-4f76-4721-b5f9-82b0ee45f9e1" alt=""><figcaption></figcaption></figure>

But worry not. 21 brand-new aquatic creatures await in this oceanic frontier. Some will test your strength, while many others may become your best companions. Stay tuned for more details about the creatures of ARK: Aquatica in upcoming updates.

<div><figure><img src="https://772063455-files.gitbook.io/~/files/v0/b/gitbook-x-prod.appspot.com/o/spaces%2F-Lgje1lBxKKWXwqycB-v%2Fuploads%2FgqMwpVQFZdtcSaj2kY3I%2FMudpuppy.png?alt=media&amp;token=90f60c36-e2aa-489c-9d76-5decbf77ac56" alt=""><figcaption></figcaption></figure> <figure><img src="https://772063455-files.gitbook.io/~/files/v0/b/gitbook-x-prod.appspot.com/o/spaces%2F-Lgje1lBxKKWXwqycB-v%2Fuploads%2FlVZWbJGCjO0xYYROJxEi%2FTridacna.png?alt=media&amp;token=0eb955f1-688a-4f29-aab3-5c64be4efbc4" alt=""><figcaption></figcaption></figure> <figure><img src="https://772063455-files.gitbook.io/~/files/v0/b/gitbook-x-prod.appspot.com/o/spaces%2F-Lgje1lBxKKWXwqycB-v%2Fuploads%2FAe2GCZj3nD9Z68IrYyOW%2FMonodon.png?alt=media&amp;token=045bfaa8-6eae-4f00-945b-95166ae3b91c" alt=""><figcaption></figcaption></figure></div>

<div><figure><img src="https://772063455-files.gitbook.io/~/files/v0/b/gitbook-x-prod.appspot.com/o/spaces%2F-Lgje1lBxKKWXwqycB-v%2Fuploads%2FzEUBI6Hr6k0S3jpr9IZC%2FOnchopristis.png?alt=media&amp;token=13938577-d443-4f30-b49d-de40e5bff974" alt=""><figcaption></figcaption></figure> <figure><img src="https://772063455-files.gitbook.io/~/files/v0/b/gitbook-x-prod.appspot.com/o/spaces%2F-Lgje1lBxKKWXwqycB-v%2Fuploads%2FUF2zs8Dk2XNQj9HTxjBF%2FShrimp.png?alt=media&amp;token=b9985993-6f31-4f1f-8c13-68515a065fea" alt=""><figcaption></figcaption></figure> <figure><img src="https://772063455-files.gitbook.io/~/files/v0/b/gitbook-x-prod.appspot.com/o/spaces%2F-Lgje1lBxKKWXwqycB-v%2Fuploads%2FisI66tsIItEhXRhWbJ0t%2FTiktaalik.png?alt=media&amp;token=a4e09fe1-03db-40e0-a367-350da388a91c" alt=""><figcaption></figcaption></figure></div>

### NEW ITEMS

#### Two unique items in Aquatica

Two amazing tools to aid your underwater journey, the Tek Trident and the Seafin Glider Suit will be essential items in this expansion!

{% embed url="<https://youtu.be/XnL_4q3TOoM>" %}

With 60 new Engrams, survivors gain access to gear designed for underwater survival. Utilize Lead Boots to walk along the ocean floor, adapt land-dwelling creatures with mutations for underwater breathing, and construct innovative TEK Air Pockets for submerged bases. Additionally, discover 10 new cooking recipes tailored to the aquatic ecosystem.

{% embed url="<https://youtu.be/OWTdUtQHRSg>" %}

## The PACK Aquatica PvE Cluster(3xH, 4xXP, 8xT)&#x20;

IP: TBA&#x20;

**NAKED AND AFRAID** \
**July 15th. 2025 through August 15th. 2025**

* Characters may transfer naked without inventories or hotbar items.
* No dino Imports
* No item Imports.&#x20;

**Patreon rewards of base kits and dinos start August 15th. 2025**

**Mods Package**&#x20;

Subscribe to this steam workshop package for our mods. <https://steamcommunity.com/sharedfiles/filedetails?id=1829354252>\
**MODS may break with the addition of Aquatica.** Please be patient as we test our chosen mods and see how they function with Aquatica items.

**Base SIZE** \
One Base of 40 x 40 Building tiles allowed. \
(No Land bases Allowed till after Server transfer is lifted.) \
Use of Ocean Platforms is permitted but Limited to a 40 x 40 Tile platform.

**Mobile Bases**: - (Water Craft, Platform saddles.) 30x30x12. Maximum size without a Special Exception (Some ship builds can be made into an Exception.) Platform Saddles have specific build limits built in. And when built on, count as multiple tames in your base count.

**NO Build AREAS** Basic No Build Rules apply until we can explore the map and find the artifacts and entryways into the deeper depths of Aquatica. Subject to change daily as we discover the new map. <https://faq.thepackgaming.com/rules/ase#id-6.-building-restrictions>

<figure><img src="https://772063455-files.gitbook.io/~/files/v0/b/gitbook-x-prod.appspot.com/o/spaces%2F-Lgje1lBxKKWXwqycB-v%2Fuploads%2FvVW5iVQ9w2qY9d3KjuEb%2Fimage.png?alt=media&amp;token=13b024e5-0c97-4b3f-9185-bf3c2f2c118a" alt=""><figcaption></figcaption></figure>

## Your Community Landmarks

The PACK Aquatica Community Center.&#x20;

### Landmarks and Places of Interest

Landmarks with GPS and ADMIN Teleport Locators. All Ark Map Residents should pick up an Awesome Teleport Remote at a Community Center or make one in your Inventory.

{% tabs %}
{% tab title="Community Builds:" %}
Here you will find Places Like the Community Center, and refinery locations. Those noted have Open Transmitters, and all are part of the Teleport System.
{% endtab %}

{% tab title="Teleporter System" %}
The PACK Admins upkeep a network of Teleporters for the use of our Players.
{% endtab %}

{% tab title="Artifact Caves" %}

{% endtab %}
{% endtabs %}

{% tabs %}
{% tab title="NO BUILD AREAS" %}

{% endtab %}

{% tab title="RESOURCES" %}

{% endtab %}

{% tab title="Points of Interest " %}
Caves, Ruins and other Interesting Places on \<MAP HERE>.
{% endtab %}
{% endtabs %}

Insert Map Image here: \*Topographical Map of \<MAP>\*

*All content on this page has been accumulated from several places including the Wiki, The PACK Admin Team, and Players from The Pack cluster.*

<figure><img src="https://772063455-files.gitbook.io/~/files/v0/b/gitbook-x-prod.appspot.com/o/spaces%2F-Lgje1lBxKKWXwqycB-v%2Fuploads%2F8Mrjs5a4lEQwX52RGOGC%2Fimage.png?alt=media&amp;token=56956fa0-c4d0-4439-be22-7cae4caf4542" alt=""><figcaption></figcaption></figure>


# ASA PVE Cluster

UE5 Remaster of Ark Survival Evolved. We offer a cluster of 7 maps including Astraeos.

## **Navigation of Pages:**

<table data-view="cards"><thead><tr><th></th><th></th></tr></thead><tbody><tr><td><strong>Left side of the page</strong> <span data-gb-custom-inline data-tag="emoji" data-code="25c0">◀️</span></td><td>Use the <strong>></strong> to open any pages in that section when the Header shows a <strong>></strong>.</td></tr><tr><td><strong>Right Side</strong> of the page <span data-gb-custom-inline data-tag="emoji" data-code="25b6">▶️</span></td><td>Click a header to go to that section of this page.</td></tr><tr><td><strong>Features of the page.</strong></td><td>are in an <strong>expandable box</strong>, please click the <strong>></strong> to open the expandable dropdown.</td></tr><tr><td><strong>Hyperlink</strong>s are often in a <strong>card form</strong> in the website.</td><td>So <strong>clicking an image</strong> will often take you to a specific page for information. </td></tr><tr><td><strong>Steam-link</strong>s are often in a <strong>card form</strong> in the website.</td><td>So <strong>clicking on a server card</strong> will take you to the Server.</td></tr></tbody></table>

## The PACK ASA Cluster:

<figure><img src="https://772063455-files.gitbook.io/~/files/v0/b/gitbook-x-prod.appspot.com/o/spaces%2F-Lgje1lBxKKWXwqycB-v%2Fuploads%2FvSON0pAFds8MTKzgESyA%2FASA_CLUSTER_Main_Flash_2025.png?alt=media&amp;token=e035b65b-7bc3-42a9-af9c-a7c7a89d8167" alt=""><figcaption></figcaption></figure>

### Owners Vision&#x20;

**OUR MOTTO! ALL MAY ENTER HERE WITHOUT PREJUDICE! This applies to All Races, All Creeds, and All Genders. All are Welcome!!!**

We are an adult gaming community, and we are looking for quality players to join our adventures. We host an ASA PvE cluster of 7 maps. With :soon:Lost Colony being added by years end. Our Cluster is Beginner friendly, with a Helpful and active admin team! We are PVE, and actively discourage PVP style "Raiding and Claiming” within our community. We have chosen a limited but satisfactory grouping of QoL mods that provide the best overall playing experience for your ARK experience, and a structured rule package that enhances Quality of life, and breeding.&#x20;

**Last of all, BE EXCELLENT TO EACH OTHER! We are all adults here, and know how to act. Let's make a happy, safe place to enjoy the games we love to play!**

***

## ASA PVE Cluster Index

<table data-view="cards"><thead><tr><th align="center"></th><th align="center"></th><th align="center"></th><th data-hidden data-card-target data-type="content-ref"></th><th data-hidden data-card-cover data-type="image">Cover image</th></tr></thead><tbody><tr><td align="center"><strong>ASA: The Island</strong></td><td align="center"><strong>To See the Page</strong></td><td align="center"><strong>Click Here !!</strong></td><td><a href="https://faq.thepackgaming.com/ark/asa-cluster/asa-island">https://faq.thepackgaming.com/ark/asa-cluster/asa-island</a></td><td><a href="https://772063455-files.gitbook.io/~/files/v0/b/gitbook-x-prod.appspot.com/o/spaces%2F-Lgje1lBxKKWXwqycB-v%2Fuploads%2FZ2736Wf15cVwjjyMXxE6%2FASA%20The%20Island.png?alt=media&amp;token=7fec5e96-2c19-424f-a6cd-fedddf83c418">ASA The Island.png</a></td></tr><tr><td align="center"><strong>ASA: Scorched Earth</strong></td><td align="center"><strong>To See the Page</strong> </td><td align="center"><strong>Click Here !!</strong></td><td><a href="https://faq.thepackgaming.com/asa/cluster/se">https://faq.thepackgaming.com/asa/cluster/se</a></td><td><a href="https://772063455-files.gitbook.io/~/files/v0/b/gitbook-x-prod.appspot.com/o/spaces%2F-Lgje1lBxKKWXwqycB-v%2Fuploads%2FNqu8kXl3z07DhMdHC0D6%2Fimage.png?alt=media&amp;token=c92efe5e-f2c9-4bda-81a1-d75873959316">image.png</a></td></tr><tr><td align="center"><strong>ASA: Aberration</strong> </td><td align="center"><strong>To See the Page</strong>  </td><td align="center"><strong>Click Here!!</strong></td><td><a href="https://faq.thepackgaming.com/asa/cluster/aberration">https://faq.thepackgaming.com/asa/cluster/aberration</a></td><td><a href="https://772063455-files.gitbook.io/~/files/v0/b/gitbook-x-prod.appspot.com/o/spaces%2F-Lgje1lBxKKWXwqycB-v%2Fuploads%2FydSBjr0fuKssD1WnSmvV%2FAB_Page_Flash.png?alt=media&amp;token=e6169be9-f086-435c-b0a6-11b91f9566cf">AB_Page_Flash.png</a></td></tr><tr><td align="center"><strong>ASA: Astraeos</strong></td><td align="center"><strong>To See the Page</strong></td><td align="center"><strong>Click Here !!</strong></td><td><a href="https://faq.thepackgaming.com/ark/asa-cluster/asa-astraeos">https://faq.thepackgaming.com/ark/asa-cluster/asa-astraeos</a></td><td><a href="https://772063455-files.gitbook.io/~/files/v0/b/gitbook-x-prod.appspot.com/o/spaces%2F-Lgje1lBxKKWXwqycB-v%2Fuploads%2F9aY7sLkVPKfAbv6JyTnc%2FASTRAEOS_Card.png?alt=media&amp;token=09858510-7617-4d42-819f-4c4f78d248ad">ASTRAEOS_Card.png</a></td></tr><tr><td align="center"><strong>ASA: Extinction</strong></td><td align="center"><strong>To See the Page</strong></td><td align="center"><strong>Click Here !!</strong></td><td><a href="https://faq.thepackgaming.com/asa/cluster/extinction">https://faq.thepackgaming.com/asa/cluster/extinction</a></td><td><a href="https://772063455-files.gitbook.io/~/files/v0/b/gitbook-x-prod.appspot.com/o/spaces%2F-Lgje1lBxKKWXwqycB-v%2Fuploads%2Fai7TF5ocGYVdil92R5h9%2FWastelandwar_extinction.png?alt=media&amp;token=f32977cd-fc17-47b2-9cf5-82cc0e884511">Wastelandwar_extinction.png</a></td></tr><tr><td align="center"><strong>ASA: Ragnarok</strong></td><td align="center"><strong>To See the Page</strong></td><td align="center"><strong>Click Here !!</strong></td><td><a href="https://faq.thepackgaming.com/ark/asa-cluster/asa-ragnarok">https://faq.thepackgaming.com/ark/asa-cluster/asa-ragnarok</a></td><td><a href="https://772063455-files.gitbook.io/~/files/v0/b/gitbook-x-prod.appspot.com/o/spaces%2F-Lgje1lBxKKWXwqycB-v%2Fuploads%2FRkDWTqq3vP4iKBkBfe5x%2FASA%20-%20RAGNAROK_LOGO_2.png?alt=media&amp;token=f6d62537-8906-49e4-aa9b-f0883211dcb4">ASA - RAGNAROK_LOGO_2.png</a></td></tr><tr><td align="center"><strong>ASA: Valguero</strong></td><td align="center"><strong>To See the Page</strong> </td><td align="center"><strong>Click Here !!</strong></td><td><a href="https://faq.thepackgaming.com/ark/asa-cluster/asa-valguero">https://faq.thepackgaming.com/ark/asa-cluster/asa-valguero</a></td><td><a href="https://772063455-files.gitbook.io/~/files/v0/b/gitbook-x-prod.appspot.com/o/spaces%2F-Lgje1lBxKKWXwqycB-v%2Fuploads%2FXzjUS7qeme7MIjlKyjPo%2FASA_Valguero_KeyArt_Logo_2560x1440.jpg?alt=media&amp;token=55a0f244-c9b6-4b58-a1a8-b36ec19fb3d1">ASA_Valguero_KeyArt_Logo_2560x1440.jpg</a></td></tr><tr><td align="center"><strong>ASA: Lost Colony</strong></td><td align="center"><strong>COMING SOON</strong></td><td align="center">🔜</td><td></td><td><a href="https://772063455-files.gitbook.io/~/files/v0/b/gitbook-x-prod.appspot.com/o/spaces%2F-Lgje1lBxKKWXwqycB-v%2Fuploads%2F7PMc82vPMvenOHBtKaww%2Fmaxresdefault.jpg?alt=media&amp;token=65f114c3-4508-4270-bd76-ff196ca52f5f">maxresdefault.jpg</a></td></tr></tbody></table>

***

<figure><img src="https://772063455-files.gitbook.io/~/files/v0/b/gitbook-x-prod.appspot.com/o/spaces%2F-Lgje1lBxKKWXwqycB-v%2Fuploads%2F7jarhL4kSgdhJ8F8ttGH%2Fimage.png?alt=media&amp;token=22118b25-7c1e-438f-95c3-58e4afc07539" alt="" width="563"><figcaption></figcaption></figure>

## How to Install or Uninstall a map in ASA.

### 1. Installation.

* Right-click on Ark: Survival Ascended in your Steam library.
* Select "Properties".
* Go to the "DLC" tab.
* Check the boxes next to any maps you want to download or install.
* Apply the changes and restart Steam if necessary.

### 2. Deletion of a DLC

* Right-click on Ark: Survival Ascended in your Steam library.
* Select "Properties".
* Go to the "DLC" tab.
* \*\*UN-\*\*Check the boxes next to any maps you do not want to download or install.
* Apply the changes. Exit Steam and restart your PC. (The map DLC will still be in your files. Follow the next step to remove the Files)
* Uninstall ARK ASCENDED in the Steam APP
* Reinstall ARK ASCENDED. This should now reinstall the game without the Selected DLC.

### In case of DLC corruption,

Follow **## 2. Deletion of a DLC** instructions, Then Follow **## 1. Installation** instructions, and then verify till ARK shows 0 files missing.

## CrossARK Transfers

There are limitations as to how items, creatures and survivors can be transferred through the normal mechanism: They can only be transferred within the same server cluster. 50 stacks in the Data tab, 30 Dinos in the Dino tab and only **250 in your inventory if you transfer (INCLUDING your Custom Cosmetics tab items).**

### Temporary Restrictions on CrossARK transfers:

* If you’re transferring or ascending to another server with an Armadoggo or Veilwyn in Companion Mode, be sure to exit Companion Mode first. Leaving it active may cause issues during the transfer.
* Please avoid transferring while you have a template in the incomplete phase to avoid potentially getting into a bugged state.

### Epic Online Services:

EOS has been randomly experiencing an outage which is impacting the ability to join servers and resulting in *Unknown Error/unable to join*, *content failed to load*, and issues with servers listing. If you fail to transfer servers, please check Epic's Status Page here: <https://status.epicgames.com/>

### No transfer items:

Specimen Implant; Boss Heads; Element {Any type}; Gacha Crystal; Event items; Bee hive; Filled Fish Basket; Apex drops.&#x20;

***Transfer Workaround -*** place the items inside a dino then use the SCS pod to cryo the dino. You may now transfer with the item in the inventory of the dino while in your inventory.

### No Foreign Dinos allowed transfer into Aberration.

Flying creatures of all kinds and gliders from other maps. Large carnivores. Modded dinos are not allowed on Aberration. Except for any mod specifically meant for Aberration. These dinos will not unpod once on Aberration. Only the creatures listed below, and all their variants, can be downloaded on Aberration&#x20;

{% embed url="<https://ark.wiki.gg/wiki/CrossARK_Transfers#Aberration>" %}

***

## Wild Card presents: Ark: Survival Ascended

<figure><img src="https://772063455-files.gitbook.io/~/files/v0/b/gitbook-x-prod.appspot.com/o/spaces%2F-Lgje1lBxKKWXwqycB-v%2Fuploads%2F5sK8kmCb8aZxMAusloCD%2FOrin_Photo_1.png?alt=media&amp;token=ddfb5201-7702-4bfd-97b2-65a72d5aaec2" alt=""><figcaption></figcaption></figure>

**ARK: Survival Ascended is a next-generation remaster of our beloved ARK: Survival Evolved, harnessing the power of Unreal Engine 5.5!**

Respawn into a new dinosaur survival experience beyond your wildest dreams… as ARK is reimagined from the ground-up into the next-generation of videogame technology with Unreal Engine 5! The definitive survival experience returns better than ever: design your Survivor, form a tribe, and tame, train, breed & ride dinosaurs within a living ecosystem. Watch your food, water, temperature, and weather patterns. Slowly expand outwards as you harvest, build structures, farm crops, customize your visual designs, and proceed to explore to uncover the true nature of The Island and the worlds beyond.

#### What is included and your purchase price.

Ark: Survival Ascended includes all previously released paid DLC and new content of its own, including additional store content, new DLC, seasonal events, and quality-of-life updates. Studio Wildcard said it plans to release 11 brand-new creatures to the game over time. The Island is released now, with the subsequent expansion worlds to be added at no additional cost on a regular basis.  Price:  US $44.99

<figure><img src="https://cdn.akamai.steamstatic.com/steam/apps/2399830/ss_f0ed123c9b3916e8d4af8b77936d7230091a6f48.1920x1080.jpg?t=1698255217" alt="" width="375"><figcaption></figcaption></figure>

***

## UPCOMING W\.C. 2025 Content:

<figure><img src="https://772063455-files.gitbook.io/~/files/v0/b/gitbook-x-prod.appspot.com/o/spaces%2F-Lgje1lBxKKWXwqycB-v%2Fuploads%2FtmNmyQrLeCVfhqOTv7qV%2Fimage.png?alt=media&amp;token=d6c28ff3-64fb-49f8-a0e0-81b15cb691b4" alt=""><figcaption></figcaption></figure>

### December 2025 - LOST COLONY  - Paid DLC

<div align="left"><figure><img src="https://772063455-files.gitbook.io/~/files/v0/b/gitbook-x-prod.appspot.com/o/spaces%2F-Lgje1lBxKKWXwqycB-v%2Fuploads%2FIHefHQplGW1p3TCRaC3V%2Flarge%20LC%20Logo.png?alt=media&amp;token=7e803a72-a0c2-49af-994a-014e1ea98775" alt="" width="375"><figcaption></figcaption></figure></div>

Get ready for the next chapter in the ARK universe, **ARK: Lost Colony** drops this December, with pre-orders starting in July, when you’ll be able to enhance your immediate survival with early access to new gameplay systems and exclusive content.

In this new frozen world, players will follow in the footsteps of legendary ARK survivor Mei Yin, on a soul-searching quest deep into the chilling heart of darkness!

*Lost Colony Expansion Pass , go to your steam page and purchase it for $29.99 USD. It will download to your client.*

## 2026 Content:

With the ongoing work throughout the year, we want to take a bit more time to give the Genesis Ascended remaster the love and attention it deserves, and we’re now looking at:

* April 2026 – Genesis & Bob’s True Tales: Part 1
* August 2026 – Genesis: Part 2 & Bob’s True Tales: Part 2
* December 2026: Free **Fjordur Ascended** with a community-voted free creature.

Over the course of the year, we’ll be sharing juicy details, sneak peeks, and reveals about all of this and more in our crunches, so stay tuned for more news!

## SYSTEM REQUIREMENTS

<table data-card-size="large" data-view="cards"><thead><tr><th></th><th></th><th></th></tr></thead><tbody><tr><td><strong>MINIMUM</strong>: </td><td>OS: Windows 10/11 with updates <br>Processor: AMD Ryzen 5 2600X, Intel Core i7-6800K <br>Memory: 16 GB RAM <br>Graphics: AMD Radeon RX 5600 XT, NVIDIA GeForce 1080 <br>DirectX: Version 12 <br>Network: Broadband Internet connection <br>Storage: 70 GB available space <br>Additional Notes: SSD Required</td><td></td></tr><tr><td><strong>RECOMMENDED:</strong></td><td>OS: Windows 10/11 with updates <br>Processor: AMD Ryzen 5 3600X, Intel i5-10600K <br>Memory: 32 GB RAM <br>Graphics: AMD Radeon RX 6800, NVIDIA GeForce RTX 3080 <br>DirectX: Version 12 <br>Network: Broadband Internet connection <br>Storage: 70 GB available space <br>Additional Notes: SSD Required</td><td></td></tr><tr><td><strong>Cross-Platform Multiplayer:</strong></td><td><p>Cross-Platform Multiplayer: form your online tribe across different gaming platforms as you work together to survive and thrive on the ARK!</p><p>Supports public online multiplayer for up to 70 players, private-session multiplayer for up to 8 players, and local split-screen for 2 players.</p></td><td></td></tr><tr><td><strong>Cross-Platform Modding:</strong></td><td>Download &#x26; play new custom content created by players, including new maps, creatures, items, and game modes, through a dedicated new Mod-bowser directly within the game! Enjoy an endless stream of new ARK content as the creativity and talent of the community is fully unleashed for the first time ever across gaming platforms!</td><td></td></tr></tbody></table>

### ARK: Bob's Tall Tales

<figure><img src="https://772063455-files.gitbook.io/~/files/v0/b/gitbook-x-prod.appspot.com/o/spaces%2F-Lgje1lBxKKWXwqycB-v%2Fuploads%2FI4hLb4ciEpeRxEpx6hFR%2Fbobs%20logo.png?alt=media&amp;token=cc437443-9b0a-4207-84f6-e27724c90240" alt=""><figcaption></figcaption></figure>

Experience the thrilling wonder and awesome spectacle of Bob’s incredibly true adventures across The Island, Scorched Earth, Aberration, and Extinction!&#x20;

**Features and Price**

**Frontier Showdown! Available with Scorched Earth DLC:** Saddle up and stake your claim on the Scorched Earth! Build new Western-style structures like your own rootin' tootin' saloon, then tickle the ivories on your own piano for an authentic frontier experience. Hunt for buried treasure with your trusty shovel, tame hardy new creatures to pull your configurable wagon, and even hop aboard a chugging steam train to explore those harsh badlands!&#x20;

**Steampunk Ascent! Available with Aberration DLC:** Climb above the subterranean depths of Aberration in your own mighty customizable airships! Gear up with retro-futuristic gadgets and unravel the mysteries of this enigmatic and lethal underworld. SIR 5RM8 and Cosmo!

**Wasteland War! Available with Extinction DLC:** Fuel up your war rigs and fight to rule the desolate wastes of Extinction. Prepare for high-octane automobile action as you clash with rival tribes and scavenge for survival in this post-apocalyptic wasteland.

*Bob's Tall Tales DLC is a **Gamepass** including content for SE, AB, and EXT.* \
*Price: $29.99*

**Frequently Asked Questions**

* **Do I need to pay for Aberration or Extinction?**
  * **Answer:** No, Aberration and Extinction is included in ARK: Survival Ascended. If you own ARK: Survival Ascended, you automatically have access to either map.
* **If I do not own Bob's Tall Tales can I still play on Servers with my friends who do have it?**
  * **Answer:** Yes! You do not need to own Bob's Tall Tales to play on any servers that have Bob's Tall Tales content
* **Is the Frontier Pack DLC just for SE, AB, or Ext.?**
  * Bob's Tall Tales DLC Pass for SE, AB, and Ext.  Each Tall Tale delivers unique and helpful creatures and vehicles. You pay once for Three DLC packs.

### Lost Colony Expansion Pass

<figure><img src="https://772063455-files.gitbook.io/~/files/v0/b/gitbook-x-prod.appspot.com/o/spaces%2F-Lgje1lBxKKWXwqycB-v%2Fuploads%2F8VkQrRXxRIWwYRgdVkwz%2Fimage.png?alt=media&amp;token=1dd77a9d-0559-468c-abca-f9d3ccca3c8c" alt="" width="563"><figcaption></figcaption></figure>

Grab the Lost Colony Expansion Pass for exclusive instant-access bonuses! Get Drakelings, Veilwyn, Skill Tree, Build Templates, TEK Bunker, Thrall cosmetics & more! Start your Arat Prime journey now with a powerful edge!

*Lost Colony Expansion Pass , go to your steam page and purchase it for $29.99 USD. It will download to your client.*

### ARK: Bob's True Tales

<div align="center"><figure><img src="https://772063455-files.gitbook.io/~/files/v0/b/gitbook-x-prod.appspot.com/o/spaces%2F-Lgje1lBxKKWXwqycB-v%2Fuploads%2Fnl7Z74JyqJJh1xocZoE1%2Fimage.png?alt=media&amp;token=f8b96221-575f-49ec-94a9-705bfdbee6b4" alt="" width="375"><figcaption></figcaption></figure></div>

Bob's True Tales DLC is a **Gamepass** including content for Genesis, and Genesis 2. \
Price: $29.99(estimated price)\
Available in 2026!

**Frequently Asked Questions**

* **Do I need to pay for Genesis or Genesis 2?**
  * **Answer:** No, Genesis and Genesis 2 are included in ARK: Survival Ascended. If you own ARK: Survival Ascended, you automatically have access to either map.
* **If I do not own Bob's True Tales can I still play on Servers with my friends who do have it?**
  * **Answer:** Yes! You do not need to own Bob's True Tales to play on any servers that have Bob's True Tales content
* **Are the Bob's True Tales just for the Genesis maps?**
  * Each Tall Tale or True Tale DLC delivers unique and helpful creatures and vehicles. You pay once for The Bob's Tall Tales and once for Bob's True Tales.

## **Fantastic Tames for ARK: Survival Ascended**!&#x20;

ARK Fantastic Tames is a new paid DLC per tame, to introduce new fantasy creatures into the world of ARK: Survival Ascended, which will be found in biome-appropriate locations of all Official Maps except for The Island and is transferrable. Owners of one of this new class of creatures gain access to a wondrous array of useful abilities!

In 2025 Two new Fantastic Beasts will be added to ASA.

In 2026 Three new Fantastic Beasts will be added to ASA.

<figure><img src="https://772063455-files.gitbook.io/~/files/v0/b/gitbook-x-prod.appspot.com/o/spaces%2F-Lgje1lBxKKWXwqycB-v%2Fuploads%2Fqap4oPdymDMbhQQ9DeZ5%2Fimage.png?alt=media&amp;token=cd897dfa-58c9-4505-8722-9023ce456d15" alt=""><figcaption></figcaption></figure>

### Dreadmare

With your Dreadmare, soar through the skies on this ominous steed and unleash a torrent of dark magic, weakening enemies by draining their life force and revitalizing your mount as they wither. Sapping your opponents’ ability to heal, the Dreadmare can further cripple foes with blasts of dark energy that tear away their defenses, and can unleash a devastating wave of dispelling magic, stripping away buffs to leave enemies exposed.

*To purchase the Dreadmare, go to your steam page and purchase for $4.99 USD. It will download to your client.*

### Pyromane

<figure><img src="https://772063455-files.gitbook.io/~/files/v0/b/gitbook-x-prod.appspot.com/o/spaces%2F-Lgje1lBxKKWXwqycB-v%2Fuploads%2FsZoZjFFkkgIyqTBiRgPK%2Fimage.png?alt=media&amp;token=74c29029-a96c-4109-9bf9-c8c2170b93bf" alt=""><figcaption></figcaption></figure>

Introducing the Pyromane which can dynamically transform from a tiny shoulder-mounted kitten to a full-size rideable lion! When shoulder-mounted as a kitten, it can be used as a flamethrower. \
Then toss the Pyromane to become a full-sized lion, which you can ride across lava fields and command to set fire to your enemies. Whether it takes the form of a majestic predator or a loyal shoulder-mount, the Pyromane will make a scorching addition to your army of powerful tames!&#x20;

*To purchase the Pyromane, go to your steam page and purchase for $4.99 USD. It will download to your client.*

## Drakelings - Fantastic Tame DLC

<figure><img src="https://772063455-files.gitbook.io/~/files/v0/b/gitbook-x-prod.appspot.com/o/spaces%2F-Lgje1lBxKKWXwqycB-v%2Fuploads%2FyGyQQnhKcO5mgIQtLzCf%2Fimage.png?alt=media&amp;token=d52b2a0c-60dd-4cc7-b07d-3484b9d9fcbe" alt=""><figcaption></figcaption></figure>

#### Drakeling Spawns:

Drakeling\_Autumn -- Extinction, The Center, Astraeos, and Ragnarok \
Drakeling\_Spring -- Extinction, The Center, and Ragnarok \
Drakeling\_Summer -- Scorched Earth, Extinction, The Center, Astraeos, and Ragnarok Drakeling\_Winter -- Extinction, The Center, Astraeos, and Ragnarok \
*\*Note - Drakelings will be able to transfer from day one to Lost Colony\**

#### How to Tame a Drakeling

To tame a Drakeling, equip a torch to lure it—once close, it will land on your shoulder as long as you're not mounted and don’t have another shoulder pet. It will then assign you a task with a 2-minute timer, requiring you to gain XP by harvesting, crafting, or killing creatures, all of which must be done on foot (mounting a creature will reset taming). Once the XP bar fills, feed it from the last slot of your hotbar. Repeat the task-feed cycle until fully tamed. All seasonal variants are tamed the same way, and higher-level Drakelings have the exact same taming requirements, making them no more difficult to tame than lower-level ones.

*Included in the Lost Colony Expansion Pass , go to your steam page and purchase it for $29.99 USD. It will download to your client.*

<figure><img src="https://772063455-files.gitbook.io/~/files/v0/b/gitbook-x-prod.appspot.com/o/spaces%2F-Lgje1lBxKKWXwqycB-v%2Fuploads%2F2y9S5TgZ9Z3IsNv8Jpgn%2Fimage.png?alt=media&amp;token=8d372128-39eb-4568-b8d0-b615c629a985" alt=""><figcaption></figcaption></figure>

## Veilwyn - Lost Colony Day 1 Bonus DLC,

#### Veilwyn Spawns:

Aberration, Extinction, The Center, Astraeos, and Ragnarok

#### How to tame the Veilwyn.

To tame these cute snow foxes you must find the "Master Copy" first. Sneak up on the "Master and claim it" Its that simple. Be sure to be crouched or in ghillie because as soon as the "Master" aggros onto an enemy they will proceed to teleport near/around their target and attack them then promptly teleport back to their original location. Every attack they land will inflict frost. Frost will slow your movement speed and stacks up to 30, at which point the target will take triple damage. BE AWARE: these cute little guys are NOT friendly and thus will try to kill the player, they also get pack buffs so if you see one, there's probably more "Copys" nearby which will also aggro onto you.

*Included in the Lost Colony Expansion Pass , go to your steam page and purchase it for $29.99 USD. It will download to your client.*

<figure><img src="https://772063455-files.gitbook.io/~/files/v0/b/gitbook-x-prod.appspot.com/o/spaces%2F-Lgje1lBxKKWXwqycB-v%2Fuploads%2FZMxKB3dQQAQKnZxXu68m%2Fimage.png?alt=media&amp;token=04844e89-0936-4d83-9058-d49811f50d55" alt=""><figcaption></figcaption></figure>

## **ELDERCLAW**

Something ancient stirs deep within the lush forests of Valguero, an ancient power of oak and vine. Meet the Elderclaw, a breathtaking new companion that’s less like an animal and more like the living soul of the wild. Draped in blossoms and adorned with protective vines, this mystical guardian blends the strength of an apex predator with the serenity of nature itself. Though it’s not prone to anger, crossing the Elderclaw’s path with ill-intent can awaken its wrath, and the forest answers its call. Rumours speak of twisting roots, protective vines, and strange totems which turn the tide of battle, sapping the will of enemies while bolstering allies. Taming one won’t be as simple as tossing a few berries its way. Survivors whisper about rare seedlings and cubs that must be nurtured to maturity, earning the trust of a being that embodies the land it roams. Those who succeed will find themselves gaining a steadfast warden capable of shielding its allies and drawing power straight from the earth. The Elderclaw will arrive alongside Valguero Ascended and is included with the Lost Colony Expansion Pass, meaning all pass holders can set out to tame this supernatural forest guardian from day-one. It will also be offered as a stand-alone Fantastic Tame purchase at a later date. Prepare yourselves, Survivors! The Elderclaw is coming, and with it, the forest breathes anew.

*Included in the Lost Colony Expansion Pass , go to your steam page and purchase it for $29.99 USD. It will download to your client.*<br>

<img src="https://772063455-files.gitbook.io/~/files/v0/b/gitbook-x-prod.appspot.com/o/spaces%2F-Lgje1lBxKKWXwqycB-v%2Fuploads%2FKFiZHHlgN1QM69t5DejF%2FPACK_PATREON.png?alt=media&amp;token=d8b84080-d3a0-4bcf-903f-ec3c9cebe9e3" alt="" width="563">

## ***Our Patreon's***&#x20;

*Will receive generous perks in our ARKS Servers.*

Please see the Patreon Role listings to see just what you can get as an IN GAME PERK!

{% embed url="<https://faq.thepackgaming.com/patreon#our-patreon-perks>" %}

<figure><img src="https://772063455-files.gitbook.io/~/files/v0/b/gitbook-x-prod.appspot.com/o/spaces%2F-Lgje1lBxKKWXwqycB-v%2Fuploads%2FjqxSPZHG4ShsycO1b9Oi%2Fimage.png?alt=media&amp;token=e5d16059-439d-456f-84bd-8b8775facb19" alt=""><figcaption></figcaption></figure>


# ASA Cluster Settings

## ***Server Settings:***

| Server Difficulty = 7  | Harvest = 3x                                   | Taming = 15x                                                           |
| ---------------------- | ---------------------------------------------- | ---------------------------------------------------------------------- |
| Experience gained = 4x | Loot crate quality = 2x                        | Fishing quality = 3x                                                   |
| Breeding = 15x         | Egg Hatch = 15x                                | Baby Mature = 15x                                                      |
| Server Dino Cap = 5k   | Tribal Dino Cap = 250 AWAKE Per Tribe Per Map. | Tribal Dino Cap in Storage = 1800 Stored Per Tribe Per Map. (Soulpods) |

*You will find your tribal Dino cap in the center of your inventory screen. (Your total cryochamber count will not show in any screens. You will have to keep track via folders and checking your storage inventories)*

#### ***Other Server Settings***

#### Character Levels:

&#x20;As of March 2025, the maximum player level is 195: survivors start at level 1, 104 levels can be gained normally, 15 by defeating the [![](https://ark.wiki.gg/images/thumb/Overseer.png/20px-Overseer.png?ba7a69)](https://ark.wiki.gg/wiki/Overseer) [Overseer](https://ark.wiki.gg/wiki/Overseer) on Alpha difficulty, 15 for defeating the [![](https://ark.wiki.gg/images/thumb/Manticore.png/20px-Manticore.png?5ecc3a)](https://ark.wiki.gg/wiki/Manticore) [Manticore](https://ark.wiki.gg/wiki/Manticore) on alpha difficulty, 15 for defeating [![](https://ark.wiki.gg/images/thumb/Rockwell.png/20px-Rockwell.png?5fddd6)](https://ark.wiki.gg/wiki/Rockwell) [Rockwell](https://ark.wiki.gg/wiki/Rockwell) on Alpha difficulty, 15 for defeating the [![](https://ark.wiki.gg/images/thumb/King_Titan.png/20px-King_Titan.png?f0b60f)](https://ark.wiki.gg/wiki/King_Titan) [King Titan](https://ark.wiki.gg/wiki/King_Titan) on Alpha difficulty 10 for collecting all [Explorer Notes](https://ark.wiki.gg/wiki/Explorer_Notes) on [The Island](https://ark.wiki.gg/wiki/The_Island), [Scorched Earth](https://ark.wiki.gg/wiki/Scorched_Earth), [Aberration](https://ark.wiki.gg/wiki/Aberration) and [Extinction](https://ark.wiki.gg/wiki/Extinction), 5 by levelling up a [Chibi](https://ark.wiki.gg/wiki/Chibi), 5 each for collecting all of the [Bob's Tall Tales](https://ark.wiki.gg/wiki/Bob%27s_Tall_Tales) explorer notes on each map the DLC is featured on ([Scorched Earth](https://ark.wiki.gg/wiki/Scorched_Earth), [Aberration](https://ark.wiki.gg/wiki/Aberration), and [Extinction](https://ark.wiki.gg/wiki/Extinction)).

| Requirement                                                      | Level Gain | Total |
| ---------------------------------------------------------------- | ---------- | ----- |
| Normal levelling                                                 | 104        | 105   |
| Slaying the Alpha Overseer                                       | 15         | 120   |
| Slaying the Alpha Manticore                                      | 15         | 135   |
| Collecting all Bob's Tall Tales Explorer Notes on Scorched Earth | 5          | 140   |
| Slaying alpha Rockwell                                           | 15         | 155   |
| Collecting all Bob's Tall Tales Explorer Notes on Aberration     | 5          | 160   |
| Slaying the Alpha King Titan                                     | 15         | 175   |
| Collecting all Bob's Tall Tales Explorer Notes on Extinction     | 5          | 180   |
| Collecting all normal Explorer Notes                             | 10         | 190   |
| Levelling your Chibi to level 6                                  | 5          | 195   |

#### Creature Levels:

#### Tameable Creature Max Levels:

**Wild Dinos/Creatures spawn with a level of 5 to 210 in our arks.** The max level for most wild creatures is 30 times the difficulty value (215  on our servers) and 30 times the difficulty value plus 1 for Tek Creatures (253 on our servers). After taming, the additional levels coming by taming efficiency can increase the tame level by half of wild level value minus 1.

However, in certain areas of the game such specific challenging caves, wild creatures will spawn at higher levels, nevertheless such creatures cannot be tamed.

The following dino/creatures are an exception:\
(Other levels apply like every other dino based on difficulty setting however.)

* Wyvern, Rock Drake, and VoidWyrm - 5 to 266
* Specific event creatures like GachaClaus - 50 to 900
* All Corrupted Creatures - 1 to 500+ (If spawned from Orbital Supply Drop or  Element Node, depending on difficulty.)
* All Tek Creatures - 20% higher level (7 to 253)
* All Titans - 1500 to 2350
* Titanosaurs - 1 to 7
* Leedsichthys, and Alpha Leedsichthys - 1 (ignores difficulty setting)

#### POST Tamed Dino Levels:

Creatures can level up 88 times. Once your creature has reached this limit, they will not be able to level up anymore.

* Tek creatures - As stated above, they can naturally spawn up to 253 with a maximum taming efficiency of +89 levels and up to 88 levels after taming, making their max possible level 430 outside of breeding.
* Reaper Kings - Queens spawn at a maximum level of 210, but their offspring can receive up to 75 additional levels during pregnancy and another 88 once matured, making their max level 372.
* Enforcers and Scouts - Spawn naturally up to level 210 and can receive an additional 88 levels after being assembled, making their max level 298.
* &#x20;Deinonychus Egg - naturally spawn up to 210 and can receive an additional 88 levels after maturation, making their max level 298 outside of breeding.

## ASA Dinos, and Where they Spawn!&#x20;

Our ASA Cluster Sports Unique ASA Creatures that spawn only on certain maps. While only spawning on certain maps, these creatures can be transferred to most of our other maps. We have used server settings to move some map Unique dinos to our different Cluster maps.&#x20;

We also offer Unique Modded Creatures that spawn specified maps. Denoted with a 💎symbol.\
MOST  Modded Dinos can be transferred to any other map, **EXCEPT Aberration.**

#### List of Creatures&#x20;

**Breeding Level Caps:** On our servers, Creatures have NO hard-capped limit on breeding. Levels of 1750 to 1800 is possible (maxing all stats at 254 x 7 +1 =Maxed out dino of 1750) .

**PLEASE NOTE:** Once you have reached a Dino with 255 in each stat value. You realistically cannot add any more domestication level points into that specific stat. If done, the stat will revert to a LEVEL ONE DINO value in that stat. And you will lose all the value of months of breeding.

{% tabs %}
{% tab title="Free Additional Creature's " %}
Acrocanthosaurus\
Archelon\
Bison\
Cat\
Ceratosaurus\
Cryolophosaurus\
Deinosuchus\
Deinotherium\
Dreadnoughtus\
Fasolasuchus\
Gigantoraptor\
Helicoprion\
Megaraptor\
Palaeoctopus\
Shastasaurus\
Xiphactinus\
Yi Ling
{% endtab %}

{% tab title="Paid within Free Maps" %}

Armadoggo &#x20;\
Burrowbuck\
Cosmo\
Drakeling\
Dreadmare\
Elderclaw\
Oasisaur\
Pyromane\
Sir-5rM8
{% endtab %}

{% tab title="Astraeous" %}
Boaratos (BOSS)\
Grand Tortugar\
Kirayli (BOSS)\
Maeguana\
Minotaur\
Rhyniognatha Drone\
Skeleton
{% endtab %}

{% tab title="Lost Colony" %}
Aureliax\
Cryolophosaurus\
Gigadesmodus\
Gloon\
Malwyn\
Neophyte\
Ossidon\
Solwyn\
Thrall\
Veilwyn
{% endtab %}

{% tab title="Genesis 1" %}

{% endtab %}

{% tab title="Genesis 2" %}

{% endtab %}
{% endtabs %}

***

## **SUBSCRIBED MODS**&#x20;

**There are two ways to get the mod for the servers.**

* Just load into ASA, go to the server browser, find The Pack servers, Click Join on the one you want, it opens a menu with a list of all the mods, Click Join and it will then install all the mods before loading into the server. If it times out, repeat the process. After all the mods are installed you can just join.

<figure><img src="https://772063455-files.gitbook.io/~/files/v0/b/gitbook-x-prod.appspot.com/o/spaces%2F-Lgje1lBxKKWXwqycB-v%2Fuploads%2FmKsyUTRW5NK0je0TzhEw%2FLogging%20into%20ASCENDED_4.png?alt=media&amp;token=b4635e40-a627-4037-b62c-7f4cd50114d5" alt=""><figcaption></figcaption></figure>

* **OR** Add one by one from the Quick List below, (this is a bit tedious by the way).

#### **Quick List of Mods**

**Click on a Mod's Card to go to the Curse Forge Page.**

<table data-view="cards"><thead><tr><th></th><th></th><th></th><th data-hidden data-card-target data-type="content-ref"></th><th data-hidden data-card-cover data-type="files"></th></tr></thead><tbody><tr><td><strong>B+ Structures: ID#990263</strong></td><td></td><td></td><td><a href="https://legacy.curseforge.com/ark-survival-ascended/mods/boss-mod">https://legacy.curseforge.com/ark-survival-ascended/mods/boss-mod</a></td><td><a href="https://772063455-files.gitbook.io/~/files/v0/b/gitbook-x-prod.appspot.com/o/spaces%2F-Lgje1lBxKKWXwqycB-v%2Fuploads%2FxZQYdOAs2caO0iDbJeUw%2Fimage_2025-03-21_041838382.png?alt=media&amp;token=92c1e76f-6e5f-4e91-b924-9a7e70f2c2ce">image_2025-03-21_041838382.png</a></td></tr><tr><td><strong>Super Cryo Storage: ID#933099</strong></td><td></td><td></td><td><a href="https://legacy.curseforge.com/ark-survival-ascended/mods/super-cryo-storage">https://legacy.curseforge.com/ark-survival-ascended/mods/super-cryo-storage</a></td><td><a href="https://772063455-files.gitbook.io/~/files/v0/b/gitbook-x-prod.appspot.com/o/spaces%2F-Lgje1lBxKKWXwqycB-v%2Fuploads%2Fhat8bPfNsO4FUjM2YkYa%2F638508643683649213.png?alt=media&amp;token=08e4f855-0601-46b9-969d-b47f31cf2a92">638508643683649213.png</a></td></tr><tr><td><strong>Awesome Teleporters: ID#950914</strong></td><td></td><td></td><td><a href="https://legacy.curseforge.com/ark-survival-ascended/mods/awesometeleporters">https://legacy.curseforge.com/ark-survival-ascended/mods/awesometeleporters</a></td><td><a href="https://772063455-files.gitbook.io/~/files/v0/b/gitbook-x-prod.appspot.com/o/spaces%2F-Lgje1lBxKKWXwqycB-v%2Fuploads%2F7EzdFxKgnlTQ3Gu5etio%2Fdownload%20(1).jpg?alt=media&amp;token=292af12e-a523-4115-90ea-82787e518f5a">download (1).jpg</a></td></tr><tr><td><strong>Awesome SpyGlass:</strong> <br><strong>ID#947033</strong></td><td></td><td></td><td><a href="https://legacy.curseforge.com/ark-survival-ascended/mods/awesomespyglass">https://legacy.curseforge.com/ark-survival-ascended/mods/awesomespyglass</a></td><td><a href="https://772063455-files.gitbook.io/~/files/v0/b/gitbook-x-prod.appspot.com/o/spaces%2F-Lgje1lBxKKWXwqycB-v%2Fuploads%2FVhdh1ZA5cagCOQMe8vDE%2Fdownload.jpg?alt=media&amp;token=193c68e3-bd1d-4f3d-b2b5-858d3caf1b7a">download.jpg</a></td></tr><tr><td><strong>Draconis Glaucus:</strong> <br><strong>ID#955932</strong></td><td></td><td></td><td></td><td><a href="https://772063455-files.gitbook.io/~/files/v0/b/gitbook-x-prod.appspot.com/o/spaces%2F-Lgje1lBxKKWXwqycB-v%2Fuploads%2Fdh0KZInVfgUl9vNu4bL0%2F638395354542517944.png?alt=media&amp;token=7e5ffa9b-d437-4371-8eee-cd7e60ca871b">638395354542517944.png</a></td></tr><tr><td><h4>Runic Wyverns</h4><p><strong>ID#974884</strong></p></td><td></td><td></td><td><a href="https://www.curseforge.com/ark-survival-ascended/mods/runic-wyverns">https://www.curseforge.com/ark-survival-ascended/mods/runic-wyverns</a></td><td><a href="https://772063455-files.gitbook.io/~/files/v0/b/gitbook-x-prod.appspot.com/o/spaces%2F-Lgje1lBxKKWXwqycB-v%2Fuploads%2FxhcuhXHRdcdoTrshF8fD%2Fimage_2025-03-21_043611904.png?alt=media&amp;token=296fca87-4dc5-43a1-bd4c-22f5831cb236">image_2025-03-21_043611904.png</a></td></tr><tr><td><strong>Astraeos - Mythological Creatures ID#1122696</strong></td><td></td><td></td><td><a href="https://legacy.curseforge.com/ark-survival-ascended/mods/astraeos-mythological-creatures">https://legacy.curseforge.com/ark-survival-ascended/mods/astraeos-mythological-creatures</a></td><td><a href="https://772063455-files.gitbook.io/~/files/v0/b/gitbook-x-prod.appspot.com/o/spaces%2F-Lgje1lBxKKWXwqycB-v%2Fuploads%2FhKUWLihTC08xXx2EtLZI%2F638681336624271998%20(1).jpeg?alt=media&amp;token=cc91e9a1-d49a-491b-966f-f22c440f60bc">638681336624271998 (1).jpeg</a></td></tr><tr><td><strong>Cliffans Horses</strong></td><td><strong>ID#936001</strong></td><td></td><td><a href="https://legacy.curseforge.com/ark-survival-ascended/mods/cliffans-horses">https://legacy.curseforge.com/ark-survival-ascended/mods/cliffans-horses</a></td><td><a href="https://772063455-files.gitbook.io/~/files/v0/b/gitbook-x-prod.appspot.com/o/spaces%2F-Lgje1lBxKKWXwqycB-v%2Fuploads%2FOfOPUOVpyOkygSuW5t6U%2Fcliffans%20horses.jpg?alt=media&amp;token=54d81c47-7727-4f8c-bf46-94b04f5ae83d">cliffans horses.jpg</a></td></tr></tbody></table>

## How to Manually Update Mods in ARK: Survival Ascended.

To update mods in ARK: Survival Ascended, you need to navigate to the Mod Settings within the game's main menu. From there, you can access the "Get Mods" section, where you'll find a list of installed mods. If a mod is out of date, it will be indicated with a recycling symbol; clicking on it and then selecting "Update" will initiate the update process.

### Detailed Steps:

* Start the game and go to the main menu.  Navigate to "Create/Resume Game".
* Select the "Mod List" tab.

<div align="left"><figure><img src="https://772063455-files.gitbook.io/~/files/v0/b/gitbook-x-prod.appspot.com/o/spaces%2F-Lgje1lBxKKWXwqycB-v%2Fuploads%2FcKHxYLK2fizwi7MR0jN9%2Fimage.png?alt=media&amp;token=7ab1eb57-93b8-4c02-b131-23e2ba1bd622" alt="" width="110"><figcaption></figcaption></figure></div>

* Go to the "Installed Mods" tab.

<div align="left"><figure><img src="https://772063455-files.gitbook.io/~/files/v0/b/gitbook-x-prod.appspot.com/o/spaces%2F-Lgje1lBxKKWXwqycB-v%2Fuploads%2FdA023wAfMv3dzsCH2CIX%2Fimage.png?alt=media&amp;token=dfd3897a-a3cc-49b9-8fa8-b3b02b04ddc7" alt="" width="352"><figcaption></figcaption></figure></div>

* Locate the mod you want to update. If it's out of date, it will have a recycling symbol next to it.

<div align="left"><figure><img src="https://772063455-files.gitbook.io/~/files/v0/b/gitbook-x-prod.appspot.com/o/spaces%2F-Lgje1lBxKKWXwqycB-v%2Fuploads%2F9zkCDNsxxb8WaRNbkDMp%2FASA_Mods%20List%203.png?alt=media&amp;token=424231b6-9170-47c1-a11f-b326afc19e89" alt="" width="563"><figcaption></figcaption></figure></div>

* Click on the out-of-date mod.
* Click the "Update" button in the top right.

<div align="left"><figure><img src="https://772063455-files.gitbook.io/~/files/v0/b/gitbook-x-prod.appspot.com/o/spaces%2F-Lgje1lBxKKWXwqycB-v%2Fuploads%2Fz0nPH9LV15vhAwTYYUNR%2Fimage.png?alt=media&amp;token=0d787165-7f62-4c12-8e03-4a7fb655f0fd" alt="" width="563"><figcaption></figcaption></figure></div>

***

## B+ Structures Disabled:

These items are either overly OP for our cluster, OR we already have systems in place that make them redundant.

* B+ Harvester; B+ Item Collector; B+ Propagator;&#x20;
* B+ Tek Alarm; B+ Transmutator; B+ Vivarium
* B+ Saddles; and B+ ARMOR.

### B+ Tips and Tricks:

**For Dedicated Storage**,\
If you are using them, put your materials down in another box, take 1 of each, and organize it the way you want. When done with said set up, hold e, click consolidate, and it will pull all your materials to the boxes.

### SCS Automated Farming:

**Fertilizer SCS terminal**\
Use SCS terminal with 3-5 podded beetles. The easiest way to obtain large amounts of medium animal feces is taming 3-5 Phiomia, pod them up and put in a terminal. A good ratio is 1 Beetle to 1 Phiomia. Set the terminal to collect poop. It will then make fertilizer and put it in the plots in its range. Use the B+ Omni tool to move the fertilizer into crop plots out of the terminal range. You can also upload the fertilizer to a B+ Dedicated Storage.

**Resource Gacha SCS Terminal**\
**No more tall towers of gacha and snow owls! Gachas can generate resources in the terminal!!** \
**NOTE: ONE Gacha Farm Terminal per Main base limited to 50 gacha!**\
Turn on resource gathering in terminal. Don't turn on poop or there won't be room for the resources.&#x20;Set each gacha to the specific resource before podding and placing in the terminal. Or set the terminal selector for each gacha. Use the B+ Omni tool to move crystals to the crackers, then wirelessly send items to storage units within 80 foundations.)  NO CROP plots needed, NO PELLETS needed. Terminals will fill up, and after 300 Full slots and gachas will no longer produce resources.

\**These settings are on each Gacha in the terminal.*

<div align="left"><figure><img src="https://772063455-files.gitbook.io/~/files/v0/b/gitbook-x-prod.appspot.com/o/spaces%2F-Lgje1lBxKKWXwqycB-v%2Fuploads%2FJSX23pbeHusrfojGBqgZ%2Fimage.png?alt=media&amp;token=12307651-47e3-4477-bae0-2a4d233a0f58" alt="" width="199"><figcaption></figcaption></figure></div>

You can add the following tames for the additional allowed resources they produce, either gender.  Depending on specific dino placed within the terminal. Upload to dedicated storage is enabled.\
Dinos shown will generate Cement paste, golden eggs, honey, bison milk, cerato spines, bio toxin, algae, and feathers.

<div align="left"><figure><img src="https://772063455-files.gitbook.io/~/files/v0/b/gitbook-x-prod.appspot.com/o/spaces%2F-Lgje1lBxKKWXwqycB-v%2Fuploads%2FYDuOMw9oRWOw8wB0U9Cl%2Fimage.png?alt=media&amp;token=6c6ef919-6266-4038-a194-11a6263436cc" alt="" width="155"><figcaption></figcaption></figure></div>

**Kibble Farm**\
Place 2-3 **females** of each kibble dino or 5 Maeguna along with a oviraptor to boost egg production. Turn on unfertilized egg gathering in terminal. Don't turn on poop or there won't be room for the eggs.&#x20;You will have eggs for kibble / extraordinary kibble in a few days. (Maeguna make the eggs for extraordinary kibbles!) You can move eggs to the Refrigerator or into Dedi storage with the B+ Omni tool.\
\**Image is from ASE, but you can use whichever dinos currently exist in ASA for eggs.*\
![](https://772063455-files.gitbook.io/~/files/v0/b/gitbook-x-prod.appspot.com/o/spaces%2F-Lgje1lBxKKWXwqycB-v%2Fuploads%2FWnn5uGSIbDYbqmH6ZGoA%2Fimage.png?alt=media\&token=bb543e17-5da3-4765-9dc7-019d64118fef)

***

## ASA Dinos, and Where they Spawn!&#x20;

Our ASA Cluster Sports Unique ASA Creatures that spawn only on certain maps. While only spawning on certain maps, these creatures can be transferred to most of our other maps. We have used server settings to move some map Unique dinos to our different Cluster maps.&#x20;

We also offer Unique Modded Creatures that spawn specified maps. Denoted with a 💎symbol.\
MOST  Modded Dinos can be transferred to any other map, **EXCEPT Aberration.**

#### List of Creatures&#x20;

{% tabs %}
{% tab title="Free Additional Creature's " %}
Acrocanthosaurus\
Archelon\
Bison\
Cat\
Ceratosaurus\
Cryolophosaurus\
Deinosuchus\
Deinotherium\
Dreadnoughtus\
Fasolasuchus\
Gigantoraptor\
Helicoprion\
Megaraptor\
Palaeoctopus\
Shastasaurus\
Xiphactinus\
Yi Ling
{% endtab %}

{% tab title="Paid within Free Maps" %}

Armadoggo &#x20;\
Burrowbuck\
Cosmo\
Drakeling\
Dreadmare\
Elderclaw\
Oasisaur\
Pyromane\
Sir-5rM8
{% endtab %}

{% tab title="Astraeous" %}
Boaratos (BOSS)\
Grand Tortugar\
Kirayli (BOSS)\
Maeguana\
Minotaur\
Rhyniognatha Drone\
Skeleton
{% endtab %}

{% tab title="Lost Colony" %}
Aureliax\
Cryolophosaurus\
Gigadesmodus\
Gloon\
Malwyn\
Neophyte\
Ossidon\
Solwyn\
Thrall\
Veilwyn
{% endtab %}

{% tab title="Genesis 1" %}

{% endtab %}

{% tab title="Genesis 2" %}

{% endtab %}
{% endtabs %}

## Custom Cosmetics to Enhance your ASA Experience.

<figure><img src="https://772063455-files.gitbook.io/~/files/v0/b/gitbook-x-prod.appspot.com/o/spaces%2F-Lgje1lBxKKWXwqycB-v%2Fuploads%2FqbW0hzS0zFAjPhsMyHkK%2Fimage.png?alt=media&amp;token=fb056561-154f-4763-98f4-6fbdf00c0d35" alt="" width="375"><figcaption></figcaption></figure>

The new "Custom Cosmetic" system allows players to dynamically apply player-generated costumes to players and dinos, end-user-created skins to armors and weapons, and end-user-created skins to all the game's structures. In most cases your client will automatically download them in the background when encountered during gameplay. NOT the full mod but an OVER view so you may see them in your subscribed mods in the Client Mod Panel.

The PACK has curated a Free list that is available to download that is approved for use ("Whitelisted") on our Servers. We have disabled Dynamic download to just the official mods, and our curated list. Due to the many issues around the COSMETIC system.

**Approved for use on The Pack cluster.**

<table data-view="cards"><thead><tr><th></th><th></th><th data-hidden data-card-cover data-type="files"></th><th data-hidden data-card-target data-type="content-ref"></th></tr></thead><tbody><tr><td><strong>Default Structure Skins</strong></td><td>A custom cosmetic mod that applies vanilla structure skins to many structures.</td><td><a href="https://772063455-files.gitbook.io/~/files/v0/b/gitbook-x-prod.appspot.com/o/spaces%2F-Lgje1lBxKKWXwqycB-v%2Fuploads%2FwA6C8iXju8ioxLiF2waN%2Fimage.png?alt=media&amp;token=8d4b9db0-484e-4a96-b2ae-5829a25fa022">image.png</a></td><td><a href="https://legacy.curseforge.com/ark-survival-ascended/mods/default-structure-skins">https://legacy.curseforge.com/ark-survival-ascended/mods/default-structure-skins</a></td></tr><tr><td><strong>Arkitect's Paradise</strong></td><td>A custom cosmetic mod that will try to make your old prehistoric world a bit more modern.<br>All building skins are perfectly seamless which means your base will look like one structure.<br><strong>Approved for official.</strong></td><td><a href="https://772063455-files.gitbook.io/~/files/v0/b/gitbook-x-prod.appspot.com/o/spaces%2F-Lgje1lBxKKWXwqycB-v%2Fuploads%2FnDD0O1xMJnsImjhtKIty%2F638565237218201982.jpeg?alt=media&amp;token=833bceaf-7647-4f9f-82a9-0db4b81b7fa2">638565237218201982.jpeg</a></td><td><a href="https://legacy.curseforge.com/ark-survival-ascended/mods/arkitects-paradise">https://legacy.curseforge.com/ark-survival-ascended/mods/arkitects-paradise</a></td></tr><tr><td><strong>Western Decor Skins</strong></td><td>Now you can decorate your Ark with western-style items, all available as skins for your existing structures.</td><td><a href="https://772063455-files.gitbook.io/~/files/v0/b/gitbook-x-prod.appspot.com/o/spaces%2F-Lgje1lBxKKWXwqycB-v%2Fuploads%2FwL880Cx9V7689y4yOrbz%2FWestern%20Decor%20Skins.jpeg?alt=media&amp;token=0ba5109f-d01e-4bcf-8273-571b36a0ccfd">Western Decor Skins.jpeg</a></td><td><a href="https://legacy.curseforge.com/ark-survival-ascended/mods/western-decor-skins">https://legacy.curseforge.com/ark-survival-ascended/mods/western-decor-skins</a></td></tr><tr><td><strong>Steampunk Decor Skins</strong></td><td>Now you can decorate your Ark with Steampunk-style items, all available as skins for your existing structures.</td><td><a href="https://772063455-files.gitbook.io/~/files/v0/b/gitbook-x-prod.appspot.com/o/spaces%2F-Lgje1lBxKKWXwqycB-v%2Fuploads%2FonQbEPEWOp38EP8RBw86%2Fdownload.jpg?alt=media&amp;token=dc68a516-0fd2-4410-b38a-00b92f9f6003">download.jpg</a></td><td><a href="https://legacy.curseforge.com/ark-survival-ascended/mods/steampunk-decor-skins">https://legacy.curseforge.com/ark-survival-ascended/mods/steampunk-decor-skins</a></td></tr><tr><td><strong>Astraeos Structures - Custom Cosmetic</strong></td><td>A full greek styled structure skin set</td><td><a href="https://772063455-files.gitbook.io/~/files/v0/b/gitbook-x-prod.appspot.com/o/spaces%2F-Lgje1lBxKKWXwqycB-v%2Fuploads%2FGw1u0E7Y4PvDNPVxNWwW%2FAstraeos%20Stuctures.jpg?alt=media&amp;token=1b331083-cbdb-40c5-ae3f-1e2a0fab3e49">Astraeos Stuctures.jpg</a></td><td><a href="https://legacy.curseforge.com/ark-survival-ascended/mods/astraeos-structures-custom-cosmetic">https://legacy.curseforge.com/ark-survival-ascended/mods/astraeos-structures-custom-cosmetic</a></td></tr><tr><td><strong>Astraeos - Wardrobe</strong></td><td>Greek inspired Armor Skins.</td><td><a href="https://772063455-files.gitbook.io/~/files/v0/b/gitbook-x-prod.appspot.com/o/spaces%2F-Lgje1lBxKKWXwqycB-v%2Fuploads%2FcibDxVZkWjIg51lWUzev%2FAstraeos%20Wardrobe.jpeg?alt=media&amp;token=b4b1093b-d5fd-4ec4-a2a3-731b84ea7bf2">Astraeos Wardrobe.jpeg</a></td><td><a href="https://legacy.curseforge.com/ark-survival-ascended/mods/astraeos-armor-skins">https://legacy.curseforge.com/ark-survival-ascended/mods/astraeos-armor-skins</a></td></tr><tr><td><strong>ZUZ Structure Cosmetics</strong></td><td></td><td><a href="https://772063455-files.gitbook.io/~/files/v0/b/gitbook-x-prod.appspot.com/o/spaces%2F-Lgje1lBxKKWXwqycB-v%2Fuploads%2FmfLrs8Q6G16kHHSKUQo4%2Fcapture-decran-2024-11-03-045903.png?alt=media&amp;token=3131c8cd-aefd-4442-9f80-a6436112d094">capture-decran-2024-11-03-045903.png</a></td><td><a href="https://legacy.curseforge.com/ark-survival-ascended/mods/zuz-structure-cosmetics/screenshots">https://legacy.curseforge.com/ark-survival-ascended/mods/zuz-structure-cosmetics/screenshots</a></td></tr></tbody></table>

***

<figure><img src="https://772063455-files.gitbook.io/~/files/v0/b/gitbook-x-prod.appspot.com/o/spaces%2F-Lgje1lBxKKWXwqycB-v%2Fuploads%2FgBCaJWecLIfU3WpW93BX%2FPACK_HEADER_ASA_GUIDES.png?alt=media&amp;token=1a6ebf27-19ab-4d21-ad17-bafeb2b33409" alt=""><figcaption></figcaption></figure>

### Helpful Guides to ASA Play

<table data-view="cards"><thead><tr><th></th><th></th><th></th><th data-hidden data-card-cover data-type="image">Cover image</th><th data-hidden data-card-target data-type="content-ref"></th></tr></thead><tbody><tr><td>The PACK ASA: Breeding Guide</td><td></td><td>Click to go to the Guide!</td><td><a href="https://772063455-files.gitbook.io/~/files/v0/b/gitbook-x-prod.appspot.com/o/spaces%2F-Lgje1lBxKKWXwqycB-v%2Fuploads%2FMYkXNQqx48nRBRvGn37Q%2FBreeding%20basics.jpg?alt=media&amp;token=78a9c3bc-2f26-4e92-a265-7949757f6ac0">Breeding basics.jpg</a></td><td><a href="https://faq.thepackgaming.com/ark/player-guides/breeding">https://faq.thepackgaming.com/ark/player-guides/breeding</a></td></tr><tr><td>ASA Explorer Notes</td><td></td><td>Click to go to the Guide!</td><td><a href="https://772063455-files.gitbook.io/~/files/v0/b/gitbook-x-prod.appspot.com/o/spaces%2F-Lgje1lBxKKWXwqycB-v%2Fuploads%2Fg4Tzg5qb6gfNeNBdS8fQ%2Fimage.png?alt=media&amp;token=d4732316-3a51-40cc-b871-2b84b232524e">image.png</a></td><td><a href="https://faq.thepackgaming.com/ark/player-guides/notes">https://faq.thepackgaming.com/ark/player-guides/notes</a></td></tr><tr><td><strong>ASA Community Wiki</strong></td><td></td><td>Click to go to the Guide!</td><td><a href="https://772063455-files.gitbook.io/~/files/v0/b/gitbook-x-prod.appspot.com/o/spaces%2F-Lgje1lBxKKWXwqycB-v%2Fuploads%2FlMP73eJ9z7NHZFqjWE6k%2FASA%20WIKI.png?alt=media&amp;token=e80cd1b0-3d0a-44cc-abe1-048c48b1e320">ASA WIKI.png</a></td><td><a href="https://ark.wiki.gg/wiki/ARK_Wiki">https://ark.wiki.gg/wiki/ARK_Wiki</a></td></tr><tr><td><strong>Wikily.gg</strong></td><td>Discover tools, interactive maps, and guides for ARK: Survival Ascended  </td><td>Level up your gameplay at  <em>Wikily.gg</em>!</td><td><a href="https://772063455-files.gitbook.io/~/files/v0/b/gitbook-x-prod.appspot.com/o/spaces%2F-Lgje1lBxKKWXwqycB-v%2Fuploads%2FizMweqasC6b9DQ5cHAsA%2Fwikily.gg%20logo.png?alt=media&amp;token=2db06af2-51cf-4abb-aba1-b369866012a0">wikily.gg logo.png</a></td><td><a href="https://wikily.gg/ark-survival-ascended/">https://wikily.gg/ark-survival-ascended/</a></td></tr></tbody></table>

***

<figure><img src="https://lh7-rt.googleusercontent.com/docsz/AD_4nXeN-ooW4HLRMm0VUuJhggu7pGAA182adNaKvKVgM4Jx5MD51vJT3EYQkwblETC7ggY96Yz1D5lSwQQY0XMREpugDsTDJXy2fYcyLU-5OSXvJ43Tslyukwnb6Z6U-fXtzqbbj29n4Q?key=GlTRPaxhvh8su6YjSiXOAg" alt=""><figcaption></figcaption></figure>

All content on this page has been accumulated from several places including the Wiki, The PACK Admin Team, and Players from The Pack cluster.

<br>


# ASA: The Island

LIVE January 11th. 2024!

## The PACK Island PvE(3xH, 4xXP, 15T/B)

<figure><img src="https://772063455-files.gitbook.io/~/files/v0/b/gitbook-x-prod.appspot.com/o/spaces%2F-Lgje1lBxKKWXwqycB-v%2Fuploads%2F4JjXLSYBzQDAx8ILtauH%2FASA%20The%20Island.png?alt=media&amp;token=85f97de6-1be0-452a-bc7f-1fb95ba76533" alt=""><figcaption></figcaption></figure>

## About This Expansion Map:

**ASA: The Island** is a large landmass with several smaller islands surrounding the central island. Resources become more common as one travels farther inland, but so do the dangers. Some areas are higher in temperature while others are lower which can be life threatening. On the Island there are two types of weather, rain and fog. When it rains, you will hydrate and can fill your drinking source with rainwater. When fog rolls in, it is hard to see very far.

### CREATURES

### Standard Creatures:

ARK Normal Creatures spawning on The Island:&#x20;

{% embed url="<https://ark.wiki.gg/wiki/The_Island#Creatures>" %}
The Island Normal Creatures
{% endembed %}

### ASA Unique Creature

Archelon; Cat; Ceratosaurus; Deinosuchus; Deinotherium; Gigantoraptor; Xiphactinus

### UNIQUE Modded Dinos:

See[ The Pack Unique Creatures and Where they Spawn!](https://faq.thepackgaming.com/asa/cluster/settings#asa-dinos-and-where-they-spawn)

List dinos for this map:

MOST Modded Dinos can be transferred to any other map, **EXCEPT Aberration.**

* **Gryphons**: Both Mountain and Artic Spawn on Island, Center, SE, and Extinction. (Mini Gryphons are available as Patreon Pets.)
* **Draconis Glaucus**: Draconis Glaucus will spawn on Island and Center Only. And can be transferred to any other map, **Except Aberration**.&#x20;

See Aberration Rules here:

{% embed url="<https://faq.thepackgaming.com/asa/settings#aberration-rules>" %}

***

## Joining ASA: The Island Server

<table data-card-size="large" data-view="cards"><thead><tr><th align="center"></th><th align="center"></th><th align="center"></th><th align="center"></th><th></th><th data-hidden data-card-cover data-type="files"></th><th data-hidden data-card-target data-type="content-ref"></th></tr></thead><tbody><tr><td align="center">𝐀𝐒𝐀: 𝐓𝐡𝐞 𝐈𝐬𝐥𝐚𝐧𝐝</td><td align="center">Server Name: 𝐓𝐡𝐞 𝐏𝐀𝐂𝐊 𝐈𝐬𝐥𝐚𝐧𝐝 𝐏𝐯𝐄 𝐂𝐥𝐮𝐬𝐭𝐞𝐫(𝟑𝐱𝐇, 𝟒𝐱𝐗𝐏, 𝟏𝟓𝐓/𝐁)</td><td align="center">IP: 66.153.149.147:7977</td><td align="center"><p> <strong>How To Join The Island</strong></p><ol><li>At the main screen when Ark opens follow these steps to join the map that your character is on:</li><li>Hit tilde key to open the command. Just under Esc key on your keyboard</li><li>Type or copy and paste this command just from the open part!!!!<br>This will direct connect you to the servers without having to go through the server select screen.<br>Island – <code>open 66.153.149.147:7977</code></li></ol></td><td>Our ASA Cluster supports Cross-Platform Play.</td><td><a href="https://772063455-files.gitbook.io/~/files/v0/b/gitbook-x-prod.appspot.com/o/spaces%2F-Lgje1lBxKKWXwqycB-v%2Fuploads%2F4JjXLSYBzQDAx8ILtauH%2FASA%20The%20Island.png?alt=media&amp;token=85f97de6-1be0-452a-bc7f-1fb95ba76533">ASA The Island.png</a></td><td></td></tr><tr><td align="center"><em><strong>ASA Servers Mod Package</strong></em></td><td align="center"><p></p><p><strong>There are two ways to get the mods for the server.</strong></p><ul><li>Just load into ASA, go to the server browser, find The Pack servers, Click Join on the one you want, it opens a menu with a list of all the mods, Click Join and it will then install all the mods before loading into the server. If it times out, repeat the process. After all the mods are installed you can just join.</li></ul></td><td align="center">Or you can add them one by one from the Quick List found when clicking this link! </td><td align="center"></td><td></td><td><a href="https://772063455-files.gitbook.io/~/files/v0/b/gitbook-x-prod.appspot.com/o/spaces%2F-Lgje1lBxKKWXwqycB-v%2Fuploads%2FHlNbFrH84KHgrCwX1nS7%2FPACK_CARDS_ASA_MODS.png?alt=media&amp;token=b6264b96-d431-4fcf-aa4e-0882fb9b3d6a">PACK_CARDS_ASA_MODS.png</a></td><td><a href="https://faq.thepackgaming.com/ark/asa-cluster/asa-settings#subscribed-mods">https://faq.thepackgaming.com/ark/asa-cluster/asa-settings#subscribed-mods</a></td></tr><tr><td align="center"><img src="https://772063455-files.gitbook.io/~/files/v0/b/gitbook-x-prod.appspot.com/o/spaces%2F-Lgje1lBxKKWXwqycB-v%2Fuploads%2FnOcl1K07RRpwAMY5jO8H%2Fimage.png?alt=media&amp;token=838a50fe-2f6f-4981-be68-c54acca4a4f0" alt=""><br><strong>Ark: Ascended PvE Rules</strong></td><td align="center"><strong>Click here to go to our Full Rules!</strong></td><td align="center"></td><td align="center"></td><td></td><td></td><td></td></tr><tr><td align="center"><img src="https://772063455-files.gitbook.io/~/files/v0/b/gitbook-x-prod.appspot.com/o/spaces%2F-Lgje1lBxKKWXwqycB-v%2Fuploads%2FxNQaZ0008RWxU92hpAk8%2Fimage.png?alt=media&amp;token=ec06bb21-1ae7-4374-ac0d-3e4fa14d8919" alt="" data-size="original"></td><td align="center"><em><strong>Unity Maps</strong></em></td><td align="center"><em><strong>ASA: The Island</strong></em> </td><td align="center"><em><strong>Landmarks and Resources!</strong></em></td><td><em><strong>Click here to go to the map!</strong></em></td><td></td><td></td></tr></tbody></table>

***

## Your Community Landmarks

<figure><img src="https://772063455-files.gitbook.io/~/files/v0/b/gitbook-x-prod.appspot.com/o/spaces%2F-Lgje1lBxKKWXwqycB-v%2Fuploads%2FMPIOov1ZbNUx3hSvQOzz%2F2025%20ISLAND%20CC_NIGHT.png?alt=media&amp;token=4728b4c2-e30f-4b85-93b0-d73001298dfc" alt=""><figcaption><p>The PACK ASA Island CC.</p></figcaption></figure>

### Landmarks and Places of Interest

Landmarks with GPS and ADMIN Teleport Locators. All Ark Map Residents should pick up an Awesome Teleport Remote at a Community Center or make one in your Inventory.

{% tabs %}
{% tab title="Community Builds:" %}
Here you will find Places Like the Community Center, and refinery locations. Those noted have Open Transmitters, and all are part of the Teleport System.

* ISLAND CC     80.36|16.60
* Alphys Stark Tower     80.36|16.60
  {% endtab %}

{% tab title="Teleporter System:" %}
(Brute)Caverns of Lost Faith      53.7|10.3       (Underwater)\
(Clever)Central Cave       41.6|46.9\
(Cunning)Caverns of Lost Hope       46.0|88.6       (Underwater)\
(Devourer)North East Cave       14.8|85.4\
(Hunter)Lower South Cave       80.1|53.6\
(Immune)Swamp Cave       62.7|37.3\
(Massive)Lava Cave       70.5|86.0\
(Pack)Upper South Cave       68.2|56.2\
(Skylord)North West Cave       19.2|19.1\
(Strong)Snow Cave       29.4|31.9\
Claw Peak Resource Node             OPEN TRANSMITTER HERE\
Fars Peak Resorce Node       34.7|79.6       OPEN TRANSMITTER HERE\
Hidden Lake Beaver Preserve       23.2|69.5\
Island Community Center       72.2|70.2       OPEN TRANSMITTER HERE\
Penguin Island Preserve       22.4|9.6\
Silica Pearl Preserve       37.8|18.\
Volcano Public Refinery       39.8|38.       OPEN TRANSMITTER HERE
{% endtab %}

{% tab title="No Build Areas:" %}
Claw Peak Resource Node             OPEN TRANSMITTER HERE\
Fars Peak Resource Node       34.7|79.6       OPEN TRANSMITTER HERE\
Hidden Lake Beaver Preserve       23.2|69.5\\

Penguin Island Preserve       22.4|9.6\
Silica Pearl Preserve       37.8|18.\
Volcano Public Refinery       39.8|38.       OPEN TRANSMITTER HERE
{% endtab %}
{% endtabs %}

#### Points of Interest

Caves, Ruins and other Interesting Places on The Island

{% tabs %}
{% tab title="Points of Interest" %}

Caves, Ruins and other Interesting Places
{% endtab %}

{% tab title="Artifact Caves" %}
Artifact locations, on The Island.

1. Artifact Of The Brute \
   Caverns of Lost Faith Entrance \
   53.7°|10.4° (Underwater)   \
   1A. Artifact Of The Brute Location 60.8° |22.0° (Underwater)
2. Artifact of the Clever Cave Entrance \
   CENTRAL CAVE 41.5|46.   \
   2A. Artifact of the Clever Location 39.6||45.9
3. Artifact of the Cunning \
   Caverns of Lost Hope Entrance 45.9|88.9 (Underwater)   \
   3A. Artifact Of The Cunning Location 46.4|83.4 (Underwater)
4. Artifact of the Devourer Cave Entrance \
   NORTH EAST CAVE 14.7| 85.4   \
   4A. Artifact of the Devourer Location 16.1|84.6
5. Artifact of the Hunter Cave Entrance \
   LOWER SOUTH CAVE 80.3|53.5   \
   5A. Artifact of the Hunter Location 83.5|56.0
6. Artifact of the Immune Cave Entrance \
   SWAMP CAVE 67.1|86.0   \
   6A. Artifact of the Immune Location 62.2|39.6
7. Artifact of the Massive Cave Entrance \
   LAVA CAVE 70.6|86.1   \
   7A. Artifact of the Massive Location 67.1|86.0
8. Artifact of the Pack Cave Entrance \
   UPPER SOUTH CAVE 62.2|39.6   \
   8A. Artifact of the Pack Location 73.0|61.0
9. Artifact of the Skylord Cave Entrance \
   NORTH WEST CAVE 19.3|19.0   \
   9A. Artifact of the Skylord 19.6|18.4
10. Artifact of the Strong Cave Entrance \
    SNOW CAVE 29.1|31.8    \
    10A. Artifact of the Strong Location 29.9|26.5
    {% endtab %}

{% tab title="Obelisks and Boss Arena" %}
Blue Obelisk Terminal     25.5 |25.6\
Green Obelisk Terminal      59.0|72.3\
Red Obelisk Terminal      79.8|17.4\
BroodMother Arena      N/A\
Megapiticus (Monkey)      Arena N/A\
Dragon Arena      N/A\
Tek Cave Entrance      42.8|39.2\
Tek Cave "Ascension" Terminal\
Overseer Arena (Inside Tek Cave)      N/A
{% endtab %}
{% endtabs %}

{% tabs %}
{% tab title="Resource Areas:" %}
Claw Peak Resource Node             OPEN TRANSMITTER HERE\
Fars Peak Resource Node       34.7|79.6       OPEN TRANSMITTER HERE\
Hidden Lake Beaver Preserve       23.2|69.5\\

Penguin Island Preserve       22.4|9.6\
Silica Pearl Preserve       37.8|18.\
Volcano Public Refinery       39.8|38.       OPEN TRANSMITTER HERE\
Volcano Public Refinery 39.8|38. OPEN TRANSMITTER HERE
{% endtab %}

{% tab title="Underwater Resources:" %}
NW Underwater Cave Entrance (Underwater) 16.0|10.1.\\

\
NNW Underwater Cave Entrance (Underwater) 10.0|21.5.\\

\
North Underwater Cave Entrance (Underwater) 10.4|39.5.\\

\
NE Underwater Cave Entrance (Underwater) 07.9|90.1.\\

\
East Upper Central Underwater Cave Entrance (Underwater) 36.3|91.5.\\

\
East Upper South Underwater Cave Entrance (Underwater) 50.5|11.2.\\

\
SE Underwater Cave Entrance (Underwater) 52.7|91.9.\\

\
SSE Underwater Cave Entrance (Underwater) 83.0|09.9.\\

\
SSW Underwater Cave Entrance (Underwater) 90.8|13.0.\\

\
SW Underwater Cave Entrance (Underwater) 89.8|36.8.\\

\
SW Lower South Underwater Cave Entrance (Underwater) 90.3|71.3.\\

\
West Central Underwater Cave Entrance (Underwater) 87.1|90.2. <br>
{% endtab %}

{% tab title="ADMIN BASES" %}

* Alphys Stark Tower     80.36|16.60
  {% endtab %}
  {% endtabs %}

### Useful Map for Resources and Lore Notes:

ARK UNITY Website: The Island | Ark: Survival Ascended

{% embed url="<https://ark-unity.com/ark-survival-ascended/maps/the-island/>" %}

<figure><img src="https://772063455-files.gitbook.io/~/files/v0/b/gitbook-x-prod.appspot.com/o/spaces%2F-Lgje1lBxKKWXwqycB-v%2Fuploads%2Fcv1ZUDtUfc1D0vo1HBsE%2FASA_ISLAND_MAP.png?alt=media&amp;token=a38e995f-8e67-4187-baa2-ff34a784e291" alt=""><figcaption><p>ASA: The ISLAND</p></figcaption></figure>

<figure><img src="https://772063455-files.gitbook.io/~/files/v0/b/gitbook-x-prod.appspot.com/o/spaces%2F-Lgje1lBxKKWXwqycB-v%2Fuploads%2Frfw2Q6thsTrWearCiSnN%2Fimage.png?alt=media&amp;token=7c24f378-9c45-4f40-9567-00370102d7df" alt=""><figcaption></figcaption></figure>

All content on this page has been accumulated from several places including the Wiki, The PACK Admin Team, and Players from The Pack cluster.


# ASA: Scorched Earth

April 1st 2024 – Scorched Earth + Frontier Adventure Pack

## ASA SCORCHED EARTH&#x20;

<figure><img src="https://772063455-files.gitbook.io/~/files/v0/b/gitbook-x-prod.appspot.com/o/spaces%2F-Lgje1lBxKKWXwqycB-v%2Fuploads%2FNqu8kXl3z07DhMdHC0D6%2Fimage.png?alt=media&amp;token=c92efe5e-f2c9-4bda-81a1-d75873959316" alt=""><figcaption></figcaption></figure>

#### About This Expansion Map:

Scorched Earth takes ARK players to an entirely new land, composed of six unique, desert themed biomes – dunes, high desert, mountains, canyons, badlands and oasis – each with their own aesthetic and ecosystem. Littered with ruins, geysers, and intricate ancient cave systems, survivors will find a whole new frontier to explore and master.

The biomes of Scorched Earth are filled with dangerous new creatures, and the intrepid survivor will find that many of them can be tamed. Among others, lead a caravan of the camel-like Morellatops, or rain fire down upon your enemies from the back of an elemental Wyvern. Just mind your step, or you might attract a Death Worm!&#x20;

Scorched Earth has three unique weather patterns: Sandstorms radically reduce visibility and drain stamina, Superheat will drain your water at a much faster rate than normal heat and induce Heat Stroke fairly quickly, while electrical storms will temporarily shut down electrical devices and prevent firearms from firing. The Electrical Generator and the Chemistry Bench will not turn off if the item Structures are covered.

## Creatures:

### Standard Creatures:

ARK Normal Creatures spawning on SE:&#x20;

{% embed url="<https://ark.wiki.gg/wiki/Scorched_Earth#Creatures_2>" %}
ASA SE Creatures from the Wiki
{% endembed %}

### ASA Unique Creatures&#x20;

Fasolasuchus; Oasisaur; Ceratosaurus; Deinosuchus; Deinotherium; Dreadmare; Electrophorus; Pyromane

### UNIQUE Modded Dinos:

See[ The Pack Unique Creatures and Where they Spawn!](https://faq.thepackgaming.com/asa/cluster/settings#asa-dinos-and-where-they-spawn)

MOST Modded Dinos can be transferred to any other map, **EXCEPT Aberration.**

* **Gryphons**: Both Mountain and Artic Spawn on Island, Center, SE, and Extinction. (Mini Gryphons are available as Patreon Pets.)
* **Runic Wyverns**: These lovely wyverns are a rare spawn on Scorched Earth. And can be transferred to any other map, **Except Aberration.**

<details>

<summary>Spawn Locations:</summary>

* Runic Flame Wyvern spawn:
  * Scorched Earth: SE\_DinoSpawnEntriesBadlands
* Runic Spark Wyvern spawn:
  * Scorched Earth: SE\_DinoSpawnEntriesBadlands
* Runic Venom Wyvern spawn:
  * Scorched Earth: SE\_DinoSpawnEntriesGreenDesert
* Runic Glacial Wyvern spawn:
  * Scorched Earth: SE\_DinoSpawnEntriesGreenDesert
* Runic Crystal Wyvern spawn:
  * Scorched Earth: SE\_DinoSpawnEntriesBadlands\_C

</details>

See Aberration Rules here:

{% embed url="<https://faq.thepackgaming.com/asa/settings#aberration-rules>" %}

***

## Joining ASA: Scorched Earth Server

<table data-card-size="large" data-view="cards"><thead><tr><th></th><th></th><th></th><th></th><th data-hidden data-card-target data-type="content-ref"></th><th data-hidden data-card-cover data-type="files"></th></tr></thead><tbody><tr><td>𝐀𝐒𝐀: 𝐒𝐜𝐨𝐫𝐜𝐡𝐞𝐝 𝐄𝐚𝐫𝐭𝐡</td><td>Server Name: 𝐓𝐡𝐞 𝐏𝐀𝐂𝐊 𝐒𝐜𝐨𝐫𝐜𝐡𝐞𝐝𝐄𝐚𝐫𝐭𝐡 𝐏𝐯𝐄 𝐂𝐥𝐮𝐬𝐭𝐞𝐫(𝟑𝐱𝐇, 𝟒𝐱𝐗𝐏, 𝟏𝟓𝐓/𝐁)  </td><td>IP:66.153.149.147:7677</td><td><p><strong>How To Join S. E.</strong></p><ul><li>At the main screen when Ark opens follow these steps to join the map that your character is on:</li><li>Hit tilde key to open the command. Just under Esc key on your keyboard</li><li>Type or copy and paste this command just from the open part!!!!<br>This will direct connect you to the servers without having to go through the server select screen.</li><li>Scorched Earth – <code>open 66.153.149.147:7677</code></li></ul></td><td></td><td><a href="https://772063455-files.gitbook.io/~/files/v0/b/gitbook-x-prod.appspot.com/o/spaces%2F-Lgje1lBxKKWXwqycB-v%2Fuploads%2FfedqIExE4NgK8TjGEAGk%2FASA_SPLASH_S%20E.png?alt=media&amp;token=0cb9d8b6-7687-4b4f-953e-8cd871cdc095">ASA_SPLASH_S E.png</a></td></tr><tr><td><em><strong>ASA Servers Mod Package</strong></em></td><td><p></p><p><strong>There are two ways to get the mods for the server.</strong></p><ul><li>Just load into ASA, go to the server browser, find The Pack servers, Click Join on the one you want, it opens a menu with a list of all the mods, Click Join and it will then install all the mods before loading into the server. If it times out, repeat the process. After all the mods are installed you can just join.</li></ul></td><td>Or you can add them one by one from the Quick List found when clicking this link! </td><td></td><td><a href="https://faq.thepackgaming.com/ark/asa-cluster/asa-settings#subscribed-mods">https://faq.thepackgaming.com/ark/asa-cluster/asa-settings#subscribed-mods</a></td><td><a href="https://772063455-files.gitbook.io/~/files/v0/b/gitbook-x-prod.appspot.com/o/spaces%2F-Lgje1lBxKKWXwqycB-v%2Fuploads%2FHlNbFrH84KHgrCwX1nS7%2FPACK_CARDS_ASA_MODS.png?alt=media&amp;token=b6264b96-d431-4fcf-aa4e-0882fb9b3d6a">PACK_CARDS_ASA_MODS.png</a></td></tr><tr><td><strong>Click here to go to our Full Rules!</strong></td><td></td><td></td><td></td><td><a href="https://faq.thepackgaming.com/rules/asa-pve-servers-rules.">https://faq.thepackgaming.com/rules/asa-pve-servers-rules.</a></td><td><a href="https://772063455-files.gitbook.io/~/files/v0/b/gitbook-x-prod.appspot.com/o/spaces%2F-Lgje1lBxKKWXwqycB-v%2Fuploads%2FCde7RVPafu2cTV0wwVbS%2FPACK_CARDS_ASA_RULES.png?alt=media&amp;token=b833c602-6136-4e0f-8a0d-8dfca66a9ed3">PACK_CARDS_ASA_RULES.png</a></td></tr><tr><td><em><strong>Unity Maps</strong></em></td><td><em><strong>ASA: Scorched Earth</strong></em></td><td><em><strong>Landmarks and Resources!</strong></em></td><td><em><strong>Click here to go to the map!</strong></em></td><td><a href=" https://ark-unity.com/ark-survival-ascended/maps/scorched-earth/ "> https://ark-unity.com/ark-survival-ascended/maps/scorched-earth/ </a></td><td><a href="https://772063455-files.gitbook.io/~/files/v0/b/gitbook-x-prod.appspot.com/o/spaces%2F-Lgje1lBxKKWXwqycB-v%2Fuploads%2FcpHsiB58y2xKJifn968o%2FASA_SE_MAP.png?alt=media&amp;token=31050067-41fb-4758-bf5d-151222d68074">ASA_SE_MAP.png</a></td></tr></tbody></table>

***

## Your Community Landmarks

Image of CC here.

### Landmarks and Places of Interest

Landmarks with GPS and ADMIN Teleport Locators. All Ark Map Residents should pick up an Awesome Teleport Remote at a Community Center or make one in your Inventory.

{% tabs %}
{% tab title="Community Builds:" %}
Here you will find Places Like the Community Center, and refinery locations. Those noted have Open Transmitters, and all are part of the Teleport System.

* SE CC, Thunderdome, and Admin Lodgings     49.08|12.69"
  {% endtab %}

{% tab title="Teleporter System:" %}
The PACK Admins upkeep a network of Teleporters for the use of our Players.

* **The Metal Mountain Protected Resource Area** at 31/29 and the surrounding resource nodes.
* **Silica Pearl Protected Resource Area**. Red OBE Water at 70/39.&#x20;
* **Oasis Crystal Cave** 73.63/40.15 (Near Red Obe){{No Building}}
* **Trench Cave** 59.10/16.21 {{No Building Resource Area}}
* **Red, Green, and Blue Obelisk Return Teleporters.**
  {% endtab %}

{% tab title="The PACK Admin Bases:" %}
The PACK Admin Base and any Outpost they Own.

"CC, Thunderdome, and Admin Lodgings\
49.08|12.69"
{% endtab %}
{% endtabs %}

### Points of Interest

Caves, Ruins and other Interesting Places on .

{% tabs %}
{% tab title="Artifact Caves" %}

Artifact locations, on ASA SE.

(Crag)Grave of the Tyrants Cave      28.6|29.7\
(Destroyer)Ruins of Nosti Cave      77.6|75.7\
(Gatekeeper)Old Tunnels Cave      59.0|48.1
{% endtab %}

{% tab title="Obelisks and Boss Arena" %}
Obelisks and Boss Arena

Thunderdome,     49.08|12.69\
Blue Obelisk      17.1|34.6\
Green Obelisk      50.0|73.6\
Red Obelisk      71.4|38.8\
Manticore Boss Arena      N/A
{% endtab %}

{% tab title="NO BUILD Areas:" %}

* **The Metal Mountain Protected Resource Area** at 31/29 and the surrounding resource nodes.
* **Silica Pearl Protected Resource Area**. Red OBE Water at 70/39.&#x20;
* **Oasis Crystal Cave** 73.63/40.15 (Near Red Obe){{No Building}}
* **Trench Cave** 59.10/16.21 {{No Building Resource Area}}
  {% endtab %}
  {% endtabs %}

### Resources:

{% tabs %}
{% tab title="Public Resource Areas" %}

* **Silica Pearl Protected Resource Area**. Red OBE Water at 70/39.&#x20;
* **Oasis Crystal Cave** 73.63/40.15 (Near Red Obe){{No Building}}
* **Trench Cave** 59.10/16.21 {{No Building Resource Area}}
* **The Metal Mountain foundry** at 31/29 and the surrounding resource nodes.
  {% endtab %}
  {% endtabs %}

***

### Useful Map for Resources and Lore Notes:

{% embed url="<https://ark-unity.com/ark-survival-ascended/maps/scorched-earth/>" %}

<figure><img src="https://772063455-files.gitbook.io/~/files/v0/b/gitbook-x-prod.appspot.com/o/spaces%2F-Lgje1lBxKKWXwqycB-v%2Fuploads%2Fny6cB3ORs8swBMYl3kON%2FASA_SE_MAP.png?alt=media&amp;token=f519c4a5-daae-4f3e-8b13-f29445b63f21" alt=""><figcaption><p>Topographical Map of SE</p></figcaption></figure>

## Scorched Earth Resource Links:

The new ASA Fasolasuchus

{% embed url="<https://www.youtube.com/watch?v=WH_9JxTjfe4&t=2s>" %}

<figure><img src="https://772063455-files.gitbook.io/~/files/v0/b/gitbook-x-prod.appspot.com/o/spaces%2F-Lgje1lBxKKWXwqycB-v%2Fuploads%2FeRGidJgeScpJS41JV5Xb%2Fbae3b6b7c0e85596850de69b437960c8edc4e98c.jpg?alt=media&amp;token=920bfc98-46ba-4800-8250-f749cc74932b" alt=""><figcaption></figcaption></figure>

## ARK: Bob's Tall Tales:

**Frontier Showdown :** Saddle up and stake your claim on the Scorched Earth! Build new Western-style structures like your own rootin' tootin' saloon, then tickle the ivories on your own piano for an authentic frontier experience. Hunt for buried treasure with your trusty shovel, tame hardy new creatures to pull your configurable wagon, and even hop aboard a chugging steam train to explore those harsh badlands!\
Price:  US $29.22

{% embed url="<https://www.youtube.com/watch?v=oBNshl23TBY>" %}

### Contents of Frontier Pack:

<details>

<summary>Everything included in the Frontier Pack</summary>

#### Player Skins&#x20;

Bowler Hat \
Rancher Hat\
Sinister Hat\
Drifter Set:  Boots; Hat; Pants; and Shirt\
Outlaw Set: Boots; Gloves; Pants; Shirt&#x20;

#### Building Structures&#x20;

Wood Scaffolding\
Frontier Structures Skins

#### Items&#x20;

Shovel \
Treasure Chest \
Platform Carts \
Plant Pots \
Water Reservoir (1000 units) \
Windmill (replaces Turbine) \
Dynamite skin for C4 and trigger unit

#### Trains&#x20;

Train Engine \
Train Platform Car \
Train Track Pieces (3)

#### Decor Items&#x20;

Shootable Bottles \
Coffin \
Saloon Chair \
Swivel Stool \
Saloon Table \
Drawing Paper \
Wooden Hanging Sign \
Barrel Storage \
Poker Table \
Town Bell \
Fancy Sofa \
Fancy Armchair \
Saloon Piano \
Frontier Lamps

</details>

{% embed url="<https://www.youtube.com/watch?v=VsxUfMaSC3c>" %}

***

<figure><img src="https://lh7-rt.googleusercontent.com/docsz/AD_4nXeN-ooW4HLRMm0VUuJhggu7pGAA182adNaKvKVgM4Jx5MD51vJT3EYQkwblETC7ggY96Yz1D5lSwQQY0XMREpugDsTDJXy2fYcyLU-5OSXvJ43Tslyukwnb6Z6U-fXtzqbbj29n4Q?key=GlTRPaxhvh8su6YjSiXOAg" alt=""><figcaption></figcaption></figure>

All content on this page has been accumulated from several places including the Wiki, The PACK Admin Team, and Players from The Pack cluster.

<br>


# ASA: Aberration

Live Sept. 5, 2024

<figure><img src="https://772063455-files.gitbook.io/~/files/v0/b/gitbook-x-prod.appspot.com/o/spaces%2F-Lgje1lBxKKWXwqycB-v%2Fuploads%2Fb5HRjWbvYB4lzoM4XVh2%2Faa20ed07fd1e6544d77e76218a961e42f74af411.jpg?alt=media&amp;token=d29d5c69-05b0-4c6b-80e3-d1aa217c7a1a" alt=""><figcaption></figcaption></figure>

## About This Expansion Map:

Aberration places survivors on a damaged ARK: its internal atmosphere has leaked away, resulting in a harsh surface with intense radiation, and a plethora of lush biomes underground. With the maintenance systems of this ARK malfunctioning, the many hazards, creatures, and nature of the environment present a thrilling new world to explore and master.

Earthquakes, radiation exposure, gas leaks, and Element chambers are among the many hazards that survivors will learn to grapple with Aberration’s varied biomes, both aboveground and below the surface. New tools are on-hand to survive on the world of Aberration, while opening up many possibilities for new competitive and cooperative scenarios.

***

## Creatures:

### Standard Creatures:

#### Aberration Rules: <a href="#aberration-rules" id="aberration-rules"></a>

No Foreign Dinos are allowed transfer into Aberration. Flying creatures of all kinds and gliders from other maps cannot be un-podded. Large Carnivores are not allowed to transfer. Modded dinos are not allowed on Aberration. Except for any mod specifically meant for Aberration.

Only the creatures listed below, and all their variants, can be downloaded on Aberration

<https://ark.wiki.gg/wiki/CrossARK_Transfers#Aberration>

### ASA Unique Creatures&#x20;

Cosmo;&#x20;Yi Ling; Aberrant Fasolasuchus; Aberrant Megalania; Aberrant Gigantoraptor; Aberrant Oviraptor

### UNIQUE Modded Dinos:

See[ The Pack Unique Creatures and Where they Spawn!](https://faq.thepackgaming.com/asa/cluster/settings#asa-dinos-and-where-they-spawn)

At this time no mods have been chosen for Aberration.

***

## Joining ASA: Aberration Server

<table data-card-size="large" data-view="cards"><thead><tr><th align="center"></th><th></th><th></th><th></th><th data-hidden data-card-target data-type="content-ref"></th><th data-hidden data-card-cover data-type="files"></th></tr></thead><tbody><tr><td align="center">𝐀𝐒𝐀: 𝐀𝐛𝐞𝐫𝐫𝐚𝐭𝐢𝐨𝐧</td><td>Server Name: 𝐓𝐡𝐞 𝐏𝐀𝐂𝐊 𝐀𝐛𝐞𝐫𝐫𝐚𝐭𝐢𝐨𝐧 𝐏𝐕𝐄(𝟑𝐱𝐇, 𝟒𝐱𝐗𝐏, 𝟏𝟓𝐓/𝐁)   </td><td>IP: 66.153.149.147:7681</td><td><p><strong>How To Join Aberration</strong></p><p><strong>1.</strong> At the main screen when Ark opens follow these steps to join the map that your character is on:<br>2. Hit tilde key to open the command. Just under Esc key on your keyboard<br>3. Type or copy and paste this command just from the open part!!!!<br>This will direct connect you to the servers without having to go through the server select screen.</p><p>Aberration – <code>open 66.153.149.147:7681</code></p></td><td></td><td><a href="https://772063455-files.gitbook.io/~/files/v0/b/gitbook-x-prod.appspot.com/o/spaces%2F-Lgje1lBxKKWXwqycB-v%2Fuploads%2FydSBjr0fuKssD1WnSmvV%2FAB_Page_Flash.png?alt=media&amp;token=e6169be9-f086-435c-b0a6-11b91f9566cf">AB_Page_Flash.png</a></td></tr><tr><td align="center"><strong>ASA Mod Guide for The PACK</strong></td><td><p></p><p><strong>There are two ways to get the mods for the server.</strong></p><ul><li>Just load into ASA, go to the server browser, find The Pack servers, Click Join on the one you want, it opens a menu with a list of all the mods, Click Join and it will then install all the mods before loading into the server. If it times out, repeat the process. After all the mods are installed you can just join.</li></ul></td><td>Or you can add them one by one from the Quick List found when clicking this link! </td><td></td><td><a href="https://faq.thepackgaming.com/ark/asa-cluster/asa-settings#subscribed-mods">https://faq.thepackgaming.com/ark/asa-cluster/asa-settings#subscribed-mods</a></td><td><a href="https://772063455-files.gitbook.io/~/files/v0/b/gitbook-x-prod.appspot.com/o/spaces%2F-Lgje1lBxKKWXwqycB-v%2Fuploads%2FHlNbFrH84KHgrCwX1nS7%2FPACK_CARDS_ASA_MODS.png?alt=media&amp;token=b6264b96-d431-4fcf-aa4e-0882fb9b3d6a">PACK_CARDS_ASA_MODS.png</a></td></tr><tr><td align="center"><strong>Click here to go to our Full Rules!</strong></td><td></td><td></td><td></td><td><a href="https://faq.thepackgaming.com/rules/asa-pve-servers-rules.">https://faq.thepackgaming.com/rules/asa-pve-servers-rules.</a></td><td><a href="https://772063455-files.gitbook.io/~/files/v0/b/gitbook-x-prod.appspot.com/o/spaces%2F-Lgje1lBxKKWXwqycB-v%2Fuploads%2FCde7RVPafu2cTV0wwVbS%2FPACK_CARDS_ASA_RULES.png?alt=media&amp;token=b833c602-6136-4e0f-8a0d-8dfca66a9ed3">PACK_CARDS_ASA_RULES.png</a></td></tr><tr><td align="center"><em><strong>Unity Maps</strong></em> </td><td><em><strong>ASA: Aberration</strong></em></td><td><em><strong>Landmarks and Resources!</strong></em></td><td><em><strong>Click here to go to the map!</strong></em></td><td></td><td><a href="https://772063455-files.gitbook.io/~/files/v0/b/gitbook-x-prod.appspot.com/o/spaces%2F-Lgje1lBxKKWXwqycB-v%2Fuploads%2FbV5Ywd5OA8LIavT3IfMJ%2FAberration.webp?alt=media&amp;token=c0a06025-871c-4feb-ba5a-06ed08c7097b">Aberration.webp</a></td></tr></tbody></table>

***

## Your Community Landmarks

Here you will find Places Like the Community Center, and refinery locations. Those noted have Open Transmitters, and all are part of the Teleport System.

<figure><img src="https://772063455-files.gitbook.io/~/files/v0/b/gitbook-x-prod.appspot.com/o/spaces%2F-Lgje1lBxKKWXwqycB-v%2Fuploads%2F5Mur7nd8I61YBnsbGEPm%2FAB%20CC.png?alt=media&amp;token=b251bc69-59e3-4644-ae88-9132e15f88c0" alt=""><figcaption></figcaption></figure>

## Landmarks and Places of Interest

Landmarks with GPS and ADMIN Teleport Locators. All Ark Map Residents should pick up an Awesome Teleport Remote at a Community Center or make one in your Inventory.

### Community Builds:

{% tabs %}
{% tab title="Community Builds" %}
Here you will find Places Like the Community Center, and refinery locations. Those noted have Open Transmitters, and all are part of the Teleport System.

◉AB Community Center at 44.6|24.4 (OPEN TRANSMITTER HERE) \
◉AB Element Catalyzers at 45.0|43.4 (OPEN TRANSMITTER HERE) \
◉AB Refinery at 47.2|62.1 (OPEN TRANSMITTER HERE) \
◉Reaper Trap at 81.1|58.6 (OPEN TRANSMITTER HERE)(Radiation)\
(will open after the first Player achieves an implant on their own)\
◉Public Drake Teleport at 47.0|46.7 (OPEN TRANSMITTER HERE)
{% endtab %}

{% tab title="Teleporter Network" %}
The PACK Admins upkeep a network of Teleporters for the use of our Players.

**Aberration Teleporter Network** for the use of our Players.

* ◉AB Community Center at 44.6|24.4 (OPEN TRANSMITTER HERE)&#x20;
* ◉AB Element Catalyzers at 45.0|43.4 (OPEN TRANSMITTER HERE)&#x20;
* ◉AB Refinery at 47.2|62.1 (OPEN TRANSMITTER HERE)&#x20;
* ◉Reaper Trap at 81.1|58.6 (OPEN TRANSMITTER HERE)(Radiation)\
  (will open after the first Player achieves an implant on their own)
* ◉Public Drake Teleport at 47.0|46.7 (OPEN TRANSMITTER HERE)
* (Depths) Old Railway Cave Entrance at 48.3|27.3
* (Shadows) Hidden Grotto Entrance at 54.2|65.7
* (Stalker) Elemental Vault Entrance at 92.5|49.9
* Cave to Surface (Blue Obelisk) \[Exit] at 19.7|27.9
* Cave to Surface (Green Obelisk) \[Exit] at 26.6|61.7
* Cave to Surface (Red Obelisk) \[Exit] at 79.6|25.6
* Rockwell Terminal at 42.7|36.7 (Radiation)\
  (After first successful Player attempt at AB Rockwell)
*

{% endtab %}

{% tab title="The PACK Admin Bases" %}
The PACK Admin Bases and any Outposts they Own.

* "Ascended Wolves Fob." (Alphy) 35.8|64.8
*
*

{% endtab %}
{% endtabs %}

### Points of Interest

Caves, Ruins and other Interesting Places on \<MAP HERE>.

{% tabs %}
{% tab title="Points of Interest" %}

{% endtab %}

{% tab title="Artifact Caves" %}
Do not place tp pads within the Artifact Caves. Such pads found will be deleted. Placing Bedrolls for quick respawns are fine, just pick up after yourselves.

* (Depths) Old Railway Cave Entrance 48.3|27.3 \
  The Artifact is located at lat 51.2 lon 23.8.
* (Shadows) Hidden Grotto Entrance 54.2|65.7 \
  The artifact is located approximately at (50.5, 72.6).
* (Stalker) Elemental Vault Entrance 92.5|49.9 (Radiation)\
  The artifact is located at lat 91.7 lon 51.3
  {% endtab %}

{% tab title="Surface Caves" %}
These Exits to the Surface all have lots of metal and flint resources in the Exit cave. All locations will have a transmitter and a tp pad.

* Cave to Surface (Blue Obelisk) \[Exit] at 19.7|27.9
* Cave to Surface (Green Obelisk) \[Exit] at 26.6|61.7
* Cave to Surface (Red Obelisk) \[Exit] at 79.6|25.6
  {% endtab %}
  {% endtabs %}

{% tabs %}
{% tab title="Resource Sites" %}
Protected Resource Areas! (we use PRA for this designation)\
:no\_entry:No building near Resources in groups of 5 nodes or more, or mixed resource nodes of 7 nodes or more.\
:no\_entry:No building within 100 building units of any  **Protected Resource Area**.

* ◉AB Element Catalyzers 45.0|43.4 (OPEN TRANSMITTER HERE)&#x20;
* ◉AB Refinery 47.2|62.1 (OPEN TRANSMITTER HERE)
* ◉Public Drake Teleport at 47.0|46.7 (OPEN TRANSMITTER HERE)
* ◉Public Reaper Trap at 81.1|58.6 (OPEN TRANSMITTER HERE)\
  (After first successful Player attempt at impregnation)
* Silica Pearls | In Fertile Lake at 48.3|27.2
* Metal 35.8|64.8 (Alphy has a open Foundry here)
* Chitin and Organic Polymer; Kill Karkinos

Subject to change daily as we discover the newly redone Aberration map.
{% endtab %}

{% tab title="No Build Areas:" %}

* ​​⛔Do not block or lock Gas collectors. These are Public Access.
* ​​⛔Keep the waterways clear for Boat traffic.
* ​​⛔Do not block Charge stations. These are Public Access.
* ​​⛔Aberration CC at 44.6|24.4 (OPEN TRANSMITTER HERE)
* ⛔No building near Resources in groups of 5 nodes or more, or mixed resource nodes of 7 nodes or more.
* ⛔No building within 100 building units of any **Protected Resource Area**.&#x20;
* ◉AB Refinery 46.7|61.8 (OPEN TRANSMITTER HERE)&#x20;
* ◉Public Drake Teleport at 46.97|46.65 (OPEN TRANSMITTER HERE)&#x20;
* ◉Public Reaper Trap at 81.1|58.6 (OPEN TRANSMITTER HERE)
* ⛔ANY Cave or Ruin that has an artifact, **Do NOT Block** the way to the item.&#x20;
* ◉Artifact Of The Depths "Old Railway Cave" (Entrance) 48.3|27.2&#x20;
* ◉Artifact Of The Shadows "Hidden Grotto" (Entrance) 54.2|65.7&#x20;
* ◉Artifact Of The Stalker "Elemental Vault" (Entrance) 81.0|47.0

Subject to change daily as we discover the newly redone Aberration map.
{% endtab %}
{% endtabs %}

***

## Useful Map for Resources and Lore Notes:

{% embed url="<https://ark-unity.com/ark-survival-ascended/maps/aberration/>" %}

<figure><img src="https://772063455-files.gitbook.io/~/files/v0/b/gitbook-x-prod.appspot.com/o/spaces%2F-Lgje1lBxKKWXwqycB-v%2Fuploads%2FnIvcF0UQ30FvRNvBaRws%2FAberration.webp?alt=media&amp;token=e23919ae-b9a8-401d-b20d-2f06c97be05b" alt=""><figcaption></figcaption></figure>

***

<figure><img src="https://772063455-files.gitbook.io/~/files/v0/b/gitbook-x-prod.appspot.com/o/spaces%2F-Lgje1lBxKKWXwqycB-v%2Fuploads%2F8cgH3DsU4dPfEAnNu7iI%2Fab%20-.png?alt=media&amp;token=cfce01f8-07d5-4fb9-99fb-0c32565f4c40" alt=""><figcaption></figcaption></figure>

## Bob's Tall Tales - Steampunk Ascent

{% embed url="<https://youtu.be/hHC00sCNOwE>" %}
Strap on your goggles and gear up for an incomparable journey to the dark heart of Aberration! Brave this lethal underworld with a trusty clockwork-robot companion by your side! Defy the subterranean depths by airship, or swing from luminous spider-silk with the new 'Cosmo' tame! Gum up adversaries with viscid projectiles, and evade attack with a wondrous watch that allows you to slip backwards to safety! Learn to identify, extract, and transfer useful DNA-traits between creatures! Harness the forces of nature and hurl the gauntlet of super-science into the frightful face of death itself!
{% endembed %}

<figure><img src="https://772063455-files.gitbook.io/~/files/v0/b/gitbook-x-prod.appspot.com/o/spaces%2F-Lgje1lBxKKWXwqycB-v%2Fuploads%2FLycnQW9ye2g5jVYgf8NW%2Fimage.png?alt=media&amp;token=3cd2e468-aae7-41ed-9490-271abcf677ba" alt=""><figcaption></figcaption></figure>

* Cosmo, the web-slinging companion, uses its webs and sharp instincts to navigate danger and protect those in need, proving that even the tiniest hero can wield great power.<br>

  <figure><img src="https://clan.akamai.steamstatic.com/images//44719856/a620f3e38a01a59fbb1f8ccdecc774670ea46bc8.jpg" alt=""><figcaption></figcaption></figure>
* New Steampunk-style structures like your own brass-clad workshop, then fire up your own Steam Forge for a truly atmospheric experience.<br>

  <figure><img src="https://clan.akamai.steamstatic.com/images//44719856/39e8064f9e2d939a5b492ac713018029c7c22be2.jpg" alt=""><figcaption></figcaption></figure>
* A large clock that seems to speed up time.<br>

  <figure><img src="https://772063455-files.gitbook.io/~/files/v0/b/gitbook-x-prod.appspot.com/o/spaces%2F-Lgje1lBxKKWXwqycB-v%2Fuploads%2FpBQR6Ztrlmg1m6c877yA%2Fimage.png?alt=media&amp;token=3d0a58d2-127d-4156-95d6-951b68fcc749" alt=""><figcaption></figcaption></figure>
* SIR-5rM8, a trusty robot friend voiced by Alan Tudyk who can automate various chores!<br>

  <figure><img src="https://clan.akamai.steamstatic.com/images//44719856/8461b02f7597f80dc856de1f80f0327ca0dfa1e0.jpg" alt=""><figcaption></figcaption></figure>
* A Zeppelin with a platform to hover the world without worry!\
  &#x20;A large dirigible with a platform to create mobile airbases!<br>

  <figure><img src="https://clan.akamai.steamstatic.com/images//44719856/ec6781ce299c0e2be482225acf45e4ad10ae7161.jpg" alt=""><figcaption><p>v</p></figcaption></figure>
* And much so more!

#### 3 New Weapons/Tools

* Gene Scanner: A utility item for players with multiple functions, including detecting specific creatures, interacting with the Gene Infusion system, extracting traits, applying infusions to baby creatures, and harvesting embryos from pregnant creatures.
* Goo Gun: Fires incapacitating and bouncy blobs of organic goo
* Stopwatch: A handheld time-traveling teleportation device

#### 11 New Structures

* Clockface: A large clock face that speeds up crafting for nearby structures
* Embryo Incubator: An incubator specifically for Embryos, with Gene Scanner compatibility for extracting Embryos from non-Egg-laying creatures
* Gene Storage: A structure for storing and applying Traits to Tames, allowing players to enhance their creatures with up to five abilities collected from wild creatures
* Industrial Preserving Bin: A larger, gasoline-powered upgrade to the Preserving Bin designed for Fabricator-level efficiency
* Library Storage: A storage structure for Blueprints and Notes, allowing all allied inventories within a certain radius to access and use stored Blueprints
* Steam Lights & Lamps: A series of electric-powered, omnidirectional Victorian-style lights for various placements, including a tabletop plasma ball lamp for added aesthetic flair
* Linked Storage Box: A Storage Box that shares its inventory with other Linked Storage Boxes
* Steam Forge: A Tek-level Forge that runs on Element
* Spotlight: A highly adjustable spotlight with a paintable front surface for custom designs, allowing players to create personalized signals and aim it in any direction
* Tesla Coil: A defensive structure that shoots arcing electricity, chaining shots to nearby enemies, with multiple arc type settings
* Tinkering Desk: A structure for combining existing Item-Blueprints for a chance to create higher-quality versions or downgrade them
* Rock Drake Steampunk Saddle Skin with Goggles: A steampunk-themed saddle skin for the Rock Drake featuring goggles, functions as a regular saddle

#### 2 New Structure Cosmetic Sets

* Steampunk Structure Skins: A steampunk-themed cosmetic skin set for furniture structures, including a table, chair, and bench
* Steampunk Structure Tileset: A steampunk-themed structure tileset including various pieces like ceilings, doors, walls, floors, and more, each designed with a steampunk aesthetic

#### 2 New Player Emotes

* Tea Time
* Hat Tip

#### 15 New Player Character Cosmetics

* Dapper Outfit Set: Includes Hat, Shirt, Pants, Gloves and Boots
* Engineer Outfit Set: Includes Hat, Shirt, Pants, Gloves and Boots
* Beret Hat Skin
* Boater Hat Skin
* Cyclist Hat Skin
* Steampunk Hat and Goggles Skin
* Steampunk Goggles Skin

#### 1 New Creature Saddle Cosmetic

* Rock Drake Steampunk Saddle Skin with Goggles: A steampunk-themed saddle skin for the Rock Drake featuring goggles, functions as a regular saddle

<figure><img src="https://clan.akamai.steamstatic.com/images//44719856/addb975ffae3c6f17625e55b74117120a6673f2a.jpg" alt=""><figcaption><p>Tesla Coil</p></figcaption></figure>

***

<figure><img src="https://lh7-rt.googleusercontent.com/docsz/AD_4nXeN-ooW4HLRMm0VUuJhggu7pGAA182adNaKvKVgM4Jx5MD51vJT3EYQkwblETC7ggY96Yz1D5lSwQQY0XMREpugDsTDJXy2fYcyLU-5OSXvJ43Tslyukwnb6Z6U-fXtzqbbj29n4Q?key=GlTRPaxhvh8su6YjSiXOAg" alt=""><figcaption></figcaption></figure>

All content on this page has been accumulated from several places including the Wiki, The PACK Admin Team, and Players from The Pack cluster.


# ASA: Extinction

Live DEC. 19th. 2024

<figure><img src="https://772063455-files.gitbook.io/~/files/v0/b/gitbook-x-prod.appspot.com/o/spaces%2F-Lgje1lBxKKWXwqycB-v%2Fuploads%2FiY6nnGLFL48uRFqq7a2d%2FASA_Extinction_Main.png?alt=media&amp;token=2d8ca9e0-7454-475c-af9d-3e0525c2f830" alt=""><figcaption></figcaption></figure>

## About This Expansion Map:

Extinction brings survivors back to where the mysterious journey all started; Earth. What was once a lush and thriving home world is now a corrupt, hostile and desolate shell of its former self. Venture into the diverse landscape where ruins of a past civilization reveal clues to Earth’s demise along with the keys to reviving its future. At the heart of this bleak and foreboding terrain is an overgrown, deserted technological metropolis that rises amidst the waste. Discover and explore long abandoned micro-biospheres which served as the early prototypes for the ARKs of today. Capture, tame and craft powerful and unusual organic and mechanical creature types different from anything previously seen in the ARK universe.&#x20;

***

## CREATURES

### Standard Creatures:

ARK Normal Creatures spawning on Extinction:&#x20;

{% embed url="<https://ark.wiki.gg/wiki/Extinction#Creatures>" %}

### ASA Unique Creatures:

Armadoggo; Dreadnoughtus; Tek Giganotosaurus; Ceratosaurus; Deinosuchus; Deinotherium; Dreadmare; Gigantoraptor; Pegomastax; Tek Creatures.

### UNIQUE Modded Dinos:

See[ The Pack Unique Creatures and Where they Spawn!](https://faq.thepackgaming.com/asa/cluster/settings#asa-dinos-and-where-they-spawn)

MOST Modded Dinos can be transferred to any other map, **EXCEPT Aberration.**

* **Gryphons**: Both Mountain and Artic Spawn on Island, Center, SE, and Extinction. (Mini Gryphons are available as Patreon Pets.)

See Aberration Rules here:

{% embed url="<https://faq.thepackgaming.com/asa/settings#aberration-rules>" %}

***

## Joining ASA: EXTINCTION Server

<table data-card-size="large" data-view="cards"><thead><tr><th align="center"></th><th></th><th></th><th></th><th data-hidden data-card-target data-type="content-ref"></th><th data-hidden data-card-cover data-type="files"></th></tr></thead><tbody><tr><td align="center">𝐀𝐒𝐀: 𝐄𝐱𝐭𝐢𝐧𝐜𝐭𝐢𝐨𝐧</td><td>Server Name: 𝐓𝐡𝐞 𝐏𝐀𝐂𝐊 𝐄𝐱𝐭𝐢𝐧𝐜𝐭𝐢𝐨𝐧 𝐏𝐕𝐄(𝟑𝐱𝐇, 𝟒𝐱𝐗𝐏, 𝟏𝟓𝐓/𝐁)   </td><td>IP: 66.153.149.147:7979</td><td><p><strong>How To Join Extinction</strong></p><p><strong>1.</strong> At the main screen when Ark opens follow these steps to join the map that your character is on:<br>2. Hit tilde key to open the command. Just under Esc key on your keyboard<br>3. Type or copy and paste this command just from the open part!!!!<br>This will direct connect you to the servers without having to go through the server select screen.</p><p>Extinction – <code>open 66.153.149.147:7979</code></p></td><td></td><td><a href="https://772063455-files.gitbook.io/~/files/v0/b/gitbook-x-prod.appspot.com/o/spaces%2F-Lgje1lBxKKWXwqycB-v%2Fuploads%2FpV9x379RgqTDbmEbcFnJ%2FWastelandwar_extinction.png?alt=media&amp;token=273f1f2b-66a5-4f34-9af7-6aa4eabd46ba">Wastelandwar_extinction.png</a></td></tr><tr><td align="center"><strong>ASA Mod Guide for The PACK</strong></td><td><p></p><p><strong>There are two ways to get the mods for the server.</strong></p><ul><li>Just load into ASA, go to the server browser, find The Pack servers, Click Join on the one you want, it opens a menu with a list of all the mods, Click Join and it will then install all the mods before loading into the server. If it times out, repeat the process. After all the mods are installed you can just join.</li></ul></td><td>Or you can add them one by one from the Quick List found when clicking this link! </td><td></td><td><a href="https://faq.thepackgaming.com/ark/asa-cluster/asa-settings#subscribed-mods">https://faq.thepackgaming.com/ark/asa-cluster/asa-settings#subscribed-mods</a></td><td><a href="https://772063455-files.gitbook.io/~/files/v0/b/gitbook-x-prod.appspot.com/o/spaces%2F-Lgje1lBxKKWXwqycB-v%2Fuploads%2FHlNbFrH84KHgrCwX1nS7%2FPACK_CARDS_ASA_MODS.png?alt=media&amp;token=b6264b96-d431-4fcf-aa4e-0882fb9b3d6a">PACK_CARDS_ASA_MODS.png</a></td></tr><tr><td align="center"><strong>Click here to go to our Full Rules!</strong></td><td></td><td></td><td></td><td><a href="https://faq.thepackgaming.com/rules/asa-pve-servers-rules.">https://faq.thepackgaming.com/rules/asa-pve-servers-rules.</a></td><td><a href="https://772063455-files.gitbook.io/~/files/v0/b/gitbook-x-prod.appspot.com/o/spaces%2F-Lgje1lBxKKWXwqycB-v%2Fuploads%2FCde7RVPafu2cTV0wwVbS%2FPACK_CARDS_ASA_RULES.png?alt=media&amp;token=b833c602-6136-4e0f-8a0d-8dfca66a9ed3">PACK_CARDS_ASA_RULES.png</a></td></tr><tr><td align="center"><strong>Unity Maps</strong></td><td><strong>ASA: Extinction</strong></td><td><strong>Landmarks and Resources</strong></td><td><strong>Click here to go to the map!</strong></td><td><a href="https://ark-unity.com/ark-survival-ascended/maps/extinction/">https://ark-unity.com/ark-survival-ascended/maps/extinction/</a></td><td><a href="https://772063455-files.gitbook.io/~/files/v0/b/gitbook-x-prod.appspot.com/o/spaces%2F-Lgje1lBxKKWXwqycB-v%2Fuploads%2FUcNDidz77gODwopITYTK%2FEXT%20Map.png?alt=media&amp;token=86430313-e85c-487c-87be-234f16607c52">EXT Map.png</a></td></tr></tbody></table>

***

## Your Community Landmarks

Photo of CC

Landmarks with GPS and ADMIN Teleport Locators. All Ark Map Residents should pick up an Awesome Teleport Remote at a Community Center or make one in your Inventory.

{% tabs %}
{% tab title="Community Builds" %}
Here you will find Places Like the Community Center, and refinery locations. Those noted have Open Transmitters, and all are part of the Teleport System.

◉Extinction Community Center 52.5|47.7 OPEN TRANSMITTER HERE\
◉Extinction Refinery 70.8|11.19 OPEN TRANSMITTER HERE<br>
{% endtab %}

{% tab title="Teleporter Network" %}
The PACK Admins upkeep a network of Teleporters for the use of our Players.

**Extinction Teleporter Network** for the use of our Players.

* ◉Extinction Community Center 52.5|47.7 OPEN TRANSMITTER HERE
* ◉Extinction Refinery 70.8|11.19 OPEN TRANSMITTER HERE
* ◉King Titan Return 5.7|46.4 OPEN TRANSMITTER HERE
* Sludge Basin 81.3|31.0&#x20;
* Desert Biome Terminal 86.5|97.12
* Desert Cave Entrance (Chaos)(Desert Titan) 92.3|76.09
* Forest Biome Terminal 12.34|19.72
* Forest Cave Entrance (Growth)(Forest Titan) 5.56|35.67
* Ice Cave Entrance (Void)(Ice Titan) 6.7|85.9
* Snow biome Terminal 28.27|84.14
  {% endtab %}

{% tab title="The PACK Admin Bases" %}
The PACK Admin Bases and any Outposts they Own.

* "Ascended Wolves Fob." (Alphy)&#x20;
*
*

{% endtab %}
{% endtabs %}

{% tabs %}
{% tab title="Artifact Caves" %}
Do not place tp pads within the Artifact Caves. Such pads found will be deleted. Placing Bedrolls for quick respawns are fine, just pick up after yourselves.

* Desert Cave Entrance (Chaos)     92.3|76.09
* Ice Cave Entrance (Void)     6.7|85.9
* Forest Cave Entrance (Growth)     5.56|35.67
  {% endtab %}

{% tab title="Obelisks and Boss Arenas" %}
◉King Titan  5.7|46.4 OPEN TRANSMITTER HERE
{% endtab %}

{% tab title="Points of Interest " %}
Caves, Ruins and other Interesting Places on Extinction.

* Sludge Basin 81.3|31.0&#x20;
* Desert Biome Terminal 86.5|97.12
* Forest Biome Terminal 12.34|19.72
* Snow biome Terminal 28.27|84.14
  {% endtab %}
  {% endtabs %}

{% tabs %}
{% tab title="Resource Sites" %}
Protected Resource Areas! (we use PRA for this designation)\
:no\_entry:No building near Resources in groups of 5 nodes or more, or mixed resource nodes of 7 nodes or more.\
:no\_entry:No building within 100 cubits of any  **Protected Resource Area**.

* Metal and Obsidian | Extinction Refinery 70.8|11.19 OPEN TRANSMITTER HERE&#x20;
* Silica Pearls |
* Chitin |&#x20;
* Organic Polymer |

Subject to change daily as we discover the newly redone map.
{% endtab %}

{% tab title="NO Build Areas:" %}

* :no\_entry:Extinction CC at 52.5|47.7 (OPEN TRANSMITTER HERE)
* :no\_entry:Extinction Refinery 70.8|11.19 OPEN TRANSMITTER HERE
* :no\_entry:Any city terminal must be treated like a public transmitter, you may be enclosed within a base, but that area must remain accessible to the public via a gate system.&#x20;
* :no\_entry:All Oil or Water wells should be UNLOCKED These are Public Access.
* :no\_entry:ANY Cave or Ruin that has an artifact, lore note, Do NOT Block the way to the item.
* If a Cave Falls into the following Resource node rule, or has special Dino Spawns you MAY NOT build in it.
* :no\_entry:Do not block Resource nodes (groups of 5 or more or including Metal, OBS, and Crystal nodes)
* :no\_entry:Sunken Forest Beaver Lake- do not block the beaver spawns in the middle of the lake. Build back from the water's edge.&#x20;
* :no\_entry:No building within 100 cubits of any  **Protected Resource Area**. \
  ◉Extinction Refinery 70.8|11.19 OPEN TRANSMITTER HERE\
  ◉Sludge Basin 81.3|31.0 OPEN TRANSMITTER HERE

Subject to change daily as we discover the newly redone map
{% endtab %}
{% endtabs %}

### Useful Map for Resources and Lore Notes:

#### Unity Interactive Map

{% embed url="<https://ark-unity.com/ark-survival-ascended/maps/extinction/>" %}

<figure><img src="https://772063455-files.gitbook.io/~/files/v0/b/gitbook-x-prod.appspot.com/o/spaces%2F-Lgje1lBxKKWXwqycB-v%2Fuploads%2Fj3idSzK551sEX8loSofq%2FEXT%20Map.png?alt=media&amp;token=1c656fbb-4d1c-499e-a72d-ac0cb87e6de5" alt=""><figcaption></figcaption></figure>

<figure><img src="https://772063455-files.gitbook.io/~/files/v0/b/gitbook-x-prod.appspot.com/o/spaces%2F-Lgje1lBxKKWXwqycB-v%2Fuploads%2FlMnnNXb9RcSFEhQMspGk%2Fbanner.png?alt=media&amp;token=91fd1d76-1df6-4ac0-9036-8940bf3986c8" alt=""><figcaption></figcaption></figure>

***

### Extinction Resource Links:

## Wasteland War - Bob's Tall Tales Three

<figure><img src="https://772063455-files.gitbook.io/~/files/v0/b/gitbook-x-prod.appspot.com/o/spaces%2F-Lgje1lBxKKWXwqycB-v%2Fuploads%2Fwr1iUPYCh91YdFmO1HUy%2FWasteland%20War%20Keyart.png?alt=media&amp;token=2a0857b4-b20c-47fc-bc5c-eaa8e4316422" alt=""><figcaption></figcaption></figure>

**NEW COMPANION**

<div><figure><img src="https://772063455-files.gitbook.io/~/files/v0/b/gitbook-x-prod.appspot.com/o/spaces%2F-Lgje1lBxKKWXwqycB-v%2Fuploads%2FnkWt359fyiiKzao3CmLK%2F05_Armadoggo.jpg?alt=media&amp;token=4355923a-e13a-41bc-a79f-6c11294eccf7" alt=""><figcaption></figcaption></figure> <figure><img src="https://772063455-files.gitbook.io/~/files/v0/b/gitbook-x-prod.appspot.com/o/spaces%2F-Lgje1lBxKKWXwqycB-v%2Fuploads%2F1gsMoaCit0913QUhabQV%2F06_Armadoggo_Armor.jpg?alt=media&amp;token=f0df54a5-64fc-4c9a-85fa-c262e5c9e4b8" alt=""><figcaption></figcaption></figure> <figure><img src="https://772063455-files.gitbook.io/~/files/v0/b/gitbook-x-prod.appspot.com/o/spaces%2F-Lgje1lBxKKWXwqycB-v%2Fuploads%2FTRZZjBgMwhgbjMgNXpB9%2F07_Armadoggo_Attachments_01.jpg?alt=media&amp;token=5b50ba68-8db7-4d3f-a867-edbf4e52aab7" alt=""><figcaption></figcaption></figure> <figure><img src="https://772063455-files.gitbook.io/~/files/v0/b/gitbook-x-prod.appspot.com/o/spaces%2F-Lgje1lBxKKWXwqycB-v%2Fuploads%2FbymIpxK5fw9Yjnz3ChgH%2F08_Armadoggo_Attachments_02.jpg?alt=media&amp;token=93c72959-06c4-4b2f-967f-01cf275a5d82" alt=""><figcaption></figcaption></figure> <figure><img src="https://772063455-files.gitbook.io/~/files/v0/b/gitbook-x-prod.appspot.com/o/spaces%2F-Lgje1lBxKKWXwqycB-v%2Fuploads%2F3gedOCTXxunNqzrgguT4%2F16_Armadoggo_Dossier.jpg?alt=media&amp;token=765a6d95-e923-4d2c-a73c-2b1df1dcf405" alt=""><figcaption></figcaption></figure></div>

* Armadoggo
  * Forge an unbreakable bond with your ultimate survival companion! More than just a pet, Armadoggo digs for treasure, fetches items, and protects you from harm, with powerful armor attachments to further enhance their abilities. And, yes, you can pet the dog!

**NEW VEHICLES**

<div><figure><img src="https://772063455-files.gitbook.io/~/files/v0/b/gitbook-x-prod.appspot.com/o/spaces%2F-Lgje1lBxKKWXwqycB-v%2Fuploads%2FA2rOpaecLbTYFfLQOEe6%2F09_Vehicle_Buggy.jpg?alt=media&amp;token=b5e9ab08-a881-48d9-bdf0-4676576a6106" alt=""><figcaption></figcaption></figure> <figure><img src="https://772063455-files.gitbook.io/~/files/v0/b/gitbook-x-prod.appspot.com/o/spaces%2F-Lgje1lBxKKWXwqycB-v%2Fuploads%2FRXwsrXqQ3bviyuwWTLlv%2F10_Vehicle_Monster_Truck.jpg?alt=media&amp;token=e281a31f-af54-495f-b395-0b4fca4ae135" alt=""><figcaption></figcaption></figure> <figure><img src="https://772063455-files.gitbook.io/~/files/v0/b/gitbook-x-prod.appspot.com/o/spaces%2F-Lgje1lBxKKWXwqycB-v%2Fuploads%2FQfxPKZvFVAD9g4kLgLeB%2F11_Vehicle_Racer.jpg?alt=media&amp;token=e13148c6-fe0d-4a33-a296-1999e47ad691" alt=""><figcaption></figcaption></figure> <figure><img src="https://772063455-files.gitbook.io/~/files/v0/b/gitbook-x-prod.appspot.com/o/spaces%2F-Lgje1lBxKKWXwqycB-v%2Fuploads%2F0nZ90MztZL3RYCFyB3jW%2F12_Vehicle_Turrets.jpg?alt=media&amp;token=c334ec8e-e119-42d4-9563-6c58e61b0797" alt=""><figcaption></figcaption></figure> <figure><img src="https://772063455-files.gitbook.io/~/files/v0/b/gitbook-x-prod.appspot.com/o/spaces%2F-Lgje1lBxKKWXwqycB-v%2Fuploads%2FiMKA0Uy9vzn91w1QqlOo%2F13_Vehicle_Addons_Garage.jpg?alt=media&amp;token=2fb99174-fc83-4c88-a002-5b9b5cf11b50" alt=""><figcaption></figcaption></figure></div>

* BattleRigs
  * Your key to Wasteland conquest! Customize these powerful, highly modular, all-terrain war machines with a variety of attachments and heavy-duty turrets, then blaze your own trail of destruction. Over 10,000 possible variations!

**NEW WEAPONS & TOOLS**

* Explosive Spear
  * Stick it to your enemies! This devastating weapon combines brutal melee combat with explosive power, detonating for maximum carnage.
* Extinguisher Grenade
  * Douse the flames of combat and snuff out your enemy’s ambition! This unique grenade releases a cloud of fire-suppressing gas, instantly extinguishing fires to give you the upper hand.

**NEW STRUCTURES**

* Bladewasp Hive
  * Keep the skies clear! This organic turret unleashes defensive swarms to defend your base, deterring pesky creatures and bringing down even the mightiest flyers.
* Bio-Grinder
  * Maximize your dino gains! This massive structure extracts every last resource from organic fodder, biodegrading it into valuable kibble and raw materials.
* Lights & Lamps
  * Light up the night! Survive in style with a range of rugged, flame-powered lights and fires for your Wasteland base.
* Makeshift Megalab
  * The pinnacle of scientific achievement! Unlock the secrets of advanced crafting in this state-of-the-art laboratory.
* Tribe Tower
  * Forge a legendary legacy! Unite your tribe, construct this awe-inspiring monument, and defend it to secure your place among the ARK elite.
* BattleRig Garage
  * Gear up and roll out! This fortified garage is your command center for building, customizing, and unleashing your BattleRigs on the Wasteland.

**NEW STRUCTURE AND COSMETIC SETS**

<div><figure><img src="https://772063455-files.gitbook.io/~/files/v0/b/gitbook-x-prod.appspot.com/o/spaces%2F-Lgje1lBxKKWXwqycB-v%2Fuploads%2FYnDBdv4wPwqORUMW6OU4%2F2105286102_02Structures.jpg.a5750f51216d8e59be031880dae4d068.jpg?alt=media&amp;token=dc927308-b017-4e2c-a63d-a4184546f6d9" alt=""><figcaption></figcaption></figure> <figure><img src="https://772063455-files.gitbook.io/~/files/v0/b/gitbook-x-prod.appspot.com/o/spaces%2F-Lgje1lBxKKWXwqycB-v%2Fuploads%2FMyNgPkiLkEUwdWWfhN2H%2F953574919_01StructuresandProps.jpg.7a6d2d37228b37f99936358e3afb9810.jpg?alt=media&amp;token=979a0f7d-b230-4808-a687-d8cf8fdd40e3" alt=""><figcaption></figcaption></figure></div>

* Wasteland Skins
  * Give your structures a gritty, post-apocalyptic makeover with these rugged new skin including a table, chair, and bench.
* Wasteland Structure Tileset Skins
  * Transform your base! A post-apocalyptic structure tileset including various pieces like ceilings, doors, walls, floors, and more.

**NEW PLAYER CHARACTER COSMETICS**

<div><figure><img src="https://772063455-files.gitbook.io/~/files/v0/b/gitbook-x-prod.appspot.com/o/spaces%2F-Lgje1lBxKKWXwqycB-v%2Fuploads%2FT1Umu6shqIFlMPlMriWw%2F161738878_03Headgear.jpg.3f0890414e894c6fcd858c1313b8dd1c.jpg?alt=media&amp;token=34bd752a-ba30-4588-b958-c53ee10edb86" alt=""><figcaption></figcaption></figure> <figure><img src="https://772063455-files.gitbook.io/~/files/v0/b/gitbook-x-prod.appspot.com/o/spaces%2F-Lgje1lBxKKWXwqycB-v%2Fuploads%2FC2j0W3n1RlXIa0IldjRQ%2F2027995539_04OutfitsAccessories.jpg.a29ee4370559deb8c1f9ebc93d209a44.jpg?alt=media&amp;token=97e33213-6071-494f-b8ae-52a1416000c3" alt=""><figcaption></figcaption></figure></div>

* WarPig Outfit Set
  * Includes Hat, Shirt, Pants, Gloves and Boots
* Warlord Outfit Set
  * Includes Hat, Shirt, Pants, Gloves and Boots
* Crocosaurus Hat
* Motorhead Hat
* BucketFace Hat

<figure><img src="https://772063455-files.gitbook.io/~/files/v0/b/gitbook-x-prod.appspot.com/o/spaces%2F-Lgje1lBxKKWXwqycB-v%2Fuploads%2F2xbd0kiGaBHXLKwotGFh%2FASA_BattleRigs_3840x2160.png?alt=media&amp;token=2b8be34e-8ccc-4d8b-ad72-2dc635ce5013" alt=""><figcaption></figcaption></figure>

***

<figure><img src="https://lh7-rt.googleusercontent.com/docsz/AD_4nXeN-ooW4HLRMm0VUuJhggu7pGAA182adNaKvKVgM4Jx5MD51vJT3EYQkwblETC7ggY96Yz1D5lSwQQY0XMREpugDsTDJXy2fYcyLU-5OSXvJ43Tslyukwnb6Z6U-fXtzqbbj29n4Q?key=GlTRPaxhvh8su6YjSiXOAg" alt=""><figcaption></figcaption></figure>

All content on this page has been accumulated from several places including the Wiki, The PACK Admin Team, and Players from The Pack cluster.


# ASA: Astraeos

Astraeos was added as the First ASA DLC on February 13, 2025.

## ASTRAEOS

<figure><img src="https://lh7-rt.googleusercontent.com/docsz/AD_4nXfWw9ulpio4nbeVcddSeSMslMMxWGG1dvWG5zKLbINro-9iyEbsfDqIDx8YQtBG747aNkwatz1nklsjgzy5-MQ4G89xYwJbHhD8ixbVkJHG1kSshx4lKxvCX-h9-0lt9cekdlyr0w?key=_EAjYxT7L6ArnS-OHHunKqzM" alt=""><figcaption></figcaption></figure>

## About This Expansion Map:

Embark on an epic odyssey in the world of ARK with Astraeos, developed by Nekatus in partnership with Nitrado! Explore this vast, breathtaking map, steeped in Greek mythology, where majestic mountain ridges and marble cliffs meet pristine white sand beaches and a paradise of cherry blossoms. Spanning over 264 square kilometers, Astraeos is brimming with stunning scenery, ancient ruins, and sacred temples. Confront powerful new bosses, enhanced alpha dino variants with valuable loot, and a fearsome miniboss lurking within mysterious caves.

### Here's a glimpse of what awaits you:

**A sprawling 264 sq km map: With over 70 sq km ready to explore at launch,** uncover every corner of this massive new world. This Greek inspired map presents Ancient ruins and sacred temples: Claim these historically inspired sites as your own. Challenging dungeons: Explore these loot-filled labyrinths at your own risk. Level up your loot: Blessed by Zeus himself, conquer OSDs, Element Veins, and loot special Supply Drops! Powerful new bosses and minibosses: Feeling Herculean? Test your skills against these formidable mythological foes!

**Diverse biomes:** Journey through landscapes inspired by the Mediterranean coast, the serene beauty of cherry blossoms, and the rugged terrain of Appalachia.  An expansive ocean ecosystem: Uncover the mysteries hidden beneath the waves. A Volcanic Island with strange wyverns.

**A Teleportation system** for fast travel between all the Player spawn areas on the map. Hold R (PC), X (Xbox), Square (PS5) to open the radial menu and choose your destination.

***

## CREATURES

### Standard Creatures:

ARK Normal Creatures spawning on Astraeos

{% embed url="<https://ark.wiki.gg/wiki/Astraeos#Creatures>" %}

### ASA Unique Creatures:

Many are Alpha, Mini Boss, and Guardian class and can not be tamed.\
**Enhanced Alpha Creature variants:** Hunt these unique **Astral** creatures for valuable loot. \
Kirayli - Sheep Miniboss, CaveMinotaur - Miniboss, Natrix the Gorgon - Guardian, Thodes the Cyclops - Guardian, Thanatos the Destroyer - World Boss.\
**The Maeguana:** a striking Maewing variant. Tamable and breedable.

### UNIQUE Modded Dinos:&#x20;

See[ The Pack Unique Creatures and Where they Spawn!](https://faq.thepackgaming.com/asa/cluster/settings#asa-dinos-and-where-they-spawn)

**Astraeos - Mythological Creatures Mod:** These tames spawn on Astraeos Only.\
**Minotaurus:** A strong mount. Knockout tame and breedable. \
**Seahorse:** A versatile water mount that can harvest pearls. Knockout tame and breedable. **Cyclops:** A beast of a creature, strong as a giga but with better stamina. Knockout tame and breedable.

See Aberration Rules here:

{% embed url="<https://faq.thepackgaming.com/asa/settings#aberration-rules>" %}

***

### Adding Astraeos to your ASA Steam account?

To add Astraeos to your ARK: Survival Ascended Account, you'll need to purchase the Astraeos DLC. Once purchased, it should be automatically available and integrated into your official server client, making it a seamless addition to your ARK worlds. You'll be able to access Astraeos through the map selection menu when setting up or joining servers.\
\
Downloadable Content: This content requires the base game ARK: Survival Ascended on Steam in order to play.

<https://store.steampowered.com/app/3483400/ARK_Astraeos/>

Buy ARK: Astraeos  $14.99

***

## Joining ASA: Astraeos Server

<table data-card-size="large" data-view="cards"><thead><tr><th align="center"></th><th></th><th></th><th></th><th data-hidden data-card-target data-type="content-ref"></th><th data-hidden data-card-cover data-type="files"></th></tr></thead><tbody><tr><td align="center">𝐀𝐒𝐀: 𝐀𝐬𝐭𝐫𝐚𝐞𝐨𝐬</td><td>Server Name: <br>𝐓𝐡𝐞 𝐏𝐀𝐂𝐊 𝐀𝐬𝐭𝐫𝐚𝐞𝐨𝐬 𝐏𝐕𝐄<br>(𝟑𝐱𝐇, 𝟒𝐱𝐗𝐏, 𝟏𝟓𝐓/𝐁)</td><td><p>IP: 66.153.149.147:7981</p><p></p></td><td><p><strong>How To Join Astraeos</strong></p><p><strong>1.</strong> At the main screen when Ark opens follow these steps to join the map that your character is on:<br>2. Hit tilde key to open the command. Just under Esc key on your keyboard<br>3. Type or copy and paste this command just from the open part!!!!<br>This will direct connect you to the servers without having to go through the server select screen.</p><p>Astraeos - <code>open 66.153.149.147:798</code></p></td><td></td><td><a href="https://772063455-files.gitbook.io/~/files/v0/b/gitbook-x-prod.appspot.com/o/spaces%2F-Lgje1lBxKKWXwqycB-v%2Fuploads%2FI6ecYsJyromE9E1KDO06%2FASTRAEOS_Card.png?alt=media&amp;token=fed54a77-d916-4aaa-be41-5d25f74da6c1">ASTRAEOS_Card.png</a></td></tr><tr><td align="center"><strong>ASA Mod Guide for The PACK</strong></td><td><p><strong>There are two ways to get the mods for the server.</strong></p><ul><li>Just load into ASA, go to the server browser, find The Pack servers, Click Join on the one you want, it opens a menu with a list of all the mods, Click Join and it will then install all the mods before loading into the server. If it times out, repeat the process. After all the mods are installed you can just join.</li></ul></td><td>Or you can add them one by one from the Quick List found when clicking this link! </td><td></td><td><a href="https://faq.thepackgaming.com/ark/asa-cluster/asa-settings#subscribed-mods">https://faq.thepackgaming.com/ark/asa-cluster/asa-settings#subscribed-mods</a></td><td><a href="https://772063455-files.gitbook.io/~/files/v0/b/gitbook-x-prod.appspot.com/o/spaces%2F-Lgje1lBxKKWXwqycB-v%2Fuploads%2FHlNbFrH84KHgrCwX1nS7%2FPACK_CARDS_ASA_MODS.png?alt=media&amp;token=b6264b96-d431-4fcf-aa4e-0882fb9b3d6a">PACK_CARDS_ASA_MODS.png</a></td></tr><tr><td align="center"><strong>Click here to go to our Full Rules!</strong></td><td></td><td></td><td></td><td><a href="https://faq.thepackgaming.com/rules/asa-pve-servers-rules.">https://faq.thepackgaming.com/rules/asa-pve-servers-rules.</a></td><td><a href="https://772063455-files.gitbook.io/~/files/v0/b/gitbook-x-prod.appspot.com/o/spaces%2F-Lgje1lBxKKWXwqycB-v%2Fuploads%2FCde7RVPafu2cTV0wwVbS%2FPACK_CARDS_ASA_RULES.png?alt=media&amp;token=b833c602-6136-4e0f-8a0d-8dfca66a9ed3">PACK_CARDS_ASA_RULES.png</a></td></tr><tr><td align="center"><strong>Unity Maps: ASTRAEOS</strong></td><td><strong>ASA: Astraeos</strong></td><td><strong>Landmarks and Resources</strong> </td><td><strong>Click here to see the map!</strong></td><td><a href="https://ark-unity.com/ark-survival-ascended/maps/astraeos/">https://ark-unity.com/ark-survival-ascended/maps/astraeos/</a></td><td><a href="https://772063455-files.gitbook.io/~/files/v0/b/gitbook-x-prod.appspot.com/o/spaces%2F-Lgje1lBxKKWXwqycB-v%2Fuploads%2FmKxoOIqf76g702lwVSfn%2Fastraeos_ingamemap.jpg?alt=media&amp;token=fe045d4b-854d-41ff-b82b-f352aa545de3">astraeos_ingamemap.jpg</a></td></tr></tbody></table>

***

### **Arkitect Structures Remastered: ID #931874** **Is NOT Loaded onto the Astraeos Server** **Do NOT take ASR Items to Astraeos.**

**Arkitect Structures Remastered: ID #931874 Will be added at a later date. We are testing that the mod is not part of the continued render lag being experienced on other servers.**

***

## Your Community Landmarks

<figure><img src="https://772063455-files.gitbook.io/~/files/v0/b/gitbook-x-prod.appspot.com/o/spaces%2F-Lgje1lBxKKWXwqycB-v%2Fuploads%2FQTgoBz2ZgoNwaOyeD9jc%2FASTRA%20CC.png?alt=media&amp;token=ecfc3b7d-e935-4355-a96c-7337ad398226" alt=""><figcaption><p>Astraeos Community Center</p></figcaption></figure>

### Landmarks and Places of Interest

Landmarks with GPS and ADMIN Teleport Locators. All Ark Map Residents should pick up an Awesome Teleport Remote at a Community Center or make one in your Inventory.

{% tabs %}
{% tab title="Community Builds:" %}
Here you will find Places Like the Community Center, and refinery locations. Those noted have Open Transmitters, and all are part of the Teleport System.

| Name                          | Lat/Lon      | Notes:                                                        |
| ----------------------------- | ------------ | ------------------------------------------------------------- |
| \*\*Astraeos Community Center | 71.32\|29.02 | Telepad and Transmitter here                                  |
| \*\*Astraeos Refinery         | 34.49\|18.04 | <p>#PR. Area - Metal Cave<br>Telepad and Transmitter here</p> |
| \*\*@Alphy's Retreat          | 8.18\|14.86  | Telepad and Transmitter here                                  |
| {% endtab %}                  |              |                                                               |

{% tab title="Teleporter System" %}
The PACK Admins upkeep a network of Teleporters for the use of our Players.

| Name                                            | Lat/Lon      | Notes:                                                               |
| ----------------------------------------------- | ------------ | -------------------------------------------------------------------- |
| Therokis - Volcanic Island                      | 65.77\|54.01 | Sulfur, Obsidian, Element, and other rare resouces spawn here.       |
| Korinthos - Main Island                         | 71.32\|29.02 | <p>\*\*Astraeos Community Center<br>Telepad and Transmitter here</p> |
| Phokintos - North Island                        | 8.18\|14.86  | \*\*@Alphy's Retreat Telepad and Transmitter here                    |
| Lemnokis - Northwest Island WIP                 | - WIP        |                                                                      |
| \*\*Astraeos Community Center                   | 71.32\|29.02 | Telepad and Transmitter here                                         |
| \*\*Astraeos Refinery                           | 34.49\|18.04 | <p>#PR. Area - Metal Cave<br>Telepad and Transmitter here</p>        |
| \*\*@Alphy's Retreat                            | 8.18\|14.86  | Telepad and Transmitter here                                         |
| <p>Green Obelisk<br>🗽 Green Obelisk Return</p> | 35.05\|15.88 | <p>Statue of Aphrodite<br>Set off to the left of the Obelisk</p>     |
| © Brute - Sunken Temple Entrance                | 48.6\|49.8   | Under WATER labyrinth                                                |
| © Clever - Sunken Caverns Entrance              | 24.5\|23.9   | Scuba and strong sea mount required.                                 |
| © Devourer - Artemis Tomb Entrance              | 21.8\|43.3   |                                                                      |
| © Hunter - Forgotten Temple Entrance            | 29.9\|9.5    | Bugs, Bats, and Minotaurs                                            |
| © Massive - Old Tomb Entrance                   | 37.4\|22.5   | PUZZLE DUNGEON - Needs Scuba Gear for final area.                    |
| © Pack - Lava Caverns Entrance                  | 67.4\|62.9   |                                                                      |
| ℗PR. Area - Bee Cave                            | 46.0\|11.3   | NO BUILD - #P.R. Area                                                |
| ℗PR. Area - Black Pearls                        | 63.62\|61.82 | NO BUILD - #P.R. Area                                                |
| ℗PR. Area - Clam Cave                           | 25.12\|15.35 | NO BUILD - #P.R. Area                                                |
| ℗PR. Area - Crystal Cave                        | 56.65\|26.10 | NO BUILD - #P.R. Area                                                |
| ℗PR. Area - Giant Beaver Dams                   | 41.06\|08.78 | NO BUILD - #P.R. Area                                                |
| ℗PR. Area - Metal Cave                          | 34.49\|18.04 | NO BUILD - #P.R. Area                                                |
| ℗PR. Area - Obsidian                            | 80.05\|30.55 | NO BUILD - #P.R. Area                                                |
| ℗PR. Area - Oil                                 | 15.64\|23.14 | NO BUILD - #P.R. Area                                                |
| ℗PR. Area - Ovis Island                         | 40.0\|52.0   | NO BUILD - Mini Boss Habitat.                                        |
| ℗PR. Area - Wyvern Scar Cave                    | 12.38\|45.46 | NO BUILD - Wyvern Habitat                                            |
| {% endtab %}                                    |              |                                                                      |

{% tab title="Artifact Caves" %}
Artifacts are unique progression items that are typically located within caves around the ARKs, but occasionally are located in other remote or unique locations, such as deep oceans and Wyvern lairs.

| Name                                 | Lat/Lon    | Notes:                                            |
| ------------------------------------ | ---------- | ------------------------------------------------- |
| © Brute - Sunken Temple Entrance     | 48.6\|49.8 | Under WATER labyrinth                             |
| © Clever - Sunken Caverns Entrance   | 24.5\|23.9 | Scuba and strong sea mount required.              |
| © Cunning - Entrance                 | - WIP      |                                                   |
| © Devourer - Artemis Tomb Entrance   | 21.8\|43.3 |                                                   |
| © Hunter - Forgotten Temple Entrance | 29.9\|9.5  | Bugs, Bats, and Minotaurs                         |
| © Immune - Entrance                  | - WIP      |                                                   |
| © Massive - Old Tomb Entrance        | 37.4\|22.5 | PUZZLE DUNGEON - Needs Scuba Gear for final area. |
| © Pack - Lava Caverns Entrance       | 67.4\|62.9 |                                                   |
| © Skylord - Entrance                 | - WIP      |                                                   |
| © Strong - Entrance                  | - WIP      |                                                   |
| {% endtab %}                         |            |                                                   |
| {% endtabs %}                        |            |                                                   |

{% tabs %}
{% tab title="No Build Areas." %}
Other than specified Metal and Crystal node areas, Metal and Crystal nodes are not included in this map as there are so many.&#x20;

* :no\_entry: **Restricted Areas:**
* :no\_entry: All Oil or Water wells should be UNLOCKED These are Public Access.
* :no\_entry: ANY Cave or Ruin that has an artifact, lore note, Do NOT Block the way to the item.
* :no\_entry: If a Cave Falls into the following Resource node rule, or has special Dino Spawns you MAY NOT build in it.
* :no\_entry: Do not block Resource nodes (groups of 5 or more or including Metal, OBS, and Crystal nodes)

&#x20;:no\_entry: **Protected Resource Areas:**

**Protected Resource Area denoted by ℗*****P.R.Areas***

| Name                          | Lat/Lon      | Notes:                        |
| ----------------------------- | ------------ | ----------------------------- |
| ℗PR. Area - Bee Cave          | 46.0\|11.3   | NO BUILD - #P.R. Area         |
| ℗PR. Area - Black Pearls      | 63.62\|61.82 | NO BUILD - #P.R. Area         |
| ℗PR. Area - Clam Cave         | 25.12\|15.35 | NO BUILD - #P.R. Area         |
| ℗PR. Area - Crystal Cave      | 56.65\|26.10 | NO BUILD - #P.R. Area         |
| ℗PR. Area - Giant Beaver Dams | 41.06\|08.78 | NO BUILD - #P.R. Area         |
| ℗PR. Area - Metal Cave        | 34.49\|18.04 | NO BUILD - #P.R. Area         |
| ℗PR. Area - Obsidian          | 80.05\|30.55 | NO BUILD - #P.R. Area         |
| ℗PR. Area - Oil               | 15.64\|23.14 | NO BUILD - #P.R. Area         |
| ℗PR. Area - Ovis Island       | 40.0\|52.0   | NO BUILD - Mini Boss Habitat. |
| ℗PR. Area - Wyvern Scar Cave  | 12.38\|45.46 | NO BUILD - Wyvern Habitat     |
| {% endtab %}                  |              |                               |

{% tab title="Resource Areas." %}
Some of the Resource Rich Nodes that have been Discovered on Astraeos.

| Name                                    | Lat/Lon                          | Notes:                                                                                       |
| --------------------------------------- | -------------------------------- | -------------------------------------------------------------------------------------------- |
| ℗PR. Area - Bee Cave                    | 46.0\|11.3                       | bee honey ; chitin; org. poly                                                                |
| ℗PR. Area - Black Pearls                | 63.62\|61.82                     | Therokis - Volcanic Island - Magma pool                                                      |
| ℗PR. Area - Clam Cave                   | 25.12\|15.35                     | Korinthos - Main Island - silica pearls                                                      |
| ℗PR. Area - Crystal Cave                | 56.65\|26.10                     | this cave and - top of any mountain - Purple crystals                                        |
| ℗PR. Area - Giant Beaver Dams           | 41.06\|08.78                     | Korinthos - Main Island - giant beaver dams; Paste, wood, flowers, pearls                    |
| ℗PR. Area - Metal Cave                  | 34.49\|18.04                     | <p>\*\*Astraeos Refinery<br>Korinthos - Main Island</p>                                      |
| ℗PR. Area - Obsidian                    | 80.05\|30.55                     | Korinthos - Main Island - Obsidan and metal nodes                                            |
| ℗PR. Area - Oil                         | 15.64\|23.14                     | Korinthos - Main Island - two oil wells                                                      |
| <p>℗PR. Area - Ovis Island<br>FIBER</p> | 40.0\|52.0                       | Mini Boss Habitat. Best place for Fiber gathering                                            |
| ℗PR. Area - Wyvern Scar Cave            | 12.38\|45.46                     | Wyvern Habitat; Sulfur, obsidian, and some metal                                             |
| Blue Gems                               | 65.77\|54.01                     | Therokis - Volcanic Island- Ashy colored Trees                                               |
| Cactus Sap                              | 65.77\|54.01                     | Therokis - Volcanic Island - near the blue gems.                                             |
| Corrupted Nodules                       | 65.77\|54.01                     | Therokis - Volcanic Island - corrupted attacking OSD                                         |
| Electronics                             |                                  | Korinthos - Main Island - tek creatures                                                      |
| Element -                               | 65.77\|54.01                     | Therokis - Volcanic Island - Osds and element veins                                          |
| Fungal Wood                             | <p>Deep ocean<br>Use a dunky</p> | - water mushrooms with dunky                                                                 |
| Hide                                    | 65.77\|54.01                     | Therokis - Volcanic Island - OSD best place.                                                 |
| Leech Blood                             | 12.38\|45.46                     | - Swamp area near Wyvern pit.                                                                |
| Rare flowers                            | 41.06\|08.78                     | Near the Giant beaver dams. Bright blue flowers.                                             |
| Rare Mushrooms                          | Mountain tops                    | - top of any mountain - Purple crystals                                                      |
| raw salt                                | 65.77\|54.01                     | - Therokis - Volcanic Island - Hit large bones.                                              |
| sand                                    | 71.32\|29.02                     | <p>Korinthos - Main Island -<br>\*\*Astraeos Community Center<br>beaches - heaps of sand</p> |
| sap                                     | 35.05\|15.88                     | - mini redwood trees near the obelisk                                                        |
| Silk                                    | 41.06\|08.78                     | - White flowers in the cherry trees - near the Beaver Dams                                   |
| {% endtab %}                            |                                  |                                                                                              |

{% tab title="Points of Interest " %}
Caves, Ruins and other Interesting Places on Astraeos.

| Name                       | Lat/Lon    | Notes:                        |
| -------------------------- | ---------- | ----------------------------- |
| Afropurse's Foot           | 34.8\|18.5 |                               |
| Armpit Theater             | 33.4\|5.7  | Good Arena Location Maybe CC? |
| Beach Bob Cave             | 22.4\|8.3  | Dry Beach Cave                |
| Brad's Armpitt             | 26.2\|15.9 |                               |
| Caribbean Cove             | 27.3\|4.1  | Good Water Base loc.          |
| Cherry Falls               | 46.2\|9.6  | Cherry tree forrest.          |
| Dock Town                  | 42.6\|25.4 |                               |
| Dusty Village              | 59.0\|26.7 |                               |
| Greek Mohaffa Town         | 53.8\|23.1 |                               |
| Katteget                   | 61.8\|23.9 |                               |
| Mini Atlas Gaff 27.6\|23.3 |            |                               |
| Mother's Mouth             | 38.0\|17.1 |                               |
| Mountain Pass Cave         | 30.2\|12.1 |                               |
| No Nipple Temple           | 25.4\|6.9  |                               |
| Ovis Island                | 40.0\|52.0 | NO BUILD - Mini Boss area.    |
| Ratclark's Crack Den       | 56.9\|18.3 |                               |
| Sea Cave 1                 | 62.3\|4.6  |                               |
| Sea Cave 2                 | 65.9\|12.7 |                               |
| Sea Cave 3                 | 68.9\|14.4 |                               |
| Small Pass Cave            | 29.8\|12.7 |                               |
| Syntac's Skirt             | 23.6\|10.3 |                               |
| The Shut                   | 23.6\|5.7  |                               |
| Wooins                     | 39.7\|29.3 |                               |
| {% endtab %}               |            |                               |
| {% endtabs %}              |            |                               |

### Useful Map for Resources and Lore Notes:

{% embed url="<https://ark-unity.com/ark-survival-ascended/maps/astraeos/>" %}

**Player Spawn Points.**

<figure><img src="https://lh7-rt.googleusercontent.com/docsz/AD_4nXfHakAQkytk157L-7sHQOkHVekJvUTXapgDUGFcdAPaMmup4S3tdAYnYNVRsABs0P45xUqmyakXp5gDIEZibORZfneW44d-XqAzMJ6TUmKUxijkwKjxFLedgPRYfNuwhzqLznWChg?key=_EAjYxT7L6ArnS-OHHunKqzM" alt=""><figcaption></figcaption></figure>

***

### Astraeos Resource Links:

<figure><img src="https://lh7-rt.googleusercontent.com/docsz/AD_4nXfUkfMySq5BiRsDkTY2HbTK6uQGBOiMP9P7tQRR0V7RC8y5oMnT0h4yxgURpHRz7iAvH7jWPG5oV1LkC2CXlNeBfYwQUUbbqsFs34MOgsPweVAHu44XYVfY0TnXI-ZNzi8vy3Yy?key=_EAjYxT7L6ArnS-OHHunKqzM" alt=""><figcaption></figcaption></figure>

<figure><img src="https://lh7-rt.googleusercontent.com/docsz/AD_4nXdXBRcXro6-DJr3XYaNUNdhBGnVbpPtcArDxcC_hmGd0J1AkLT44r-amLLNrsiSEz_6jYIZ3ydMAn5aU2ZDaR7WjIQH3CRGrliHE4Ck4nVuSonfX4be6BurBdtxxuqnQtXpVDNbXw?key=_EAjYxT7L6ArnS-OHHunKqzM" alt=""><figcaption></figcaption></figure>

### **Major Astraeos “Lemnokis” Content Update this June!**&#x20;

The first major update of Astraeos comes with a new island - Lemnokis! A massive landmass with many biomes. Snowy redwoods, warm redwoods, valleys, forests and combined with many bigger and smaller building caves, even a glacier cave. Lemnokis is also the home of the first duo-miniboss: Kalydonios & Erymanthian. Two massive boars attacking with fire and poisonous gas! The ocean areas will have new deep-sea areas full of resources and a special new place out in the ocean - The Maelstrom!

### OSDs on Astraeos and Extinction Building Rule

**If you’ve built near potential OSD drop zones, we strongly recommend relocating your base before the patch goes live on July 15th. 2025.**

Wild Card is making a key adjustment to OSDs on **Astraeos** to address a bug. **Starting July 15th**, when an OSD lands, it will now destroy any nearby player-built structures within its impact radius. This will be the same radius used for OSDs on **Extinction**.

***

<figure><img src="https://772063455-files.gitbook.io/~/files/v0/b/gitbook-x-prod.appspot.com/o/spaces%2F-Lgje1lBxKKWXwqycB-v%2Fuploads%2F8Mrjs5a4lEQwX52RGOGC%2Fimage.png?alt=media&amp;token=56956fa0-c4d0-4439-be22-7cae4caf4542" alt=""><figcaption></figcaption></figure>

*All content on this page has been accumulated from several places including the Wiki, The PACK Admin Team, and Players from The Pack cluster.*


# ASA: Ragnarök

Ragnarok was originally released on June 12, 2017 for the PC. The ASA version Released June 19 th. 2025.

## Ragnarök!

<figure><img src="https://lh7-rt.googleusercontent.com/docsz/AD_4nXfdg2ASg0FakS_s2TA4eidzbWpTt2otiRiyTxw9HVSeeCzQmgwua5DBOEU6TmOeeaAtBzeYMZBw5i_2D8A7c76YWuHmfGC28fwlBbI6MXam2S3J14P_s29Q-5ZmGg0SF7gmwl7Y?key=l2ylyjP67AIGqrj88buiQ_w2" alt=""><figcaption></figcaption></figure>

## Here's a glimpse of what awaits you:

Journey through an expansive 144 sq. kilometer environment where elements from The Island, Scorched Earth, and all new biomes are combined to bring the ultimate survivor experience. Whether tackling the extreme cold atop the highest mountains, harvesting resources from an active volcano, or just searching for that perfect base location, Ragnarok plays host to explorers and base builders alike. But survivors beware, Ragnarok houses such creatures as Polar Bears, Ice Wyverns, and a mystical creature many have yet to tame in the ARK universe. Ragnarok boasts many unique features such as: custom explorer notes, challenging dungeons, dungeon bosses, active hot springs, unique pickup-able/harvestable resources, new biomes, an active volcano, unique tree platform locations, environmental traps, unique ruins, and so much more combined with a beautiful world to explore.

***

## Creatures:

### Standard Creatures:

ARK Normal Creatures spawning on Ragnarok\
<https://ark.wiki.gg/wiki/Ragnarok#Creatures>

Dire Polar Bear\
Griffin\
Ice Wyvern\
Iceworm Male and Queen\\

Lava Elemental\
Spirit Dire Bear\
Spirit Direwolf

### ASA Unique Creatures

Autumn Drakeling\
Bison\
Spring Drakeling\
Summer Drakeling\
Nunatak (New Ragnarok Dragon Boss)\
Winter Drakeling

<figure><img src="https://772063455-files.gitbook.io/~/files/v0/b/gitbook-x-prod.appspot.com/o/spaces%2F-Lgje1lBxKKWXwqycB-v%2Fuploads%2FYEaB1EcBT3qyKhMbMeCc%2Fnew%20rag%20griffin.png?alt=media&amp;token=4a8243f0-b96d-452c-abd9-2bf2b9b66103" alt=""><figcaption></figcaption></figure>

***

## Joining ASA: Ragnarök Server

<table data-card-size="large" data-view="cards"><thead><tr><th align="center"></th><th></th><th></th><th></th><th data-hidden data-card-target data-type="content-ref"></th><th data-hidden data-card-cover data-type="files"></th></tr></thead><tbody><tr><td align="center">𝐀𝐒𝐀: 𝐑𝐚𝐠𝐧𝐚𝐫𝐨̈𝐤</td><td>Server Name: <br>ᴛʜᴇ ᴘᴀᴄᴋ ʀᴀɢɴᴀʀᴏᴋ ᴘᴠᴇ ᴄʟᴜsᴛᴇʀ(𝟹xʜ, 𝟺xxᴘ, 𝟷𝟻ᴛ/ʙ)</td><td>IP: 66.153.149.147:7401<br></td><td><p><strong>How To Join</strong> 𝐑𝐚𝐠𝐧𝐚𝐫𝐨̈𝐤</p><p><strong>1.</strong> At the main screen when Ark opens follow these steps to join the map that your character is on:<br>2. Hit tilde key to open the command. Just under Esc key on your keyboard<br>3. Type or copy and paste this command just from the open part!!!!<br>This will direct connect you to the servers without having to go through the server select screen.</p><p>𝐑𝐚𝐠𝐧𝐚𝐫𝐨̈𝐤 - <code>open 66.153.149.147:7401</code></p></td><td></td><td><a href="https://772063455-files.gitbook.io/~/files/v0/b/gitbook-x-prod.appspot.com/o/spaces%2F-Lgje1lBxKKWXwqycB-v%2Fuploads%2FOALYoBnOaOAoAeWeyVQ6%2FASA%20-%20RAGNAROK_LOGO_2.png?alt=media&amp;token=cf1ac7f9-0931-47a9-9165-dde8afa13417">ASA - RAGNAROK_LOGO_2.png</a></td></tr><tr><td align="center"><strong>ASA Mod Guide for The PACK</strong></td><td><p><strong>There are two ways to get the mods for the server.</strong></p><ul><li>Just load into ASA, go to the server browser, find The Pack servers, Click Join on the one you want, it opens a menu with a list of all the mods, Click Join and it will then install all the mods before loading into the server. If it times out, repeat the process. After all the mods are installed you can just join.</li></ul></td><td>Or you can add them one by one from the Quick List found when clicking this link! </td><td></td><td><a href="https://faq.thepackgaming.com/ark/asa-cluster/asa-settings#subscribed-mods">https://faq.thepackgaming.com/ark/asa-cluster/asa-settings#subscribed-mods</a></td><td><a href="https://772063455-files.gitbook.io/~/files/v0/b/gitbook-x-prod.appspot.com/o/spaces%2F-Lgje1lBxKKWXwqycB-v%2Fuploads%2FHlNbFrH84KHgrCwX1nS7%2FPACK_CARDS_ASA_MODS.png?alt=media&amp;token=b6264b96-d431-4fcf-aa4e-0882fb9b3d6a">PACK_CARDS_ASA_MODS.png</a></td></tr><tr><td align="center"><strong>Click here to go to our Full Rules!</strong></td><td></td><td></td><td></td><td><a href="https://faq.thepackgaming.com/rules/asa-pve-servers-rules.">https://faq.thepackgaming.com/rules/asa-pve-servers-rules.</a></td><td><a href="https://772063455-files.gitbook.io/~/files/v0/b/gitbook-x-prod.appspot.com/o/spaces%2F-Lgje1lBxKKWXwqycB-v%2Fuploads%2FCde7RVPafu2cTV0wwVbS%2FPACK_CARDS_ASA_RULES.png?alt=media&amp;token=b833c602-6136-4e0f-8a0d-8dfca66a9ed3">PACK_CARDS_ASA_RULES.png</a></td></tr><tr><td align="center"><strong>WIKILY MAPS</strong></td><td><strong>ASA: Ragnarok</strong></td><td><strong>Landmarks and Resources</strong></td><td><strong>Click here to see the map!</strong></td><td><a href="https://wikily.gg/ark-survival-ascended/maps/ragnarok/">https://wikily.gg/ark-survival-ascended/maps/ragnarok/</a></td><td><a href="https://772063455-files.gitbook.io/~/files/v0/b/gitbook-x-prod.appspot.com/o/spaces%2F-Lgje1lBxKKWXwqycB-v%2Fuploads%2FK6IiJ91pdEH7pTAsKcV3%2Frag%20_%20map.png?alt=media&amp;token=9600c36a-77ea-4d70-9eee-fe2061a892a7">rag _ map.png</a></td></tr></tbody></table>

***

## Your Community Landmarks

<figure><img src="https://772063455-files.gitbook.io/~/files/v0/b/gitbook-x-prod.appspot.com/o/spaces%2F-Lgje1lBxKKWXwqycB-v%2Fuploads%2F6giwVPORTyWUbGACNrxM%2FASA_Ragnarok%20Community%20Center..png?alt=media&amp;token=02f80f48-dc6d-48dd-a0db-6eb706ac2025" alt=""><figcaption></figcaption></figure>

### Landmarks and Places of Interest

Landmarks with GPS and ADMIN Teleport Locators. All Ark Map Residents should pick up an Awesome Teleport Remote at a Community Center or make one in your Inventory.

{% tabs %}
{% tab title="Community Builds:" %}
Here you will find Places Like the Community Center, and refinery locations. Those noted have Open Transmitters, and all are part of the Teleport System.

| Name                               | Lat/Lon      | Notes                                                                         |
| ---------------------------------- | ------------ | ----------------------------------------------------------------------------- |
| ◉ Ragnarok Community Center        | 22.0\|33.8   | Telepad and Transmitter here                                                  |
| ◉ The PACK \*\*Admins Base         | 21.0\|17.1   | Telepad and Transmitter here                                                  |
| ◉The PACK Event Area               | 67.7\|71.4   | Telepad and Transmitter here                                                  |
| ◉ Rockwell Battle Site             | 67.90\|74.71 | Telepad                                                                       |
| ◉#P.R.Areas - OIl Well Field       | 80.37\|60.07 | Hot! Other Resources Nearby! DANGEOUS Wildlife! Telepad and Transmitter here. |
| ◉#P.R.Areas - Ragnarok Refinery    | 80.2\|61.8   | Hot! Other Resources Nearby! DANGEOUS Wildlife! Telepad and Transmitter here. |
| ◉#P.R.Areas - Ragnarok Wyvern Trap | 19.7\|70.2   | Telepad and Transmitter here                                                  |
| {% endtab %}                       |              |                                                                               |

{% tab title="Teleporter System" %}
The PACK Admins upkeep a network of Teleporters for the use of our Players.

| Name                                       | Lat/Lon      | Notes                                                                         |
| ------------------------------------------ | ------------ | ----------------------------------------------------------------------------- |
| ◉ Ragnarok Community Center                | 22.0\|33.8   | Telepad and Transmitter here                                                  |
| ◉ The PACK \*\*Admins Base                 | 21.0\|17.1   | Telepad and Transmitter here                                                  |
| ◉The PACK Event Area                       | 67.7\|71.4   | Telepad and Transmitter here                                                  |
| ◉ Rockwell Battle Site                     | 67.90\|74.71 | Telepad                                                                       |
| ◉#P.R.Areas - OIl Well Field               | 80.37\|60.07 | Hot! Other Resources Nearby! DANGEOUS Wildlife! Telepad and Transmitter here. |
| ◉#P.R.Areas - Ragnarok Refinery            | 80.2\|61.8   | Hot! Other Resources Nearby! DANGEOUS Wildlife! Telepad and Transmitter here. |
| ◉#P.R.Areas - Ragnarok Wyvern Trap         | 19.7\|70.2   | Telepad and Transmitter here                                                  |
| #P.R. Area - Volcano Beach - Chitin/Poly   | 16.7\|57.0   | Telepad                                                                       |
| #P.R.Areas - Blk.Pearls                    | 71.0\|21.3   | UNDER WATER Telepad and Transmitter here                                      |
| #P.R.Areas - Crystal Cave                  | 19.09\|45.18 | Telepad                                                                       |
| #P.R.Areas - Giant Beaver Lake             | 23.3\|45.2   | Telepad and Transmitter here                                                  |
| #P.R.Areas - Silica Pearls                 | 79.1\|22.2   | Telepad                                                                       |
| 🗽Blue Obelisk Return                      | 18.8\|17.9   | Telepad                                                                       |
| 🗽Green Obelisk Return                     | 57.1\|38.9   | Telepad                                                                       |
| 🗽Red Obelisk Return                       | 34.6\|86.4   | Telepad                                                                       |
| Carnivorous Caverns Cave (Cunning)(Immune) | 17.7\|42.4   | Telepad at cave entrance!                                                     |
| Fallen Redwood Cave (Brute)                | 36.0\|77.0   | Telepad at cave entrance!                                                     |
| Frozen Dungeon Cave (Pack)(ICE QUEEN)      | 31.3\|33.7   | Telepad at cave entrance!                                                     |
| Jungle Dungeon Cave (Hunter)               | 18.2\|28.4   | Telepad at cave entrance!                                                     |
| Life's Labyrinth Cave (4 ARTIFACTS HERE)   | 51.6\|77.5   | Telepad at cave entrance!                                                     |
| Monkey's Puzzle Cave (Strong)              | 24.6\|25.0   | Telepad at cave entrance!                                                     |
| Pirate Ship Wreck(Devourer)                | 47.4\|2.3    | (Underwater, lots of squids) Telepad at cave entrance!                        |
| {% endtab %}                               |              |                                                                               |

{% tab title="Artifact Caves" %}
Artifacts are unique progression items that are typically located within caves around the ARKs, but occasionally are located in other remote or unique locations, such as deep oceans and Wyvern lairs.

| Name                                                         | Lat        | Notes                                 |
| ------------------------------------------------------------ | ---------- | ------------------------------------- |
| 1. Artifact Of The Brute Fallen Redwood Cave Entrance        | 36.0\|77.0 |                                       |
| 1A. Artifact Of The Brute                                    | 35.2\|78.2 |                                       |
| 2. Artifact of the Clever Life's Labyrinth Cave Entrance     | 51.6\|77.5 | (4 Artifacts) Lifes Labryinth Dungeon |
| 2A. Artifact of the Clever                                   | 48.0\|78.6 |                                       |
| 3. Artifact Of The Cunning Carnivorous Caverns Cave Entrance | 17.7\|42.4 |                                       |
| 3A. Artifact Of The Cunning                                  | 20.3\|45.9 |                                       |
| 4. Artifact of the Devious Life's Labyrinth Cave Entrance    | 51.6\|77.5 | (4 Artifacts) Lifes Labryinth Dungeon |
| 4A. Artifact of the Devious                                  | 49.0\|79.4 |                                       |
| 5. Artifact of the Devourer Pirate Ship Wreck                | 47.4\|2.3  |                                       |
| 5A. Artifact of the Devourer                                 | 47.4\|2.3  |                                       |
| 6. Artifact of the Hunter Jungle Dungeon Cave Entrance       | 18.2\|28.4 |                                       |
| 6A. Artifact of the Hunter                                   | 21.5\|27.2 |                                       |
| 7. Artifact of the Immune Carnivorous Caverns Cave Entrance  | 21.7\|41.9 |                                       |
| 7A. Artifact of the Immune                                   | 23.6\|44.5 |                                       |
| 8. Artifact of the Massive Life's Labyrinth Cave Entrance    | 51.6\|77.5 | (4 Artifacts) Lifes Labryinth Dungeon |
| 8A. Artifact of the Massive                                  | 48.9\|79.4 |                                       |
| 9. Artifact of the Pack Frozen Dungeon Cave Entrance         | 31.3\|33.7 |                                       |
| 9A. Artifact of the Pack                                     | 33.5\|43.4 |                                       |
| 10. Artifact of the Skylord Life's Labyrinth Cave Entrance   | 51.6\|77.5 | (4 Artifacts) Lifes Labryinth Dungeon |
| 10A. Artifact of the Skylord                                 | 47.7\|78.9 |                                       |
| 11. Artifact of the Strong The Monkey's Puzzle Cave Entrance | 24.6\|25.0 |                                       |
| 11A. Artifact of the Strong                                  | 24.8\|24.7 |                                       |
| {% endtab %}                                                 |            |                                       |
| {% endtabs %}                                                |            |                                       |

{% tabs %}
{% tab title="NO BUILD AREAS" %}
Other than specified metal node areas, Metal nodes are not included in this map as there are so many. **Protected Resource Area denoted by&#x20;*****#P.R.Areas***

* :no\_entry: All Oil or Water wells should be UNLOCKED These are Public Access.

* :no\_entry: ANY Cave or Ruin that has an artifact, lore note, Do NOT Block the way to the item.

* :no\_entry: If a Cave Falls into the following Resource node rule, or has special Dino Spawns you MAY NOT build in it.

* :no\_entry: Do not block Resource nodes (groups of 10 or more, Metal and Crystal is not included in this ban.

* :no\_entry:No building within 75 tiles of any  **Protected Resource Area**.

* ◉#P.R.Areas - Oil Well Field 80.37|60.07 Hot! Other Resources Nearby! DANGEOUS Wildlife! Telepad and Transmitter here.

* ◉#P.R.Areas - Ragnarok Refinery 80.2|61.8 Hot! Other Resources Nearby! DANGEOUS Wildlife! Telepad and Transmitter here.

* ◉#P.R.Areas - Ragnarok Wyvern Trap 19.7|70.2 Telepad and Transmitter here

* \#P.R. Area - Volcano Beach - Chitin/Poly 16.7|57.0 Telepad

* \#P.R.Areas - Blk.Pearls 71.0|21.3 UNDER WATER Telepad and Transmitter here

* \#P.R.Areas - Giant Beaver Lake 23.3|45.2 Telepad and Transmitter here

Subject to change daily as we discover the newly redone map.
{% endtab %}

{% tab title="RESOURCES" %}
Some of the Resource Rich Nodes that have been Discovered on Ragnarok

| Name                                     | Lat/Lon      | Notes                                                                         |
| ---------------------------------------- | ------------ | ----------------------------------------------------------------------------- |
| ◉#P.R.Areas - OIl Well Field             | 80.37\|60.07 | Hot! Other Resources Nearby! DANGEOUS Wildlife! Telepad and Transmitter here. |
| ◉#P.R.Areas - Ragnarok Refinery          | 80.2\|61.8   | Hot! Other Resources Nearby! DANGEOUS Wildlife! Telepad and Transmitter here. |
| ◉#P.R.Areas - Ragnarok Wyvern Trap       | 19.7\|70.2   | Telepad and Transmitter here                                                  |
| #P.R. Area - Volcano Beach - Chitin/Poly | 16.7\|57.0   | Telepad                                                                       |
| #P.R.Areas - Blk.Pearls                  | 71.0\|21.3   | UNDER WATER Telepad and Transmitter here                                      |
| #P.R.Areas - Giant Beaver Lake           | 23.3\|45.2   | Telepad and Transmitter here                                                  |
|                                          |              |                                                                               |
| {% endtab %}                             |              |                                                                               |

{% tab title="Points of Interest " %}
Caves, Ruins and other Interesting Places on Ragnarök

| Name                          | Lat/Lon      | Notes           |
| ----------------------------- | ------------ | --------------- |
| Abandoned Lighthouse          |              |                 |
| Castle Of The Swamp           |              |                 |
| Character Creation Background |              |                 |
| Life Labyrinth (Entrance)     | 51.6\|77.5   |                 |
| Life Labyrinth (Exit)         | 51.99\|79.69 |                 |
| Forbidden Desert              |              |                 |
| Pirate Cave                   | 21.18\|24.42 | Oluf Jungle     |
| Ruined Bridge                 |              |                 |
| Ruins Northern Islands        |              |                 |
| Ruins Northern Swamps         |              |                 |
| Scorched Desert Ruins         |              |                 |
| Scotland Plains:              | 25.45\|76.46 | Upper Highlands |
| {% endtab %}                  |              |                 |
| {% endtabs %}                 |              |                 |

### Ragnarök Resource Links:

#### Useful Map for Resources and Lore Notes:

[Wikily ASA Maps Website:](https://wikily.gg/ark-survival-ascended/maps/)&#x20;

<figure><img src="https://772063455-files.gitbook.io/~/files/v0/b/gitbook-x-prod.appspot.com/o/spaces%2F-Lgje1lBxKKWXwqycB-v%2Fuploads%2FK6IiJ91pdEH7pTAsKcV3%2Frag%20_%20map.png?alt=media&amp;token=9600c36a-77ea-4d70-9eee-fe2061a892a7" alt=""><figcaption></figcaption></figure>

***

## Resource Links:

***

<figure><img src="https://772063455-files.gitbook.io/~/files/v0/b/gitbook-x-prod.appspot.com/o/spaces%2F-Lgje1lBxKKWXwqycB-v%2Fuploads%2F8Mrjs5a4lEQwX52RGOGC%2Fimage.png?alt=media&amp;token=56956fa0-c4d0-4439-be22-7cae4caf4542" alt=""><figcaption></figcaption></figure>

*All content on this page has been accumulated from several places including the Wiki, The PACK Admin Team, and Players from The Pack cluster.*


# ASA: Valguero

Valguero DLC for ARK: Survival Evolved was released on June 18, 2019, for PC. The ASA version was released on Oct. 7, 2025.

<figure><img src="https://772063455-files.gitbook.io/~/files/v0/b/gitbook-x-prod.appspot.com/o/spaces%2F-Lgje1lBxKKWXwqycB-v%2Fuploads%2FXzjUS7qeme7MIjlKyjPo%2FASA_Valguero_KeyArt_Logo_2560x1440.jpg?alt=media&amp;token=55a0f244-c9b6-4b58-a1a8-b36ec19fb3d1" alt=""><figcaption></figcaption></figure>

### About This Expansion Map:

Explore new heights and hidden depths; whether it's creating your foundations in the White Cliffs or discovering the secrets of the pit of Aberration, Valguero offers a new experience of the ARK universe. With new biomes, a formidable dungeon boss and mysterious ruins to discover, there is always something exciting - and dangerous - in Valguero. Among its more than 60 square kilometers, you'll find everything from lush jungles to environmental hazards, from snowfields to lava flows, to savannas and hot springs.

***

### Unique Environmental Features

* Rainbows across the map.
* Occasional auroras at night.
* Shooting stars at night.
* Freezing air in the snow desert.
* An underground ocean called The Abyss&#x20;
* Ichthyosaurus and Carbonemys corpses scattered along the lake.
* There is also an underground biome called the aberration trench cave.
* Mushrooms on the emerald forest that can be harvested for [![](https://ark.wiki.gg/images/thumb/Rare_Flower.png/20px-Rare_Flower.png?da2f70)](https://ark.wiki.gg/wiki/Rare_Flower) Flowers, [![](https://ark.wiki.gg/images/thumb/Rare_Mushroom.png/20px-Rare_Mushroom.png?f1fca8)](https://ark.wiki.gg/wiki/Rare_Mushroom) Rare Mushrooms and [![](https://ark.wiki.gg/images/thumb/Bio_Toxin.png/20px-Bio_Toxin.png?bc6a71)](https://ark.wiki.gg/wiki/Bio_Toxin) Bio Toxin.
* Radiation area called The Unknown .
* Deinonychus nests on the The Paradise, Chalk Hills.
* An Underground Volcanic Wyvern Trench, to get [![](https://ark.wiki.gg/images/thumb/Fire_Wyvern_Egg.png/20px-Fire_Wyvern_Egg.png?2827dd)](https://ark.wiki.gg/wiki/Fire_Wyvern_Egg) Fire Wyvern Eggs.
* Wild Broodmother

### CREATURES

#### Standard Creatures:

ARK Normal Creatures spawning on Valguero:&#x20;

[Normal spawns for Valguero.](https://ark.wiki.gg/wiki/Valguero#Creatures)

### Unique Creatures&#x20;

* Chalk Golem
* Deinonychus
* Ice Golem
* Grendel (NEW 🆕 Boss)

### ASA Unique Creatures

* Shastasaurus
* Elderclaw
* Megaraptor

#### UNIQUE Modded Dinos:

See[ The Pack Unique Creatures and Where they Spawn!](https://faq.thepackgaming.com/asa/asa-server-settings#the-pack-modded-creatures-and-where-they-spawn)

* Draconis Glaucus 💎

See Our Server Settings here:

{% embed url="<https://faq.thepackgaming.com/asa/settings#aberration-rules>" %}

{% embed url="<https://www.youtube.com/watch?v=MsUT1NqjhgA>" %}

<div><figure><img src="https://772063455-files.gitbook.io/~/files/v0/b/gitbook-x-prod.appspot.com/o/spaces%2F-Lgje1lBxKKWXwqycB-v%2Fuploads%2Fp7lFqNfF37SsSSZGsxS3%2Fimage.png.e56ac2d346f56353ed9dda3d1b926b1c.png?alt=media&amp;token=b98724a4-7fc3-4b20-b855-85cd394f8760" alt=""><figcaption></figcaption></figure> <figure><img src="https://772063455-files.gitbook.io/~/files/v0/b/gitbook-x-prod.appspot.com/o/spaces%2F-Lgje1lBxKKWXwqycB-v%2Fuploads%2F1bMbfAxJitSYOGVSFoZX%2Fmegaraptor.jpg?alt=media&amp;token=c588379e-8c41-4789-b5f1-4d256f648d89" alt=""><figcaption></figcaption></figure></div>

***

## Joining ASA: Valguero Server

<table data-card-size="large" data-view="cards"><thead><tr><th align="center"></th><th></th><th></th><th></th><th></th><th data-hidden data-card-target data-type="content-ref"></th><th data-hidden data-card-cover data-type="image">Cover image</th></tr></thead><tbody><tr><td align="center">𝐀𝐒𝐀: </td><td>Server Name:    </td><td>IP: </td><td><p><strong>How To Join Valguero</strong></p><p><strong>1.</strong> At the main screen when Ark opens follow these steps to join the map that your character is on:<br>2. Hit tilde key to open the command. Just under Esc key on your keyboard<br>3. Type or copy and paste this command just from the open part!!!!<br>This will direct connect you to the servers without having to go through the server select screen.</p><p>`open ~</p></td><td></td><td></td><td><a href="https://772063455-files.gitbook.io/~/files/v0/b/gitbook-x-prod.appspot.com/o/spaces%2F-Lgje1lBxKKWXwqycB-v%2Fuploads%2FOtJhBSGNsmQT7l48Uogq%2FValguero%20Flash.png?alt=media&amp;token=b953b135-5bbc-406b-9adf-461d61a2280a">Valguero Flash.png</a></td></tr><tr><td align="center"><strong>ASA Mod Guide for The PACK</strong></td><td><p></p><p><strong>There are two ways to get the mods for the server.</strong></p><ul><li>Just load into ASA, go to the server browser, find The Pack servers, Click Join on the one you want, it opens a menu with a list of all the mods, Click Join and it will then install all the mods before loading into the server. If it times out, repeat the process. After all the mods are installed you can just join.</li></ul></td><td>Or you can add them one by one from the Quick List found when clicking this link! </td><td></td><td></td><td><a href="https://faq.thepackgaming.com/asa/cluster#quick-list-of-our-subscribed-mods">https://faq.thepackgaming.com/asa/cluster#quick-list-of-our-subscribed-mods</a></td><td><a href="https://772063455-files.gitbook.io/~/files/v0/b/gitbook-x-prod.appspot.com/o/spaces%2F-Lgje1lBxKKWXwqycB-v%2Fuploads%2FHlNbFrH84KHgrCwX1nS7%2FPACK_CARDS_ASA_MODS.png?alt=media&amp;token=b6264b96-d431-4fcf-aa4e-0882fb9b3d6a">PACK_CARDS_ASA_MODS.png</a></td></tr><tr><td align="center"><strong>Click here to go to our Full Rules!</strong></td><td></td><td></td><td></td><td></td><td><a href="https://faq.thepackgaming.com/rules/asa-pve-servers-rules.">https://faq.thepackgaming.com/rules/asa-pve-servers-rules.</a></td><td><a href="https://772063455-files.gitbook.io/~/files/v0/b/gitbook-x-prod.appspot.com/o/spaces%2F-Lgje1lBxKKWXwqycB-v%2Fuploads%2FCde7RVPafu2cTV0wwVbS%2FPACK_CARDS_ASA_RULES.png?alt=media&amp;token=b833c602-6136-4e0f-8a0d-8dfca66a9ed3">PACK_CARDS_ASA_RULES.png</a></td></tr><tr><td align="center"><strong>Wikily Ma</strong>p</td><td><strong>ASA: Valguero</strong></td><td><strong>Landmarks and Resources</strong></td><td><strong>Click here to open the map!</strong></td><td></td><td><a href="https://wikily.gg/ark-survival-ascended/maps/valguero/">https://wikily.gg/ark-survival-ascended/maps/valguero/</a></td><td><a href="https://772063455-files.gitbook.io/~/files/v0/b/gitbook-x-prod.appspot.com/o/spaces%2F-Lgje1lBxKKWXwqycB-v%2Fuploads%2FOvRFK7zKB9IelCHNZOfn%2FASA_VAL_CARD_Flash.png?alt=media&amp;token=0d839ae1-23ac-4d2c-bbc1-118aa67e19d6">ASA_VAL_CARD_Flash.png</a></td></tr></tbody></table>

***

## Your Community Landmarks

CC image here

### Landmarks and Places of Interest

Landmarks with GPS and ADMIN Teleport Locators. All Ark Map Residents should pick up an Awesome Teleport Remote at a Community Center or make one in your Inventory.

{% tabs %}
{% tab title="Community Builds:" %}
Here you will find Places Like the Community Center, and other Cluster locations. Those noted have Open Transmitters, and all are part of the Teleport System.

| \*\*Valguero Community Center        | 37.4\|91.5 | Telepad and Transmitter here                                             |
| ------------------------------------ | ---------- | ------------------------------------------------------------------------ |
| \*\*P.R.Areas - Valguero Refinery    | 75.1\|72.1 | Other Resources Nearby! DANGEOUS Wildlife! Telepad and Transmitter here. |
| \*\*P.R.Areas - Valguero Wyvern Scar | 11.9\|69.8 | Telepad and Transmitter here                                             |
| \*\*P.R. Area - Aberration Trench    | 33.8\|83.7 | - Aberration Gas Collectors with Telepad and Transmitter here            |
| {% endtab %}                         |            |                                                                          |

{% tab title="Teleporter System" %}
The PACK Admins upkeep a network of Teleporters for the use of our Players.

| \*\*Valguero Community Center                   | 37.4\|91.5   | Telepad and Transmitter here                                             |          |              |
| ----------------------------------------------- | ------------ | ------------------------------------------------------------------------ | -------- | ------------ |
| \*\*P.R.Areas - Valguero Refinery               | 75.1\|72.1   | Other Resources Nearby! DANGEOUS Wildlife! Telepad and Transmitter here. |          |              |
| \*\*P.R.Areas - Valguero Wyvern Scar            | 11.9\|69.8   | Telepad and Transmitter here                                             |          |              |
| \*\*P.R. Area - Aberration Trench               | 33.8\|83.7   | - Aberration Gas Collectors with Telepad and Transmitter here            |          |              |
| {Brute & Devourer} The Lost Temple Entrance     | 46.9\|87.5   | Telepad here                                                             |          |              |
| {Crag} Boreal Forest Entrance                   | 34.3\|51.4   | Telepad here                                                             |          |              |
| {Cunning} Snow Mountains Cave Entrance          | 15.5\|27.3   | Telepad here                                                             |          |              |
| {Destroyer} Jungle Entrance                     | 67.0\|89.1   | Telepad here                                                             |          |              |
| {Gatekeeper} The Unknown Cave Entrance          | <p>37.9      | 57.4<br>Second entrance 32.2                                             | 92.4</p> | Telepad here |
| {Immune, Pack, Strong} The Lair Cave Entrance   | 73.1\|40.6   | Broodmother Found here                                                   |          |              |
| {Skylord} The Great Trench {Fire Wyvern Trench} | <p>8.9       | 78.8<br>Second entrance 9.3                                              | 71.0</p> | Telepad here |
| Blue Obelisk RETURN                             | 9.4\|17.3    | Telepad here                                                             |          |              |
| Green Obelisk RETURN                            | 48.9\|76.2   | Telepad here                                                             |          |              |
| Red Obelisk RETURN                              | 76.2\|17.2   | Telepad here                                                             |          |              |
| P.R.Areas - AB Red Zone Cave                    | 52.1\|61.6   | Telepad here                                                             |          |              |
| P.R.Areas - Ascended Memorial Site              | 34.7\|88.9   | (PlayersONLY) Telepad here                                               |          |              |
| P.R.Areas - Beaver Lake                         | 53.6\|73.3   | Telepad here                                                             |          |              |
| P.R.Areas - Black Pearl Bay                     | 45.0\|33.0   | UNDERWATER! Telepad here                                                 |          |              |
| P.R.Areas - Crystal Cave                        | 32.2\|8.9    | Telepad here                                                             |          |              |
| P.R.Areas - Deep Sea TP                         | 44.8\|24.7   | (Water) Telepad here                                                     |          |              |
| P.R.Areas - Deino Nests                         | 90.1\| 88.7  | Telepad here                                                             |          |              |
| P.R.Areas - Ice Cave Entrance                   | 15.9\|27.5   | Telepad here                                                             |          |              |
| P.R.Areas - Oil Island                          | 48.4\|63.5   | Telepad and Transmitter here                                             |          |              |
| P.R.Areas - Silica Pearls                       | 44.61\|22.87 | UNDERWATER Telepad here                                                  |          |              |
| P.R.Areas - Swamp Cave                          | 74.4\|43.5   | (BroodMother) Telepad here                                               |          |              |
| {% endtab %}                                    |              |                                                                          |          |              |

{% tab title="Artifact Caves" %}
Artifacts are unique progression items that are typically located within caves around the ARKs, but occasionally are located in other remote or unique locations, such as deep oceans and Wyvern lairs.

| {Brute & Devourer} The Lost Temple Entrance     | 46.9\|87.5 | Telepad here                 |          |              |
| ----------------------------------------------- | ---------- | ---------------------------- | -------- | ------------ |
| {Crag} Boreal Forest Entrance                   | 34.3\|51.4 | Telepad here                 |          |              |
| {Cunning} Snow Mountains Cave Entrance          | 15.5\|27.3 | Telepad here                 |          |              |
| {Destroyer} Jungle Entrance                     | 67.0\|89.1 | Telepad here                 |          |              |
| {Gatekeeper} The Unknown Cave Entrance          | <p>37.9    | 57.4<br>Second entrance 32.2 | 92.4</p> | Telepad here |
| {Immune, Pack, Strong} The Lair Cave Entrance   | 73.1\|40.6 | Broodmother Found here       |          |              |
| {Skylord} The Great Trench {Fire Wyvern Trench} | <p>8.9     | 78.8<br>Second entrance 9.3  | 71.0</p> | Telepad here |
| {% endtab %}                                    |            |                              |          |              |
| {% endtabs %}                                   |            |                              |          |              |

{% tabs %}
{% tab title="NO BUILD Resource Areas" %}
**Protected Resource Area denoted by&#x20;*****#P.R.Areas*** \
Other than specified \<resource> node areas,  \<resource> nodes are not included in this map as there are so many.&#x20;

| \*\*P.R.Areas - Valguero Refinery    | 75.1\|72.1   | Other Resources Nearby! DANGEOUS Wildlife! Telepad and Transmitter here. |
| ------------------------------------ | ------------ | ------------------------------------------------------------------------ |
| \*\*P.R.Areas - Valguero Wyvern Scar | 11.9\|69.8   | Telepad and Transmitter here                                             |
| \*\*P.R. Area - Aberration Trench    | 33.8\|83.7   | - Aberration Gas Collectors with Telepad and Transmitter here            |
| P.R.Areas - AB Red Zone Cave         | 52.1\|61.6   | Telepad here                                                             |
| P.R.Areas - Ascended Memorial Site   | 34.7\|88.9   | (PlayersONLY) Telepad here                                               |
| P.R.Areas - Beaver Lake              | 53.6\|73.3   | Telepad here                                                             |
| P.R.Areas - Black Pearl Bay          | 45.0\|33.0   | UNDERWATER! Telepad here                                                 |
| P.R.Areas - Crystal Cave             | 32.2\|8.9    | Telepad here                                                             |
| P.R.Areas - Deep Sea TP              | 44.8\|24.7   | (Water) Telepad here                                                     |
| P.R.Areas - Deino Nests              | 90.1\| 88.7  | Telepad here                                                             |
| P.R.Areas - Ice Cave Entrance        | 15.9\|27.5   | Telepad here                                                             |
| P.R.Areas - Oil Island               | 48.4\|63.5   | Telepad and Transmitter here                                             |
| P.R.Areas - Silica Pearls            | 44.61\|22.87 | UNDERWATER Telepad here                                                  |
| P.R.Areas - Swamp Cave               | 74.4\|43.5   | (BroodMother) Telepad here                                               |
| {% endtab %}                         |              |                                                                          |

{% tab title="Points of Interest " %}
Caves, Ruins and other Interesting Places on Valguero.

| \*\*Crater Lake\*\*         | ­79.7\|66.9  |                             |          |   |
| --------------------------- | ------------ | --------------------------- | -------- | - |
| Ruins at edge of snow biome |              |                             |          |   |
| Redwoods and sakara trees   |              |                             |          |   |
| Metal Cliffs of dover       | 76.26\|71.35 |                             |          |   |
| Abb entrance                | 33.8\|83.7   |                             |          |   |
| Swamp Cave Entrance         | 74.4\|43.5   |                             |          |   |
| Broodmothers + Cave         | 73.1\|40.6   |                             |          |   |
| Ice Cave Entrance           | 15.9\|27.5   |                             |          |   |
| Fire Wyvern Trench          | <p>8.9       | 78.8<br>Second entrance 9.3 | 71.0</p> |   |
| Cave in the White Cliffs    |              |                             |          |   |
| Deino Nests                 | 71.5\|63.1   |                             |          |   |
| Forgotten City              | ­84.2\|89.8  |                             |          |   |
| {% endtab %}                |              |                             |          |   |
| {% endtabs %}               |              |                             |          |   |

## Useful Map for Resources and Lore Notes:

\*Topographical Map of Valguero\*

<figure><img src="https://772063455-files.gitbook.io/~/files/v0/b/gitbook-x-prod.appspot.com/o/spaces%2F-Lgje1lBxKKWXwqycB-v%2Fuploads%2FwehxBxYDgDKJP7955hnc%2FMap.png?alt=media&amp;token=09cbd314-e8d7-4798-9106-83bea71f1e57" alt=""><figcaption></figcaption></figure>

***

### Map Resource Links:

Wikily -\
ARK: Survival Ascended Map Wiki & Calculators

{% embed url="<https://wikily.gg/ark-survival-ascended/maps/valguero/>" %}

***

<figure><img src="https://772063455-files.gitbook.io/~/files/v0/b/gitbook-x-prod.appspot.com/o/spaces%2F-Lgje1lBxKKWXwqycB-v%2Fuploads%2F8Mrjs5a4lEQwX52RGOGC%2Fimage.png?alt=media&amp;token=56956fa0-c4d0-4439-be22-7cae4caf4542" alt=""><figcaption></figcaption></figure>

*All content on this page has been accumulated from several places including the Wiki, The PACK Admin Team, and Players from The Pack cluster.*


# LOST COLONY :🔜

***

<figure><img src="https://772063455-files.gitbook.io/~/files/v0/b/gitbook-x-prod.appspot.com/o/spaces%2F-Lgje1lBxKKWXwqycB-v%2Fuploads%2F1fCLJ860KiqwHJRmTqly%2Fss_205d1f6f1fb8a727ec905098b492d2fc1b443840.1920x1080.jpg?alt=media&amp;token=9b906f5d-2419-4185-8764-26beb7b05962" alt=""><figcaption></figcaption></figure>

## ASA: Lost Colony

Developer: Studio Wildcard

Publisher: Studio Wildcard, Snail Games USA

Franchise: Snail Games USA

Release Date: Day 1 Content Released on:  Fri, June 20, 2025

Price: $29.99 USD

Steam Page Link: [ASA: Lost Colony](https://store.steampowered.com/app/3720100/ARK_Lost_Colony_Expansion_Pass/)

***

&#x20;ARK: Lost Colony Expansion Pass - \
Day 1 Content Released on:  Fri, June 20, 2025
----------------------------------------------

Enhance your journey from day one with the Lost Colony Expansion Pass! Immediately gain access to these exclusive bonuses:<br>

* Fantastic Tame - Drakelings: Gain immediate access to the enchanting Drakelings, miniature dragons that serve as both a steadfast shoulder pet and a versatile tool. With four distinct seasonal variations, each offering unique passive benefits and the ability to be wielded for powerful attacks and tactical support for your allies!
* Veilwyn: This captivating companion dynamically enhances your adventures with its aura-based buffs for defense, offense, and speed! Unleash its active abilities to revitalize yourself and your creatures, or to empower your next decisive strike. Prepare for a game-changer: this creature can evolve into one of two formidable forms with the official release of Lost Colony, each unlocking entirely new and potent abilities!
* New Player Skill Tree: Master a new style of progression with exclusive early access to a new skill system. Earn points by achieving Milestones and invest them in skills across three distinct trees, allowing for deep specialization as a master of creatures, a seasoned explorer, or a resourceful survivor.
* Template Hammer: Revolutionize and simplify your base building with this essential tool! The Structure Template system allows you to select a portion of your existing base, save it as a reusable template, and then easily replicate that structure in other locations. Say goodbye to tedious repetition and hello to rapid base expansion and consistent design!
* TEK Bunker: The underground is now your battleground, as you can deploy the incredible new TEK Bunker to expand your base underneath the earth into a whole new playing-field.
* DarkTek Cosmetics: Don this striking fusion of gothic elegance and sci-fi technology with a captivating bloodthirsty undertone, including armor component skins, sword skin, and Dark Drakeling skin.

### About This Expansion Map:

Confront the demons of Arat Prime -- birthplace of the ARKs -- in ASA's first massive canonical expansion pack, ARK Lost Colony! Starring Michelle Yeoh as Mei Yin in cinematic anime sequences by legendary Japanese studio MAPPA, the epic new story of ARK Lost Colony bridges the gap from ARK Extinction to ARK Genesis and into the world of ARK 2. As you follow in Mei Yin's footsteps through an intense journey into the heart of darkness, you'll unlock powerful "Lost" character ability trees, befriend exotic tames, craft "Cursed" tiers of gear, and master advanced new building systems!

But beware, the frozen wastes of Arat Prime are not devoid of intelligent life; on the contrary, the city has become a war-torn battleground between twisted Element-powered 'factions' seeking to undo what was accomplished at the end of ARK Extinction. Together with generations of heroes, you'll unite the past and the future of ARK!

{% embed url="<https://youtu.be/PRF5zxZjANg>" %}

### ASA: Lost Colony Anime Trailer

{% embed url="<https://video.fastly.steamstatic.com/store_trailers/257115725/movie_max_vp9.webm?t=1742269478>" %}
ASA: Lost Colony Anime Trailer
{% endembed %}

***


# SERVER PAGE TEMPLATE

Server Flash graphic here.

### About This Expansion Map:

***

## CREATURES

### Standard Creatures:

ARK Normal Creatures spawning on \<MAP>:&#x20;

Link to wiki dinos

### ASA Unique Creatures&#x20;

List dinos for this map

#### UNIQUE Modded Dinos:

See[ The Pack Unique Creatures and Where they Spawn!](https://faq.thepackgaming.com/asa/asa-server-settings#the-pack-modded-creatures-and-where-they-spawn)

List dinos for this map

See Aberration Rules here:

{% embed url="<https://faq.thepackgaming.com/asa/settings#aberration-rules>" %}

***

## Joining ASA: \<map> Server

<table data-card-size="large" data-view="cards"><thead><tr><th align="center"></th><th></th><th></th><th></th><th data-hidden data-card-target data-type="content-ref"></th><th data-hidden data-card-cover data-type="files"></th></tr></thead><tbody><tr><td align="center">𝐀𝐒𝐀: Map</td><td>Server Name:    </td><td>IP: </td><td><p><strong>How To Join</strong> &#x3C;map></p><p><strong>1.</strong> At the main screen when Ark opens follow these steps to join the map that your character is on:<br>2. Hit tilde key to open the command. Just under Esc key on your keyboard<br>3. Type or copy and paste this command just from the open part!!!!<br>This will direct connect you to the servers without having to go through the server select screen.</p><p>&#x3C;map>- `open ~</p></td><td></td><td></td></tr><tr><td align="center"><strong>ASA Mod Guide for The PACK</strong></td><td><p></p><p><strong>There are two ways to get the mods for the server.</strong></p><ul><li>Just load into ASA, go to the server browser, find The Pack servers, Click Join on the one you want, it opens a menu with a list of all the mods, Click Join and it will then install all the mods before loading into the server. If it times out, repeat the process. After all the mods are installed you can just join.</li></ul></td><td>Or you can add them one by one from the Quick List found when clicking this link! </td><td></td><td><a href="https://faq.thepackgaming.com/asa/cluster#quick-list-of-our-subscribed-mods">https://faq.thepackgaming.com/asa/cluster#quick-list-of-our-subscribed-mods</a></td><td><a href="https://772063455-files.gitbook.io/~/files/v0/b/gitbook-x-prod.appspot.com/o/spaces%2F-Lgje1lBxKKWXwqycB-v%2Fuploads%2FHlNbFrH84KHgrCwX1nS7%2FPACK_CARDS_ASA_MODS.png?alt=media&amp;token=b6264b96-d431-4fcf-aa4e-0882fb9b3d6a">PACK_CARDS_ASA_MODS.png</a></td></tr><tr><td align="center"><strong>Click here to go to our Full Rules!</strong></td><td></td><td></td><td></td><td><a href="https://faq.thepackgaming.com/rules/asa-pve-servers-rules.">https://faq.thepackgaming.com/rules/asa-pve-servers-rules.</a></td><td><a href="https://772063455-files.gitbook.io/~/files/v0/b/gitbook-x-prod.appspot.com/o/spaces%2F-Lgje1lBxKKWXwqycB-v%2Fuploads%2FCde7RVPafu2cTV0wwVbS%2FPACK_CARDS_ASA_RULES.png?alt=media&amp;token=b833c602-6136-4e0f-8a0d-8dfca66a9ed3">PACK_CARDS_ASA_RULES.png</a></td></tr><tr><td align="center"><strong>Unity Ma</strong>p</td><td><strong>ASA: &#x3C;map></strong></td><td><strong>Landmarks and Resources</strong></td><td><strong>Click here to open the map!</strong></td><td></td><td></td></tr></tbody></table>

***

## Your Community Landmarks

CC image here

### Landmarks and Places of Interest

Landmarks with GPS and ADMIN Teleport Locators. All Ark Map Residents should pick up an Awesome Teleport Remote at a Community Center or make one in your Inventory.

{% tabs %}
{% tab title="Community Builds:" %}
Here you will find Places Like the Community Center, and refinery locations. Those noted have Open Transmitters, and all are part of the Teleport System.
{% endtab %}

{% tab title="Teleporter System" %}
The PACK Admins upkeep a network of Teleporters for the use of our Players.
{% endtab %}

{% tab title="Artifact Caves" %}

{% endtab %}
{% endtabs %}

{% tabs %}
{% tab title="NO BUILD AREAS" %}

{% endtab %}

{% tab title="RESOURCES" %}

{% endtab %}

{% tab title="Points of Interest " %}
Caves, Ruins and other Interesting Places on \<MAP HERE>.
{% endtab %}
{% endtabs %}

## Useful Map for Resources and Lore Notes:

Insert Map Image here: \*Topographical Map of \<MAP>\*

***

### Map Resource Links:

Wikily -\
ARK: Survival Ascended Map Wiki & Calculators\
<https://wikily.gg/><br>

***

<figure><img src="https://772063455-files.gitbook.io/~/files/v0/b/gitbook-x-prod.appspot.com/o/spaces%2F-Lgje1lBxKKWXwqycB-v%2Fuploads%2F8Mrjs5a4lEQwX52RGOGC%2Fimage.png?alt=media&amp;token=56956fa0-c4d0-4439-be22-7cae4caf4542" alt=""><figcaption></figcaption></figure>

*All content on this page has been accumulated from several places including the Wiki, The PACK Admin Team, and Players from The Pack cluster.*


# ASA: The Center

Live June 4th. 2024

<figure><img src="https://772063455-files.gitbook.io/~/files/v0/b/gitbook-x-prod.appspot.com/o/spaces%2F-Lgje1lBxKKWXwqycB-v%2Fuploads%2FpuQa9bOrpTV8rA6S6BRg%2Fimage.png?alt=media&amp;token=920de921-768f-4f9c-9157-3db4260773d9" alt=""><figcaption></figcaption></figure>

### The Center Ascended will be replaced with Valguero Ascended when the map drops October 7, 2025.,

Please begin to transition your bases off of Center onto one of our other maps before the October 6, 2025. deadline. Be Kind to your dodos and bubble wrap them before the move!

## About This Expansion Map:

The Center is a free add-on for ARK: Survival Ascended that includes a massive new map for survivors to explore, nearly double the size of the playable geography of the standard ARK Island landscape making it about 70 sq. kilometers. The Center complements the current ARK biomes with a rich, hand-drawn Tolkien-esque aesthetic. Filled with stunning lighting effects, lava rivers, giant picturesque mountains, misty floating islands, ancient underground ice caves, and more.

The Center Ascended isn’t just a map; it’s an entire world waiting for you to explore. Embark on this grand adventure and discover a new dimension to your ARK: Survival Ascended experience!

## CREATURES

### Standard Creatures:

ARK Normal Creatures spawning on The Center:&#x20;

{% embed url="<https://ark.wiki.gg/wiki/The_Center#Creatures>" %}

### ASA exclusive:

Pyromane; Shastasaurus; Archelon; Cat; Ceratosaurus; Deinosuchus; Deinotherium; Gigantoraptor; Xiphactinus

### UNIQUE Modded Dinos:

See[ The Pack Unique Creatures and Where they Spawn!](https://faq.thepackgaming.com/asa/cluster/settings#asa-dinos-and-where-they-spawn)

MOST Modded Dinos can be transferred to any other map, **EXCEPT Aberration.**

* **Gryphons**: Both Mountain and Artic Spawn on Island, Center, SE, and Extinction. (Mini Gryphons are available as Patreon Pets.)
* **Draconis Glaucus**: Draconis Glaucus will spawn on Island and Center Only. And can be transferred to any other map, **Except Aberration**.

See Aberration Rules here:

{% embed url="<https://faq.thepackgaming.com/asa/settings#aberration-rules>" %}

<figure><img src="https://772063455-files.gitbook.io/~/files/v0/b/gitbook-x-prod.appspot.com/o/spaces%2F-Lgje1lBxKKWXwqycB-v%2Fuploads%2FJ5PA6n2zh3wkS0yTshlX%2FASA_Shastasaurus_2560x1440.jpg?alt=media&amp;token=2540e61b-1f47-4528-9187-e5a0304dbc9e" alt=""><figcaption><p>Shastasaurus the Community Pick for Center.</p></figcaption></figure>

***

## Joining ASA: The Center Server

<table data-card-size="large" data-view="cards"><thead><tr><th align="center"></th><th align="center"></th><th align="center"></th><th align="center"></th><th data-hidden data-card-target data-type="content-ref"></th><th data-hidden data-card-cover data-type="files"></th></tr></thead><tbody><tr><td align="center">𝐀𝐒𝐀: 𝐓𝐡𝐞 𝐂𝐞𝐧𝐭𝐞𝐫</td><td align="center">Server Name: 𝐓𝐡𝐞 𝐏𝐀𝐂𝐊 𝐂𝐞𝐧𝐭𝐞𝐫 𝐏𝐯𝐄(𝟑𝐱𝐇, 𝟒𝐱𝐗𝐏, 𝟏𝟓𝐓/𝐁)</td><td align="center"> IP: 66.153.149.147:7679 </td><td align="center"><p><strong>How To Join The Center</strong><br><strong>1.</strong> At the main screen when Ark opens follow these steps to join the map that your character is on:<br>2. Hit tilde key to open the command. Just under Esc key on your keyboard<br>3. Type or copy and paste this command just from the open part!!!!<br>This will direct connect you to the servers without having to go through the server select screen.</p><p>Center – <code>open 66.153.149.147:7679</code></p></td><td></td><td><a href="https://772063455-files.gitbook.io/~/files/v0/b/gitbook-x-prod.appspot.com/o/spaces%2F-Lgje1lBxKKWXwqycB-v%2Fuploads%2F01sAIGDOIjObtxssxPjV%2FASA_TheCenter_CommunityCrunch_Wallpaper_2560x1440.png?alt=media&amp;token=98544611-2291-41a0-8687-43ed9cc91927">ASA_TheCenter_CommunityCrunch_Wallpaper_2560x1440.png</a></td></tr><tr><td align="center"><strong>ASA Mod Guide for The PACK</strong></td><td align="center"><p></p><p><strong>There are two ways to get the mods for the server.</strong></p><ul><li>Just load into ASA, go to the server browser, find The Pack servers, Click Join on the one you want, it opens a menu with a list of all the mods, Click Join and it will then install all the mods before loading into the server. If it times out, repeat the process. After all the mods are installed you can just join.</li></ul></td><td align="center">Or you can add them one by one from the Quick List found when clicking this link! </td><td align="center"></td><td><a href="https://faq.thepackgaming.com/ark/asa-cluster/asa-settings#subscribed-mods">https://faq.thepackgaming.com/ark/asa-cluster/asa-settings#subscribed-mods</a></td><td><a href="https://772063455-files.gitbook.io/~/files/v0/b/gitbook-x-prod.appspot.com/o/spaces%2F-Lgje1lBxKKWXwqycB-v%2Fuploads%2FHlNbFrH84KHgrCwX1nS7%2FPACK_CARDS_ASA_MODS.png?alt=media&amp;token=b6264b96-d431-4fcf-aa4e-0882fb9b3d6a">PACK_CARDS_ASA_MODS.png</a></td></tr><tr><td align="center"><img src="https://772063455-files.gitbook.io/~/files/v0/b/gitbook-x-prod.appspot.com/o/spaces%2F-Lgje1lBxKKWXwqycB-v%2Fuploads%2FnOcl1K07RRpwAMY5jO8H%2Fimage.png?alt=media&amp;token=838a50fe-2f6f-4981-be68-c54acca4a4f0" alt=""></td><td align="center"><strong>Click here to go to our Full Rules!</strong></td><td align="center"></td><td align="center"></td><td><a href="https://faq.thepackgaming.com/rules/asa-pve-servers-rules.">https://faq.thepackgaming.com/rules/asa-pve-servers-rules.</a></td><td></td></tr><tr><td align="center"><em><strong>Unity Maps</strong></em> </td><td align="center"><em><strong>ASA:</strong></em> <em><strong>The Center</strong></em> </td><td align="center"><em><strong>Landmarks and Resources!</strong></em></td><td align="center"><em><strong>Click here to go to the map!</strong></em></td><td><a href="https://ark-unity.com/ark-survival-ascended/maps/the-center/">https://ark-unity.com/ark-survival-ascended/maps/the-center/</a></td><td><a href="https://772063455-files.gitbook.io/~/files/v0/b/gitbook-x-prod.appspot.com/o/spaces%2F-Lgje1lBxKKWXwqycB-v%2Fuploads%2Fq54BNK5sONf5WEUszi16%2FCenter%20map.png?alt=media&amp;token=0c210ff3-9417-439b-8c5e-bb8d11d8e160">Center map.png</a></td></tr></tbody></table>

***

## Your Community Landmarks

Picture Placeholder.

### Community Builds:

Here you will find Places Like the Community Center, and refinery locations. Those noted have Open Transmitters, and all are part of the Teleport System.

{% tabs %}
{% tab title="Community Builds" %}
Here you will find Places Like the Community Center, and refinery locations. Those noted have Open Transmitters, and all are part of the Teleport System.

* CC and Admin Lodgings      48.6|78.0
  {% endtab %}

{% tab title="Teleporter Network" %}
The PACK Admins upkeep a network of Teleporters for the use of our Players.

**Center Teleporter Network** for the use of our Players.

* ◉ CC and Admin Lodgings      48.6|78.0
* Silica Pear Bay (PRA) (*86.44|75.69*) Run out onto the shallow shelf underwater.
* Skull Mtn (PRA) *(64.8|69.4)* {Obsidian and a bit of Metal and Crystal}
* Alphy's Favorite patch. Redwoods at *(85.99|44.15)* on the ridge above Ascended Wolves base. {{Rich Metal, Crystal, Flint}}
* Oil Node bed. *(87.43|78.96)* Deep in the water under the end Waterfall Redwoods){{Underwater}}
* Red Obelisk Return Teleporter at 11.87|54.20
* Blue Obelisk Return Teleporter at 51.5|74.1
* Green Obelisk Return Teleporter at 36.77|14.82
  {% endtab %}

{% tab title="The PACK Admin Bases" %}
The PACK Admin Bases and any Outposts they Own.

* CC and Admin Lodgings      48.6|78.0
* The Pack\*\*ADMIN\@Alphy's    &#x20;
  {% endtab %}
  {% endtabs %}

### Points of Interest&#xD;

Caves, Ruins and other Interesting Places on .

{% tabs %}
{% tab title="Points of Interest" %}

{% endtab %}

{% tab title="Artifact Caves" %}

| Name                                    | Lat\|Lon   | Notes                           |
| --------------------------------------- | ---------- | ------------------------------- |
| Southwest Trench (Brute)                | 54.6\|62.7 | (Underwater) {{NO BUILD AREAS}} |
| North Ice (Clever & Devourer)           | 35.9\|34.4 | {{NO BUILD AREAS}}              |
| Cliffside Cavern (Cunning)              | 71.6\|91.9 | {{NO BUILD AREAS}}              |
| The Center (Devious)                    | 11.2\|67.4 | {{NO BUILD AREAS}}              |
| West Lava (Hunter)                      | 59.8\|22.4 | {{NO BUILD AREAS}}              |
| Jungle (Immune)                         | 35.1\|14.5 | {{NO BUILD AREAS}}              |
| East Lava (Massive & Strong)            | 18.9\|29.7 | {{NO BUILD AREAS}}              |
| Underground World Jumping Puzzle (Pack) | 53.4\|55.9 | {{NO BUILD AREAS}}              |
| South Ice (Skylord)                     | 15.8\|50.5 | {{NO BUILD AREAS}}              |
| {% endtab %}                            |            |                                 |

{% tab title="Obelisks and Boss Arena" %}

{% endtab %}
{% endtabs %}

### Resources and No Build Areas:

{% tabs %}
{% tab title="Resource Sites" %}
Protected Resource Areas! (we use PRA for this designation)

* ◉Lava Island Foundry (PRA) at (*14.47|48.37*) and the surrounding resource nodes. {Metal, Obsidian, and Crystal on Lava Island}
* ◉Tree sap Farm at at *(83.62|45.47)*
* Silica Pear Bay (PRA) (*86.44|75.69*) Run out onto the shallow shelf underwater.
* Skull Mtn (PRA) *(64.8|69.4)* {Obsidian and a bit of Metal and Crystal}
* Alphy's Favorite patch. Redwoods at *(85.99|44.15)* on the ridge above the middle waterfall Redwoods.
* Oil Node bed. *(87.43|78.96)* Deep in the water under the end Waterfall Redwoods){{Underwater}}
  {% endtab %}

{% tab title="No Build Areas:" %}

{% endtab %}
{% endtabs %}

***

### Useful Map for Resources and Lore Notes:

{% embed url="<https://ark-unity.com/ark-survival-ascended/maps/the-center/>" %}

<figure><img src="https://772063455-files.gitbook.io/~/files/v0/b/gitbook-x-prod.appspot.com/o/spaces%2F-Lgje1lBxKKWXwqycB-v%2Fuploads%2FvRWiD2cnqEgdyUzVNCf1%2FCenter%20map.png?alt=media&amp;token=dfadaa1a-6b19-4d0c-9517-012d41b23e2a" alt=""><figcaption></figcaption></figure>

***

<figure><img src="https://lh7-rt.googleusercontent.com/docsz/AD_4nXeN-ooW4HLRMm0VUuJhggu7pGAA182adNaKvKVgM4Jx5MD51vJT3EYQkwblETC7ggY96Yz1D5lSwQQY0XMREpugDsTDJXy2fYcyLU-5OSXvJ43Tslyukwnb6Z6U-fXtzqbbj29n4Q?key=GlTRPaxhvh8su6YjSiXOAg" alt=""><figcaption></figcaption></figure>

All content on this page has been accumulated from several places including the Wiki, The PACK Admin Team, and Players from The Pack cluster.<br>


# ARK Franchise Player Guides

Player Help Guides

## **Navigation of Pages:**

<table data-view="cards"><thead><tr><th></th><th></th></tr></thead><tbody><tr><td><strong>Left side of the page</strong> <span data-gb-custom-inline data-tag="emoji" data-code="25c0">◀️</span></td><td>Use the <strong>></strong> to open any pages in that section when the Header shows a <strong>></strong>.</td></tr><tr><td><strong>Right Side</strong> of the page <span data-gb-custom-inline data-tag="emoji" data-code="25b6">▶️</span></td><td>Click a header to go to that section of this page.</td></tr><tr><td><strong>Features of the page.</strong></td><td>are in an <strong>expandable box</strong>, please click the <strong>></strong> to open the expandable dropdown.</td></tr><tr><td><strong>Hyperlink</strong>s are often in a <strong>card form</strong> in the website.</td><td>So <strong>clicking an image</strong> will often take you to a specific page for information. </td></tr><tr><td><strong>Steam-link</strong>s are often in a <strong>card form</strong> in the website.</td><td>So <strong>clicking on a server card</strong> will take you to the Server.</td></tr></tbody></table>

## ARK Franchise Player Guides

<table data-view="cards"><thead><tr><th></th><th></th><th></th><th data-hidden data-card-cover data-type="files"></th></tr></thead><tbody><tr><td>ARK: Breeding Guide</td><td>Both ASE and ASA included!</td><td>Click to go to the page.</td><td><a href="https://772063455-files.gitbook.io/~/files/v0/b/gitbook-x-prod.appspot.com/o/spaces%2F-Lgje1lBxKKWXwqycB-v%2Fuploads%2FMYkXNQqx48nRBRvGn37Q%2FBreeding%20basics.jpg?alt=media&amp;token=78a9c3bc-2f26-4e92-a265-7949757f6ac0">Breeding basics.jpg</a></td></tr><tr><td>ARK: Lore Note Locations!</td><td>Both ASE and ASA included!</td><td>Click to go to the page.</td><td><a href="https://772063455-files.gitbook.io/~/files/v0/b/gitbook-x-prod.appspot.com/o/spaces%2F-Lgje1lBxKKWXwqycB-v%2Fuploads%2FXph3liQDZxdkcjzUT0Yh%2Fimage.png?alt=media&amp;token=e55c8e37-4622-4f30-b03a-422c88e4eb79">image.png</a></td></tr><tr><td>ART for your ARK!</td><td>Both ASE and ASA included!</td><td>Click to go to the page.</td><td><a href="https://772063455-files.gitbook.io/~/files/v0/b/gitbook-x-prod.appspot.com/o/spaces%2F-Lgje1lBxKKWXwqycB-v%2Fuploads%2FZMPDzYAZmSwj1dDJSq2d%2FARK%20PNT%20TUTORIAL.png?alt=media&amp;token=ab7e29aa-6f7a-4129-ace9-1c6eeb7975a1">ARK PNT TUTORIAL.png</a></td></tr><tr><td>ARK: Custom Cooking Recipies!</td><td>Works in both ASE and ASA!</td><td>Click to go to the page.</td><td><a href="https://772063455-files.gitbook.io/~/files/v0/b/gitbook-x-prod.appspot.com/o/spaces%2F-Lgje1lBxKKWXwqycB-v%2Fuploads%2FpA0VF2IkHHIDVzn08KOQ%2Fimage.png?alt=media&amp;token=14f13d8a-d581-4818-9a64-20e39fec6b12">image.png</a></td></tr><tr><td>The Story of ARK: Survival Evolved!</td><td>Click to go to the page.</td><td></td><td><a href="https://772063455-files.gitbook.io/~/files/v0/b/gitbook-x-prod.appspot.com/o/spaces%2F-Lgje1lBxKKWXwqycB-v%2Fuploads%2FcGpr8ZkFoTtKl4UuGwSh%2Fhq720.jpg?alt=media&amp;token=f6a3c167-1768-4271-b986-77ac4d34c0d9">hq720.jpg</a></td></tr></tbody></table>


# ARK: Breeding Guide

Pointers and information for the players who want to breed on our Cluster.

#### Our Clusters are set up for Breeders to enjoy the experience of Breeding "That Ultimate Dino" that you've ever wanted. To help this along we have added this page and some pointers and links to videos to help the newly inspired breeder, or the 'Old Hand' breeders to get their "Dino Groove" on.

## Creature Levels in both ASE and ASA:

<details>

<summary>Creature Levels:</summary>

**Dinos/Creatures spawn with a level of 5 to 210 in our arks.**\
The following dino/creatures are an exception:\
(Other levels apply like every other dino based on difficulty setting however.)

* ![](data:image/png;base64,iVBORw0KGgoAAAANSUhEUgAAABQAAAAUCAYAAACNiR0NAAAAAXNSR0IArs4c6QAAAn5JREFUOE+F1Evop3MUx/HX5H5n3OVuXHO/JBZSkhILk4UFS0tNTaMkC5SVBQulKSU2djIJxdQUFsptyig1pVzK/TaGITJ66/z+/V3G/1u/nt/zPOf5nPP5nM85q6x89scvy8JuxvM4H9twKQ7Gq8WsWgFvH/w2McfiOlyDp7AGJbsY3+ANvPh/gAfgIHyN29H9WVPZezh1AAM7Ea/jgT0BHo7vp7ILcMvQC/hkfIIP8AOumCT345n/AjwUOwbsTgS+qDT9duItHIMTkBQ/4kk8+0/AvbAvduE+XIX356OoHY0L8dnElKj4I7AbGwPs18NO1X01FKruXLyA06abh+CPqTKAulvCKuz6eGDLKS6avh5ptzfexPFTxc/4AmdOI7biHtwxoM8tKAd604i8doR/d7SKVp4LdPVQ2z46x+x07Dde3bQAvHs++nbskOAfDb3zRpLefTiV5M+qTZIwov4pHukmY96IcwbgHdwwupX5d3w+ukU3o1dpgL2r8pOwqUYGmPsruxEqsI/7X4I6+zQuG3F7l/fS7vLp+nHTkA2L0VuHq/HlaJbXss8pkyAqgWSjdH0Ul0ziJ/DKsvFdXYW3TQXZ4TCkTz68FdkksKyTflFLt5pxF5KnptXUJNgR4FG4cvRo2NOioKhmmxJtxvU4Y4DfxoMzLU3V0jba0yynx9kTeNE0KMNn5q4P4bVh0Cj2/K8TYBQPHGppee0YNxpp2bxmnZfwMWpC2m2ZDZQ8S2dRYRR/wsNjo+5/HfPWlOwRtdzwHdosrbVsVdy/ABvuApvfFmj2aIlmnzoaWGvrSLyMx6YxeXKJ7vKN3fKs9K73jus3rrDNk6nO/u38CcjbmCS3645yAAAAAElFTkSuQmCC) [Wyvern](https://ark.wiki.gg/wiki/Wyvern), ![](data:image/png;base64,iVBORw0KGgoAAAANSUhEUgAAABQAAAAUCAYAAACNiR0NAAAAAXNSR0IArs4c6QAAAptJREFUOE991VkI5nMUxvHPjKWxZs++ZM1+IZGSGzdKisgNKUW2ciERN5KllCLlRrlwQS7EhQuTG4OMNSJLYpiUfcs2lkFfc956m8yc+vd/+/1/v+f3nOc857wrbIqDcQlWYBW2xT/4DvdgT/yAjbN/i68AFnEdXsDJOGJAv8S9s2EH7Iif8fvSuZXYBr03LhhtwMXYDYdjlzlwENbiJTy7BBLjzv6JH5fptng9dp8Ph+IM/Ir3cSR+wmf4Ap/gVby7Wc5dfCzWB3gH9kYsV+MNnDhaxuAvnIU9hm36FqW4HY7CL8P4mQAfxPZ4e7QIvJT/xv5Ix7Q9YViuwbk4YJivwz74Aw8EeB/2wkdz85mjY4x7YvLbFGPXYd566X+DACPxFJ4L8LapbNX9AF9PKqWbNl1UmqWXtsdMBlmqi16eSzu7NsAbh/6pU7U+dHDfWc9/RSn1pFlydFGMXxuW6fgf4M34FNeOTi/ieRw4TzYq2vM69sNOU6AyiHnfIrEmwKumE7JLKXw8muw8OmXaKl0HFRWwwzHPg4HHvHgzwLtxWujjuaMn3cROx6/GCZdNB6XZ07hhvJoE6X4/LlwAHoaHcdFUrk74fABKK2OvR+3Xelm0/haOG1dk9lUB3jJDIF8dgsdw+tKAOH/SqxD1eJnchA+XuuUknJL9ArxmWi/x69kOPoRbcfmYuQvOGcsshkVmbm9T6dsFeIB3DbN3cOeMsexw6djicTyCq/Ho9HJggSzGWVLk1Q0LwDolP6VJ0+VJnIcncPsUIH/2O32/H3abzYhNIyi7nI33xmP1aZOjar4y+jXWYl9kp2bi/8ZiwF4wHZAF6uVcf8WwvXKJeROnlttiLE/sqnn8TJwmc7bIi6Uf2zqiImz1b+BfT1aqe5WHErAAAAAASUVORK5CYII=) [Rock Drake](https://ark.wiki.gg/wiki/Rock_Drake), and VoidWyrm - 5 to 266
* Specific event creatures like ![](data:image/png;base64,iVBORw0KGgoAAAANSUhEUgAAABQAAAAUCAYAAACNiR0NAAAAAXNSR0IArs4c6QAAA15JREFUOE9tlHtoT3EYxj/nN/xmzIhpN35sC6OYDGOyEZFbwtxFCKXFQrlEiFn4T5HlVtgwSm5JyRhzyS25G7lu42du29ydoyfvtOTU6VvnfL/P93mf93kfhz/PbKAHUA3cAfYBoUAc0BzoDzQCPgItgKfAaeCqnf+7OMAKYBLQzr4+BPYDv4Bo4JZ9rwI6A62BSqAGuA5EAJ+B78A1AR4Dhtoh3bgZ2AnMB6KAK0Af4L7taQnkGXg8MB7oBHwDTgkwAKy1ksTiOfAVaAZcAgbaIQFKllhgJpABPAY6GOvLwFIB1n0E/Nr0KwHeArutrKPANuAeUAgMsmqeAeHAegEJMAZ4A3QFuhszbRIjn7H7AJTaf2nVCqgPbDCw3sB2VSZAiaruDQcmmDai/8X0Faga4QEpQFNAF14w3URE4CuBMAHWA34C04AhxlC2kV6fADXhpb1h9l86+oH3QHvgATBXlhKgGLjGcKz57gRw0spUF3WhtFOjJJFKltaqYjJwA1gtVwhQdH8AbYE51lmVpe7L6PKhDN6mjqnlhiIgDRgH7AV2iYwA9QpA9HOAJ9ZNWUNTcRc4YgclvpifNW+OABI9zxvqOI4GwV9rG+mkTq8CugAjrbxsG7Md5i0Z+qKXs+SIs3Rdlu1R2YtnRUQkBPz+6lrAJtYATcRyo19gEyPzrjHAQz6f753ruueB5J4+369Ay6jYL1HR+4/evHa41oe1q0JARt4ENAAOmu/0X1Lo2WNryYKUlKxkn9e26eugPyQ8vOrux2+FC1+Uzqg7KQLU0CtZ5Ec16hTQEwhKS8dxZnie552/WByanNRx+PvKSh4tXuY2Olfse+iGlE0JvoqtCyg/NgTUwYk2IY/Mb4oupUuCUiln1cpQx/NiymtqcMsqaH3gEIlpvarSz5zO/HeWBSjPiV0+kGReVDwpTRRnAwIx0bdflZVH/fzjAndYSIOwzOlTP43Oy5v3L6Ak0pgpcZYAC4By01Z+VfOk76Jp2dlP/RUVbbYWFLipjrMlPj6hJP9x6fj/AUaaZlOAjTbDGi0livJP6ZOVmZHRuLCoqLrvwH5DRqWlH09N73s5tV//1P8B6qB0HKx8syiTlmKosRPz4sjIyMRgMFgaiIubuD43N7dLt65XOiR1GvMbuUL6qbVsJFcAAAAASUVORK5CYII=) [GachaClaus](https://ark.wiki.gg/wiki/GachaClaus) - 50 to 900
* All [Corrupted Creatures](https://ark.wiki.gg/wiki/Corrupted_Creatures) - 1 to 500+ (If spawned from ![](data:image/png;base64,iVBORw0KGgoAAAANSUhEUgAAABQAAAAUCAYAAACNiR0NAAAAAXNSR0IArs4c6QAABTRJREFUOE99lGtMVEcUx8/cfT+BZRf2hctjBbQKoUQQaHGNKNoGSFHqA5MasbZpNNp+6RfTpB9M+8nYNqZJWy2JomlJfWAkVakSghi6YiuoQFlW2AWXfbL37l527957d5pLovGRdr7NOTO/+c/M+R8Er4zKgwclZbLszJ+/+yq4pv7d1rq6N323/xiscY2NE+/v2BqSgO3W2bNfehyt7db+i11zr+5HrwZa9+41XTx3zrf3wEe7KZo5waZSEjLBZsSoONJnyjmeww8Gfr9cLeyrbGpSjly9uvQi4zXgno4O2/nTp2d37v/wQjLJ7BIhgDgvBZbDwNBB4FiWl2o0RwYv/XqqbnOz+c7Nnqf/CWxraxOpLBZN58mT0Xfadk+oVdqS0pV2btrrE837QyCTQBr4lCi4sPDb/Tv9OzY3N5tv9vwP0OFwiM3mwhXnz59xb9mwqddeULiNExHgHP0bAqEQZKi1kG+yApuMn7o5cPtQjaPRfrf/+jQA4GcqX7pyc3Nzbk9Pj19IWnL0HxcUFJ2Y8/kUZCwGSERghAikUipDntnZ9wBgUFhXVlubMzo0FHgN6HA45P39/Yxw2rbW7dcQxlU8l9IHfH7AmIMUj0Eqk4FcJufIJOeXSqTDD+7c3q7PyzNvXL/e393dzQvQ5wprt9TmDN0YCrR3tH8wNe39yWo0it8oLYahISfm0hwqNFnAHw5jpVaNnjz1ARkNL5oloQ0DI/6xwsrCDPeIm3wJWLRuXd600+ldW7n22xhFH64oL0uXFNvRwOCfSK5SwZp8G4z+MwVUPIZTGKPFUBDoWPRoNBj9JicnJzcQCCw/1XOFeXZ7kdflms7Q6340Go0H6mvWY5VKiYbvjwGHMBAIIBAIAGYx6A3ZQJIkUBR1zO/1HrcUFhYrCGLW5XIxAhBVVVXpMMZKp9PpzTabvy4pLvq8bFUpSGQSePBwEkLhAIQXnkKCSYEm0wAmqwXIaBSSbOqYd3zyuKBMo9Hoi4uLSdTY1qa73t0dEYLl9Y6dLBX/xGrJrjcZcyGdBnj4eAJ88/MAmIM4TYNMoQVbUQGmaRpFQhE3IGJel2v4YdLpPGctL7egLS0teTeuXPFu3Lq1c2bWuyuVSMqK8i1gs1kxw3Ho8YQLpsYnQKVVABmhQKnSwspSOyapGApHSBCJpKDJ0tyaGRvdJPw4amhoWNHX1+c59OnRwbvD9+oWI4u8REwQEjFCBr0ewotR8Mx4YLW9CGY8XuARArPVDL7gIhBSKSeTSMViCTE+9df91ZCfn4na29utXV1dc4c/O3r50cRkS1ZWFhaLRPBkxoOoKAl+nw8QIHirvBzm/EHwUxHQ6XTAAoFFEjHwbAollxJnZibHOwoqKmxo3759xs7OzgWDASqyDasuGYwmm9FkxGq1GkiSQuHwIjBsCvy+BUgmEyCTykGry8Y8zyIyGgGOYcILXu9+AOjR22wmJPhXqVRaent7Z2tqqr+g6NiRWIzWKRRKyNRl8VK5koiRUXC7poFhkoJpsVSuIAT7ppJLj1JJ5hSk4fs11dW5D4eHw8t1WNlQmTHSNyJYJ97S0rRndHTsCBWPVbE8DwyTAmYpsVywhIgAQAgQIkAklS5oM3M6gnPuXkFZCM0mYAaizwu7sbFRNzAwoEwkEstduGRVyTU6Tpew6bSc5zgFx3IawedisTiQJkTDKZ77JR4Mdssz5flqsTocCoViLzlFmAgNwuPx5Lnd7qkXm+a90cnSnTua3mbTbNLjenL2WU6lUhlpmhY6NvUs9i8gHmovaka31gAAAABJRU5ErkJggg==) [Orbital Supply Drop](https://ark.wiki.gg/wiki/Orbital_Supply_Drop) or ![](data:image/png;base64,iVBORw0KGgoAAAANSUhEUgAAABQAAAAUCAYAAACNiR0NAAAAAXNSR0IArs4c6QAAA85JREFUOE+VlEtsG0Ucxv/rteP6ET/rbJImIVEWZNVxk9YQxxDTTRslbVWBVGkPSEWqgHtFQaLlBJeKA3CBAyAhIhUEUuCAEKSqgmQSg2OJJamxXUM3xtk4xmvXr/Xb612jjUhEm8Slc5nDzPz0fTPffAg8ZDidTp3f7+cAQI8Z+/vZ3GbQ4XAoKIri9zuKPBx4GvP7f2SPjUy81azV7obptS+OHiW04bCn9MhAkiTRaDSqpCiqMn7c/TNf52+shlc+stlcplDIl31kIEEQhzweT+2FVy5jsd9ue9lU9mo0HvhmbIwwrK15CgDQehDa1vL0NKlfXJwvXH7tjWdXl6mvo/HYtXiC/pQgSG2xGK1TFNV8ENoWOPP0TNetX26lZmcvvFjLFz9LpdKf3/lr7X0ACACAdFZSuDNvi20HlLlGXT2+276tUfvEFYva+F6Ry1P+O76zAJDuNnXbktlkCABQABB2rB8IHBgYMDIMk5M26vWWl609j39cqpS4EBNwj46MD+U4DmGYyHc4jitpmq63BTrAoVDZVVrv795cr6nv7bJQR0cHbFcaPC8EN8JzmAXTIjKYo2ORn/4PEHHizk4/7efMZuy0BlVflSkU6HDPY1MgAmwk4zURxC+jiT9eslqt5kgkIsVn97X3WMawYxqWDZQlC2NPPPmhKAonqpVKX7cR6+9U64BJMuvBzcAkACRxHLfQNJ3+b3T2AEe6RrBgKsgaNOZLfdiRV5GOjrxR1Wk3qPTGYq1UWg4sfdBsNt6cGJwYXImtJACg0Q6ITDum+xepRWYIw28YtYaLAiqW9Fq91qDRA5PY5OiNP8PyFvpOXsh/iwGmYYHddrPvoxAEIVeD5fAPnvmky+4OHNaa7IUqB+VSCeSovFXkikg6m86n6+zzALAEAAYAyB8InJycNHq93lyr1TrkcpyMa2Uqc6lSFoUGL5PLFCJf52UMG8umauxFAFgAAB0ASE20v8IzxJnBm56bsSn3zLVKuXZdLG9fT0un6QQ1qoZUJo2s/33313vV9FPSQi/0qhOQqBwAJNFLpMYyNz+XPD9z4Xsuz53jMgVB2dGB8HxDZuo0QCafbWaqhQUmST9n09lMIS4kqZP+816FLpdL5fP5qkqdbvbUiZNfNeuCIZvLQY+pC5LphHSPS5lc5pNsk9tsNmtL/wZasnBf4+zGBsfPKml6QfpCR55xTF1v8cJQtlAYV8rlG/cyycBWfovckUG6SFWoEBLC4fB9kdlTDu7jbsvy6vJuUId7ra+vJyLv7oCG+2w4Eq+naKClthb3K9h/ANVLwCTOwQWyAAAAAElFTkSuQmCC) [Element Node](https://ark.wiki.gg/wiki/Element_Node), depending on difficulty.)
* All [Tek Creatures](https://ark.wiki.gg/wiki/Tek_Creatures) - 20% higher level (7 to 253)
* All [Titans](https://ark.wiki.gg/wiki/Titans) - 1500 to 2350
* ![](data:image/png;base64,iVBORw0KGgoAAAANSUhEUgAAABQAAAAUCAYAAACNiR0NAAAAAXNSR0IArs4c6QAAAmJJREFUOE+N1Fvoz3cYB/AXWYwxGm6UccXVNjcIOcQFc6rVkpSyiRvHXCCJVpO4YDXZpJlLXNiFMOLCWqt/szVZLhRzuJCpzfkwa3r/e77//fwdn/rW93N6f57n/X4/ny7+jz64jf9a5l7ntwe64H4252coLtbJt3EH/74OErpXAo8wAz0DuLQWjuFMJvFPfS/DfQO98DfmYRraAjgH71a2v+A4utb4RZkGLBffxCR8WHR9HsCZVeI9jMWvOIy3cPc5nHZDb/yFKZhelZ3FwwC+h5HYXbcNxklcqYMRqolkHrBkNg5z8Qe2YhauB3AQVmNbiZMShuGrQhlQfDbqByyxGSl9VY3X4ecAJvbiR+zCZHyCiJT5zjEcozEB2/EbPqjqvmgAI0x/7KjTR3Aey4qOkH4O+7CwFH0fHxfnUTl8f9cABieHAxKw3wtgP+bjWgmXci9gavluSVHzGX7K2QDGzI38o4qbH/BmlTMQC7C+9qUJIkC43oDLpcOXTadEuVghbo/J473YYUzZZw9ywWJ8jU+xNhbBN5XxCdyK1ZqSk017L2IihpS/MrexDsVWV2scB6T0LS2KpWvutnIY5yfb9HIIT/mZu4SDlVXabGdLySvRD2mKZNz+OLRGXo4HWFRA32MTjuJUy8aPqqsaDwan3acvAgyH43GoLHK6/nMmPOeFSjdlvRG1/b7OgCk532OsQd9SNqS3YTaW40CVnjc05Wb/cwEzmV5t+jflpvkTeTD+xDtIm4WeRCjqiM4ZNgshOq9JYgVGVJ/nIfi25lv3vBIwFyWTG09r1jEKFVH8mXgCff2SlzfTwiUAAAAASUVORK5CYII=) [Jerboa](https://ark.wiki.gg/wiki/Jerboa), ![](data:image/png;base64,iVBORw0KGgoAAAANSUhEUgAAABQAAAAUCAYAAACNiR0NAAAAAXNSR0IArs4c6QAAAnBJREFUOE+F1F3Iz3cYBvDP493jbXmXCFvzNnNAScLBjqSQHExZW+10TrYc7ERtTqQcmHIijXCmUE60MdIIIaHYhNqB4bF5nfeXrqf7t7w8Ht/617//9/u/7uu+ruu+W7z79MNTPKgnn2IkBmMo+uMw9mIIbuRdSwd4XdAXd+puBsbjET7GCBzALOTt8nqXAnfeBOyGF3iGsViEPjhSLMKyB9ZjOhbiLNYUaM9XAbvjSV1MLQbPq6XL+B7/4R7O4BhWYQJ2Yxt6NYChHnaPMRPjMAg/dSDJdxiNm/gRX6A3NkbCBrC9f8zDZLThCu5iCjbjEwwv3dJ6SAzE/eoijFsD2LQ6DEtLw6vV1pdVPYBLyvHIcqp+X1Ya/lCdtAMmHmEyt9pNLH4pM8I47KPbBzhRBGLMBaRw2N7CphRpWg7oHEyqjJ3Dh+V0AKPRUfxZ36cVeIh9VBKtTgIawNmVsT/K3QT1YWkWDWNQNLpUGcxdLyyuGP1WLvdtAD8vhl0xCheLSQRPDsN+DM5jS7GK9qeLwB5sjzwNYP7wGf4tU/IwDBLo21iLb0v4Q7hen2sIiZV11z2A0aeZ1zdjF3ZhuQ7flAwHkRb/Ks0jRRjGzLYAJk8BTaW4l5NoZPwy03/jZ3xVC+D3MiEuH0cKpP28f97RcmhYplDMyBbJaC0ogAxAYrIB+2vBhEiWR4fbpgEM4wH4p1gkUsln2O/Czspm5jsj2346Y5g2ApqIbC1nTxbQrzV2Cfz/YO8DbK3tkmUxHxMrhyvQs5ZJDHvtdMYwhoRBzMhiSOsZvWzojGF0fOt0BthE5utapjuwrxxtkvAW4EtY7o1oeOL4zQAAAABJRU5ErkJggg==) [Leedsichthys](https://ark.wiki.gg/wiki/Leedsichthys), and ![](data:image/png;base64,iVBORw0KGgoAAAANSUhEUgAAABQAAAAUCAYAAACNiR0NAAAAAXNSR0IArs4c6QAAA9FJREFUOE991Xto11UYx/HX+f7mNrc5m7uQzHXVaSFd7PJHZBlJZVFQYvdSSYyoFimRGtUq0Mq00sy0G1pYRH90NYoCqYyiQjMrumHlrznn3KbOtrl2vvFdLsi089fDeR7e53k+z3nOCQ6yUsI8ql6n61s6s5BlXFDK2G7J8GaG7RVLh/H+XFbO5IgVbA2k4UDeWoreoXwpOzLfUqZETh8iic3S+hZp1YmS9b9Kz+qQ9jzGOVncrVQvofVfwNWUXk8X4nJO/4mphVSMZv0mBg9mQifhIh5ex7gmrox8tpqGDPogQ/8BLqPs5v3lvSR36TbppA6xs5NVi/lqGsuPlDhM7K6T2zjZ+LfvsO6pVsaczJu3MXcKZf3AVyh8kmQd3S/KTd0nPbGdilmK7g668gOypMqOf9AfczrFo3vJPyS3ZpV0YpuYzOqvWq4fmNWfaXY706skE8pp7xU3FLPrT8n4BnH2ai4skNS3i/vyjBsiKflZLCin5wTens7LjQwLA6U+zXFbJA2VFJeSP1bY8Lm+WxKh/EJhzVviBYV0tbBzDBuLJZXviZMr2byIK7PEHqEqNFLTSMur3LxFmNAhrajj9UpJbZP0ql0U/SFt7qB0DN92CH1t0ljLD6Mku7YyrlvM38nsmQNNWUVtuWTGR2JtB1U1bC7i5GJhXDPJTmkcyzdHSX7bTl+TeOpQ1vcRBwmnldDSIL10JEX9Gi7i2oRTCuU2fK3vzMjhg+kdItRvltY1UTSR5mOE1qOEtd1ia4Gk4l3x/AJKTpV8eoV40w2ZhhnwPu4KwuQe0u3Smjrh93ZpUsTeSNnHHP8lJSP5/TrJB7+II8oZOlry4yficZW8spD5mXz9wNuYXMrVhZLWvLjnXLZ8T28jKzP//cKH90jHZ/YM9hxGW7Wwp4LWr6Xbl+5vykJKwyUMeYM9B5vpgb17hfUPSM8oJjYInSP5qEbIfyEe3sIbT/HcDEY8Qz6sYNBGyjrIlVKcQWroLSMuZlArTbPZsJiT6uidJuzOsW2wsKlAfG8Wq6ZQOJH0Rnr/8zgMZJVNz+V/H7B7Kj+sYdQEWuqFwnbpb/UsamR1Ft9IeSO7M/uQwOcpnk4v+i4m/yu1lwlb26RtLSx9mWcnUT2Jnob9sP8Fvkj5texOzSyZY+WXbRw9WvhpuPTpa3j8PGrOpevOA/Q/ZIZLqG5gx2tyM7aJ076Xjijgu0eYlGUyn8p57DywmYcEzqV6ATuekDwapGfvk27tYe0cVsxj+Hy2Hexm/B+wcgE772JBH+eM4oUb+n8CuYUU38HegwH/AvDgX5I8z+jbAAAAAElFTkSuQmCC) [Alpha Leedsichthys](https://ark.wiki.gg/wiki/Alpha_Leedsichthys) - 1 (ignores difficulty setting)

**The max dino level (without breeding)** after taming and leveling is 372 on our servers. (i.e. 210 wild level + 74 level taming bonus + 88 domesticated level ups). There are a few exceptions to this rule:

* Tek creatures - As stated above, they can naturally spawn up to 253 with a maximum taming efficiency of +89 levels and up to 88 levels after taming, making their max possible level 430 outside of breeding.
* Reaper Kings - Queens spawn at a maximum level of 210, but their offspring can receive up to 75 additional levels during pregnancy and another 88 once matured, making their max level 372.
* Enforcers and Scouts - Spawn naturally up to level 210 and can receive an additional 88 levels after being assembled, making their max level 298.
* &#x20;Deinonychus Egg - naturally spawn up to 210 and can receive an additional 88 levels after maturation, making their max level 298 outside of breeding.
* &#x20;Crystal Wyvern Egg, Wyvern Egg, and  Rock Drake Egg- can spawn naturally up to 266 and can receive an additional 88 levels after maturation, making their max level 354.
* &#x20;Magmasaur Egg - naturally spawn up to 210 and can receive an additional 88 levels after maturation, making their max level 298 outside of breeding.

**Breeding Level Caps:** On our servers, Creatures have NO hard-capped limit on breeding. Levels of 1750 to 1800 is possible (maxing all stats at 254 x 7 +1 =Maxed out dino of 1750) .

PLEASE NOTE: Once you have reached a Dino with 255 in each stat value. You realistically cannot add any more domestication level points into that specific stat. If done, the stat will revert to a LEVEL ONE DINO value in that stat. And you will lose all the value of months of breeding.

Tamable creatures introduced in the Genesis DLCs,

[![](data:image/png;base64,iVBORw0KGgoAAAANSUhEUgAAABQAAAAUCAYAAACNiR0NAAAAAXNSR0IArs4c6QAAA35JREFUOE9tlGloVHcUxX/zksZEzaJmNOukxogGV2oxrVYtJn6xnbgEFFpBQdAGigui9YOobW2r2FYEF9QibbBQcalarBBaNbjUukaJA0oVLCouE2NiRieTmTdy2vtgPuTB482b+c+5555zz/Xx/+UALpAODAda7Hs9ZgJvAy+BS0Al0A78BOQCUaDLO++zD2lAAhgDTAH0PhD4CwgAw4ABgM7HgV7AV8B1oD/wAugWlgeoZ4ZVWmAAbwHPgEzgBJAFjDKm7wAXgGPAH0A+EE4FVEWP9gZghFVV64XATWPfF8gDqoDbwF3ge5NIhaMewxygA5gHzAD8wFMgG3jD2IvhP6ZZDdBq7weAX6zQcwHqlhnSYLP9ID3ftFZkloR/bGfOmoZFwB0rfAgQ+4inXQzoByw1rSTBSOCo/VmmnLECKtZmmqnlD0zjkEAFKCAdqAWGmmty+DmwEpgILAIajanGpxOYbd1IrnOm5UABahykx2emmcYgAhwHTgOTgHFmjMCfGIkyA1QnYr8YGCRADacGdasZIz3F5hRQYY6r9SXAe1ZMkmwHphrQ79ZFYSrgbkuCtJDgmq1bZtgES4uYS6IX/pyc1ZGurqGvYrF6x3F+TSQSexUGAXpDKQZycr+lZwUwGCgFxhqQTDib7jjxuOvqrLRXkjYlk8nIcL8/S4B9rA39sMrYJQE53wxMA3oDEj8eyM1d+G97+xVp/v6QITWVJYHzO5tOrROJDVM/LPbmUDOkPEp0LQfF8LAx1kLQ7NX6fL7mjOysvV0dL9XWlNryyvqKQGmiI8mhjU2NC1OjJyMUHY1D6vUNELQlUN03M3NtZzQamJxfULNswZxhzVdb8qLPOikOFEcfPWm73xaN7/ei54GLmdrT/cBGp9g2jJuRkX4wFov321FXN/+TTasLL/19zT285QfGjq5wwuFwpN1lcSqgx0yZfWVJ2WK5LnGg0XW4iUtjQ13dgclzp5e1XA65vx09SV7/bKetNfx49+1QQU+A3qL4CPjC1lXEcZxzruteSSaTx9ZUTbjR2Z0o93W7iWD9x2klpUXs+64h9GXT8RE9AXquV9uwaznclzHbxlfv+vTin61VuUWbx5QVLh9dkJ+WXV4Rq5436+G1Iyd/DH779ec9AWpby3WlZxnwri3ajcA9T5c9weDPZaX+aecvhm6sv3xB6+y/6zXO0BXfzdnOJgAAAABJRU5ErkJggg==)](https://ark.wiki.gg/wiki/R-Creatures)R-Creatures and

[![](data:image/png;base64,iVBORw0KGgoAAAANSUhEUgAAABQAAAAUCAYAAACNiR0NAAAAAXNSR0IArs4c6QAAA3BJREFUOE9tlGloVHcUxX/vzRInZvFpTE0dNXGLcSKKhraJFiGjIIhtbSnigtgv5pstaltooR+K0g9CpYV+kVIQShekpQ1ocEEliVtDaetSNJq4JHVJzOaYSWaSzJRj7ytB8uAx783859xzzzn3Ovx3uUAGCAKLgKv2vT7eAKqAJNACVAADwGGgEBgGUv55xx4CwBiwFFgN6L0YuADMBsqBaYDOjwI5wH7gL2AqkABGhOUD6jNslXYYwHKgF5gENAARYIkxfQW4CNQDp4Ai4PF4QFX0ae8DYlZVrZcA14x9HjAFeBloBdqBz00iFR72GRYAT4BtwOvAdKAbyAdCxl4Mb5lma4Aeez8C/GCF+gWoW2ZIgwP2g/QstVZkloR/ZGeaTcMXgTYr/BMg9oO+dmnAA941rSRBJfCr/VmmNFkBFeszzdTyetP4b4EKUEA68BqwwFyTw/3A+8BKYCdwwpgqPk+BN60byXXOtCwWoOIgPT40zRSDQeAocBZ4FVhhxgi8y0jMMUB1IvZ1wAsCVDgV1C/MGOkpNmeA+ea4Wt8FrLJikuQroNaAjlkXJeMBD9kkSAsJrmzdMMNqbFrEXBI93VjCx1d6md+Woq7ApX4gw6FNxcwToB9KMZCTP9r07AHKgFnAMgOSCdJLrt8HHgBzAWX32SXAydaGRuwDY5cF5PyfwFogF5D4o9Ew2zvTXP5okfv9dC8TixXx0CNw+0qHm58XJOnnUBnSPEp0LQeN4c/GWAtB2VMK/iiNcOTOEIFfVvJOxUyn1ouQHEiSbGwNNHlhp9efFBmh0VEcxl+fARtsCcRd+CQDCzUhzVsLyp3hZLwj4TyOlRBYcnhES+X/5eA/i5na0/2PRWembRhNzLchqKjf7pXFlxVVd/cPp3Nzg25icGyg70m64/a1rgaf4XhWmtkhm5SDNtdR4CTw29dVVK6r8d7yol7297ahS0tLw/H2R6PfDfUlvHT3YM5EgP6i2AJ8autKcTkPNH6z2J1RVensnTyjsOt4u3P57Zfy6h70pC42Xeo6HZ3kPIvN85fvetzCrlY7XTifgX31q8Obo5H07rsp9wKukx8rC8/t7RkZu3k/c7M7G7o+EaC2tVzX9LwHVGvRrsrnYHOC1pO17pc5wWzNjUSwJRoZKwymMi2hiFs9ms0691Khtn8BlCMHe6TtOB0AAAAASUVORK5CYII=)](https://ark.wiki.gg/wiki/X-Creatures)X-Creatures, and Lost Island's

[![](data:image/png;base64,iVBORw0KGgoAAAANSUhEUgAAABQAAAAUCAYAAACNiR0NAAAAAXNSR0IArs4c6QAAArdJREFUOE9NlWmIjmEUhq+xjn3f17KTIpFkKdmSKIUIf0QmUkSJhEiKn5aSCImQiR8K4Ydo8kMzyZaxL6HBWLIO6cr9ad56+t7O+zz3c8597vt8RUA74A/wjn/PWGAB0BB4BbQEfgIfE/sKXACuZ38r4EPeKSq8AFOA6Tnk4brAe6Ax8At4DNQBeuTbQ2B/zrfIhf8B9wDDgGfA+WxsC/QJiNnfA9YBPZOxmVcAOwJa34vNcAkwA7gKbAfmAP2Bejno/t/AS2Byvgn2LbFDwNFQVyXgNqAYWAUsAz4DlUBrYBDQHvD250DzUGLMs/J8BjhW4NPgFuBTlgeapFQvcTXIZjkUuEPAPPsjjfOyy0CZQTOTI1MfBUwD5K8p8D2lvwYupUybNCSXmWmhaSpln4A708HdwApgeLLsHDnZ8TLgZhryIJzeiDLMsne+XRHwQAAtZWQacQ2ojgbvhvAvwBNgVvbLcTPgVmJK6pSAR8KDXHXLJks5C2wEFiV+GzgJbAJ83wu0ybsdF7hCQEuVbDcJNA7oG7eY1cSULsDidFoAgX3k9ziwEigRUA12DbAcCjgi2Ui0pbtOh5636bx6lT/pKQcOAjUCDs7N+lPPjgfGRI+WZDMUvZ63At0h1wMiH/3eKFmWFry8OlLRERfjV6UzKQcPx8/q1PIEHBqr9krpGqSy9nCQg9nJYCmwIbyuyTSR9JLE/HWYdAK6h9dSkxHQ9jtVfE4AozMgHAy641EGh3tmRqNr44z5wMCUbpXlhQy7xOg2aB4g8UrIuJmpxbnJRl7t8OZcIC0vgK3uLwA6WeyoyxvvRC5mopgdqsuBKsA5uD5W7Jf4fWCXfajNoZ1SX4LXRIcSL+DUNEph611d4QyYkHGmCZylxbUB5dAp7VI+HSNa49ryTXhemLn4NBX5V3AuNq3+C8kntYRfrhSlAAAAAElFTkSuQmCC)](https://ark.wiki.gg/wiki/Dinopithecus)Dinopithecus are the only exception, they can go over the 1750 up to 1800.

</details>

## ASA Unique Items:

<details>

<summary>Gigantoraptor Feathers.</summary>

Feathers for Breeding: Once per 24-hour cooldown (Or every 4 hours on Host-Local/Singleplayer), you can pluck a [![](https://ark.wiki.gg/images/thumb/a/af/Gigantoraptor_Feather.png/20px-Gigantoraptor_Feather.png)](https://ark.wiki.gg/wiki/Gigantoraptor_Feather) [Gigantoraptor Feather](https://ark.wiki.gg/wiki/Gigantoraptor_Feather) from the Gigantoraptor that improves the chance of babies being born with the higher parental stat; the feather will tell you which stat and what percent chance. To use the feather, place the feather in the inventory of the female and male dino you are breeding. The feathers will be consumed after the female lays a fertilized egg or begins gestating.

</details>

<details>

<summary>Traits     <span data-gb-custom-inline data-tag="emoji" data-code="1f195">🆕</span>  (Added in the Bob's Tall Tales - Aberration</summary>

The Traits are a new mechanic that came out along with Aberration on [![](https://ark.wiki.gg/images/thumb/1/1a/ARK_Survival_Ascended.png/20px-ARK_Survival_Ascended.png)](https://ark.wiki.gg/wiki/ARK:_Survival_Ascended) ARK: Survival Ascended.

### General

Traits are additional passives that affect on certain ways the creatures that posses them. Every time a creature appears or hatches from a WILD fertilized egg it will have a random trait and level of this one. This information can be known by looking at the creatures with the [![](https://ark.wiki.gg/images/thumb/4/45/Gene_Scanner.png/20px-Gene_Scanner.png)](https://ark.wiki.gg/wiki/Gene_Scanner) [Gene Scanner](https://ark.wiki.gg/wiki/Gene_Scanner) and holding H key, this menu will bring more information about the traits that the creature has.

### Usage

Traits can be extracted from tamed creatures by hitting them with the [![](https://ark.wiki.gg/images/thumb/4/45/Gene_Scanner.png/20px-Gene_Scanner.png)](https://ark.wiki.gg/wiki/Gene_Scanner) [Gene Scanner](https://ark.wiki.gg/wiki/Gene_Scanner), then the traits can be stored on a [![](https://ark.wiki.gg/images/thumb/a/a5/Gene_Storage.png/20px-Gene_Storage.png)](https://ark.wiki.gg/wiki/Gene_Storage) Gene Storage or on the same Gene Scanner that was used for the extraction, but it can only store up to 10 at the same time.

If the creature is an adult, it will be unable to receive any traits, including ones extracted from that creature. However, any creature that has not reached full maturity is able to freely transfer traits. Each creature can have up to 5 traits at the same time.

List of Currently Known Traits.

#### Durability Traits

* **Tenacious**: Damage taken by this creature is reduced by 0-2.5% as Health goes down to 50-25%, reaching maximum damage reduction value at 25% and below. Stackable 2 times.
* **Numb**: 25% of the damage this creature takes is dealt over a 5-second damage-over-time (DoT) effect. The DoT cannot be reduced by other means of damage reduction.
* **Athletic**: This creature gains 0.05 health regen and 0.0005 stamina regen for each point in the Oxygen stat. Stackable 3 times.
* **Fatty**: The creature gains 0.1 armor per point invested in the Food stat. Stackable 3 times.
* **Vampiric**: This creature gains life steal based on 5% of all damage it deals. Smaller creatures can gain twice the amount of life steal.

***

#### Defensive Traits

* **Warm**: The dino and its rider gain 40 Hypothermic Insulation as well as 5% damage reduction from Cold-based attacks. Stackable 3 times.
* **Cold**: This critter and its rider gain 40 Hyperthermic Insulation as well as 5% damage reduction from Heat-based attacks. Stackable 3 times.
* **Distracting**: Non-allied targets that take damage from this Creature's melee attacks deal 5% less damage to all other targets for 20 seconds.
* **Protective**: This Creature's rider gets a 15% damage reduction. The effect lingers for 10 seconds after dismounting. Stackable 2 times.

***

#### Mobility Traits

* **Nocturnal**: This dino has 2.5% reduced stamina consumption at night. Stackable 3 times.
* **Diurnal**: This creature has 2.5% reduced stamina consumption at night. Stackable 3 times.
* **Carefree**: The creature gains a 7.5% movement speed bonus, which is temporarily lost for 20 seconds after receiving/dealing damage and/or gaining a new rider.
* **Aggressive**: Dealing damage to a non-allied target grants a 2.5% movement speed bonus. Refreshes on every melee hit. Stackable 2 times.
* **High Endurance**: Stamina consumption from Sprinting is reduced by 4% while riding this creature.
* **Aquatic**: The creature swims 7.5% faster. Stamina drain from swimming is reduced by 4%, and Oxygen drain while submerged is reduced by 12.5%.
* **Cowardly**: If this creature receives damage from a non-allied target, it gains 2.5% extra movement speed. Buff refreshes on receiving additional damage. Stackable 3 times.

***

#### Economic Traits

* **Fast Learner**: The dino gains 15% extra experience. Stackable 3 times and can be replaced on mature dinos.
* **Frenetic**: The torpor drain rate is increased by 7.5%. Stackable 3 times.
* **Slow Metabolism**: The creature has a 5% reduced Food resource drain. Stackable 3 times and can be replaced on mature dinos.

***

#### Melee Traits

* **Heavy-Hitting**: The creature's basic attacks are 5% slower and deal 2.5% more melee damage. Stackable 3 times.
* **Quick-Hitting**: The dino's basic attacks are 5% faster and deal 2.5% less melee damage. Stackable 3 times.
* **Excitable**: When the creature lands basic attacks successfully, it reduces the cooldown of all other abilities by 0.25 seconds.
* **Angry**: Damage dealt by this creature is increased by 0-2.5% as Health goes down to 50-25%, reaching maximum damage reduction value at 25% and below. Stackable 2 times.
* **Giantslaying**: The creature deals 7.5% more damage to non-allied creatures with a drag weight of 500 or above, but deals 2.5% less damage to non-allied creatures with a drag weight of 200 or below. Stackable 2 times.
* **Kingslaying**: This critter deals 5% more damage to Alphas and bosses, but 10% less damage to all other targets. Stackable 3 times.

***

#### Carriage Traits

The following traits reduce the weight of specific resources by 15% while they're in the dino inventory. All of these are stackable 3 times.

* **Desert-Bearing**: Silk, Raw Salt, Sand, Cactus Sap, Sulfur
* **Carcass-Bearing**: Chitin, Hide, Keratin, Organic Polymer, Pelt, Wood
* **Meat-Bearing**: Raw Meat, Raw Mutton, Raw Fish Meat, Raw Prime Meat, Raw Prime Fish Meat
* **Plant-Bearing**: Thatch, Wood, Fibers, Berries, Crops, Seeds
* **Mineral-Bearing**: Flint, Stone, Crystal, Obsidian, Metal Ore
* **Cave-Bearing**: Blue Gem, Red Gem, Green Gem, Congealed Gas Ball, Elemental Ore
* **Exotic-Bearing**: Angler Gel, Black Pearls, Element, Leech Blood, Oil, Silica Pearls

For now, these are all the traits added to ARK Survival Ascended. We'll update this article if more are introduced in a future update.

</details>

## Breeding Mechanics

#### **Specialized Parents**

To maximize the stats of the offspring, specialized parents with a good value in few stats are needed. The more specialized a creature is in one stat, the higher it can be. To get a really good breed you need 6 creatures, each with a high upleveled (only the wild-leveling counts here) different stat. After at least 3 generations a creature with the best of the stats can be bred.

Dinos with a 55 to 80 in a stat are possible to capture on our ARKs. Mostly trap those in the 189 to 210 for exceptional base stats.

**ASA** - To make this process faster the player can use [![](https://ark.wiki.gg/images/thumb/a/af/Gigantoraptor_Feather.png/20px-Gigantoraptor_Feather.png)](https://ark.wiki.gg/wiki/Gigantoraptor_Feather) **Gigantoraptor Feathers** from a tamed [![](https://ark.wiki.gg/images/thumb/8/8f/Gigantoraptor.png/20px-Gigantoraptor.png)](https://ark.wiki.gg/wiki/Gigantoraptor) Gigantoraptor specialized on every stat that the player needs from a breeding line to do this step quicker.

Every generated feather will randomly have a percent above 55% and a specialize into a specific stat between\
Health; Stamina; Oxygen; Food; Weight; Melee Damage

To use one put it inside a female inventory and it will automatically be consumed after the mating process ends, the baby will have a higher chance of inherit the higher stat levels of that stat.&#x20;

The stat-values (not the stat-levels) of the offspring are calculated (RNG) like for a creature that was just tamed with a 100% taming effectiveness with the taming effectiveness bonuses applied.&#x20;

#### **Baby's Stats:**

The stat-values (not the stat-levels) of the offspring are calculated (RNG) like for a creature that was just tamed with a 100% taming effectiveness with the taming effectiveness bonuses applied. For example a hatchling with 56, 48, 50,48,52,46,42 would be a level 343 (56 + 48 + 50 + 48 + 52 + 46 + 42 + 1\[this represents the offspring's own base level] = 343.

The resulting level of the baby is the sum of (base stats) of each of its parents. So a breeding pair of Adults both lv 210 with matching stats of 56, 48, 50,48,52,46,42. The offspring would be born with a level of 210 up to 600 if a perfect doubling of all stats happened.

For this process it’s not important that after some time your male will have more then 20/20 mutations. As long as your female has 0/20 on the matrilineal side you can always get a mutation. The female dino provides a possible mutation and the male dino better stats.

Remember if both creatures have 20+/20 mutation in their respective side (male on patrilineal and female on matrilineal side) you can’t get a new mutation. This is when you move to the **Unlimited Mutations Method** described below.

<details>

<summary>Mutation Colors</summary>

When a mutation occurs, two things **always** happen; a stat is selected at random and 2 wild levels are added to the "chosen" parent's current stat level and the mutation counter is increased by 1 (over the originally calculated sum), and a color region is randomly selected to apply a random color to.&#x20;

This region could have been any of the 6 used in Ark, even if that species doesn't make use of that region (it's not visible). Once a region has been chosen, a color **within the current size of the color definitions array** is chosen, completely at random.&#x20;

The random color has an equal chance of being a "vibrant" color as it does any other color. The code selects an index that corresponds to the colors listed in the definitions array. You can very easily end up with a color that your creature could have spawned with naturally or even the same color it had originally, it's all up to RNG.&#x20;

</details>

***The Above Section on "Breeding" is from the*** [*<mark style="color:blue;">**ark.wiki.gg**</mark>*](https://ark.wiki.gg/wiki/Breeding) *<mark style="color:blue;">**site**</mark>* ***and edited to fit our server clusters Base stats.***

### Unlimited Mutations Method

*So, what if we've got a super breeding line at its cap of 20 mutations?*

*So, what if we've got a super breeding line at its cap of 20 mutations?* Well, simply inbreed them **28 generations**, overflow the counter, and since ***a negative number is always less than 20 they can start to get mutations again.***

***How this is done!***

The mutations counter is a 32 bit signed integer.  If your pet has 1 mutation, in binary he has 00000001 mutations.  If you mate them with another 1 mutation pet, he will have 2, or 00000010 mutations.

If you inbreed that generation, you have:\
00000010   +  00000010  =  00000100 mutations, or 4.  \
Do it again, you have 00001000 mutations, or 8. As you can see, every doubling of mutations moves the 1 left.

Now, for a little bit of computer fun, computers don't use the 32nd bit of a signed integer as a quantity, they use it as the positive or negative sign.  0 = positive.  1 = negative.

So, what happens after our 31st generation of inbreeding?\
01000000 00000000 00000000 00000000 (1,0731741,824 mutations)    +\
01000000 00000000 00000000 00000000 (1,0731741,824 mutations)    =\
10000000 00000000 00000000 00000000 ( -2,147,483,648 mutations)

Yes, that is negative 2,147,483,648 mutations.  (for computer math reference, negative 1 is binary all 1s, all 0s is the 'biggest' negative number) if you inbreed that generation, the 1 is pushed off the 32 bits containing the integer and we're back at 0.

***The Above Section on "Unlimited Mutations Glitch (Dirty Breeding)" is from Redit user:*** [Wulf2k](https://survivetheark.com/index.php?/profile/1088532-wulf2k/), *<mark style="color:blue;">February 28, 2019</mark>* ***and edited to fit our server clusters Base stats.***

## SMART BREEDING APP:

<table data-card-size="large" data-view="cards" data-full-width="false"><thead><tr><th></th><th></th><th></th><th data-hidden data-card-target data-type="content-ref"></th><th data-hidden data-card-cover data-type="files"></th></tr></thead><tbody><tr><td><strong>Ark Smart Breeding App:</strong></td><td><strong>click here to download the app!</strong></td><td></td><td><a href="https://cadon.github.io/ARKStatsExtractor/">https://cadon.github.io/ARKStatsExtractor/</a></td><td><a href="https://772063455-files.gitbook.io/~/files/v0/b/gitbook-x-prod.appspot.com/o/spaces%2F-Lgje1lBxKKWXwqycB-v%2Fuploads%2FEOwFbnQwDIs8x3UlrKaR%2Fsmart%20breeder%20app.jpg?alt=media&amp;token=eb26c099-20a3-43f5-be3e-42f6e0a44970">smart breeder app.jpg</a></td></tr><tr><td><strong>Ark Smart Breeder App For ASA.</strong></td><td></td><td></td><td><a href="https://www.youtube.com/watch?v=lUr5tIfG8NU">https://www.youtube.com/watch?v=lUr5tIfG8NU</a></td><td><a href="https://772063455-files.gitbook.io/~/files/v0/b/gitbook-x-prod.appspot.com/o/spaces%2F-Lgje1lBxKKWXwqycB-v%2Fuploads%2F8V9kHGdWOj9nHO3AcMYj%2FASA%20tutorial.jpg?alt=media&amp;token=090fa28a-7921-484b-9711-1fe4f2e1071c">ASA tutorial.jpg</a></td></tr></tbody></table>

<table data-card-size="large" data-view="cards"><thead><tr><th></th><th></th><th></th></tr></thead><tbody><tr><td>These are the Settings for ASE,  for the Smart Breeder App:</td><td><img src="https://772063455-files.gitbook.io/~/files/v0/b/gitbook-x-prod.appspot.com/o/spaces%2F-Lgje1lBxKKWXwqycB-v%2Fuploads%2F1B7mIm4DUo3yhXiav0pk%2Fimage.png?alt=media&amp;token=263971a3-d745-408b-a939-1d7425fb73e8" alt="" data-size="original"></td><td></td></tr><tr><td>These are the Settings for ASA,  for the Smart Breeder App:</td><td><img src="https://772063455-files.gitbook.io/~/files/v0/b/gitbook-x-prod.appspot.com/o/spaces%2F-Lgje1lBxKKWXwqycB-v%2Fuploads%2Fi9xezAQAOqNyKavFHQqG%2Fimage.png?alt=media&amp;token=39955d1a-474b-4465-81a2-c42009d36986" alt="" data-size="original"></td><td></td></tr><tr><td></td><td></td><td></td></tr></tbody></table>

## ASE COLOR ID'S

#### *You can't have a fully nude/non-colored dino. Ark core game logic thinks fully nude dinos are a new spawn, and triggers a full random color roll on all regions.*

<figure><img src="https://772063455-files.gitbook.io/~/files/v0/b/gitbook-x-prod.appspot.com/o/spaces%2F-Lgje1lBxKKWXwqycB-v%2Fuploads%2FQMU6PhTgIR0K1yE4FQi7%2Fimage.png?alt=media&amp;token=f396eec9-9d0a-4e3d-8db7-810cd0da8e62" alt=""><figcaption></figcaption></figure>

## ASA COLOR ID'S

#### *You can't have a fully nude/non-colored dino. Ark core game logic thinks fully nude dinos are a new spawn, and triggers a full random color roll on all regions.*

***Colors (Click image to enlarge)***

<figure><img src="https://772063455-files.gitbook.io/~/files/v0/b/gitbook-x-prod.appspot.com/o/spaces%2F-Lgje1lBxKKWXwqycB-v%2Fuploads%2F7wAnc5lFiKG4z34sSUJA%2FASA_ColorIDS.png?alt=media&amp;token=cedd6c56-4d1c-4399-bcac-8bba7478666c" alt=""><figcaption></figcaption></figure>

***Dyes (Click image to enlarge)***\
***The following colors are only obtainable through mutations, dyes or event candy.***

<figure><img src="https://772063455-files.gitbook.io/~/files/v0/b/gitbook-x-prod.appspot.com/o/spaces%2F-Lgje1lBxKKWXwqycB-v%2Fuploads%2FdeCYVQaePck4Abggecwb%2FASA_DyeIDS.png?alt=media&amp;token=6f4b7b12-a75c-4fa4-8eac-227f0d638087" alt=""><figcaption></figcaption></figure>

{% embed url="<https://www.youtube.com/watch?v=Uq2Pph56rtU&t>" %}

{% embed url="<https://youtu.be/jXx_gxYLfkA>" %}

{% embed url="<https://youtu.be/cQbDBcdFfe0?si=IsfSRFEq7hI_Wndi>" %}

<figure><img src="https://772063455-files.gitbook.io/~/files/v0/b/gitbook-x-prod.appspot.com/o/spaces%2F-Lgje1lBxKKWXwqycB-v%2Fuploads%2F0c2DH46EmFtAbQV4hJxr%2Fimage.png?alt=media&amp;token=2a1e46b7-7766-43ca-8ee5-9d6c3dd9c4d8" alt=""><figcaption></figcaption></figure>


# ARK: Explorer Notes

Collecting all Explorer Notes unlocks an additional 10 levels for your character.

Explorer Notes are collectible items scattered across The Island, Scorched Earth, Aberration, Extinction, Genesis: Part 1, and Genesis: Part 2 that are either a Dossier or a piece of narrative from actual survivors intended to tell the story behind the ARKs. The Explorer Notes are collected just by walking or flying near it.

For every Note found you gain 100 XP an effect that lasts 10 minutes where XP-Collection is twice as high (Similar to the "[![](https://ark.wiki.gg/images/thumb/f/f2/Broth_of_Enlightenment.png/20px-Broth_of_Enlightenment.png)](https://ark.wiki.gg/wiki/Broth_of_Enlightenment) Broth of Enlightenment"). It is advisable to collect them while on a dino because your dino gets the XP and the effect as well. So the reward for finding these are doubled. If you find two Notes within a short time the effect time is added to the current one and not reset.

Collecting all Explorer Notes unlocks an additional 10 levels for your character.

## ASE Note Locations

All available explorer notes except 11 are listed below. The other 11 are the boss dossiers, obtained by defeating each of the bosses.

For an interactive map of Explorer Notes and other collectibles, see the following pages:

#### Canon Explorer Notes

<table data-view="cards"><thead><tr><th></th><th></th><th></th><th data-hidden data-card-target data-type="content-ref"></th></tr></thead><tbody><tr><td><strong>The Island</strong> <img src="https://772063455-files.gitbook.io/~/files/v0/b/gitbook-x-prod.appspot.com/o/spaces%2F-Lgje1lBxKKWXwqycB-v%2Fuploads%2FsGPNgt31e2sjf1YMECmx%2Fimage.png?alt=media&amp;token=075e9bdb-9403-4199-92ca-96689a561f62" alt=""></td><td></td><td><h4>Canon Explorer Notes</h4></td><td><a href="https://ark.wiki.gg/wiki/Explorer_Map/The_Island">https://ark.wiki.gg/wiki/Explorer_Map/The_Island</a></td></tr><tr><td><strong>Scorched Earth</strong><a href="https://ark.wiki.gg/wiki/Explorer_Map_(Scorched_Earth)"><br><img src="https://ark.wiki.gg/images/2/26/ExplorerNotesScorchedEarthThumbnail.png" alt="Scorched Earth"></a></td><td></td><td><h4>Canon Explorer Notes</h4></td><td><a href="https://ark.wiki.gg/wiki/Explorer_Map/Scorched_Earth">https://ark.wiki.gg/wiki/Explorer_Map/Scorched_Earth</a></td></tr><tr><td><strong>Aberration</strong> <img src="https://772063455-files.gitbook.io/~/files/v0/b/gitbook-x-prod.appspot.com/o/spaces%2F-Lgje1lBxKKWXwqycB-v%2Fuploads%2Fv9mLTDeyCP9dR14y4tht%2Fimage.png?alt=media&amp;token=d430caf5-3034-42e5-b76a-0172bb962e77" alt=""></td><td></td><td><h4>Canon Explorer Notes</h4></td><td><a href="https://ark.wiki.gg/wiki/Explorer_Map/Aberration">https://ark.wiki.gg/wiki/Explorer_Map/Aberration</a></td></tr><tr><td><strong>Extinction</strong> <img src="https://772063455-files.gitbook.io/~/files/v0/b/gitbook-x-prod.appspot.com/o/spaces%2F-Lgje1lBxKKWXwqycB-v%2Fuploads%2FZkRo1u94RtajZGaxTe6q%2Fimage.png?alt=media&amp;token=f052c4cc-260d-4778-a773-154c9a44ccf7" alt=""></td><td></td><td><h4>Canon Explorer Notes</h4></td><td><a href="https://ark.wiki.gg/wiki/Explorer_Map/Extinction">https://ark.wiki.gg/wiki/Explorer_Map/Extinction</a></td></tr><tr><td><p><strong>Genesis: Part 1</strong></p><p><a href="https://ark.wiki.gg/wiki/Explorer_Map_(Genesis:_Part_1)"><img src="https://ark.wiki.gg/images/thumb/e/e8/Genesis_Part_1_Map.jpg/150px-Genesis_Part_1_Map.jpg" alt="Genesis: Part 1"></a></p></td><td></td><td><h4>Canon Explorer Notes</h4></td><td><a href="https://ark.wiki.gg/wiki/Explorer_Map/Genesis:_Part_1">https://ark.wiki.gg/wiki/Explorer_Map/Genesis:_Part_1</a></td></tr><tr><td><strong>Genesis: Part 2</strong> <img src="https://772063455-files.gitbook.io/~/files/v0/b/gitbook-x-prod.appspot.com/o/spaces%2F-Lgje1lBxKKWXwqycB-v%2Fuploads%2FIoEp8B22C5rUzzNIN1oP%2Fimage.png?alt=media&amp;token=ccd2bb82-f184-4283-a0fe-bf9e10725e68" alt=""></td><td></td><td><h4>Canon Explorer Notes</h4></td><td><a href="https://ark.wiki.gg/wiki/Explorer_Map/Genesis:_Part_2">https://ark.wiki.gg/wiki/Explorer_Map/Genesis:_Part_2</a></td></tr></tbody></table>

## Genesis - 1 Glitches

| Name                                | Lat  | Lon  |
| ----------------------------------- | ---- | ---- |
| Glitch Discovery\|Biome Bog #1      | 69.9 | 77   |
| Glitch Discovery\|Biome Bog #2      | 57.4 | 84.8 |
| Glitch Discovery\|Biome Bog #3      | 74.5 | 76.5 |
| Glitch Discovery\|Biome Bog #4      | 70.2 | 76.6 |
| Glitch Discovery\|Biome Bog #5      | 60.2 | 59.5 |
| Glitch Discovery\|Biome Bog #6      | 84.2 | 74.8 |
| Glitch Discovery\|Biome Moon #1     | 47.1 | 14.1 |
| Glitch Discovery\|Biome Moon #2     | 22.3 | 31.3 |
| Glitch Discovery\|Biome Moon #3     | 21.6 | 26   |
| Glitch Discovery\|Biome Moon #4     | 30.2 | 35.4 |
| Glitch Discovery\|Biome Moon #5     | 32.3 | 37.7 |
| Glitch Discovery\|Biome Moon #6     | 26.5 | 19.3 |
| Glitch Discovery\|Biome Moon #7     | 34.2 | 26.8 |
| Glitch Discovery\|Biome Moon #8     | 46.4 | 21.5 |
| Glitch Discovery\|Biome Ocean #1    | 18.9 | 47.4 |
| Glitch Discovery\|Biome Ocean #2    | 20.7 | 55   |
| Glitch Discovery\|Biome Ocean #3    | 18.4 | 56.4 |
| Glitch Discovery\|Biome Ocean #4    | 25.9 | 58   |
| Glitch Discovery\|Biome Ocean #5    | 31.4 | 56.7 |
| Glitch Discovery\|Biome Ocean #6    | 35.9 | 45.7 |
| Glitch Discovery\|Biome Snow #1     | 64.1 | 37.5 |
| Glitch DiscoveryBiome Snow #2       | 79.9 | 34.9 |
| Glitch Discovery\|Biome Snow #3     | 74.7 | 30.5 |
| Glitch Discovery\|Biome Snow #4     | 77   | 21.7 |
| Glitch Discovery\|Biome Snow #5     | 67.5 | 25.8 |
| Glitch Discovery\|Biome Snow #6     | 62.7 | 30.7 |
| Glitch Discovery\|Biome Snow #7     | 70.8 | 28.7 |
| Glitch Discovery\|Biome Snow #8     | 73.7 | 25.2 |
| Glitch Discovery\|Biome Snow #9     | 78.6 | 16.4 |
| Glitch Discovery\|Biome Volcanic #1 | 44.6 | 85.5 |
| Glitch Discovery\|Biome Volcanic #2 | 26.9 | 77.2 |
| Glitch Discovery\|Biome Volcanic #3 | 47.5 | 66.8 |
| Glitch Discovery\|Biome Volcanic #4 | 35.7 | 77.5 |
| Glitch Discovery\|Biome Volcanic #5 | 27.9 | 66.7 |
| Glitch Discovery\|Biome Volcanic #6 | 25.3 | 77.3 |
| Glitch Discovery\|Biome Volcanic #7 | 12.4 | 76.3 |
| Glitch Discovery\|Story             | 17.1 | 71.3 |
| Glitch Discovery\|Story             | 17.3 | 87.9 |
| Glitch Discovery\|Story             | 18.4 | 37.4 |
| Glitch Discovery\|Story             | 18.9 | 51.8 |
| Glitch Discovery\|Story             | 21.4 | 14.5 |
| Glitch Discovery\|Story             | 23.1 | 51.3 |
| Glitch Discovery\|Story             | 28.3 | 74   |
| Glitch Discovery\|Story             | 28.5 | 80.6 |
| Glitch Discovery\|Story             | 30.7 | 56.2 |
| Glitch Discovery\|Story             | 31.8 | 57.3 |
| Glitch Discovery\|Story             | 32.2 | 46.2 |
| Glitch Discovery\|Story             | 32.2 | 48.5 |
| Glitch Discovery\|Story             | 34.3 | 32.1 |
| Glitch Discovery\|Story             | 36.4 | 49.3 |
| Glitch Discovery\|Story             | 36.7 | 72.4 |
| Glitch Discovery\|Story             | 37.3 | 24.5 |
| Glitch Discovery\|Story             | 37.3 | 86.2 |
| Glitch Discovery\|Story             | 39.1 | 47.1 |
| Glitch Discovery\|Story             | 40.2 | 56.3 |
| Glitch Discovery\|Story             | 41.6 | 75.9 |
| Glitch Discovery\|Story             | 43.4 | 35.2 |
| Glitch Discovery\|Story             | 48.4 | 73.6 |
| Glitch Discovery\|Story             | 48.8 | 18   |
| Glitch Discovery\|Story             | 49.7 | 29.2 |
| Glitch Discovery\|Story             | 50.9 | 13.9 |
| Glitch Discovery\|Story             | 61.3 | 37.5 |
| Glitch Discovery\|Story             | 61.4 | 33   |
| Glitch Discovery\|Story             | 66.5 | 85   |
| Glitch Discovery\|Story             | 68.1 | 59.8 |
| Glitch Discovery\|Story             | 70.9 | 75.1 |
| Glitch Discovery\|Story             | 71.1 | 76.8 |
| Glitch Discovery\|Story             | 71.2 | 19.5 |
| Glitch Discovery\|Story             | 73.5 | 76.9 |
| Glitch Discovery\|Story             | 73.7 | 83.7 |
| Glitch Discovery\|Story             | 75.3 | 75.8 |
| Glitch Discovery\|Story             | 75.7 | 53.1 |
| Glitch Discovery\|Story             | 76.4 | 28.1 |
| Glitch Discovery\|Story             | 80.6 | 26.7 |
| Glitch Discovery\|Story             | 82.3 | 21.4 |
| Glitch Discovery\|Story             | 82.6 | 42   |
| Glitch Discovery\|Tidbit #1         | 83.5 | 60.6 |
| Glitch Discovery\|Tidbit #2         | 72.6 | 70   |
| Glitch Discovery\|Tidbit #3         | 67.2 | 78.2 |
| Glitch Discovery\|Tidbit #4         | 66.2 | 67.5 |
| Glitch Discovery\|Tidbit #5         | 32.7 | 59   |
| Glitch Discovery\|Tidbit #6         | 33.1 | 51.9 |
| Glitch Discovery\|Tidbit #7         | 28.8 | 60.6 |
| Glitch Discovery\|Tidbit #8         | 33.3 | 51.4 |
| Glitch Discovery\|Tidbit #9         | 75.5 | 46.2 |
| Glitch Discovery\|Tidbit #10        | 70.1 | 31.1 |
| Glitch Discovery\|Tidbit #11        | 73.3 | 27.3 |
| Glitch Discovery\|Tidbit #12        | 66.2 | 21.3 |
| Glitch Discovery\|Tidbit #13        | 24.3 | 13.7 |
| Glitch Discovery\|Tidbit #14        | 40.8 | 38.2 |
| Glitch Discovery\|Tidbit #15        | 32.8 | 32.9 |
| Glitch Discovery\|Tidbit #16        | 12.4 | 38.8 |
| Glitch Discovery\|Tidbit #17        | 43.3 | 80.7 |
| Glitch Discovery\|Tidbit #18        | 43.6 | 76.1 |
| Glitch Discovery\|Tidbit #19        | 21.8 | 69.2 |
| Glitch Discovery\|Tidbit #20        | 28.2 | 80.3 |
| Glitch Discovery\|Tidbit #21        | 38.5 | 24.6 |
| Glitch Discovery\|Tidbit #22        | 50.5 | 27.8 |
| Glitch Discovery\|Tidbit #23        | 23.6 | 25.7 |
| Glitch Discovery\|Tidbit #24        | 26.4 | 32.7 |
| Glitch Discovery\|Tidbit #25        | 27   | 27.6 |
| Glitch Discovery\|Tidbit #26        | 31.9 | 14.8 |
| Glitch Discovery\|Tidbit #27        | 33.9 | 19.3 |
| Glitch Discovery\|Tidbit #28        | 47.4 | 23.7 |
| Glitch Discovery\|Tidbit #29        | 50.8 | 31.1 |
| Glitch Discovery\|Tidbit #30        | 67.8 | 72.9 |
| Glitch Discovery\|Tidbit #31        | 66.4 | 75.3 |
| Glitch Discovery\|Tidbit #32        | 64.2 | 74.7 |
| Glitch Discovery\|Tidbit #33        | 71.6 | 75.4 |
| Glitch Discovery\|Tidbit #34        | 72.5 | 76.6 |
| Glitch Discovery\|Tidbit #35        | 59.8 | 61.1 |
| Glitch Discovery\|Tidbit #36        | 73.1 | 84.9 |
| Glitch Discovery\|Tidbit #          | 63.8 | 76.5 |
| Glitch Discovery\|Tidbit #          | 57.7 | 61.8 |
| Glitch Discovery\|Tidbit #          | 42.8 | 73.6 |
| Glitch Discovery\|Tidbit #          | 33.1 | 66.9 |
| Glitch Discovery\|Tidbit #          | 35.1 | 86.6 |
| Glitch Discovery\|Tidbit #          | 19.8 | 72.8 |
| Glitch Discovery\|Tidbit #          | 21.2 | 85.4 |
| Glitch Discovery\|Tidbit #          | 40.8 | 73.7 |
| Glitch Discovery\|Tidbit #          | 42.3 | 67.8 |
| Glitch Discovery\|Tidbit #          | 30.9 | 81.9 |
| Glitch Discovery\|Tidbit #          | 13.7 | 87.1 |
| Glitch Discovery\|Tidbit #          | 29.2 | 48.1 |
| Glitch Discovery\|Tidbit #          | 34.3 | 45.3 |
| Glitch Discovery\|Tidbit #          | 26.7 | 51.1 |
| Glitch Discovery\|Tidbit #          | 23.8 | 48.8 |
| Glitch Discovery\|Tidbit #          | 21.8 | 50.3 |
| Glitch Discovery\|Tidbit #          | 21   | 51   |
| Glitch Discovery\|Tidbit #          | 20.2 | 50.1 |
| Glitch Discovery\|Tidbit #          | 15.9 | 47.5 |
| Glitch Discovery\|Tidbit #          | 35.1 | 54   |
| Glitch Discovery\|Tidbit #          | 22.2 | 69.6 |
| Glitch Discovery\|Tidbit #          | 15.4 | 74.5 |
| Glitch Discovery\|Tidbit #          | 82.2 | 18.8 |
| Glitch Discovery\|Tidbit #          | 86.2 | 15.3 |
| Glitch Discovery\|Tidbit #          | 85.5 | 30.8 |
| Glitch Discovery\|Tidbit #          | 57.2 | 69.2 |
| Glitch Discovery\|Tidbit #          | 61.5 | 74.8 |
| Glitch Discovery\|Tidbit #          | 71.9 | 69.4 |
| Glitch Discovery\|Tidbit #          | 79.4 | 72.6 |
| Glitch Discovery\|Tidbit #          | 34.5 | 51   |
| Glitch Discovery\|Tidbit #          | 28.8 | 47.8 |
| Glitch Discovery\|Tidbit #          | 40.9 | 12.7 |
| Glitch Discovery\|Tidbit #          | 68   | 21.9 |
| Glitch Discovery\|Tidbit #          | 73.1 | 30.9 |
| Glitch Discovery\|Tidbit #          | 70.6 | 33.4 |
| Glitch Discovery\|Tidbit #          | 85   | 37.1 |
| Glitch Discovery\|Tidbit #          | 72.5 | 43.4 |
| Glitch Discovery\|Tidbit #          | 67.  | 32.8 |

## Fjordur Rune Stones By Biome

<details>

<summary>Vannaland (Overworld) Fjordur Runes</summary>

Rune #1: 63.9 LAT and 95.7 LON (Located on the tarnished side of the island.)

Rune #2: 64.6 LAT and 93.1 LON (Located on the beach side of the island just near the sea.)

Rune #3: 53.9 LAT and 83.1 LON (Located inside the cave on the bigger island.)

Rune #4: 51.7 LAT and 85.0 LON (In the same cave, continue to the designated point and collect the rune.)

Rune #5: 50.3 LAT and 81.7 LON (Travel inside the same cave and get to the designated point.)

Rune #6: 52.5 LAT and 82.3 LON (Come out of the cave and the rune is located by the side of the top hill of the island.)

Rune #7: 60.6 LAT and 80.5 LON (It is located by the side of the waterfall near the sea.)

Rune #8: 60.5 LAT and 70.7 LON (Hidden in the outer boundary of the hills.)

Rune #9: 55.2 LAT and 67.4 LON (Get into the cave which has an opening in front of the sea and reach the point inside to get the rune.)

Rune #10: 53.7 LAT and 65.2 LON (Carry on in the cave to reach the coordinate mentioned.)

Rune #11: 48.3 LAT and 72.7 LON (This one is located on the top of hills on the island.)

Rune #12: 45.6 LAT and 61.1 LON (It is located at the edge of a huge green hill with a small lowered platform.)

Rune #13: 42.7 LAT and 64.4 LON (It is inside the cave where there is lava all around.)

Rune #14: 38.2 LAT and 60.0 LON (It is inside the cave having an entrance from the seaside. Get to the coordinate inside the cave.)

Rune #15: 41.7 LAT and 52.7 LON (It is right by the side of a small waterfall in an open space.)

Rune #16: 35.5 LAT and 49.7 LON (It is under the purple tree that is very close to a pond.)

Rune #17: 34.4 LAT and 42.6 LON (It is right by the side of flowing water from a giant waterfall.)

Rune #18: 28.7 LAT and 43.5 LON (It is on the outside of the fenced house.)

Rune #19: 28.6 LAT and 39.9 LON (It is inside a cave with an opening at 28.6 LAT and 39.9 LON, located by the side of a water reservoir.)

Rune #20: 27.6 LAT and 46.1 LON (Carry into the same cave and go to the designated coordinate.)

Rune #21: 30.8 LAT and 52.5 LON (It is located in an open space, under a bridge with several supporting pillars.)

Rune #22: 27.1 LAT and 49.9 LON (Right by the side of the waterfall.)

Rune #23: 25.0 LAT and 50.9 LON (On the edge of a huge hill.)

Rune #24: 19.0 LAT and 59.1 LON (It is inside a cave with an opening at 20.7 LAT and 57.3 LON.)

Rune #25: 16.2 LAT and 61.6 LON (This one is also in the same cave as the previous one was.)

Rune #26: 17.8 LAT and 65.7 LON (It is in the cave and lies on a huge skeleton.)

Rune #27: 13.3 LAT and 63.8 LON (Located in the open sky and is by the side of a mysterious sign.)

Rune #28: 13.5 LAT and 67.5 LON (It is inside the cave with an opening right under the location of the previous rune location.)

Rune #29: 22.4 LAT and 61.6 LON (At the coordinate is a small cave. In it is the rune.)

Rune #30: 26.4 LAT and 64.6 LON (At the given coordinate lies the rune openly.)

Rune #31: 31.6 LAT and 66.4 LON (It is located on the outer side of a solid structure.)

Rune #32: 32.2 LAT and 65.2 LON (It is on the opposite side of the previous one.)

Rune #33: 34.3 LAT and 82.9 LON (It is near a lake located by the side of a forest.)

Rune #34: 39.3 LAT and 95.5 LON (It is under the green surface of the hill.)

Rune #35: 37.5 LAT and 96.8 LON (It is located on the top of the hill at the given coordinate.)

Rune #36: 30.1 LAT and 91.3 LON (It is by the side of running water from a waterfall where a tree log is lying above the water stream.)

Rune #37: 22.7 LAT and 82.3 LON (On the outer side of a solid structure inside the forest.)

Rune #38: 19.2 LAT and 77.4 LON (At the edge of a forest where there is a water reservoir also.)

Rune #39: 18.5 LAT and 79.4 LON (It lies openly at the coordinate.)

Rune #40: 18.2 LAT and 91.1 LON (Hidden between tall trees at the given point.)

Rune #41: 08.4 LAT and 92.5 LON (At a site where the waterfall is falling into the sea.)

Rune #42: 11.3 LAT and 84.2 LON (Inside a cave with an opening at 10.1 LAT and 84.5 LON.)

Rune #43: 13.7 LAT and 85.2 LON (Inside the same cave.)

Rune #44: 18.3 LAT and 82.6 LON (Continue to the coordinate in the same cave.)

Rune #45: 06.4 LAT and 76.0 LON (It is near the sea where the waterfall is falling into the sea.)

Rune #46: 06.4 LAT and 60.8 LON (Lying openly at the coordinate.)

Rune #47: 06.3 LAT and 56.5 LON (It is near a waterfall with a black opening.)

Rune #48: 06.9 LAT and 45.3 LON (It is underground at the coordinate.)

Rune #49: 08.2 LAT and 37.7 LON (Inside a cave with an entrance at 07.6 LAT and 39.1 LON.)

Rune #50: 07.5 LAT and 34.4 LON (Carry out in the same cave to get this one.)

Rune #51: 06.8 LAT and 33.6 LON (Go to the given coordinate inside the same cave.)

Rune #52: 07.5 LAT and 22.5 LON (It is underground inside a cave with a very small opening.)

Rune #53: 06.5 LAT and 23.3 LON (Inside the same cave as above.)

Rune #54: 06.5 LAT and 28.2 LON (Inside the same cave as above.)

Rune #55: 02.9 LAT and 14.2 LON (Under a roof of a huge extended hill covered with snow.)

Rune #56: 05.1 LAT and 06.0 LON (Get underwater at 03.5 LAT and 03.9 LON and enter the opening ahead. You’ll find the rune at the given coordinate.)

Rune #57: 06.0 LAT and 10.0 LON (Carry inside the same underwater tunnel.)

Rune #58: 08.4 LAT and 13.4 LON (It is also inside the same underwater tunnel.)

Rune #59: 11.1 LAT and 05.0 LON (It is on the top of a hill covered with snow.)

Rune #60: 14.7 LAT and 02.4 LON (By the side of a wrecked boat.)

Rune #61: 19.1 LAT and 11.8 LON (Get underground by finding a way to the given coordinate.)

Rune #62: 17.7 LAT and 14.7 LON (It is on the top of a hill covered with snow.)

Rune #63: 19.8 LAT and 18.8 LON (Lying in the open sky and can be easily obtained by getting to the coordinate.)

Rune #64: 13.0 LAT and 17.2 LON (Just by the side of the sea.)

Rune #65: 33.7 LAT and 20.0 LON (It is floating above rocky ground by the side of a water reservoir.)

Rune #66: 34.9 LAT and 33.2 LON (From where the last rune was collected, go straight above the water surface and get into it through a crafted opening. Then carry to the coordinate underwater.)

Rune #67: 32.1 LAT and 32.2 LON (In the same underwater tunnel, you’ll find this rune.)

</details>

<details>

<summary>Swamp Biome Fjordur Runes</summary>

Rune #1: 40.4 LAT and 05.2 LON (It’s right at the edge of the cliff, in the rubble where the wall is broken.)

Rune #2: 42.7 LAT and 04.6 LON (It is by the bottom of the hill.)

Rune #3: 45.9 LAT and 11.5 LON (It is right outside the hut at the location.)

Rune #4: 44.9 LAT and 15.9 LON (It is just by the side of the sea.)

Rune #5: 47.6 LAT and 13.9 LON (It is inside the swamp cave.)

Rune #6: 49.1 LAT and 10.0 LON (It is also in the swamp cave and is by the side of a huge metallic door.)

Rune #7: 47.3 LAT and 07. 7 LON (It is by the side of a huge straight hill inside the swamp cave.)

Rune #8: 45.5 LAT and 12.6 LON (It is underwater inside the Swamp Cave.)

Rune #9: 43.0 LAT and 10.4 LON (Located inside the cave and can be found in an area of mushroom-shaped rocks.)

</details>

<details>

<summary>Volcanic Biome Fjordur Runes</summary>

Rune #1: 75.5 LAT and 78.8 LON (It is just by the side of the sea and is located on the blackish rocks.)

Rune #2: 72.1 LAT and 89.3 LON (It is in the salty region of the Volcanic Island.)

Rune #3: 74.8 LAT and 94.7 LON (It is inside the shallow water surrounded by salty rocks.)

Rune #4: 75.1 LAT and 95.5 LON (It is located on the top of Blackish hill.)

Rune #5: 81.7 LAT and 86.0 LON (It is located by the side of a huge volcano and is hidden to some extent but the coordinates are more than enough to take you to the location.)

Rune #6: 81.7 LAT and 79.4 LON (It is by the side of a muddy path connected with volcanic rock.)

Rune #7: 82.1 LAT and 73.6 LON (Located in the huge cracks of the Volcano.)

Rune #8: 85.4 LAT and 71.5 LON (It is located in the huge cavity located by the side of the volcano.)

Rune #9: 90.5 LAT and 73.7 LON (Continue towards right from the place where you found the previous rune and you’ll get this one.)

Rune #10: 96.1 LAT and 78.2 LON (Located outside the cavity, this can be found just by the side of the cavity on the upper side of it.)

Rune #11: 95.9 LAT and 81.4 LON (This one is also located in the great cavity by the side of the volcano.)

Rune #12: 96.1 LAT and 84.5 LON (Going right from the site of the previous rune will take you to this one.)

Rune #13: 90.9 LAT and 91.9 LON (Continue straight from the previous point and then take a left to get there.)

Rune #14: 90.2 LAT and 79.3 LON (This one is in the great cracks of the volcano.)

Rune #15: 89.8 LAT and 83.1 LON (This one is also underground and can be followed from the location of the previous rune.)

Rune #16: 89.0 LAT and 86.5 LON (Also underground and follows the previous sequence of the crack.)

Rune #17: 88.2 LAT and 85.7 LON (Right by the side of the previous one. It is below the previous rune and is floating above the water surrounding the rock.)

Rune #18: 87.1 LAT and 82.7 LON (At the specified coordinate, this rune is also floating above the water surface.)

Rune #19: 88.2 LAT and 84.7 LON (Getting out from under the ground, this one is located on the hill.)

Rune #20: 89.8 LAT and 85.2 LON (Also on the hill, it is just next to the previous rune.)

Rune #21: 92.7 LAT and 84.8 LON (In the middle of rocks, this is also in the hilly areas.)

Rune #22: 96.9 LAT and 84.1 LON (This one is by the site of the sea.)

Rune #23: 94.0 LAT and 96.5 LON (It is in the proximity of both the sea and the volcanic crack.)

### Bob's Tale Tales Notes:

Rune #24: 93.0 LAT and 93.1 LON (Located between the back rocks of the volcanic hills.)

Rune #25: 88.0 LAT and 92.3 LON (It is situated by the side of a lava stream and is hidden to some extent.)

Rune #26: 85.8 LAT and 92.1 LON (This one is obvious even from a distance and is above the volcanic hill.)

Rune #27: 84.0 LAT and 96.4 LON (The last rune in the volcanic rune is also above the ground surface and is located on the black hill.)

</details>

<details>

<summary>Space Biome Fjordur Runes</summary>

You’ll be able to reach all these runes after getting into the space cave that is located underwater. The entrance to the cave is located at 85.8 LAT and 98.2 LON.

Rune #1: 86.9 LAT and 97.0 LON (Continue straight into the cave and the mentioned coordinate to collect the Rune.)

Rune #2: 83.3 LAT and 94.5 LON (Like the previous one, collect this by getting to the point mentioned in the coordinates.)

Rune #3: 83.6 LAT and 92.5 LON (Inside the cave and by the side of a small plant.)

</details>

<details>

<summary>Asgard Portal Fjordur Runes</summary>

Rune #1: 19.6 LAT and 24.9 LON (It is on the side of rock near a water stream.)

Rune #2: 27.2 LAT and 17.7 LON (It is under a rocky structure covered with grass.)

Rune #3: 32.4 LAT and 12.8 LON (It is in a tall rocky structure.)

Rune #4: 21.7 LAT and 09.7 LON (It is in the open space.)

Rune #5: 20.4 LAT and 43.9 LON (It is located near a small waterfall and a small pond.)

Rune #6: 31.0 LAT and 53.6 LON (It is located on the side of a blue magical lake.)

Rune #7: 39.1 LAT and 50.4 LON (It is located in the center of the blue magical lake.)

Rune #8: 45.7 LAT and 55.7 LON (It is in the open space of the island.)

Rune #9: 42.5 LAT and 40.3 LON (It is by the side of a small rock in an open space.)

Rune #10: 42.5 LAT and 30.1 LON (Located between the crack of huge rocks.)

Rune #11: 62.4 LAT and 48.5 LON (Just head to the designated coordinate.)

Rune #12: 60.3 LAT and 35.9 LON (It is on the central island of the region with red plants.)

Rune #13: 63.5 LAT and 30.0 LON (It is under a rock in the red region.)

Rune #14: 56.6 LAT and 25.1 LON (It is in near proximity to a small waterfall.)

Rune #15: 66.5 LAT and 13.7 LON (It is located in the middle of the red region under a green tree.)

</details>

<details>

<summary>Jotunheim Portal Fjordur Runes</summary>

Rune #1: 74.4 LAT and 24.5 LON (On the edge of a snowy rock.)

Rune #2: 70.5 LAT and 32.6 LON (At the bottom of the snowy rock.)

Rune #3: 60.4 LAT and 26.0 LON (Between the trees at the bottom.)

Rune #4: 60.2 LAT and 34.0 LON (It is obvious and can be grabbed by getting to the coordinate.)

Rune #5: 63.1 LAT and 33.7 LON (It is near the waterfall.)

Rune #6: 64.6 LAT and 39.4 LON (On the top of a rocky region.)

Rune #7: 62.8 LAT and 48.4 LON (It is located inside a broken structure.)

Rune #8: 71.4 LAT and 48.0 LON (Just get to the designated coordinate.)

Rune #9: 75.8 LAT and 48.5 LON (On a huge rock by side of a mountain.)

Rune #10: 84.0 LAT and 56.6 LON (On a huge rock of snow extended from the mountain.)

Rune #11: 91.9 LAT and 50.6 LON (It is under a natural bridge of rock.)

Rune #12: 84.1 LAT and 46.7 LON (Very obvious and can be found by getting to the coordinate.)

Rune #13: 80.1 LAT and 39.1 LON (It is on a rock extending from a mountain.)

Rune #14: 82.0 LAT and 36.7 LON (On the inner boundary of the cavity.)

Rune #15: 91.0 LAT and 27.1 LON (At a height, can be seen after getting to the coordinate.)

</details>

<details>

<summary>Vanahiem Portal Fjordur Runes</summary>

Rune #1: 12.3 LAT and 64.4 LON (Located by the side of a waterfall.)

Rune #2: 01.3 LAT and 69.7 LON (Get into the cave above the rune collected recently and get to the mentioned point.)

Rune #3: 00.0 LAT and 68.8 LON (Just go to the point mentioned and you’ll find the rune.)

Rune #4: 19.5 LAT and 74.8 LON (It is on the stem of a huge tree.)

Rune #5: 27.7 LAT and 63.3 LON (On a platform attached to the outer boundary of a huge rock.)

Rune #6: 30.7 LAT and 75.7 LON (It is located near a small pond of blue water.)

Rune #7: 31.8 LAT and 83.0 LON (It is also on the stem of a tree with a greenish stem.)

Rune #8: 29.6 LAT and 89.8 LON (Located on a platform between a bunch of trees.)

Rune #9: 18.8 LAT and 99.9 LON (It is located on the green branch of a huge tree.)

Rune #10: 10.5 LAT and 97.0 LON (This one is located on the grounds with the coordinates mentioned.)

Rune #11: 00.0 LAT and 99.7 LON (This one is located on the grounds with the coordinates mentioned.)

Rune #12: 00.0 LAT and 99.9 LON (It is located behind the falling water of the waterfall.)

Rune #13: 02.2 LAT and 91.7 LON (It is located on elevated ground.)

Rune #14: 09.2 LAT and 84.7 LON (From the coordinates (00.6 LAT and 88.7 LON) continue straight to the above coordinates taking you to a cave behind a waterfall where you’ll find the rune.)

Rune #15: 11.1 LAT and 83.1 LON (It is also behind the small waterfall.)

</details>

<details>

<summary>Vardiland Fjordur Runes</summary>

Rune #1: 60.4 LAT and 35.7 LON (Lies in open space and can be obtained by getting to the point.)

Rune #2: 63.9 LAT and 25.8 LON (It is by the left side of the waterfall.)

Rune #3: 66.0 LAT and 33.4 LON (On the edge of a snowy hill.)

Rune #4: 66.6 LAT and 39.1 LON (It is located among the hexagonal pillars.)

Rune #5: 74.3 LAT and 34.0 LON (Just go to the mentioned point and you’ll find the rune easily.)

Rune #6: 76.8 LAT and 36.2 LON (It is between the two giant waterfalls.)

Rune #7: 79.9 LAT and 28.3 LON (It is in close proximity to a small waterfall.)

Rune #8: 83.5 LAT and 35.4 LON (It also lies by the side of a waterfall whose water quickly vanishes.)

Rune #9: 87.6 LAT and 45.0 LON (It is on a huge rock in the sea.)

Rune #10: 90.6 LAT and 39.8 LON (Go underwater at 91.6 LAT and 41.7 LON and carry to the coordinate of the rune.)

Rune #11: 94.0 LAT and 34.7 LON (It is floating openly at the given coordinate.)

Rune #12: 97.0 LAT and 21.9 LON (Just follow the given coordinate above the ground surface to collect the rune.)

Rune #13: 97.6 LAT and 06.4 LON (It is on the beach lying on a wooden platform.)

Rune #14: 97.8 LAT and 05.5 LON (It is right next to the previous rune.)

Rune #15: 94.3 LAT and 07.7 LON (Get to the coordinate and collect the rune.)

Rune #16: 91.6 LAT and 07.6 LON (It is also very close to the previous rune.)

Rune #17: 92.0 LAT and 01.9 LON (It is by the side of a waterfall falling directly into the sea.)

Rune #18: 89.3 LAT and 02.6 LON (Go to the left side of the previous waterfall and you’ll find this one.)

Rune #19: 89.2 LAT and 06.5 LON (It lies openly at the given coordinate.)

Rune #20: 86.1 LAT and 06.9 LON (It is next to a small canal in the snow.)

Rune #21: 85.8 LAT and 06.8 LON (Get into a tunnel from 86.2 LAT and 05.2 LON and get to the coordinate above to find the rune.)

Rune #22: 87.6 LAT and 11.6 LON (In the same tunnel, follow the coordinate and you’ll find the rune in a dinosaur’s mouth.)

Rune #23: 84.8 LAT and 15.4 LON (In the same tunnel, it lies at the coordinate and is obvious from a distance.)

Rune #24: 84.7 LAT and 16.0 LON (In the same tunnel, you’ll find the rune.)

Rune #25: 82.5 LAT and 16.3 LON (It is also in the same tunnel, right next to a glowing tree.)

Rune #26: 81.1 LAT and 13.7 LON (It is located beside a small plant in the same tunnel.)

Rune #27: 87.8 LAT and 16.7 LON (It is in the same tunnel.)

Rune #28: 88.2 LAT and 20.1 LON (In the same tunnel, it lies by the side of molten lava.)

Rune #29: 78.8 LAT and 15.6 LON (It is hidden behind tall white trees at the given coordinates.)

Rune #30: 83.2 LAT and 14.6 LON (It can be easily located at the given coordinate.)

Rune #31: 86.7 LAT and 13.0 LON (It is right on the top of a huge rock covered with snow.)

Rune #32: 89.7 LAT and 13.7 LON (Surrounded by rocks from all sides, it is located in a cavity.)

Rune #33: 91.3 LAT and 16.4 LON (It is right on the top of hills covered with snow.)

Rune #34: 81.2 LAT and 04.5 LON (Get at the coordinate to get the rune.)

Rune #35: 80.0 LAT and 03.5 LON (On the heights of the hills, this rune lies.)

Rune #36: 78.8 LAT and 03.4 LON (Get at the coordinate to find the rune.)

Rune #37: 77.8 LAT and 09.9 LON (Get at the coordinate to find the rune.)

Rune #38: 69.7 LAT and 05.0 LON (Get at the coordinate to find the rune.)

Rune #39: 67.8 LAT and 07.9 LON (Get at the coordinate to find the rune.)

Rune #40: 51.2 LAT and 38.3 LON (It can be obtained by simply getting to the coordinate.)

Rune #41: 65.9 LAT and 07.7 LON (Get at the coordinate to find the rune.)

Rune #42: 63.2 LAT and 10.1 LON (Get at the coordinate to find the rune.)

Rune #43: 70.0 LAT and 12.2 LON(Get at the coordinate to find the rune.)

Rune #44: 73.7 LAT and 19.8 LON (Get at the coordinate to find the rune.)

Rune #45: 73.9 LAT and 05.3 LON (Get underwater from the side of the island where there’s a tall tree. Then follow the coordinate and get the rune.)

Rune #46: 75.4 LAT and 06.5 LON (In the Same tunnel, you’ll find this one.)

Rune #47: 76.4 LAT and 08.3 LON (This marks the last Fjordur Rune in Ark Fjordur and is also inside the same tunnel.)

</details>

## ASA NOTES Locations:

ARK Wiki Explorer Map. &#x20;

Click on the Note Icon and the Note ID#; Coords; and (single player teleports) will appear in a Tab.

#### ASA Bob's Tall Tale NOTES:

You must own Bob's Tall Tales to see the notes locations. Locations are included in the above Interactive maps.

**NOTE:** Joining/transferring to The Island should trigger one (prologue 1), and ascending the other (epilogue 1). Neither are required for the bonus levels.

<table data-view="cards"><thead><tr><th></th><th></th><th></th><th data-hidden data-card-cover data-type="files"></th><th data-hidden data-card-target data-type="content-ref"></th></tr></thead><tbody><tr><td>ASA Island Note Interactive map.</td><td>Click to go to map!</td><td></td><td><a href="https://772063455-files.gitbook.io/~/files/v0/b/gitbook-x-prod.appspot.com/o/spaces%2F-Lgje1lBxKKWXwqycB-v%2Fuploads%2FVOCDmhuCErRd8y1t5URa%2FASA_ISLAND_MAP.png?alt=media&amp;token=c7d5843e-ee94-41ad-b00b-70cc4306c50b">ASA_ISLAND_MAP.png</a></td><td><a href="https://ark.wiki.gg/wiki/Explorer_Map/The_Island">https://ark.wiki.gg/wiki/Explorer_Map/The_Island</a></td></tr><tr><td>ASA Scorched Earth Note Interactive map.</td><td>Click to go to map!</td><td></td><td><a href="https://772063455-files.gitbook.io/~/files/v0/b/gitbook-x-prod.appspot.com/o/spaces%2F-Lgje1lBxKKWXwqycB-v%2Fuploads%2F6BFxhS34SWGwJcLs4tLr%2FASA_SE_MAP.png?alt=media&amp;token=d8675b53-8903-4dbc-a5e9-179bd2232cf8">ASA_SE_MAP.png</a></td><td><a href="https://ark.wiki.gg/wiki/Explorer_Map/Scorched_Earth">https://ark.wiki.gg/wiki/Explorer_Map/Scorched_Earth</a></td></tr><tr><td>ASA Aberration Note Interactive map.</td><td>Click to go to map!</td><td></td><td><a href="https://772063455-files.gitbook.io/~/files/v0/b/gitbook-x-prod.appspot.com/o/spaces%2F-Lgje1lBxKKWXwqycB-v%2Fuploads%2FNK42UkaWiTkbFPLIZHxt%2FAberration.webp?alt=media&amp;token=3532a35f-66fe-41c6-b368-8ae7b03e0934">Aberration.webp</a></td><td><a href="https://ark.wiki.gg/wiki/Explorer_Map/Aberration">https://ark.wiki.gg/wiki/Explorer_Map/Aberration</a></td></tr><tr><td>ASA Extinction Note Interactive map.</td><td>Click to go to map!</td><td></td><td><a href="https://772063455-files.gitbook.io/~/files/v0/b/gitbook-x-prod.appspot.com/o/spaces%2F-Lgje1lBxKKWXwqycB-v%2Fuploads%2Ft52WZeCppnTa4p8ySEZA%2FEXT%20Map.png?alt=media&amp;token=496be784-2246-4ce3-990f-12982378d18c">EXT Map.png</a></td><td><a href="https://ark.wiki.gg/wiki/Explorer_Map/Extinction">https://ark.wiki.gg/wiki/Explorer_Map/Extinction</a></td></tr></tbody></table>

<figure><img src="https://772063455-files.gitbook.io/~/files/v0/b/gitbook-x-prod.appspot.com/o/spaces%2F-Lgje1lBxKKWXwqycB-v%2Fuploads%2F9tag1Qo2KWqdNriGuoZn%2Fimage.png?alt=media&amp;token=65e61738-2de2-44cf-8404-208affdea16f" alt=""><figcaption></figcaption></figure>


# The Story of ARK: Survival Evolved

Spoiler ALERT!!! If you do not want the mysteries of the ARKs or the ending to this story spoiled, PLEASE DO NOT READ THIS!

## Back history of Earth.

### &#x20;Element&#x20;

Element is a highly advanced material filled with energy, that either came from outer space, or deep down from earth. Humans discovered it during the 22nd century, and quickly became obsessed with this overpowered resource. Humans evolved quickly and discovered/invented new technologies that were possible due to Element. However, Element turned out not just to be a precious resource.

During the "Element War", the use of element-powered weapons began to heavily pollute the earth. The war on Earth soon took its toll as the polluted element became almost conscious/self-aware, and the element was revealed to almost be a form of living organism/flora with a hive mind personality with endless hatred, that only wanted to cause devastation and annihilation. Because of its self-awareness, Element has begun to dig deep into Earth at Element-polluted battlefields.

Earth has grown terminally ill as if it is in an end-stage disease from something, most likely from pollution over the course of human history and the recent three centuries of Element pollution caused by the URE and Terran Federation.

### 22nd. Century Earth Governments.&#x20;

In the 22nd century, two superpowers had mastered Element-based technology (referred to as Tek) - the United Republic of Earth (URE) and the Terran Federation (Feds). For reasons that are still unclear, the two factions were inevitably drawn into a war that ultimately consumed them both. What they were fighting over is unknown, but "Original" Santiago suspects the usual culprits of starting a war: politicians.

#### The United Republic of Earth (URE)&#x20;

The United Republics wanted to use the new energy source (Element), to manipulate the human body and survive by becoming more than human. Employing the neurological modifications that allowed interfacing with Element. Thus, becoming a race of Transhumans', eventually becoming early Homo Deus (energy-based beings). The URE hoped that the Homo Deus would be an option of escape for humanity. In Genesis: Part 2, many Terran Federation explorer notes explain that Homo Deus were referred to as "Transhumans'" in the past and they were mainly from the United Republics of Earth. The Homo Deus/ Transhumans' have a strict mindset that “Original” Santiago describes where people involved in Project Genesis must do whatever it takes no matter the cost to succeed and sacrifice themselves and their livelihoods for the greater good.

#### The Terran Federation (Feds)&#x20;

The Terran Federation wanted to use the new energy source (Element) for a grand engineering of Earth to repair and hack into it. By creating weapons and machines that employed the use of Element. They promoted being Humanist. And heavily restricting or discouraging their citizens from putting on neurological modifications and interfacing with the unknown.

### Element War - Year 2327 - Year 2347&#x20;

The Element War lasted 16 to 17 years with tensions escalating two years before the start of the war. According to "Genesis Clone" Santiago, one of the causes, if not the main cause of the Element War was the differences between the two Governments use of (Element). "Original" Santiago's death ended the Element War in Year 2347.

### The Collapse - Year 2347 -?&#x20;

By the end of the Element War, Element grew to critical masses at alarming rates. The entire planet Earth collapsed as Element spread across the planet by first digging roots deep into its crust, enabling it to create Titans to ravage everything in sight. \
On top of that, natural disasters ravaged the environment and killed a majority of the inhabitants. Most notably, Earth's rotation has stopped for some reason, causing certain locations on Earth to have constant day, constant night, and a twilight zone.&#x20;

Once the two factions realized the damage that they caused, and the greater threat of Element, they reconciled and worked together to focus on the real problem. They invested all of their effort into Project Genesis. In the aftermath of the Titans, and natural disasters brought on by Elements' ravages, both the URE and the Terran Federation collapsed, and very few landmarks and monuments remained intact, with most traces of the old world consumed by rapidly growing veins of Element. The only notable surviving landmarks are the city of Sanctuary, the Proto-ARKs of Extinction, and Arat Prime.&#x20;

#### Project Genesis&#x20;

Project Genesis initially was a project that planned to preserve and restore all life without Element contamination. And both factions worked together to construct the ARKs and the Colony Ship (Genesis Simulation) in an attempt to save life on earth from extinction.&#x20;

Project Genesis was a massive project that was done by the Terran Federation humanists and the United Republics of Earth transhumans, its purpose is to hold and record every engrammic matrix, or the minds and personalities of every single known human in Earth's history into an archive. The project was so indifferent that if the whole world found out about efforts to archive every human into an archive, a multitude of organized mobs and riots will try to shut them down. As a result, the general public was kept in the dark.&#x20;

Both the Colony Ship and ARKs will hold a copy of this archive to allow them to repopulate the worlds they will inhabit respectively. Before the collapse, the Genesis Simulation was one of many simulations that students used to routinely learn their classes, most notably online sciences by wandering around the given simulation's environments. It was also a vital research facility where social science researchers such as psychologists and sociologists are enjoying the sight of seeing every possible human interaction.

![](https://772063455-files.gitbook.io/~/files/v0/b/gitbook-x-prod.appspot.com/o/spaces%2F-Lgje1lBxKKWXwqycB-v%2Fuploads%2FZxY1lzzqkBcXayNZGa7l%2FARK_2022_Header.jpeg?alt=media\&token=db8f1421-9049-4910-bdb3-20461b948aaf)

## The ARK in-lore story&#x20;

***The ARK in-lore story*** begins about millions, or even billions of years after The Collapse, when the ARKs begin to malfunction. Explorer notes indicate that the ARKs have remained in orbit far longer than 646 years.

### ***ARK***&#x20;

Is a space station intended to house living organisms such as humans, Creatures, and Plants. They are incredible feats of human engineering, kilometers-wide mobile space stations housing vast vaults of genetic information, cloning devices, and terraforming technology. In their dormant state, they wait in Earth orbit, simulating a diverse ecosystem by controlling onboard climate and animal populations. The dome that protects this false ecosystem from the void of space also doubles as an artificial horizon, masking the station's true nature with a blue sky and an artificial day/night cycle. Humans are deterred from reaching the edge of this artificial horizon by methods that look like natural boundaries. For an unknown period of time, the ARKs awaited an activation signal from Earth. The stations are programmed to perform a controlled descent in response to this signal, touching down on the planet's surface. Each station is a giant seed built to bloom over the Earth's wasteland, its terraforming systems sweeping away the Element infestation. All of this is triggered by an order called the Reseed Protocol that calls the ARKs to return back to Earth's surface. However, the Reseed Protocol is blocked by another piece of criteria: the Element Toxicity Rating.

***ARKs’*** are powered by the Obelisk, and each ARK contains at least one Guardian. In-game, the power of the obelisks are shown in the Extinction ending cutscene when the obelisks and their station released enough energy to cause a shockwave that levels the nearby remains of the city of Sanctuary. Curiously, although designed to repopulate the planet, modern Earth species are almost entirely absent from every known ARK. Their creators used each model as a whimsical genetic playground, featuring new species that are either heavily modified or completely fabricated. The Island, the closest known ARK to a 'pure' Earth ecosystem, features modified versions of animals from across prehistory unnaturally mixed together.

***ARKs'*** strange quirks do not stop at their animal populations. Their builders discovered a hidden part of the brain called an 'engrammic matrix', which stored information in some human bodies even after years of decay. Personalities and memories were recreated for people who had been dead for centuries or even millennia.\[3] These people were set loose in the ARKs with no idea of where they were, or how much time had passed. Every human that is on the ARK has a strange implant in their left wrist in the shape of a prism. This implant somehow acts as a medium between two languages by translating the speaker's language to the listener's language, so the listener completely understands what the speaker is actually saying.

These ***ARKs'*** were launched prior to a global-level extinction event in which Element wiped out Earth's Human population. With the defeat of the King Titan and the activation of the signal, every single ARK descended to Earth, including the Aberrant ARK with Rockwell and a station full of corrupt Element. Given that Rockwell is present on the Colony Ship and has intentions on conquering a different habitable world, Rockwell fled through the Genesis Simulation as Earth is clean of corrupt Element and the ARKs were able to clean up the Aberration ARK.

### Homo Deus&#x20;

Homo Deus, meaning "god-man" from the Latin roots, are conscious entities that watch over the ARKs. They are energy-based beings who live in a tangential reality and are an option of escape for humanity. The technology of Element, the Genesis Simulation, and the ARKs were likely developed from the same principals; and thus the Homo Deus were capable of integrating with the ARKs. \
The Homo Deus eventually become the beings created to watch over the ARKs.&#x20;

These beings can rarely resurrect any Humans. One did and created a new Homo Deus, A notable one, "The One Who Waits", who guides the survivor through The Island, Scorched Earth, and Aberration to Extinction via the use of Notes and Dossiers. With Element prolonging the ARK's time in orbit, this caused the Homo Deus to lose themselves. Helena is the last Homo Deus whose mind hasn't crumbled yet.

Homo Deus have a number of abilities: Being able to see the entire universe in a virtual pane of glass. Their ability to see so much at the same time helped those who built the ARKs. They have a power that tends to the ARKs. They can interact with the physical world by touching survivor's minds and making things to help them. Where a typical person lives a day, Home Deus’s ability to see and experience entire time streams (i.e. the beginning to the end of the universe) as singular moments may be likely what causes the Homo Deus to lose their sanity, as maintaining a singular persona within non-finite experience requires great effort and energy.

Homo Deus technically don't exist in the physical world anymore and have their own plane of reality, a reality. In the Island's space station at the end of the Tek cave, the third planet hologram with the Dead Earth being highlighted in red has another hologram across it that has a description that states that the Homo Deus are considered endangered.

It is worth noting that not every human using the Genesis technology became Homo Deus. Some prerequisite seems to exist, but it is tastefully undisclosed. The only clue on who becomes a Homo Deus is from Santiago's Mek Pilot Evaluation on Helena Walker, the only mek pilot in-lore that has maxed out every synchronization gauge.

### The ARKs’ interaction with the Genesis Simulation&#x20;

While the ARKs simulated environments in analog, the Genesis Simulation was entirely virtual. Housed aboard a colony ship it was built to train passengers in preparation for arrival, without waking them from hibernation. Genesis was designed by the same group that built the ARKs. \
Both projects seem to have developed concurrently, with lessons learned from one feeding into the other. Both technological marvels improved each other with their mutual relationship. \
When the ARKs have an issue in how they operate, the builders go back to the Genesis Simulation and apply the conditions inside the simulation in order to safely know how to resolve the problem. This process can be the reverse when the Genesis Simulation glitches out and it needs the ARKs to resolve its issue.&#x20;

From humble beginnings, Genesis was built into a technological marvel rivaling even the great ARKs, in a more compact package. Its design focus changed several times over development. Remnants of code from older versions still linger, causing glitches. The Genesis simulation has an early version of a piece of technology that can store a personality and put it into a body that was later applied to the ARKs. This result of the technology can be seen during the in-game's respawn mechanic. Older versions of the Genesis Simulation included pleasant environments such as a shopping center.

### The Creator Teams of the ARKs’&#x20;

The creators of the ARKs and the Colony Ship were constantly considering what lifeforms they were going to bring into their habitats. The team can't possibly recreate every single form of life that existed, and they decided to back up as many as they can, whether the creature is extinct or currently living. Some of the creatures may have made a possible balance in ecosystems and that it doesn't make sense on how some civilizations in the past may have survived a natural disaster.&#x20;

The creators of the ARKs and Colony Ship not only looked up information about dinosaurs, but also about creatures of mythological, and sci-fi origin to have more creatures. Humans surviving alongside dinosaurs worked so well as a simulation that it worked just as well in the real analog world for a strange reason. This explains why all the ARKs have creatures that are mostly dinosaurs. When the dinosaurs were a simulation experiment, the creators sorted out the dinosaur behaviors in the simulation and those edited dinosaurs were brought to life on the ARKs.&#x20;

Some of the creatures are the result of genetic modification that was caused by humans using Tek gene manipulation technology to alter organisms to have traits of more than two creatures. This was done to expand on more creatures for humans to be experimented with.

### Phase 2: Creating Prototypes&#x20;

With the Genesis Simulation technology near perfection, the creators of the ARK moved to phase 2: creating prototypes.&#x20;

Proto-ARKs can be found on Extinction. Unlike the environments that were sent up into space, Humans and Creatures can freely enter and leave the Proto-ARKs. They also have a prototype obelisk in their center that powers the ARK. Those obelisks helped the builders of the ARK to figure out what will power the ARKs while they are in orbit. The only problem the Proto-ARKs have is a dome that allows creatures to walk in and out of the ARKs. This was solved by making the dome strong enough to prevent creatures from getting in or out.

The ARKS The ARKs were designed to help heal the poisoned Earth. At one point, the makers moved the ARKs and Genesis Simulation up into orbit over concern of the Proto-ARKs inhabitants being mixed with animals outside the ARK.

The very first Proto-ARK that is up in orbit, the Farm stands as the basis in design for the artificial biomes and the many prehistoric creatures that are native in the ARKs and the Colony Ship. The Farm developed technology that later applied to the ARKs. A terraforming system- The Reseed Protocol. The Farm could speed evolve lifeforms with a memory engram learning system, it was able to adapt to the new situations. The AI Control of all the Farm systems, and eventually became the Overseer in all the ARKs. The Farm will have inhabitants that will have conflicts with each other, as indicated with 99.452187% chance of having conflicts.&#x20;

Obviously, it is the basis for **The Island,** the closest known ARK to a 'pure' Earth ecosystem, features modified versions of animals from across prehistory unnaturally mixed together.

**Scorched Earth** was a breeding ground for wyverns and other fantastical monsters. Their creators used each model as a whimsical genetic playground, featuring new species that are either heavily modified or completely fabricated.&#x20;

**Aberration began as a normal ark** and was changed as Helena, Mei Yin, and Santiago destabilized the obelisks. Causing the Rockwell incident and overseeing the Completion of the Gateway Project (2 weeks before it was finished). The events in Aberration are all within 30 standard days.

### Extinction and Arat Prime

**In Extinction**, there are creatures that are either natural or genetically modified by Element, allowing them to have abnormal powers that can be done by Element. They were present in-between Earth's collapse and the Arrival of the Colony Ship at the habitable world.

The ARK creators moved the Proto-ARKs up into orbit to prevent creatures from both outside and inside the ARKs to interbreed, but the damage had been done, many generations of inbreeding leading to the snow owls, managarmrs, velonasaurs, gachas, and gasbags that are on Extinction.

The Crater Forest was a failed experiment. This underground forest was formerly an operational, forest-themed Proto-ARK but sunk into the ground. It seems to have no borders. This implies that the ARKs need a boxed-in area.&#x20;

The Desert Dome was an experiment that had improvements since the ARK now has a metal ring, a circular area, but has a massive hole and some ARK structures being exposed. This might imply that the ARKs need solid ground that has very few cave systems underneath it.&#x20;

The Snow Dome was an experiment that might be the foundation of all the ARKs since it has no exposed structures, few cave systems, and holes. Now all that is left for building the ARKs is making the barrier far sturdier so survivors can't exit, more, larger obelisks to power the ARK, a wider area for the ARK, and systems that can carve, and move the chunk of land up and safely down from orbit.&#x20;

**Arat Prime** is a mysterious location on the far side of Earth from Sanctuary City, somehow related to both the ARKs and the Genesis Simulation. Arat Prime when translated into Latin is called "Primus Aratra". Primus means "first" and Aratra means "plow". Put together, Arat Prime means "The First Plow". Based on what its name means, the technology on Arat Prime will play a pivotal role with all of the ARK's Reseed Protocols where Arat Prime acts as the plowing tool to make the ground ripe for growth, and the ARKs act as seeds that plant themselves into the ground.

With Earth currently not rotating, the area around Sanctuary had constant exposure to the sun, giving an impression of constant day. Since the location of Arat prime is on the far side of Earth, it would experience the opposite: constant night.

Arat Prime is a location that has a superlight speed bridge via Genesis Simulation to connect the Colony Ship with Earth. Mei-Yin and Diana Altaras, now the only two people left on Earth, head for Arat Prime. According to Diana Altaras and Mei Yin, Arat Prime was being referenced by the bunker they found and showed information how Element can command the Corrupted horde with troop movements, and any artificial entity made by Element can spread it anywhere they go.  Remarkably, at the final cutscene of Extinction, we see that the broken aberration ARK crash landed on a dark part of earth, giving us a hint that maybe Rockwell made his way to Arat Prime.

### The Colony Ship (Genesis Simulation)- Earth 22nd. Century&#x20;

The Feds concentrated their energies in building the Colony Ship to find a planet with similar conditions to Earth. “Original” Santiago pondered about this as he was thinking of recruiting people that are willing to sacrifice their lifetimes and their children's lifetimes to see the Colony Ship's mission through to the end. The project also became disturbing to some of the initial Colony Ship crew members. The transhumans made engrammic copies of the crew members in the archive's database regardless wither they consented into being archived or not. When “Original” Santiago did random searches on the engram archive database, he found something disturbing that he noted he will never unsee: the engram archive team under Yongki somehow meshed two distinct identities together that became the result of a person that never existed in human history. Yongki, the archive director and friend of Santiago, found that his family had been archived regardless of if they said yes or no to consent.

### Genesis: Part 1 - Over 684 years after the events of The Collapse.&#x20;

The current version of the Genesis Simulation has five simulated environments: Bog, Moon, Ocean, Snow, and Volcanic. Anti-contamination codes work to keep elements of one ecosystem from crossing over into another. They simulate extreme biomes that can greatly impact Earth as a whole. However, these extremes are not found on Earth in its current hazardous state.

Upon beating the Corrupted Master Controller to escape the Genesis Simulation, the player wakes up from their storage unit on the colony ship and notices a specimen implant that is dubbed a "Terran Ascension Implant".

### Genesis: Part 2&#x20;

A massive ship with a Terran Federation Logo that is the setting of Genesis: Part 2, the Colony Ship contains ring worlds that depict the most accurate picture of humanity's peak ingenuity and technology through Tek tier. According to Rockwell, the ring worlds are a treasure trove of so many advanced scientific discoveries that are so groundbreaking, the known boundary between biology and technology is about to disappear. It was built and launched by the Terran Federation during or just before the Collapse and was sent with the hope of people finding a new planet to colonize. The colony ship was made as a backup plan, in case the reseed protocol never initiated.

Arat Prime might not just have been used to launch the colony ship, but may also be used to beam/transfer peoples minds/consciousnesses to the Genesis Simulation onboard the colony ship, into a sleeping clone body on the ship. How Rockwell got onboard is unknown, but a fair guess is that after the broken aberration ARK crashed into Earth in Extinction, Rockwell made it to Arat Prime where he beamed himself to the ship in deep space.

The Colony Ship supposedly also had an operational crew born from generations of humans that were launched with the ship. However, most of the crew got slaughtered when Rockwell began to overtake the ship. According to Nida, the remaining crew members went into hiding but it is uncertain if they put themselves in pods or Rockwell drew them out and slaughtered them

The Corrupted Garden Ring, home of Rockwell prime contains many types of creatures either natural or genetically modified by Element, allowing them to have abnormal powers that can be done by Element. The Astrocetus and the Astrodelphis are some of the creatures that live naturally in the space between the Eden and Corrupted Garden Ring.

An “unknown event” that will soon happen in the ARK universe, Helena mentions that the ship will soon arrive, the Genesis Simulation on the colony ship keeps participants under constant pressure to prepare them with survival skills in anticipation for the “upcoming event”. The end of Genesis part 2, the whole ship, aside from the Eden ring, crashes down on a gas giant/deserted looking planet. The Eden ring however, begins to launch pods with survivors including “Genesis:2” Santiago down to a neighboring planet. According to Santiago, this is, "Just the easy part". This may be "The Arrival".

***Below you will find the various links and sites that the above accumulation of lore has come from. All Credits reside in the authors of these sites.***&#x20;

Editors of Lore - [ARK: Survival Evolved Wiki (fandom.com)](https://ark.fandom.com/wiki/Lore)&#x20;

u/diamondcreeper of Reddit for the wonderful condensation of [ARK's Lore](https://www.reddit.com/r/playark/comments/cmf0xa/everything_you_need_to_know_about_arks_story/).&#x20;

***Interesting Character Sheets from "ark.fandom.com".*** \
***I wanted to capture these awesome compilations of the various Characters of ARK Survival Evolved. They have been copied into a document for safe keeping.***&#x20;

***All rights are attributed to the editors of "ark.fandom.com".***&#x20;

[ARK: Character - Diana Altaras](https://docs.google.com/document/d/1XDQGpyqiDrvALHSO6ajEc1RLK6Apm9jhI-G6-fKfyeE/edit#heading=h.rkqhy53parbe) \
[ARK: Character - Edmund Rockwell](https://docs.google.com/document/d/1YHL_Z6b0admaoD9HabnqQjxcg6J-iU9zKjG1LVnquZ4/edit) \
[ARK: Character - Gaius Marcellus Nerva](https://docs.google.com/document/d/1pW5-pQRW3K3YrDnplSxd33WT3awuDBLRbK5QycKh5FY/edit) \
[ARK: Character - Helena Walker](https://docs.google.com/document/d/11ROnZVfMBA2oD7fTa7KLxQ1z5wv4hJBbI4_U7QRSBAs/edit) \
[ARK: Character - John Dahkeya ](https://docs.google.com/document/d/1UxZi2dVV75ruENzpwK1E6nukpLkb6XAwNM3FPQOwwio/edit)\
[ARK: Character - Mei Yin Li ](https://docs.google.com/document/d/14gaRRxHkMqBJP7JjHjC4ksmVLGHeMkGDPeR1zL2u5Ak/edit)\
[ARK: Character - Raia](https://docs.google.com/document/d/1cZNgtE4tPjI1uzrTWhZTY74RXZ17KgWxwu9OMqKlaKo/edit) \
[ARK: Character - Santiago](https://docs.google.com/document/d/1p_0tpYMi1LWP8t3IbIaQQIuBA93_0rOpa5QYIuliDUY/edit)

***Wonderful Videos done by @Neddy the Noodle on YouTube.***&#x20;

#### ARK Lore Explained

[**Prologue - ARK Lore Explained (E1)**](https://www.youtube.com/watch?v=uoEgydLrwRQ\&list=PLbI9iPz34TRhlvYTb8Npii_7o6qwf0D2f\&index=2)\
[**Introducing The ARKs - ARK Lore Explained (E2)**](https://www.youtube.com/watch?v=RPxGESfi8_A\&list=PLbI9iPz34TRhlvYTb8Npii_7o6qwf0D2f\&index=3)\
[**Ascension to Discovery - ARK Lore Explained (E3)**](https://www.youtube.com/watch?v=LqwRcsLwqRQ\&list=PLbI9iPz34TRhlvYTb8Npii_7o6qwf0D2f\&index=4)

#### The Survival Stories: [ARK: The Survival Stories - Helena Walker (The Island) - YouTube ](https://www.youtube.com/watch?v=ZJAvsqT7F8I\&ab_channel=NeddyTheNoodle) [ARK: The Survival Stories - Li Mei-Yin (The Island) - YouTube](https://www.youtube.com/watch?v=HseLrGAXkP4\&t=2s\&ab_channel=NeddyTheNoodle) [ARK: The Survival Stories - Sir Edmund Rockwell (The Island) - YouTube ](https://www.youtube.com/watch?v=cX-6qXK3Ndo\&ab_channel=NeddyTheNoodle) [ARK: The Survival Stories - Gaius Marcellus Nerva (The Island) - YouTube ](https://www.youtube.com/watch?v=XhnVJwVyaa8\&ab_channel=NeddyTheNoodle) [ARK: The Survival Stories - John Dahkeya (Scorched Earth) - YouTube](https://www.youtube.com/watch?v=47zRGaF-veQ\&ab_channel=NeddyTheNoodle) [ARK: The Survival Stories - Raia (Scorched Earth) - YouTube](https://www.youtube.com/watch?v=TDjLJgJEFkk\&ab_channel=NeddyTheNoodle) [ARK: The Survival Stories - Sir Edmund Rockwell (Scorched Earth) - YouTube](https://www.youtube.com/watch?v=gfQEjxalZ4s\&ab_channel=NeddyTheNoodle) [ARK: The Survival Stories - Helena Walker (Scorched Earth) - YouTube](https://www.youtube.com/watch?v=YgsOJeLXx6c\&ab_channel=NeddyTheNoodle)

#### ARK: Helena Walker's Dossiers

[**ARK: Helena Walker's Dossiers - Supercut (All Island Dossiers)**](https://www.youtube.com/watch?v=Dl4Chi7BlbI\&list=PLbI9iPz34TRise0_C3EfPk7PigR8900Zj\&index=7\&pp=iAQB)\
[**ARK: Helena Walker's Dossiers - (Scorched Earth)**](https://www.youtube.com/watch?v=QvG1m7qAb1E\&list=PLbI9iPz34TRise0_C3EfPk7PigR8900Zj\&index=8\&pp=iAQB)\
[**ARK: Helena Walker's Dossiers - (Aberration)**](https://www.youtube.com/watch?v=oNDiq7A4tO0\&list=PLbI9iPz34TRise0_C3EfPk7PigR8900Zj\&index=9\&pp=iAQB)

<figure><img src="https://772063455-files.gitbook.io/~/files/v0/b/gitbook-x-prod.appspot.com/o/spaces%2F-Lgje1lBxKKWXwqycB-v%2Fuploads%2Fxa4vxEaJNgJqknpjz0DW%2Fimage.png?alt=media&amp;token=8ce127bc-20d3-4a05-98de-3f6a298b685b" alt=""><figcaption></figcaption></figure>


# ART for YOUR ARK!

How to use .pnt Files in ARK:Survivor Evolved

**HERE IS HOW TO USE THE .pnt FILES**&#x20;

#### *Where do I put ARK .pnt files?*

`ARK .pnt files need to go into the “MyPaintings” directory:`

`C:\Program Files (x86)\Steam\SteamApps\common\ARK\ShooterGame\Saved\MyPaintings\`

If you are using additional space to store your ARK Game files, look here: `X:\SteamLibrary\steamapps\common\ARK\ShooterGame\Saved\MyPaintings\`

`Note: If the ‘MyPaintings’ folder can’t be found, you can manually create one yourself.`

`The “MyPaintings” folder itself only exists if you create it manually, or have saved a .pnt file in ARK previously.`

<table data-view="cards"><thead><tr><th></th><th></th><th></th><th data-hidden data-card-target data-type="content-ref"></th></tr></thead><tbody><tr><td><img src="https://772063455-files.gitbook.io/~/files/v0/b/gitbook-x-prod.appspot.com/o/spaces%2F-Lgje1lBxKKWXwqycB-v%2Fuploads%2FJKCwTgKQgjKPbhZLZPXG%2Fimage.png?alt=media&amp;token=94d35455-b5e7-4710-8a03-7303ffeac133" alt=""></td><td><h4>Making Warpaints [by TheJollyLlama875]</h4></td><td></td><td><a href="http://steamcommunity.com/sharedfiles/filedetails/?id=522841147">http://steamcommunity.com/sharedfiles/filedetails/?id=522841147</a></td></tr><tr><td><img src="https://772063455-files.gitbook.io/~/files/v0/b/gitbook-x-prod.appspot.com/o/spaces%2F-Lgje1lBxKKWXwqycB-v%2Fuploads%2F0JkxVWEn46pq2WWdDg7x%2Fimage.png?alt=media&amp;token=a82581b9-7186-45e9-9757-00a1552f321e" alt=""></td><td><h4>ARKpnt Editor [by DRAGNET] </h4></td><td></td><td><a href="http://steamcommunity.com/sharedfiles/filedetails/?id=518296250">http://steamcommunity.com/sharedfiles/filedetails/?id=518296250</a></td></tr><tr><td><img src="https://772063455-files.gitbook.io/~/files/v0/b/gitbook-x-prod.appspot.com/o/spaces%2F-Lgje1lBxKKWXwqycB-v%2Fuploads%2FxA3EVhTmtFNxb39Hlv06%2Fimage.png?alt=media&amp;token=b44f1ec3-b626-4823-80ed-2ae9a96cde94" alt=""></td><td><h4>ARKPaint Converter Update and Warpaint Tutorial </h4></td><td></td><td><a href="http://www.ark-survival.net/en/2015/09/18/arkpaint-converter-update-and-warpaint-tutorial/">http://www.ark-survival.net/en/2015/09/18/arkpaint-converter-update-and-warpaint-tutorial/</a></td></tr><tr><td><img src="https://772063455-files.gitbook.io/~/files/v0/b/gitbook-x-prod.appspot.com/o/spaces%2F-Lgje1lBxKKWXwqycB-v%2Fuploads%2FystyvLEXvjqZgayupaI6%2Fimage.png?alt=media&amp;token=926bd82d-c7e4-44da-8f43-97f37a0127d0" alt=""></td><td><h4>Image to Board / Sign (PNT) Converter </h4></td><td></td><td><a href="http://www.ark-survival.net/en/image-to-board-sign-pnt-converter/">http://www.ark-survival.net/en/image-to-board-sign-pnt-converter/</a></td></tr><tr><td><img src="https://772063455-files.gitbook.io/~/files/v0/b/gitbook-x-prod.appspot.com/o/spaces%2F-Lgje1lBxKKWXwqycB-v%2Fuploads%2FHJiaKudUA1k5EIBaHbKe%2Fimage.png?alt=media&amp;token=57235a83-0bca-49dc-9869-27ab1587daa3" alt=""></td><td><h4>WEBSITE OF COOL IMAGE FILES ALREADY TO DROP INTO ARK - ARK TEMPLATES</h4></td><td></td><td><a href="https://arktemplates.com/">https://arktemplates.com/</a></td></tr><tr><td><img src="https://772063455-files.gitbook.io/~/files/v0/b/gitbook-x-prod.appspot.com/o/spaces%2F-Lgje1lBxKKWXwqycB-v%2Fuploads%2FG3wUykOcZJtwatHkHSTy%2Fimage.png?alt=media&amp;token=c239d9a5-39e9-47e5-a062-fc37b8c8db09" alt=""></td><td><strong>ARKPAINT. com WEBSITE</strong></td><td></td><td><a href="http://arkpaint.com/">http://arkpaint.com/</a></td></tr></tbody></table>

## ASE COLOR ID'S

#### You can't have a fully nude/non-colored dino. Ark core game logic thinks fully nude dinos are a new spawn, and triggers a full random color roll on all regions.

<figure><img src="https://772063455-files.gitbook.io/~/files/v0/b/gitbook-x-prod.appspot.com/o/spaces%2F-Lgje1lBxKKWXwqycB-v%2Fuploads%2FQMU6PhTgIR0K1yE4FQi7%2Fimage.png?alt=media&amp;token=f396eec9-9d0a-4e3d-8db7-810cd0da8e62" alt=""><figcaption><p>ASE Dino and Dye colors</p></figcaption></figure>

## ASA Color ID's:

<figure><img src="https://772063455-files.gitbook.io/~/files/v0/b/gitbook-x-prod.appspot.com/o/spaces%2F-Lgje1lBxKKWXwqycB-v%2Fuploads%2FoV1gMAvh35gHdN38B6Ih%2FASA_ColorIDS.png?alt=media&amp;token=b8f9483c-e4ce-4d1d-9985-50a7cea6a86a" alt=""><figcaption><p>ASA Dino colors</p></figcaption></figure>

<figure><img src="https://772063455-files.gitbook.io/~/files/v0/b/gitbook-x-prod.appspot.com/o/spaces%2F-Lgje1lBxKKWXwqycB-v%2Fuploads%2F86NyOdpl4Mx52k9r3Pva%2FASA_DyeIDS.png?alt=media&amp;token=471b58e7-0824-4a70-8a49-6e2000a6dd1e" alt=""><figcaption><p>ASA Dye Colors</p></figcaption></figure>

## ARK colors for the Color Blind

<details>

<summary>WHAT IS DEUTAN COLOR BLINDNESS?</summary>

**Deutan color blindness** (also known as **deuteranomaly**) is a type of **red-green color blindness** in which the green cones in the eye detect too much red light and not enough green light.

As a result red, yellow, green, and brown can appear similar, especially in low light. It may also be difficult to tell the difference between blues and purples, or pinks and grays. Learn more about Deutan and other types of color blindness.

![](https://772063455-files.gitbook.io/~/files/v0/b/gitbook-x-prod.appspot.com/o/spaces%2F-Lgje1lBxKKWXwqycB-v%2Fuploads%2FyEDjCYK2hRfECDyx1jFd%2Fimage.png?alt=media\&token=6ddcf9d1-6557-4b80-87ae-c22250c0d42d)

</details>

<details>

<summary>WHAT IS PROTAN COLOR BLINDNESS?</summary>

**Protans** are people with **protanomaly,** a type of r**ed-green color blindness** in which the red cones do not detect enough red and are too sensitive to greens, yellows, and oranges.

As a result, greens, yellows, oranges, reds, and browns may appear similar, especially in low light. It can also be difficult to tell the difference between blues and purples, or pinks and grays. Red and black can be difficult to differentiate, especially when red text is against a black background. Unless Protan glasses are used, it can be challenging to tell them apart.

![](https://772063455-files.gitbook.io/~/files/v0/b/gitbook-x-prod.appspot.com/o/spaces%2F-Lgje1lBxKKWXwqycB-v%2Fuploads%2FOJRR0Y5AUvh7ezyj1zJv%2Fimage.png?alt=media\&token=482bb3a2-1ef8-41e6-8989-e8ef79ce4712)

</details>

<details>

<summary>WHAT IS TRITAN COLOR BLINDNESS?</summary>

**Tritan**-type color vision is characterized by a loss of color discrimination for shades of blue and yellow. Tritanomaly, causing reduced blue sensitivity and Tritanopia, resulting in no blue sensitivity, can be inherited or acquired; the inherited form is a rare autosomal recessive condition. More commonly, tritanomaly is acquired later in life due to age-related or environmental factors. Cataracts, glaucoma and age related macular degeneration could cause someone to test as a Tritan. People with tritanomaly have reduced sensitivity in their blue “S” cone cells, which can cause confusion between blue versus green and red from purple.

![](https://772063455-files.gitbook.io/~/files/v0/b/gitbook-x-prod.appspot.com/o/spaces%2F-Lgje1lBxKKWXwqycB-v%2Fuploads%2Fggmd6oG2lO382uRaiGIt%2Fimage.png?alt=media\&token=9485d39b-68ae-4d8a-88a6-b4d02c07b092)

</details>

<details>

<summary>WHAT IS TETRACHROMACY? </summary>

We’ve all heard of some people being color blind and how the condition impedes your color vision, but how many of us have heard of tetrachromacy? This is a condition affecting your color vision which enables you to see around 100 million shades of colors. To put this into perspective, the average person with standard color vision sees approximately 1 million different hues, while somebody who is color blind may see as few as 10,000 colors.

![](https://772063455-files.gitbook.io/~/files/v0/b/gitbook-x-prod.appspot.com/o/spaces%2F-Lgje1lBxKKWXwqycB-v%2Fuploads%2FGydBEqZnRqhy1dISy2xc%2Fimage.png?alt=media\&token=20210e3a-beda-45a8-bfce-7fc2c7f99aee)

</details>

<figure><img src="https://772063455-files.gitbook.io/~/files/v0/b/gitbook-x-prod.appspot.com/o/spaces%2F-Lgje1lBxKKWXwqycB-v%2Fuploads%2F0c2DH46EmFtAbQV4hJxr%2Fimage.png?alt=media&amp;token=2a1e46b7-7766-43ca-8ee5-9d6c3dd9c4d8" alt=""><figcaption></figcaption></figure>

<figure><img src="https://772063455-files.gitbook.io/~/files/v0/b/gitbook-x-prod.appspot.com/o/spaces%2F-Lgje1lBxKKWXwqycB-v%2Fuploads%2FoKyC4YtgzdCOY4RnEXJa%2Fimage.png?alt=media&amp;token=7dc73970-b3e2-4fc3-84bd-e2c3828333e6" alt=""><figcaption></figcaption></figure>


# ARK: Custom Cooking Guide

Cooking in ARK!

## How to Make ARK Recipes&#x20;

<details>

<summary><img src="https://772063455-files.gitbook.io/~/files/v0/b/gitbook-x-prod.appspot.com/o/spaces%2F-Lgje1lBxKKWXwqycB-v%2Fuploads%2Fcsow7ackeSoXuI3UspFN%2Fimage.png?alt=media&amp;token=409e58ff-26f5-43ad-835b-925749479278" alt="" data-size="original">  ARK Recipes<img src="https://772063455-files.gitbook.io/~/files/v0/b/gitbook-x-prod.appspot.com/o/spaces%2F-Lgje1lBxKKWXwqycB-v%2Fuploads%2FVJfjAWIBKTT7NI2JxCjE%2Fimage.png?alt=media&amp;token=cd787268-a4e7-4e38-b93d-fa31c172d10b" alt=""></summary>

In *ARK: Survival Evolved* survivors are able to cook various standard Recipes in a [![](https://ark.wiki.gg/images/thumb/f/f9/Cooking_Pot.png/20px-Cooking_Pot.png)](https://ark.wiki.gg/wiki/Cooking_Pot) [Cooking Pot](https://ark.wiki.gg/wiki/Cooking_Pot) or an [![](https://ark.wiki.gg/images/thumb/9/91/Industrial_Cooker.png/20px-Industrial_Cooker.png)](https://ark.wiki.gg/wiki/Industrial_Cooker) [Industrial Cooker](https://ark.wiki.gg/wiki/Industrial_Cooker).

**Recipes can be used to**:

* craft dishes that grant temporary buffs or useful effects. For example, Medical Brew and Enduro Stew.
* make [dyes](https://ark.wiki.gg/wiki/Dye) to customize many items, creatures and structures. For example, Black Dye.
* create special food for taming or feeding animals. For example, the various Kibbles and [Sweet Vegetable Cake](https://ark.wiki.gg/wiki/Sweet_Vegetable_Cake).

**These recipes are not a learned skill,** require no experience or engrams. Any survivor can cook any of these recipes at any time with nothing more than the cooker of choice, and the required ingredients.&#x20;

**Multiple recipes can cook concurrently**, however be aware that some combinations of ingredients for multiple recipes may produce other unwanted dishes, as there are limited recipe ingredients creating considerable overlap in recipes. This feature is of the most use when **mass cooking kibble**; by placing all the required kibble ingredients into a cooker at once, it is possible to cook all the kibble types at the same time, without producing unwanted dishes.&#x20;

**All standard recipes require water.** Water can be provided to the Industrial Cooker through pipes, or placed by hand into either cooker using Water Flasks and so on.&#x20;

</details>

<details>

<summary><img src="https://772063455-files.gitbook.io/~/files/v0/b/gitbook-x-prod.appspot.com/o/spaces%2F-Lgje1lBxKKWXwqycB-v%2Fuploads%2FuscJl3QZT9O9Q94TFTeD%2Fimage.png?alt=media&amp;token=731b2b26-16cf-4df6-afc4-e08598d2dff9" alt="" data-size="line">  Custom Recipes</summary>

Basically there are a few considerations to make when planning a custom food. They are: HP, stamina, food, and weight. Making a good recipe requires a delicate balance of all these. Its also important to note that this is a great way to store surplus food that would otherwise rot. Custom consumables have an extremely long shelf life when refrigerated compared to normal food.

When you make a **Custom recipe** you must use a **normal cooking pot**. You cannot create a recipe page![](https://772063455-files.gitbook.io/~/files/v0/b/gitbook-x-prod.appspot.com/o/spaces%2F-Lgje1lBxKKWXwqycB-v%2Fuploads%2FmrVc61Iy2bBNd9T9oC4L%2Fimage.png?alt=media\&token=9dbc4ab6-2312-4333-b6d7-bad1663629fc) in an Industrial Cooker. \
**Other important tips**:

* Only eight stacks of ingredients can be in a single recipe.
* Drugs and pre-made Dishes can not be used in a recipe.
* If eggs are used in the recipe, the recipe is specific to that type of egg.

For a food filler, it's typically made of RAW meat. The best one I have is 10 raw meat for 101 food. Cooked meat technically gives more food, but I like the extra heal from raw

Element dust is a FANTASTIC ingredient. High stats evenly distributed with good weight

For healing recipes, try to use 2-4  bee honey and the rest of your 8 recipe slots some prime meat.&#x20;

Mushrooms in general just make better recipes; primarily because they have more balanced stats. The downside is they lack real sustenance as food to fill your hunger. However, food is the easiest stat to fill almost without trying.

Stimberries and Auric mushrooms would normally decrease your water; but in a food recipe, they do not lower your water stat. It still does reduce the water given by a drink though when included in the drink's recipe.

DO NOT USE EGGS - THEY ARE MASSIVELY HEAVY! You're better off turning the eggs into kibble and using that in a recipe for the insane stamina regen. KIBBLE GIVES A TON OF STAMINA

Crops/veggies are best used in drinks. 2-4 on a good crafter will fill your water to 100\
Please pay attention to weight. You would not believe how much extra room you can make just by getting rid of your egg recipes and doing meat or mushrooms instead.&#x20;

KEEP IT SIMPLE. I tried making recipes with 4 or 5 different ingredients but it just leads to a big hassle that totally isn't worth it.

Also, note that recipes don't really become "worth it" until about 500% - 550% CS. That is the turning point when you start to reap benefits instead of taking losses.

To find out what ingredients have what effect, check out this guide: [***Ingredient Effects***](https://ark.gamepedia.com/Custom_Consumable#Ingredient_Effects)

</details>

## CUSTOM RECIPIES from around the cluster and the Web.

<div align="left"><figure><img src="https://772063455-files.gitbook.io/~/files/v0/b/gitbook-x-prod.appspot.com/o/spaces%2F-Lgje1lBxKKWXwqycB-v%2Fuploads%2F9QyYl0sIgCQ8ttqQ7nwV%2Fimage.png?alt=media&amp;token=d07118b1-e570-4b34-9770-f44e999f3539" alt=""><figcaption><p>Bill Cosby's Special Cake</p></figcaption></figure> <figure><img src="https://files.gitbook.com/v0/b/gitbook-legacy-files/o/assets%2F-Lgje1lBxKKWXwqycB-v%2F-MFcoeodojOz3Y9vxTml%2F-MFczWlBJv9BE_ugj4NC%2Faquafresh.jpg?alt=media&#x26;token=a80f50d9-1f46-43af-b840-6d6f9e970b22" alt=""><figcaption><p>Nooo Not the Toothpaste!</p></figcaption></figure></div>

<div align="left"><img src="https://772063455-files.gitbook.io/~/files/v0/b/gitbook-legacy-files/o/assets%2F-Lgje1lBxKKWXwqycB-v%2F-MFcoeodojOz3Y9vxTml%2F-MFcz_f-JrBzrMKGjv4r%2Fcheeseburger.jpg?alt=media&amp;token=5518990c-3d6d-4437-97c0-fcc1528a1ed8" alt="Just a cheeseburger"> <figure><img src="https://files.gitbook.com/v0/b/gitbook-legacy-files/o/assets%2F-Lgje1lBxKKWXwqycB-v%2F-MFcoeodojOz3Y9vxTml%2F-MFd1tYYdzxs_dbmslha%2Ftek%20cake.jpg?alt=media&#x26;token=29273f56-5284-4fd1-be71-23fc97229124" alt=""><figcaption><p>Tek Cake</p></figcaption></figure></div>

<div align="center"><img src="https://772063455-files.gitbook.io/~/files/v0/b/gitbook-legacy-files/o/assets%2F-Lgje1lBxKKWXwqycB-v%2F-MFcoeodojOz3Y9vxTml%2F-MFd1zeSFqRhzoADZihm%2Fstamburber.jpg?alt=media&amp;token=5520f154-be1d-4119-ad08-5a3b0b8d168f" alt="StamBurger" width="375"></div>

<div align="left"><img src="https://772063455-files.gitbook.io/~/files/v0/b/gitbook-legacy-files/o/assets%2F-Lgje1lBxKKWXwqycB-v%2F-MFcoeodojOz3Y9vxTml%2F-MFd-R0_jI6KUg87Qhi-%2Fberry%20juice.png?alt=media&amp;token=5dd75a2f-1b89-4535-a257-a8ac782d6fc2" alt="Alphy&#x27;s Berry Juice"> <figure><img src="https://files.gitbook.com/v0/b/gitbook-legacy-files/o/assets%2F-Lgje1lBxKKWXwqycB-v%2F-MFcoeodojOz3Y9vxTml%2F-MFd-XTJFAfVuUgDoUbE%2Fbreakfast%20hash.png?alt=media&#x26;token=d7e1ad35-df71-4ae9-aaa2-6704c3b0fa34" alt=""><figcaption></figcaption></figure></div>

<div align="left"><img src="https://772063455-files.gitbook.io/~/files/v0/b/gitbook-legacy-files/o/assets%2F-Lgje1lBxKKWXwqycB-v%2F-MFcoeodojOz3Y9vxTml%2F-MFd064H9hR_V2fN7V2J%2Fbronto%20pot%20roast.png?alt=media&amp;token=4e51ae7a-41ca-43e7-bcbd-3cfb4396c385" alt="Alphy&#x27;s Bronto Pot Roast"> <figure><img src="https://files.gitbook.com/v0/b/gitbook-legacy-files/o/assets%2F-Lgje1lBxKKWXwqycB-v%2F-MFcoeodojOz3Y9vxTml%2F-MFd0Hqq-EVPePGzbJ9o%2Fdiplo%20stew.png?alt=media&#x26;token=b5fdb68b-d22e-43c9-9c90-0636f2e5c835" alt=""><figcaption></figcaption></figure></div>

<div align="left"><img src="https://772063455-files.gitbook.io/~/files/v0/b/gitbook-legacy-files/o/assets%2F-Lgje1lBxKKWXwqycB-v%2F-MFcoeodojOz3Y9vxTml%2F-MFd0QN2ajMm8NWCf5b7%2Fdouble%20bacon%20cheese%20burger.png?alt=media&amp;token=a8c1cf89-cce9-4950-b77d-1442c3fea030" alt="Alphy&#x27;s Double Bacon Cheese Burger"> <figure><img src="https://files.gitbook.com/v0/b/gitbook-legacy-files/o/assets%2F-Lgje1lBxKKWXwqycB-v%2F-MFcoeodojOz3Y9vxTml%2F-MFd0_by0BU7i_PpKPgC%2Fdouble%20double%20animal%20style.png?alt=media&#x26;token=69b73214-6010-4e6a-9442-4c84e910028e" alt=""><figcaption></figcaption></figure></div>

<div align="left"><img src="https://772063455-files.gitbook.io/~/files/v0/b/gitbook-legacy-files/o/assets%2F-Lgje1lBxKKWXwqycB-v%2F-MFcoeodojOz3Y9vxTml%2F-MFd0mDktFfiAx0dAdHb%2Ffeild%20ration%20Herbivore.png?alt=media&amp;token=747e8c6e-6c70-4770-a6fc-520eb673aa5f" alt="Field Ration Mejo/Herbivore"> <figure><img src="https://files.gitbook.com/v0/b/gitbook-legacy-files/o/assets%2F-Lgje1lBxKKWXwqycB-v%2F-MFcoeodojOz3Y9vxTml%2F-MFd1B59Rte_DG3S_pmm%2Fmcfish.png?alt=media&#x26;token=a44def82-720c-4f1e-b8cc-ecc3da007583" alt=""><figcaption></figcaption></figure></div>

<div align="left"><img src="https://772063455-files.gitbook.io/~/files/v0/b/gitbook-legacy-files/o/assets%2F-Lgje1lBxKKWXwqycB-v%2F-MFcoeodojOz3Y9vxTml%2F-MFd1Lfq01OjKtnnhZnl%2Fmutton%20pie.png?alt=media&amp;token=680cd07c-3863-446a-9b25-93856dd9e3e7" alt="Alphy&#x27;s Mutton Pie"> <figure><img src="https://files.gitbook.com/v0/b/gitbook-legacy-files/o/assets%2F-Lgje1lBxKKWXwqycB-v%2F-MFcoeodojOz3Y9vxTml%2F-MFd1TDrU612tevT-APM%2FV8.png?alt=media&#x26;token=3b3c883a-10d8-4717-9cc2-88282111ac11" alt=""><figcaption></figcaption></figure></div>

<div align="left"><img src="https://772063455-files.gitbook.io/~/files/v0/b/gitbook-legacy-files/o/assets%2F-Lgje1lBxKKWXwqycB-v%2F-MFcoeodojOz3Y9vxTml%2F-MFd0yseMUU67h_1M8Bw%2Ffeild%20ration%20stimulant.png?alt=media&amp;token=3292f363-8f45-441d-991c-1063ab04418e" alt="Field Ration Stim/wakeup"> <figure><img src="https://files.gitbook.com/v0/b/gitbook-legacy-files/o/assets%2F-Lgje1lBxKKWXwqycB-v%2F-MFcoeodojOz3Y9vxTml%2F-MFd1B59Rte_DG3S_pmm%2Fmcfish.png?alt=media&#x26;token=a44def82-720c-4f1e-b8cc-ecc3da007583" alt=""><figcaption></figcaption></figure></div>

<div align="left"><img src="https://772063455-files.gitbook.io/~/files/v0/b/gitbook-legacy-files/o/assets%2F-Lgje1lBxKKWXwqycB-v%2F-MFcoeodojOz3Y9vxTml%2F-MFd1Lfq01OjKtnnhZnl%2Fmutton%20pie.png?alt=media&amp;token=680cd07c-3863-446a-9b25-93856dd9e3e7" alt="Alphy&#x27;s Mutton Pie"> <figure><img src="https://files.gitbook.com/v0/b/gitbook-legacy-files/o/assets%2F-Lgje1lBxKKWXwqycB-v%2F-MFcoeodojOz3Y9vxTml%2F-MFd1TDrU612tevT-APM%2FV8.png?alt=media&#x26;token=3b3c883a-10d8-4717-9cc2-88282111ac11" alt=""><figcaption></figcaption></figure></div>

<figure><img src="https://772063455-files.gitbook.io/~/files/v0/b/gitbook-x-prod.appspot.com/o/spaces%2F-Lgje1lBxKKWXwqycB-v%2Fuploads%2FoYNXEiL9D1mp4EWvWwiT%2Fimage.png?alt=media&amp;token=cf29ca43-365c-469d-8b6a-bc5af914ff82" alt=""><figcaption></figcaption></figure>


# Conan Exiles PvE Servers

We have Exiled Lands, & Savage Wilds. Find your perfect Conan Exiles Experience!

**Navigation of Pages:**

<table data-view="cards"><thead><tr><th></th><th></th></tr></thead><tbody><tr><td><strong>Left side of the page</strong> <span data-gb-custom-inline data-tag="emoji" data-code="25c0">◀️</span></td><td>Use the <strong>></strong> to open any pages in that section when the Header shows a <strong>></strong>.</td></tr><tr><td><strong>Right Side</strong> of the page <span data-gb-custom-inline data-tag="emoji" data-code="25b6">▶️</span></td><td>Click a header to go to that section of this page.</td></tr><tr><td><strong>Features of the page.</strong></td><td>are in an <strong>expandable box</strong>, please click the <strong>></strong> to open the expandable dropdown.</td></tr><tr><td><strong>Hyperlink</strong>s are often in a <strong>card form</strong> in the website.</td><td>So <strong>clicking an image</strong> will often take you to a specific page for information. </td></tr><tr><td><strong>Steam-link</strong>s are often in a <strong>card form</strong> in the website.</td><td>So <strong>clicking on a server card</strong> will take you to the Server.</td></tr></tbody></table>

<figure><img src="https://772063455-files.gitbook.io/~/files/v0/b/gitbook-x-prod.appspot.com/o/spaces%2F-Lgje1lBxKKWXwqycB-v%2Fuploads%2Fn1WVqOvvHW84w0lsmlMD%2FSERVERS_SPASH_TRI_SERVERS_2024.png?alt=media&amp;token=f6f7b307-2b16-4be4-810e-194bb916eca7" alt=""><figcaption></figcaption></figure>

## Owners Vision

**OUR MOTTO! ALL MAY ENTER HERE WITHOUT PREJUDICE!** This applies to All Races, All Creeds, and All Genders. All are Welcome!!!

We are an adult gaming community, and we are looking for quality players to join our adventures. We host three PvE Conan Exiles Servers. Exiled Lands, Isle of Siptah, and Savage Wilds! We are Beginner friendly, with a Helpful and active admin team! We strive to create a playing environment that fosters Community, and personal growth. We have chosen a limited but satisfactory grouping of QoL mods that provide the best overall playing experience for your CONAN experience, and a structured rule package that enhances Quality of life, we try to provide the best environment to build the base of your dreams, but also balanced with the knowledge that load times are important too!

Last of all, **BE EXCELLENT TO EACH OTHER!** We are all adults here and know how to act. Let's make a happy, safe place to enjoy the games we love to play!

<figure><img src="https://772063455-files.gitbook.io/~/files/v0/b/gitbook-x-prod.appspot.com/o/spaces%2F-Lgje1lBxKKWXwqycB-v%2Fuploads%2FgofyN27MgRtPvrAYXLJQ%2FCONAN_EXILES_TRIMED_HEADER.png?alt=media&amp;token=1b2542a6-bd6d-47a9-aa7a-791bfd81982e" alt=""><figcaption></figcaption></figure>

## Our Conan Exiles Servers!

<table data-view="cards"><thead><tr><th align="center"></th><th></th><th></th><th data-hidden data-card-cover data-type="files"></th><th data-hidden data-card-target data-type="content-ref"></th></tr></thead><tbody><tr><td align="center"><strong>The PACK AOC PvE 18+(3xXP 3xH)</strong></td><td>Connect to the server by using the 'Direct Connect' button in the in-game server browser, and providing the following address: </td><td>66.153.149.147:7777</td><td><a href="https://772063455-files.gitbook.io/~/files/v0/b/gitbook-x-prod.appspot.com/o/spaces%2F-Lgje1lBxKKWXwqycB-v%2Fuploads%2FUk0gEpf0yowJje9IDe3p%2FCONAN_EXILEDLANDS_AOC_PVE.jpg?alt=media&amp;token=99cfa97a-f065-4c6c-a00c-1381a9bad118">CONAN_EXILEDLANDS_AOC_PVE.jpg</a></td><td></td></tr><tr><td align="center"><strong>The PACK QOL PVE 18+(1.5xXP 1.5xH)</strong> </td><td>Connect to the server by using the 'Direct Connect' button in the in-game server browser, and providing the following address: </td><td>66.153.149.147:7775</td><td><a href="https://772063455-files.gitbook.io/~/files/v0/b/gitbook-x-prod.appspot.com/o/spaces%2F-Lgje1lBxKKWXwqycB-v%2Fuploads%2FNiVEtFX16ZWsL9gTpUx2%2FCONAN_EXILEDLANDS_HARD_PVE.jpg?alt=media&amp;token=7641f3d6-b729-456a-ab2e-2a23bf96c737">CONAN_EXILEDLANDS_HARD_PVE.jpg</a></td><td></td></tr><tr><td align="center"><strong>The PACK Savage Wilds PvE 18+ (3xXP 3xH)</strong></td><td>Connect to the server by using the 'Direct Connect' button in the in-game server browser, and providing the following address: </td><td>66.153.149.147:7773</td><td><a href="https://772063455-files.gitbook.io/~/files/v0/b/gitbook-x-prod.appspot.com/o/spaces%2F-Lgje1lBxKKWXwqycB-v%2Fuploads%2FyaIjdLlm4FeGw5oJOjLW%2FSAVAGE_WILDS_FLASH_Splash.png?alt=media&amp;token=9190c24b-dfb6-449b-a3a5-0a1ad63dbd12">SAVAGE_WILDS_FLASH_Splash.png</a></td><td></td></tr><tr><td align="center"><strong>The PACK AOC PvE 18+(3xXP 3xH)</strong></td><td>Mod Collection</td><td>Click Here!</td><td><a href="https://772063455-files.gitbook.io/~/files/v0/b/gitbook-x-prod.appspot.com/o/spaces%2F-Lgje1lBxKKWXwqycB-v%2Fuploads%2F3Si8asm8ZIlqljgKVqmY%2FAOC%20SERVER%20MODS.png?alt=media&amp;token=6b10732a-6fac-479a-ae19-969fa6a9668a">AOC SERVER MODS.png</a></td><td><a href="https://steamcommunity.com/sharedfiles/filedetails/?id=1713993940">https://steamcommunity.com/sharedfiles/filedetails/?id=1713993940</a></td></tr><tr><td align="center"><strong>The PACK QOL PVE 18+(1.5xXP 1.5xH)</strong></td><td>Mod Collection</td><td>Click Here!</td><td><a href="https://772063455-files.gitbook.io/~/files/v0/b/gitbook-x-prod.appspot.com/o/spaces%2F-Lgje1lBxKKWXwqycB-v%2Fuploads%2FrpG3cxMYF1P0qQSJIndn%2FQOL%20SERVER%20MODS.png?alt=media&amp;token=1e8227a7-f42e-4d8c-b79f-c00f2c5dda0b">QOL SERVER MODS.png</a></td><td><a href="https://steamcommunity.com/sharedfiles/filedetails/?id=2226366634">https://steamcommunity.com/sharedfiles/filedetails/?id=2226366634</a></td></tr><tr><td align="center"><strong>The PACK Savage Wilds PvE 18+ (3xXP 3xH)</strong></td><td>Mod Collection</td><td>Click Here!</td><td><a href="https://772063455-files.gitbook.io/~/files/v0/b/gitbook-x-prod.appspot.com/o/spaces%2F-Lgje1lBxKKWXwqycB-v%2Fuploads%2FDWAigxkFOrKgBLDJrwte%2FSW%20SERVER%20MODS.png?alt=media&amp;token=4babaee3-8149-4591-96a3-e9db5459ae14">SW SERVER MODS.png</a></td><td><a href="https://steamcommunity.com/sharedfiles/filedetails/?id=2655853821">https://steamcommunity.com/sharedfiles/filedetails/?id=2655853821</a></td></tr></tbody></table>

## THE AGE OF HEROES!

<figure><img src="https://772063455-files.gitbook.io/~/files/v0/b/gitbook-x-prod.appspot.com/o/spaces%2F-Lgje1lBxKKWXwqycB-v%2Fuploads%2F02RzzyYnAKSAUSrEJRIZ%2FAge%20of%20Heros%20maim.jpg?alt=media&amp;token=eebdbc83-e201-483f-99dc-882473a09481" alt=""><figcaption></figcaption></figure>

Let your war cries fill the air in welcome to the Age of Heroes. Glorious times are upon us!&#x20;

Embark on new exciting quests with two new Companions, transform your base into a living settlement full of workers and warriors, and more!&#x20;

Now, witness the consequences of taking everything from a warrior of the Aesir, and leaving them alive. This is Freya, one of the Companions who will join you.&#x20;

<figure><img src="https://772063455-files.gitbook.io/~/files/v0/b/gitbook-x-prod.appspot.com/o/spaces%2F-Lgje1lBxKKWXwqycB-v%2Fuploads%2FmzmMnHZ8myssp8v7fmfL%2FCE_A3C1_ForumHeaders_Companions.png?alt=media&amp;token=4b16f53f-b974-4ebd-bae3-8ded23ef5d4e" alt=""><figcaption></figcaption></figure>

In this first Chapter of the Age of Heroes, meet Liu Fei, the Khitan sorcerer, and Freya, the Aesir warrior. Embark on each of their epic questlines to gain their loyalty as a permanent Companion. These fully voiced characters will each gain perks unique to them based on your actions during their story. The time has come, Exile. Lead these heroes through the blaze of corruption and vengeance – to glory!&#x20;

<figure><img src="https://772063455-files.gitbook.io/~/files/v0/b/gitbook-x-prod.appspot.com/o/spaces%2F-Lgje1lBxKKWXwqycB-v%2Fuploads%2FWLHkdD8rcKTpbVOmF2tf%2FCE_AOH_Companions.png?alt=media&amp;token=cf920c53-1928-4076-878a-7834255c95ac" alt=""><figcaption></figcaption></figure>

{% embed url="<https://www.youtube.com/watch?v=XTI5N7tBlvc&t=3s>" %}

<figure><img src="https://772063455-files.gitbook.io/~/files/v0/b/gitbook-x-prod.appspot.com/o/spaces%2F-Lgje1lBxKKWXwqycB-v%2Fuploads%2F5DIl0fKxpjV0xCnt2pQX%2FCE_A3C1_ForumHeaders_LivingSettlements.png?alt=media&amp;token=2840f567-290d-4596-9035-68a0675fffdf" alt=""><figcaption></figcaption></figure>

Today, all of your worker thralls are transformed into living, breathing people. No longer mere items in your inventory, workers will now also go about their business in your base, socializing and meeting needs like sleep, hunger, and rest. Don’t worry, their duties will still be tended to, even when away from their crafting table.  When danger is present, some succumb to panic and flee, while others will stand and protect their leader. They are the lifeblood of your settlement.&#x20;

<figure><img src="https://772063455-files.gitbook.io/~/files/v0/b/gitbook-x-prod.appspot.com/o/spaces%2F-Lgje1lBxKKWXwqycB-v%2Fuploads%2F0hGpHQvDTVghZxI08Pnq%2FCE_AOH_Living_Settlements.png?alt=media&amp;token=be5b1666-0016-4720-a00b-7e80786880ac" alt=""><figcaption></figcaption></figure>

<figure><img src="https://772063455-files.gitbook.io/~/files/v0/b/gitbook-x-prod.appspot.com/o/spaces%2F-Lgje1lBxKKWXwqycB-v%2Fuploads%2Fh2bmgqSYTFZtdxtGvf4r%2Fimage.png?alt=media&amp;token=d4fd6511-845a-4123-a370-cf7362986304" alt=""><figcaption></figcaption></figure>

### Producer’s Letter: 2024 and Ahead

January 15, 2025 |&#x20;

Exiles,&#x20;

I want to begin with a hearty “Thank You” for your continued support and dedication to Conan Exiles. Your passion for the Exiled Lands and its community is the driving force behind everything we do. As we look back on 2024, we’re also marching on toward the future, and I want to share some important updates about the road ahead for Exiles. &#x20;

Conan Exiles was not actually intended to be a “game as a service” when we developed and first released it into Early Access in 2017. We hoped to recoup the costs of development and make enough money for our next project. Instead, it became the biggest success in Funcom’s history. With so much interest from the community, we continued building on it for the next seven years.

Over time, keeping up with this ambitious release plan has become increasingly difficult. Conan Exiles development is complex because we must balance new development with the need to address long-standing issues brought on by years of expanding a game that was never built for it. This led to a shift in the feedback we received from you, which went from requesting new content to addressing stability and bugs.

Therefore, we’ve taken the decision to hold off on developing new content and features while we focus on improving the game from a technical and quality-of-life standpoint. At this point, we believe we need to put more focus into making the game better, not just bigger.&#x20;

Our goal for the next update is to start focusing on resolving bugs and increasing stability. We will release this update in spring 2025 and give you more insight into what to expect as we get closer to release. This update will be a key step in addressing the game’s core issues and laying a stable foundation for the future.&#x20;

{% embed url="<https://www.conanexiles.com/blog/producers-letter-2024-and-ahead/>" %}

***

<figure><img src="https://772063455-files.gitbook.io/~/files/v0/b/gitbook-x-prod.appspot.com/o/spaces%2F-Lgje1lBxKKWXwqycB-v%2Fuploads%2FyxxguESIXdK02yWuvKEV%2Fimage.png?alt=media&amp;token=bbe395e0-e4fb-4d46-89fc-91e88ddb0fa1" alt=""><figcaption></figcaption></figure>

## Happy 7 Years of Conan Exiles

Exiles,

May 8th marks seven years since they first took your family and your riches and left you to die in the Exiled Lands. From the early days of your first sandstone hovel to the sprawling strongholds of today, surviving, building, and dominating with you has been an incredible journey.

We’re still hard at work improving stability and fixing bugs for the next release, but we wanted to take a moment to celebrate the occasion with a few things:

#### Twitch Drops: Watcher Furniture May 7 - May 21

First, you can claim the five pieces of the Watcher Furniture Set May 7th through May 21st from Twitch.tv, just by watching any Conan Exiles streams for a combined total of 1 hour. If you haven’t linked your account, you can do so \[right here]!<https://www.conanexiles.com/twitch/>

## Free Items

Keep your eyes peeled for a special item code you can redeem in-game for some free goodies; the Golden Pickaxe, Illusion scroll bundles, and the Fake Death emote. It won’t last long, so keep your eyes peeled, Exiles.

Here's to seven brutal, glorious years, Exiles. And to many more.

The Conan Exiles Team

***

### PATCH NOTES

<div align="center"><figure><img src="https://772063455-files.gitbook.io/~/files/v0/b/gitbook-x-prod.appspot.com/o/spaces%2F-Lgje1lBxKKWXwqycB-v%2Fuploads%2FK22Ye6dTRgjtSx7QmQ64%2FCE_A3C1_ForumHeaders_Patch-Notes.png?alt=media&amp;token=ad1afb08-06fc-45a3-90e7-a2dc6323b3bd" alt=""><figcaption></figcaption></figure></div>

### C.E. Base Game&#x20;

* Liu Fei: Eyes of the Innocent and the Ancient Rhino Horn can now be obtained once more.

### AOC Patch Notes:

V.4.36

Changes & Fixes:\
– Improved mod compatibility with Loot & Harvest Mods\
(Mods that alter the harvest of resource nodes, such as Stone, Iron Nodes, etc. should now be compatible with AoC)\
– Fixed an issue where tools would lose more durability than normal\
– Fixed an issue where followers wouldn’t attack the Risen Dead\
– Fixed various bugs

### Savage Wilds Patch Notes:

* Added a Wendigo boss near the Wintergarde Outpost
* Fixed a minor loot problem that caused two NPCs not to drop T4 golem parts or coffer treasures&#x20;
* Removed some fog particles in the Lost Valley to make it less obnoxious.

***

## KNOWN ISSUES:

<figure><img src="https://772063455-files.gitbook.io/~/files/v0/b/gitbook-x-prod.appspot.com/o/spaces%2F-Lgje1lBxKKWXwqycB-v%2Fuploads%2FnS6NblzOUk0ynDIHzcvR%2FKnown%20issuse.png?alt=media&amp;token=3de7b873-3d97-4101-9570-d6869a244d45" alt=""><figcaption></figcaption></figure>

### CONAN EXILES BASE GAME KNOWN ISSUES:

* “Assign a Crafting Thrall to a station” step of Thrall Taker journey is not completing.
* In light of reports of Living Settlements still disappearing your thralls, we're temporarily disabling LS on our servers until Funcom can solve this issue.

### AOC Currently  Known issues

**Known Issues:**

* Putting an AoC Thrall in Shallow Graves causes issues with stat multipliers
* Logging out in AoC Dungeons or Faction Hubs can spawn you back in outside the geometry. Temporary Solution: Avoid logging off in these areas if possible.
* Using a controller when using certain magic seems to not work correctly.&#x20;

**Please do not report Known Issues. These are already being looked into.**

### Savage Wilds Map or Shima's Compendium Known Issues

***

<figure><img src="https://772063455-files.gitbook.io/~/files/v0/b/gitbook-x-prod.appspot.com/o/spaces%2F-Lgje1lBxKKWXwqycB-v%2Fuploads%2FDWMVKTBgcyTan9sb3L1X%2Fimage.png?alt=media&amp;token=97dc7df1-33c7-4d1a-a7f8-acacc89cbeb5" alt="" width="375"><figcaption></figcaption></figure>

<table data-card-size="large" data-view="cards"><thead><tr><th></th><th></th><th></th><th data-hidden></th><th data-hidden data-card-target data-type="content-ref"></th><th data-hidden data-card-cover data-type="files"></th></tr></thead><tbody><tr><td><strong>How To Get The BEST Companion Liu Fei - The Complete Guide - The AGE OF HEROES | Conan Exiles |</strong></td><td><a href="https://www.youtube.com/@KiahOnFireOfficial"><img src="https://yt3.ggpht.com/etXWIcqiGlfKX9RV_iseWoNYyszsVmzqTj_rI4uktSevmqYNURRVfEoFu9btnfS-QSnIiKcI0Q=s68-c-k-c0x00ffffff-no-rj" alt=""></a><a href="https://www.youtube.com/@KiahOnFireOfficial">KiahOnFire</a></td><td></td><td></td><td><a href="https://www.youtube.com/watch?v=eL2PsIliO8U">https://www.youtube.com/watch?v=eL2PsIliO8U</a></td><td><a href="https://772063455-files.gitbook.io/~/files/v0/b/gitbook-x-prod.appspot.com/o/spaces%2F-Lgje1lBxKKWXwqycB-v%2Fuploads%2F7vNeHy8SyMtCE2QEdKbx%2FLiu%20Fei%20Guide.png?alt=media&amp;token=eca11f82-326f-4ed5-81a4-38b658cee81a">Liu Fei Guide.png</a></td></tr><tr><td><strong>FREYA Ultimate STEP-BY-STEP Companion Guide | Conan Exiles: Age of Heroes</strong></td><td><a href="https://www.youtube.com/@Pixelcave"><img src="https://yt3.ggpht.com/ytc/AIdro_kbSEvcH7TT8ZWsChpUHolrdOZx4Ho787tB8DcN9Hz8Ee0=s68-c-k-c0x00ffffff-no-rj" alt=""></a><a href="https://www.youtube.com/@Pixelcave">Pixelcave</a></td><td></td><td></td><td><a href="https://www.youtube.com/watch?v=1s5nSw62PAU">https://www.youtube.com/watch?v=1s5nSw62PAU</a></td><td><a href="https://772063455-files.gitbook.io/~/files/v0/b/gitbook-x-prod.appspot.com/o/spaces%2F-Lgje1lBxKKWXwqycB-v%2Fuploads%2FYxN2cUvWHcq4fIkz8OoW%2FUnlock%20Freya.png?alt=media&amp;token=2f49f2ea-a007-49c3-9740-00ddf47d0746">Unlock Freya.png</a></td></tr><tr><td><strong>What has Changed &#x26; Age of Heroes Highlights | Conan Exiles</strong></td><td><a href="https://www.youtube.com/@Pixelcave"><img src="https://yt3.ggpht.com/ytc/AIdro_kbSEvcH7TT8ZWsChpUHolrdOZx4Ho787tB8DcN9Hz8Ee0=s68-c-k-c0x00ffffff-no-rj" alt=""></a><a href="https://www.youtube.com/@Pixelcave">Pixelcave</a></td><td></td><td></td><td><a href="https://www.youtube.com/watch?v=Vsz3EhZzJGc">https://www.youtube.com/watch?v=Vsz3EhZzJGc</a></td><td><a href="https://772063455-files.gitbook.io/~/files/v0/b/gitbook-x-prod.appspot.com/o/spaces%2F-Lgje1lBxKKWXwqycB-v%2Fuploads%2FuZ2uyJmrGWfDNRVcyzqg%2FWhat%20has%20changed%20in%20Conan.png?alt=media&amp;token=844e6882-d0dd-452a-88ce-47310e8e0250">What has changed in Conan.png</a></td></tr><tr><td><strong>Age of Heroes DELETES your Crafters Conan Exiles</strong></td><td>        </td><td><a href="https://www.youtube.com/@wak4863"><img src="https://yt3.ggpht.com/ytc/AIdro_kDrEpXcp1gwAxghKmnoY1FLuOw2o7wExg3VhM3xGHkTcY=s68-c-k-c0x00ffffff-no-rj" alt=""></a><a href="https://www.youtube.com/@wak4863">wak4863</a></td><td></td><td><a href="https://www.youtube.com/watch?v=ttkdH1xZyk0">https://www.youtube.com/watch?v=ttkdH1xZyk0</a></td><td><a href="https://772063455-files.gitbook.io/~/files/v0/b/gitbook-x-prod.appspot.com/o/spaces%2F-Lgje1lBxKKWXwqycB-v%2Fuploads%2FFBIlcu8lbdHWcKRhLURM%2Fdeleted!.png?alt=media&amp;token=be48bbc5-3bf5-45ec-9104-8bda01eb07a0">deleted!.png</a></td></tr></tbody></table>

<figure><img src="https://772063455-files.gitbook.io/~/files/v0/b/gitbook-x-prod.appspot.com/o/spaces%2F-Lgje1lBxKKWXwqycB-v%2Fuploads%2FMkxfFXxRFHo5HoJDiU5b%2FCONAN_ANNIVERSARY_6TH.png?alt=media&amp;token=cf85aa19-25cd-4cb0-993d-5f96eaa4db54" alt="" width="497"><figcaption></figcaption></figure>

## ***Our Patreon's***&#x20;

![](https://772063455-files.gitbook.io/~/files/v0/b/gitbook-x-prod.appspot.com/o/spaces%2F-Lgje1lBxKKWXwqycB-v%2Fuploads%2FKFiZHHlgN1QM69t5DejF%2FPACK_PATREON.png?alt=media\&token=d8b84080-d3a0-4bcf-903f-ec3c9cebe9e3)

*Will receive generous perks in our Conan Server. Some of which is the ability to summon a friend (type of teleport).*&#x20;

Please see the Patreon Role listings to see just what you can get as an IN GAME PERK!

{% embed url="<https://faq.thepackgaming.com/patreon#our-patreon-perks>" %}

<figure><img src="https://772063455-files.gitbook.io/~/files/v0/b/gitbook-x-prod.appspot.com/o/spaces%2F-Lgje1lBxKKWXwqycB-v%2Fuploads%2FQLWnhvGrxW8h1a5oafMn%2Fimage.png?alt=media&amp;token=f947b0ed-3ebf-4df3-b242-3756803e4b51" alt=""><figcaption></figcaption></figure>


# The PACK AOC PvE 18+(3xXP 3xH)

## We welcome you to **The PACK AOC PvE 18+(3xXP 3xH)**

<figure><img src="https://772063455-files.gitbook.io/~/files/v0/b/gitbook-x-prod.appspot.com/o/spaces%2F-Lgje1lBxKKWXwqycB-v%2Fuploads%2FUk0gEpf0yowJje9IDe3p%2FCONAN_EXILEDLANDS_AOC_PVE.jpg?alt=media&amp;token=99cfa97a-f065-4c6c-a00c-1381a9bad118" alt=""><figcaption></figcaption></figure>

## How to connect to our AOC Server.

<table data-card-size="large" data-view="cards"><thead><tr><th align="center"></th><th></th><th></th><th data-hidden data-card-cover data-type="files"></th><th data-hidden data-card-target data-type="content-ref"></th></tr></thead><tbody><tr><td align="center"><strong>The PACK AOC PvE 18+(3xXP 3xH)</strong></td><td>Connect to the server by using the 'Direct Connect' button in the in-game server browser, and providing the following address: </td><td>66.153.149.147:7777</td><td><a href="https://772063455-files.gitbook.io/~/files/v0/b/gitbook-x-prod.appspot.com/o/spaces%2F-Lgje1lBxKKWXwqycB-v%2Fuploads%2FUk0gEpf0yowJje9IDe3p%2FCONAN_EXILEDLANDS_AOC_PVE.jpg?alt=media&amp;token=99cfa97a-f065-4c6c-a00c-1381a9bad118">CONAN_EXILEDLANDS_AOC_PVE.jpg</a></td><td></td></tr><tr><td align="center"><strong>The PACK AOC PvE 18+(3xXP 3xH)</strong></td><td>Mod Collection on Steam Workshop</td><td>Click Here to download the mods.</td><td><a href="https://772063455-files.gitbook.io/~/files/v0/b/gitbook-x-prod.appspot.com/o/spaces%2F-Lgje1lBxKKWXwqycB-v%2Fuploads%2F3Si8asm8ZIlqljgKVqmY%2FAOC%20SERVER%20MODS.png?alt=media&amp;token=6b10732a-6fac-479a-ae19-969fa6a9668a">AOC SERVER MODS.png</a></td><td><a href="https://steamcommunity.com/sharedfiles/filedetails/?id=1713993940">https://steamcommunity.com/sharedfiles/filedetails/?id=1713993940</a></td></tr></tbody></table>

<figure><img src="https://772063455-files.gitbook.io/~/files/v0/b/gitbook-x-prod.appspot.com/o/spaces%2F-Lgje1lBxKKWXwqycB-v%2Fuploads%2F4J0QOzI5bwMFzJcPWOpY%2Fimage.png?alt=media&amp;token=801bf832-ba12-422c-afd4-7ae8878cbbaf" alt=""><figcaption></figcaption></figure>

## About Our AOC Server

<figure><img src="https://772063455-files.gitbook.io/~/files/v0/b/gitbook-x-prod.appspot.com/o/spaces%2F-Lgje1lBxKKWXwqycB-v%2Fuploads%2FUZpg4eSA06e5YEk2jjNF%2FAOC%20SERVER%20HUB%202025.png?alt=media&amp;token=4b8c3f02-b416-4c12-869e-a84d61b2e828" alt=""><figcaption></figcaption></figure>

### AOC Server Hub:

Our Server HUB, Maproom (with Warp Thespians)\
Server Tavern, shop in the upper left room above the kitchen.\
Admins Rms. Just past the shop area.\
Trade Thespians will be in several small enclosures in the fence.

### Our **AOC PVE** server settings:

***The PACK AOC Server Settings***\
Relaxed PVE Environment. Full Nudity (18+ Servers) \
Inventory kept on death. Only owner can loot own corpse. \
Character does not stay in game while logged out. \
Decay is 14 days in RL. Player structures are indestructible by other players. \
Thrall/Pet limits: 150 Per Tribe (15 Per Tribe member)\
Building limits: (1)Main Base: 100x100 cubits. (1) Outpost: 50x50 cubits.\
EXP and Harvest are set to 1.5 multiplier. (makes it about a 3x rate.) \
Day/Night progression is comparable to RL and lasts 60 mins. RL.\
PVP enabled only within "Badlands" or other specialized areas.

### AOC SERVER modlist.txt

Download and drop this into your Conan Exiles Mods folder.\
`....\steamapps\common\Conan Exiles\ConanSandbox\Mods`

{% file src="/files/oUaZmCxmBKHnCRwtT4U5" %}

<figure><img src="https://772063455-files.gitbook.io/~/files/v0/b/gitbook-x-prod.appspot.com/o/spaces%2F-Lgje1lBxKKWXwqycB-v%2Fuploads%2FG4BwMRoHPxi3WA8kbfzl%2Fimage.png?alt=media&amp;token=ec47f9fc-25b3-4363-8d58-6583e2a42ee2" alt=""><figcaption></figcaption></figure>

## Exiled Land Resources:

<figure><img src="https://772063455-files.gitbook.io/~/files/v0/b/gitbook-x-prod.appspot.com/o/spaces%2F-Lgje1lBxKKWXwqycB-v%2Fuploads%2FOxyARJKIvYLDkuVMa0ZL%2Fimage.png?alt=media&amp;token=64c67bc1-cb13-4c56-befd-c9609ed8a2ff" alt="" width="563"><figcaption></figcaption></figure>

### Interactive Maps and Wiki

<table data-view="cards"><thead><tr><th align="center"></th><th align="center"></th><th align="center"></th><th align="center"></th><th data-hidden data-card-target data-type="content-ref"></th><th data-hidden data-card-cover data-type="files"></th></tr></thead><tbody><tr><td align="center"></td><td align="center"> <strong>Vanilla Exiled Lands</strong> </td><td align="center"><strong>Interactive Map</strong></td><td align="center"></td><td><a href="http://conanmap.mapvault.net/">http://conanmap.mapvault.net/</a></td><td><a href="https://772063455-files.gitbook.io/~/files/v0/b/gitbook-x-prod.appspot.com/o/spaces%2F-Lgje1lBxKKWXwqycB-v%2Fuploads%2FRcYJpOR5UYuwq84iAQTv%2FQoL%20map.png?alt=media&amp;token=333b18a5-1ca5-4306-ba9f-de74220e229c">QoL map.png</a></td></tr><tr><td align="center"></td><td align="center"><strong>Age of Calamitous</strong></td><td align="center"><strong>Interactive Exiled Lands Map</strong></td><td align="center"></td><td><a href="https://www.worldanvil.com/w/the-age-of-calamitous/map/ee441aeb-e106-4d00-9b00-1faab0fdfb21">https://www.worldanvil.com/w/the-age-of-calamitous/map/ee441aeb-e106-4d00-9b00-1faab0fdfb21</a></td><td><a href="https://772063455-files.gitbook.io/~/files/v0/b/gitbook-x-prod.appspot.com/o/spaces%2F-Lgje1lBxKKWXwqycB-v%2Fuploads%2FPPTpHYl1OovGmhw6yLXj%2Fdownload.jpg?alt=media&amp;token=23e7c7b0-4ae0-4e7c-8ecb-1a5e4a58e891">download.jpg</a></td></tr><tr><td align="center"></td><td align="center"><strong>The OFFICIAL</strong> </td><td align="center"><strong>Conan Exiles Wiki</strong></td><td align="center"></td><td><a href="/conan/info/aoc">The PACK AOC PvE 18+(3xXP 3xH)</a></td><td><a href="https://772063455-files.gitbook.io/~/files/v0/b/gitbook-x-prod.appspot.com/o/spaces%2F-Lgje1lBxKKWXwqycB-v%2Fuploads%2FWGO7gyEEgQg77ksI0YPp%2Fimage_2024-12-07_205344087.png?alt=media&amp;token=a97d42e2-b9e0-43f6-9459-a4c8d3db97c4">image_2024-12-07_205344087.png</a></td></tr></tbody></table>

<figure><img src="https://772063455-files.gitbook.io/~/files/v0/b/gitbook-x-prod.appspot.com/o/spaces%2F-Lgje1lBxKKWXwqycB-v%2Fuploads%2F6FqNvu142UxorWEOMowX%2Fpippi%20warps.png?alt=media&amp;token=af1a6688-ed33-4efa-9535-3e06178213f0" alt="" width="375"><figcaption></figcaption></figure>

### **AOC PvE 18+** Travel

**Pippi Warps** are laid out in a progression, Free, Obelisks, Rift, Patreons.\
Several Warps are Free to all Players, others are created for our Patreon system. \
Our Patreon's receive special tags that allow access to a special Portal Thespian where certain warps are available to them. **The use of TPR and TPA is a Patreon Perk.**\
**Obelisks** - Specific to Exiled Lands. Obelisks are free, and you must have found the Obelisk before you attempt to use it. Once you have achieved the feat for a Maproom you may build a Maproom which is your hub to all the Obelisks on the map.  There is also a free to use Maproom in the AOC Server Hub.\
**Rift Gate System - AOC Feature -** This system allows you to use Rift Gates around the world to travel between unlocked destinations. The new Rift Energy that can be found all around the world will allow you to unlock new destinations for the Rift Gate.\
In order to unlock a new destination, explore the world for Tomes encased in blue flames.

{% tabs %}
{% tab title="FREE TO ALL" %}
:man:**Thespian Job:&#x20;*****Player Warps***\
**Server Standard Warps - FREE TO ALL**

**◎Server Hub** - Open to All - Tavern/ Inn Workshop Admin Housing. /warp hub \
**◎Patreon Warp NPC** - Open to Patreon Members Only - /warp patwarps \
**◎THE Beach** - Starting AOC area- /warp beach \
**◎The AOC Hall** - The AOC Hall - /warp AOC \
**◎The Aoc Market Hall** /warp market \
**◎Desert** - The edge of the Desert - /warp desert \
**◎Savana** - The edge of the Savana - /warp savana \
**◎Jungle -** The edge of the Jungle - /warp jungle\
**◎Dafari** - The Summoning Place - /warp darfari \
**◎The City of Seperamu** - /warp relic \
**◎ The City of Asgarth** - /warp vanir \
**◎ Badlands** - PVP - Battlegrounds - /warp badlands\
**◎Sinner's Ridge -** brimstone - /warp sinners\
**◎ Weavers Hollow** - Spiders and the Zath teacher. - /warp zath
{% endtab %}

{% tab title="OBELISK" %}
Map Room is on the top Floor of the Server Hub.

**⇞**&#x44;agon's Eye N/6 \
**⇞**&#x55;pper Staging Area K/8 \
**⇞**&#x54;he Sinkhole H/6 \
**⇞**&#x55;nnamed City, near The Archives D/6 \
**⇞**&#x53;outh of Shattered Springs C/8 \
**⇞**&#x54;he Black Keep, between Ruins of Xullan and the Bridge of the Betrayer F/11 \
**⇞**&#x54;he Temple of Frost D/13 \
**⇞**&#x53;outh West of Path of the Penitent G/14 \
**⇞**&#x54;he Dregs D/4 \
**⇞**&#x4D;ounds of the Dead B/11
{% endtab %}

{% tab title="RIFT" %}
*This system allows players to interact with Rift Gates around the world, which works in a similar fashion to the old Portal System.*

*※* **The AOC Faction Hall** -  free to all - /warp AOC \
※ **THE Beach** - Starting AOC area- /warp BEACH \
※ **The Market Hall** - /warp market
{% endtab %}

{% tab title="PATREON" %}
:man: ***Thespian Job: Patreon Warps***&#x20;

**◎The Wine Cellar** - /warp winemaker \
**◎The Scorpion Den** - /warp silvermine \
**◎The Well of Skelos** - /warp volcano \
**◎Warmaker's Sanctuary** - /warp klael \
**◎The Midnight Grove** - /warp grove \
**◎Hanuman's Grotto** - /warp apeman \
**◎Gallaman's Tomb** - /warp brimstone \
**◎Buccaneer's Bay** - /warp port \
**◎Starmetal Field -** /warp Starmetal \
**◎Sand Swept Ruins -** /warp SandSwept\
**◎The Underwater Cavern -** /warp cavern
{% endtab %}
{% endtabs %}

<div align="center"><img src="https://772063455-files.gitbook.io/~/files/v0/b/gitbook-legacy-files/o/assets%2F-Lgje1lBxKKWXwqycB-v%2F-MHc_brB5hF0WvNNZH1v%2F-MHc_kM5cdprU-erPDMe%2FPippi%20Warps.png?alt=media&amp;token=24aaecd7-64d8-44ff-95e7-2128050b5fcd" alt="" width="188"></div>

## **The PACK Pippi Kit System:**

<figure><img src="https://772063455-files.gitbook.io/~/files/v0/b/gitbook-x-prod.appspot.com/o/spaces%2F-Lgje1lBxKKWXwqycB-v%2Fuploads%2FLWhxHbZU6QnSWykeDwJL%2FPack_Pippi_kit_system.png?alt=media&amp;token=d8100851-d1e1-494e-91d4-3963d9dff34d" alt="" width="375"><figcaption></figcaption></figure>

<details>

<summary><strong>Pippi KITS for purchase  AOC Map</strong></summary>

/kit loyalty - Daily AOC loyalty Token, Chance for a second one - Free and has a 24 hour cooldown.&#x20;

/kit pat-loyalty - A Patreon Daily kit of AOC loyalty Tokens, Chance to get up to 4 coin pouches! - Free and has a 24 hour cooldown.&#x20;

/kit cookies! - COOKIES!!! 5 cookies.&#x20;

/kit starter - The Pack Starter Kit! Limited to those under Level 60. 5 day cooldown (in case of lost)Free \[iron pickax, cheap armor, healing wraps]&#x20;

/kit heal - For 1 Gold receive 10 concentrated aloe potions for an instant heal and use in battle in an emergency. 1 hour cooldown.&#x20;

/kit repair - 10 Gold gets you 1 weapon repair kit and 4 armor repair kits. 24 Hour cooldown.&#x20;

/kit leg\_repair - 20 Gold gets you 2 Legendary repair kits and 5 Legendary Armor repair kits. 7 day cooldown.&#x20;

/kit myth\_rpr - 20 Gold gets you 2 Mythical repair kits and 5 Mythical Armor repair kits. 7 day cooldown.&#x20;

/kit music - The MusiqBox - For 10 Gold receive a music box to place in your base. 7 day Cooldown&#x20;

/kit wallpaper - For 5 Gold receive 10 pippi wallpaper that your can use anywhere in your base. 7 day Cooldown&#x20;

/kit flaggi - For 5 Gold receive 4 pippi Flaggi that you can use anywhere in your base. 7 day Cooldown&#x20;

</details>

NPC Thespians

**"Scattered throughout the world are Thespians**, some give quests, some provide warps. Dialogue Thespians will give quests, some are assigned to teleport you to sites in the World."\
**Skeleton Key Merchant** - a merchant that buys your extra Skeleton keys, 1:1 ratio. \
**BS - Beyond Stations Mastery** - a merchant that sells the BS T4 Journals for 10 gold. \
For AOC merged Stations.. You MUST have the AOC Feats: "The Ancient Arts" and "Art of the Craft" in order to use the Beyond Scrolls for AoC Merged Stations.\
**Uber Patreon Kits** - a merchant that provides the Weekly Patreon Kit to those Patreons at $10 Donation and up. \
**◎Warp Specialist Player** - Provides Free Players Warps \
**◎Warp Specialist Patreon** - Provides Our Patreons Warps \
**◎Warp Specialist AOC** - Provides Selected AOC locations as Warps.

### Pets, Thralls, and Recipes for Conan Exiles&#x20;

<table data-card-size="large" data-view="cards"><thead><tr><th></th><th align="center"></th><th align="center"></th><th data-hidden data-card-cover data-type="files"></th><th data-hidden data-card-target data-type="content-ref"></th></tr></thead><tbody><tr><td><strong>Named T4 Thralls List for Conan Exiles</strong></td><td align="center"></td><td align="center"></td><td><a href="https://772063455-files.gitbook.io/~/files/v0/b/gitbook-x-prod.appspot.com/o/spaces%2F-Lgje1lBxKKWXwqycB-v%2Fuploads%2FMVmLw6TjYTjFJLTL7pRf%2Fimage_2024-12-07_204320230.png?alt=media&amp;token=6066ee6a-a98e-4fd8-871c-f6a6ea0943e7">image_2024-12-07_204320230.png</a></td><td><a href="https://incendar.com/conanexiles_thralls.php">https://incendar.com/conanexiles_thralls.php</a></td></tr><tr><td><strong>Conan Full NPC spawn list</strong></td><td align="center"></td><td align="center"></td><td><a href="https://772063455-files.gitbook.io/~/files/v0/b/gitbook-x-prod.appspot.com/o/spaces%2F-Lgje1lBxKKWXwqycB-v%2Fuploads%2FMVmLw6TjYTjFJLTL7pRf%2Fimage_2024-12-07_204320230.png?alt=media&amp;token=6066ee6a-a98e-4fd8-871c-f6a6ea0943e7">image_2024-12-07_204320230.png</a></td><td><a href="https://incendar.com/conanexiles_templatetablespawn.php">https://incendar.com/conanexiles_templatetablespawn.php</a></td></tr><tr><td><strong>Conan Exiles Item Database</strong></td><td align="center"></td><td align="center"></td><td><a href="https://772063455-files.gitbook.io/~/files/v0/b/gitbook-x-prod.appspot.com/o/spaces%2F-Lgje1lBxKKWXwqycB-v%2Fuploads%2FMVmLw6TjYTjFJLTL7pRf%2Fimage_2024-12-07_204320230.png?alt=media&amp;token=6066ee6a-a98e-4fd8-871c-f6a6ea0943e7">image_2024-12-07_204320230.png</a></td><td><a href="https://incendar.com/conanexiles_itemids.php">https://incendar.com/conanexiles_itemids.php</a></td></tr><tr><td><strong>Conan Exiles Thrall Unique Bonus Recipes Unlocks List</strong></td><td align="center"></td><td align="center"></td><td><a href="https://772063455-files.gitbook.io/~/files/v0/b/gitbook-x-prod.appspot.com/o/spaces%2F-Lgje1lBxKKWXwqycB-v%2Fuploads%2FMVmLw6TjYTjFJLTL7pRf%2Fimage_2024-12-07_204320230.png?alt=media&amp;token=6066ee6a-a98e-4fd8-871c-f6a6ea0943e7">image_2024-12-07_204320230.png</a></td><td><a href="https://incendar.com/conanexiles_thrall_recipe_unlocks.php">https://incendar.com/conanexiles_thrall_recipe_unlocks.php</a></td></tr></tbody></table>

#### **AOC Pets**

The below link is old but has a great deal of info.

{% embed url="<https://aoc.fandom.com/wiki/Pets>" %}

**Emberlight Pets**

Emberlight's Animal Husbandry feature and its associated items and systems let players domesticate animals that they capture in the wild. This gameplay centers on Animal Pens, which provide different resources based on the type of pen. All animal pens are hand crafted once players have the required Knowledge feat.

Obtaining and using Animal Pens:

1. Purchase any of the required feats, beginning with Rabbit Keeper (see Animal Pen Info below)
2. Craft an animal pen and place it in the world
3. Interact with the animal pen and place its required baby animals and feeding materials in its inventory. All Animal Pens require [Ranch Water](https://conanexiles.fandom.com/wiki/Mod:Emberlight#Ranch_Water), but different animal pens require different types of food, indicated in their crafting info panel.
4. Close the inventory by pressing the Interact key to begin the life cycle

<figure><img src="https://772063455-files.gitbook.io/~/files/v0/b/gitbook-x-prod.appspot.com/o/spaces%2F-Lgje1lBxKKWXwqycB-v%2Fuploads%2FdPgmZtr4UTPnfr3Yltqo%2Fimage.png?alt=media&amp;token=f6f8462e-f7c0-4658-9ba4-7328eb9b57dc" alt="" width="375"><figcaption></figcaption></figure>

## ***Our Patreon's***&#x20;

![](https://772063455-files.gitbook.io/~/files/v0/b/gitbook-x-prod.appspot.com/o/spaces%2F-Lgje1lBxKKWXwqycB-v%2Fuploads%2FKFiZHHlgN1QM69t5DejF%2FPACK_PATREON.png?alt=media\&token=d8b84080-d3a0-4bcf-903f-ec3c9cebe9e3)

*Will receive generous perks in our Conan Server. Some of which is the ability to summon a friend (type of teleport).*&#x20;

Please see the Patreon Role listings to see just what you can get as an IN GAME PERK!

{% embed url="<https://faq.thepackgaming.com/patreon#our-patreon-perks>" %}

<figure><img src="https://772063455-files.gitbook.io/~/files/v0/b/gitbook-x-prod.appspot.com/o/spaces%2F-Lgje1lBxKKWXwqycB-v%2Fuploads%2FQLWnhvGrxW8h1a5oafMn%2Fimage.png?alt=media&amp;token=f947b0ed-3ebf-4df3-b242-3756803e4b51" alt=""><figcaption></figcaption></figure>


# The PACK QOL PVE 18+ (1.5xXP 1.5xH)

## We welcome you to The PACK The PACK QOL PVE 18+&#x20;

<figure><img src="https://772063455-files.gitbook.io/~/files/v0/b/gitbook-x-prod.appspot.com/o/spaces%2F-Lgje1lBxKKWXwqycB-v%2Fuploads%2FNiVEtFX16ZWsL9gTpUx2%2FCONAN_EXILEDLANDS_HARD_PVE.jpg?alt=media&amp;token=7641f3d6-b729-456a-ab2e-2a23bf96c737" alt=""><figcaption></figcaption></figure>

## How to connect to our Conan Exiles Servers.

<table data-card-size="large" data-view="cards"><thead><tr><th align="center"></th><th></th><th></th><th data-hidden data-card-cover data-type="files"></th><th data-hidden data-card-target data-type="content-ref"></th></tr></thead><tbody><tr><td align="center"><strong>The PACK QOL PVE 18+(1.5xXP 1.5xH)</strong> </td><td>Connect to the server by using the 'Direct Connect' button in the in-game server browser, and providing the following address: </td><td>66.153.149.147:7775</td><td><a href="https://772063455-files.gitbook.io/~/files/v0/b/gitbook-x-prod.appspot.com/o/spaces%2F-Lgje1lBxKKWXwqycB-v%2Fuploads%2FNiVEtFX16ZWsL9gTpUx2%2FCONAN_EXILEDLANDS_HARD_PVE.jpg?alt=media&amp;token=7641f3d6-b729-456a-ab2e-2a23bf96c737">CONAN_EXILEDLANDS_HARD_PVE.jpg</a></td><td></td></tr><tr><td align="center"><strong>The PACK QOL PVE 18+(1.5xXP 1.5xH)</strong> </td><td>Mod Collection on Steam Workshop</td><td>Click Here to download the mods.</td><td><a href="https://772063455-files.gitbook.io/~/files/v0/b/gitbook-x-prod.appspot.com/o/spaces%2F-Lgje1lBxKKWXwqycB-v%2Fuploads%2FrpG3cxMYF1P0qQSJIndn%2FQOL%20SERVER%20MODS.png?alt=media&amp;token=1e8227a7-f42e-4d8c-b79f-c00f2c5dda0b">QOL SERVER MODS.png</a></td><td><a href="https://steamcommunity.com/sharedfiles/filedetails/?id=2226366634">https://steamcommunity.com/sharedfiles/filedetails/?id=2226366634</a></td></tr></tbody></table>

## About Our QoL Server

### Our Server HUB,&#x20;

Community Center&#x20;

### Our *QOL* **PVE** Server settings:

***The PACK QOL Server*** ***Settings***\
Relaxed PVE Environment. Full Nudity (18+ Servers) \
Inventory kept on death. Only owner can loot own corpse. \
Character does not stay in game while logged out. \
Decay is 14 days in RL. Player structures are indestructible by other players. \
Thrall/Pet limits: 150 Per Tribe (15 Per Tribe member)\
Building limits: (1)Main Base: 100x100 cubits. (1) Outpost: 50x50 cubits.\
EXP and Harvest are set to 1.25 multiplier. (makes it about a 2x rate.) \
Day/Night progression is comparable to RL and lasts 60 mins. RL.\
PVP enabled only within "Arena" or other specialized areas.

### **QOL** SERVER modlist.txt

Download and drop this into your Conan Exiles Mods folder.\
`....\steamapps\common\Conan Exiles\ConanSandbox\Mods`

{% file src="/files/tvE4i6zadhMSUbvWNEKp" %}

<figure><img src="https://772063455-files.gitbook.io/~/files/v0/b/gitbook-x-prod.appspot.com/o/spaces%2F-Lgje1lBxKKWXwqycB-v%2Fuploads%2FCm0CQ1cXNnSci8q9b29w%2FGeneric%20Conan.png?alt=media&amp;token=d2109233-1906-409f-864f-839365d7e0cc" alt=""><figcaption></figcaption></figure>

## *QOL* **PVE** Server - Resources

### Interactive Maps and Wiki

<table data-card-size="large" data-view="cards"><thead><tr><th align="center"></th><th align="center"></th><th align="center"></th><th align="center"></th><th data-hidden data-card-target data-type="content-ref"></th><th data-hidden data-card-cover data-type="files"></th></tr></thead><tbody><tr><td align="center"></td><td align="center"> <strong>Vanilla Exiled Lands</strong> </td><td align="center"><strong>Interactive Map</strong></td><td align="center"></td><td><a href="http://conanmap.mapvault.net/">http://conanmap.mapvault.net/</a></td><td><a href="https://772063455-files.gitbook.io/~/files/v0/b/gitbook-x-prod.appspot.com/o/spaces%2F-Lgje1lBxKKWXwqycB-v%2Fuploads%2FRcYJpOR5UYuwq84iAQTv%2FQoL%20map.png?alt=media&amp;token=333b18a5-1ca5-4306-ba9f-de74220e229c">QoL map.png</a></td></tr><tr><td align="center"></td><td align="center"><strong>The OFFICIAL</strong> </td><td align="center"><strong>Conan Exiles Wiki</strong></td><td align="center"></td><td><a href="https://conanexiles.fandom.com/wiki/Conan_Exiles_Wiki">https://conanexiles.fandom.com/wiki/Conan_Exiles_Wiki</a></td><td><a href="https://772063455-files.gitbook.io/~/files/v0/b/gitbook-x-prod.appspot.com/o/spaces%2F-Lgje1lBxKKWXwqycB-v%2Fuploads%2FWGO7gyEEgQg77ksI0YPp%2Fimage_2024-12-07_205344087.png?alt=media&amp;token=a97d42e2-b9e0-43f6-9459-a4c8d3db97c4">image_2024-12-07_205344087.png</a></td></tr></tbody></table>

<figure><img src="https://772063455-files.gitbook.io/~/files/v0/b/gitbook-x-prod.appspot.com/o/spaces%2F-Lgje1lBxKKWXwqycB-v%2Fuploads%2F6FqNvu142UxorWEOMowX%2Fpippi%20warps.png?alt=media&amp;token=af1a6688-ed33-4efa-9535-3e06178213f0" alt="" width="375"><figcaption></figcaption></figure>

### **QoL PvE 18+** Travel

**Pippi Warps** are laid out in a progression, Free, Obelisks, Patreons.\
Several Warps are Free to all Players, others are created for our Patreon system. \
Our Patreon's receive special tags that allow access to a special Portal Thespian where certain warps are available to them. The use of TPR and TPA is a Patreon Perk.\
**Obelisks** - Specific to Exiled Lands. Obelisks are free, and you must have found the Obelisk before you attempt to use it. Once you have achieved the feat for a Maproom you may build a Maproom which is your hub to all the Obelisks on the map.  There is also a free to use Maproom in the QoL Server Hub.

{% tabs %}
{% tab title="FREE TO ALL" %}
:man:**Thespian Job:&#x20;*****Player Warps***\
**Server Standard Warps - FREE TO ALL**

**◎Server Hub** - Open to All - /warp Hub \
**◎Patreon Warp NPC** - Open to Patreon Members Only - /warp patwarps \
**◎Server Tavern and Trade Hub** - Open to All - /warp tavern \
**◎Server Arena** - Open to All - (wip) /warp arena \
**◎Desert** - The edge of the Desert - /warp desert \
**◎Savana** - The edge of the Savana - /warp savana \
**◎Jungle** - The edge of the Jungle - /warp jungle \
**◎Dafari** - The Summoning Place - /warp darfari \
**◎The City of Seperamu** - /warp relic \
**◎ The City of Asgarth** - /warp vanir \
**◎ Sinner's Ridge** - brimstone - /warp sinners \
**◎ Weavers Hollow** - Spiders and the Zath teacher - /warp zath
{% endtab %}

{% tab title="OBELISK" %}
Map Room is on the top Floor of the Server Hub.

**⇞**&#x44;agon's Eye N/6 \
**⇞**&#x55;pper Staging Area K/8 \
**⇞**&#x54;he Sinkhole H/6 \
**⇞**&#x55;nnamed City, near The Archives D/6 \
**⇞**&#x53;outh of Shattered Springs C/8 \
**⇞**&#x54;he Black Keep, between Ruins of Xullan and the Bridge of the Betrayer F/11 \
**⇞**&#x54;he Temple of Frost D/13 \
**⇞**&#x53;outh West of Path of the Penitent G/14 \
**⇞**&#x54;he Dregs D/4 \
**⇞**&#x4D;ounds of the Dead B/11
{% endtab %}

{% tab title="PATREON" %}
:man: ***Thespian Job: Patreon Warps***&#x20;

**◎Patreon Warp NPC** - Open to Patreon Members Only - /warp patwarps\
**◎The Wine Cellar** - /warp cellar \
**◎The Scorpion Den** - /warp Scorpion \
**◎The Well of Skelos** - /warp skelos \
**◎Warmaker's Sanctuary** - /warp warmaker \
**◎The Midnight Grove** - /warp grove \
**◎Hanuman's Grott**o - /warp apeman \
**◎Gallaman's Tomb** - /warp crocodile \
**◎Buccaneer's Bay** - /warp bounty \
**◎Starmetal Feild** - /warp Starmetal \
**◎Sand Swept Ruins** - /warp SandSwept \
**◎Mountaineer** - /warp Mountaineer
{% endtab %}
{% endtabs %}

<div align="center"><img src="https://772063455-files.gitbook.io/~/files/v0/b/gitbook-legacy-files/o/assets%2F-Lgje1lBxKKWXwqycB-v%2F-MHc_brB5hF0WvNNZH1v%2F-MHc_kM5cdprU-erPDMe%2FPippi%20Warps.png?alt=media&amp;token=24aaecd7-64d8-44ff-95e7-2128050b5fcd" alt="" width="188"></div>

## **The PACK Pippi Kit System:**

<figure><img src="https://772063455-files.gitbook.io/~/files/v0/b/gitbook-x-prod.appspot.com/o/spaces%2F-Lgje1lBxKKWXwqycB-v%2Fuploads%2FLWhxHbZU6QnSWykeDwJL%2FPack_Pippi_kit_system.png?alt=media&amp;token=d8100851-d1e1-494e-91d4-3963d9dff34d" alt="" width="375"><figcaption></figcaption></figure>

<details>

<summary><strong>Pippi KITS for purchase  QoL Map</strong></summary>

/kit loyalty - Daily gold kit that gives 1 Gold, and a chance for up to 4 golds total. Free and has a 24 hour cooldown.&#x20;

/kit patreon - A Patreon Gold kit (daily) that gives 3 Gold, and a chance or up to 12 golds total. Free and has a 24 hour cooldown.&#x20;

/kit starter - The Pack Starter Kit! Limited to those under Level 60. 5 day cooldown (in case of lost)Free \[iron pickax, cheap armor, healing wraps]&#x20;

/kit heal - For 1 Gold receive 10 concentrated aloe potions for an instant heal and use in battle in an emergency. 1 hour cooldown.&#x20;

/kit repair - 10 Gold gets you 1 weapon repair kit and 4 armor repair kits. 24 Hour cooldown.&#x20;

/kit leg\_repair - 20 Gold gets you 2 Legendary repair kits and 5 Legendary Armor repair kits. 7 day cooldown.&#x20;

/kit myth\_rpr - 20 Gold gets you 2 Mythical repair kits and 5 Mythical Armor repair kits. 7 day cooldown.&#x20;

/kit music - The MusiqBox - For 10 Gold receive a music box to place in your base. 7 day Cooldown&#x20;

/kit wallpaper - For 5 Gold receive 10 pippi wallpaper that your can use anywhere in your base. 7 day Cooldown&#x20;

/kit flaggi - For 5 Gold receive 4 pippi Flaggi that you can use anywhere in your base. 7 day Cooldown Beyond Stations Mastery Kits&#x20;

/kit (BS)Alchemy - (BS)T4 Alchemist Station(P) - Covers all Vanilla Alchemy Benches, Cauldron Recipes, Dyers Bench Recipes 10 Pippi gold&#x20;

/kit (BS)Smith - (BS)T4 Blacksmith Station(P) - Covers all Vanilla Blacksmith Bench Recipes, Casting Table, Tinkers Table, Torturers Table 10 Pippi gold&#x20;

/kit (BS)Smelter - (BS)T4 Smelter Station(P) - Covers All Vanilla Furnace Recipes 10 Pippi gold

/kit (BS)Cooking - (BS)T4 Cooking Stations(P) - Covers All Vanilla Stove Recipes, Fermentation Barrel 10 Pippi gold

/kit (BS)Armorer - (BS)T4 Armorer Station(P) - Covers All Vanilla Armorer Recipes, Tanners Bench, Saddlers Workstation 10 Pippi gold

/kit (BS)Artisan - (BS)T4 Artisan Station(P) - Covers All Vanilla and DLC Artisan Recipes, 10 Pippi gold

/kit (BS)Carpenter - (BS)T4 Carpenters Station(P) - Covers All Vanilla Carpentry Recipes, 10 Pippi gold

/kit (BS)Tanner - (BS)T4 Tannery Station(P) - Covers All Vanilla Tannery Recipes 10 Pippi gold

/kit (BS)Wheel - (BS)T4Thrall Wheels REG - This journal teaches you all 3 available thrall training methods. 10 Pippi gold

</details>

### Pets, Thralls, and Recipes for Conan Exiles&#x20;

<table data-card-size="large" data-view="cards"><thead><tr><th></th><th align="center"></th><th align="center"></th><th data-hidden data-card-target data-type="content-ref"></th><th data-hidden data-card-cover data-type="files"></th></tr></thead><tbody><tr><td><strong>Named T4 Thralls List for Conan Exiles</strong></td><td align="center"></td><td align="center"></td><td><a href="https://incendar.com/conanexiles_thralls.php">https://incendar.com/conanexiles_thralls.php</a></td><td><a href="https://772063455-files.gitbook.io/~/files/v0/b/gitbook-x-prod.appspot.com/o/spaces%2F-Lgje1lBxKKWXwqycB-v%2Fuploads%2FMVmLw6TjYTjFJLTL7pRf%2Fimage_2024-12-07_204320230.png?alt=media&amp;token=6066ee6a-a98e-4fd8-871c-f6a6ea0943e7">image_2024-12-07_204320230.png</a></td></tr><tr><td><strong>Conan Full NPC spawn list</strong></td><td align="center"></td><td align="center"></td><td><a href="https://incendar.com/conanexiles_templatetablespawn.php">https://incendar.com/conanexiles_templatetablespawn.php</a></td><td><a href="https://772063455-files.gitbook.io/~/files/v0/b/gitbook-x-prod.appspot.com/o/spaces%2F-Lgje1lBxKKWXwqycB-v%2Fuploads%2FMVmLw6TjYTjFJLTL7pRf%2Fimage_2024-12-07_204320230.png?alt=media&amp;token=6066ee6a-a98e-4fd8-871c-f6a6ea0943e7">image_2024-12-07_204320230.png</a></td></tr><tr><td><strong>Conan Exiles Item Database</strong></td><td align="center"></td><td align="center"></td><td><a href="https://incendar.com/conanexiles_itemids.php">https://incendar.com/conanexiles_itemids.php</a></td><td><a href="https://772063455-files.gitbook.io/~/files/v0/b/gitbook-x-prod.appspot.com/o/spaces%2F-Lgje1lBxKKWXwqycB-v%2Fuploads%2FMVmLw6TjYTjFJLTL7pRf%2Fimage_2024-12-07_204320230.png?alt=media&amp;token=6066ee6a-a98e-4fd8-871c-f6a6ea0943e7">image_2024-12-07_204320230.png</a></td></tr><tr><td><strong>Conan Exiles Thrall Unique Bonus Recipes Unlocks List</strong></td><td align="center"></td><td align="center"></td><td><a href="https://incendar.com/conanexiles_thrall_recipe_unlocks.php">https://incendar.com/conanexiles_thrall_recipe_unlocks.php</a></td><td><a href="https://772063455-files.gitbook.io/~/files/v0/b/gitbook-x-prod.appspot.com/o/spaces%2F-Lgje1lBxKKWXwqycB-v%2Fuploads%2FMVmLw6TjYTjFJLTL7pRf%2Fimage_2024-12-07_204320230.png?alt=media&amp;token=6066ee6a-a98e-4fd8-871c-f6a6ea0943e7">image_2024-12-07_204320230.png</a></td></tr></tbody></table>

**Emberlight Pets**

Emberlight's Animal Husbandry feature and its associated items and systems let players domesticate animals that they capture in the wild. This gameplay centers on Animal Pens, which provide different resources based on the type of pen. All animal pens are hand crafted once players have the required Knowledge feat.

Obtaining and using Animal Pens:

1. Purchase any of the required feats, beginning with Rabbit Keeper (see Animal Pen Info below)
2. Craft an animal pen and place it in the world
3. Interact with the animal pen and place its required baby animals and feeding materials in its inventory. All Animal Pens require [Ranch Water](https://conanexiles.fandom.com/wiki/Mod:Emberlight#Ranch_Water), but different animal pens require different types of food, indicated in their crafting info panel.
4. Close the inventory by pressing the Interact key to begin the life cycle

<figure><img src="https://772063455-files.gitbook.io/~/files/v0/b/gitbook-x-prod.appspot.com/o/spaces%2F-Lgje1lBxKKWXwqycB-v%2Fuploads%2F9RPVwf3c89wCljmiAiCS%2Fimage.png?alt=media&amp;token=de2ac9ca-cb39-48c5-b488-a9317261f557" alt="" width="375"><figcaption></figcaption></figure>

## ***Our Patreon's***&#x20;

![](https://772063455-files.gitbook.io/~/files/v0/b/gitbook-x-prod.appspot.com/o/spaces%2F-Lgje1lBxKKWXwqycB-v%2Fuploads%2FKFiZHHlgN1QM69t5DejF%2FPACK_PATREON.png?alt=media\&token=d8b84080-d3a0-4bcf-903f-ec3c9cebe9e3)

*Will receive generous perks in our Conan Server. Some of which is the ability to summon a friend (type of teleport).*&#x20;

Please see the Patreon Role listings to see just what you can get as an IN GAME PERK!

{% embed url="<https://faq.thepackgaming.com/patreon#our-patreon-perks>" %}

<figure><img src="https://772063455-files.gitbook.io/~/files/v0/b/gitbook-x-prod.appspot.com/o/spaces%2F-Lgje1lBxKKWXwqycB-v%2Fuploads%2FQLWnhvGrxW8h1a5oafMn%2Fimage.png?alt=media&amp;token=f947b0ed-3ebf-4df3-b242-3756803e4b51" alt=""><figcaption></figcaption></figure>


# The PACK Savage Wilds PVE 18+(3xXP 3xH)

## We welcome you to The PACK Savage Wilds PVE &#x20;

<figure><img src="https://772063455-files.gitbook.io/~/files/v0/b/gitbook-x-prod.appspot.com/o/spaces%2F-Lgje1lBxKKWXwqycB-v%2Fuploads%2F5jqn88I8SGa88WPdNB51%2FCE_SAVAGE_WILDS.png?alt=media&amp;token=6b45b78a-b1a8-4247-b038-75fba7912a03" alt=""><figcaption></figcaption></figure>

## How to connect to our Conan Exiles Servers.

<table data-card-size="large" data-view="cards"><thead><tr><th align="center"></th><th></th><th></th><th data-hidden data-card-cover data-type="files"></th></tr></thead><tbody><tr><td align="center"><strong>The PACK Savage Wilds PvE 18+ (3xXP 3xH)</strong></td><td>Connect to the server by using the 'Direct Connect' button in the in-game server browser, and providing the following address: </td><td>66.153.149.147:7773</td><td><a href="https://772063455-files.gitbook.io/~/files/v0/b/gitbook-x-prod.appspot.com/o/spaces%2F-Lgje1lBxKKWXwqycB-v%2Fuploads%2FyaIjdLlm4FeGw5oJOjLW%2FSAVAGE_WILDS_FLASH_Splash.png?alt=media&amp;token=9190c24b-dfb6-449b-a3a5-0a1ad63dbd12">SAVAGE_WILDS_FLASH_Splash.png</a></td></tr><tr><td align="center"><strong>The PACK Savage Wilds PvE 18+ (3xXP 3xH)</strong></td><td>Mod Collection on Steam Workshop</td><td>Click Here to download the mods.</td><td><a href="https://772063455-files.gitbook.io/~/files/v0/b/gitbook-x-prod.appspot.com/o/spaces%2F-Lgje1lBxKKWXwqycB-v%2Fuploads%2FDWAigxkFOrKgBLDJrwte%2FSW%20SERVER%20MODS.png?alt=media&amp;token=4babaee3-8149-4591-96a3-e9db5459ae14">SW SERVER MODS.png</a></td></tr></tbody></table>

<figure><img src="https://772063455-files.gitbook.io/~/files/v0/b/gitbook-x-prod.appspot.com/o/spaces%2F-Lgje1lBxKKWXwqycB-v%2Fuploads%2FCSVzVUDsVMsBfqFLu3bU%2Fimage.png?alt=media&amp;token=c5c9dca7-84af-4b4a-beae-1c0730062f53" alt=""><figcaption></figcaption></figure>

## About Our Savage Wilds Server

### **S.W. Server Hub:**

### Our *S.W* **PVE** Server settings:

***The PACK S.W Server*** ***Settings***\
Relaxed PVE Environment. Full Nudity (18+ Servers) \
Inventory kept on death. Only owner can loot own corpse. \
Character does not stay in game while logged out. \
Decay is 14 days in RL. Player structures are indestructible by other players. \
Thrall/Pet limits: 150 Per Tribe (15 Per Tribe member)\
Building limits: (1)Main Base: 100x100 cubits. (1) Outpost: 50x50 cubits.\
EXP and Harvest are set to 1.5 multiplier. (makes it about a 3x rate.) \
Day/Night progression is comparable to RL and lasts 60 mins. RL.\
PVP enabled only within "Arena" or other specialized areas.

### **QOL** SERVER modlist.txt

Download and drop this into your Conan Exiles Mods folder.\
`....\steamapps\common\Conan Exiles\ConanSandbox\Mods`

{% file src="/files/KaSjYJGK1QzYKREH1hjD" %}

{% embed url="<https://107768092-files.gitbook.io/~/files/v0/b/gitbook-x-prod.appspot.com/o/spaces%2F-Lgje1lBxKKWXwqycB-v%2Fuploads%2FJ5Cb5PD2v8PFisckTkz3%2FSavage%20Wilds%20Header.png?alt=media&token=866f2459-2544-4c7e-b67f-7f6d81ce6040>" %}

## Savage Wilds Resources

<table data-view="cards" data-full-width="false"><thead><tr><th align="center"></th><th align="center"></th><th align="center"></th><th data-hidden data-card-target data-type="content-ref"></th></tr></thead><tbody><tr><td align="center"><img src="https://772063455-files.gitbook.io/~/files/v0/b/gitbook-x-prod.appspot.com/o/spaces%2F-Lgje1lBxKKWXwqycB-v%2Fuploads%2F1yBZOGl3qC9Kr9uPDt6z%2Fimage.png?alt=media&amp;token=a2306498-7d4e-4ddc-8045-d6f5b9a7ae2e" alt=""></td><td align="center"><strong>Nia's Nifty Interactive Map</strong> </td><td align="center"> Here is a new interactive map showing POI, Feat locations, etc.<br><br>Click here to vist the site!</td><td><a href="https://nia292.github.io/savage-wilds-map/">https://nia292.github.io/savage-wilds-map/</a></td></tr><tr><td align="center"><p></p><p><img src="https://772063455-files.gitbook.io/~/files/v0/b/gitbook-x-prod.appspot.com/o/spaces%2F-Lgje1lBxKKWXwqycB-v%2Fuploads%2FUyLJwyK01OI5PQrWC6j7%2FMUNRUN-ATLAS.png?alt=media&amp;token=7005135f-e01c-41a2-a15b-53e866b32f9e" alt="Munrun with marked locations" data-size="original"></p></td><td align="center">Munrun with marked locations</td><td align="center"></td><td></td></tr><tr><td align="center"><p><img src="https://772063455-files.gitbook.io/~/files/v0/b/gitbook-x-prod.appspot.com/o/spaces%2F-Lgje1lBxKKWXwqycB-v%2Fuploads%2FaGjn8cqIJNCHJ80U82pf%2Fimage.png?alt=media&amp;token=cf686984-7672-42da-a5a4-27e534fa2137" alt=""></p><p>No Mans Land Map</p></td><td align="center"></td><td align="center"></td><td></td></tr><tr><td align="center"><img src="https://772063455-files.gitbook.io/~/files/v0/b/gitbook-x-prod.appspot.com/o/spaces%2F-Lgje1lBxKKWXwqycB-v%2Fuploads%2FNDItWCgOQAjdHg5kDEAc%2Fimage.png?alt=media&amp;token=ff7d28b5-a654-4493-bb85-5c98b0f32115" alt=""></td><td align="center">Ruins of Xun'Sha</td><td align="center"></td><td></td></tr><tr><td align="center"><img src="https://772063455-files.gitbook.io/~/files/v0/b/gitbook-x-prod.appspot.com/o/spaces%2F-Lgje1lBxKKWXwqycB-v%2Fuploads%2FCosaHxUNcSe8HYz3rOOV%2Fimage.png?alt=media&amp;token=aa4183a6-894b-452c-a7da-318fb368de9c" alt=""></td><td align="center">The Atoll</td><td align="center"></td><td></td></tr><tr><td align="center"><img src="https://772063455-files.gitbook.io/~/files/v0/b/gitbook-x-prod.appspot.com/o/spaces%2F-Lgje1lBxKKWXwqycB-v%2Fuploads%2FGCqnnBXXM8qMJIaJ00MZ%2Fimage.png?alt=media&amp;token=f8304d8b-4eb3-4493-a204-07532f9f85d7" alt=""></td><td align="center">The Last Refuge</td><td align="center"></td><td></td></tr><tr><td align="center"><img src="https://772063455-files.gitbook.io/~/files/v0/b/gitbook-x-prod.appspot.com/o/spaces%2F-Lgje1lBxKKWXwqycB-v%2Fuploads%2F7mIqAj856nWdczto3w1C%2Fimage.png?alt=media&amp;token=34d7c67b-44ce-4cf1-8b70-f2a314c7ba97" alt=""></td><td align="center">The Volcano</td><td align="center"></td><td></td></tr></tbody></table>

<figure><img src="https://772063455-files.gitbook.io/~/files/v0/b/gitbook-x-prod.appspot.com/o/spaces%2F-Lgje1lBxKKWXwqycB-v%2Fuploads%2F6FqNvu142UxorWEOMowX%2Fpippi%20warps.png?alt=media&amp;token=af1a6688-ed33-4efa-9535-3e06178213f0" alt="" width="375"><figcaption></figcaption></figure>

### **WILDS PvE 18+** Travel

**Pippi Warps** are laid out in a progression, Free, Caravans, Patreons.\
Several Warps are Free to all Players, others are created for our Patreon system. \
Our Patreon's receive special tags that allow access to a special Portal Thespian where certain warps are available to them. The use of TPR and TPA is a Patreon Perk.\
**Caravans** - Specific to Savage Wilds. Caravan's are much like Waypoint's. They cost 100-150 CE Bronze (per trip), and you must have found the Caravan before you attempt to use it.

{% tabs %}
{% tab title="FREE" %}
Thespian Job: Player Warps&#x20;

**◎**&#x57;ILDS Server Hub - Munrun Outskirts - /warp hub \
**◎**&#x50;VP area - For duels and Events - (Enabled for Events) /warp PVP \
**◎**&#x41;ncient - Port Gateway to the south continent. /warp port \
**◎**&#x42;rimstone Isle - starter area resource - /warp brim \
**◎**&#x4D;unrun - Munrun Outskirts - Caravan Stop /warp munrun \
**◎**&#x4F;ld Trade Docks /warp docks \
**◎**&#x54;he Last Bastion /warp bastion \
**◎**&#x54;he Last Refuge /warp Refuge \
**◎**&#x54;he Notch & Arrow Tavern - /warp tavern \
**◎**&#x54;he Pit - Spawn POINT - /warp pit \
**◎**&#x54;he Ruins of Xun'Sha /warp ruins \
**◎**&#x54;he Volcano /warp volcano
{% endtab %}

{% tab title="Patreon" %}
Thespian Job: Patreon Warps&#x20;

**◎**&#x4E;o Mans Land - The Entry way to the Dungeons of SW. - /warp nomans \
**◎**&#x54;he Atlantean Tomb /warp tomb \
**◎**&#x54;he Cistern /warp cistern \
**◎**&#x54;he Citadell of the White Hand /warp whitehand \
**◎**&#x54;he Ethereal Bastion Entrance /warp ethereal \
**◎**&#x54;he Frozen Battlefeild /warp battlefeild \
**◎**&#x54;he Frozen Gate /warp frozen \
**◎**&#x54;he Grove /warp grove \
**◎**&#x54;he Queens Tomb /warp queen \
**◎**&#x54;he Skull Gate /warp skull
{% endtab %}

{% tab title="Caravan Outposts" %}
**Caravans** - Specific to Savage Wilds.&#x20;

🐎Munrun Outskirts - Shima's Caravan Outpost - F7\
🐎Cracked Fjords - Shimas Caravan Site - H19\
🐎Last Refuge - Shimas Caravan Site - M11\
🐎South Beach - Shimas Caravan Site - E5\
🐎Old Trade Docks - Shimas Caravan Site - H10\
🐎Volcano POI - Shimas Caravan Site - Inside the POI\
🐎Ruins of Xun'sha POI - Shimas Caravan Site - Inside the POI\
🐎Ancient Port - Shimas Caravan Site - D3\
🐎Wolfrun Caravan - Shimas Caravan Site - A14\
🐎No Mans Land - Shimas Caravan Site - Inside the Dungeon\
🐎Broken Caravan - Shimas Caravan Site - F1
{% endtab %}
{% endtabs %}

<div align="center"><img src="https://772063455-files.gitbook.io/~/files/v0/b/gitbook-legacy-files/o/assets%2F-Lgje1lBxKKWXwqycB-v%2F-MHc_brB5hF0WvNNZH1v%2F-MHc_kM5cdprU-erPDMe%2FPippi%20Warps.png?alt=media&amp;token=24aaecd7-64d8-44ff-95e7-2128050b5fcd" alt="" width="188"></div>

## **The PACK Pippi Kit System:**

<figure><img src="https://772063455-files.gitbook.io/~/files/v0/b/gitbook-x-prod.appspot.com/o/spaces%2F-Lgje1lBxKKWXwqycB-v%2Fuploads%2FLWhxHbZU6QnSWykeDwJL%2FPack_Pippi_kit_system.png?alt=media&amp;token=d8100851-d1e1-494e-91d4-3963d9dff34d" alt="" width="375"><figcaption></figcaption></figure>

<details>

<summary><strong>Pippi KITS for purchase  Savage Wilds Map</strong></summary>

/kit (SW)Void - 100 Pippi gold, Req. Lv. 60, receive a Unique to SW Tome of the Void - (Convergence Mastery) Single use per server.&#x20;

/kit loyalty - Stipend of 100 SW Bronze&#x20;

/kit pat-loyalty - A selection of Tokens for Dungeon rewards

/kit starter - The Pack Starter Kit! Limited to those under Level 60. 5 day cooldown (in case of lost)Free \[iron pickax, cheap armor, healing wraps]&#x20;

/kit heal - For 1 Gold receive 10 concentrated aloe potions for an instant heal and use in battle in an emergency. 1 hour cooldown.&#x20;

/kit repair - 10 Gold gets you 1 weapon repair kit and 4 armor repair kits. 24 Hour cooldown.&#x20;

/kit leg\_repair - 20 Gold gets you 2 Legendary repair kits and 5 Legendary Armor repair kits. 7 day cooldown.&#x20;

/kit myth\_rpr - 20 Gold gets you 2 Mythical repair kits and 5 Mythical Armor repair kits. 7 day cooldown.&#x20;

/kit music - The MusiqBox - For 10 Gold receive a music box to place in your base. 7 day Cooldown&#x20;

/kit wallpaper - For 5 Gold receive 10 pippi wallpaper that your can use anywhere in your base. 7 day Cooldown&#x20;

/kit flaggi - For 5 Gold receive 4 pippi Flaggi that you can use anywhere in your base. 7 day Cooldown Beyond Stations Mastery Kits&#x20;

/kit (BS)Alchemy - (BS)T4 Alchemist Station(P) - Covers all Vanilla Alchemy Benches, Cauldron Recipes, Dyers Bench Recipes 10 Pippi gold&#x20;

/kit (BS)Smith - (BS)T4 Blacksmith Station(P) - Covers all Vanilla Blacksmith Bench Recipes, Casting Table, Tinkers Table, Torturers Table 10 Pippi gold&#x20;

/kit (BS)Smelter - (BS)T4 Smelter Station(P) - Covers All Vanilla Furnace Recipes 10 Pippi gold

/kit (BS)Cooking - (BS)T4 Cooking Stations(P) - Covers All Vanilla Stove Recipes, Fermentation Barrel 10 Pippi gold

/kit (BS)Armorer - (BS)T4 Armorer Station(P) - Covers All Vanilla Armorer Recipes, Tanners Bench, Saddlers Workstation 10 Pippi gold

/kit (BS)Artisan - (BS)T4 Artisan Station(P) - Covers All Vanilla and DLC Artisan Recipes, 10 Pippi gold

/kit (BS)Carpenter - (BS)T4 Carpenters Station(P) - Covers All Vanilla Carpentry Recipes, 10 Pippi gold

/kit (BS)Tanner - (BS)T4 Tannery Station(P) - Covers All Vanilla Tannery Recipes 10 Pippi gold

/kit (BS)Wheel - (BS)T4Thrall Wheels REG - This journal teaches you all 3 available thrall training methods. 10 Pippi gold

</details>

### Pets, Thralls, and Recipes for Conan Exiles \~ Savage Wilds.

<table data-card-size="large" data-view="cards"><thead><tr><th></th><th align="center"></th><th align="center"></th><th data-hidden data-card-target data-type="content-ref"></th><th data-hidden data-card-cover data-type="files"></th></tr></thead><tbody><tr><td><strong>Named T4 Thralls List for Conan Exiles</strong></td><td align="center"></td><td align="center"></td><td><a href="https://incendar.com/conanexiles_thralls.php">https://incendar.com/conanexiles_thralls.php</a></td><td><a href="https://772063455-files.gitbook.io/~/files/v0/b/gitbook-x-prod.appspot.com/o/spaces%2F-Lgje1lBxKKWXwqycB-v%2Fuploads%2FMVmLw6TjYTjFJLTL7pRf%2Fimage_2024-12-07_204320230.png?alt=media&amp;token=6066ee6a-a98e-4fd8-871c-f6a6ea0943e7">image_2024-12-07_204320230.png</a></td></tr><tr><td><strong>Conan Full NPC spawn list</strong></td><td align="center"></td><td align="center"></td><td><a href="https://incendar.com/conanexiles_templatetablespawn.php">https://incendar.com/conanexiles_templatetablespawn.php</a></td><td><a href="https://772063455-files.gitbook.io/~/files/v0/b/gitbook-x-prod.appspot.com/o/spaces%2F-Lgje1lBxKKWXwqycB-v%2Fuploads%2FMVmLw6TjYTjFJLTL7pRf%2Fimage_2024-12-07_204320230.png?alt=media&amp;token=6066ee6a-a98e-4fd8-871c-f6a6ea0943e7">image_2024-12-07_204320230.png</a></td></tr><tr><td><strong>Conan Exiles Item Database</strong></td><td align="center"></td><td align="center"></td><td><a href="https://incendar.com/conanexiles_itemids.php">https://incendar.com/conanexiles_itemids.php</a></td><td><a href="https://772063455-files.gitbook.io/~/files/v0/b/gitbook-x-prod.appspot.com/o/spaces%2F-Lgje1lBxKKWXwqycB-v%2Fuploads%2FMVmLw6TjYTjFJLTL7pRf%2Fimage_2024-12-07_204320230.png?alt=media&amp;token=6066ee6a-a98e-4fd8-871c-f6a6ea0943e7">image_2024-12-07_204320230.png</a></td></tr><tr><td><strong>Conan Exiles Thrall Unique Bonus Recipes Unlocks List</strong></td><td align="center"></td><td align="center"></td><td><a href="https://incendar.com/conanexiles_thrall_recipe_unlocks.php">https://incendar.com/conanexiles_thrall_recipe_unlocks.php</a></td><td><a href="https://772063455-files.gitbook.io/~/files/v0/b/gitbook-x-prod.appspot.com/o/spaces%2F-Lgje1lBxKKWXwqycB-v%2Fuploads%2FMVmLw6TjYTjFJLTL7pRf%2Fimage_2024-12-07_204320230.png?alt=media&amp;token=6066ee6a-a98e-4fd8-871c-f6a6ea0943e7">image_2024-12-07_204320230.png</a></td></tr></tbody></table>

**Emberlight Pets**

Emberlight's Animal Husbandry feature and its associated items and systems let players domesticate animals that they capture in the wild. This gameplay centers on Animal Pens, which provide different resources based on the type of pen. All animal pens are hand crafted once players have the required Knowledge feat.

Obtaining and using Animal Pens:

1. Purchase any of the required feats, beginning with Rabbit Keeper (see Animal Pen Info below)
2. Craft an animal pen and place it in the world
3. Interact with the animal pen and place its required baby animals and feeding materials in its inventory. All Animal Pens require [Ranch Water](https://conanexiles.fandom.com/wiki/Mod:Emberlight#Ranch_Water), but different animal pens require different types of food, indicated in their crafting info panel.
4. Close the inventory by pressing the Interact key to begin the life cycle

<figure><img src="https://772063455-files.gitbook.io/~/files/v0/b/gitbook-x-prod.appspot.com/o/spaces%2F-Lgje1lBxKKWXwqycB-v%2Fuploads%2FKeZ9spqmmXUYI7ilbvRK%2Fimage.png?alt=media&amp;token=437da695-a7ec-4ba1-8709-2e71f33fc7c6" alt=""><figcaption></figcaption></figure>

## Savage Wilds UPDATES

Watch our Discord channel, #👳┊update-spam for any Savage Wilds Map or Shima's Compendium Updates.

<figure><img src="https://772063455-files.gitbook.io/~/files/v0/b/gitbook-x-prod.appspot.com/o/spaces%2F-Lgje1lBxKKWXwqycB-v%2Fuploads%2FhiRmjq7bfEB3znk2xDfN%2Fimage.png?alt=media&amp;token=86116c65-0814-41a8-91b5-a6aaa41e2608" alt="" width="375"><figcaption></figcaption></figure>

{% embed url="<https://www.youtube.com/watch?v=Is8yaBXEunI>" %}

## ***Our Patreon's***&#x20;

![](https://772063455-files.gitbook.io/~/files/v0/b/gitbook-x-prod.appspot.com/o/spaces%2F-Lgje1lBxKKWXwqycB-v%2Fuploads%2FKFiZHHlgN1QM69t5DejF%2FPACK_PATREON.png?alt=media\&token=d8b84080-d3a0-4bcf-903f-ec3c9cebe9e3)

*Will receive generous perks in our Conan Server. Some of which is the ability to summon a friend (type of teleport).*&#x20;

Please see the Patreon Role listings to see just what you can get as an IN GAME PERK!

{% embed url="<https://faq.thepackgaming.com/patreon#our-patreon-perks>" %}

<figure><img src="https://772063455-files.gitbook.io/~/files/v0/b/gitbook-x-prod.appspot.com/o/spaces%2F-Lgje1lBxKKWXwqycB-v%2Fuploads%2FQLWnhvGrxW8h1a5oafMn%2Fimage.png?alt=media&amp;token=f947b0ed-3ebf-4df3-b242-3756803e4b51" alt=""><figcaption></figcaption></figure>


# Conan Exiles Player Guides

Player Help Guides

**Navigation of Pages:**

<table data-view="cards"><thead><tr><th></th><th></th></tr></thead><tbody><tr><td><strong>Left side of the page</strong> <span data-gb-custom-inline data-tag="emoji" data-code="25c0">◀️</span></td><td>Use the <strong>></strong> to open any pages in that section when the Header shows a <strong>></strong>.</td></tr><tr><td><strong>Right Side</strong> of the page <span data-gb-custom-inline data-tag="emoji" data-code="25b6">▶️</span></td><td>Click a header to go to that section of this page.</td></tr><tr><td><strong>Features of the page.</strong></td><td>are in an <strong>expandable box</strong>, please click the <strong>></strong> to open the expandable dropdown.</td></tr><tr><td><strong>Hyperlink</strong>s are often in a <strong>card form</strong> in the website.</td><td>So <strong>clicking an image</strong> will often take you to a specific page for information. </td></tr><tr><td><strong>Steam-link</strong>s are often in a <strong>card form</strong> in the website.</td><td>So <strong>clicking on a server card</strong> will take you to the Server.</td></tr></tbody></table>

## **Player Help Guides!**

<table data-view="cards"><thead><tr><th></th><th data-hidden data-card-cover data-type="files"></th><th data-hidden data-card-target data-type="content-ref"></th></tr></thead><tbody><tr><td>Conan Progression Guide</td><td><a href="https://772063455-files.gitbook.io/~/files/v0/b/gitbook-x-prod.appspot.com/o/spaces%2F-Lgje1lBxKKWXwqycB-v%2Fuploads%2FDUYwe4aqwpAGzkqcxdQS%2Fimage.png?alt=media&amp;token=4e9856de-8c75-4541-8c18-fa530d8e1358">image.png</a></td><td><a href="https://faq.thepackgaming.com/ce/player-guide/progression">https://faq.thepackgaming.com/ce/player-guide/progression</a></td></tr><tr><td>Pippi Player Guide</td><td><a href="https://772063455-files.gitbook.io/~/files/v0/b/gitbook-legacy-files/o/assets%2F-Lgje1lBxKKWXwqycB-v%2F-MHcIVeLJbN0Wg66iWov%2F-MHcK3Pqxofn-LV1znVQ%2FPippi%20User%20manual.png?alt=media&amp;token=c5123f67-5670-435f-afc9-bb09ab4277e1">Pippi User manual.png</a></td><td><a href="https://faq.thepackgaming.com/ce/player-guide/pippi">https://faq.thepackgaming.com/ce/player-guide/pippi</a></td></tr><tr><td>Wallpaper ART</td><td><a href="https://772063455-files.gitbook.io/~/files/v0/b/gitbook-x-prod.appspot.com/o/spaces%2F-Lgje1lBxKKWXwqycB-v%2Fuploads%2FF4EfAWyU99NqwlDr2rNb%2Fimage_2025-03-21_013215616.png?alt=media&amp;token=70a18e5d-0206-4cb3-b406-d7480edac8ae">image_2025-03-21_013215616.png</a></td><td><a href="https://faq.thepackgaming.com/ce/player-guide/wallpapers">https://faq.thepackgaming.com/ce/player-guide/wallpapers</a></td></tr><tr><td>Emberlight Mod Guide</td><td><a href="https://772063455-files.gitbook.io/~/files/v0/b/gitbook-x-prod.appspot.com/o/spaces%2F-Lgje1lBxKKWXwqycB-v%2Fuploads%2FeLnPLKADxxbSmQEFGtYF%2Fimage_2025-03-21_013635881.png?alt=media&amp;token=3f5765d5-83eb-41c5-8eb3-044b4b8856a2">image_2025-03-21_013635881.png</a></td><td><a href="https://faq.thepackgaming.com/ce/player-guide/emberlight">https://faq.thepackgaming.com/ce/player-guide/emberlight</a></td></tr><tr><td>Age of Calamitous Guides</td><td><a href="https://772063455-files.gitbook.io/~/files/v0/b/gitbook-x-prod.appspot.com/o/spaces%2F-Lgje1lBxKKWXwqycB-v%2Fuploads%2FOA7jhrSEEicw9zJx7FpW%2Fimage_2025-03-21_013824144.png?alt=media&amp;token=37e61c37-6c32-477f-be90-7d9bb7d3e38e">image_2025-03-21_013824144.png</a></td><td><a href="https://faq.thepackgaming.com/ce/player-guide/aoc">https://faq.thepackgaming.com/ce/player-guide/aoc</a></td></tr><tr><td>Shima's Compendium Mod Guide</td><td><a href="https://772063455-files.gitbook.io/~/files/v0/b/gitbook-x-prod.appspot.com/o/spaces%2F-Lgje1lBxKKWXwqycB-v%2Fuploads%2FJ6qpbilVPYzDz3LcAYua%2Fimage_2025-03-21_013951276.png?alt=media&amp;token=1d0d6564-ff6f-4492-9901-34f2bc44184d">image_2025-03-21_013951276.png</a></td><td><a href="https://faq.thepackgaming.com/ce/player-guide/shimas">https://faq.thepackgaming.com/ce/player-guide/shimas</a></td></tr></tbody></table>

## ***Our Patreon's***&#x20;

![](https://772063455-files.gitbook.io/~/files/v0/b/gitbook-x-prod.appspot.com/o/spaces%2F-Lgje1lBxKKWXwqycB-v%2Fuploads%2FKFiZHHlgN1QM69t5DejF%2FPACK_PATREON.png?alt=media\&token=d8b84080-d3a0-4bcf-903f-ec3c9cebe9e3)

*Will receive generous perks in our Conan Server. Some of which is the ability to summon a friend (type of teleport).*&#x20;

Please see the Patreon Role listings to see just what you can get as an IN GAME PERK!

{% embed url="<https://faq.thepackgaming.com/patreon#our-patreon-perks>" %}

<figure><img src="https://772063455-files.gitbook.io/~/files/v0/b/gitbook-x-prod.appspot.com/o/spaces%2F-Lgje1lBxKKWXwqycB-v%2Fuploads%2FQLWnhvGrxW8h1a5oafMn%2Fimage.png?alt=media&amp;token=f947b0ed-3ebf-4df3-b242-3756803e4b51" alt=""><figcaption></figcaption></figure>


# Conan Progression Guide

<figure><img src="https://772063455-files.gitbook.io/~/files/v0/b/gitbook-x-prod.appspot.com/o/spaces%2F-Lgje1lBxKKWXwqycB-v%2Fuploads%2F9eKkWM0oS9fiiVPQVVlr%2Fimage.png?alt=media&amp;token=18071459-1f4c-4ffe-9bf5-f053358424d5" alt=""><figcaption></figcaption></figure>

***

**Notes**

\- This guide was created without using any combat thralls or pets in mind. While still possible to use them, it may make some things trivial in terms of difficulty.\
\- Important items are listed next to the locations they are found at. Make sure you have them before you move on from a location.\
\- **Attune to Obelisks** when you see them.\
\- I suggest playing with the [interactive map](http://conanmap.mapvault.net/) open and completing nearby cities/caves/ruins/vistas/etc as you go, while letting the "Key Locations" guide your general direction.\
\- [Legendary Creatures:](https://conanexiles.gamepedia.com/Legendary_Creature) Great way to acquire legendary weapons when you feel capable of doing so (Perhaps between Tier 1 & 2)\
\- I would recommend completing the Journey Steps when you can but some of them seem rather out of order in terms of difficulty. By following the list above, you are likely to complete them naturally. However be sure to do the more simple tasks (block an attack, throw an orb, etc) asap.

***

**The list below is in order of story progression and difficulty.**

**Prelude**

\- Nunu the Cannibal gives players a major hint in terms of progression which can be easily missed. Be sure to chat with him and see what he has to say! It's not needed if you follow the list below, but it's still neat regardless.\[Specifically about Lotus Potions and a unique/alternate effect they have.

\- [Shaman's Rise](https://conanexiles.fandom.com/wiki/Shaman%27s_Rise) ( NPC: [Nunu the Cannibal](https://conanexiles.fandom.com/wiki/Nunu_the_Cannibal) )

***

**Tier 1 Main Locations**

\- [The Dregs](https://conanexiles.gamepedia.com/The_Dregs) ( [Item](https://conanexiles.gamepedia.com/Staff_of_the_Triumvirate) )

\- [The Tower of Bats](https://conanexiles.gamepedia.com/The_Tower_of_Bats) ( [Item](https://conanexiles.gamepedia.com/Awakened_Staff_of_the_Triumvirate) )\
\- [Gallaman's Tomb](https://conanexiles.gamepedia.com/Gallaman%27s_Tomb) ( [Item](https://conanexiles.gamepedia.com/Jagged_Scourgestone_Piece) )\
\- [Captain's Quarters](https://conanexiles.gamepedia.com/Captain%27s_Quarters) ( [Item](https://conanexiles.gamepedia.com/Shattered_Scourgestone_Piece) )\
\- [The Passage](https://conanexiles.gamepedia.com/The_Passage) ( [Item](https://conanexiles.gamepedia.com/Broken_Scourgestone_Piece) )\
\- [Palace of the Witch Queen](https://conanexiles.gamepedia.com/Palace_of_the_Witch_Queen) ( [Item 1](https://conanexiles.gamepedia.com/Key_to_Razma%27s_Quarters) , [Item 2](https://bit.ly/3hQqBMT) )

**Tier 1 Cities**

* [The Black Galleon](https://conanexiles.gamepedia.com/The_Black_Galleon)
* [Sinner's Refuge](https://conanexiles.gamepedia.com/Sinner%27s_Refuge)
* [The Summoning Place](https://conanexiles.gamepedia.com/The_Summoning_Place)
* [Sepermeru, City of the Relic Hunters](https://conanexiles.gamepedia.com/Sepermeru,_City_of_the_Relic_Hunters) ( NPC: [Razma of Shem](https://conanexiles.gamepedia.com/Razma_of_Shem) )
* [Forgotten City of Xel-ha](https://conanexiles.gamepedia.com/Forgotten_City_of_Xel-ha)

**Tier 1 Caves/POIs**

* [Cavern of Fiends](https://conanexiles.gamepedia.com/Cavern_of_Fiends)
* [Skittering Cavern](https://conanexiles.gamepedia.com/Skittering_Cavern)
* [Warren of Degenerates](https://conanexiles.gamepedia.com/Warren_of_Degenerates)
* [Hanuman's Grotto](https://conanexiles.gamepedia.com/Hanuman%27s_Grotto)
* [Shaleback Hollow](https://conanexiles.gamepedia.com/Shaleback_Hollow)
* [Scuttler's Shortcut](https://conanexiles.gamepedia.com/Scuttler%27s_Shortcut)
* [Weaver's Hollow](https://conanexiles.gamepedia.com/Weaver%27s_Hollow)
* [Executioners Entrance](https://conanexiles.gamepedia.com/Executioners_Entrance)
* [Shaman's Rise](https://conanexiles.gamepedia.com/Shaman%27s_Rise) ( Yog Trainer: [Nunu the Cannibal](https://conanexiles.gamepedia.com/Nunu_the_Cannibal) )
* [Pagoda of Boundless Lusts](https://conanexiles.gamepedia.com/Pagoda_of_Boundless_Lusts) ( Derketo Trainer: [Yakira, Priestess of Derketo](https://conanexiles.gamepedia.com/Yakira,_Priestess_of_Derketo) )
* [Mek-kamoses's Spire](https://conanexiles.gamepedia.com/Mek-kamoses%27s_Spire) ( Set Trainer: [Mek-kamoses:](https://conanexiles.gamepedia.com/Mek-kamoses) )
* [Muriela's Hope](https://conanexiles.gamepedia.com/Muriela%27s_Hope) ( Mitra Trainer: [Muriela the Artisan](https://conanexiles.gamepedia.com/Muriela_the_Artisan) )

***

**Tier 2 Main Locations**

\- [Sandswept Ruins](https://conanexiles.gamepedia.com/Sandswept_Ruins) ( [Item](https://bit.ly/31PsmEf) )

\- [The Barrow King](https://conanexiles.gamepedia.com/The_Barrow_King) ( [Item](https://conanexiles.gamepedia.com/Diadem_of_the_Giant-kings) )\
\- [Midnight Grove](https://conanexiles.gamepedia.com/Midnight_Grove) ( [Item](https://conanexiles.gamepedia.com/Flesh_of_Remembrance) , NPC: [Child of Jhebbal Sag](https://conanexiles.gamepedia.com/Child_of_Jhebbal_Sag) )\
\- [The Black Keep](https://conanexiles.gamepedia.com/The_Black_Keep) ( [Item 1](https://conanexiles.gamepedia.com/Ancient_Key) , [Item 2](https://conanexiles.gamepedia.com/Tears_of_Two_Races) , POI: [The Undergate](https://conanexiles.gamepedia.com/Undergate) )\
\- [The Arena](https://conanexiles.gamepedia.com/The_Arena) ( [Item](https://conanexiles.gamepedia.com/Star_of_the_Champion) )\
\- [The Unnamed City](https://bit.ly/31IfDTY) ( [Item](https://conanexiles.gamepedia.com/Fragment_of_Power) , POI: [The Archives](https://conanexiles.gamepedia.com/The_Archives) )

**Tier 2 Cities**

* [New Asagarth](https://conanexiles.gamepedia.com/New_Asagarth)
* [Mounds of the Dead](https://conanexiles.gamepedia.com/Mounds_of_the_Dead)
* [The Temple of Frost](https://conanexiles.gamepedia.com/The_Temple_of_Frost)

**Tier 2 Caves/POIs**

* [Xalthar's Refuge](https://conanexiles.gamepedia.com/Xalthar%27s_Refuge)
* [Bin-Yakin's Seal](https://conanexiles.gamepedia.com/Bin-Yakin%27s_Seal)
* [Jhil's Roost](https://conanexiles.gamepedia.com/Jhil%27s_Roost)
* [Lockstone Cave](https://conanexiles.gamepedia.com/Lockstone_Cave)
* [The Scraps](https://conanexiles.gamepedia.com/The_Scraps)
* [The Crevice (cave)](https://bit.ly/34ScGly)
* [The Outcast Camp](https://conanexiles.gamepedia.com/The_Outcast_Camp) ( Ymir Trainer: [The Outcast](https://conanexiles.gamepedia.com/The_Outcast) )

***

**Tier 3 Main Locations**

\- [Well of Skelos](https://conanexiles.gamepedia.com/The_Well_of_Skelos) ( [Item](https://conanexiles.gamepedia.com/The_Shining_Trapezohedron) )

\- [The Scorpion Den<br>](https://conanexiles.gamepedia.com/The_Scorpion_Den)- [The Sunken City<br>](https://conanexiles.gamepedia.com/The_Sunken_City)- [Wine Cellar<br>](https://conanexiles.gamepedia.com/Wine_Cellar)- [Warmaker's Sanctuary](https://conanexiles.gamepedia.com/Warmaker%27s_Sanctuary)

**Tier 3 Cities**

* N/A

**Tier 3 Caves/POIs**

* [Dragonmouth:](https://conanexiles.gamepedia.com/Dragonmouth) Volcano Entrance
* [The Floe:](https://conanexiles.gamepedia.com/The_Floe) Volcano Entrance
* [The High Way:](https://conanexiles.gamepedia.com/The_High_Way) Volcano Entrance

***

**The Final Step**

\- [Chaosmouth](/patreon) ([Item](/join))

Guide courtesy of :([Progression Card](https://conanprogression.carrd.co/#progression))

***

<figure><img src="https://772063455-files.gitbook.io/~/files/v0/b/gitbook-x-prod.appspot.com/o/spaces%2F-Lgje1lBxKKWXwqycB-v%2Fuploads%2FRRkIoj3WQ8RTD1uBPiRy%2Fimage.png?alt=media&amp;token=5ec6d158-0816-4a56-99e5-fbb2a690ada7" alt=""><figcaption></figcaption></figure>

## **Exiles Journey Chapters**

**Below you will find Information on each of the Exiles Journey Chapters**

&#x20;The Exiles Journey is a progression method within Conan Exiles.

* The player must select a journey from Journey tab to be their active journey. Progress can only be gained in the current journey. The next step of the active journey is displayed at the top-right of the screen, if Show Journey Steps is enabled in Gameplay settings. The active journey can be switched at any time without losing progress on completed steps, allowing one to complete whichever steps are most convenient at the given moment.
* Completing a journey step awards [experience](https://conanexiles.fandom.com/wiki/Experience), with more advanced steps awarding higher amount, and completing a full journey gives an additional reward in the form of loot deposited directly into the player's inventory or new crafting recipes.

| **Journey**                                                                                  | **Unlock Prerequisites**                                                                                           | **Description**                                                                                                                                                                     | **Reward**                                                                                                                                                                                                                                                                                                                                                                                                                                                                     |
| -------------------------------------------------------------------------------------------- | ------------------------------------------------------------------------------------------------------------------ | ----------------------------------------------------------------------------------------------------------------------------------------------------------------------------------- | ------------------------------------------------------------------------------------------------------------------------------------------------------------------------------------------------------------------------------------------------------------------------------------------------------------------------------------------------------------------------------------------------------------------------------------------------------------------------------ |
| [Survivor](https://conanexiles.fandom.com/wiki/Survivor_\(Journey\))                         | The Exiled Lands                                                                                                   | The Exiled Lands take the weak and test the strong. You must learn to survive these harsh lands before you can dominate them.                                                       | [Supply Materials](https://conanexiles.fandom.com/wiki/Supply_Materials_\(Variant_A\))                                                                                                                                                                                                                                                                                                                                                                                         |
| [Survival Shelter](https://conanexiles.fandom.com/wiki/Survival_Shelter_\(Journey\))         | Complete Survivor or Island Survivor Journey                                                                       | Constructing a shelter requires basic materials and the knowledge of how to work them.                                                                                              | [Survival Kit](https://conanexiles.fandom.com/wiki/Survival_Kit)                                                                                                                                                                                                                                                                                                                                                                                                               |
| [Warrior](https://conanexiles.fandom.com/wiki/Warrior_\(Journey\))                           | Learn [Warrior Knowledge](https://conanexiles.fandom.com/wiki/Warrior_\(Knowledge\))                               | Warriors can stand their ground in hostile situations.                                                                                                                              | <p>Learn <a href="https://conanexiles.fandom.com/wiki/Brawler_Handwraps_(Knowledge)">Brawler Handwraps</a><br>5 <a href="https://conanexiles.fandom.com/wiki/Weapon_Repair_Kit">Weapon Repair Kits</a></p>                                                                                                                                                                                                                                                                     |
| [Soldier](https://conanexiles.fandom.com/wiki/Soldier_\(Journey\))                           | Complete Warrior Journey                                                                                           | Soldiers defeat their enemies with strength and precision by raining heavy blows down upon them.                                                                                    | Learn [Sharp Iron Sword](https://conanexiles.fandom.com/wiki/Sharp_Iron_Sword_\(Knowledge\))                                                                                                                                                                                                                                                                                                                                                                                   |
| [Rogue](https://conanexiles.fandom.com/wiki/Rogue_\(Journey\))                               | Complete Warrior Journey                                                                                           | Rogues accomplish their goals with daggers, dirty tricks, and a penchant for poisons.                                                                                               | Learn [Balanced Iron Poniards](https://conanexiles.fandom.com/wiki/Balanced_Iron_Poniards_\(Knowledge\))                                                                                                                                                                                                                                                                                                                                                                       |
| [Archer](https://conanexiles.fandom.com/wiki/Archer_\(Journey\))                             | Learn [Archer Knowledge](https://conanexiles.fandom.com/wiki/Archer_\(Knowledge\))                                 | Archers specialize in combat at a distance and with enough training can defeat enemies without ever being touched.                                                                  | <p>Learn <a href="https://conanexiles.fandom.com/wiki/Powerful_Hunting_Bow_(Knowledge)">Powerful Hunting Bow</a><br>50 <a href="https://conanexiles.fandom.com/wiki/Ironhead_Arrow">Ironhead Arrows</a></p>                                                                                                                                                                                                                                                                    |
| [Sharpshooter](https://conanexiles.fandom.com/wiki/Sharpshooter_\(Journey\))                 | Complete Archer Journey                                                                                            | Sharpshooters can target the legs or heads of enemies and impart vicious wounds on them, crippling them and slowing them down.                                                      | Learn [Powerful Hyrkanian Bow](https://conanexiles.fandom.com/wiki/Powerful_Hyrkanian_Bow_\(Knowledge\))                                                                                                                                                                                                                                                                                                                                                                       |
| [Tanner](https://conanexiles.fandom.com/wiki/Tanner_\(Journey\))                             | Learn [Tanner Knowledge](https://conanexiles.fandom.com/wiki/Tanner_\(Knowledge\))                                 | Tanning hides and pelts produces high quality leather with a wide variety of applications.                                                                                          | Learn [Improved Tanner's Table](https://conanexiles.fandom.com/wiki/Improved_Tanner%27s_Table_\(Knowledge\))                                                                                                                                                                                                                                                                                                                                                                   |
| [Alchemist](https://conanexiles.fandom.com/wiki/Alchemist_\(Journey\))                       | Learn [Firebowl Cauldron Knowledge](https://conanexiles.fandom.com/wiki/Firebowl_Cauldron_\(Knowledge\))           | Alchemists specialize in the brewing of elixirs and potions.                                                                                                                        | 10 [Glass Flasks](https://conanexiles.fandom.com/wiki/Glass_Flask)                                                                                                                                                                                                                                                                                                                                                                                                             |
| [Armorer](https://conanexiles.fandom.com/wiki/Armorer_\(Journey\))                           | Learn [Armorer Knowledge](https://conanexiles.fandom.com/wiki/Armorer_\(Knowledge\))                               | Armorers hone their craft by making armors suitable for different situations.                                                                                                       | 5 [Armor Repair Kits](https://conanexiles.fandom.com/wiki/Armor_Repair_Kit)                                                                                                                                                                                                                                                                                                                                                                                                    |
| [Expert Armorer](https://conanexiles.fandom.com/wiki/Expert_Armorer_\(Journey\))             | Complete Armorer Journey                                                                                           | Expert Armorers are capable of making durable and effective armors capable of withstanding even the most ruthless blows.                                                            | 5 [Advanced Armor Repair Kits](https://conanexiles.fandom.com/wiki/Advanced_Armor_Repair_Kit)                                                                                                                                                                                                                                                                                                                                                                                  |
| [Master Armorer](https://conanexiles.fandom.com/wiki/Master_Armorer_\(Journey\))             | Complete Expert Armorer Journey                                                                                    | Master Armorers can craft armors that are both durable and resistant to both the elements and the mightiest of axes.                                                                | Learn [Perfected Exile Armors](https://conanexiles.fandom.com/wiki/Perfected_Exile_Armors_\(Knowledge\))                                                                                                                                                                                                                                                                                                                                                                       |
| [Tinkerer](https://conanexiles.fandom.com/wiki/Tinkerer_\(Journey\))                         | Learn [Apprentice Tinker Knowledge](https://conanexiles.fandom.com/wiki/Apprentice_Tinker_\(Knowledge\))           | Tinkerers craft modifications to improve armors, weapons, and tools.                                                                                                                | Learn [Prying Kit](https://conanexiles.fandom.com/wiki/Prying_Kit_\(Knowledge\))                                                                                                                                                                                                                                                                                                                                                                                               |
| [Blacksmith](https://conanexiles.fandom.com/wiki/Blacksmith_\(Journey\))                     | Level 10                                                                                                           | Blacksmiths craft advanced weapons and tools to aid them in their journeys.                                                                                                         | [Weapon Repair Kit](https://conanexiles.fandom.com/wiki/Weapon_Repair_Kit)                                                                                                                                                                                                                                                                                                                                                                                                     |
| [Steelsmith](https://conanexiles.fandom.com/wiki/Steelsmith_\(Journey\))                     | Complete Blacksmith Journey                                                                                        | The crafting of steel weapons grants intrepid blacksmiths even more powerful instruments of destruction.                                                                            | <p>Learn <a href="https://conanexiles.fandom.com/wiki/Perfected_Steel_Light_Weapons_(Knowledge)">Perfected Steel Light Weapons</a><br>Learn <a href="https://conanexiles.fandom.com/wiki/Perfected_Steel_Heavy_Weapons_(Knowledge)">Perfected Steel Heavy Weapons</a><br>Learn <a href="https://conanexiles.fandom.com/wiki/Perfected_Steel_Poniards_(Knowledge)">Perfected Steel Poniards</a><br>50 <a href="https://conanexiles.fandom.com/wiki/Steelfire">Steelfire</a></p> |
| [Hardened Steel Smith](https://conanexiles.fandom.com/wiki/Hardened_Steel_Smith_\(Journey\)) | Complete Steelsmith Journey                                                                                        | Hardened Steel Smiths master new techniques to smelt and perfect steel for their craft.                                                                                             | <p>Learn <a href="https://conanexiles.fandom.com/wiki/Perfected_Hardened_Steel_Light_Weapons_(Knowledge)">Perfected Hardened Steel Light Weapons</a><br>Learn <a href="https://conanexiles.fandom.com/wiki/Perfected_Hardened_Steel_Heavy_Weapons_(Knowledge)">Perfected Hardened Steel Heavy Weapons</a><br>Learn <a href="https://conanexiles.fandom.com/wiki/Perfected_Hardened_Steel_Special_Weapons_(Knowledge)">Perfected Hardened Steel Special Weapons</a></p>         |
| [Warsmith](https://conanexiles.fandom.com/wiki/Warsmith_\(Journey\))                         | Complete Hardened Steel Smith Journey                                                                              | The Warsmith is the pinnacle of perfection when it comes to crafting armors and weapons.                                                                                            | Learn [Repairing Grindstone](https://conanexiles.fandom.com/wiki/Repairing_Grindstone_\(Knowledge\))                                                                                                                                                                                                                                                                                                                                                                           |
| [Mason](https://conanexiles.fandom.com/wiki/Mason_\(Journey\))                               | Level 10                                                                                                           | Masons build sturdy buildings out of hardy materials, and wells to draw water from.                                                                                                 | [Supply Materials](https://conanexiles.fandom.com/wiki/Supply_Materials_\(Variant_A\))                                                                                                                                                                                                                                                                                                                                                                                         |
| [Homesteader](https://conanexiles.fandom.com/wiki/Homesteader_\(Journey\))                   | Complete Survivor Shelter Journey                                                                                  | Homesteaders craft furniture, both practical and fanciful, in order to decorate their homes.                                                                                        | Learn [Reinforced Wooden Box](https://conanexiles.fandom.com/wiki/Reinforced_Wooden_Box_\(Knowledge\))                                                                                                                                                                                                                                                                                                                                                                         |
| [Master Mason](https://conanexiles.fandom.com/wiki/Master_Mason_\(Journey\))                 | Complete Mason Journey                                                                                             | Master Masons craft buildings to last sieges and the most incessant storms. These buildings stand while kingdoms around them crumble.                                               | 5 [Supply Materials](https://conanexiles.fandom.com/wiki/Supply_Materials_\(Variant_B\))                                                                                                                                                                                                                                                                                                                                                                                       |
| [Thrall Taker](https://conanexiles.fandom.com/wiki/Thrall_Taker_\(Journey\))                 | Learn [Thrall Taker Knowledge](https://conanexiles.fandom.com/wiki/Thrall_Taker_\(Knowledge\))                     | With companions at your side, you are no longer facing the dangerous wilds by yourself.                                                                                             | Learn [Purple Lotus Orb](https://conanexiles.fandom.com/wiki/Purple_Lotus_Orb_\(Knowledge\))                                                                                                                                                                                                                                                                                                                                                                                   |
| [Beast Master](https://conanexiles.fandom.com/wiki/Beast_Master_\(Journey\))                 | Complete Thrall Taker Journey                                                                                      | Beast Masters commonly travel with pet companions that they have trained themselves.                                                                                                | <p>Learn <a href="https://conanexiles.fandom.com/wiki/Ratcatcher%27s_Whistle_(Knowledge)">Ratcatcher's Whistle</a><br>5 <a href="https://conanexiles.fandom.com/wiki/Shadebloom">Shadeblooms</a></p>                                                                                                                                                                                                                                                                           |
| [Overlord](https://conanexiles.fandom.com/wiki/Overlord_\(Journey\))                         | Complete Thrall Taker Journey                                                                                      | Overlords train and fight with thralls side by side and back to back.                                                                                                               | Learn [Slaver's Hood](https://conanexiles.fandom.com/wiki/Slaver%27s_Hood_\(Knowledge\))                                                                                                                                                                                                                                                                                                                                                                                       |
| [Outrider](https://conanexiles.fandom.com/wiki/Outrider_\(Journey\))                         | Learn [Stablemaster Knowledge](https://conanexiles.fandom.com/wiki/Stablemaster_\(Knowledge\))                     | Outriders use mounts to traverse vast deserts, caravan goods, or ride into battle.                                                                                                  | Learn [Reinforced Lance](https://conanexiles.fandom.com/wiki/Reinforced_Lance_\(Knowledge\))                                                                                                                                                                                                                                                                                                                                                                                   |
| [Farmer](https://conanexiles.fandom.com/wiki/Farmer_\(Journey\))                             | Learn [Peasant Knowledge](https://conanexiles.fandom.com/wiki/Peasant_\(Knowledge\))                               | Farmers can sustain themselves with their produce and grow plants for food and alchemy.                                                                                             | 10 [Potent Compost](https://conanexiles.fandom.com/wiki/Potent_Compost)                                                                                                                                                                                                                                                                                                                                                                                                        |
| [Brewer](https://conanexiles.fandom.com/wiki/Brewer_\(Journey\))                             | Learn [Fluid Press Knowledge](https://conanexiles.fandom.com/wiki/Fluid_Press_\(Knowledge\))                       | Brewers craft a variety of alchoholic drinks to sustain themselves in these wild lands.                                                                                             | 5 [Curative Mixtures](https://conanexiles.fandom.com/wiki/Curative_Mixture)                                                                                                                                                                                                                                                                                                                                                                                                    |
| [Chef](https://conanexiles.fandom.com/wiki/Chef_\(Journey\))                                 | Learn [Improved Campfire Knowledge](https://conanexiles.fandom.com/wiki/Improved_Campfire_\(Knowledge\))           | Food is more than simple sustenance. A good chef cooks food that grant benefits beyond merely sating your hunger.                                                                   | 50 [Exquisite Meat](https://conanexiles.fandom.com/wiki/Exquisite_Meat)                                                                                                                                                                                                                                                                                                                                                                                                        |
| [MasterChef](https://conanexiles.fandom.com/wiki/MasterChef_\(Journey\))                     | Complete Chef Journey                                                                                              | Master Chefs have perfected the art of cooking and can cook feasts that grant powerful effects that aid in surviving the wilderness.                                                | Learn [Charcoal Kiln](https://conanexiles.fandom.com/wiki/Charcoal_Kiln_\(Knowledge\))                                                                                                                                                                                                                                                                                                                                                                                         |
| [Mountaineer](https://conanexiles.fandom.com/wiki/Mountaineer_\(Journey\))                   | <p>The Exiled Lands<br>Go to <a href="https://conanexiles.fandom.com/wiki/Fingerfang_Rock">Fingerfang Rock</a></p> | Mountaineers climb the highest peaks of the Exiled Lands to scout the wilderness.                                                                                                   | Learn [Spiderclimb Boots](https://conanexiles.fandom.com/wiki/Spiderclimb_Boots_\(Knowledge\))                                                                                                                                                                                                                                                                                                                                                                                 |
| [Potionmaker](https://conanexiles.fandom.com/wiki/Potionmaker_\(Journey\))                   | Complete Alchemist Journey                                                                                         | The potionmaker's concoctions grant great benefits such as night vision or increased strength.                                                                                      | 50 [Glass Flasks](https://conanexiles.fandom.com/wiki/Glass_Flask)                                                                                                                                                                                                                                                                                                                                                                                                             |
| [Dismantler](https://conanexiles.fandom.com/wiki/Dismantler_\(Journey\))                     | Learn [Grinder Knowledge](https://conanexiles.fandom.com/wiki/Grinder_\(Knowledge\))                               | By dismantling objects, you will be able to make use of equipment that have is worn out or obsolete.                                                                                | Learn [Improved Dismantling Bench](https://conanexiles.fandom.com/wiki/Improved_Dismantling_Bench_\(Knowledge\))                                                                                                                                                                                                                                                                                                                                                               |
| [Purge Defender](https://conanexiles.fandom.com/wiki/Purge_Defender_\(Journey\))             | <p>The Exiled Lands<br>Level 30</p>                                                                                | The Purge is a test of strength and endurance - surviving it can be very rewarding.                                                                                                 | <p>Learn <a href="https://conanexiles.fandom.com/wiki/Golden_Stygian_Raider_Armor_(Knowledge)">Golden Stygian Raider Armor</a><br>Learn <a href="https://conanexiles.fandom.com/wiki/Golden_Stygian_Raider_Epic_(Knowledge)">Golden Stygian Raider Epic</a></p>                                                                                                                                                                                                                |
| [Raider](https://conanexiles.fandom.com/wiki/Raider_\(Journey\))                             | Learn [Engineer Knowledge](https://conanexiles.fandom.com/wiki/Engineer_\(Knowledge\))                             | From throwing orbs of fire, to constructing Trebuchets, Raiders excel at sieging enemy encampments.                                                                                 | Learn [Ironstone Siege Boulder](https://conanexiles.fandom.com/wiki/Ironstone_Siege_Boulder_\(Knowledge\))                                                                                                                                                                                                                                                                                                                                                                     |
| [Sorcerer](https://conanexiles.fandom.com/wiki/Sorcerer_\(Journey\))                         | Level 20                                                                                                           | As a sorcerer, you strive to grasp power at every chance, even if it comes at the cost of lives. Your will shrivel your opposition to dust and their blood will fuel your conquest. | <p>Learn <a href="https://conanexiles.fandom.com/wiki/Acheronian_Legate_(Knowledge)">Acheronian Legate</a><br>Learn <a href="https://conanexiles.fandom.com/wiki/Acheronian_Legate_Epic_(Knowledge)">Acheronian Legate Epic</a></p>                                                                                                                                                                                                                                            |
| [Artificer](https://conanexiles.fandom.com/wiki/Artificer_\(Journey\))                       | Learn [Decorative Warpaints Knowledge](https://conanexiles.fandom.com/wiki/Decorative_Warpaints_\(Knowledge\))     | Sometimes, it's not about what you do but what you look like while doing it that matters.                                                                                           | Learn [Silver Jewelry](https://conanexiles.fandom.com/wiki/Silver_Jewelry_\(Knowledge\))                                                                                                                                                                                                                                                                                                                                                                                       |
| [Adventurer](https://conanexiles.fandom.com/wiki/Adventurer_\(Journey\))                     | <p>The Exiled Lands<br>Level 60</p>                                                                                | Adventurers find and attain rare knowledge and powerful artifacts as they explore the world.                                                                                        | [Fragment of Power](https://conanexiles.fandom.com/wiki/Fragment_of_Power)                                                                                                                                                                                                                                                                                                                                                                                                     |
| [Island Adventurer](https://conanexiles.fandom.com/wiki/Island_Adventurer_\(Journey\))       | <p>The Isle of Siptah<br>Level 60</p>                                                                              | Adventurers find and attain rare knowledge and powerful artifacts as they explore the world.                                                                                        | [Fragment of Power](https://conanexiles.fandom.com/wiki/Fragment_of_Power)                                                                                                                                                                                                                                                                                                                                                                                                     |
| [Cartographer](https://conanexiles.fandom.com/wiki/Cartographer_\(Journey\))                 | <p>The Exiled Lands<br>Level 25</p>                                                                                | Mapping your environments and knowing them is key to understanding and, eventually, mastering them.                                                                                 | Learn [Valeria's Sword](https://conanexiles.fandom.com/wiki/Valeria%27s_Sword_\(Knowledge\))                                                                                                                                                                                                                                                                                                                                                                                   |
| [Dungeon Delver](https://conanexiles.fandom.com/wiki/Dungeon_Delver_\(Journey\))             | <p>The Exiled Lands<br>Go to <a href="https://conanexiles.fandom.com/wiki/The_Dregs">The Dregs</a></p>             | Dungeons have powerful enemies and unique rewards inside them.                                                                                                                      | <p>Learn <a href="https://conanexiles.fandom.com/wiki/Ranger_Armor_(Knowledge)">Ranger Armor</a><br>Learn <a href="https://conanexiles.fandom.com/wiki/Ranger_Armor_Epic_(Knowledge)">Ranger Armor Epic</a></p>                                                                                                                                                                                                                                                                |
| [Warpainter](https://conanexiles.fandom.com/wiki/Warpainter_\(Journey\))                     | Learn [Decorative Warpaints Knowledge](https://conanexiles.fandom.com/wiki/Decorative_Warpaints_\(Knowledge\))     | Warpaints inspire dread in your enemies and courage in your companions.                                                                                                             | 5 [Dye Packs](https://conanexiles.fandom.com/wiki/Dye_Pack)                                                                                                                                                                                                                                                                                                                                                                                                                    |
| [Acolyte](https://conanexiles.fandom.com/wiki/Acolyte_\(Journey\))                           | Level 12                                                                                                           | Adherence to a creed and the backing of a god can gain you powers beyond mortal ken.                                                                                                | [Supply Materials](https://conanexiles.fandom.com/wiki/Supply_Materials_\(Variant_E\))                                                                                                                                                                                                                                                                                                                                                                                         |
| [High Priest](https://conanexiles.fandom.com/wiki/High_Priest_\(Journey\))                   | Complete Acolyte Journey                                                                                           | The High Priest has the ability to call forth enormous avatars of destruction by invoking their gods anger.                                                                         | 10 [Incense](https://conanexiles.fandom.com/wiki/Incense)                                                                                                                                                                                                                                                                                                                                                                                                                      |

Chart above Courtesy of [Conan Exiles Wiki](https://conanexiles.fandom.com/wiki/Conan_Exiles_Wiki)

***

## CONAN EXILES DAMAGE GUIDE

***

If your weapons in Conan Exiles seem to deal low damage, ensure your weapons are upgraded with the correct kits, that your attributes (Strength or Dexterity) are high enough for the weapon type, and that you're using appropriate armor and buffs.&#x20;

Here's a more detailed breakdown:

1\. Weapon Upgrades (Kits):

* Equipment Upgrades: Weapons can be upgraded with kits (also called mods) that improve their stats.&#x20;
* Tinker's Bench: These kits are crafted at the Tinker's Bench.&#x20;
* Durability: Ensure your weapon has full durability before attempting to apply a kit.&#x20;
* Repair: If the weapon is missing durability, try repairing it first, then retry applying the kit&#x20;

2\. Attributes:

* Strength vs. Dexterity: Weapons scale with either Strength or Dexterity.
* Increase Attributes: To deal more damage, increase the attribute that your weapon scales with.
* Weapon Type: Different weapons scale with different attributes. Spears, for example, are Strength weapons.&#x20;

3\. Armor:

* Armor Bonuses:\
  Certain armor pieces can increase the damage of either Strength or Dexterity weapons.
* Darfari Gear:\
  For example, Darfari gear can increase Strength weapon damage by a certain percentage.&#x20;

4\. Buffs:

* Food and Elixirs: Food and elixirs can provide temporary damage buffs.&#x20;

5\. Other Considerations:

* Thralls:\
  Thralls do not benefit from the "Vengeful" bonus.&#x20;
* Master Weapon Fitting:\
  Consider using Master Weapon Fittings to increase health damage and armor penetration.&#x20;
* Known Issues:
* Legendaries:\
  Some Legendaries  are not working as they should according to the damage numbers from Exiles wiki.
* Mod Conflicts:\
  Some mods might interfere with weapon kit application, so check for any conflicts.&#x20;
* Bugged Weapons:\
  Be aware that some weapons, like "The Predatory Blade", have been reported to deal no damage.&#x20;

***

## CONAN EXILES ATTRIBUTE GUIDE

***

Each time your [character](https://conanexiles.fandom.com/wiki/Character) levels up, you will receive additional attribute points (AP). You may allocate these points across any attributes you choose to customize your character. There are significant bonuses to be earned as you reach various levels of any given attribute. In game, you may hover over any attribute to read more about these bonuses and the perks table below details those.

The maximum AP is earned at [level 60](https://conanexiles.fandom.com/wiki/Character) at the rate of 1 AP per level. At that point, you will have a total of 60 AP and you will not earn any more thereafter. This is an intentional design feature of the game. You cannot maximize all attributes and instead you will need to find a balance of attributes that serves your play style. It will cost you 20 AP just to max out one attribute, meaning you can completely max out three attributes.

You may reset your attribute points at any time by consuming a [Potion of Bestial Memory](https://conanexiles.fandom.com/wiki/Potion_of_Bestial_Memory).

At attribute level 10 and 20, you get to choose from two perks.

***

### List of Attributes

* Strength "determines the damage that you do with strength based weapons and slightly increases how much you can carry."
* Agility "determines the damage that you do with agility based weapons, helps you act after a dodge and slightly increases the size of your stamina pool."
* Vitality "determines the size of your health pool." [Regeneration](https://conanexiles.fandom.com/wiki/Regeneration) is used to refill your supply of health.
* Authority "determines the amount of damage your followers deal and the amount of concussive damage you deal."
* Expertise "determines the maximum weight you can carry." (Carrying more than your max makes the player [over encumbered](https://conanexiles.fandom.com/wiki/Encumbered).)

***

### **Corrupted Attributes**

Players draw power from [Corruption](https://conanexiles.fandom.com/wiki/Corruption) and corrupt their attributes. Corrupting an attribute requires players to have at least Heavy corruption (40% corruption or more) as well as [Soul Essence](https://conanexiles.fandom.com/wiki/Soul_Essence), 1 Essence per point. Corrupting a perk will result in the character getting new Corrupted perks that will replace the old perk. Corrupted perks tend to be much more powerful. However, corrupting an attribute also results in 2.5% of permanent Corruption (this corruption can *only* be cleansed by [resetting attributes](https://conanexiles.fandom.com/wiki/Potion_of_Bestial_Memory)). Meaning fully corrupting a single attribute, will result in player suffering 50% permanent corruption. However, since permanent Corruption is capped at 50%, a character can corrupt all attributes with the same maximum penalty.

Currently only Strength, Vitality and Authority can be corrupted.

***

### Followers

Followers do not get Authority or Expertise. The bonuses provided per point by their other attributes vary depending on the follower, e.g. 1 point of vitality will give a different amount of health. The effects of the followers' current attributes can be seen on their status screens.

* Strength: increases damage caused by strength-based weapons. All pets use strength-based weapons (including rhino mount horn attacks\*), even those with ranged attacks.
* Agility: increases damage caused by agility-based weapons, which only thralls (not pets) can be equipped with. On mounts, this also affects the aiming reticle for mounted archery.
* Vitality: increases health.
* Grit: increases natural armor rating. This is far more useful on pets than thralls, as pets cannot be equipped with armor.

\* Trampling is also supposed to be a strength-based attack, however, the mount checks for its mount's strength, and since mounts do not have mounts, it always returns a 0.

Mounts do not benefit from any bonuses provided by the player, such as their Authority or [+follower damage](https://conanexiles.fandom.com/wiki/Category:Bonus_Follower_Damage) gear.

Truncheons are not strength- or agility-based weapons and will gain no bonus from those attributes, however, thralls' melee/ranged damage multipliers do affect concussive damage.

Information above Courtesy of [Conan Exiles Wiki](https://conanexiles.fandom.com/wiki/Conan_Exiles_Wiki)

***

<figure><img src="https://772063455-files.gitbook.io/~/files/v0/b/gitbook-x-prod.appspot.com/o/spaces%2F-Lgje1lBxKKWXwqycB-v%2Fuploads%2FBZN8RKQthOZezj2NDM08%2Fimage.png?alt=media&amp;token=24d95e75-040b-4937-8513-339951d83cb3" alt=""><figcaption></figcaption></figure>


# Pippi Player Guide

![](https://772063455-files.gitbook.io/~/files/v0/b/gitbook-legacy-files/o/assets%2F-Lgje1lBxKKWXwqycB-v%2F-MHcIVeLJbN0Wg66iWov%2F-MHcK3Pqxofn-LV1znVQ%2FPippi%20User%20manual.png?alt=media\&token=c5123f67-5670-435f-afc9-bb09ab4277e1)

## PIPPI USER MANUAL 4th. Edition

<table data-view="cards"><thead><tr><th></th><th></th><th></th><th data-hidden data-card-target data-type="content-ref"></th></tr></thead><tbody><tr><td><h3>Pippi Manual 4th. Edition</h3></td><td>This includes updates to the Player's Guide, Admins Guide, and Command Quick Reference, as well as a new section for Admin Tools up to 1.8.0. Additional updates will be added separately. </td><td></td><td><a href="https://drive.google.com/file/d/18D_9EnDPZtCm8bGyXj3b8BQhBCA-Zo5R/view?usp=sharing">https://drive.google.com/file/d/18D_9EnDPZtCm8bGyXj3b8BQhBCA-Zo5R/view?usp=sharing</a></td></tr><tr><td><h3>Pippi Manual 1.8.1 to 1.8.3 Addendum</h3></td><td>Includes information on the Egress, Zohnes, CamLoc, and additions to existing features and functions. </td><td>This does not replace the manual, it is a supplement to it.</td><td><a href="https://drive.google.com/file/d/1U5r63M_2gjb7dU4BKK3dIQ8H_7xivEZT/view?usp=sharing">https://drive.google.com/file/d/1U5r63M_2gjb7dU4BKK3dIQ8H_7xivEZT/view?usp=sharing</a></td></tr><tr><td><h3>Wallpaper Quick Guide for Update 1.9.5</h3></td><td>Images will need to be in a png or jpg format from an online source. For example; if you have a Discord channel, you can upload custom images then copy/paste the address. </td><td>Additionally, Josh created a video showcasing the use of Wallpapers:</td><td><a href="https://www.youtube.com/watch?v=qxThnJP-Ujo">https://www.youtube.com/watch?v=qxThnJP-Ujo</a></td></tr><tr><td><img src="https://772063455-files.gitbook.io/~/files/v0/b/gitbook-x-prod.appspot.com/o/spaces%2F-Lgje1lBxKKWXwqycB-v%2Fuploads%2Fy7GNcDCobMdCBGCgiZ84%2Fimage.png?alt=media&amp;token=5e0f2f49-2a75-4b39-a2de-c01748e112a4" alt=""><strong>Flaggi ART</strong></td><td></td><td>Link to our Flaggi ART post page!</td><td><a href="https://faq.thepackgaming.com/conan/guides/mods/pippi/flaggi">https://faq.thepackgaming.com/conan/guides/mods/pippi/flaggi</a></td></tr><tr><td><img src="https://772063455-files.gitbook.io/~/files/v0/b/gitbook-x-prod.appspot.com/o/spaces%2F-Lgje1lBxKKWXwqycB-v%2Fuploads%2Fd9INo9IDNP865yJxOPYA%2Fimage.png?alt=media&amp;token=650cb735-5f42-4f92-8709-7184eff7d7f7" alt=""><strong>Wallpaper ART</strong></td><td></td><td>Link to our Wallpaper ART page!</td><td></td></tr></tbody></table>

## How to Use some PIPPI Features

<table data-card-size="large" data-view="cards"><thead><tr><th></th><th></th><th></th><th data-hidden data-card-target data-type="content-ref"></th><th data-hidden data-card-cover data-type="files"></th></tr></thead><tbody><tr><td><img src="https://772063455-files.gitbook.io/~/files/v0/b/gitbook-x-prod.appspot.com/o/spaces%2F-Lgje1lBxKKWXwqycB-v%2Fuploads%2FQ8nnQcgOtxo6fvrZXEVp%2Fimage.png?alt=media&amp;token=1fc7e717-72f6-444d-a022-a041aba24c36" alt="" data-size="original"><strong>Pippi MusiqBox Configuration</strong></td><td>MusiqBox Instructions:</td><td>1.Name your box.<br>2. Click Allow Clan Members if you want others to control the musiqbox.<br>3. Click 3D sound.<br>4. Set your radius to fit inside your walls or base area.<br>5. Convert some songs to MP3 format and load them into the net or into the discord music bot channel. Then place the URL in the box that opens when you click add.<br>6. Click Apply to save all changes and then close the config box.<br><strong>Online MP3 converter for youtube videos: YtMp3 Site (click this box to go there!)</strong></td><td><a href=" https://ytmp3.cc/"> https://ytmp3.cc/</a></td><td></td></tr><tr><td><img src="https://772063455-files.gitbook.io/~/files/v0/b/gitbook-x-prod.appspot.com/o/spaces%2F-Lgje1lBxKKWXwqycB-v%2Fuploads%2FRrItPRsWsZgBZEQ0xZ6W%2Fimage.png?alt=media&amp;token=8a33975c-93ab-47f3-abe0-1284d3e5628a" alt=""><strong>Pippi Wallpaper Configuration</strong></td><td>Wallpaper Configuration.</td><td><ol><li>Name of the Picture</li><li>Allow Clan Members to interact.</li><li>Make it a Solid object.</li><li>Set the best Dimensions for your art. (X is Horizontal, Y is Vertical, both are in pixels wide.)</li><li>Place the images URL here. (Take any art url from the Art channel or any site on line.)</li><li>Apply to save changes.</li><li>Close the menu.</li></ol></td><td></td><td></td></tr><tr><td><strong>Flaggi Configuration.</strong></td><td><p>Admins and players can create their own custom banners to display proudly with Flaggi. Loading images works like Wallpapers apart from the required size. When creating a banner for Flaggi, the total image size must be to the power of two. Basically, the</p><p>width/height that can be doubled-up or divided- down by "2." In simpler terms, make the total</p><p>image a square. The visible image (banner) must take up the left 1/3rd of the canvas. The right 2/3rd can remain blank. Images will need to be in a png or jpg format from an online source.</p></td><td>Images can be uploaded to a private Discord. Right click on the image in Discord then copy the link. Paste that link into the provided field. Use the above image as a template</td><td></td><td><a href="https://772063455-files.gitbook.io/~/files/v0/b/gitbook-x-prod.appspot.com/o/spaces%2F-Lgje1lBxKKWXwqycB-v%2Fuploads%2F6g632M4jphI28bPwZj5a%2FFlaggi%20image%20set%20up.png?alt=media&amp;token=b2295612-30b4-460e-957e-d3adb37dad02">Flaggi image set up.png</a></td></tr><tr><td><strong>Player Access to the Heatmap</strong></td><td><p>Type /heatmap in the chat window and press Enter. It will open in a separate window.</p><p>Players may access their heatmap if the command is enabled for the server. </p><p>Solo players (those not in a clan) can only view their heatmap.</p><p>Players in a clan can only view their clan’s heatmap.</p><p><strong>Building Heatmap</strong></p><p>Pippi’s heat map locates all building pieces, placeables, thralls, pets, and Pippi tools for the player or clan. These are represented by colored markers on the map. The markers increase in size and opacity depending on the amount of building pieces or number of placed items. Building pieces and placeables provided by mods are included in the heatmap’s markers.</p></td><td><p><strong>Legend</strong></p><p>Players may choose what will display on the map by checking the box under the individual selections. The total number is displayed next to the name of each of the Legend’s items.</p><p><strong>Map Tone</strong></p><p>Use the slider at the top right of the heatmap to darken the map. The Legend's color markers will become more visible.</p><p><strong>Resizing</strong></p><p>A section of the map will display initially. With the cursor anywhere on the map, roll the Middle Mouse Button (MMB) to shrink or enlarge the map.</p><p><strong>Panning</strong></p><p>Hold down the left mouse button on the map to move to a new section.</p><p></p></td><td></td><td></td></tr><tr><td><strong>Build Info</strong></td><td><p>Players may access their build info if the command is enabled for the server. It is Enabled by default.</p><p>Type /buildinfo in the chat window and press Enter to receive the total count of building pieces, placeables, thralls, pets, and Pippi tools.</p></td><td>The information displayed is either for the clan (if the player is in one) or for a solo player (if the player is not in a clan).</td><td></td><td><a href="https://772063455-files.gitbook.io/~/files/v0/b/gitbook-x-prod.appspot.com/o/spaces%2F-Lgje1lBxKKWXwqycB-v%2Fuploads%2FhVuMJlt9hbVToEKeopAu%2FBuild%20info.png?alt=media&amp;token=e2a1d2e2-ac2e-4eb0-9d2c-6d3bfdeca051">Build info.png</a></td></tr></tbody></table>

## Player Slash Commands:

These commands are executed through the chat window. Not all commands will be available to players. Admins set the permissions for each command. \
NOTE: When a command requires a player’s name Pippi does not require the players full name, you are able to use partial names and Pippi will try and determine which player you are trying to use. If Pippi fails to find the player or there is more than 1 possible player you will get a message stating so, in which case you simply increase the length of the partial name the <br>

{% tabs %}
{% tab title=" Players Commands" %}
/help \[/h] - Displays help message generated for what the player is permitted to use \
/me - Broadcasts a local message in 3rd person context \
/shout - Shouts a message (2x Local Radius) \
/whisper \[/w] - Whisper to player \
/reply \[/r] - Replies to last received whisper \
/mute - Mutes incoming chat messages from specified player \
/unmute - Unmutes a player you have muted \
/sethome - Sets your current location as your home \
/home - Teleports you to your sethome \
/kill - Kill yourself \
/list players - Lists all players online \
/list admins - Lists all admins online \
/list mute - Lists all players you have muted \
/list kits - Lists the kits available to you (>1.5.0) \
/list warps - Lists the available warps \
/return - Returns you to the position before you teleported \
/warp - Teleports you to specified warp \
/wallet - Displays the amount currently in your wallet \
/pay - Pays the specified player the provided amount and type providing you have the amount in your wallet \
/kit - Gives you the contents of the specified kit (>1.5.0) \
/roll - Roll the dice \
/flip - Flip a coin \
/afk - Toggles AFK status \
/act - Allows temporary name change to a player’s character \
/rename - Renames thralls \
/rules - Displays rules \
/act - speaks as the specified name instead of your IGN. \
/customize - alter your characters looks /convert gold - {converts CE coin to Pippi currency} /convert silver - {converts CE coin to Pippi currency} \
/convert bronze - {converts CE coin to Pippi currency} \
/time - displays server time to player \
/buildinfo - displays info about your buildings \
/heatmap - displays a heatmap for you builds \
/mumble - mumbles a message \
/whoami - displays players account information \
/trade - \<playername ||accept> - Request to trade with a player /8ball - query a mysterious ball of knowledge&#x20;
{% endtab %}

{% tab title="Patreons" %}
Used by \~ Our Patreons; Student Admins; Admins ONLY:&#x20;

#### This includes all of the previous commands and the following:

/tprequest \[/tpr] - Request to teleport to the specified player \
/tpaccept \[/tpa] - Accepts a teleport request
{% endtab %}

{% tab title="Student Admins" %}
**Used by \~ Student Admins; Admins ONLY:**&#x20;

#### This includes all of the previous commands and the following:

/meteor - force meteor shower \
/sandstorm - force sandstorm \
/god - toggles god mode \
/spawnitem - spawns items from template ID \
/invisible - toggles invisibility \
/ghost - toggles ghost mode /airdrop - || - Sends an airdrop to a specific player\
/teleport - Teleports you to the specified player \
/summon - Summons specified player to your location \
/silence - Silences a player from using chat \
/unsilenced - Un-silence a player from using chat \
/vote - Accepts requested time of day \
/vote dawn - Requests time of day changed to dawn \
/vote noon - Requests time of day changed to noon \
/vote dusk - Requests time of day changed to dusk \
/fly - fly mode \
/kick - Kicks player from server \
/warp player - warps the player to a warp \
/whois - display information about a characters account
{% endtab %}

{% tab title="Admins ONLY" %}
**Used by \~ Admins ONLY:**&#x20;

#### This includes all of the previous commands and the following:

/server - Broadcasts a message as the server \
/warp create - Creates a basic warp \
/warp delete - Deletes specified warp \
/payday - Creates currency and gives it to a player. Mostly an admin command \
/currency add - Adds currency from a player \
/currency remove - Removes currency from a player \
/cleanup - removes all corpses from your server. \
/bal - displays wallet balance for the player \
/kill player - kills the specified player
{% endtab %}
{% endtabs %}

<figure><img src="https://772063455-files.gitbook.io/~/files/v0/b/gitbook-x-prod.appspot.com/o/spaces%2F-Lgje1lBxKKWXwqycB-v%2Fuploads%2F6Y5xHJM6z1aVTXTFnKDF%2FThe_Pack_CE_Economy.png?alt=media&amp;token=ae85e4df-7b32-4056-9bdb-510fb2988ad6" alt="" width="375"><figcaption></figcaption></figure>

<details>

<summary><strong>The PACK Gaming CE Economy</strong></summary>

CE COINS - The PACK uses your Pippi Wallet. We do accept deposits of CE Gold and CE Silver coins into your Pippi Wallet, but we do not allow you to exchange them from your Pippi Wallet back into anything but CE Silver or Gold Coins. \
Use /convert "type" "amount" , and it is set to a 24h cooldown.

PIPPI COINS -  \
1 Pippi Gold = 100 Pippi Silver; \
1 Pippi Gold = 10,000 Pippi Bronze;  \
1 Pippi Silver = 100 Pippi Bronze;&#x20;

AOC COINS - Your AoC Master of Coin Will handle most AOC coin exchanges. \
We allow deposits of AOC Tin Coins into your Pippi Wallet, and will allow withdrawals from your Pippi Wallet in AOC Tin Coins. \
Use /convert "type" "amount" , and it is set to a 24h cooldown.

Pippi Payday & Taxman - \
Pippi Payday is enabled at 1 Pippi gold per 24 hours. \
Pippi Taxman requires 0.10% taxes on your Pippi Wallet every 168 hours

NPC Coins Loot - \
Coin loot is set to drop 15% for up to 3 Pippi Silver, and 10% for up to 3 Pippi Gold. \
AoC coins loot is set to drop 15% for up to 3 Pippi Silver, and 10% for up to 3 Pippi Gold All NPCS, Elite Creatures, and Legendary Creatures - will give a mixture of NPC Coin Loot. Other Mod tokens may be added per Map basis, along with a mix of random keys and special items.

AIR DROP Enabled - Every 2 hours up to 4 Bats will take off and Fly over the Exiled Lands. These Bats will drop a Payload in specific spots. Which will last for 30 mins. All Payloads are marked on the Live game map. Have fun hunting for the Payloads and grabbing some free items.

</details>

<details>

<summary><strong>Pippi KITS for purchase  Savage Wilds Map</strong></summary>

/kit (SW)Void - 100 Pippi gold, Req. Lv. 60, receive a Unique to SW Tome of the Void - (Convergence Mastery) Single use per server.&#x20;

/kit loyalty - Stipend of 100 SW Bronze&#x20;

/kit pat-loyalty - A selection of Tokens for Dungeon rewards

/kit starter - The Pack Starter Kit! Limited to those under Level 60. 5 day cooldown (in case of lost)Free \[iron pickax, cheap armor, healing wraps]&#x20;

/kit heal - For 1 Gold receive 10 concentrated aloe potions for an instant heal and use in battle in an emergency. 1 hour cooldown.&#x20;

/kit repair - 10 Gold gets you 1 weapon repair kit and 4 armor repair kits. 24 Hour cooldown.&#x20;

/kit leg\_repair - 20 Gold gets you 2 Legendary repair kits and 5 Legendary Armor repair kits. 7 day cooldown.&#x20;

/kit myth\_rpr - 20 Gold gets you 2 Mythical repair kits and 5 Mythical Armor repair kits. 7 day cooldown.&#x20;

/kit music - The MusiqBox - For 10 Gold receive a music box to place in your base. 7 day Cooldown&#x20;

/kit wallpaper - For 5 Gold receive 10 pippi wallpaper that your can use anywhere in your base. 7 day Cooldown&#x20;

/kit flaggi - For 5 Gold receive 4 pippi Flaggi that you can use anywhere in your base. 7 day Cooldown Beyond Stations Mastery Kits&#x20;

/kit (BS)Alchemy - (BS)T4 Alchemist Station(P) - Covers all Vanilla Alchemy Benches, Cauldron Recipes, Dyers Bench Recipes 10 Pippi gold&#x20;

/kit (BS)Smith - (BS)T4 Blacksmith Station(P) - Covers all Vanilla Blacksmith Bench Recipes, Casting Table, Tinkers Table, Torturers Table 10 Pippi gold&#x20;

/kit (BS)Smelter - (BS)T4 Smelter Station(P) - Covers All Vanilla Furnace Recipes 10 Pippi gold

/kit (BS)Cooking - (BS)T4 Cooking Stations(P) - Covers All Vanilla Stove Recipes, Fermentation Barrel 10 Pippi gold

/kit (BS)Armorer - (BS)T4 Armorer Station(P) - Covers All Vanilla Armorer Recipes, Tanners Bench, Saddlers Workstation 10 Pippi gold

/kit (BS)Artisan - (BS)T4 Artisan Station(P) - Covers All Vanilla and DLC Artisan Recipes, 10 Pippi gold

/kit (BS)Carpenter - (BS)T4 Carpenters Station(P) - Covers All Vanilla Carpentry Recipes, 10 Pippi gold

/kit (BS)Tanner - (BS)T4 Tannery Station(P) - Covers All Vanilla Tannery Recipes 10 Pippi gold

/kit (BS)Wheel - (BS)T4Thrall Wheels REG - This journal teaches you all 3 available thrall training methods. 10 Pippi gold

</details>

## OUR MERCHANT SYSTEM

![](https://772063455-files.gitbook.io/~/files/v0/b/gitbook-legacy-files/o/assets%2F-Lgje1lBxKKWXwqycB-v%2F-MHcIVeLJbN0Wg66iWov%2F-MHcJxqoke39GS74Wnbj%2FPippi%20social%20merchant.png?alt=media\&token=eb3fa1e1-03c6-4c77-91e3-a4f348460c3e)

### Pippi Merchant System

Scattered throughout the world are **`Thespians,`** some give quests, some are vendors.

**`Dialogue Thespians`** will give quests, some are assigned to teleport you to sites in the World.\
These will be found in the **`Server hub`** built by the admins, accessed by the `/warp hub`  Pippi command.

**`Professional Merchants`** will purchase your excess goods for a minimal amount of pippi currency. These will also sell some of the same items allowing those that do not have the skills or levels yet to acquire better gear or weapons and their repair kits. These will be found in the **`Traders hub`** built by the admins, accessed by the `/warp traders`  Pippi command.

There are also **`Player Owned Social Merchants`** that will be personal stores for each clan. These Merchants tend disappear when placed on non player foundations. The Pack has discontinued use of these due to players lost gold and items.

### Admin Merchant System:

Under construction.  \
**Skeleton Key Merchant -** a merchant that buys your extra Skeleton keys, 3 keys for 2 gold.

### Dialogue Thespians&#x20;

**Pippi Warp NPCS**\
◎Warp Specialist Player - Provides Free Players Warps\
◎Warp Specialist Patreon - Provides Our Patreons Warps\
◎Warp Specialist AOC - Provides Selected AOC locations as Warps.\
◎Warp Specialist WILDS - Provides Selected Caravans locations as Warps.

**NPC Quest Givers** \
Fosh - The Abolitionist. No taking slaves! Offers companions, (Maybe even a rare Funtimes companion) \
Narue - The Slave Trader. Takes slaves and pets in quantity and gives back some coin. \
Safire the Trader - Provides 3 different trading dailies for those Under lv. 70\
Le'Lupus - Once Bitten Quest \
Magilla I<3 Gorillas - get your Gorilla here!

**The Beast Hunters Guild** - \
A group of beast hunters of all ilk's that search the lands of Hyboria and beyond for savage and rare beasts, coming soon ™  \
Actiller - \
Elmira -\
Daemion - \
Brunhilda - \
Sheba - \
Atali - \
Cpt. NoHair

**Brotherhood of the Relic Hunters** - \
A group of relic hunters of all ilk's that search the lands of Hyboria and beyond for precious Relics and Tomes of Knowledge. coming soon ™ \
SheWhoSearches - \
SheWhoResearches -

**AOC NPC Quest Givers** \
Tru - AOC LOYALTY Vendor - Passes out the Packs AoC loyalty tokens. 24 hour timer. \
AOC Faction Teacher 120- AOC FACTION MASTERY - Training for those over lv. 120 \
AOC Faction Teacher 150- AOC FACTION MASTERY - Training for those over lv. 150 \
Strider - AOC PROFESSION MASTERY - Training for those that have mastered their first AoC Profession and want a second, or even a third. MIN Level to start the quests = 60. \
The Immortal - Quest for the Calamity artifacts. Has a very good prize at the end.

**Shima's Compendium NPCS**

<figure><img src="https://772063455-files.gitbook.io/~/files/v0/b/gitbook-x-prod.appspot.com/o/spaces%2F-Lgje1lBxKKWXwqycB-v%2Fuploads%2FPjm1a407lrntLkmoxRvf%2Fimage.png?alt=media&amp;token=bdddb83a-2de9-4fbe-b8ff-5b4f69d5a890" alt=""><figcaption></figcaption></figure>


# Wallpaper art

## Some ART we have collected. Saved in here at full resolution but show in a smaller size.

Just right click an image and choose "copy image address" and paste that into the Wallpaper image box.

<div align="left"><img src="https://772063455-files.gitbook.io/~/files/v0/b/gitbook-legacy-files/o/assets%2F-Lgje1lBxKKWXwqycB-v%2F-Lgtc_g9gHhAHXQyM3so%2F-LgtcxJvGgQOjuFUN8u9%2Fboris_vallejo_85theexecutioner.jpg?alt=media&amp;token=3857b5f1-c789-44fe-a03f-8dfd5593b44f" alt="" width="375"> <figure><img src="https://772063455-files.gitbook.io/~/files/v0/b/gitbook-x-prod.appspot.com/o/spaces%2F-Lgje1lBxKKWXwqycB-v%2Fuploads%2Fb2dwaKgdPyBZhy2r7rOG%2Fimage.png?alt=media&amp;token=6c7e7b0c-d2e4-4b26-82df-d6bad1838469" alt="" width="353"><figcaption></figcaption></figure></div>

<div align="left"><img src="https://772063455-files.gitbook.io/~/files/v0/b/gitbook-legacy-files/o/assets%2F-Lgje1lBxKKWXwqycB-v%2F-Lgtc_g9gHhAHXQyM3so%2F-LgtcxJqPYzpjTLgmwOD%2FBoris_Vallejo_-_Femme_et_monstre_geant.jpg?alt=media&amp;token=9f3fdcf0-518c-402f-9b42-1c77aab9c0de" alt="" width="375"> <figure><img src="https://772063455-files.gitbook.io/~/files/v0/b/gitbook-x-prod.appspot.com/o/spaces%2F-Lgje1lBxKKWXwqycB-v%2Fuploads%2FJFMKIynaCCGqsHB5NsOz%2Fimage.png?alt=media&amp;token=64b61d01-4c82-49ad-b0f9-a9553c7162c6" alt="" width="375"><figcaption></figcaption></figure></div>

<div align="left"><img src="https://772063455-files.gitbook.io/~/files/v0/b/gitbook-legacy-files/o/assets%2F-Lgje1lBxKKWXwqycB-v%2F-Lgtc_g9gHhAHXQyM3so%2F-LgtcxJjeqJsJiVBRZEY%2FBirth.png?alt=media&amp;token=f748414d-db4a-4355-b8d9-231e08eba49a" alt="Birth by Boris Vallejo" width="375"> <figure><img src="https://772063455-files.gitbook.io/~/files/v0/b/gitbook-x-prod.appspot.com/o/spaces%2F-Lgje1lBxKKWXwqycB-v%2Fuploads%2FTx5elMYByzPxrCe0GuNq%2Fimage.png?alt=media&amp;token=030475f5-1124-4ec9-9265-caa99e575ab1" alt=""><figcaption></figcaption></figure></div>

<div align="left"><img src="https://772063455-files.gitbook.io/~/files/v0/b/gitbook-legacy-files/o/assets%2F-Lgje1lBxKKWXwqycB-v%2F-Lgtc_g9gHhAHXQyM3so%2F-LgtcxJfdACeia4gCLsI%2FB-232-672x682.jpg?alt=media&amp;token=f500d98b-fa73-465b-915d-e3ab0c7c0605" alt="" width="375"> <figure><img src="https://772063455-files.gitbook.io/~/files/v0/b/gitbook-x-prod.appspot.com/o/spaces%2F-Lgje1lBxKKWXwqycB-v%2Fuploads%2FncwJLZtgguP9Ppl4LMiV%2Fimage.png?alt=media&amp;token=bfc8cf30-5731-476a-beab-8bc11a92f7c3" alt=""><figcaption></figcaption></figure></div>

<div align="left"><img src="https://772063455-files.gitbook.io/~/files/v0/b/gitbook-legacy-files/o/assets%2F-Lgje1lBxKKWXwqycB-v%2F-Lgtc_g9gHhAHXQyM3so%2F-LgtcxJY6aTAbTeslilk%2FWildling.jpg?alt=media&amp;token=3c64c0b5-dfc3-4dbb-84d5-2a632ea02ba6" alt=""> <figure><img src="https://772063455-files.gitbook.io/~/files/v0/b/gitbook-x-prod.appspot.com/o/spaces%2F-Lgje1lBxKKWXwqycB-v%2Fuploads%2Fcw4gGEwudLgkMAQagsnA%2Fimage.png?alt=media&amp;token=c4ae360d-a9a5-434c-b70c-bc8339d7976c" alt="" width="375"><figcaption></figcaption></figure></div>

<div align="left"><img src="https://772063455-files.gitbook.io/~/files/v0/b/gitbook-legacy-files/o/assets%2F-Lgje1lBxKKWXwqycB-v%2F-Lgtc_g9gHhAHXQyM3so%2F-LgtcxJS-Cs7ShY1YosM%2FThe%20Journey%20Home.jpg?alt=media&amp;token=689a77dc-4884-4bb5-8379-4df9fd626408" alt="" width="375"> <figure><img src="https://772063455-files.gitbook.io/~/files/v0/b/gitbook-x-prod.appspot.com/o/spaces%2F-Lgje1lBxKKWXwqycB-v%2Fuploads%2FgDZMsNoKEbpeXz76gs8i%2Fimage.png?alt=media&amp;token=27e74f79-7e0d-4737-9367-f46546ed778b" alt="" width="333"><figcaption></figcaption></figure></div>

<div align="left"><img src="https://772063455-files.gitbook.io/~/files/v0/b/gitbook-legacy-files/o/assets%2F-Lgje1lBxKKWXwqycB-v%2F-Lgtc_g9gHhAHXQyM3so%2F-LgtcxJNccHmlimOB_0B%2FStromfellPrince.jpg?alt=media&amp;token=0e228627-0eb7-42ef-8e17-5d08b6537c73" alt="" width="375"> <figure><img src="https://772063455-files.gitbook.io/~/files/v0/b/gitbook-x-prod.appspot.com/o/spaces%2F-Lgje1lBxKKWXwqycB-v%2Fuploads%2F7ui9Uic9cNmwfnUfytLR%2Fimage.png?alt=media&amp;token=1d781f45-aa3e-4e02-b3aa-411a5871b7f6" alt="" width="375"><figcaption></figcaption></figure></div>

<div align="left"><img src="https://772063455-files.gitbook.io/~/files/v0/b/gitbook-legacy-files/o/assets%2F-Lgje1lBxKKWXwqycB-v%2F-Lgtc_g9gHhAHXQyM3so%2F-LgtcxJH12Qz8VQRmoS-%2FRed%20Warioress.jpg?alt=media&amp;token=299c59e4-2a76-4dc5-9fb9-0240a9a973aa" alt="" width="375"> <figure><img src="https://772063455-files.gitbook.io/~/files/v0/b/gitbook-x-prod.appspot.com/o/spaces%2F-Lgje1lBxKKWXwqycB-v%2Fuploads%2Fvjnf3CRSWY1XqpNArKMH%2Fimage.png?alt=media&amp;token=84fce150-aa3e-4872-9b43-b8e898c78d1c" alt="" width="347"><figcaption></figcaption></figure></div>

<div align="left"><img src="https://772063455-files.gitbook.io/~/files/v0/b/gitbook-legacy-files/o/assets%2F-Lgje1lBxKKWXwqycB-v%2F-Lgtc_g9gHhAHXQyM3so%2F-LgtcxJ9Ra1Sd_qOtpG4%2Fpainting4.png?alt=media&amp;token=79f55477-dbef-476f-a45f-44ff74df1443" alt="" width="375"> <figure><img src="https://772063455-files.gitbook.io/~/files/v0/b/gitbook-x-prod.appspot.com/o/spaces%2F-Lgje1lBxKKWXwqycB-v%2Fuploads%2FJs0mNQg0ub5vQLkSiOL5%2Fimage.png?alt=media&amp;token=a1fdef19-dad9-44b7-8fff-722e466bf696" alt="" width="375"><figcaption></figcaption></figure></div>

<div align="left"><img src="https://772063455-files.gitbook.io/~/files/v0/b/gitbook-legacy-files/o/assets%2F-Lgje1lBxKKWXwqycB-v%2F-Lgtc_g9gHhAHXQyM3so%2F-LgtcxJ3m0OSK662SbfJ%2Fpainting2.png?alt=media&amp;token=079eabc1-0e60-494a-9f1c-4feb604fc68a" alt="" width="375"> <figure><img src="https://772063455-files.gitbook.io/~/files/v0/b/gitbook-x-prod.appspot.com/o/spaces%2F-Lgje1lBxKKWXwqycB-v%2Fuploads%2FkxQqcF3sG08kcjUzvF11%2Fimage.png?alt=media&amp;token=9f4736ca-fba0-41b7-90a9-d75bff35603d" alt=""><figcaption></figcaption></figure></div>

![](https://772063455-files.gitbook.io/~/files/v0/b/gitbook-legacy-files/o/assets%2F-Lgje1lBxKKWXwqycB-v%2F-Lgtc_g9gHhAHXQyM3so%2F-LgtcxJ-WDcc5oITsBIk%2FJulieBell.png?alt=media\&token=b90fb7d2-76d9-4a2e-a74f-b78ed0cc90fc)

<div align="left"><img src="https://772063455-files.gitbook.io/~/files/v0/b/gitbook-legacy-files/o/assets%2F-Lgje1lBxKKWXwqycB-v%2F-Lgtc_g9gHhAHXQyM3so%2F-LgtcxIuQVEUvTdOZ_Ad%2Ffight.jpg?alt=media&amp;token=4cc0cf30-460d-4668-abbe-bdf468f9fc96" alt="" width="375"> <figure><img src="https://772063455-files.gitbook.io/~/files/v0/b/gitbook-x-prod.appspot.com/o/spaces%2F-Lgje1lBxKKWXwqycB-v%2Fuploads%2FY2pVNKSS65rvqnckvSFl%2Fimage.png?alt=media&amp;token=98874032-be7b-4405-b943-01a040e0ac2b" alt="" width="375"><figcaption></figcaption></figure></div>

<div align="left"><img src="https://772063455-files.gitbook.io/~/files/v0/b/gitbook-legacy-files/o/assets%2F-Lgje1lBxKKWXwqycB-v%2F-Lgtc_g9gHhAHXQyM3so%2F-LgtcxIpkJV2Tp7EsqJ0%2FFemaleNORD.jpg?alt=media&amp;token=8f6ace25-33a9-4ffc-841f-223a74bc9e89" alt="" width="375"> <figure><img src="https://772063455-files.gitbook.io/~/files/v0/b/gitbook-x-prod.appspot.com/o/spaces%2F-Lgje1lBxKKWXwqycB-v%2Fuploads%2FyHd0Ak6sa9qjiHWM0t7e%2Fimage.png?alt=media&amp;token=00dcee55-6f87-4766-8b46-263d089ba0d9" alt="" width="368"><figcaption></figcaption></figure></div>

<div align="left"><img src="https://772063455-files.gitbook.io/~/files/v0/b/gitbook-legacy-files/o/assets%2F-Lgje1lBxKKWXwqycB-v%2F-Lgtc_g9gHhAHXQyM3so%2F-LgtcxInYT__nvC1_AX6%2Ferotisch_004.jpg?alt=media&amp;token=b3ebaee2-e897-477d-b19f-d1e25032d276" alt="" width="375"> <figure><img src="https://772063455-files.gitbook.io/~/files/v0/b/gitbook-x-prod.appspot.com/o/spaces%2F-Lgje1lBxKKWXwqycB-v%2Fuploads%2FG4hWobymoE6TS7sfhaMx%2Fimage.png?alt=media&amp;token=2a7c9f9a-4699-412c-8399-7de4bc8ea375" alt="" width="375"><figcaption></figcaption></figure></div>

<div align="left"><img src="https://772063455-files.gitbook.io/~/files/v0/b/gitbook-legacy-files/o/assets%2F-Lgje1lBxKKWXwqycB-v%2F-Lgtc_g9gHhAHXQyM3so%2F-LgtcxIcefS4Wlh-hNgz%2Fdacer.png?alt=media&amp;token=c8645eaf-f0ae-4a31-93a5-b8a5650daee9" alt="" width="375"> <figure><img src="https://772063455-files.gitbook.io/~/files/v0/b/gitbook-x-prod.appspot.com/o/spaces%2F-Lgje1lBxKKWXwqycB-v%2Fuploads%2FWt5eKIPhAHyRNXnoqIr0%2Fimage.png?alt=media&amp;token=969e390f-cb66-480a-9467-505a6dbeae0b" alt="" width="375"><figcaption></figcaption></figure></div>

## Household uses for Wallpaper art:

<div align="left"><img src="https://772063455-files.gitbook.io/~/files/v0/b/gitbook-legacy-files/o/assets%2F-Lgje1lBxKKWXwqycB-v%2F-Lgtc_g9gHhAHXQyM3so%2F-LgtcxIXKkgWFd3mZj_d%2FConan-Map-Frame-1024-01.png?alt=media&amp;token=84357707-3594-49c3-90e3-cbdffc560152" alt="" width="375"> <figure><img src="https://772063455-files.gitbook.io/~/files/v0/b/gitbook-x-prod.appspot.com/o/spaces%2F-Lgje1lBxKKWXwqycB-v%2Fuploads%2FuOQcVmkLCKO869s0KxiJ%2Fimage.png?alt=media&amp;token=cb27bbd4-3c69-4521-8b76-94bb838b8099" alt="" width="375"><figcaption></figcaption></figure></div>

<div align="left"><img src="https://772063455-files.gitbook.io/~/files/v0/b/gitbook-legacy-files/o/assets%2F-Lgje1lBxKKWXwqycB-v%2F-Lgtc_g9gHhAHXQyM3so%2F-LgtfUTTZVaIP61tr8gH%2FConan_map_-_Cords5.png?alt=media&amp;token=926298f0-85c8-4c58-9b6e-8c9feb279852" alt="" width="375"> <figure><img src="https://772063455-files.gitbook.io/~/files/v0/b/gitbook-x-prod.appspot.com/o/spaces%2F-Lgje1lBxKKWXwqycB-v%2Fuploads%2Fz9YRmv8MLVG61jLukfWw%2Fimage.png?alt=media&amp;token=ccd60801-1e82-489a-aa89-78d58504bd17" alt="" width="375"><figcaption></figcaption></figure></div>

<div align="left"><img src="https://772063455-files.gitbook.io/~/files/v0/b/gitbook-legacy-files/o/assets%2F-Lgje1lBxKKWXwqycB-v%2F-Lgtc_g9gHhAHXQyM3so%2F-LgtfUSpSvML8QheCLAE%2Fdarker.png?alt=media&amp;token=9ef58fa4-d042-4dad-a533-1a4fa50a611e" alt="" width="375"> <figure><img src="https://772063455-files.gitbook.io/~/files/v0/b/gitbook-x-prod.appspot.com/o/spaces%2F-Lgje1lBxKKWXwqycB-v%2Fuploads%2FIYIPX5RezI1UEd4bi3lq%2Fimage.png?alt=media&amp;token=535cd2c1-4022-4d5c-847e-145e9f71fcd8" alt="" width="375"><figcaption></figcaption></figure></div>

<div align="left"><img src="https://772063455-files.gitbook.io/~/files/v0/b/gitbook-legacy-files/o/assets%2F-Lgje1lBxKKWXwqycB-v%2F-Lgtc_g9gHhAHXQyM3so%2F-LgtfUSsmTAm19q22tWu%2Fetagere_1.png?alt=media&amp;token=0ad6fe98-80de-4b52-b0e5-1563b10c1844" alt=""> <figure><img src="https://772063455-files.gitbook.io/~/files/v0/b/gitbook-x-prod.appspot.com/o/spaces%2F-Lgje1lBxKKWXwqycB-v%2Fuploads%2FnMDRhaFHsfLuWI6WzTUE%2Fimage.png?alt=media&amp;token=ab86744a-e54c-4cf8-b066-63b01f822fad" alt=""><figcaption></figcaption></figure></div>

<img src="https://772063455-files.gitbook.io/~/files/v0/b/gitbook-legacy-files/o/assets%2F-Lgje1lBxKKWXwqycB-v%2F-Lgtc_g9gHhAHXQyM3so%2F-LgtfUTDe9NcfHQvJOXg%2F22968.jpg?alt=media&amp;token=b0bc70dc-5d6e-467f-a8f8-d3f8529baa24" alt="" width="563">

<div align="left"><img src="https://772063455-files.gitbook.io/~/files/v0/b/gitbook-legacy-files/o/assets%2F-Lgje1lBxKKWXwqycB-v%2F-Lgtc_g9gHhAHXQyM3so%2F-LgtfUSuLOmeEkKDUCgY%2Fgolden_tree.png?alt=media&amp;token=c7d2e416-68a5-4cd6-80bb-7b3f29a8d03e" alt="" width="375"> <figure><img src="https://772063455-files.gitbook.io/~/files/v0/b/gitbook-x-prod.appspot.com/o/spaces%2F-Lgje1lBxKKWXwqycB-v%2Fuploads%2Fjy8bU43U15XR2RXyZGev%2Fimage.png?alt=media&amp;token=b2a86780-cbd7-4093-a91e-492e140a2652" alt="" width="306"><figcaption></figcaption></figure></div>

<img src="https://772063455-files.gitbook.io/~/files/v0/b/gitbook-legacy-files/o/assets%2F-Lgje1lBxKKWXwqycB-v%2F-Lgtc_g9gHhAHXQyM3so%2F-LgtfUTCWfakAdvpAFqy%2FStained_Glass_round.png?alt=media&amp;token=e028d3be-f4e6-43a7-a843-82d745f7ed68" alt="" width="375">

<div align="left"><img src="https://772063455-files.gitbook.io/~/files/v0/b/gitbook-legacy-files/o/assets%2F-Lgje1lBxKKWXwqycB-v%2F-Lgtc_g9gHhAHXQyM3so%2F-LgtfUTP6QPXYFz38HHN%2FCharmkinsWindowDoor.png?alt=media&amp;token=e24dd398-d731-4c41-a133-308191d55fe5" alt="" width="375"> <figure><img src="https://772063455-files.gitbook.io/~/files/v0/b/gitbook-x-prod.appspot.com/o/spaces%2F-Lgje1lBxKKWXwqycB-v%2Fuploads%2FUFhvqbIehcH3rR7Fnhzs%2Fimage.png?alt=media&amp;token=b4d59e0d-29ed-4bf8-9fb0-97d31992c7a7" alt=""><figcaption></figcaption></figure></div>

<img src="https://772063455-files.gitbook.io/~/files/v0/b/gitbook-legacy-files/o/assets%2F-Lgje1lBxKKWXwqycB-v%2F-Lgtc_g9gHhAHXQyM3so%2F-LgtfUSqlqfBSU_LoGXq%2FDiamond_Glass.png?alt=media&amp;token=40ece4fe-fac8-4faf-97e4-a2eefd2daeda" alt="" width="375">

<img src="https://772063455-files.gitbook.io/~/files/v0/b/gitbook-legacy-files/o/assets%2F-Lgje1lBxKKWXwqycB-v%2F-Lgtc_g9gHhAHXQyM3so%2F-LgtfUSywulhu_nao6Q4%2Fkisspng-paper-volume-parchment-reel-gold-frame-5a71c5bb3131a3.3726687715174056272015.png?alt=media&amp;token=df294617-064d-40bb-af69-4b5a3c70cf7a" alt="" width="375">

<img src="https://772063455-files.gitbook.io/~/files/v0/b/gitbook-legacy-files/o/assets%2F-Lgje1lBxKKWXwqycB-v%2F-Lgtc_g9gHhAHXQyM3so%2F-LgtfUT1CySX1uGGTSs6%2Fold_book.jpg?alt=media&amp;token=a944953c-3b6f-4bcb-a3c9-bf01d161ba50" alt="" width="375">

<img src="https://772063455-files.gitbook.io/~/files/v0/b/gitbook-legacy-files/o/assets%2F-Lgje1lBxKKWXwqycB-v%2F-Lgtc_g9gHhAHXQyM3so%2F-LgtfUTMHt-5uk4sgOqn%2Fbs1.png?alt=media&amp;token=aec43cfe-316a-4107-ae4c-9a5c74fb7fbe" alt="" width="375">

<img src="https://772063455-files.gitbook.io/~/files/v0/b/gitbook-legacy-files/o/assets%2F-Lgje1lBxKKWXwqycB-v%2F-Lgtc_g9gHhAHXQyM3so%2F-LgtfUSzBlJGhHZyNOmN%2Fkisspng-window-blinds-shades-curtain-clip-art-curtains-5acc589b7394e7.8317184415233414674734.png?alt=media&amp;token=7eab6168-7694-4cef-bfea-36264d6ffebf" alt="" width="375">

<img src="https://772063455-files.gitbook.io/~/files/v0/b/gitbook-legacy-files/o/assets%2F-Lgje1lBxKKWXwqycB-v%2F-Lgtc_g9gHhAHXQyM3so%2F-LgtfUTEAmH8h10pQB6G%2Falph0nzocurtainfliped.png?alt=media&amp;token=eee7bce3-a0e4-4ee7-b0db-8abc7ce3daa6" alt="" width="375">

![](https://772063455-files.gitbook.io/~/files/v0/b/gitbook-legacy-files/o/assets%2F-Lgje1lBxKKWXwqycB-v%2F-Lgtc_g9gHhAHXQyM3so%2F-LgtfUT2g2DZUqb3U6Dv%2Fpink_rose_curtain.png?alt=media\&token=ec5ee898-7700-4064-8d31-dc0079bd2da2)

![](https://772063455-files.gitbook.io/~/files/v0/b/gitbook-legacy-files/o/assets%2F-Lgje1lBxKKWXwqycB-v%2F-Lgtc_g9gHhAHXQyM3so%2F-LgtfUT-7XyOmyrUyyrF%2Fkisspng-window-blinds-shades-window-treatment-curtain-li-curtains-5ab64e8e0365c9.6285009715218971020.png?alt=media\&token=468a877b-9275-447b-b1a0-0e6075094fc2)

![](https://772063455-files.gitbook.io/~/files/v0/b/gitbook-legacy-files/o/assets%2F-Lgje1lBxKKWXwqycB-v%2F-Lgtc_g9gHhAHXQyM3so%2F-LgtfUT88pWJfRxSlbQt%2Frug7.2.png?alt=media\&token=25d23c04-6cf3-446a-88f9-b144bd8f9f88)

![](https://772063455-files.gitbook.io/~/files/v0/b/gitbook-legacy-files/o/assets%2F-Lgje1lBxKKWXwqycB-v%2F-Lgtc_g9gHhAHXQyM3so%2F-LgtfUT7k3pdkvcOLHFT%2Frug6.png?alt=media\&token=3db3bc37-17f2-436f-9e91-342b86de2e07)

![](https://772063455-files.gitbook.io/~/files/v0/b/gitbook-legacy-files/o/assets%2F-Lgje1lBxKKWXwqycB-v%2F-Lgtc_g9gHhAHXQyM3so%2F-LgtfUT6V9Jzvp_OMcbR%2Frug5.png?alt=media\&token=46728626-e024-4803-ae4e-e6f7e86d599b)

![](https://772063455-files.gitbook.io/~/files/v0/b/gitbook-legacy-files/o/assets%2F-Lgje1lBxKKWXwqycB-v%2F-Lgtc_g9gHhAHXQyM3so%2F-LgtfUT4Zur-ESuxKodG%2Frug3.png?alt=media\&token=8dab4aea-62bd-4068-8f01-b9d4403963c2)

![](https://772063455-files.gitbook.io/~/files/v0/b/gitbook-legacy-files/o/assets%2F-Lgje1lBxKKWXwqycB-v%2F-Lgtc_g9gHhAHXQyM3so%2F-LgtfUTHgvWy9_dwNxja%2Fblue__rune_by_deathninja07_d7ppcjs-pre.png?alt=media\&token=de0ce781-29a1-4534-a4f7-a5419e46c924)

<figure><img src="https://772063455-files.gitbook.io/~/files/v0/b/gitbook-x-prod.appspot.com/o/spaces%2F-Lgje1lBxKKWXwqycB-v%2Fuploads%2FQhqyuLlvZ0IWRQDf2ai9%2Fimage.png?alt=media&amp;token=7f313620-9499-42b5-80d9-0435f060e87b" alt=""><figcaption></figcaption></figure>


# Emberlight

<figure><img src="https://772063455-files.gitbook.io/~/files/v0/b/gitbook-x-prod.appspot.com/o/spaces%2F-Lgje1lBxKKWXwqycB-v%2Fuploads%2FwedInAsdIGupDNsFFQii%2Fimage.png?alt=media&amp;token=b5637503-da9f-44af-ab93-1f760802a369" alt=""><figcaption></figcaption></figure>

**Emberlight** is a mod for Conan Exiles. It adds new items to the game such as weapons, armor and placeables, and introduces new game mechanics such as the Vanity feature. This mod is crafted with players at the forefront of our work. Our focus is interactivity. We want players to feel like the things in our mod can be picked up, held, and put to use. Here's an overview of our features.

## Emberlight's features&#x20;

Belong to five broad groups:

* Core: Quality of life tweaks and items expanding on core gameplay
* Chroma: Allows players to tint buildings
* Homestead: items and additional game systems related to farming and husbandry
* Carnage: new weapons and armor, as well as additional combat mechanics
* Vanity: expanded visual customization for player characters and thralls

<figure><img src="https://772063455-files.gitbook.io/~/files/v0/b/gitbook-x-prod.appspot.com/o/spaces%2F-Lgje1lBxKKWXwqycB-v%2Fuploads%2FwjcH053sVbiWlb2JL8FI%2Fimage.png?alt=media&amp;token=97217555-79f4-4332-93fa-3c2775be0489" alt="" width="319"><figcaption></figcaption></figure>

## CORE

### Cuisine!

Food, soups and drinks are now visible when placed in the inventory of special Serving dishes and mugs, tankards and flagons. You can obtain these items from the Hospitality feats in the Decoration tab of your Feats screen.\
Bindable Bed Pillows for cohabitation; Bookshelves, placeable rows of journals and stacks of scrolls; Stone butcher tools (learned with the Apprentice Butcher feat); Iron Sickle (learned with the Iron Tools feat)

#### Custom Thralls and Emberloot!

Thralls with recipes for Emberlight Weapons and Armor have a chance to spawn in the Exiled Lands. Enemies may be equipped with Emberlight Armory weapons, and may cause you to have a bad day. Emberlight items will drop from slain enemies and can be found in chests around the game world

#### Quality of life tweaks

Some stack sizes adjusted; Basic crafting station inventory size increased to 30 slots.\
Barrels and Small Barrels can now be used to store items; Combine Leather to make Thick Leather at the Armorer's Bench.

<figure><img src="https://772063455-files.gitbook.io/~/files/v0/b/gitbook-x-prod.appspot.com/o/spaces%2F-Lgje1lBxKKWXwqycB-v%2Fuploads%2FGSWpnre2qTHEaHYsQ7D9%2Fimage.png?alt=media&amp;token=97bb156d-7d79-462a-a386-a74ab25b4e5b" alt="" width="319"><figcaption></figcaption></figure>

> ***Core Features Information:***\
> [https://conanexiles.gamepedia.com/Mod:Emberlight#Core\_Features](https://steamcommunity.com/linkfilter/?u=https%3A%2F%2Fconanexiles.gamepedia.com%2FMod%3AEmberlight%23Core_Features)

## Chroma

Emberlight lets you color your buildings with the Chroma feature

Paint buildings color by color, using the game's material tints to create totally unique looks. Some modded building pieces are supported, and more will be added over time

Emberlight comes with several basic themes players can use instead of painting individual colors. Admins can restrict access to painting and can limit available themes to only those they select.

To use the Chroma feature:

* Use the radial menu on any building (not decorative placeables). Use the Paint option to tint the building
* Building Bases are tinted by tier (Sandstone, Black Ice, etc.), not by individual building piece
* Depending on server settings put in place by admins, users can paint individual tint channels or apply themes, which tint an entire building tier
* Some modded building sets can be tinted using Chroma. However, most official DLC building sets are not set up to be tinted, and are currently not supported

Here is a PDF from the devs of Emberlight, and I would suggest checking the Emberlight Discord Channel Chroma Strings for ideas.<br>

{% embed url="<https://discord.com/channels/425828350137991169/1067713596227854417>" %}
Chroma Strings
{% endembed %}

{% file src="/files/fnrEwi8bYqTWcAS9w0n2" %}

<figure><img src="https://772063455-files.gitbook.io/~/files/v0/b/gitbook-x-prod.appspot.com/o/spaces%2F-Lgje1lBxKKWXwqycB-v%2Fuploads%2F29v5NnbGRRJe2GNlCuyq%2Fimage.png?alt=media&amp;token=757517a1-4e92-4dbd-a49a-6e48d2f4983b" alt="" width="319"><figcaption></figcaption></figure>

## Homestead

The Homestead feature group encompasses all Horticulture and Animal Husbandry game mechanics and items. Explore the Exiled Lands and slay enemies to find the knowledge you need to craft these items.

> ***Homestead Information:***\
> [https://conanexiles.gamepedia.com/Mod:Emberlight#Homestead:\_Basics](https://steamcommunity.com/linkfilter/?u=https%3A%2F%2Fconanexiles.gamepedia.com%2FMod%3AEmberlight%23Homestead%3A_Basics)

**Horticulture**\
Craft, farm and decorate with a wide variety of items:\
Decorative flower pots and trees; Placeable potted planters and mushroom boxes; Garden boxes and wedges which snap to building pieces

<figure><img src="https://772063455-files.gitbook.io/~/files/v0/b/gitbook-x-prod.appspot.com/o/spaces%2F-Lgje1lBxKKWXwqycB-v%2Fuploads%2FHbO06DOFSBO07MYdcvgd%2Fimage.png?alt=media&amp;token=b4e67136-4c10-489c-880b-fd9c6eebd044" alt=""><figcaption></figcaption></figure>

***Special Herbalist NPCs*** have a chance to spawn anywhere an Alchemist NPC can spawn. If knocked unconscious and broken on a Wheel of Pain, they become Herbalist thralls. Herbalist thralls can be used in a Horticulturist's Bench to improve crafting and generate Ranch Water if the station's inventory also contains a Water Bucket.

**Animal Husbandry**\
Build pens and keep game for hides, meat and other resources. The following animals can be domesticated: Rabbits; Antelopes; Gazelle; Ostriches; Goats; Boar; Deer; Shoebills

<figure><img src="https://772063455-files.gitbook.io/~/files/v0/b/gitbook-x-prod.appspot.com/o/spaces%2F-Lgje1lBxKKWXwqycB-v%2Fuploads%2FNP0AyW8RzmeQcSOd7zsk%2Fimage.png?alt=media&amp;token=056358f6-907e-40be-8957-8051dca1c868" alt="" width="319"><figcaption></figcaption></figure>

**Wine Maker**\
Build an Arbor to grow grapes for food, juice and wine, and use your Horticulture bench to craft decorative trellises and vines. The arbor, trellises and vines can be configured with different styles and colors so you can live our your perfect Tuscany fantasy life in Exile.\
\
**Sericulture**\
Construct silkworm habitats and produce silk. Like Wine Maker, learning this sophisticated skill comes down to killing the right NPCs out in the world. Why should they have silk worms and not you?

## Vanity

Emberlight's Vanity features are accessed through the Vanity Table, Thrall Vanity Table and Vanity Hand Mirror items. These are available via the Vanity feat, and the items themselves can be crafted at an Artisan's Workbench.

> ***Vanity Information:***\
> [https://conanexiles.gamepedia.com/Mod:Emberlight#Vanity](https://steamcommunity.com/linkfilter/?u=https%3A%2F%2Fconanexiles.gamepedia.com%2FMod%3AEmberlight%23Vanity)

#### **Vanity Table:**

Use the Vanity table to customize your character's aesthetic, expanding available options and giving you more robust control over how your character looks. In addition to some basics like lipstick style, hair and beard style, the Vanity Table placeable and Vanity Hand Mirror allow you to do the following:\
\
Trim or completely shave your character's body hair; Change your scalp style independently of your hair style, allowing for unique combinations\
Change your stubble style (for males) independently of beard style, allowing for unique combinations; Wear a mustache, because we found them in the Dev Kit so why not?\
Apply glistening body oil to your character for either a subtle desert glow or Aquilonian gladiator shine

#### Thrall Vanity Table

Use the Thrall Dressing Room to customize the appearance of your Thralls:\
Place Thralls in the dressing room to activate the dressing room UI\
You can activate the dressing room UI for a placed thrall by using the radial menu. The vanity feat is required in order to do this, and DLC warpaints require either the decorative warpaints feat or the basic building feat from the corresponding DLC.

<figure><img src="https://772063455-files.gitbook.io/~/files/v0/b/gitbook-x-prod.appspot.com/o/spaces%2F-Lgje1lBxKKWXwqycB-v%2Fuploads%2FfKEKFXr1tMxTVl9vU6NH%2Fimage.png?alt=media&amp;token=afd0137e-b9fd-404e-b3f8-3d256a039c97" alt="" width="319"><figcaption></figcaption></figure>

## Carnage

Emberlight introduces a number of new weapons to the game, using both new and existing movesets.

> ***Armory Information***\
> [https://conanexiles.gamepedia.com/Mod:Emberlight#Armory](https://steamcommunity.com/linkfilter/?u=https%3A%2F%2Fconanexiles.gamepedia.com%2FMod%3AEmberlight%23Armory)

#### ***New weapons:***

* Darfari War Blades (axes) for tiers 2 through 5
* Darfari Greatblades (Greatswords) for tiers 2 through 5
* Fist Weapons for tiers 2 through 5
* Greataxes for tiers 2 through 5 as well as Star Metal
* Infantry Spears (hastas and dorys) for tiers 2 through 5 and Star Metal
* Bastard Swords allowing both one-handed and two-handed attack styles
* Expedition Armor - Exile light, medium and heavy armor for cold weather, including epics
* Legendary-tier Falcata, Cutlass, Khopesh, iron and wooden targe shields, and many more!

#### New legendary weapons

* Legendary-tier Falcata, Cutlass, Khopesh, iron and wooden targe shields, and many more!

#### Craftable armor variants and visually modified clothing

* Expedition Armor - Exile light, medium and heavy armor for cold weather, including epics
* Bandit Mask
* Variant Setite chokers
* Rugged Wraps - craftable and practical loincloths and chestwraps for hot and cold weather
* Cold weather climbing boots and gloves, learned via the Mountaineer feat

{% embed url="<https://www.youtube.com/live/eff-HHoHZKo?si=qRjiH54ZZDbVgnNJ>" %}

<figure><img src="https://772063455-files.gitbook.io/~/files/v0/b/gitbook-x-prod.appspot.com/o/spaces%2F-Lgje1lBxKKWXwqycB-v%2Fuploads%2FLISHs7bRwZTFsQydxloe%2Fimage.png?alt=media&amp;token=7ec1cb4c-af7a-4137-b83b-ece50ba74d18" alt=""><figcaption></figcaption></figure>


# The Age of Calamitous (AOC)

This mod serves as a complimentary expansion to the main game, introducing new content, feats, systems, and much more!

<figure><img src="https://772063455-files.gitbook.io/~/files/v0/b/gitbook-x-prod.appspot.com/o/spaces%2F-Lgje1lBxKKWXwqycB-v%2Fuploads%2FXNNRVTvgr40dweRWxVrl%2Fimage.png?alt=media&amp;token=b4a969fa-ad56-4b34-a2f6-d9b1cdd12949" alt=""><figcaption></figcaption></figure>

&#x20;**WELCOME TO THE AGE OF CALAMITOUS**

Dive into an adventure where the barbaric lands of Conan meet the medieval world of the Age of Calamitous.

**What is The Age of Calamitous mod?** The Age of Calamitous is a total conversion mod for Conan Exiles.&#x20;

**What does AoC add?** AoC adds tons of changes to the map and new content like a full quest system, a unique magic system, new character customizations, new crafting stations, armors, weapons, a level cap of 150, custom-made dungeons, and more. It adds six different Factions you can join, each Faction having two sub-factions, making for a total in twelve total Factions you can choose from. It also adds in five different professions you can pick from, giving you a way to craft material crates to earn money. AoC also has it's own menu that allows you to customize and change many AoC game settings to your liking.

**Where can I find out more about the lore of AoC** \
You can check out our lore site here at [WorldAnvil:](https://www.worldanvil.com/w/the-age-of-calamitous.)&#x20;

***

## AGE of HEROS - DAWN OF A NEW AGE

### Major Features

* **THE ALLIANCE SYSTEM**\
  This means once the player selects a Faction, all NPCs allied with that faction will now become allied. This will allow the player to enter any of their respective faction camps across the map without any problems. Once allied with a faction, the player is safe and free to trade, roam, etc. without concern.\
  ***NOTE: that this is only applicable to the Player’s MAIN FACTION, not any additional factions joined through Gold Tokens.***\
  \
  **Opposing Factions:**\
  Stormhold <-> Vanghoul \
  Elvanor <-> Cold Embrace \
  Elven Covenant <-> Shaedarion Dominion<br>
* **REPUTATION SYSTEM**\
  **Patch V.4.22 Changes & Fixes: – Renamed Honor Points to Reputation Points**\
  The Honor System goes hand in hand with the Alliance System, you can now build reputation with your allied factions. Once you select a Faction, you’ll start with 100 RP points for that Faction. The allied factions will be at a Neutral standing, meaning 0. When you work to build reputation with other factions, you’ll be able to unlock new content from those factions. Additionally, factions you have a Neutral standing or Good standing with will not attack you. However, if you go below 0 or Neutral standing, you will be considered an enemy of that faction. Factions you are an enemy with will attack you on sight and you will not be able to participate in quests, use their merchants, etc. \
  **You can build Reputation Points by completing Quests or defeating enemies of that specific faction**
* **LEGACY SYSTEM**\
  The Legacy System allows players to take their progression even further. The Legacy System will give the player additional benefits, such as higher Reputation earnings, higher Faction Commissions, faster Skill Leveling, etc. Each player starts at level 1 in their Legacy and can level up once they reach the Character Max Level of 150.\
  Once the player levels up their legacy, their *Character Level is reset to 1*. However, Skills, Reputation, Alliance/Faction, and so on will not be reset. The quests, however, will be fully reset, allowing the player to go through the questlines again and reap the rewards once more.
* **DEATH PENALTY**\
  The new Death Penalty System has been created for those who want to up the stakes in their gameplay. The Death Penalty will cause a Corrupted Soul that reduces the overall attributes’ effectiveness and it will last for 1 hour unless cleansed. The Shrine of the True God has been added to the Dark Forest ruins, where players can go to cleanse their Souls.\
  Additionally, a new bonus is available as part of this system, the Survival Bonus. The Survival Bonus will come into effect after surviving for 2 hours and will increase stats as well as boost Skill XP).
* **CONQUEST SYSTEM**\
  The new Conquest System is a PvP-centered update. This system will make parts of the world into PvP zones and/or Safe Zones. In the AoC Server Settings, admins can decide which area will be considered a PvP zone and what area should be a Safe Zone free of any PvP. These options currently include: SOUTH – Dark Forest, Lake Felkar, and Devil Mountain. EAST – Jungle. WEST – Desert, and Unnamed City. NORTH – Grasslands, Mounds of the Dead, Snowy Mountains, and Volcano. EVENT ZONES – Faction Hall.\
  **NOTE: This system is currently only supported on PvE servers where the selected zones will allow for PvP. It currently does not support Building Damage, only Player VS Player.**
* **RIFT GATE SYSTEM**\
  This system allows players to interact with Rift Gates around the world, which works in a similar fashion to the old Portal System. However, Rift Gates allow players to unlock Rifts between locations and can connect gates to each other. As an example, the player can access a Rift Gate in the Volcano and when interacting with it, they can choose to open a Rift to any previously unlocked location, such as the Faction Hall.
* **SOUL ESSENCE SYSTEM**\
  Soul Essence replaces the stamina usage for Magic weapons. Additionally, Magic Weapons will no longer require stacks of spells. Once a spell has been crafted, you can apply that to your Magic weapon and cast magic. The spell doesn’t need to be crafted in quantity as you’ll be able to use it indefinitely now. However, Soul Essence will dictate how much you can cast a time now.
* **DYNAMIC COMBAT SYSTEM**\
  This system makes it possible to level up your weapons and tools, increasing their overall strength and quality. Part of this system includes Faction NPCs, which will now be scaling dynamically alongside the player.\
  This is the first iteration of this system and we plan to expand upon it further down the road.\
  **SHADOWCALLING**\
  This new combat style is only available on 2 sets of weapons as of right now: Blades of Elydarh (Shadaerion Dominion) and Sanguis Daggers (Cold Embrace).\
  This combat style offers a Melee/Magic type of combat.

### Age of Calamitous Frequently Asked Questions:

**Is there a shortcut to open the AoC Menu?** \
Press 9+0

**AoC Menu Tabs —** (Character, Journal, Conquest, Codex, and Server Info) \
**Character tab includes:** Character, Alliance & Faction, Coin Pouch, Stats, and Skills\
**Journal tab includes:** Quest Log and Characters \
**Conquest tab includes:** Battleground, Faction Wars, Scoreboard\
**Codex tab includes:** Customization, Updates, Tips & Tricks, Credits\
**Server Info tab includes:** Server Settings, Mod List, Admin Panel

**What is the Level Cap in AOC?**\
level 150

**How many attribute points should I have at level 150?**\
AoC gives 1 point for every other level. Equaling = 60&#x20;

**How do I add my crown currency to my coin pouch?** \
Press 9+0 and go to the character tab.

**How do I complete the first Journey Step to find the smoke and wagon?** \
Once you leave the faction hall, you can follow the road right to it.

**Where is the Faction Hall?**\
The Faction Hall can now be found at the Vanquished Coast.

**Why am I not getting the "Spend an Attribute Point" Journey Step?** \
For some reason, the game doesn't like alterations to the attribute point system. This Journey Step will complete once you hit level 120 and spend your final attribute point.

**Why am I not getting X AoC material from this node? (Example: Gems from Crystals)** \
First make sure you are not using a Pickaxe (<img src="https://772063455-files.gitbook.io/~/files/v0/b/gitbook-x-prod.appspot.com/o/spaces%2F-Lgje1lBxKKWXwqycB-v%2Fuploads%2FQFJHuyoCV8Csqe7pJVB1%2Fimage.png?alt=media&amp;token=a98ab2ee-2f4a-46b6-ae7e-8f4695cef5ba" alt="" data-size="line">), you will need to use a steel or better PICK (<img src="https://772063455-files.gitbook.io/~/files/v0/b/gitbook-x-prod.appspot.com/o/spaces%2F-Lgje1lBxKKWXwqycB-v%2Fuploads%2FAlHZ50qu0XFb1HqtljRc%2Fimage.png?alt=media&amp;token=8be3f825-40ae-4699-8a34-6391cbaf9efd" alt="" data-size="line">).

**My weapons/tools are auto-sheathing randomly, how do I fix this?** \
This is the result of a base game bug that can happen with some of the armors that cover both the torso and legs, like the Lemurian armors. Any armors like these can cause the issue.&#x20;

**I need help with so and so quest.** \
We have a Quest Guide you should check out! [**QUEST GUIDE**](https://docs.google.com/spreadsheets/d/1AtAMXLjAezwhF14HXXEn24TCCX3Pr0dxeOiaxmKlrPs/edit?usp=sharing)

**I did my sub-faction quest, but I don't see my new feats to learn?** \
Make sure you interacted with the statue bearing your sub-factions logo near that quest NPC and have eaten the token.

**Can I learn more than one faction/professions?** \
Your beginning faction you can join with no pre-reqs through the tutorial quests. \
To obtain a second or a third Faction, will require 1000 reputation points with each faction you want to join. You will gain this reputation either from killing the opposing faction thralls, or doing the daily quests that are available in each faction's hub from that factions quest giver.

**How do I level up my profession?** Open your Knowledge tab, go to decorations section. Your chosen Profession and associated feats are located here, you can learn them as you gain character levels.

**When joining a clan, there are some new factors to consider.** \
The clan will be considered an Alliance Clan based on the ***leader’s Alliance.*** This has some impact on the gameplay.

* Thralls, Pets, and Mounts are player owned followers until the player joins a clan. However, the moment the player joins a clan, their Thralls, Pets, and Mounts will be owned by the clan. This is how the Clan System works in the base game. **What is important to note is that the Clan Leader will be the owner where the Clan Alliance is concerned. (This has no impact on the players themselves, only followers).**
* As an example, *if a Silverlight Accord Player* joins a *Forsaken Legion Clan*, all Thralls, Pets, and Mounts will be *considered Forsaken Legion*. This means that all Silverlight Accord NPCs will attack these Thralls, Pets, and Mounts. Because this is a limitation of how the base game utilizes user IDs versus IDs of clans.

**How do I survive the plague? Can I make my thralls/pets immune to plague?** \
The plague is meant to be deadly. Staying inside of the clouds for too long will cause certain death. Be careful with you and your thralls, making sure to order them out of the way before it's too late. The sub-faction for Felgarth, House Stormcaller, can craft a Ring of Era'Vosh that removes a plague stack every 4 seconds. **Your faction pets** can be made immune by purchasing the Metamorphosis from the Guild Vendor and placing it in their inventory. Some faction pets, like the hunting dog, can also be made plague immune with their skin, also purchased at the Guild Vendor.

**Why can't I grow AoC seeds?** \
Make sure you're growing AoC seeds in an AoC planter (Indoor, Outdoor, Temple), using the AoC Waterbucket crafted at the AoC Woodworking Bench. Fill the bucket with water like you would any waterskin, and then put the bucket, the seed and the appropriate compost in the planter. Plants will take either potent or normal, most will use potent.

**Now that magic has changed, where can I find information on where things have moved to?** \
**\*ALL Magical information\* is found in the "** [**MAGIC GUIDE**](https://docs.google.com/spreadsheets/d/1twCKoOoltTWWOi68eOYOD1LnNNfdrK8rhzAHEx9zjss/edit?gid=0#gid=0): "\
To start your magical journey, you need to learn the Ancients Arts knowledge by reading (using) the **Great Tome of the Ancient Arts**. You can acquire this tome for free with a quest, or purchase it from a couple vendors. Quest: The Essence of Magic, from Aethos Stormcaller on The Vanquished Coast (the starting beach).\
**Magic Attunements —** You no longer learn attunements directly from quest givers. The only way to learn the feats is to buy the appropriate book from a vendor. All the attunement books are available for sale in the Faction Hall, but the quest NPC for each school of magic sells them at GREATLY reduced prices.\
**Shrines** — Most of the shrines have moved with this patch. After you've attuned, you can find and use them at the locations outlined in the [**MAGIC GUIDE**](https://docs.google.com/spreadsheets/d/1twCKoOoltTWWOi68eOYOD1LnNNfdrK8rhzAHEx9zjss/edit?gid=0#gid=0)**.**\
**CAREFUL**: many are now protected by hostile magic-using mobs!\
**Tomes** —  Required to build and use magic altars. They are for sale in the Faction Hall, but can be found for free out in the world. These books are also the objective of the final quest in the chain for each school.

**Why am I exploding when I use the shrines for magic?** \
Make sure you did the correct quests and have "used" the attunement book.&#x20;

**AoC Weapon Tier System has been reworked.** \
The new tiers are as follows: \
T1 – Crude T2 – Hammered T3 – Ironshod T4 – Bronzewrought T5 – Steelbound T6 – Stormtempered T7 – Runebound T8 – Nobleforged T9 – Eldercrafted T10 – Eternalbound

### **AoC** ROADMAP – 2025

**Greetings everyone!**\
This Roadmap serves as a rough estimation of our plans, and as such, it is subject to change, both in content and time frames. Please note that these points are not set in stone and merely serve as a way for us to communicate our plans and wishes for AoC moving forward.\
From us at Anarious Productions, we thank you for your support and hope that this roadmap will serve as a great first step to better communicating the future of our projects!<br>

<figure><img src="https://772063455-files.gitbook.io/~/files/v0/b/gitbook-x-prod.appspot.com/o/spaces%2F-Lgje1lBxKKWXwqycB-v%2Fuploads%2FfQJ9BJar74yT1QNBYlyR%2Fimage.png?alt=media&amp;token=a4a7e3df-1960-4ae9-8885-e1c367311542" alt=""><figcaption></figcaption></figure>

<figure><img src="https://772063455-files.gitbook.io/~/files/v0/b/gitbook-x-prod.appspot.com/o/spaces%2F-Lgje1lBxKKWXwqycB-v%2Fuploads%2FTCILtPEyCeBcjfzK1xZS%2Fimage.png?alt=media&amp;token=807494eb-dbf5-4c6a-964a-4294f2b7cd53" alt=""><figcaption></figcaption></figure>

## THE AGE OF CALAMITOUS:

<table data-view="cards"><thead><tr><th align="center"></th><th align="center"></th><th align="center"></th><th data-hidden data-card-target data-type="content-ref"></th></tr></thead><tbody><tr><td align="center"><img src="https://772063455-files.gitbook.io/~/files/v0/b/gitbook-x-prod.appspot.com/o/spaces%2F-Lgje1lBxKKWXwqycB-v%2Fuploads%2FK97QY0zcSKr3uZTDNIcY%2Fimage.png?alt=media&amp;token=00966319-6efb-4b8c-9f8a-0c93dfc424a8" alt=""></td><td align="center"><strong>The Age of Calamitous</strong></td><td align="center"><strong>Steam Workshop Page</strong></td><td><a href="https://steamcommunity.com/sharedfiles/filedetails/?id=1113901982">https://steamcommunity.com/sharedfiles/filedetails/?id=1113901982</a></td></tr><tr><td align="center"><img src="https://772063455-files.gitbook.io/~/files/v0/b/gitbook-x-prod.appspot.com/o/spaces%2F-Lgje1lBxKKWXwqycB-v%2Fuploads%2FHBv5FIxmBZHAXgTevwLP%2Fimage.png?alt=media&amp;token=34ce1215-f9bd-4e56-883e-fe3003d6c2f9" alt=""></td><td align="center"><strong>ANARIOUS PRODUCTIONS</strong></td><td align="center"><strong>THE AGE OF CALAMITOUS MOD</strong></td><td><a href="https://anarious-productions.com/aoc-mod-conan-exiles/">https://anarious-productions.com/aoc-mod-conan-exiles/</a></td></tr><tr><td align="center"><img src="https://772063455-files.gitbook.io/~/files/v0/b/gitbook-x-prod.appspot.com/o/spaces%2F-Lgje1lBxKKWXwqycB-v%2Fuploads%2FudHksvZZNHz380UsuQVA%2Fimage.png?alt=media&amp;token=eab6b058-5e4b-421d-8bc5-0f249f5f8242" alt=""></td><td align="center">Steam Community</td><td align="center">The Age of Calamitous Patch notes</td><td><a href="https://steamcommunity.com/sharedfiles/filedetails/changelog/1113901982">https://steamcommunity.com/sharedfiles/filedetails/changelog/1113901982</a></td></tr></tbody></table>

***

<figure><img src="https://772063455-files.gitbook.io/~/files/v0/b/gitbook-x-prod.appspot.com/o/spaces%2F-Lgje1lBxKKWXwqycB-v%2Fuploads%2FIgI8baycWGGJtrQyS0pZ%2Fimage.png?alt=media&amp;token=001a98ed-5807-4611-9317-2501577fe0fa" alt=""><figcaption></figcaption></figure>

ANARIOUS PRODUCTIONS \~ THE AGE OF CALAMITOUS \~ OFFICIAL PATCH NOTES WEBSITE

{% embed url="<https://anarious-productions.com/category/aoc-mod-patch/>" %}

## AOC GUIDES

All Guides for AoC are written and monitored by the AoC Team.&#x20;

<table data-view="cards"><thead><tr><th></th><th></th><th></th><th data-hidden data-card-target data-type="content-ref"></th><th data-hidden data-card-cover data-type="files"></th></tr></thead><tbody><tr><td><strong>QUEST GUIDE</strong></td><td>The tutorial tab in the Quest guide is now also up to date.<br>Faction quest tabs were hidden in the guide to avoid confusion.<br>Daily Quests and Relic Quests have also been slightly updated.</td><td>LAST UPDATED <br><em>—</em> 2/28/2025</td><td><a href="https://docs.google.com/spreadsheets/d/1AtAMXLjAezwhF14HXXEn24TCCX3Pr0dxeOiaxmKlrPs/edit?usp=sharing">https://docs.google.com/spreadsheets/d/1AtAMXLjAezwhF14HXXEn24TCCX3Pr0dxeOiaxmKlrPs/edit?usp=sharing</a></td><td><a href="https://772063455-files.gitbook.io/~/files/v0/b/gitbook-x-prod.appspot.com/o/spaces%2F-Lgje1lBxKKWXwqycB-v%2Fuploads%2FnfuQNadFWLhBm9NfK8co%2FGuide.png?alt=media&amp;token=fc86b6ea-48a8-48fd-ae5f-ff64a1989a44">Guide.png</a></td></tr><tr><td><strong>MAGIC GUIDE</strong></td><td>The magic guide has been updated to include step by step guides to locating quest givers.</td><td>LAST UPDATED <br><em>—</em> 2/28/2025</td><td></td><td><a href="https://772063455-files.gitbook.io/~/files/v0/b/gitbook-x-prod.appspot.com/o/spaces%2F-Lgje1lBxKKWXwqycB-v%2Fuploads%2FzFXI6AuQyiO6EWE04ovt%2Fmagic.png?alt=media&amp;token=288ebf9d-cd08-4912-8b94-76445e9a3f3c">magic.png</a></td></tr><tr><td><strong>PROFESSION GUIDE</strong></td><td>To Be Updated Soon™</td><td><p>LAST UPDATED  </p><p><em>—</em> 4/28/2024</p></td><td></td><td><a href="https://772063455-files.gitbook.io/~/files/v0/b/gitbook-x-prod.appspot.com/o/spaces%2F-Lgje1lBxKKWXwqycB-v%2Fuploads%2Fkna7vA0rdNhyotqpm5ES%2FProfession.png?alt=media&amp;token=bec66c8c-0d12-45a1-aa61-7ae05b122d3f">Profession.png</a></td></tr></tbody></table>

<figure><img src="https://772063455-files.gitbook.io/~/files/v0/b/gitbook-x-prod.appspot.com/o/spaces%2F-Lgje1lBxKKWXwqycB-v%2Fuploads%2FQLpBcsE2tvKk8mQ8srRN%2Fimage.png?alt=media&amp;token=261462d1-6711-4b2b-b9fe-baa149269d89" alt=""><figcaption></figcaption></figure>


# Shima's Compendium

<figure><img src="https://772063455-files.gitbook.io/~/files/v0/b/gitbook-x-prod.appspot.com/o/spaces%2F-Lgje1lBxKKWXwqycB-v%2Fuploads%2FUcImT5oanWVYh0oqqtdG%2Fimage.png?alt=media&amp;token=22fd9bd4-395b-4662-b275-0e323488433d" alt="" width="563"><figcaption><p>Shima Queen of the Black Coast</p></figcaption></figure>

## **Savage Wilds Integration**

Most features in this mod were created with the Savage Wilds map in mind, and if you're running Savage Wilds, you will get the most out of this mod.&#x20;

* **What thralls go where?** \
  Most, if not all, Crafting stations in Shima’s Compendium are able to have thralls work at them. The table below will show you what thralls can be placed in what crafting stations: \
  Grill = Cook \
  Witches Cauldron = Alchemist \
  Druid’s Alchemy Table = Alchemist \
  Witch Tree = Alchemist \
  Book of Ages = Alchemist \
  Desiccator = Tanner \
  Seedling Bench = Alchemist \
  Greenhouse = Cook \
  Arcane Laborem = Blacksmith \
  Arcane Conflagurator = Smelter \
  Arcane Caminus = Blacksmith
* **Loot** \
  In Shima’s Compendium, we add a lot of content in the form of loot to the world of Savage Wilds.
  * **Faction Loot** now drops from Hyperboreans, the Crimson Tide faction, the Hyrkanians and the Clan Culann. These faction items can also be learned from knowledge books placed in the world, that we encourage you to find.
  * **Boss Loot —** Various bosses (both base game and Savage Wilds specific bosses) now come with additional loot. This additional loot has been added to bosses found in the world, dungeons, adventure zones and more. The nature of the loot varies from boss to boss, and there are several hundred new items to discover, amongst others weapons with new movement sets, features, and/or visuals!
* **Hazards**\
  Shimas Compendium comes with several types of hazards placed in the world. These hazards range from Razor clams to Fire traps.
* **Automatic world distribution of Knowledge Books**
  * **Knowledge teachers** \
    Knowledge teachers (those books you interact with to learn things) can be found spread out in the world.
  * **Knowledge Extensions** \
    The Decorative Gold, Silver, Star Metal, Steel, and Hardened Steel bars have been automatically added to the “Blacksmith Décor” knowledge.&#x20;
* **More and better Fishing Spears**\
  If you are using the spear-fishing feature built into Savage Wilds, you will find that shoals of fish can now (rarely) drop a Fishing Instruction Manual. Reading this manual will upgrade your knowledge about Spearfishing and allows you to progress through the material tiers of making new Fishing-Spears. Each read of the manual will increase the maximum tier of material you can use to craft new spears.

<figure><img src="https://772063455-files.gitbook.io/~/files/v0/b/gitbook-x-prod.appspot.com/o/spaces%2F-Lgje1lBxKKWXwqycB-v%2Fuploads%2F4ypueLDKSaCuqT8t7xjV%2Fdownload%20(4).jfif?alt=media&amp;token=c7582fa1-3da5-4308-a45f-21217a118f4d" alt=""><figcaption></figcaption></figure>

### **Notch and Arrow Buildset**

A new Tier-3 set for all your building goodness! The Notch and Arrow build set can be unlocked for free in the Building section of the Knowledge tab, if you meet the prerequisite for it. It contains 60+ building pieces for your building-pleasure! Compatible with Northern Timber and Sand and Stone.

<figure><img src="https://772063455-files.gitbook.io/~/files/v0/b/gitbook-x-prod.appspot.com/o/spaces%2F-Lgje1lBxKKWXwqycB-v%2Fuploads%2FXdwuwmMuGSy2EAzdGc6C%2Fdownload%20(1).jfif?alt=media&amp;token=38dfa77e-fc8b-41e8-bc07-43b586ac9c04" alt=""><figcaption></figcaption></figure>

### **Arcane Machinations and Druidcraft**

Dive into the world of animism or ancient mechanisms to further enhance your crafting!

### **Arcane Machinations Ecology**&#x20;

Arcane Machinations gives you the knowledge to focus arcane energies on weapons and placeables. The Arcane feature-set contains several new crafting stations (more information below), weapons, and even the ability to summon (and defeat) powerful bosses for more loot goodness.&#x20;

Two key resources exist for Arcane Machinations – Arcanite and Arcanite Crystals. \
Arcanite is a metal infused with magic energies, and Arcanite Crystals are crystallized forms of Arcanite. When crafting Arcanite crystals, you may, rarely, end up with a Dull or Shining variant of the crystal. These have the same effect as the normal crystal, although is weaker or stronger in its effects. Arcanite Bars are used to craft weapons while the Crystals can be placed into an Arcanite Concentrator in order to provide a variety of effects, ranging from producing lights, to providing buffs when going near the Concentrator.&#x20;

**The complete list of Arcane Machinations placeables are as follows:**&#x20;

* &#x20;Arcane Armor Display – An armor display case&#x20;
* Arcane Weapon Display – A weapon display case&#x20;
* Arcane Illuminator – A light fixture&#x20;
* Arcane Concentrator – A receptacle for Arcanite Crystals&#x20;
* Arcane Caminus – A crafting station for all things arcane&#x20;
* Arcane Conflagurator – A furnace. This furnace not only smelts all the things a normal furnace would smelt but can do two more things. Firstly, it can smelt loot found on bosses (Shima’s Compendium loot only) into raw Arcanite.&#x20;
* Arcane Invocantrix – The Invocantrix allows you to summon powerful bosses. These ‘calls’ are crafted in the Arcane Caminus by combining Fragments of Power, Arcanite Dust and Radium gems.&#x20;
* Arcane Laborem – The Laborem is the prime crafting station for Arcanite weaponry.&#x20;
* Arcane Pharus – The Pharus is a light-fixture. It can take any of the dyes and colors the beam of light accordingly. If you rename the placeable, it will also provide a map-marker. Renaming this back to Arcane Pharus will remove the map-marker (may require a server-restart)

**Summonable Bosses**\
Summonable bosses can be obtained by placing a summon token (“Call of xxxxxx”) in an Arcane Invocantrix. Doing so will summon the boss to the center of the platform. Each of these bosses have a chance of dropping unique loot and powerful base game items

**Arcanite Weaponry**\
An Arcane Conflagurator furnace can fuse Perfected Arcanite Weaponry with Infused Arcanite to provide even more powerful weapons – you can, for example, combine a Perfect Arcanite Sword with a Vitality-Infused Arcanite gem to produce a Perfect Arcanite sword with the effects of that gem.&#x20;

### **Druidcraft Ecology**&#x20;

Druidcraft lets you delve into witchcraft, animism, and druidic magic. Druidcraft contains several new crafting stations, placeables, poisons, alchemy items and orbs (more details below). Key resources for Druid-craft are Seeds and Saps. Seeds can be grafted and enhanced to provide upgraded versions of already existing seeds, or produce new seeds used in the Druidcraft schematics.

**The complete list of Arcane Machinations placeables are as follows:**&#x20;

* Druid's Cauldron – This is the primary crafting station for you to craft powerful mixtures, potions, and concoctions.&#x20;
* Druid's Alchemy Table – This station grants recipes for Witch-weapons and placeables (except for the Desiccated trees, see ‘Desiccator’ below).&#x20;
* Witch-Tree – By placing compost or potent compost into the Witch-Tree, you can produce Sap. This sap is a key ingredient when grafting seeds, edibles, or lures.&#x20;
* Book of Ages – The Book of Ages allows you to craft Thrall Training Regimens and also allows further exploration into the Druidcraft ecology by crafting Schematic-teachers for elixirs, tinctures and essences. These books can be used to learn these schematics, and even handed to others for them to learn.&#x20;
* Desiccator – The desiccator works as a Tannery and a Dryer but can also produce Desiccated Trees and Desiccated Tree Protectors. Desiccated trees are placeables made from 50 Dry wood and 10 salt. This counts as a Tier-3 Tannery.&#x20;
* Seedling Bench – The seedling bench is where you can upgrade existing seeds to more potent variants – you may also graft seeds, meaning, you can combine two types of seeds to get a new type of seed. These seeds can then be grown in a Greenhouse, to provide new flowers that can be crushed for powders.&#x20;
* Hive – The Hive is a placeable that accepts Lures. When a lure is placed into a hive, it will spawn a swarm of the appropriate type. A variety of swarms exist for this, ranging from Fireflies that grant light, to Wasps that sting enemies. Lures can also be thrown like an orb to provide similar effects.&#x20;
* Greenhouse – The greenhouse has a single function – to grow seeds into plants. It uses sap from a Witch-Tree to grow seeds into edibles, or plants.&#x20;
* Hatchery – The hatchery allows faster incubation of eggs, while not increasing the decay rate for hatched animals. Simply put an creature egg into the hatchery and wait.

**New Orbs**\
The Druidcraft ecology has a great variety of throwable orbs. These orbs provide buffs, poisons or call forth swarms of creatures in the area affected by the orb. When crafting orbs, you may (rarely) end up with a Weak or Potent orb – these orbs have the same effect as normal orbs, but with a modified strength. Do not make the mistake of considering the weaker orbs useless, however, since even the weaker ones have powerful effects. Do note that some orbs, while powerful, are very tactical in their effects. What this means is that a powerful healing orb will keep you healthy – but it will also keep your enemies healthy if they’re standing in it.

**Swarms** \
Insects and creature swarms such as Bats, Fireflies, Butterflies, Moths, etc will follow anyone that step into their radius. While creatures or players are within the radius of such a swarm, they will be affected by the swarm. Each swarm provides a different effect; read the description for the items to know what these effects are.

<figure><img src="https://772063455-files.gitbook.io/~/files/v0/b/gitbook-x-prod.appspot.com/o/spaces%2F-Lgje1lBxKKWXwqycB-v%2Fuploads%2F4gomtBxa6NZMUER5aCLi%2Fdownload%20(5).jfif?alt=media&amp;token=25914807-5662-4cf4-8214-a465f09ae13a" alt=""><figcaption></figcaption></figure>

**New pets, thralls, and pet-features such as Training Regimens**

* **New NPC/Thrall Races:** Clan Culann; Crimson Tide; Cultists; Hyperborean; Champions of Jhebbal Sag. Not all are tameable.
* **Pets** \
  Several new pet types can be found in Savage Wilds. In order for you to make these pets, you will need to find their younglings and raise them in an Animal Pen, or have an admin spawn them in for you. In some rare cases, pets such as the Jackalopes can be hatched from eggs.
* **Thrall Training Regimens** \
  Through the Book of Ages (see Druidcraft below), you can craft Training Regimens. These regimens retrain your thralls to have specific perks. Try them all to find the set of perks that works for you!

<figure><img src="https://772063455-files.gitbook.io/~/files/v0/b/gitbook-x-prod.appspot.com/o/spaces%2F-Lgje1lBxKKWXwqycB-v%2Fuploads%2F8CJYZpx2S3ZAhfQXZCUC%2Fdownload%20(3).jfif?alt=media&amp;token=086eaf93-11f7-4b05-8ae8-c9af3a7d132b" alt=""><figcaption></figcaption></figure>

In addition to the features above, Shima's Compendium contains a large amount of content injected into the game.&#x20;

* **Hundreds of placeables**\
  Several hundred new placeables are available in Shima’s Compendium. For the most part, these placeables can be found by exploring the world and learning the Knowledge from books already present.
* **Food** \
  Shima’s Compendium comes with a selection of new food items, such as Eggplants, Garlic, Pears, Salad and so forth. These items are mostly flavor, but it is possible, through druidic magic, to infuse them with Witch-Tree sap in order to make them throwable weapons. Yes – you can have a food fight.
* **Full-color body warpaints**\
  Full-Body warpaints allow you to color your entire body in a single go – feel particularly sickly? How about a yellow tint? Feeling a bit green? You can literally color your entire body to any of the dye-colors present in the game.

<figure><img src="https://772063455-files.gitbook.io/~/files/v0/b/gitbook-x-prod.appspot.com/o/spaces%2F-Lgje1lBxKKWXwqycB-v%2Fuploads%2FNPwWyAYNTWzZyqBtEpB8%2Fdownload%20(6).jfif?alt=media&amp;token=e192cb4b-b714-4521-b52d-107245a7625f" alt=""><figcaption></figcaption></figure>

## Shima's Compendium Manuals.

{% file src="/files/HjifBgw0huE2Uqlv81dM" %}

Lockpicking is Toggled off on The PACK Savage Wilds.

{% file src="/files/PJfKEqqmoQv4I1mSzX4R" %}

{% file src="/files/UljX8pociPfrzHIh95v1" %}

<figure><img src="https://772063455-files.gitbook.io/~/files/v0/b/gitbook-x-prod.appspot.com/o/spaces%2F-Lgje1lBxKKWXwqycB-v%2Fuploads%2FCjrpLQE2Yl2E5lEfn7hi%2Fimage.png?alt=media&amp;token=7fc8a95a-5270-45b3-9d1e-9c6c1e19f130" alt="" width="375"><figcaption></figcaption></figure>

{% embed url="<https://www.youtube.com/watch?v=PgDp1NS3zNc>" %}

{% embed url="<https://images.app.goo.gl/ogj7EMESCxaBnbHNA>" %}

<figure><img src="https://772063455-files.gitbook.io/~/files/v0/b/gitbook-x-prod.appspot.com/o/spaces%2F-Lgje1lBxKKWXwqycB-v%2Fuploads%2FPyac6BtzKjjEjgbO5mzz%2Fimage.png?alt=media&amp;token=23fe5240-1252-4fef-b8dc-695112dd8ae9" alt=""><figcaption></figcaption></figure>


# The PACK PVE | 1.0 Server

7 Days to Die is a new survival horde crafting game from The Fun Pimps:

## **Navigation of Pages:**

<table data-view="cards"><thead><tr><th></th><th></th></tr></thead><tbody><tr><td><strong>Left side of the page</strong> <span data-gb-custom-inline data-tag="emoji" data-code="25c0">◀️</span></td><td>Use the <strong>></strong> to open any pages in that section when the Header shows a <strong>></strong>.</td></tr><tr><td><strong>Right Side</strong> of the page <span data-gb-custom-inline data-tag="emoji" data-code="25b6">▶️</span></td><td>Click a header to go to that section of this page.</td></tr><tr><td><strong>Features of the page.</strong></td><td>are in an <strong>expandable box</strong>, please click the <strong>></strong> to open the expandable dropdown.</td></tr><tr><td><strong>Hyperlink</strong>s are often in a <strong>card form</strong> in the website.</td><td>So <strong>clicking an image</strong> will often take you to a specific page for information. </td></tr><tr><td><strong>Steam-link</strong>s are often in a <strong>card form</strong> in the website.</td><td>So <strong>clicking on a server card</strong> will take you to the Server.</td></tr></tbody></table>

## 𝟕 𝐃𝐚𝐲𝐬 𝐭𝐨 𝐃𝐢𝐞 𝟏.𝟎

<table data-card-size="large" data-view="cards" data-full-width="true"><thead><tr><th></th><th></th><th align="center"></th></tr></thead><tbody><tr><td><h2><strong>7 Days to Die 1.0: Over a Decade in the Making</strong></h2></td><td><p>After nearly twelve years of early access, the highly anticipated Version 1.0 release of “7 Days to Die” is here!  This momentous milestone marks a significant evolution in the survival horror genre, paired with an updated release for current-gen consoles coming in just a few weeks. </p><p>The 1.0 Edition brings more optimizations, polish, quality-of-life improvements, new content, new features, and new gameplay systems than ever before.<br><br>If you have never played 7 Days to Die or you have not played it for a while, you’re going to want to check out version 1.0. Building on an already amazing foundation, this update sets the bar even higher for the survival genre. </p></td><td align="center"><img src="https://772063455-files.gitbook.io/~/files/v0/b/gitbook-x-prod.appspot.com/o/spaces%2F-Lgje1lBxKKWXwqycB-v%2Fuploads%2FZeX492f1UfwbaprZ9l3O%2Fimage.png?alt=media&amp;token=810edd34-5265-4db9-ac61-2fed0562b815" alt="" data-size="original">     <a href="https://7daystodie.gamepedia.com/The_Fun_Pimps">The Fun Pimps</a>:</td></tr><tr><td><h3><strong>GAME FEATURES</strong></h3></td><td><p><strong>Explore</strong> – Huge, unique and rich environments, offering the freedom to play the game any way you want with many unique biomes.</p><p><strong>Craft</strong> – Craft and repair weapons, clothes, armor, tools, vehicles, and more with over 500 recipes. Learn more powerful recipes by finding schematics.</p><p><strong>Build</strong> – Take over a ruin, or build from the ground-up. Design the ultimate fort to include traps, electric power, auto turrets, automated doors, gadgets and defensive positions to survive the undead. The world is fully destructible and moldable.</p><p><strong>Improve</strong> – Increase your skills in 5 major disciplines with a multitude of perks under each attribute. Gain additional skills by reading over 100 books. 7 Days to Die is the only true survival RPG.</p><p><strong>Combat</strong> – Encounter over 50 unique zombie archetypes including special infected with unique behaviors and attacks.</p><p><strong>Survive</strong> – Experience real hardcore survival mechanics with nearly 50 buff boosts/ailments including hunger, thirst, infections, broken bones, food poisoning, hypothermia, heat exhaustion, dysentery and more.</p></td><td align="center"></td></tr></tbody></table>

<figure><img src="https://772063455-files.gitbook.io/~/files/v0/b/gitbook-x-prod.appspot.com/o/spaces%2F-Lgje1lBxKKWXwqycB-v%2Fuploads%2FDfZZtAgvcbcFH6eyuJnY%2Fimage.png?alt=media&amp;token=672033ff-f909-45e8-83ae-6212b5ee3a96" alt="" width="375"><figcaption></figcaption></figure>

## The PACK PVE | 1.0 Server

<table data-card-size="large" data-view="cards" data-full-width="true"><thead><tr><th align="center"></th><th></th><th></th><th data-hidden data-card-target data-type="content-ref"></th><th data-hidden data-card-cover data-type="files"></th></tr></thead><tbody><tr><td align="center"><img src="https://772063455-files.gitbook.io/~/files/v0/b/gitbook-x-prod.appspot.com/o/spaces%2F-Lgje1lBxKKWXwqycB-v%2Fuploads%2FLdseqaL0C3rm5imHkfyY%2Fimage.png?alt=media&amp;token=e538801e-6f6f-4be2-ae10-165275b67852" alt="" data-size="original"></td><td><p><br><strong>ABOUT OUR SERVER</strong> </p><p></p></td><td><strong>We are currently hosting a 150% XP | 150% Loot Server.</strong> <br><strong>The PACK PVE V1.0 SERVER COMMANDS</strong> <br>Slash commands that can be typed into any of the chat channels. <br><strong>The PACK Starter Kit.</strong> <br>No cost One time use!! <br><strong>The PACK Economy!</strong> <br>Survivors can earn the server currency "FunCoin" and spend on items in our Shop, trading with other players! -There are a few ways to earn, Playtime and Zombie Kills. <br><strong>The PACK offers the use of TELEPORT Commands!</strong> <br>Will use FunCoin for the teleport system. It has a Default delay of 5 seconds, and Default 1 minute cooldown.</td><td><a href="https://faq.thepackgaming.com/7dtd/info/Hardcore">https://faq.thepackgaming.com/7dtd/info/Hardcore</a></td><td></td></tr><tr><td align="center"><strong>The PACK PVE | 150% XP | 150% Loot | QOL MODS</strong> </td><td><p><strong>Connect-to-IP-Port</strong> </p><p>66.153.149.147:26910 </p><p><strong>Steam-Connect-Link</strong> </p><p>steam://connect/66.153.149.147:26910</p></td><td><strong>Click here to go to steamlink</strong></td><td><a href="steam://connect/66.153.149.147:26910">steam://connect/66.153.149.147:26910</a></td><td><a href="https://772063455-files.gitbook.io/~/files/v0/b/gitbook-x-prod.appspot.com/o/spaces%2F-Lgje1lBxKKWXwqycB-v%2Fuploads%2FLdseqaL0C3rm5imHkfyY%2Fimage.png?alt=media&amp;token=e538801e-6f6f-4be2-ae10-165275b67852">image.png</a></td></tr><tr><td align="center"><img src="https://772063455-files.gitbook.io/~/files/v0/b/gitbook-x-prod.appspot.com/o/spaces%2F-Lgje1lBxKKWXwqycB-v%2Fuploads%2F2GWs6PN9eRncVs8wFWGw%2Fimage.png?alt=media&amp;token=8e5df15c-c769-45d9-8629-56d83175c685" alt="" data-size="original"></td><td>FunBot Features:</td><td>1 Special Teleport Locations allowed <br>Standard earnings in currency <br>Player will lose currency when they die. </td><td></td><td></td></tr><tr><td align="center"><em><strong>How to get VIP? - 1.0 | PACK_CUSTOM</strong></em></td><td>Please visit: <br><a href="https://7dtdserver1.thepackgaming.com/shop/2">https://7dtdserver1.thepackgaming.com/shop/2</a></td><td><ul><li> Sign into the Shop with your Steam ID. </li><li> Once you're logged in via steam, you will see an option on the top right bar for a link to your profile. </li><li> Open your profile settings, now you can update/link your discord ID. </li><li> Once you have done these two things, The server should auto tag you with VIP.</li></ul></td><td></td><td></td></tr></tbody></table>

### ***QOL MODS*****&#x20;SERVER SETTINGS**

<details>

<summary>QOL MODS SERVER SETTINGS</summary>

Claim Size = 121 Blocks; Claim Deadzone = 40 Blocks; Claim Duration = 21 Days \
No Claim Decay Infinite Claim Health While online or offline. With 0 time ORP.\
Bedroll Deadzone = 15 Blocks, Bedroll lasts = 45 days\
Difficulty = Survivalist;  \
24 HR cycle = 60 min.; \
Daylight length = 18 HRS; \
Blood Moon Count = 8 Enemies \
Zombie Day Speed = Run \
Zombie Night Speed = Sprint \
Zombie Feral Speed = Nightmare \
Zombie Blood Moon Speed = Sprint \
Zombie Feral Sense = Night \
Max Zombies = 90 \
Max Animals = 100 \
XP Multiplier - 150%, Party Kill Shared Range = 200m. Show Friends on Map yes. \
Player Block Dmg.; AI Block Dmg.; AI Blood Moon Block Dmg. All 150%.\
Loot Respawn Time = 7 game days. \
Days Chunk Reset Time = Disabled \
No Drop on Death or Quit \
Air Drops = Every 3 Days and they are Marked.\
&#x20;

</details>

## CHAT COMMAND LIST

<details>

<summary>The following must be typed into any of the chat channels. They must have the slash in the front of them.</summary>

***FREE STUFF***

/starterkit - Kit of Starter Items! (NO COST, ONE TIME USE)&#x20;

***GENERAL***&#x20;

/help - Get some help!! \
/seen \<playerName> (or /ls) - Check when a player was last seen online. Ex. /ls funtimes&#x20;

***ECONOMY***&#x20;

Our players can earn the Server Currency "FunCoin" and spend on Items in our Shop, Trading with other players, /Gimme, /Teleport System! There are a few ways to earn, Playtime and Zombie Kills.

***TELEPORT SYSTEM***&#x20;

There is a Cost to use the Teleport System. It has a Default Delay of 10 seconds, and Default 2 Minute Cooldown.&#x20;

/cc - Teleports you the The PACK Community Center!

/tpa - Teleports you to a player, must be allies! Ex. /tpa funtimes

/get - Teleports lost or stuck vehicle to you. Vehicle must be in a chunk rendered by a player on the map. Ex. /get Bicycle, Minibike, Motorcycle, Jeep, Gyro, Drone<br>

**\*VIP (SUPPORTERS)**&#x20;

* VIP's earn more and also get Discounts in the Shop and on the cost of the /Commands as part of our Patreon Perk System!
* VIP'S will be able to set extra teleport locations.
* VIP's will need to link their Discord profile to their CSMM profile to get the Ingame \[VIP] Roles assigned to them!

**VIP Economy Commands**\
/shop (/store) - Ingame shop! \
/claim - Claim items you have bought in the Web Shop! \
/balance (/ bal, /wallet) - Check how much FunCoin is in your wallet! \
/pay \<playerName> \<amount> - Send some currency to another player! Ex. /pay funtimes 9999999 \
/gimme (or /gimmie) - Gamble and receive a random item from a Loot Table! 20 minute cooldown. Cost: 50 FunCoin&#x20;

**VIP Teleport Commands**\
&#x20;/teleset (/settele) - Create a teleport location. Ex. /settele Home \
/tele (/tp) - Teleport to a set location. Ex. /tp Vandals Super Secret Loot Room \
/listtele (/telelist) - List of personal teleport locations. \
/listtele public - List of public teleports. \
/teleprivate (/telepriv) - Make a teleport private. Ex. /telepriv Funtimes Garage \
/telepublic (/telepub, pubtele) - Let everyone on the server teleport to the location. Ex. /telepub Vandals Dungeon \
/removetele (/deltele) - Remove a teleport location. Ex. /deltele Funtimes Old House /renametele - Rename a teleport location. Ex. /renametele Funtimes New House

</details>

<figure><img src="https://772063455-files.gitbook.io/~/files/v0/b/gitbook-x-prod.appspot.com/o/spaces%2F-Lgje1lBxKKWXwqycB-v%2Fuploads%2FJWNEKB0FULdLaPrQtcYC%2Fimage.png?alt=media&amp;token=0af137cb-5213-426c-b412-76723fd5b898" alt="" width="375"><figcaption></figcaption></figure>

<table data-card-size="large" data-view="cards" data-full-width="true"><thead><tr><th align="center"></th><th align="center"></th><th align="center"></th><th data-hidden data-card-target data-type="content-ref"></th></tr></thead><tbody><tr><td align="center"><em><strong>LIVE HEAT MAP!</strong></em><br><em><strong>Click here to go to map.</strong></em></td><td align="center"><em><strong>Image.of.map.</strong></em><img src="https://cdn.discordapp.com/emojis/982526298960310322.webp?size=44&#x26;quality=lossless" alt=":soon_TM:">  </td><td align="center"><strong>LIVE MAP. Please ensure to login via Steam to see your land claims, login is in the bottom left corner. And then click on Region Files. (Top Right corner).</strong></td><td><a href="http://66.153.149.147:58095/legacymap/index.html">http://66.153.149.147:58095/legacymap/index.html</a></td></tr></tbody></table>

<figure><img src="https://772063455-files.gitbook.io/~/files/v0/b/gitbook-x-prod.appspot.com/o/spaces%2F-Lgje1lBxKKWXwqycB-v%2Fuploads%2FyjjbW054ce4znL5K9CfM%2Frelease_notes_1_OFFICIAL_KEY_ART_FULL_SIZE-1-980x355.png?alt=media&amp;token=249d914a-e8ec-433e-933c-74e0fa83afc2" alt=""><figcaption></figcaption></figure>

## **V1.0 Official Release Notes** <br>

{% embed url="<https://7daystodie.com/v1-0-official-release-notes/>" %}

## 7DTD Basic Terminology and Controls

<details>

<summary>Terminology</summary>

* Zombies refers to all humanoid NPC enemies.
* Specials can refer to all special enemies and hostile animals. These include the Spider Zombie, Bear, Zombie Bear, Zombie Dog, Feral Zombie, Screamer, Infected Police Officer, and Burn Victim.
* Early Game is a loose term often used to refer to the time around when a player has just started in a world, it is also referred to as the 'Primitive Stage'.
* Mid Game is a loose term to refer to the time around when a player has established a safe place to stay overnight, in addition to a good supply of resources and sufficient weaponry.
* Late Game is a loose term to refer to the time around when a player is nearly fully self-sustained and can pretty much deal with any threat without much trouble.
* End Game refers to when a player has a well defended fortress and is completely self-sustained.

</details>

<details>

<summary>Controls</summary>

The controls used to play 7 Days to Die are a combination of keyboard keys, the mouse and mouse buttons. All keys can be re-assigned using the *Controls* tab found in the *Options* tab on the main menu of the game. From there you can change the key bindings, adjust the mouse sensitivity and invert the mouse control if desired.

* Mouse

Used to control the character's point of view. This allows the player to look around in all directions in addition to being used to turn left or right while moving either forward or backwards with the W and S keys.

* W, A, S, D Keys

Used to control the player's character's forward, backward and sideways movement. W is used to move forward, S is used to move backwards, A is used to move sideways to the left and D is used to move sideways to the right.

* Space Bar

Used to jump. The player's character can jump a minimum of 1 block high. It is possible to jump higher by investing skill points into Parkour.

* Left-Shift Key

Used to sprint. This increases your speed, but will decrease your Stamina.

* Ctrl Key

Used to crouch. This is a toggle key whereby pressing it once will make the character crouch and pressing it again will cause them to stand up. In addition to activating the Stealth System, the player will also be able to move their character around silently and make less sound when searching containers. However, searching containers while using stealth will take more time. Whilst undetected, the player has chance at activating a sneak attack if they hit a Zombie. This will increase the amount of damage given by the attack.

* C Key

Used to crouch. this works exactly the same way as the Ctrl Key, however it does not toggle and the player will need to hold it down to keep their character crouched.

* Left Mouse Button

Used to activate an item's primary effect.

* For melee weapons and tools, left clicking causes a swing which is either used to damage zombies or break blocks.
* For placeable blocks, left clicking will rotate them.
* For Pipe Bombs and Small Stones, holding the Left Mouse Button down will power up the strength the projectile will be thrown at, and releasing the button will launch the projectile.
* For consumables like food and medicine, this action will consume one unit.
* For firearms, the Left Mouse Button will discharge the firearm, consuming one unit of ammunition from inside the chamber and causing recoil. There are several different types of ammunition for the different firearms.
* Right Mouse Button

Used to activate an item's secondary effect.

* For repair/building tools such as the Stone Axe, Claw Hammer, or Nailgun, right clicking will attempt to repair the block if damaged, or upgrade frame shapes into a stronger material such as Concrete or Steel.
* For blocks or traps, this action places them at the cross-hair on the selected area.
* For Pipe Bombs, Dynamite, and other similar items, it will ignite the fuse, but don't forget to use the Left Mouse Button to throw them!
* For firearms and the Crossbow, right clicking will allow the player to aim down sight for greater accuracy. However, while the Weapon is aimed down on the sight, the player's character movements will become very slow.
* For most tools and melee weapons, the Right Mouse Button will initiate a Power Attack, which deals more damage but takes longer to execute.
  * Utilizing a Tool or Weapon power attack, whether hitting something or not, will drain your Stamina considerably.
* For Glass Jars and Buckets, right clicking on a water source such as a lake will convert it into Bottled Murky Water and Bucket of Water respectively.
* E Key

Used to open a Door or search a container. Holding down the E Key over player crafted Doors or Chests will activate the option icons used to lock or unlock it and to input, create or change the Doors password. However these options are only available to the creator of the Door or chest.

* R Key

Used to reload a Weapon. Holding down with some Weapons will show a wheel menu to load alternate ammunition types. When searching a Loot container the R key allows you to take everything at once. This, however, causes more noise than removing the contents piece by piece.

* Tab Key

Used to open the inventory giving access to the crafting menu.

* M Key

Used to open and close the Map Menu. On the bottom right of the Map Menu there are several icons in the bottom left which say exactly what they depict, as well as a bed icon. This is the point where the player has placed a Sleeping Bag as a spawn point, provided one has been placed.

* G Key

Used to drop the currently selected object from the Toolbelt, or if a stack is selected it will drop one out of the stack. This key can be dangerous if accidentally pressed.

* F Key

Used to switch on/off the Flashlight.

* Mouse scroll

Used to control Weapon and Map Menu zoom or to cycle the Toolbelt. Also, while aiming down the sight of a hunting rifle or snipers rifle, using the Mouse scroll allows you zoom the scope in and out, the same goes for the Map Menu. Using the Mouse scroll while not aiming down the sight of a Weapon or using the map will allow you to cycle through the Toolbelt to select a desired slot.

* I Key

Used to show other players and their statistics. Essentially a scoreboard that will give you information regarding the players currently on the server, character level, Gamestage, Zombie kills, player kills, deaths, and ping.

</details>

***

## V2.0 Storm’s Brewing Release Schedule

<figure><img src="https://772063455-files.gitbook.io/~/files/v0/b/gitbook-x-prod.appspot.com/o/spaces%2F-Lgje1lBxKKWXwqycB-v%2Fuploads%2FIR9L6tNirHticj8fgIo1%2Fimage.png?alt=media&amp;token=7e6c235d-7010-4721-8de0-cc49f8c4b239" alt=""><figcaption></figcaption></figure>

The Fun Pimps are pleased to announce our Storms Brewing V2.0 release schedule below. More details on all the events below will be coming soon so stay tuned!

* **The Dev Stream – Tuesday June 10th**\
  Come and Join Lathan Meadows and Richard Huenink for an in-depth discussion on 2.0 features.
* **Streamer Weekend – Friday June 13th – Sunday June 15th**\
  Watch a sneak peek of 2.0 from your favorite TFP Creators! If you are interested in participating, apply to our creator program here: <https://creators.thefunpimps.com/>
* **2.0 Experimental – Monday June 16th**\
  The Public can opt into the 2.0 experimental on this day.
* **2.0 Stable – Monday June 30th**\
  Barring any game breaking bugs or Certification issues we are planning on releasing stable on pc and consoles on this date.

***

## **V2.0 Storm Brewing - Status Update**

<figure><img src="https://772063455-files.gitbook.io/~/files/v0/b/gitbook-x-prod.appspot.com/o/spaces%2F-Lgje1lBxKKWXwqycB-v%2Fuploads%2FM889ewlfilDyP1cXrmMi%2Fimage.png?alt=media&amp;token=ef2f58ef-49b9-4c57-8962-d41a5679925f" alt=""><figcaption></figcaption></figure>

**Biome Progression Elemental Survival**

Prepare to face the elements like never before! Conquer those tough biomes in manageable chunks, unlock permanent survival in the harshest environments, and craft temporary buffs to push your limits. This is survival redefined!

* Progress through each biome with increasing threat levels and challenges
* Smoke, heat, cold and radiation damage, remedies and survival
* Craft consumables to increase your temporary biome elemental resistance
* Complete challenges to unlock permanent biome elemental hazard immunity
* Progressive biome maximum loot caps to encourage exploration
* Game options will be available for custom and classic playstyles
* New HUD and player elemental VFX and Sound FX
* Several new Biome Zombies are coming to 2.0 including the new ***desert Plague spitter and snow Frost Claw*** ***with completely unique behaviors to the game***.

**Dynamic Severe Storms**

On top of new Biome Elemental Survival we have added a new Dynamic Severe Storm System.

* Dynamic Severe Storms force players to take or build shelters
* Update 2.0 will feature a unique storm type per biome
* Rain and light snow still exist but are not hazardous

**Perk Updates & Rebalance**

We’ve added a brand-new general tab, unlocking a whole new level of customization. Plus, we’ve filled in those empty slots in the attribute lists with exciting new perks!

* All attributes have 10 perks with new and improved perks&#x20;
* Each perk has 5 levels
* New Mastery Perk Set for each attribute
* Moved some perks to a new General Perks tab without attribute requirements

**Sledgehammer Saga**

* We’ve added a new book series for the sledgehammer weapon class

**New Higher Gamestaged Zombies**

* Get ready for a whole new level of zombie mayhem! Similar to the current green Radiated Zombies we have added new higher gamestaged Charged Blue and Infernal Orange zombie Archetype groups with new behaviors coming. These new Archetypes will intensify the later game experience!&#x20;

**Trees and Foliage Update**

* A Majority of the trees have been optimized to run on the same speed tree shader for a performance boost and reduced draw calls on many
* The burnt and wasteland trees have been redone with a greatly improved look
* We have added a new sub-biome foliage system which allows for clearings and thicker foliage forests with lower growing plants on their perimeter for a much more believable look without sacrificing performance.

**Crawl out Zombies**

* We have added functionality to allow zombies to spawn and crawl out of smaller 1 meter spaces and crawl under tighter areas.
* We have improved the tools for spawning and respawning enemies and reworked many of the larger POIS to take full advantage maintaining the challenge while improving the performance

**Navezgane Update**&#x20;

* Navezgane has gotten a makeover to work seamlessly with the new biome progression elemental system. Biome boundaries and trader POI positions updated to improve travel time and flow to and from large POI townships.

**POIs: The World is Expanding!**&#x20;

* We’re aiming for a whopping 50 new Points of Interest, adding even more depth and variety to your world!
* We’ve added a greater variety of POIs for wilderness.
* We’ve added more remnants for performance.
* We’ve also updated some of our more demanding POI’s to perform better – those sneaky zombies are now using crawl outs to surprise you – watch out!

**Audio**

* We’ve added meaningful individual footsteps, making the world feel more alive and immersive than ever!
* Zombie audio for new biome zombies!

**Clothing Cosmetic Options, Twitch Drops and DLC**

* Wear what you want for protection but choose how you cosmetically look with new outfits.
* We will be adding some new cosmetic DLCs options and Twitch Drops to 2.0! Get ready to unlock awesome new content and show off your unique style.

**Random Gen Improvements**

* Wilderness spawning has been improved allowing a lot more wilderness POIs to spawn and their spawn locations have better random positioning
* Wilderness road placement has been improved

**New Quest Marker System**

* We’ve have added a new quest maker that displays a custom quest flag type per quest

\
**Spawn Near Friend**

* Starting a new save? Choose a friend to spawn near for ultimate teamwork!
* We’ve added a handy button to go back to the main menu before joining a game – no more getting stuck!

***

## FAQ's and Wikis found on the WEB.

**Alpha 20 is not compatible with previous Alpha worlds or save game data. New Pre-gen-Maps have been created and can be used. We also advise that you delete the 7 Days save Game data folder before playing.**

<table data-view="cards"><thead><tr><th></th><th></th><th></th><th data-hidden data-card-target data-type="content-ref"></th><th data-hidden data-card-cover data-type="files"></th></tr></thead><tbody><tr><td></td><td>1.0 Official Release Notes</td><td></td><td><a href="https://7daystodie.com/a20-official-release-notes">https://7daystodie.com/a20-official-release-notes</a></td><td><a href="https://772063455-files.gitbook.io/~/files/v0/b/gitbook-x-prod.appspot.com/o/spaces%2F-Lgje1lBxKKWXwqycB-v%2Fuploads%2FuX20WLJsxaHefIGr459U%2Frelease_notes_1_OFFICIAL_KEY_ART_FULL_SIZE-1-980x355.png?alt=media&amp;token=4b36d3c7-0a76-4580-9980-ea6d4749325b">release_notes_1_OFFICIAL_KEY_ART_FULL_SIZE-1-980x355.png</a></td></tr><tr><td><h3>1.0 Experimental Known Issues</h3></td><td>This Google doc is regularly updated with the known issues. Please check it before reporting any issues.</td><td></td><td><a href="https://docs.google.com/spreadsheets/d/1ctmU1eMhVZYoUXCZtFijnbboLQ2r8FIj_D-Ui6b6YHU/edit#gid=0">https://docs.google.com/spreadsheets/d/1ctmU1eMhVZYoUXCZtFijnbboLQ2r8FIj_D-Ui6b6YHU/edit#gid=0</a></td><td><a href="https://772063455-files.gitbook.io/~/files/v0/b/gitbook-x-prod.appspot.com/o/spaces%2F-Lgje1lBxKKWXwqycB-v%2Fuploads%2F1yyIMEVv7wc1c8tEIc57%2FBUGS.png?alt=media&amp;token=3636594a-34d7-4592-95e7-8b3005bbbb47">BUGS.png</a></td></tr><tr><td><img src="https://772063455-files.gitbook.io/~/files/v0/b/gitbook-x-prod.appspot.com/o/spaces%2F-Lgje1lBxKKWXwqycB-v%2Fuploads%2FjMbWvVYmjtQ8AySj9mJW%2Fimage.png?alt=media&amp;token=de19bb77-04fb-4bd7-9595-dff64c20ed50" alt=""></td><td><h3><strong>7DtD General Support</strong></h3></td><td>Also if you are planning to do a bug report, please use the correct area, and <strong>follow the instructions</strong>.</td><td><a href="https://community.7daystodie.com/forum/17-general-support/">https://community.7daystodie.com/forum/17-general-support/</a></td><td></td></tr><tr><td><img src="https://772063455-files.gitbook.io/~/files/v0/b/gitbook-x-prod.appspot.com/o/spaces%2F-Lgje1lBxKKWXwqycB-v%2Fuploads%2FjrL2fZFx1RwuyhFhmyYc%2Fimage.png?alt=media&amp;token=46411189-f77b-4b6c-a488-efe4cbc29af9" alt=""></td><td><h3>7DtD Forum</h3></td><td></td><td><a href="https://community.7daystodie.com/">https://community.7daystodie.com/</a></td><td></td></tr><tr><td><img src="https://772063455-files.gitbook.io/~/files/v0/b/gitbook-x-prod.appspot.com/o/spaces%2F-Lgje1lBxKKWXwqycB-v%2Fuploads%2FM013DndKbY6n92cffxGA%2Fimage.png?alt=media&amp;token=e871882c-fd93-47fb-ae7f-e06e8422db87" alt=""></td><td><h3>7 Days to Die News</h3></td><td></td><td><a href="https://7daystodie.com/news/">https://7daystodie.com/news/</a></td><td></td></tr><tr><td><img src="https://772063455-files.gitbook.io/~/files/v0/b/gitbook-x-prod.appspot.com/o/spaces%2F-Lgje1lBxKKWXwqycB-v%2Fuploads%2FJhxqB77D3EwJb5UWbGvc%2Fimage.png?alt=media&amp;token=8b4a5a46-d5ac-4065-9388-2a265cecb9a2" alt=""></td><td><h3>7 Days to Die Wikipedia </h3></td><td><h3>by Gamepedia</h3></td><td></td><td></td></tr></tbody></table>

<figure><img src="https://772063455-files.gitbook.io/~/files/v0/b/gitbook-x-prod.appspot.com/o/spaces%2F-Lgje1lBxKKWXwqycB-v%2Fuploads%2FccshBdSq1pZsWOJlQ8ip%2Fimage.png?alt=media&amp;token=c8b4bd1f-b535-4b3f-bf47-5dab37886905" alt="" width="375"><figcaption></figcaption></figure>

{% embed url="<https://images.app.goo.gl/1ogqvt2wcpZ8L8TJ8>" %}

***

## ***Our Patreon's***&#x20;

![](https://772063455-files.gitbook.io/~/files/v0/b/gitbook-x-prod.appspot.com/o/spaces%2F-Lgje1lBxKKWXwqycB-v%2Fuploads%2FKFiZHHlgN1QM69t5DejF%2FPACK_PATREON.png?alt=media\&token=d8b84080-d3a0-4bcf-903f-ec3c9cebe9e3)

*Will receive generous perks in our 7DtD Servers.*

Please see the Patreon Role listings to see just what you can get as an IN GAME PERK!

{% embed url="<https://faq.thepackgaming.com/patreon#our-patreon-perks>" %}

<figure><img src="https://772063455-files.gitbook.io/~/files/v0/b/gitbook-x-prod.appspot.com/o/spaces%2F-Lgje1lBxKKWXwqycB-v%2Fuploads%2FBmVBpUfR75UpTAAx5jts%2Fimage.png?alt=media&amp;token=c1de7c32-eaa1-4932-9134-0ce83b85a8dd" alt=""><figcaption></figcaption></figure>


# Dark and Light PvE Servers.

## **Navigation of Pages:**

<table data-view="cards"><thead><tr><th></th><th></th></tr></thead><tbody><tr><td><strong>Left side of the page</strong> <span data-gb-custom-inline data-tag="emoji" data-code="25c0">◀️</span></td><td>Use the <strong>></strong> to open any pages in that section when the Header shows a <strong>></strong>.</td></tr><tr><td><strong>Right Side</strong> of the page <span data-gb-custom-inline data-tag="emoji" data-code="25b6">▶️</span></td><td>Click a header to go to that section of this page.</td></tr><tr><td><strong>Features of the page.</strong></td><td>are in an <strong>expandable box</strong>, please click the <strong>></strong> to open the expandable dropdown.</td></tr><tr><td><strong>Hyperlink</strong>s are often in a <strong>card form</strong> in the website.</td><td>So <strong>clicking an image</strong> will often take you to a specific page for information. </td></tr><tr><td><strong>Steam-link</strong>s are often in a <strong>card form</strong> in the website.</td><td> So <strong>clicking on a server card</strong> will take you to the Server.</td></tr></tbody></table>

<figure><img src="https://772063455-files.gitbook.io/~/files/v0/b/gitbook-x-prod.appspot.com/o/spaces%2F-Lgje1lBxKKWXwqycB-v%2Fuploads%2F7DLDcONo82ntlyaPc8PV%2FDNL_1.png?alt=media&amp;token=0f7961fd-f44f-4d74-849b-189fd721deb1" alt=""><figcaption></figcaption></figure>

#### Owners Vision

OUR MOTTO! ALL MAY ENTER HERE WITHOUT PREJUDICE! This applies to All Races, All Creeds, and All Genders. All are Welcome!!!

We are an adult gaming community, and we are looking for quality players to join our adventures. We host two PvE Dark and Light Servers. The Path, and The Shard! We are Beginner friendly, with a Helpful and active admin team! We strive to create a playing environment that fosters Community, and personal growth. We have chosen a limited but satisfactory grouping of QoL mods that provide the best overall playing experience for your gaming experience, and a structured rule package that enhances Quality of life. We try to provide the best environment to build the base of your dreams, but also balanced with the knowledge that load times are important too!

Last of all, BE EXCELLENT TO EACH OTHER! We are all adults here, and know how to act. Let's make a happy, safe place to enjoy the games we love to play!

<figure><img src="https://772063455-files.gitbook.io/~/files/v0/b/gitbook-x-prod.appspot.com/o/spaces%2F-Lgje1lBxKKWXwqycB-v%2Fuploads%2FP2EvQETdbVDvW8pQEmcu%2FDNL_GENERIC_HEADER.png?alt=media&amp;token=32b81eed-7037-409c-99c9-75ab093543d1" alt=""><figcaption></figcaption></figure>

## Our Dark and Light PvE Servers

<table data-card-size="large" data-view="cards" data-full-width="true"><thead><tr><th align="center"></th><th align="center"></th><th align="center"></th><th data-hidden data-card-cover data-type="image">Cover image</th><th data-hidden data-card-target data-type="content-ref"></th></tr></thead><tbody><tr><td align="center"></td><td align="center"><strong>ɢᴀɪᴀ (ᴛʜᴇ sʜᴀʀᴅ)</strong> </td><td align="center">Click to Join Server !!</td><td><a href="https://772063455-files.gitbook.io/~/files/v0/b/gitbook-legacy-files/o/assets%2F-Lgje1lBxKKWXwqycB-v%2F-Lz9-cxjoc0HjAtkdEcS%2F-Lz90R_AVM0PlE9Icj86%2FThe%20Shard%20of%20faith.png?alt=media&amp;token=343dc3ab-abb7-44ab-9bf6-f4fb105f967e">The Shard of faith.png</a></td><td><a href="steam://connect/45.92.39.93:25015">steam://connect/45.92.39.93:25015</a></td></tr><tr><td align="center"></td><td align="center"><strong>ᴀʀᴄʜᴏs (ᴛʜᴇ ᴘᴀᴛʜ)</strong> </td><td align="center">Click to Join Server !!</td><td><a href="https://772063455-files.gitbook.io/~/files/v0/b/gitbook-legacy-files/o/assets%2F-Lgje1lBxKKWXwqycB-v%2F-MB2PJL7as7YXKnFUBFT%2F-MB2eRcIt9Wk3XCY2C8_%2FDNL%20The%20Path.png?alt=media&amp;token=4ac1b853-b85f-4697-b6cb-8a65515e831e">DNL The Path.png</a></td><td><a href="steam://connect/45.92.39.93:25017">steam://connect/45.92.39.93:25017</a></td></tr><tr><td align="center"></td><td align="center"><strong>Dark and Light PvE Server Rules</strong></td><td align="center"></td><td><a href="https://772063455-files.gitbook.io/~/files/v0/b/gitbook-x-prod.appspot.com/o/spaces%2F-Lgje1lBxKKWXwqycB-v%2Fuploads%2Ftu9uWNet3R9CNFV35FgS%2FDNL_2_SPLASH_2023.png?alt=media&amp;token=858eccc9-5fb2-472f-a0d7-a8f9ab2e5f00">DNL_2_SPLASH_2023.png</a></td><td><a href="https://faq.thepackgaming.com/rules/dnl">https://faq.thepackgaming.com/rules/dnl</a></td></tr><tr><td align="center"><strong>The PACK Dark and Light MOD Content pack:</strong> </td><td align="center">Click to see MODS !!</td><td align="center"></td><td><a href="https://772063455-files.gitbook.io/~/files/v0/b/gitbook-x-prod.appspot.com/o/spaces%2F-Lgje1lBxKKWXwqycB-v%2Fuploads%2FM1rkS3MqojJBEvVwlwUw%2FDark%20and%20light.jpg?alt=media&amp;token=c6c55545-d2e2-4003-ab74-0567c6ac55a5">Dark and light.jpg</a></td><td><a href="https://steamcommunity.com/sharedfiles/filedetails/?id=1962227173">https://steamcommunity.com/sharedfiles/filedetails/?id=1962227173</a></td></tr></tbody></table>

<figure><img src="https://772063455-files.gitbook.io/~/files/v0/b/gitbook-x-prod.appspot.com/o/spaces%2F-Lgje1lBxKKWXwqycB-v%2Fuploads%2FqITv0vbZWJcrPOS1H9zK%2Fimage.png?alt=media&amp;token=464b16a6-04bf-420c-b792-00ef346c5b9c" alt=""><figcaption></figcaption></figure>

## Our Mod pack and our Rates

<table data-view="cards"><thead><tr><th></th><th></th><th data-hidden data-card-cover data-type="files"></th><th data-hidden data-card-target data-type="content-ref"></th></tr></thead><tbody><tr><td><strong>The PACK Dark and Light MOD Content pack:</strong> </td><td>Click to see our MODS !!</td><td><a href="https://772063455-files.gitbook.io/~/files/v0/b/gitbook-x-prod.appspot.com/o/spaces%2F-Lgje1lBxKKWXwqycB-v%2Fuploads%2F4va4hESwFqN1e4t779oG%2Fdark-and-light.jpg?alt=media&amp;token=4d85c750-fdd2-4277-b880-2bc07706a40f">dark-and-light.jpg</a></td><td><a href="https://steamcommunity.com/sharedfiles/filedetails/?id=1962227173">https://steamcommunity.com/sharedfiles/filedetails/?id=1962227173</a></td></tr><tr><td><strong>The PACK Dark and Light Servers Settings:</strong> </td><td><strong>Our current rates are 3x Experience, 3x Harvest, 15x Taming</strong>. Both player and tames now have double the weight capacity.</td><td><a href="https://772063455-files.gitbook.io/~/files/v0/b/gitbook-x-prod.appspot.com/o/spaces%2F-Lgje1lBxKKWXwqycB-v%2Fuploads%2FM1rkS3MqojJBEvVwlwUw%2FDark%20and%20light.jpg?alt=media&amp;token=c6c55545-d2e2-4003-ab74-0567c6ac55a5">Dark and light.jpg</a></td><td></td></tr><tr><td></td><td></td><td></td><td></td></tr></tbody></table>

<figure><img src="https://772063455-files.gitbook.io/~/files/v0/b/gitbook-x-prod.appspot.com/o/spaces%2F-Lgje1lBxKKWXwqycB-v%2Fuploads%2FOEaJ8awKdKPRkNvgfXfI%2FDNL_Header_2_2023_800x200.png?alt=media&amp;token=a682b183-9514-4e7b-98df-0338be611faa" alt=""><figcaption></figcaption></figure>

## DARK AND LIGHT TRANSFER SYSTEM:

<details>

<summary>Transfer Steps:</summary>

1\) On the current server you need to travel to a World Resurrection Altar Node that is controlled by your race.

<img src="https://772063455-files.gitbook.io/~/files/v0/b/gitbook-x-prod.appspot.com/o/spaces%2F-Lgje1lBxKKWXwqycB-v%2Fuploads%2F6IMqhSyNCJiTjT8sgDAX%2FDNL_TRANSFER_1.png?alt=media&amp;token=347d8ff6-e57b-4843-9640-6d1ffb658304" alt="" data-size="original">

2\) While at the altar.\
Select Fast travel and the world map will appear.\
At the bottom of the map select the Tab Transfer to another SERVER.

<img src="https://772063455-files.gitbook.io/~/files/v0/b/gitbook-x-prod.appspot.com/o/spaces%2F-Lgje1lBxKKWXwqycB-v%2Fuploads%2FH1IwR6VGx8IrkMR4hV7L%2FDNL_TRANSFER_2.png?alt=media&amp;token=de375dd7-5dc2-44fa-b71a-1f04d04a16a0" alt="" data-size="original">

3\) The 2 Worlds will appear,\
Select the **Archos - The Path (BLUE)** or **Gaia - The Shard, (RED)** world.\
A list of servers available to transfer to will Pop up.

<img src="https://772063455-files.gitbook.io/~/files/v0/b/gitbook-x-prod.appspot.com/o/spaces%2F-Lgje1lBxKKWXwqycB-v%2Fuploads%2FrBGPrU1y7AGO21cOnGUm%2FDNL_TRANSFER_3.png?alt=media&amp;token=66b59867-2b15-4e66-8047-5dceb0625991" alt="" data-size="original">

4\) Select the server, ( either **"The PACK PvE Sacred Path 3xXP 3xH 15xT"** or **"The PACK PvE Shard 3xXP 3xH 15xT"**)

<img src="https://772063455-files.gitbook.io/~/files/v0/b/gitbook-x-prod.appspot.com/o/spaces%2F-Lgje1lBxKKWXwqycB-v%2Fuploads%2FmS718406Jzw5o9ar7Heb%2FDNL_TRANSFER_4.png?alt=media&amp;token=e36026e0-e30d-47c0-9e47-cd0ba2176adc" alt="" data-size="original">

You will need to ***WAIT*** based on the timer for your items to transfer.\
*(NOTE: often its just the timer you must wait on and you do not have items that won't transfer. There is no hard defined list of things that won't transfer, but avoid any items that are a product of a mod, just as a safety measure.)*

<img src="https://772063455-files.gitbook.io/~/files/v0/b/gitbook-x-prod.appspot.com/o/spaces%2F-Lgje1lBxKKWXwqycB-v%2Fuploads%2FrIFb1UlXizeBMvXVjqCn%2FDNL_TRANSFER_5.png?alt=media&amp;token=6b080c16-2cf4-48a0-b8ec-3fd4d6c392c4" alt="" data-size="original">

Once the timer is up click accept, and it will commence loading your character onto the new sever. (Could take up to 15 mins to transfer. Patience is needed)

5\) Once the game loads on the new Server, you will be on the World map again.

<img src="https://772063455-files.gitbook.io/~/files/v0/b/gitbook-x-prod.appspot.com/o/spaces%2F-Lgje1lBxKKWXwqycB-v%2Fuploads%2FxVaaTUhybxucu4JIbDqk%2FDNL_TRANSFER_6.png?alt=media&amp;token=61a72bb9-39f1-4daf-83be-ae43485b0582" alt="" data-size="original">

6\) Select the TAB at the bottom that says ***"Download DnL Character"***\
and you will need to wait about 10 min or longer for the character to appear on the list.\
***Select the character and click download.***

<img src="https://772063455-files.gitbook.io/~/files/v0/b/gitbook-x-prod.appspot.com/o/spaces%2F-Lgje1lBxKKWXwqycB-v%2Fuploads%2F3UUH5oRhUYWzNQKA0cz5%2FDNL_TRANSFER_7.png?alt=media&amp;token=d44f7781-a6c0-4807-b23b-5843c3fee723" alt="" data-size="original">

Now select where your character will spawn by selecting a world ***Resurrection Altar*** to travel too.

***That's it.***

</details>

<details>

<summary>Transfer Problems:</summary>

###

<mark style="color:red;">**Warning:**</mark> Transfers on an UN-Official cluster are not always guaranteed to happen smoothly, and without loss of inventory items. ***We are unable to provide any refunds to persons or clans for loss of items, resources, in-game properties and so on, regardless of the reason.***

**There have been reports of players losing their character by using the transmitting-feature.** This is often caused by Steam cloud error, client crash, server rollback/maintenance (restarts), or client buffer overload issues, when attempting to download or upload before the next server save, so use this feature at your own risk. **Sometimes items are lost when transferring. This is why we ask that you wait 15 to 30 mins, so the server saves the players inventory.** If you only carry a small amount of items in your inventory, you will transfer without as many issues. Transferring pets and tames in soul stones may or may not work. ***Those that are modded by "Invasion - The Shard" for use in  “The Path”, will not transfer.***

#### Client Crashes that result in death.

***When you transfer:*** Keep in mind that your data goes into the **Steam Cloud network** and The Pack Gaming Owners and Admins have no way to recover this data. ***DO NOT TRANSFER from 20 MIN. Prior to a RESTART, and wait 30 Min. AFTER a Restart to Transfer again.*** So that data is properly transferred and not lost.

**Characters/Tames/Items uploaded to Steam Data cloud have a 24-hour time limit.**&#x20;

Ensure you are set to download them into another server before the timer runs out, or else your items will decay in your Steam upload when the timer goes past 0.

#### Some tips for recovering a "Lost in Transmission Character"

Sometimes when transferring the game drops out, you just need to rejoin the server.

If you attempt to upload after the 5 min. to restart warning from a server, and you lost your character on the server you transferred TO, the game will still force you to create a new character as if you do not have any on the server despite it existing. Please return to the server you uploaded from to regain your character.&#x20;

#### Server Restarts, and Server Crashes (Not Client Side Crashes)

Server Restarts, and Server Crashes will have a 15 to 30 min. Rollback to the save Prior to the restart, or the last save before the Crash. All Data collected between the Save time stamp and the restart or Crash will be erased. This means if you ***transfer in or out just before a RESTART*** your information and what you have pulled out of the terminal will be deleted. The Pack Gaming is not responsible for replacing items or dinos.

</details>

<figure><img src="https://772063455-files.gitbook.io/~/files/v0/b/gitbook-x-prod.appspot.com/o/spaces%2F-Lgje1lBxKKWXwqycB-v%2Fuploads%2FhnafhUmwgSSYnnQVvZFS%2FDNL_Header_2023_1248x200.png?alt=media&amp;token=422ab366-2e0e-43bf-8664-729228886eaf" alt=""><figcaption></figcaption></figure>

<figure><img src="https://cdn.akamai.steamstatic.com/steam/apps/529180/extras/logo1.png?t=1666906165" alt="" width="375"><figcaption></figcaption></figure>

The shattered remains of the mother planet Gaia float in stark contrast against the sky on nearby satellite planet, Archos, serving as inescapable evidence of the dark forces surrounding the world. As a lone explorer in the wilderness, you must learn to understand the terrain, natural resources, as well as how to domesticate the local creatures and build a home. You will need to harness and control the magical energy that courses through the planet, or you risk being consumed by the looming darkness that permeates throughout the planet.

<figure><img src="https://cdn.akamai.steamstatic.com/steam/apps/529180/extras/456.png?t=1666906165" alt="" width="375"><figcaption></figcaption></figure>

<figure><img src="https://cdn.akamai.steamstatic.com/steam/apps/529180/extras/y-1.png?t=1666906165" alt=""><figcaption></figcaption></figure>

Every aspect of Dark and Light has been re-imagined, re-worked, and upgraded from the 2004 original. Gaia’s very existence is dictated by primal elemental forces, including wind, earth, water, fire, light, and darkness.&#x20;

<figure><img src="https://cdn.akamai.steamstatic.com/steam/apps/529180/extras/y-2.png?t=1666906165" alt=""><figcaption></figcaption></figure>

Ages ago, Gaia was attacked by dark forces and collapsed, plunging the world into darkness. Many sought exodus to Archos, one of Gaia’s satellite planets - unwittingly (or for some, perhaps intentionally) bringing the dark forces along with them. As a result, Archos’s atmosphere has been adversely affected, causing some strange occurrences on the planet during the night.&#x20;

<figure><img src="https://772063455-files.gitbook.io/~/files/v0/b/gitbook-x-prod.appspot.com/o/spaces%2F-Lgje1lBxKKWXwqycB-v%2Fuploads%2FLy1yCSd28QLTWUzP7fsz%2Fimage.png?alt=media&amp;token=eaaec419-e7d3-4f43-8a33-471073ef21b5" alt=""><figcaption></figcaption></figure>

<figure><img src="https://cdn.akamai.steamstatic.com/steam/apps/529180/extras/213.png?t=1666906165" alt="" width="375"><figcaption></figcaption></figure>

Magic permeates throughout everything Dark and Light, and the line between physical and magical becomes increasingly blurred as the game progresses. There are dozens of magical skills related to survival, exploration, defense, transformation, control, attack, and more.&#x20;

<figure><img src="https://772063455-files.gitbook.io/~/files/v0/b/gitbook-x-prod.appspot.com/o/spaces%2F-Lgje1lBxKKWXwqycB-v%2Fuploads%2FTtkMkNcGQvH3hKAQjKqk%2Fimage.png?alt=media&amp;token=8f0766c5-1fab-4dd7-9907-09c776f6432e" alt=""><figcaption></figcaption></figure>

Dark and Light features dozens of magical beasts, including dragons, griffins, unicorns, centaurs, goblins, and many, many more. There are also plenty of unique creatures that players have never seen before, and all are native to this planet.&#x20;

<figure><img src="https://772063455-files.gitbook.io/~/files/v0/b/gitbook-x-prod.appspot.com/o/spaces%2F-Lgje1lBxKKWXwqycB-v%2Fuploads%2F5zYrVn5VFMVidVzTh87i%2Fimage.png?alt=media&amp;token=dcf081e6-197e-4ff8-af5e-7ce165671d68" alt=""><figcaption></figcaption></figure>

Players and NPCs can all progress through their own growth systems, and players can choose which skills they want their characters to master. These include both physical skills such as speed, endurance, and strength, but can also apply to a character's crafting abilities.&#x20;

<figure><img src="https://772063455-files.gitbook.io/~/files/v0/b/gitbook-x-prod.appspot.com/o/spaces%2F-Lgje1lBxKKWXwqycB-v%2Fuploads%2FHtCuW87rHvEu0I7PrGuF%2Fimage.png?alt=media&amp;token=317bb1a6-bcb0-4cc8-9be7-15b2a413082f" alt=""><figcaption></figcaption></figure>

<figure><img src="https://772063455-files.gitbook.io/~/files/v0/b/gitbook-x-prod.appspot.com/o/spaces%2F-Lgje1lBxKKWXwqycB-v%2Fuploads%2FBV15XeKpEVY5vLTyn2KH%2Fimage.png?alt=media&amp;token=ac6da713-a714-4bb4-b408-90d0ad53a03f" alt="" width="320"><figcaption></figcaption></figure>

Dark and Light is designed to encourage cooperation at every level; survival, exploration, and combat are all incredibly demanding, and few will be able to fully master their surroundings.

<figure><img src="https://772063455-files.gitbook.io/~/files/v0/b/gitbook-x-prod.appspot.com/o/spaces%2F-Lgje1lBxKKWXwqycB-v%2Fuploads%2FzIjCWof92d4FxmpSK9QK%2Fimage.png?alt=media&amp;token=5af4cb6f-f776-434d-9cbf-bd27fb092363" alt=""><figcaption></figcaption></figure>

Dark and Light's sandbox world affords players the freedom to create and build just about anywhere in the world. Whether you want a secret underground base or a fortress atop a massive floating island, if you can reach it, you can build there. As the forces of darkness simmer on the horizon, defending your homestead will become increasingly important.&#x20;

<figure><img src="https://cdn.akamai.steamstatic.com/steam/apps/529180/extras/y-8.png?t=1666906165" alt=""><figcaption></figcaption></figure>

Archos is still threatened by the total collapse of Gaia and a massive invasion by the forces of darkness. Even though the portals that link Archos to Gaia have closed, darkness emanates from the mother planet, affecting all the living creatures on Archos. Whether to embrace the darkness or fight it is a choice that remains solely with you, and it is your choice that will represent the future of the world.<br>

<figure><img src="https://cdn.akamai.steamstatic.com/steam/apps/529180/extras/qwe.png?t=1666906165" alt="" width="375"><figcaption></figcaption></figure>

### SYSTEM REQUIREMENTS

<table data-card-size="large" data-view="cards" data-full-width="true"><thead><tr><th align="center"></th><th></th><th></th></tr></thead><tbody><tr><td align="center"><strong>MINIMUM:</strong></td><td><strong>OS:</strong> 64-Bit Windows 7 Service Pack 1, Windows 8, or Windows 10<br><strong>Processor:</strong> Intel Core i5 2500K<br><strong>Memory:</strong> 8 GB RAM</td><td><strong>Graphics:</strong> GeForce GTX 960 or higher<br><strong>DirectX:</strong> Version 10<br><strong>Storage:</strong> 50 GB available space</td></tr><tr><td align="center"><strong>RECOMMENDED:</strong></td><td><strong>OS:</strong> 64-Bit Windows 7 Service Pack 1, Windows 8, or Windows 10<br><strong>Processor:</strong> Intel Core i7-5820k 6x 3.3 GHz<br><strong>Memory:</strong> 16 GB RAM</td><td><strong>Graphics:</strong> GeForce GTX 1070 or higher<br><strong>DirectX:</strong> Version 10<br><strong>Storage:</strong> 50 GB available space</td></tr></tbody></table>

test

<figure><img src="https://772063455-files.gitbook.io/~/files/v0/b/gitbook-x-prod.appspot.com/o/spaces%2F-Lgje1lBxKKWXwqycB-v%2Fuploads%2F7DLDcONo82ntlyaPc8PV%2FDNL_1.png?alt=media&amp;token=0f7961fd-f44f-4d74-849b-189fd721deb1" alt=""><figcaption></figcaption></figure>

#### Owners Vision

OUR MOTTO! ALL MAY ENTER HERE WITHOUT PREJUDICE! This applies to All Races, All Creeds, and All Genders. All are Welcome!!!

We are an adult gaming community, and we are looking for quality players to join our adventures. We host two PvE Dark and Light Servers. The Path, and The Shard! We are Beginner friendly, with a Helpful and active admin team! We strive to create a playing environment that fosters Community, and personal growth. We have chosen a limited but satisfactory grouping of QoL mods that provide the best overall playing experience for your gaming experience, and a structured rule package that enhances Quality of life. We try to provide the best environment to build the base of your dreams, but also balanced with the knowledge that load times are important too!

Last of all, BE EXCELLENT TO EACH OTHER! We are all adults here, and know how to act. Let's make a happy, safe place to enjoy the games we love to play!

<figure><img src="https://772063455-files.gitbook.io/~/files/v0/b/gitbook-x-prod.appspot.com/o/spaces%2F-Lgje1lBxKKWXwqycB-v%2Fuploads%2FP2EvQETdbVDvW8pQEmcu%2FDNL_GENERIC_HEADER.png?alt=media&amp;token=32b81eed-7037-409c-99c9-75ab093543d1" alt=""><figcaption></figcaption></figure>

## Our Dark and Light PvE Servers

<table data-card-size="large" data-view="cards" data-full-width="true"><thead><tr><th align="center"></th><th align="center"></th><th align="center"></th><th data-hidden data-card-cover data-type="files"></th><th data-hidden data-card-target data-type="content-ref"></th></tr></thead><tbody><tr><td align="center"></td><td align="center"><strong>ɢᴀɪᴀ (ᴛʜᴇ sʜᴀʀᴅ)</strong> </td><td align="center">Click to Join Server !!</td><td><a href="https://772063455-files.gitbook.io/~/files/v0/b/gitbook-legacy-files/o/assets%2F-Lgje1lBxKKWXwqycB-v%2F-Lz9-cxjoc0HjAtkdEcS%2F-Lz90R_AVM0PlE9Icj86%2FThe%20Shard%20of%20faith.png?alt=media&amp;token=343dc3ab-abb7-44ab-9bf6-f4fb105f967e">The Shard of faith.png</a></td><td><a href="steam://connect/45.92.39.93:25015">steam://connect/45.92.39.93:25015</a></td></tr><tr><td align="center"></td><td align="center"><strong>ᴀʀᴄʜᴏs (ᴛʜᴇ ᴘᴀᴛʜ)</strong> </td><td align="center">Click to Join Server !!</td><td><a href="https://772063455-files.gitbook.io/~/files/v0/b/gitbook-legacy-files/o/assets%2F-Lgje1lBxKKWXwqycB-v%2F-MB2PJL7as7YXKnFUBFT%2F-MB2eRcIt9Wk3XCY2C8_%2FDNL%20The%20Path.png?alt=media&amp;token=4ac1b853-b85f-4697-b6cb-8a65515e831e">DNL The Path.png</a></td><td><a href="steam://connect/45.92.39.93:25017">steam://connect/45.92.39.93:25017</a></td></tr><tr><td align="center"></td><td align="center"><strong>Dark and Light PvE Server Rules</strong></td><td align="center"></td><td><a href="https://772063455-files.gitbook.io/~/files/v0/b/gitbook-x-prod.appspot.com/o/spaces%2F-Lgje1lBxKKWXwqycB-v%2Fuploads%2Ftu9uWNet3R9CNFV35FgS%2FDNL_2_SPLASH_2023.png?alt=media&amp;token=858eccc9-5fb2-472f-a0d7-a8f9ab2e5f00">DNL_2_SPLASH_2023.png</a></td><td><a href="https://faq.thepackgaming.com/rules/dnl">https://faq.thepackgaming.com/rules/dnl</a></td></tr><tr><td align="center"><img src="https://772063455-files.gitbook.io/~/files/v0/b/gitbook-x-prod.appspot.com/o/spaces%2F-Lgje1lBxKKWXwqycB-v%2Fuploads%2FGoMNQ41Wof5kFzU8JC7r%2Fimage.png?alt=media&amp;token=f45b1f65-2592-41ce-a83b-227f1eac52dc" alt=""></td><td align="center"><strong>The PACK Dark and Light MOD Content pack:</strong> </td><td align="center">Click to see MODS !!</td><td></td><td><a href="https://steamcommunity.com/sharedfiles/filedetails/?id=1962227173">https://steamcommunity.com/sharedfiles/filedetails/?id=1962227173</a></td></tr></tbody></table>

<figure><img src="https://772063455-files.gitbook.io/~/files/v0/b/gitbook-x-prod.appspot.com/o/spaces%2F-Lgje1lBxKKWXwqycB-v%2Fuploads%2FOEaJ8awKdKPRkNvgfXfI%2FDNL_Header_2_2023_800x200.png?alt=media&amp;token=a682b183-9514-4e7b-98df-0338be611faa" alt=""><figcaption></figcaption></figure>

## DARK AND LIGHT TRANSFER SYSTEM:

<details>

<summary>Transfer Steps:</summary>

1\) On the current server you need to travel to a World Resurrection Altar Node that is controlled by your race.

<img src="https://772063455-files.gitbook.io/~/files/v0/b/gitbook-x-prod.appspot.com/o/spaces%2F-Lgje1lBxKKWXwqycB-v%2Fuploads%2F6IMqhSyNCJiTjT8sgDAX%2FDNL_TRANSFER_1.png?alt=media&amp;token=347d8ff6-e57b-4843-9640-6d1ffb658304" alt="" data-size="original">

2\) While at the altar.\
Select Fast travel and the world map will appear.\
At the bottom of the map select the Tab Transfer to another SERVER.

<img src="https://772063455-files.gitbook.io/~/files/v0/b/gitbook-x-prod.appspot.com/o/spaces%2F-Lgje1lBxKKWXwqycB-v%2Fuploads%2FH1IwR6VGx8IrkMR4hV7L%2FDNL_TRANSFER_2.png?alt=media&amp;token=de375dd7-5dc2-44fa-b71a-1f04d04a16a0" alt="" data-size="original">

3\) The 2 Worlds will appear,\
Select the **Archos - The Path (BLUE)** or **Gaia - The Shard, (RED)** world.\
A list of servers available to transfer to will Pop up.

<img src="https://772063455-files.gitbook.io/~/files/v0/b/gitbook-x-prod.appspot.com/o/spaces%2F-Lgje1lBxKKWXwqycB-v%2Fuploads%2FrBGPrU1y7AGO21cOnGUm%2FDNL_TRANSFER_3.png?alt=media&amp;token=66b59867-2b15-4e66-8047-5dceb0625991" alt="" data-size="original">

4\) Select the server, ( either **"The PACK PvE Sacred Path 3xXP 3xH 15xT"** or **"The PACK PvE Shard 3xXP 3xH 15xT"**)

<img src="https://772063455-files.gitbook.io/~/files/v0/b/gitbook-x-prod.appspot.com/o/spaces%2F-Lgje1lBxKKWXwqycB-v%2Fuploads%2FmS718406Jzw5o9ar7Heb%2FDNL_TRANSFER_4.png?alt=media&amp;token=e36026e0-e30d-47c0-9e47-cd0ba2176adc" alt="" data-size="original">

You will need to ***WAIT*** based on the timer for your items to transfer.\
*(NOTE: often its just the timer you must wait on and you do not have items that won't transfer. There is no hard defined list of things that won't transfer, but avoid any items that are a product of a mod, just as a safety measure.)*

<img src="https://772063455-files.gitbook.io/~/files/v0/b/gitbook-x-prod.appspot.com/o/spaces%2F-Lgje1lBxKKWXwqycB-v%2Fuploads%2FrIFb1UlXizeBMvXVjqCn%2FDNL_TRANSFER_5.png?alt=media&amp;token=6b080c16-2cf4-48a0-b8ec-3fd4d6c392c4" alt="" data-size="original">

Once the timer is up click accept, and it will commence loading your character onto the new sever. (Could take up to 15 mins to transfer. Patience is needed)

5\) Once the game loads on the new Server, you will be on the World map again.

<img src="https://772063455-files.gitbook.io/~/files/v0/b/gitbook-x-prod.appspot.com/o/spaces%2F-Lgje1lBxKKWXwqycB-v%2Fuploads%2FxVaaTUhybxucu4JIbDqk%2FDNL_TRANSFER_6.png?alt=media&amp;token=61a72bb9-39f1-4daf-83be-ae43485b0582" alt="" data-size="original">

6\) Select the TAB at the bottom that says ***"Download DnL Character"***\
and you will need to wait about 10 min or longer for the character to appear on the list.\
***Select the character and click download.***

<img src="https://772063455-files.gitbook.io/~/files/v0/b/gitbook-x-prod.appspot.com/o/spaces%2F-Lgje1lBxKKWXwqycB-v%2Fuploads%2F3UUH5oRhUYWzNQKA0cz5%2FDNL_TRANSFER_7.png?alt=media&amp;token=d44f7781-a6c0-4807-b23b-5843c3fee723" alt="" data-size="original">

Now select where your character will spawn by selecting a world ***Resurrection Altar*** to travel too.

***That's it.***

</details>

<details>

<summary>Transfer Problems:</summary>

###

<mark style="color:red;">**Warning:**</mark> Transfers on an UN-Official cluster are not always guaranteed to happen smoothly, and without loss of inventory items. ***We are unable to provide any refunds to persons or clans for loss of items, resources, in-game properties and so on, regardless of the reason.***

**There have been reports of players losing their character by using the transmitting-feature.** This is often caused by Steam cloud error, client crash, server rollback/maintenance (restarts), or client buffer overload issues, when attempting to download or upload before the next server save, so use this feature at your own risk. **Sometimes items are lost when transferring. This is why we ask that you wait 15 to 30 mins, so the server saves the players inventory.** If you only carry a small amount of items in your inventory, you will transfer without as many issues. Transferring pets and tames in soul stones may or may not work. ***Those that are modded by "Invasion - The Shard" for use in  “The Path”, will not transfer.***

#### Client Crashes that result in death.

***When you transfer:*** Keep in mind that your data goes into the **Steam Cloud network** and The Pack Gaming Owners and Admins have no way to recover this data. ***DO NOT TRANSFER from 20 MIN. Prior to a RESTART, and wait 30 Min. AFTER a Restart to Transfer again.*** So that data is properly transferred and not lost.

**Characters/Tames/Items uploaded to Steam Data cloud have a 24-hour time limit.**&#x20;

Ensure you are set to download them into another server before the timer runs out, or else your items will decay in your Steam upload when the timer goes past 0.

#### Some tips for recovering a "Lost in Transmission Character"

Sometimes when transferring the game drops out, you just need to rejoin the server.

If you attempt to upload after the 5 min. to restart warning from a server, and you lost your character on the server you transferred TO, the game will still force you to create a new character as if you do not have any on the server despite it existing. Please return to the server you uploaded from to regain your character.&#x20;

#### Server Restarts, and Server Crashes (Not Client Side Crashes)

Server Restarts, and Server Crashes will have a 15 to 30 min. Rollback to the save Prior to the restart, or the last save before the Crash. All Data collected between the Save time stamp and the restart or Crash will be erased. This means if you ***transfer in or out just before a RESTART*** your information and what you have pulled out of the terminal will be deleted. The Pack Gaming is not responsible for replacing items or dinos.

</details>

<figure><img src="https://772063455-files.gitbook.io/~/files/v0/b/gitbook-x-prod.appspot.com/o/spaces%2F-Lgje1lBxKKWXwqycB-v%2Fuploads%2FhnafhUmwgSSYnnQVvZFS%2FDNL_Header_2023_1248x200.png?alt=media&amp;token=422ab366-2e0e-43bf-8664-729228886eaf" alt=""><figcaption></figcaption></figure>

## ***Our Patreon's***&#x20;

![](https://772063455-files.gitbook.io/~/files/v0/b/gitbook-x-prod.appspot.com/o/spaces%2F-Lgje1lBxKKWXwqycB-v%2Fuploads%2FKFiZHHlgN1QM69t5DejF%2FPACK_PATREON.png?alt=media\&token=d8b84080-d3a0-4bcf-903f-ec3c9cebe9e3)

*Will receive generous perks in our Dark and Light Servers.*

Please see the Patreon Role listings to see just what you can get as an IN GAME PERK!

{% embed url="<https://faq.thepackgaming.com/patreon#our-patreon-perks>" %}

<figure><img src="https://772063455-files.gitbook.io/~/files/v0/b/gitbook-x-prod.appspot.com/o/spaces%2F-Lgje1lBxKKWXwqycB-v%2Fuploads%2FQLWnhvGrxW8h1a5oafMn%2Fimage.png?alt=media&amp;token=f947b0ed-3ebf-4df3-b242-3756803e4b51" alt=""><figcaption></figcaption></figure>


# Dark and Light \~ The PATH

![The Sacred Path](https://772063455-files.gitbook.io/~/files/v0/b/gitbook-legacy-files/o/assets%2F-Lgje1lBxKKWXwqycB-v%2F-Lz9-cxjoc0HjAtkdEcS%2F-LxgX0VHNsyettzN9caB%2Fdark-and-light.jpg?alt=media\&token=01b34f68-0e9a-4ecf-a146-d651cd7e4e94)

*"The shattered remains of the mother planet Gaia float in stark contrast against the sky on nearby satellite planet, Archos, serving as inescapable evidence of the dark forces surrounding the world. As a lone explorer in the wilderness, you must learn to understand the terrain, natural resources, as well as how to domesticate the local creatures and build a home. You will need to harness and control the magical energy that courses through the planet, or you risk being consumed by the looming darkness that permeates throughout the planet."*&#x20;

<figure><img src="https://772063455-files.gitbook.io/~/files/v0/b/gitbook-x-prod.appspot.com/o/spaces%2F-Lgje1lBxKKWXwqycB-v%2Fuploads%2FIqVHwspiRb0eTY7dixnS%2Fimage.png?alt=media&amp;token=7afdc8d5-74c4-4eec-ba58-5714f8e66301" alt=""><figcaption></figcaption></figure>

<table data-card-size="large" data-view="cards" data-full-width="true"><thead><tr><th align="center"></th><th align="center"></th><th align="center"></th><th data-hidden data-card-target data-type="content-ref"></th></tr></thead><tbody><tr><td align="center"><img src="https://772063455-files.gitbook.io/~/files/v0/b/gitbook-x-prod.appspot.com/o/spaces%2F-Lgje1lBxKKWXwqycB-v%2Fuploads%2FVpVRgCUDGDJf4JujjxSh%2Fimage.png?alt=media&amp;token=59ed0d32-697e-4734-a443-5c967e388267" alt=""></td><td align="center"><strong>ᴀʀᴄʜᴏs (ᴛʜᴇ ᴘᴀᴛʜ)</strong> </td><td align="center">Click to join Server!</td><td><a href="steam://connect/45.92.39.93:25017">steam://connect/45.92.39.93:25017</a></td></tr><tr><td align="center"></td><td align="center"><strong>Our current rates are 3x Experience, 3x Harvest, 15x Taming</strong>. Both player and tames now have double the weight capacity.</td><td align="center"></td><td></td></tr><tr><td align="center"><img src="https://772063455-files.gitbook.io/~/files/v0/b/gitbook-x-prod.appspot.com/o/spaces%2F-Lgje1lBxKKWXwqycB-v%2Fuploads%2F01V4V8UqJGzT3rPnq7Mb%2Fimage.png?alt=media&amp;token=0a3e04b4-5785-424c-b47a-048ede46ffd7" alt=""></td><td align="center">The Sacred Path</td><td align="center">POI Map</td><td></td></tr><tr><td align="center"><img src="https://772063455-files.gitbook.io/~/files/v0/b/gitbook-x-prod.appspot.com/o/spaces%2F-Lgje1lBxKKWXwqycB-v%2Fuploads%2Fbotsz3BP5Xu9sxPyB4I9%2Fimage.png?alt=media&amp;token=72ea966e-64a9-4774-ab6c-ee31fccd24ba" alt=""></td><td align="center">The Sacred Path</td><td align="center">Resource Map</td><td></td></tr></tbody></table>

<figure><img src="https://772063455-files.gitbook.io/~/files/v0/b/gitbook-x-prod.appspot.com/o/spaces%2F-Lgje1lBxKKWXwqycB-v%2Fuploads%2FXdcBojstNxoKAiHpTrHn%2Fimage.png?alt=media&amp;token=9a05fe40-8606-4fae-8c77-a8c0b8ab79e1" alt=""><figcaption></figcaption></figure>

## Our added mod The Invasion and how it works.

<details>

<summary>The Invasion has begun.</summary>

This Mod adds **spawn points on The Sacred Path** for many of the creatures from the Shard of Faith DLC, and **adds new hunter vendors in the cities** where you can purchase the saddles and suppression stones for them. **Also, you can now additionally harvest Crimson Ore from Darkstone Nodes.**

</details>

<details>

<summary>Wild Creature Spawns:</summary>

**Snowfoxes and Piglings** - Spawns near the 3 main cities. Piglings can be scattered through several of the forests near the cities as well.\
**Uillip** - Spawns in the ruins near the 3 main cities as well as the ruins near the Snow Mountains. (The ones near the human city like to run down to the beach and play with Rabbits)\
**Kasha** - Spawns in many of the forests and can also be found on the plains as well.\
**Bufo** - Spawns in rivers scattered throughout the map. (Currently their spawn has been reduced and can be found mostly in deeper rivers)\
**Dharkhu** - Spawns in the mountains, the higher you go, the more there are. (Spawn rate is slightly lower than originally set)\
**Overseer** - Spawns in the forests (near cities as well) and in the lower mountains.\
**Scarab** - Spawns on the beaches and some cliffs near the ocean. \
**Boglord (Withered Treant)** - Spawns in and around the Moors. (Mushroom forest)\
**Spectre** - Spawns in Death forest and The Shipwreck. Pretty much anywhere reapers spawn naturally. (Spawn rate is reduced on the main continent and increased at the shipwreck)\
**Ice Golem** - Spawns almost everywhere Earth Elementals spawn. (Half of the current Earth Elementals have been converted to Ice Golems to ensure balance)\
**Dune Threshers** - Spawns near the beaches and the base of Volcano Island.\
**Owl** - Spawns near the base of mountains and near most Unicorn spawn points. (Currently slightly low)\
**Ice Dragon** - Ice Dragon Spawn has been added to the top of the Largest Snow Mountain as **a Rare**. (Please keep an eye out for any overpopulation since they do tend to wander and allow more to spawn eventually.)

</details>

<details>

<summary>The Vendors: </summary>

&#x20;  The hunter Vendors have twins now that sell the suppression stones for Uillip and Overseers. As well as the saddles for Bufo, Kasha, and Dharkhu. They sell the saddles at roughly the same donation amount as Panther Saddles. -Hunter Vendors have been updated to sell items required to Revive Uillip and Overseers. (Tetrachromat Beads, Shade Essence, Crystalline Eye Beam, Smoldering Core)\
&#x20;    The vendors also share Development status with the current Hunter Vendors. So if you donate to either one they both will receive the development towards purchases. (The new vendors do not purchase any items, they do sell some of the same stuff as the originals, extra feed and the such)\
&#x20;    The new vendors look like the current hunter vendors and are very close to their originals so they are easy to find.

</details>

## ***Our Patreon's***&#x20;

![](https://772063455-files.gitbook.io/~/files/v0/b/gitbook-x-prod.appspot.com/o/spaces%2F-Lgje1lBxKKWXwqycB-v%2Fuploads%2FKFiZHHlgN1QM69t5DejF%2FPACK_PATREON.png?alt=media\&token=d8b84080-d3a0-4bcf-903f-ec3c9cebe9e3)

*Will receive generous perks in our Dark and Light Servers.*

Please see the Patreon Role listings to see just what you can get as an IN GAME PERK!

{% embed url="<https://faq.thepackgaming.com/patreon#our-patreon-perks>" %}

<figure><img src="https://772063455-files.gitbook.io/~/files/v0/b/gitbook-x-prod.appspot.com/o/spaces%2F-Lgje1lBxKKWXwqycB-v%2Fuploads%2FQLWnhvGrxW8h1a5oafMn%2Fimage.png?alt=media&amp;token=f947b0ed-3ebf-4df3-b242-3756803e4b51" alt=""><figcaption></figcaption></figure>


# Dark and Light \~ THE SHARD

![The Shard of Light](https://772063455-files.gitbook.io/~/files/v0/b/gitbook-legacy-files/o/assets%2F-Lgje1lBxKKWXwqycB-v%2F-Lz9-cxjoc0HjAtkdEcS%2F-Lz90R_AVM0PlE9Icj86%2FThe%20Shard%20of%20faith.png?alt=media\&token=343dc3ab-abb7-44ab-9bf6-f4fb105f967e)

*"The first expansion to Dark and Light, Shard of Faith, features Adventurers’ expedition to Ganareth’s Shard for the purpose of stopping the corruption that encroaches mother planet Gaia. Adventurers will uncover new power of mysterious Faith, and fight against the forces of darkness with the help of ancient God and deities."*

Shard of Faith provides a entirely new map: Garaneth’s Shard \
● With the cross scene and cross plane feature, it expands and supplements the larger universe of Dark and Light. (Currently Cross Plane is unavailable due to difficulties with duplicate abuse)\
● New races are brought in. As adventurers build up a relationship with these races, they will be able to model after the esteemed heroes amongst these races, and use their heroes’ abilities. \
● A new magical taming system allows adventurers to tame and summon creatures with magical circle. \
● Improvement on the core system, including Quest system, Knowledge system, as well as optimization and adjustment to character death drop.

<figure><img src="https://772063455-files.gitbook.io/~/files/v0/b/gitbook-x-prod.appspot.com/o/spaces%2F-Lgje1lBxKKWXwqycB-v%2Fuploads%2F2D8yVIZuFWuhXkFMoRTw%2Fimage.png?alt=media&amp;token=e34d3de6-5db2-4c54-aecd-0fbaad7dfe0a" alt=""><figcaption></figcaption></figure>

<table data-card-size="large" data-view="cards" data-full-width="true"><thead><tr><th align="center"></th><th align="center"></th><th align="center"></th><th data-hidden data-card-cover data-type="files"></th><th data-hidden data-card-target data-type="content-ref"></th></tr></thead><tbody><tr><td align="center"></td><td align="center"><strong>ɢᴀɪᴀ (ᴛʜᴇ sʜᴀʀᴅ)</strong> </td><td align="center">Click to Join Server !!</td><td><a href="https://772063455-files.gitbook.io/~/files/v0/b/gitbook-legacy-files/o/assets%2F-Lgje1lBxKKWXwqycB-v%2F-Lz9-cxjoc0HjAtkdEcS%2F-Lz90R_AVM0PlE9Icj86%2FThe%20Shard%20of%20faith.png?alt=media&amp;token=343dc3ab-abb7-44ab-9bf6-f4fb105f967e">The Shard of faith.png</a></td><td><a href="steam://connect/45.92.39.93:25015">steam://connect/45.92.39.93:25015</a></td></tr><tr><td align="center"></td><td align="center"><strong>Dark and Light PvE Server Rules</strong></td><td align="center"></td><td><a href="https://772063455-files.gitbook.io/~/files/v0/b/gitbook-x-prod.appspot.com/o/spaces%2F-Lgje1lBxKKWXwqycB-v%2Fuploads%2Ftu9uWNet3R9CNFV35FgS%2FDNL_2_SPLASH_2023.png?alt=media&amp;token=858eccc9-5fb2-472f-a0d7-a8f9ab2e5f00">DNL_2_SPLASH_2023.png</a></td><td><a href="https://faq.thepackgaming.com/rules/dnl">https://faq.thepackgaming.com/rules/dnl</a></td></tr><tr><td align="center"><img src="https://772063455-files.gitbook.io/~/files/v0/b/gitbook-x-prod.appspot.com/o/spaces%2F-Lgje1lBxKKWXwqycB-v%2Fuploads%2FGoMNQ41Wof5kFzU8JC7r%2Fimage.png?alt=media&amp;token=f45b1f65-2592-41ce-a83b-227f1eac52dc" alt=""></td><td align="center"><strong>The PACK Dark and Light MOD Content pack:</strong> </td><td align="center">Click to see MODS !!</td><td></td><td><a href="https://steamcommunity.com/sharedfiles/filedetails/?id=1962227173">https://steamcommunity.com/sharedfiles/filedetails/?id=1962227173</a></td></tr><tr><td align="center"></td><td align="center"><strong>Our current rates are 3x Experience, 3x Harvest, 15x Taming</strong>. Both player and tames now have double the weight capacity.</td><td align="center"></td><td></td><td></td></tr><tr><td align="center"><img src="https://772063455-files.gitbook.io/~/files/v0/b/gitbook-x-prod.appspot.com/o/spaces%2F-Lgje1lBxKKWXwqycB-v%2Fuploads%2FcppsfMuxdgMKl3dmyXms%2Fimage.png?alt=media&amp;token=f82e729f-cc78-4dd9-b896-0f0524ddbfe3" alt=""></td><td align="center">The Shard</td><td align="center">Resource Map</td><td></td><td></td></tr><tr><td align="center"><img src="https://772063455-files.gitbook.io/~/files/v0/b/gitbook-x-prod.appspot.com/o/spaces%2F-Lgje1lBxKKWXwqycB-v%2Fuploads%2FQqwRG0MN1hPWseVlw4f0%2Fimage.png?alt=media&amp;token=d0d3bbba-2d36-4587-b386-e18b5901fab6" alt=""></td><td align="center">The Shard</td><td align="center">POI's Map</td><td></td><td></td></tr></tbody></table>

<figure><img src="https://772063455-files.gitbook.io/~/files/v0/b/gitbook-x-prod.appspot.com/o/spaces%2F-Lgje1lBxKKWXwqycB-v%2Fuploads%2FFScvyO3MLjxHjpFn3I4X%2Fimage.png?alt=media&amp;token=6a4d0dc9-f2b4-4e0b-85c0-5f5bd44e92de" alt=""><figcaption></figcaption></figure>

## ***Our Patreon's***&#x20;

![](https://772063455-files.gitbook.io/~/files/v0/b/gitbook-x-prod.appspot.com/o/spaces%2F-Lgje1lBxKKWXwqycB-v%2Fuploads%2FKFiZHHlgN1QM69t5DejF%2FPACK_PATREON.png?alt=media\&token=d8b84080-d3a0-4bcf-903f-ec3c9cebe9e3)

*Will receive generous perks in our Dark and Light Servers.*

Please see the Patreon Role listings to see just what you can get as an IN GAME PERK!

{% embed url="<https://faq.thepackgaming.com/patreon#our-patreon-perks>" %}

<figure><img src="https://772063455-files.gitbook.io/~/files/v0/b/gitbook-x-prod.appspot.com/o/spaces%2F-Lgje1lBxKKWXwqycB-v%2Fuploads%2FQLWnhvGrxW8h1a5oafMn%2Fimage.png?alt=media&amp;token=f947b0ed-3ebf-4df3-b242-3756803e4b51" alt=""><figcaption></figcaption></figure>


# The Pack Palworld PvE Server

## **Navigation of Pages:**

<table data-view="cards"><thead><tr><th></th><th></th></tr></thead><tbody><tr><td><strong>Left side of the page</strong> <span data-gb-custom-inline data-tag="emoji" data-code="25c0">◀️</span></td><td>Use the <strong>></strong> to open any pages in that section when the Header shows a <strong>></strong>.</td></tr><tr><td><strong>Right Side</strong> of the page <span data-gb-custom-inline data-tag="emoji" data-code="25b6">▶️</span></td><td>Click a header to go to that section of this page.</td></tr><tr><td><strong>Features of the page.</strong></td><td>are in an <strong>expandable box</strong>, please click the <strong>></strong> to open the expandable dropdown.</td></tr><tr><td><strong>Hyperlink</strong>s are often in a <strong>card form</strong> in the website.</td><td>So <strong>clicking an image</strong> will often take you to a specific page for information. </td></tr><tr><td><strong>Steam-link</strong>s are often in a <strong>card form</strong> in the website.</td><td>So <strong>clicking on a server card</strong> will take you to the Server.</td></tr></tbody></table>

<figure><img src="https://772063455-files.gitbook.io/~/files/v0/b/gitbook-x-prod.appspot.com/o/spaces%2F-Lgje1lBxKKWXwqycB-v%2Fuploads%2FCGyiiyDpcv91PRIxbDMu%2FPALWORLD_SPLASH_2024.png?alt=media&amp;token=0df1f0d2-8de6-4ed8-bb37-4d61e25df1ef" alt=""><figcaption></figcaption></figure>

<figure><img src="https://772063455-files.gitbook.io/~/files/v0/b/gitbook-x-prod.appspot.com/o/spaces%2F-Lgje1lBxKKWXwqycB-v%2Fuploads%2FTu9BCwToi2OOvmhQtmEr%2FFrozen%20Flame%20Media_divider.png?alt=media&amp;token=67819a54-15ea-4d3a-9860-775268168a24" alt=""><figcaption></figcaption></figure>

## Palworld!

#### Over 100 Different Pals

Palworld is home to over 100 unique Pals, each equipped with a diverse set of skills to enhance the player's adventure. Along your journey, you will also encounter formidable boss Pals that pose a challenge even for the most seasoned Pal tamers. Naturally, these boss Pals are also capturable

#### Engage in Battles and Capture Pals

Palworld seamlessly integrates elements of battle, monster-capturing, training, and base building. Players wield a range of weapons, from classic bows and spears to modern assault rifles and rocket launchers. The process of capturing Pals involves strategically throwing a sphere, with a higher likelihood of success when weakening the target. Captured Pals become powerful allies in combat, each possessing distinct attributes and skills, even among those of the same type.

#### Base Building with Pals

Players can enjoy the experience of constructing bases alongside their Pals. Within the created base, players can assign Pals to various tasks, automating item collection, production, farming, and even electricity generation. Each Pal works uniquely based on its personality, requiring food and rest. The care provided directly influences the Pal's motivation, playing a pivotal role in base operations.

#### Open-World Multiplayer

Work together with fellow players for shared adventures in an open-world setting. Multiplayer not only allows for cooperation but also conflict, enabling players to attack one another, steal Pals, and even steal items. Players can engage in Pal battles, pitting their Pals against each other in combat.

<figure><img src="https://772063455-files.gitbook.io/~/files/v0/b/gitbook-x-prod.appspot.com/o/spaces%2F-Lgje1lBxKKWXwqycB-v%2Fuploads%2FTu9BCwToi2OOvmhQtmEr%2FFrozen%20Flame%20Media_divider.png?alt=media&amp;token=67819a54-15ea-4d3a-9860-775268168a24" alt=""><figcaption></figcaption></figure>

### SYSTEM REQUIREMENTS&#x20;

<table data-card-size="large" data-view="cards" data-full-width="true"><thead><tr><th></th><th></th><th></th></tr></thead><tbody><tr><td><strong>MINIMUM:</strong> </td><td><br>Requires a 64-bit processor and operating system <br>OS: Windows 10 64bit <br>Processor: Intel Core i5 2310 / AMD FX-6300 <br>Memory: 8 GB RAM <br>Graphics: NVIDIA® GeForce GTX 970 / ATI Radeon R9 series <br>DirectX: Version 11 <br>Network: Broadband Internet connection <br>Storage: 10 GB available space </td><td></td></tr><tr><td><strong>RECOMMENDED:</strong> </td><td><br>Requires a 64-bit processor and operating system <br>OS: Windows 10 64bit <br>Processor: Intel Core i5 7500 / AMD Ryzen 5 1600 <br>Memory: 16 GB RAM <br>Graphics: NVIDIA® GeForce GTX 1070 / AMD Radeon RX 580 <br>DirectX: Version 12 <br>Network: Broadband Internet connection <br>Storage: 10 GB available space</td><td></td></tr></tbody></table>

<figure><img src="https://772063455-files.gitbook.io/~/files/v0/b/gitbook-x-prod.appspot.com/o/spaces%2F-Lgje1lBxKKWXwqycB-v%2Fuploads%2FTu9BCwToi2OOvmhQtmEr%2FFrozen%20Flame%20Media_divider.png?alt=media&amp;token=67819a54-15ea-4d3a-9860-775268168a24" alt=""><figcaption></figcaption></figure>

## ***The PACK Palworld PVE Server***&#x20;

<table data-card-size="large" data-view="cards" data-full-width="true"><thead><tr><th align="center"></th><th align="center"></th><th align="center"></th><th data-hidden data-card-target data-type="content-ref"></th></tr></thead><tbody><tr><td align="center"><img src="https://772063455-files.gitbook.io/~/files/v0/b/gitbook-x-prod.appspot.com/o/spaces%2F-Lgje1lBxKKWXwqycB-v%2Fuploads%2FObpGpFembrfLE9p4WhLH%2Fimage.png?alt=media&amp;token=3f8ef771-c8c9-42db-917b-6fc488c62ad6" alt=""></td><td align="center"><strong>Join our Discord to receive</strong> <br><strong>Ip and Password info.</strong></td><td align="center"><br><img src="https://772063455-files.gitbook.io/~/files/v0/b/gitbook-x-prod.appspot.com/o/spaces%2F-Lgje1lBxKKWXwqycB-v%2Fuploads%2Fezw2bLgvnyvZYPuYDyeC%2Fimage.png?alt=media&amp;token=62ab133a-fe90-4d0f-a3fe-650123a91788" alt=""></td><td><a href="https://discord.gg/EjXsVfgY">https://discord.gg/EjXsVfgY</a></td></tr><tr><td align="center"><img src="https://772063455-files.gitbook.io/~/files/v0/b/gitbook-x-prod.appspot.com/o/spaces%2F-Lgje1lBxKKWXwqycB-v%2Fuploads%2F6GvnoU9jfxFUePsP4xK8%2Fimage.png?alt=media&amp;token=69dc6e4e-437e-449f-a141-cf77530b2cf6" alt="" data-size="original"></td><td align="center"><h2>Palworld Server Rules</h2><p>All rules found here will pertain to all of our current and future Servers. Please read and familiarize yourself with them. UPDATED 1/22/2024</p></td><td align="center"></td><td><a href="https://faq.thepackgaming.com/rules/palworld">https://faq.thepackgaming.com/rules/palworld</a></td></tr></tbody></table>

<figure><img src="https://772063455-files.gitbook.io/~/files/v0/b/gitbook-x-prod.appspot.com/o/spaces%2F-Lgje1lBxKKWXwqycB-v%2Fuploads%2FTu9BCwToi2OOvmhQtmEr%2FFrozen%20Flame%20Media_divider.png?alt=media&amp;token=67819a54-15ea-4d3a-9860-775268168a24" alt=""><figcaption></figcaption></figure>

<figure><img src="https://772063455-files.gitbook.io/~/files/v0/b/gitbook-x-prod.appspot.com/o/spaces%2F-Lgje1lBxKKWXwqycB-v%2Fuploads%2FI5X7rqFcL3JDOfCyMFiq%2Fimage.png?alt=media&amp;token=42148231-f22b-4504-a41e-3604fb1f2be7" alt=""><figcaption><p><em>You feel an evil presence watching you...</em></p></figcaption></figure>

## About the Palworld “Tides of Terraria” update:

***"Palworld: Tides of Terraria"*** is a major update that introduces a collaboration with the adventure game ***"Terraria"***, which has sold over 60 million copies worldwide.

*The world of Terraria collides with Palworld!* *Catch, train, fight, and work monsters from Terraria just like Pals...?*

In addition to the collaboration content, further new content will be added, including new Pals and new islands. The contents of the update will be announced across official Palworld social media channels over the next few weeks, so please follow!

Thank you for your continued support of Palworld.

Palworld Development Team

<div><figure><img src="https://772063455-files.gitbook.io/~/files/v0/b/gitbook-x-prod.appspot.com/o/spaces%2F-Lgje1lBxKKWXwqycB-v%2Fuploads%2Fcie9W5FgTY94xzgw5bNy%2Fterria_teaser_fishing.png?alt=media&amp;token=d5b3c8d5-29b9-47a4-81c8-6d8bf2d2894f" alt=""><figcaption><p>Fishing!</p></figcaption></figure> <figure><img src="https://772063455-files.gitbook.io/~/files/v0/b/gitbook-x-prod.appspot.com/o/spaces%2F-Lgje1lBxKKWXwqycB-v%2Fuploads%2F0GevtqM8RBlH1J2zz7Dj%2Fterria_teaser_pals.png?alt=media&amp;token=7b64ef33-9d9e-403c-b809-c1f6f2fb2a6c" alt=""><figcaption><p>New PALS!</p></figcaption></figure> <figure><img src="https://772063455-files.gitbook.io/~/files/v0/b/gitbook-x-prod.appspot.com/o/spaces%2F-Lgje1lBxKKWXwqycB-v%2Fuploads%2F2fgJg8gjCkylZVAAh0Il%2FTerria_teaser_sub.png?alt=media&amp;token=902ec9a9-8a9d-4508-9241-0401296f7415" alt=""><figcaption><p>New ISLAND!</p></figcaption></figure></div>

<figure><img src="https://772063455-files.gitbook.io/~/files/v0/b/gitbook-x-prod.appspot.com/o/spaces%2F-Lgje1lBxKKWXwqycB-v%2Fuploads%2FTu9BCwToi2OOvmhQtmEr%2FFrozen%20Flame%20Media_divider.png?alt=media&amp;token=67819a54-15ea-4d3a-9860-775268168a24" alt=""><figcaption></figcaption></figure>

### Palworld Important Guides <a href="#hl_1" id="hl_1"></a>

<table data-card-size="large" data-view="cards"><thead><tr><th align="center"></th><th align="center"></th><th align="center"></th><th data-hidden data-card-target data-type="content-ref"></th><th data-hidden data-card-cover data-type="files"></th></tr></thead><tbody><tr><td align="center"><strong>Palpedia - The Ultimate Palworld Pedia</strong> <br><strong>(Pokedex)</strong></td><td align="center">The Ultimate Palworld Guide</td><td align="center"><strong>Click here to go to Palpedia!</strong></td><td><a href="https://www.palpedia.net/">https://www.palpedia.net/</a></td><td><a href="https://772063455-files.gitbook.io/~/files/v0/b/gitbook-x-prod.appspot.com/o/spaces%2F-Lgje1lBxKKWXwqycB-v%2Fuploads%2FhgST3MntSl9V8tutYMyG%2FPalpedia.png?alt=media&amp;token=8cd65c5f-e733-44a1-bf90-4cc412705a21">Palpedia.png</a></td></tr><tr><td align="center"><strong>Palworld Interactive Map</strong></td><td align="center">by ~ mapgenie.io</td><td align="center"><strong>Click go to map!</strong></td><td><a href="https://mapgenie.io/palworld/maps/palpagos-islands">https://mapgenie.io/palworld/maps/palpagos-islands</a></td><td><a href="https://772063455-files.gitbook.io/~/files/v0/b/gitbook-x-prod.appspot.com/o/spaces%2F-Lgje1lBxKKWXwqycB-v%2Fuploads%2FOBq54y2RMwU14LXhqIW5%2FPal_MAP_Feybreak.png?alt=media&amp;token=1ba6755e-87fb-4135-8a29-bab91b5a68eb">Pal_MAP_Feybreak.png</a></td></tr><tr><td align="center"><strong>Palworld Wiki Guide</strong></td><td align="center">Whether you're looking for a boss order, Pal locations, or tips for improving your base, you're in the right place with IGN's Palworld guide.</td><td align="center"><strong>Click here to go to the Wiki!</strong></td><td><a href="https://www.ign.com/wikis/palworld">https://www.ign.com/wikis/palworld</a></td><td><a href="https://772063455-files.gitbook.io/~/files/v0/b/gitbook-x-prod.appspot.com/o/spaces%2F-Lgje1lBxKKWXwqycB-v%2Fuploads%2FW7bcOwQImh9t8P6yJWZT%2FPalworld%20Guide_IGN.png?alt=media&amp;token=f2b52591-5d40-4d3d-99bf-dbc67e27cc90">Palworld Guide_IGN.png</a></td></tr><tr><td align="center"><strong>Graphical Enhancements and Bug fixes</strong></td><td align="center">Post of helpful Optimizations and Client side bug fixes for our Palworld Players:</td><td align="center"><strong>Click here to go to the the enhancement page!</strong></td><td><a href="https://faq.thepackgaming.com/alphys-help-desk/directory/palworld">https://faq.thepackgaming.com/alphys-help-desk/directory/palworld</a></td><td><a href="https://772063455-files.gitbook.io/~/files/v0/b/gitbook-x-prod.appspot.com/o/spaces%2F-Lgje1lBxKKWXwqycB-v%2Fuploads%2FqieGklvoNelM22z4nmtR%2FHELPDESK_PALWORLD_2024.png?alt=media&amp;token=3e747d11-478d-41cf-bd70-a2059767ff68">HELPDESK_PALWORLD_2024.png</a></td></tr></tbody></table>

## Palworld Maps <a href="#hl_1" id="hl_1"></a>

{% embed url="<https://mapgenie.io/palworld/maps/palpagos-islands>" %}

<figure><img src="https://772063455-files.gitbook.io/~/files/v0/b/gitbook-x-prod.appspot.com/o/spaces%2F-Lgje1lBxKKWXwqycB-v%2Fuploads%2FOBq54y2RMwU14LXhqIW5%2FPal_MAP_Feybreak.png?alt=media&amp;token=1ba6755e-87fb-4135-8a29-bab91b5a68eb" alt=""><figcaption></figcaption></figure>

<figure><img src="https://772063455-files.gitbook.io/~/files/v0/b/gitbook-x-prod.appspot.com/o/spaces%2F-Lgje1lBxKKWXwqycB-v%2Fuploads%2FTu9BCwToi2OOvmhQtmEr%2FFrozen%20Flame%20Media_divider.png?alt=media&amp;token=67819a54-15ea-4d3a-9860-775268168a24" alt=""><figcaption></figcaption></figure>

## Regarding the lawsuit, changes to Palworld and the future

<figure><img src="https://772063455-files.gitbook.io/~/files/v0/b/gitbook-x-prod.appspot.com/o/spaces%2F-Lgje1lBxKKWXwqycB-v%2Fuploads%2FCLRfMNZOJ3WdCbDv8MC8%2FScreenshot_1.png?alt=media&amp;token=e7c167ae-0dc4-4a47-9736-278fc8026812" alt=""><figcaption></figcaption></figure>

We would like to express our sincere gratitude and appreciation for the continued support of our fans over the past few months. We apologize for not being able to share as much information as we would like, but we trust our fans understand how difficult it is to be fully transparent while litigation is ongoing.

Currently, we remain involved in prolonged legal proceedings regarding alleged patent infringement. We continue to dispute these claims and assert the invalidity of the patents in question. However, we have had to make certain compromises in order to avoid disruptions to the development and distribution of Palworld.

On November 30th, 2024, we released Patch v0.3.11 for Palworld. This patch removed the ability to summon Pals by throwing Pal Spheres and instead changed it to a static summon next to the player. Several other game mechanics were also changed with this patch. As many have speculated, these changes were indeed a result of the ongoing litigation. Everyone here at Pocketpair was disappointed that this adjustment had to be made, and we fully understand that many players feel the same frustration. Unfortunately, as the alternative would have led to an even greater deterioration of the gameplay experience for players, it was determined that this change was necessary.

Furthermore, we regret to inform our players that with the implementation of **Patch v0.5.5,** we must make yet another compromise. **From this patch onward, gliding will be performed using a glider rather than with Pals.** Pals in the player's team will still provide passive buffs to gliding, but players will now need to have a glider in their inventory in order to glide. We understand that this will be disappointing for many, just as it is for us, but we hope our fans understand that these changes are necessary in order to prevent further disruptions to the development of Palworld.

We also want to extend our apologies to our fans for the discomfort and concern this ongoing litigation has caused. We remain committed to developing Palworld and delivering exciting new content to our fans.

On behalf of everyone at Pocketpair and Team Palworld, thank you again for your continued support.

<figure><img src="https://772063455-files.gitbook.io/~/files/v0/b/gitbook-x-prod.appspot.com/o/spaces%2F-Lgje1lBxKKWXwqycB-v%2Fuploads%2FTu9BCwToi2OOvmhQtmEr%2FFrozen%20Flame%20Media_divider.png?alt=media&amp;token=67819a54-15ea-4d3a-9860-775268168a24" alt=""><figcaption></figcaption></figure>

<figure><img src="https://772063455-files.gitbook.io/~/files/v0/b/gitbook-x-prod.appspot.com/o/spaces%2F-Lgje1lBxKKWXwqycB-v%2Fuploads%2FILTLLvQSw1W3RpB7FhXM%2Fyou%20tube%20links.png?alt=media&amp;token=94c5b46f-e365-4b7c-812c-e9d68da93c1c" alt="" width="375"><figcaption></figcaption></figure>

{% embed url="<https://www.youtube.com/watch?v=mhgwP-kCRAY&pp=ygUIUGFsd29ybGQ%3D>" %}

<figure><img src="https://772063455-files.gitbook.io/~/files/v0/b/gitbook-x-prod.appspot.com/o/spaces%2F-Lgje1lBxKKWXwqycB-v%2Fuploads%2FTu9BCwToi2OOvmhQtmEr%2FFrozen%20Flame%20Media_divider.png?alt=media&amp;token=67819a54-15ea-4d3a-9860-775268168a24" alt=""><figcaption></figcaption></figure>

## General Feedback and Bug Reporting

<figure><img src="https://772063455-files.gitbook.io/~/files/v0/b/gitbook-x-prod.appspot.com/o/spaces%2F-Lgje1lBxKKWXwqycB-v%2Fuploads%2FT5llcqIgd8DaMlseG1BI%2Fimage.png?alt=media&amp;token=b1330896-16f7-4c7b-bf0c-3d23821b1bfb" alt="" width="375"><figcaption></figcaption></figure>

You can access the submission form through the "Report Bugs & Issues" button in the options tab of the in-game menu.![](https://lh7-us.googleusercontent.com/5lAoauJIPoH-ILTLNUggvM7kq0ah0xuoUXkSIVB_159IQOyxV8HzQq1w88PY3rT7f7V-mmUUqGh4avkkWU7WDUmj8UVQongPfT8Efn7IGAYMoW1FhciovHwyW8bJ_U4mVmTMFeJF6ZBztbPI)

<details>

<summary>We also welcome feedback and bug reports through the following channels:</summary>

(Note: Reporting from within the game, as mentioned above, ensures the most reliable delivery to the development team.)

Palworld General Discussion Board :: Steam Community

[https://steamcommunity.com/app/1623730/discussions/](https://www.google.com/url?q=https://steamcommunity.com/app/1623730/discussions/\&sa=D\&source=editors\&ust=1706224236863504\&usg=AOvVaw0hF6tLgPr1ZfhzFHxUd1lX)

Palworld X Official Account

[https://x.com/Palworld\_EN](https://www.google.com/url?q=https://x.com/Palworld_EN\&sa=D\&source=editors\&ust=1706224236863882\&usg=AOvVaw3tjt3CS59UghXANn2-RAB8)

Pocketpair Official Inquiry Email

<support@pocketpair.jp>

</details>

<figure><img src="https://772063455-files.gitbook.io/~/files/v0/b/gitbook-x-prod.appspot.com/o/spaces%2F-Lgje1lBxKKWXwqycB-v%2Fuploads%2FTu9BCwToi2OOvmhQtmEr%2FFrozen%20Flame%20Media_divider.png?alt=media&amp;token=67819a54-15ea-4d3a-9860-775268168a24" alt=""><figcaption></figcaption></figure>

## ***Our Patreon's***&#x20;

![](https://772063455-files.gitbook.io/~/files/v0/b/gitbook-x-prod.appspot.com/o/spaces%2F-Lgje1lBxKKWXwqycB-v%2Fuploads%2FKFiZHHlgN1QM69t5DejF%2FPACK_PATREON.png?alt=media\&token=d8b84080-d3a0-4bcf-903f-ec3c9cebe9e3)

*Will receive generous perks in our ARKS Servers.*

Please see the Patreon Role listings to see just what you can get as an IN GAME PERK!

{% embed url="<https://faq.thepackgaming.com/patreon#our-patreon-perks>" %}

<figure><img src="https://772063455-files.gitbook.io/~/files/v0/b/gitbook-x-prod.appspot.com/o/spaces%2F-Lgje1lBxKKWXwqycB-v%2Fuploads%2FzU1zzT7g4UEZ1c9jvqlW%2Fimage.png?alt=media&amp;token=202a4c78-50f7-4e70-a904-a899b428e99d" alt=""><figcaption></figcaption></figure>


# The PACK Soulmask PVE Server

\~ An Unexpected journey into self awareness in the South American Jungles!

## **Navigation of Pages:**

<table data-view="cards"><thead><tr><th></th><th></th></tr></thead><tbody><tr><td><strong>Left side of the page</strong> <span data-gb-custom-inline data-tag="emoji" data-code="25c0">◀️</span></td><td>Use the <strong>></strong> to open any pages in that section when the Header shows a <strong>></strong>.</td></tr><tr><td><strong>Right Side</strong> of the page <span data-gb-custom-inline data-tag="emoji" data-code="25b6">▶️</span></td><td>Click a header to go to that section of this page.</td></tr><tr><td><strong>Features of the page.</strong></td><td>are in an <strong>expandable box</strong>, please click the <strong>></strong> to open the expandable dropdown.</td></tr><tr><td><strong>Hyperlink</strong>s are often in a <strong>card form</strong> in the website.</td><td>So <strong>clicking an image</strong> will often take you to a specific page for information. </td></tr><tr><td><strong>Steam-link</strong>s are often in a <strong>card form</strong> in the website.</td><td>So <strong>clicking on a server card</strong> will take you to the Server.</td></tr></tbody></table>

<figure><img src="https://772063455-files.gitbook.io/~/files/v0/b/gitbook-x-prod.appspot.com/o/spaces%2F-Lgje1lBxKKWXwqycB-v%2Fuploads%2FgMP91ZJ77UIl2HQyjnuy%2Fsoulmask_flash.png?alt=media&amp;token=9c279127-87b7-48d3-9d0f-c4ccdb752305" alt=""><figcaption></figcaption></figure>

## Soulmask \~ An Unexpected journey into self awareness in the South American Jungles!

<table data-card-size="large" data-view="cards" data-full-width="true"><thead><tr><th align="center"></th><th align="center"></th><th align="center"></th><th data-hidden data-card-cover data-type="files"></th></tr></thead><tbody><tr><td align="center"></td><td align="center">Soulmask is a sandbox game that prioritizes an authentic survival experience. As the "last one" blessed with the mysterious mask, players will grapple for survival in a primitive land steeped in mysterious faiths, carving out a path to ascendance. Start from nothing, explore, build, recruit tribesmen to fortify your clan, and ultimately unravel the mysterious truths hidden behind the civilizations of this world.</td><td align="center"></td><td><a href="https://772063455-files.gitbook.io/~/files/v0/b/gitbook-x-prod.appspot.com/o/spaces%2F-Lgje1lBxKKWXwqycB-v%2Fuploads%2F4ooBg4l7oy3DqboG21hg%2FSoulmask%20Mask%20v2.jpg?alt=media&amp;token=256c23e4-08d6-4c56-9bc7-cd5189757f94">Soulmask Mask v2.jpg</a></td></tr><tr><td align="center"></td><td align="center"><p>A vast and rich world full of ancient civilizations</p><p>Roam in a vast world including rainforests, rivers, deserts, plateaus, wetlands, volcanoes, and snow mountains, and experience, survive, and challenge the unique climate and creatures in different regions.</p><p>Explore ancient ruins and stunning temples scattered throughout the world that seem to have a mysterious connection with the masks, civilizations, and this world's secret past.</p></td><td align="center"></td><td><a href="https://772063455-files.gitbook.io/~/files/v0/b/gitbook-x-prod.appspot.com/o/spaces%2F-Lgje1lBxKKWXwqycB-v%2Fuploads%2FKj4UMnORo4VXVOcnuyzg%2Flrobv9skkrx6hjeiy4l.jpg?alt=media&amp;token=7fdf52ec-f149-42d5-8dac-5cc3532dee63">lrobv9skkrx6hjeiy4l.jpg</a></td></tr><tr><td align="center"></td><td align="center"><p>Merge Soul and Mask</p><p>Envy an NPC's powerful talent or skill? Make it your own! In Soulmask, synchronize your consciousness with the tribesmen as you recruit them to strengthen your tribe. Possess and take over their bodies and transform into anyone. </p></td><td align="center"></td><td><a href="https://772063455-files.gitbook.io/~/files/v0/b/gitbook-x-prod.appspot.com/o/spaces%2F-Lgje1lBxKKWXwqycB-v%2Fuploads%2FU5Z1crqDqE9LGzGzX76v%2F522b459e-a79c-4184-884d-b7f21981ad3d.jpg?alt=media&amp;token=da799ecf-f4a0-4ac9-9fd9-82e0168b2f4e">522b459e-a79c-4184-884d-b7f21981ad3d.jpg</a></td></tr><tr><td align="center"></td><td align="center"><p>Build a family of talented tribesmen with dynamic personalities.</p><p>Play as a lone wolf without feeling lost or lonely with a multitude of different NPCs. With different personalities and talents, you can recruit bloodthirsty warriors, dexterous hunters, and ingenious craftsmen. . . and even a drunk lazy alcoholic!</p></td><td align="center"></td><td><a href="https://772063455-files.gitbook.io/~/files/v0/b/gitbook-x-prod.appspot.com/o/spaces%2F-Lgje1lBxKKWXwqycB-v%2Fuploads%2FXJy7rf5taiY1hIP8CA3u%2Flrobu915xbntv5qmvk.jpg?alt=media&amp;token=702637c6-bc34-47b1-a94a-f2d3931e40d6">lrobu915xbntv5qmvk.jpg</a></td></tr><tr><td align="center"></td><td align="center"><p>Diverse action combat based on realistic physics</p><p>The game currently provides 8 different styles of weapons and 75 different supporting combat skills and special action modules, each of which strictly restores the experience of real physical characteristics. Tailor your fighting style to defeat your opponents</p></td><td align="center"></td><td><a href="https://772063455-files.gitbook.io/~/files/v0/b/gitbook-x-prod.appspot.com/o/spaces%2F-Lgje1lBxKKWXwqycB-v%2Fuploads%2FV8oNtoZYvc4zwbBp4juX%2F48f61ffd-d86e-4436-8003-c006e5a32a87.jpg?alt=media&amp;token=fa2783f8-e3b1-4e7a-a63f-ad109dbea4c4">48f61ffd-d86e-4436-8003-c006e5a32a87.jpg</a></td></tr><tr><td align="center"></td><td align="center"><em>Soulmask</em> is a very complex game with tons of features.  Start with our summary of the lore of the game, and then check out our Tips and Tricks Section.</td><td align="center"></td><td><a href="https://772063455-files.gitbook.io/~/files/v0/b/gitbook-x-prod.appspot.com/o/spaces%2F-Lgje1lBxKKWXwqycB-v%2Fuploads%2FQ8rmdBJyVbLJ3LvC7ZJ6%2Fe7b15a67-cadb-4241-88bc-f3e80fccb054.jpg?alt=media&amp;token=7387cd71-0fe3-4fb4-ae0f-e36978d7943d">e7b15a67-cadb-4241-88bc-f3e80fccb054.jpg</a></td></tr></tbody></table>

### System Requirements:

<table data-card-size="large" data-view="cards"><thead><tr><th></th><th></th><th></th></tr></thead><tbody><tr><td><p>MINIMUM:</p><p></p></td><td><p>Requires a 64-bit processor and operating system</p><p>OS: 64bit -win10</p><p>Processor: Intel Core i5-8400 / AMD Ryzen 3 3300X</p><p>Memory: 16 GB RAM</p><p>Graphics: GTX 970 4GB / AMD RX 580 4GB</p></td><td><p>DirectX: Version 12</p><p>Network: Broadband Internet connection</p><p>Storage: 25 GB available space</p><p>Sound Card: on board</p><p>Additional Notes: SSD(preferred)</p></td></tr><tr><td><p>RECOMMENDED:</p><p></p></td><td><p>Requires a 64-bit processor and operating system</p><p>OS: Windows 10 (64-bit version) / Windows 11</p><p>Processor: Intel Core i7-9700 / AMD Ryzen 7 3700X</p><p>Memory: 24 GB RAM</p><p>Graphics: RTX 3060 / AMD 6700XT</p></td><td><p>DirectX: Version 12</p><p>Network: Broadband Internet connection</p><p>Storage: 25 GB available space</p><p>Sound Card: on board</p><p>Additional Notes: SSD is highly recommended</p></td></tr></tbody></table>

## Welcome to The PACKS Soulmask PvE Server.

<table data-card-size="large" data-view="cards" data-full-width="true"><thead><tr><th align="center"></th><th align="center"></th><th align="center"></th><th data-hidden data-card-target data-type="content-ref"></th><th data-hidden data-card-cover data-type="files"></th></tr></thead><tbody><tr><td align="center">Please join our Discord and see #Steam-Links to receive the IP and Password.</td><td align="center"><br><img src="https://772063455-files.gitbook.io/~/files/v0/b/gitbook-x-prod.appspot.com/o/spaces%2F-Lgje1lBxKKWXwqycB-v%2Fuploads%2F1onK3wTsvoRmO5id8biq%2Fimage.png?alt=media&amp;token=68b31492-c651-4236-bd1d-b2de7918ceb8" alt=""></td><td align="center"></td><td><a href="https://discord.gg/7Hag9M8s7k">https://discord.gg/7Hag9M8s7k</a></td><td><a href="https://772063455-files.gitbook.io/~/files/v0/b/gitbook-x-prod.appspot.com/o/spaces%2F-Lgje1lBxKKWXwqycB-v%2Fuploads%2Fhax7adwXiFohTFCIESWt%2Fheader_soulmask.jpg?alt=media&amp;token=daa8fb83-299b-4d10-963c-0168a550491c">header_soulmask.jpg</a></td></tr><tr><td align="center"><em><strong>Soulmask PVE Server Rules</strong></em></td><td align="center">All rules found here will pertain to all of our current and future Servers. Please read and familiarize yourself with them. <br>UPDATED 6/21/2024</td><td align="center">Click here to go to Our Rules!</td><td><a href="/rules/soulmask">Soulmask Server Rules</a></td><td><a href="https://772063455-files.gitbook.io/~/files/v0/b/gitbook-x-prod.appspot.com/o/spaces%2F-Lgje1lBxKKWXwqycB-v%2Fuploads%2FpCpL4zSNmIz46HaeHRdV%2F7f3f8b2b-7b2f-4724-9870-6e3d812931be.png?alt=media&amp;token=c8b053b5-34e3-4e55-8e42-84ef4bffb73b">7f3f8b2b-7b2f-4724-9870-6e3d812931be.png</a></td></tr><tr><td align="center"><strong>Soulmask Tips and Tricks</strong></td><td align="center"><em><strong>Helpful information compiled about Soulmask.</strong></em></td><td align="center"><em>Click here to go to our guide.</em></td><td><a href="https://faq.thepackgaming.com/soulmask/info/guide">https://faq.thepackgaming.com/soulmask/info/guide</a></td><td><a href="https://772063455-files.gitbook.io/~/files/v0/b/gitbook-x-prod.appspot.com/o/spaces%2F-Lgje1lBxKKWXwqycB-v%2Fuploads%2FvAYNuqe4eYRTNF0jE5ZG%2FSoulmask%20Jaguar.jpg?alt=media&amp;token=397db3c9-7e0b-498e-ad09-cdd7b5cc2189">Soulmask Jaguar.jpg</a></td></tr></tbody></table>

<figure><img src="https://772063455-files.gitbook.io/~/files/v0/b/gitbook-x-prod.appspot.com/o/spaces%2F-Lgje1lBxKKWXwqycB-v%2Fuploads%2Fnfxm33Xgw5Ae4MoHu7Pr%2FSoulmask%20divider.png?alt=media&amp;token=bbd912b9-3ec5-4044-b4ab-1b7e1c9a6eda" alt=""><figcaption></figcaption></figure>

### 𝐒𝐨𝐮𝐥𝐦𝐚𝐬𝐤 𝐒𝐞𝐫𝐯𝐞𝐫 𝐒𝐞𝐭𝐭𝐢𝐧𝐠𝐬

<details>

<summary>The PACK Soulmask PVE Server Settings</summary>

***All Settings Shown here are under testing phase and may change without notice. All efforts to  keep the list updated will be taken.***

*Standard Rates are shown before the ->.*

Awareness EXP Multiplier: 1 -> 2 \
Automated Production Base Output Multiplier: 1 -> 1.5 \
Plant Crop Yield Multiplier: 1 -> 1.5 \
Barbarian Taming Speed Multiplier: 1 -> 1.5 \
Crop Growth Speed Multiplier: 1 -> 1.5 \
Building Decay Coefficient: 1 -> 0.1 \
Multiplier of building construction and repair speed: 1 -> 1.5 \
Crafting Speed Multiplier: 1 -> 2 \
Character EXP Multiplier: 1 -> 2 \
Mask EXP Multiplier: 1 -> 2 \
Proficiency EXP Multiplier: 1 -> 2 \
Durability Consumption Multiplier: 1 -> 0.5 \
Collection EXP Multiplier: 1 -> 2 \
Craft EXP Multiplier: 1 -> 2 \
Monster-killing EXP Multiplier: 1 -> 2 \
Other EXP Multiplier: 1 -> 2 \
HP Recovery Speed Multiplier: 1 -> 1.5 \
Stamina Recovery Speed Multiplier: 1 -> 1.5 \
Feign Death HP Recovery Speed: 1 -> 1.5 \
Collecting Efficiency Multiplier: 1 -> 1.5 \
Resource Collection HP Coefficient: 1 -> 1.5 \
Fuel consumption rate: 1 -> 0.5 \
Animal Growth Speed: 1 -> 1.5 \
Animal Production Efficiency: 1 -> 1.5 \
Animal Yield Multiplier: 1 -> 1.5 \
Animal Food Consumption Speed: 1 -> 0.5 \
Animal Water Consumption Speed: 1 -> 0.5 \
Crop Fertilizer Consumption Speed: 1 -> 0.2 \
Repair reduces the durability limit coefficient: 1 -> 0.5 \
Tribe Recruitment limit: 50 -> 100 \
Mood Increase Multiplier: 1 -> 1.5 \
Mood Reduction Multiplier: 1 -> 0.5 \
Kill EXP Sharing Coefficient: 0.2 -> 0.4 \
Tribe Animals Quantity Limit: 50 -> 100 \
Personal Animal Quantity Limit: 10 -> 30 \
Bonfire Burning Speed Coefficient: 1 -> 0.3 \
Info Entry Limit: 4 -> 6\ <br>

</details>

<details>

<summary>The PACK DECAY settings.</summary>

**The Pack** maintains the server with a Decay rate that lasts x10 longer than normal, and decay is slowed by x10.

Each material provides a certain amount of fuel per 300 stack:

* Thatch: 14 minutes
* Branch: 1.28 hours&#x20;
* Bark: 1.28 hours
* Log: 3.75 hours
* Hardwood: 35.45 hours
* Premium Hardwood: 35.45 hours

</details>

<figure><img src="https://772063455-files.gitbook.io/~/files/v0/b/gitbook-x-prod.appspot.com/o/spaces%2F-Lgje1lBxKKWXwqycB-v%2Fuploads%2FjdV0PKqILq1uumQkTIXa%2FSoulmask%20divider%202.png?alt=media&amp;token=1755e9a0-5c1b-43d1-9ae5-51ffb08abd6c" alt=""><figcaption></figcaption></figure>

### **𝐒𝐎𝐔𝐋𝐌𝐀𝐒𝐊 𝐈𝐧𝐭𝐞𝐫𝐚𝐜𝐭𝐢𝐯𝐞 𝐌𝐚𝐩**&#x20;

{% embed url="<https://gamingwithdaopa.ellatha.com/soulmask/category/maps/>" %}

**𝐒𝐎𝐔𝐋𝐌𝐀𝐒𝐊 𝐅𝐚𝐧𝐝𝐨𝐦 𝐖𝐢𝐤𝐢**&#x20;

{% embed url="<https://soulmask.fandom.com/wiki/Soulmask_Wiki>" %}

## Our First Anniversary: New Masks, New Tribes, A New Soulmask

That's right—365 days have passed since our Early Access launch, and Soulmask has journeyed alongside all of you! As our first survival game on Steam, Maggie and the rest of our development team have spent this year in a constant mix of anxiety and excitement.

We all agreed that we couldn't let down your support over this past year, so Soulmask has prepared an anniversary gift—what we believe best represents the core concept of Soulmask: a special free DLC featuring a brand-new mask representing an alien civilization, along with new automation features that will truly transform your tribe into a powerful machine.

***

## New Free DLC: Lost Civilization

<figure><img src="https://772063455-files.gitbook.io/~/files/v0/b/gitbook-x-prod.appspot.com/o/spaces%2F-Lgje1lBxKKWXwqycB-v%2Fuploads%2FzGZ99V45Qt2ufqso03O0%2FLost%20Civilization.gif?alt=media&amp;token=eab0584e-4672-4781-8f16-825f5721c5c1" alt=""><figcaption></figcaption></figure>

*Golden Visage, bright through ages, dazzling now.*\
*The Star-Seer's own; it pierces the Nine Depths, touches celestial crowns.*\
*A vigil of a thousand years.*\
——From an unknown civilization's tablet found beneath the sea.

Meet "*Golden Legend,*" Soulmask's first mask DLC. A mask lost beneath the ocean for a thousand years, along with the mysterious decorations of its vanished civilization. From the moment you touch it, you know it's different from all your other masks: there's no familiar echo of barbarian souls. Instead, it brings you something more... otherworldly, a mismatched civilization from distant shores.

<figure><img src="https://772063455-files.gitbook.io/~/files/v0/b/gitbook-x-prod.appspot.com/o/spaces%2F-Lgje1lBxKKWXwqycB-v%2Fuploads%2FTER74MkxeYGSZDyrsOPh%2Fimage.png?alt=media&amp;token=9d59fc76-90df-4a53-8b8c-86143918663e" alt=""><figcaption></figcaption></figure>

Through it, the figures of your tribesmen become clearer. No longer just their bravery or cowardice—you can faintly sense the potential deep within their souls. Who is the true blade? Who is the most skilled craftsman? The barbarians' secrets are no longer hidden from you.

<figure><img src="https://772063455-files.gitbook.io/~/files/v0/b/gitbook-x-prod.appspot.com/o/spaces%2F-Lgje1lBxKKWXwqycB-v%2Fuploads%2FodbMeWG8RdhOFeKl8S0P%2Fimage.png?alt=media&amp;token=e418711c-8816-4f81-ab21-331589f71100" alt=""><figcaption></figcaption></figure>

It holds many powers yet to be discovered. Where did it come from? Why was it found in that ocean corner? What civilization lies behind it? You know nothing, but it will completely change how you rule your tribe.

<figure><img src="https://772063455-files.gitbook.io/~/files/v0/b/gitbook-x-prod.appspot.com/o/spaces%2F-Lgje1lBxKKWXwqycB-v%2Fuploads%2FIxDhRjJN9O1LjySN1be5%2Fimage.png?alt=media&amp;token=8568535f-3b58-4306-85c1-6b6226901f99" alt=""><figcaption></figcaption></figure>

Yes, t*here's much more we could tell you about "Golden Legend,"* even about the entirely new civilization behind it. We'll release a dedicated introduction for it soon. But without doubt, it represents just the tip of the iceberg of Soulmask's ambitious vision.

***

## Automation: From "Tribe" to "Empire”

<figure><img src="https://772063455-files.gitbook.io/~/files/v0/b/gitbook-x-prod.appspot.com/o/spaces%2F-Lgje1lBxKKWXwqycB-v%2Fuploads%2FMO6cLj0OyEDooKQ6wNiX%2Fimage.png?alt=media&amp;token=237d70c7-e014-4a79-b6cc-ff77ccb763bb" alt=""><figcaption></figcaption></figure>

So, on our EA anniversary today, you can see the first step of this blueprint: *Construction and Transportation*—the two issues Chieftains care about most. Today, on our anniversary, we finally have an automation solution that satisfies us.

First, welcome to experience the powered ropeway system. Power from windmill arrays can be directly input into these robust cables and pulleys, creating cargo transportation channels spanning camps, mines, and everywhere in between.

With powered ropeways, plus your clever building creativity and route planning, your tribe will no longer be limited to small primitive camps. They could potentially become logistics hubs spanning the entire map (provided you protect them well, of course!). But once established, your barbarian tribe—or even the embryo of a barbaric Empire—will gain a crucial piece of the puzzle.

<figure><img src="https://772063455-files.gitbook.io/~/files/v0/b/gitbook-x-prod.appspot.com/o/spaces%2F-Lgje1lBxKKWXwqycB-v%2Fuploads%2Fze2CeeRTMiwH696wVCUA%2Fimage.png?alt=media&amp;token=74987a02-4530-4972-b899-74db1aa28afa" alt=""><figcaption></figcaption></figure>

So we've listened to your voices and let tribesmen handle it all: the building filling function lets you freely pre-build construction shadow, having tribesmen gather materials, produce components, and then automatically construct everything.

This allows Chieftains to more easily build desired structures in new camps, let the tribesmen there complete the remaining work, and then—you do whatever you want, handle your own business!

Like "Golden Legend," we'll provide more detailed systematic introductions in the coming days. But you'll experience this immediately: on June 5th, you'll "unwrap" this anniversary gift. Take a peek—we hope you like it.

***

## Through masks, what is civilization's endpoint? Besides this tribal world, are there other mask civilizations?

This question is what we hope to let Chieftains truly experience in Soulmask's gameplay—the truth of this world.\
As mentioned before, Soulmask has three concepts that occupy important parts of the game—【Masks】, 【Tribes】, 【Civilizations】:

<figure><img src="https://clan.fastly.steamstatic.com/images//44705810/3b16534da94a01cbd2d845a132e64cf4db9daab6.jpg" alt=""><figcaption></figcaption></figure>

### 【Civilizations】:&#x20;

Different "lost civilizations" will be one of future Soulmask's core themes.\
"Golden Legend" clearly shows everyone the style of another mask-dominated civilization: different civilizations obviously vary greatly in the role masks play within them and their ability to use these magical artifacts.

<figure><img src="https://772063455-files.gitbook.io/~/files/v0/b/gitbook-x-prod.appspot.com/o/spaces%2F-Lgje1lBxKKWXwqycB-v%2Fuploads%2FuLCW8AwcreLsyXnurvUD%2Ftribes.gif?alt=media&amp;token=dc949268-7844-4f48-aaad-901f4aaf38a4" alt=""><figcaption></figcaption></figure>

### 【Tribes】:&#x20;

Chieftains who obtain multiple masks will eventually embark on a unique tribal growth path. Pre-construction and logistics transportation are just the beginning—the connection between tribal members and each of you will become increasingly closer, ultimately becoming a new civilization exclusively yours.

<figure><img src="https://772063455-files.gitbook.io/~/files/v0/b/gitbook-x-prod.appspot.com/o/spaces%2F-Lgje1lBxKKWXwqycB-v%2Fuploads%2FsLtcZAzWfm7KjLDB4A5s%2Fmasks.gif?alt=media&amp;token=4477bbfe-c7d1-4714-a337-9b59b7e0e384" alt=""><figcaption></figcaption></figure>

### 【Masks】

Yes, masks—mysterious creations. "Golden Legend's" special abilities will make you can't help but imagine more. Their secrets seem not yet fully explored: What other capabilities do they have? How many civilizations have they influenced? As carriers of consciousness transfer, might they still harbor some... *consciousness other than yours?*

{% embed url="<https://youtu.be/q-4ofULAgdQ>" %}

***

## ***Our Patreon's***&#x20;

![](https://772063455-files.gitbook.io/~/files/v0/b/gitbook-x-prod.appspot.com/o/spaces%2F-Lgje1lBxKKWXwqycB-v%2Fuploads%2FKFiZHHlgN1QM69t5DejF%2FPACK_PATREON.png?alt=media\&token=d8b84080-d3a0-4bcf-903f-ec3c9cebe9e3)

*Will receive generous perks in our ARKS Servers.*

Please see the Patreon Role listings to see just what you can get as an IN GAME PERK!

{% embed url="<https://faq.thepackgaming.com/patreon#our-patreon-perks>" %}

<figure><img src="https://772063455-files.gitbook.io/~/files/v0/b/gitbook-x-prod.appspot.com/o/spaces%2F-Lgje1lBxKKWXwqycB-v%2Fuploads%2FzU1zzT7g4UEZ1c9jvqlW%2Fimage.png?alt=media&amp;token=202a4c78-50f7-4e70-a904-a899b428e99d" alt=""><figcaption></figcaption></figure>


# Soulmask Tips and Tricks

Helpful information compiled about Soulmask.

<figure><img src="https://772063455-files.gitbook.io/~/files/v0/b/gitbook-x-prod.appspot.com/o/spaces%2F-Lgje1lBxKKWXwqycB-v%2Fuploads%2FvAYNuqe4eYRTNF0jE5ZG%2FSoulmask%20Jaguar.jpg?alt=media&amp;token=397db3c9-7e0b-498e-ad09-cdd7b5cc2189" alt=""><figcaption></figcaption></figure>

## How to maintain a bonfire in Soulmask

Bonfires stay lit with fuel, and there are six different types of materials that serve as fuel: Thatch, Branches, Bark, Logs, Hardwood, and Premium Hardwood. These materials differ severely in both how abundant they are in the world around you and how long they keep a bonfire going.

Each material provides a certain amount of fuel:

* **Thatch: 28 seconds**
* **Branch: 1:54 minutes**
* **Bark: 1:54**&#x20;
* **Log: 4:46**
* **Hardwood: 7:09**
* **Premium Hardwood: 7:09**

Bark, while it doesn’t provide the most fuel time, is one of the better options for fuel because unlike the other items, it isn’t used in many other recipes. Both types of Hardwood provide the most fuel time, but Hardwood is also a very important crafting material. Do not use Thatch in a bonfire; it provides almost nothing to the fuel time and it’s way more useful in other crafting recipes.

***

## The MASK&#x20;

<figure><img src="https://772063455-files.gitbook.io/~/files/v0/b/gitbook-x-prod.appspot.com/o/spaces%2F-Lgje1lBxKKWXwqycB-v%2Fuploads%2F3pIQM9wTQQT7Dj5LywUd%2Flrobtffm7hnwe0agp4e.jpg?alt=media&amp;token=589be21e-d18c-48ee-b8f9-57cdb87b5c6a" alt=""><figcaption></figcaption></figure>

Choosing the right mask in Soulmask depends on your gameplay style and preferences. Each mask comes with unique abilities and a Mimicry mode, making them suitable for different strategies and play styles in Soulmask.

#### Starter Masks:

<div align="center"><figure><img src="https://772063455-files.gitbook.io/~/files/v0/b/gitbook-x-prod.appspot.com/o/spaces%2F-Lgje1lBxKKWXwqycB-v%2Fuploads%2FTaiGFsoTrYS5qFDyreTH%2FCIVILIZATION.png?alt=media&amp;token=9e77c5ac-39fd-4c13-8d94-d2fe172672ae" alt="" width="110"><figcaption><p>CIVILIZATION</p></figcaption></figure> <figure><img src="https://772063455-files.gitbook.io/~/files/v0/b/gitbook-x-prod.appspot.com/o/spaces%2F-Lgje1lBxKKWXwqycB-v%2Fuploads%2FB87ImkWCN4WssSuqaIGx%2FCONQUEST.png?alt=media&amp;token=cc707100-16b3-4129-98da-f551a30b8ea4" alt="" width="110"><figcaption><p>CONQUEST</p></figcaption></figure> <figure><img src="https://772063455-files.gitbook.io/~/files/v0/b/gitbook-x-prod.appspot.com/o/spaces%2F-Lgje1lBxKKWXwqycB-v%2Fuploads%2FM2iWuvHxVperDM0UohEV%2FRICH.png?alt=media&amp;token=24ebd781-b7ef-4192-8afa-7d19460830f3" alt="" width="110"><figcaption><p>RICH</p></figcaption></figure></div>

<img src="https://772063455-files.gitbook.io/~/files/v0/b/gitbook-x-prod.appspot.com/o/spaces%2F-Lgje1lBxKKWXwqycB-v%2Fuploads%2F01l60xCQV21TgkEXGAvW%2Fimage.png?alt=media&amp;token=1fb2a457-cc8c-41a6-9920-af3c519ec4b7" alt="" data-size="line">The Civilization mask is ideal for players who prioritize durability and survival in combat, offering benefits like increased stamina, reduced damage, and emergency healing.

<img src="https://772063455-files.gitbook.io/~/files/v0/b/gitbook-x-prod.appspot.com/o/spaces%2F-Lgje1lBxKKWXwqycB-v%2Fuploads%2FG8FvjaBw24sLoHMZYtkz%2Fimage.png?alt=media&amp;token=618c61e6-2609-4f9b-8271-4cfffe2b55e9" alt="" data-size="line">For those who prefer stealth and tactical maneuvering, the Conquest mask enhances stealth abilities, boosts damage from behind, and includes a powerful life steal effect.

<img src="https://772063455-files.gitbook.io/~/files/v0/b/gitbook-x-prod.appspot.com/o/spaces%2F-Lgje1lBxKKWXwqycB-v%2Fuploads%2F2irRJc0z9oJ7LikCzK6W%2Fimage.png?alt=media&amp;token=ffdceb9a-2aca-41f3-a590-931a662fab27" alt="" data-size="line">On the other hand, the Rich mask caters to archery enthusiasts and hunters with improved arrow precision, increased damage against creatures, and reduced stamina costs for tasks.&#x20;

#### Every Mask in Soulmask and How to Find Them!

| Mask                                                                                                                                                                                                                                     | Nodes                                                                                                                                                                                    | Bonus                                                        | How To Find & Unlock         |
| ---------------------------------------------------------------------------------------------------------------------------------------------------------------------------------------------------------------------------------------- | ---------------------------------------------------------------------------------------------------------------------------------------------------------------------------------------- | ------------------------------------------------------------ | ---------------------------- |
| ![](https://772063455-files.gitbook.io/~/files/v0/b/gitbook-x-prod.appspot.com/o/spaces%2F-Lgje1lBxKKWXwqycB-v%2Fuploads%2FPoLZpvcNo6I1XFf5sjt2%2Fimage.png?alt=media\&token=f6b85e0a-45e8-4544-aaee-afd497316cdf)Civilization (Starter) | <p>Common Overclock<br>Stamina Surge<br>Deep Sleep<br>Critical Barrier<br>Outer Armor<br>Sequence Protection<br>Healer Mode (Mimicry)<br>Microscopic Repair (Active)</p>                 | Stamina and Defense                                          | Ancient Ruins - Level 25     |
| ![](https://772063455-files.gitbook.io/~/files/v0/b/gitbook-x-prod.appspot.com/o/spaces%2F-Lgje1lBxKKWXwqycB-v%2Fuploads%2Fp87TesY9hcWfCukqxWW0%2Fimage.png?alt=media\&token=3e5ca47c-2642-4bf6-896f-f559ea9ed39d)Conquest (Starter)     | <p>Common Overclock<br>Falling Buffer<br>Noise Absorption<br>Forbidden Territory<br>Light Disturbance<br>Hidden Assault<br>Slayer Mode (Mimicry)<br>Critical Strike (Active)</p>         | Stealth and Combat                                           | Ancient Ruins - Level 25     |
| ![](https://772063455-files.gitbook.io/~/files/v0/b/gitbook-x-prod.appspot.com/o/spaces%2F-Lgje1lBxKKWXwqycB-v%2Fuploads%2F72PE4BG2mF8nqmyIGu9R%2Fimage.png?alt=media\&token=9b5fe5f4-639a-4d94-9ad2-b15021b74d10)Rich (Starter)         | <p>Common Overclock<br>Data Analysis<br>Projectile Adjustment<br>Hunting Guide<br>Poison Injection<br>Deeply Focused<br>Sniping Mode (Mimicry)<br>Weak Spot Analysis (Active)</p>        | Archery                                                      | Ancient Ruins - Level 25     |
| ![](https://772063455-files.gitbook.io/~/files/v0/b/gitbook-x-prod.appspot.com/o/spaces%2F-Lgje1lBxKKWXwqycB-v%2Fuploads%2FubwKFavIYXMH4mHnxGkf%2Fimage.png?alt=media\&token=09b3bc91-ba40-432b-804c-a088e800c4da)Torch of Eternity      | <p>Metabolism Maintenance<br>Life Halt<br>Artery Isolation<br>Life Maintenance<br>Cell Proliferation<br>Tissue Repair<br>Holy Mode (Mimicry)</p>                                         | Keeps you alive after being injured                          | Holy Ruins - Level 30        |
| ![](https://772063455-files.gitbook.io/~/files/v0/b/gitbook-x-prod.appspot.com/o/spaces%2F-Lgje1lBxKKWXwqycB-v%2Fuploads%2FiUYTU85vc11AORbEKo9S%2Fimage.png?alt=media\&token=c9a3ebeb-0d0e-4c73-af4e-39835871403b)Wilderness Mark        | <p>Frequency Adjustment<br>Fatal Blow<br>Dynamic Shooting<br>Mirror Reflection<br>Air Manipulation<br>Nerve Coordination<br>Hunting Mode (Mimicry)<br>Firepower Guidance (Active)</p>    | Archery and Hunting                                          | Holy Ruins - Level 40        |
| ![](https://772063455-files.gitbook.io/~/files/v0/b/gitbook-x-prod.appspot.com/o/spaces%2F-Lgje1lBxKKWXwqycB-v%2Fuploads%2FnrXIlmBpRT1EZQf0gkey%2Fimage.png?alt=media\&token=f9df81ec-4f77-4aaf-9da1-b2fdf6ba928a)Tactical Guidance      | <p>Reconnaissance<br>Teamwork<br>Full-out Attack<br>Positional Defense<br>Combat Deployment<br>Emergency Mobilization<br>Protection Mode (Mimicry)<br>Ironic Armor (Active)</p>          | Bonus to deployed Tribesmen                                  | Holy Ruins - Level 50        |
| ![](https://772063455-files.gitbook.io/~/files/v0/b/gitbook-x-prod.appspot.com/o/spaces%2F-Lgje1lBxKKWXwqycB-v%2Fuploads%2Fh2zmXlNN8TtBDMlC3Pnj%2Fimage.png?alt=media\&token=88ba10a4-d9b1-4df0-b10f-38b592f501f3)Shadow Walker          | <p>Flexible Torso<br>Vision Blockage<br>Silent Operation<br>Dark Camouflage<br>Vital Attack<br>Illegal Invasion<br>Shadow Mode (Mimicry)<br>Optical Mimicry (Active)</p>                 | Stealth and Damage                                           | Holy Ruins - Level 55        |
| ![](https://772063455-files.gitbook.io/~/files/v0/b/gitbook-x-prod.appspot.com/o/spaces%2F-Lgje1lBxKKWXwqycB-v%2Fuploads%2Fi3ah48ObE2A9RODH57hx%2Fimage.png?alt=media\&token=dd6c5e9e-1609-475f-9c20-0ca8e9c3709c)Explorer               | <p>Emergency Repair<br>Living Body Mod<br>High Mobility<br>Immunity Activated<br>Tissue Enhancement<br>Power Injection<br>Special Mode (Mimicry)<br>Electromagnetic Barrier (Active)</p> | Resistance to negative status effects and harsh environments | Holy Ruins - Level 60        |
| ![](https://772063455-files.gitbook.io/~/files/v0/b/gitbook-x-prod.appspot.com/o/spaces%2F-Lgje1lBxKKWXwqycB-v%2Fuploads%2FUspUzbpCPXK3xespKTsg%2Fimage.png?alt=media\&token=0f66015f-a1e7-4a9c-93e3-2c591411d4e9)Ironblood Guard        | <p>Stamina Burst<br>Absorption Barrier<br>Endless Vitality<br>Sequence Protection<br>Extreme Vigilance<br>Combat Potential<br>Vigilance Mode (Mimicry)<br>Muscle Revival (Active)</p>    | Resistance and Stamina                                       | Ancient Dungeons - Repair it |

| ![](https://772063455-files.gitbook.io/~/files/v0/b/gitbook-x-prod.appspot.com/o/spaces%2F-Lgje1lBxKKWXwqycB-v%2Fuploads%2F4MvEGQDrOIyTUrrQCfxA%2Fimage.png?alt=media\&token=15ea2eee-f4ad-4d91-b989-6c75e232c4e0)Nature Enlightenment | <ul><li>Nature’s Blessing</li><li>Nature’s Heal</li><li>Nature’s Protection</li><li>Eco-Balance</li><li>Nature’s Domain</li><li>Resonance Mode (Mimicry)</li><li>Nature's Heart (Active)</li></ul> | Mastery over animals | Ancient Dungeons - Repair it |
| -------------------------------------------------------------------------------------------------------------------------------------------------------------------------------------------------------------------------------------- | -------------------------------------------------------------------------------------------------------------------------------------------------------------------------------------------------- | -------------------- | ---------------------------- |

***

## Zone Progression

<figure><img src="https://772063455-files.gitbook.io/~/files/v0/b/gitbook-x-prod.appspot.com/o/spaces%2F-Lgje1lBxKKWXwqycB-v%2Fuploads%2FJsKmz4hNwfUxUvrRBlv3%2FSoulmask%20map.png?alt=media&amp;token=63c86fe4-1c9d-4ce9-840a-10834b749c31" alt=""><figcaption></figcaption></figure>

-Eastern Rainforest, typically where you spawn in and start your journey, followed by the Western and Northern Rainforest, the last two zones scale from 10-25 with level 25 Mobs and Barbarians respectively can be found in the Barracks for tribes located there.

-Mangrove is next which is across the water to the south-west of the Western Rainforest which introduces a lot more "aquatic life" and makes for pretty rough base locations, so it is not really recommended as a spot of operations, but there are some tablets to pick up here though for those adventurous enough.

-Next, we\`ll continue heading west into the three zones that all have monsters and Barbarians of varying levels from 21-30+ in the Rocky Bottomland, The Wild and finally Pit Hill. These three places make for decent locations if you are looking to build either a second base and or maybe just an outpost?

-From here we head North and into the Table Mountains where the level range is 30 - 40, however further to our west is a median zone, Lakeside Forest(26-35). And is one of the recommended locations for your second base if you are 35 and closing in on 40 as the weather is very temperamental and it gets pretty chilly, so you\`ll want to have access to the Air Heater(Awareness 40) but you WILL make due if you have level 2 Cold mod on the clothing for your tribesmen to stave of the cold. The Lakeside Forest also houses the Flint Tribe Fortress, where the levels go up to 50+, so not recommended to go in if you're low leveled here as they will turn you into a pincushion very quickly but it's an excellent place to gather good crafters and laborers later in the game.

-Just west of the Lakeside Forest is also the Jungle Cave which is a poisonous hellscape with Poison dart frogs, scorpions and other creepy crawlies but also the best place for Iron Ore.&#x20;

-North of the Table Mountain is the Plateau Woodland, sharing a level range of 31-40. It holds a dungeon where you need Awareness 40 to enter, so it's worth exploring once you hit that threshold, just make sure you come WELL prepared.

-We continue our adventure north into the Giant Wood Forest and Great Prairie. Good area for a base on the Prairie as it's beautiful and full of life. But some of the enemies here are terrifying, so don’t go there unless you have the resources to make barriers around the entire base first.

-We are now going into the last of the northern regions and reaching the initial level cap of 50 in the Southern Wasteland where we are now dealing with enemies in the 41-50 bracket, sometimes even above. Don't consider this a base location unless you are ready to deal with the radiation but it's a cool locale with very varied flora and fauna. You will also find the Fang tribe has it\`s Fortress in this area, so it's definitely worth the adventure.

-Volcanic Forest 41-50, which is due southwest of the Wild, followed by the Barren Meadow 41-50+ just South of the Jungle Cave and finally the Scorching Volcano in the bottom left of the map with a whooping 46-55 level range and let me tell you. Unless you have Heat protection here, you will die in seconds the closer you get to the Volcano and you can in fact get inside the volcano as it has an expansive underground system to explore.

-The last zone is the Dark Forest, Frostleaf Grove, Frost Canyon and Alpine Land all of which are as of yet, unexplored, but perhaps someone else can offer some insight about these areas for us?

***

## Farming and Foods 🌶🌽🥕🌻

<figure><img src="https://772063455-files.gitbook.io/~/files/v0/b/gitbook-x-prod.appspot.com/o/spaces%2F-Lgje1lBxKKWXwqycB-v%2Fuploads%2FXJy7rf5taiY1hIP8CA3u%2Flrobu915xbntv5qmvk.jpg?alt=media&amp;token=702637c6-bc34-47b1-a94a-f2d3931e40d6" alt=""><figcaption></figcaption></figure>

#### Where to find Crops and Seeds?

Barbarian Barracks without Mines often have crop plots. These are located in the two Barracks shown, just outside the front gates. Be sure to kill the 1st Watch Fire so no multiple npc's spawn on you.  You will also find seeds from multiple boxes within the Barracks, and other items you may need or want.

The plants vary from location to location and also they can vary in what has spawned in at that current time.

**Location 1 - Northwest Barracks (Alpaca site TOO!)**\
Crops often found here: pumpkins; chilies;  potatoes; cotton; corn; and tomatoes.

<div><figure><img src="https://772063455-files.gitbook.io/~/files/v0/b/gitbook-x-prod.appspot.com/o/spaces%2F-Lgje1lBxKKWXwqycB-v%2Fuploads%2FGdJfjkURTIZYOuo53ZNf%2FPlants_1.png?alt=media&amp;token=d1a398c1-fc78-4e64-b287-5d473ddd2950" alt=""><figcaption><p>Barbarian Barracks: Flint Tribe<br>North west of the Jungle.</p></figcaption></figure> <figure><img src="https://772063455-files.gitbook.io/~/files/v0/b/gitbook-x-prod.appspot.com/o/spaces%2F-Lgje1lBxKKWXwqycB-v%2Fuploads%2FY5UqwwsYn2JjgyrTLptc%2FPlants_2.png?alt=media&amp;token=4120f022-52a3-4773-bb52-2654a0e24194" alt=""><figcaption><p>Barbarian Barracks: Flint Tribe<br>South west of the Salt pan in the Mangrove Swamp.</p></figcaption></figure></div>

**Location 2 - South West Barracks (Salt pan here TOO!)**\
Crops often found here: papaya; guava; corn; cashew; cotton; quinoa; and cocoa.\
This is probably the earliest place that you're going to find a lot of quinoa growing that you could actually get to and obtain those items without dying early game. Rear side of the Barracks is the salt pan if you need crude salt.

#### Before The Granary

Wait! I got my first farm but it says I need a Granary?

Okay you just laid down the first farmland now it says you need a granary.  Worry not you can manually plant seeds on this plot, just put the intended seed on your hot bar and start planting. You will need to manually water and fertilize as well.

**Here's Some Tips About Manual Farming**

* Watering with only a water skin is a madness just let the rain come and fill the farmland naturally.
* I recommend you get water tanks from Potting Technique to run water till water buckets are unlocked in Bronze Age-Advanced Carpentry.
* Plants won't grow without fertilizers. Depending on which plant you're growing you need the correct fertilizer. (See Fertilizer Below.)
* Focus on one farmland and just plant what you need till granary is obtained.

**Fertilizer Information**

Depending on your farm set up you'll know exactly which fertilizer you need to use most.

* Compost: Potatoes, Cotton, Aloe, Agave
* Ash: Pumpkin, Tobacco, Cocoa
* Bone Powder: Corn, Cashew, Peanut, Tomato, Papaya, Quinoa
* Stone Powder: Chili, Guava, Papaya
* Compound: All crops benefit. Boosts Crop Speed 10%

**Herbicide and Locust Pesticide**

Both of these treat two separate issues, I recommend you load these directly on your dedicated farmer tribesman, they often didn't work being put into boxes or the granary.

**Bonfire Location**

When establishing farm plots, it's crucial to note that they can only be placed within the radius of a bonfire. If necessary, consider constructing additional bonfires to expand your farming area. Additionally, the level of your bonfire directly impacts the maximum number of plots you can have, so upgrading it becomes essential for scaling up your farming operations.

**Once Granary is \[Unlocked]**

As you transition from manual farming to automation and multiple plots, it's imperative to have prioritized fertilizer production. By this stage, most players also consider upgrading from their thatch hut to establish their first early mid-game main base, signaling the imminent entry into the Bronze Age.

You should have the following items Unlocked:

* Farmland
* Fertilizer Bucket
* Well / Rain Collector (if not near water)
* The Granary.

**Assign your Farmer to Both The Granary & Fertilizer Bucket**

One remarkable aspect is that specialized tribesmen can efficiently manage both planting and fertilizer tasks, providing full automation for your farming buildings. Ensure that you load all your seeds and fertilizer materials as required, then set up automated tasks accordingly. This streamlined process maximizes efficiency and minimizes manual intervention in your farming operations.

**Farms inside Barracks & Fortresses**

These farms are incredible if you are looking to get resources for either food and even crafting by way of cotton, needed for a lot of various crafts. What is important to note here is that these farms, IF you empty them out, leave and return at a later time, the crops may actually change. The availability of what they can change into, seem to be dependent on what you find in the chests within the Barracks and or Fortress. In the Flint Tribe fortress, you may collect everything except for Cactus out of their farms.

***

### Cooking and Food Buffs

**Cooking is one of the most important proficiencies in the world of Soulmask.**

Highly recommend that you get a tribesman who's good cooking and put points towards output when selecting bonuses as they improve. In Soulmask, knowing what food to consume from early to late-game stages is essential for maximizing your character’s stats and performance. Early in the game, focus on unlocking the Cooking Stove at awareness strength 8 to expand your cooking options. Until then, use a Campfire or Bonfire. At level 18, unlock the Drying Rack, and by level 20, start brewing to enhance your recipes. Focus on making Cooking Oil by unlocking the Oil Press at level 30. Unlock the Worktop at level 30 to access late-game recipes. At this stage, prioritize foods with higher stat boosts and longer preservation.

#### **Types of buffs:**

**Staple Food, Recreational, Beverage, Vegetable/Fruit, Meat, Medical Potion and finally a Cigar.**

Alcohol and Cigar provide significant recreational buffs, especially in mid and late-game stages. You can have 7 different buffs active at any one time. **3 Meals, 2 Drinks, 1 Medical and 1 "unhealthy" one in the Cigar.**

<details>

<summary>Best Foods for your Journey in Soulmask</summary>

#### Special Foods for Leveling

Quinoa-based dishes are essential for leveling up your character efficiently:

* Quinoa Porridge: +5% critical damage and +100% body experience efficiency. Good for early-game.
* Seafood Quinoa: +10% critical damage and +200% body experience efficiency. Good for mid to late-game.

#### Best Early-Game Foods in Soulmask

* Cooked Meat
* Broth
* Roasted Corn or Roasted Potato (Staple Food)
* Roasted Pumpkin (Vegetable)
* Fruit Wine or Mezcal (Recreational)

Key Buffs:

* Food Buff: Use Broth for a cheap 100 HP boost.
* Staple Food Buff: Choose between Roasted Corn (defense boost) or Roasted Potato (carry weight boost).
* Fruits and Vegetables Buff: Opt for Roasted Pumpkin to increase stamina recovery.

#### Best Mid-game foods in Soulmask:

* Premium Jerky
* Tortilla or Cooked Potato (Staple Food)
* Pumpkin Salad (Vegetable)
* Tequila (Recreational)

Key Buffs:

* Premium Jerky: Provides 100 HP and +5 attack, with no spoil timer.
* Tortilla: Increase defense by 10.
* Cooked Potato: Max load increased by 40%.
* Pumpkin Salad: Boosts stamina recovery by 50% and max stamina by 10.

#### Best Late-Game Foods in Soulmask:

* Smoked Ham
* Fried Taco or Fried Potato Bun (Staple Food)
* Fried Pumpkin Ring (Vegetable)
* Mead (Recreational)

Key Buffs:

* Smoked Ham: Increases HP by 200% and attack by 10, with no spoil timer.
* Fried Taco: Enhances defense by 40%.
* Fried Potato Bun: Increases max load by 80.
* Fried Pumpkin Ring: Improves stamina recovery by 100% and max stamina by 20.

#### Alcohol and Cigar Buffs

**Alcohol:**

* Fruit Wine: +3% damage.
* Mezcal: +3% critical hit chance.
* Tequila: +6% critical hit chance.
* Mead: +6% damage.

**Cigar:**

* General Buff: +10% critical resist.

</details>

***

### Hunting

The hunting Gallery is VERY useful.

It will show a lot of useful info about the local wildlife and enemies you encounter so I recommend having a look if you are struggling with a specific enemy, perhaps you\`re just using the wrong weapon to fight it?

🌶🌽🥕🌻

***

## The Mounts 🦙 🐆

<figure><img src="https://static0.gamerantimages.com/wordpress/wp-content/uploads/wm/2024/06/where-to-find-all-mounts-in-soulmask.jpg" alt=""><figcaption></figcaption></figure>

### **Quick facts before we deep dive:**

* All animals have rarities ranging from lowest to highest: White, Green, Blue, Purple, Yellow, Orange/Red.
* The rarity of an animal determines both its size and its stats. Higher rarity means a larger mount with better stats.
* Saddles also have rarities, and the rarity of the saddle will further improve the stats of the animal it is equipped on.

### Alpaca Guide 🦙

Alpacas are the first early game mount you should come across, these guys are very easy to tame and take no time to catch.

<details>

<summary>Catching your First Alpaca</summary>

**What They Eat**

Thatch, Potato, Quinoa, Pumpkin, Corn, Banana, Pineapple, Peanut, Alpaca Feed, Refined Alpaca Feed

**How to Catch**

Honestly the easiest to catch you can find them at ancient ruins, and barbarian barracks. Since they're already caged up you simply need to pick them up and set them down on the ground from there, whistle them and walk back to base.

</details>

### Llama Guide 🦙

Llamas are similar to the Alpaca. They are very easy to tame and take no time to catch. They're able to carry way larger weight limits (800 vs 350) are great for resource collecting. They can also carry unconscious barbarians or small livestock.

<details>

<summary>Catching your First Llama</summary>

**What They Eat**

Quinoa, Pumpkin, Corn, Banana, Pineapple, Peanut, Llama Feed, Refined Llama Feed

**How to Catch**

What's Needed:

* 1-2 medium traps crafted
* any item they eat (1 is only needed per trap)

Where to Find

WIP

</details>

### Jaguar Guide 🐆

Jaguars are another early game mount you should come across, these guys can be difficult to catch and require a lot of patience since there is a capture event mini-game associated with the cubs.

NOTE: The Mini Game Can Fail! If the mother jaguar agro's you and you kill it before a cub spawns you will need to start over, once the cub is spawned you can kill the mother.

<details>

<summary></summary>

**What They Eat**

Fresh Meat, Fish, Premium Fish, Meat, Rare Fresh Meat

**How to Catch**

What's Needed:

* 1-2 medium traps crafted
* any meat (1 is only needed per trap)

**Early Game Locations**

Basically anywhere you find jaguars. There is a spot West of the Flint tribe Barracks that is reported consistent.

***Capture Event Mini Game***

* Scan the game environment for Jaguar tracks.
* Follow the tracks to initiate the capture event. Continuously scan and interact with each new set of tracks.
* Eventually, you'll observe an adult female jaguar hunting wild animals. Remain hidden and observe as the jaguar catches its prey.
* Listen for the jaguar to announce it's returning home to feed the cub. Follow the jaguar slowly, staying crouched to avoid aggro.
* When the jaguar reaches its den, it will spawn a cub and the female will display "resting" text. This is your opportunity to eliminate the female jaguar.
* Place traps strategically and load them with food.
* Be patient and wait for the cautious jaguar cub to approach the traps. Use Q (or the appropriate command) repeatedly to monitor and ensure they walk into the trap successfully.
* Finally pick up your Jaguar and check its stats.&#x20;

Note: for black jaguars they need to be Orange Quality

</details>

### Other Mounts

Ostrich, Snow Leopard (Guides Coming Soon)

***

## Capturing Animals 🦃 🐻 🐒 🦜

### Capturing Capybara 🐻

Your Early Meat supply! Capybara are found around the ponds and rivers of the jungle. You need to sneak up and find a Mother with a cub with her. Place a medium trap nearby, bait it with pumpkins, and wait out of sight. Use perception to check if the cub has entered the trap. Alternatively if you want to keep the adults from eating your bait. Kill them off but leave the cubs. You will need the Capybara pen for your new tame. Breeding is handled after you find a male and female, The Pen can be used as a location for a tribesman to automate.

### Capturing Turkeys 🦃&#x20;

These are meat and feathers for arrows. Use a small trap and find a family of turkey.  Place the trap down ahead of the family and walk behind them to herd them towards the trap. The small turkey should get ensnared. You can also use ground corn to bait the trap. You will need the Turkey pen for your new tame. Breeding is handled after you find a male and female, The Pen can be used as a location for a tribesman to automate.

### Optional: Capturing Monkeys 🐒

Monkeys are super versatile; they can basically collect crops, and niche items you may need for your crafting when you assign it by holding \[e] when highlighting them with your cursor. You can find monkeys at wild storage nests throughout the jungle and will need small traps to catch them, after some testing the bait can be any fruit or nuts and they're extremely easy to catch. Crafting  a Monkey storage nest and placing it will allow the tames to bring back their finds.

### Optional: Capturing Parrots 🦜

Parrots are an early warning system for raids on your base. They also provide feathers for crafting. They are throughout the jungle area. Look for an area they like to be on the ground at. You will need small traps to catch them, and ground corn for bait. These guys are very alert and you will need to crouch and sneak to set the trap. Stay hidden and do not alert the bird and eventually it will go inside to eat the bait. Bring your prized Parrot home and place it on your Parrot stand and feed and water it.

***

## Wild Tribesman

<figure><img src="https://772063455-files.gitbook.io/~/files/v0/b/gitbook-x-prod.appspot.com/o/spaces%2F-Lgje1lBxKKWXwqycB-v%2Fuploads%2FcussmMYnxykX2JruPa4u%2Fimage.png?alt=media&amp;token=a31f207c-aa88-4e47-a8fa-5c1252ef4afd" alt=""><figcaption></figcaption></figure>

### There are 5 Tribes: Claw, Flint, Fang, Outcasts and Plunderers.

* -Everyone can be deterred except Plunderers and Elites (The ones with a unique name and a silver border around their health bar).
* -The Claw tribe is considered to have the best fighters
* -The Fang tribe specializes in Poisons and Healing/Remedies, which means they will also do well as Archers due to it being the only weapon that can utilize poisons.
* -The Flint tribe is all about developing and furthering their own tribe and are considered to make great crafters and overall workers. They also make for great warriors but with a focus on defense.
* -The outcasts don\`t belong to any tribes and their stats as such are completely random. You can find great ones of course but expect a lower chance of finding what you need, compared to if you were chasing the more specialized tribes.

### Deterrence

Deterring is the main way to recruit or gain tribesmen for your tribe. Outcasts, Barbarians and regular enemy tribesmen can be recruited with deter. When an Outcast, Barbarian, or enemy tribesman is low on health (<20% by default), a mask wearer can use their interact (default "E" key) to Deter them. The deterred NPC will fall unconscious and start slowly gaining recognition. When a minimal recognition (default 500) is reached they can be recruited. While unconscious, deterred NPC's can be healed by placing a bandage or other healing item in their inventory and clicking the use function(double clicking the item usually works). They can also be fed liquid foods such as broth in the same way. Feeding them while they are unconscious may be necessary to keep them alive. Deterred NPC's, that are still unconscious, can be picked up and carried over the shoulder or on a llama extended seat. Note: Scouts can not be deterred and recruited. The interact function interrogates them and reveals map information, instead. Scouts remain alive and hostile after the interrogation. Plunders and Tribe leaders also can not be deterred.

Players may recruit a number of Tribesmen based on their Mask upgrades. The initial Control node allows 3 Tribesmen, and fully upgrading Connection Enhancement raises the cap to 18.

### Control

After repairing the Control node on your Mask, you may take direct control of a Tribesmen by putting the mask on them. Your player character will fall asleep while you control the Tribesman. Actions taken while controlling a Tribesman use the Tribesman's skills and proficiency. EXP gained while controlling a Tribesman goes to the Tribesman's Body, Weapon, and Crafting levels. Awareness EXP earned while controlling a Tribesman goes to the chieftain controlling the tribesman.

### Profession

The Tribesmen's profession directly affects the proficiency level cap, for example: the Warrior's profession only has a probability of reaching the proficiency level cap of 120 for the five weapons: Sword, Dual-Blade, Hammer, Great sword, and Gauntlets. This probability is randomized within the interval, not calculated by probability.

The initial proficiency level of a barbarian is affected by three factors: Tribesmen level, Tribesmen profession, and Tribesmen status. For example, a Tribesmen of level 40 or above, with a high status in the smith profession, will be able to reach an initial level of 55-65 in crafting proficiency, whereas the initial level of other Proficiencies will be lower.

#### How to determine if a Barbarian is worth deterring before engaging.

* Press "Y" to open up your Mase nodes tree. Once your Core Functional Module has been activated, continue going right till you reach Perception Enhancement and then the linked node called Quality Assessment. With this node repaired, you\`ll be able to view more detailed information about both the Wildlife and the Barbarians, their titles and their potential are among some of the things you can see.
* This should help you find your preferred Barbarians to deter, but keep in mind that nothing is final as there is still a lot of RNG involved and getting the perfect barbarian is still something that we\`ll be chasing for a long time, but best of luck to you all.

THE MOST IMPORTANT thing to look for when selecting tribesmen to deter seems to be the title they hold (indicative of the types of proficiencies they're good in), and the rank (for how high their cap in those potentially goes). Highest rank I've seen so far is Master.

* Laborers are great at the collection of materials: Logging, Mining, Harvesting
* Craftsmen: Any crafting, completely random which ones they are given. Also supposed to unlock various tribes' medium/advanced clothing and costumes if they are found in a fortress(Only 3 fortresses at the minute.) Potentially bugged right now though as I\`ve deterred 50+ Craftsmen of varying levels from Novice to Master Craftsmen in a Flint fortress with 0 unlocks as of yet).
* Porters: Good at working the Kiln and or Furnace but they are also Great at transporting large quantities of items over longer distances as their weight limits are different and they have positive traits that affect how having more weight makes them move faster etc. (Unlocks the first tribe clothing too. Level 20-25 area barracks)

It is very important to note that there are currently a lot of unknowns when it comes to the positive and negative traits spread amongst all three tribes and there is NOT a definitive answer here.  As a lot of you may have experienced, you can find an Outcast on the starter beach that has a perfect spread of 120 proficiencies that you may be looking for, but as they are not tied to any tribes, they thus won\`t get any of the tribe exclusive traits.

### Rarities

White < Green < Blue < Purple < Yellow(Gold) < Red\
Those are for potential (i.e. the chances for that character to have good talents and growth). THEY ARE NOT INDICATIVE OF GOOD PROFICIENCIES AT ALL.

### Proficiencies

Proficiencies go from 1-125+ in each respective school and what they have is based on a lot of factors as well as the low chance of them being a uniquely titled barbarian that can give them various perks outside of the proficiencies themselves.

The level of the deterred barbarian ONLY affects what the overall proficiencies start at when you deter them and the higher the level the better the proficiency, the level also affects their attributes.

You can totally have a white dude with one or more 120+ proficiency in something.

### Talents

Tribesmen come with certain innate Talents, and gain more as they level up. All Talents are grouped into Innate, Title, Likes, Experience, Tribe, Advantage Talents, Defect. Further, each Talent is graded into three levels: I, II, and III. Advantage talents are related to the Tribesmen Profession, and Defects will not be Profession-related (to avoid Advantages and Defects conflicting).

Each Tribesman will start with 0-3 random Likes and 0-5 random Defects. Every 10 levels, Tribesmen will gain a new Advantage Talent. Every 5 levels, they have a probability to remove a Defect.

Barbarians have a chance to unlearn negative talents every five levels and are guaranteed to get positive perks every 10. Essentially, you want to recruit tribe members with many positive talents and a few negative ones at their lowest level to increase their chances of developing more valuable characteristics.

There are 29 distinct Tribe talents and 1 Experience talent. There are 12 Innate talents (6 Advantages and 6 Defects). There are 22 Titles (19 Advantages and 3 Defects).

Link to wiki list of talents: [Tribe Talents](https://soulmask.fandom.com/wiki/Tribesmen?veaction=edit\&section=5) Use ctrl+f and “search” the wiki page for the talent you are researching.

#### Why are Talents Important

Soulmask Talents play a significant role in determining the strength of your tribe. Stacking on tribespeople with many positive traits can make your experience much more accessible. In addition, if you want to change your current playable character, being able to hop on to a different tribe mate with lots of positive aspects can open new opportunities for you.

***

## Mysterious Tisane

Mysterious Tisane, dropped by bosses will reset the attributes of your main aka the Vagrant Novice character, but the Mysterious body shaping pill will reset the attributes of any of your deterred tribesmen.

NOTE:-there is a server setting that changes this, letting you reset the attributes of your deterred tribesmen much earlier in the game, effectively making the Mysterious body shaping pill a completely irrelevant addition to the game, so the choice is yours. Make the game easier earlier and or play it the way it's "meant" to be played.&#x20;

***

## Invasion

**Fever Buildup**

![](https://lh7-us.googleusercontent.com/docsz/AD_4nXct6LnHrhwr7BXOOrQ6ks7I5peyHW7vWbLjz3Qqs-mGFlHvjs1y4_cE-NzB6WWhgUwb0JdL4wuOg6GI6PnlImPSpFp8galiu7onMZNIrBlS8Rk679ZigWsqsZ4Na-H9_Sjh_OhtAWEmKyM2NcMyetQq548t?key=sRe5gowsns1dJNWMxgC0kA)Fever Bar

This gradual increase in Fever indicates that hostile forces are becoming increasingly aware of your presence and activities. Activities around Bonfires, such as working at outposts like the Logging Yard, Collection Yard, and Excavation Pit, contribute to Fever buildup. Once the Fever bar reaches its peak, it triggers an invasion event. During this event, hostile Barbarians and possibly other enemy factions will attempt to attack the Bonfire area. They aim to capture any Tribesmen working nearby and disrupt your operations. The intensity and frequency of invasions can vary based on the Fever level and player activities.

#### Managing Invasions

**Defense Preparation**

Players are advised to build various defenses around their bases to protect against these invasions. This includes:

* Traps: Ground spikes, Sticky Traps, Iron Peg Boards, Combustion Can Traps, Explosive Can Traps, and Arrow Traps. These traps can delay or damage invading forces, providing crucial time for your Tribesmen to respond.
* Barriers: Wooden Barriers, Stone Barriers, Wooden Anti-Climb Thorns, Metal Anti-Climb Thorns, Roadblocks (Bronze, Iron, and Steel). These barriers slow down or redirect enemy movements, enhancing the effectiveness of other defenses.
* Artillery: Crossbow Towers and Siege Ballista. These powerful defensive structures can inflict significant damage on invading forces from a distance.

**Patrol Route**

Effective management involves not only physical defenses but also strategic planning:

* Patrol Route Checkpoints: Place these checkpoints to establish defense routes for armed Tribesmen. These routes ensure that your forces are patrolling critical areas around the Bonfire, ready to respond to invasions.
* Equipping Tribesmen: Ensure that Tribesmen are well-equipped with weapons and armor to effectively combat invading forces. Training and managing their skills can significantly impact their performance during invasions.
* Resource Allocation: Maintain a steady supply of resources for repairs and upgrades to your defenses. Regularly check and reinforce weak points in your defenses to prevent breaches.

**Statue of God**\
The "Statue of God",  in Soulmask, is a special building item that serves multiple purposes within the game, *one being an inclusion to the Invasion Mechanics.* It is more than just a decorative piece; it has functional benefits that can aid players significantly. **Notably, non combatant tribesmen will retreat to any nearby Statue of God - place them in well defended areas to keep the enemy from capturing them.**

***

### Portals

<figure><img src="https://772063455-files.gitbook.io/~/files/v0/b/gitbook-x-prod.appspot.com/o/spaces%2F-Lgje1lBxKKWXwqycB-v%2Fuploads%2FwPb3oYNdWXw73HSwJNZB%2Fimage.png?alt=media&amp;token=7355bbdd-adc1-4a34-9cda-4c2ae1355bd7" alt=""><figcaption></figcaption></figure>

The Basic Portal that you can craft yourself will not let you teleport to unlocked teleporters, only to other basic teleporters. It is important to note that you can only teleport with whatever is currently on your action/hotbar and it will not bring anything in your inventory when using this discount portal they have provided us with unless you turn on Custom Supply Portal in the right-hand Menu in the server settings.

***

## Armor & Weapon crafting

For tribesmen traits, select Durability for 30-60 respectively and then Quality once you hit Iron as this is the point where leveling starts to slow down.\
You will unlock the Sabre tooth Armor at Awareness 40 once you kill the Berserk Sabre-toothed Predator which is a recommendation to everyone. Then when crafting the Saber tooth gear it will inherit the stats of the Iron Armor that goes into it. Hence you want to make sure it's as good as possible as this will be the best Armor you will have access to for quite a while.

Modifications make a huge difference

* All these mods you keep looting in chests from barracks and dungeons are not useless, even if the numbers may seem small they make a massive difference so use them.
* Having multiple Armor sets with different mods on them will be a benefit, even though it is grindy. Having one with Heat, Cold, Poison and Radiation protection will be the difference between surviving or dyeing.
* Repairing a Weapon or Armor WILL remove the MOD that is on them, so keep this in mind. Repair first, then put on the mod of choice.

IMPORTANT: You can in fact have EVERY single mod that fits in each respective category on a single piece of Armor, this includes but is not limited to every resistance for example: Poison proof, chill proof, heat proof and so on.

### **Unlocking Tribe Costumes and Armor**

* -The first three sets can be unlocked by Deterring the Porters in each respective low-level barrack.
* -The higher tiered ones can be acquired by deterring craftsmen from different Fortresses, supposedly. (Not proven yet.)

\~credits:\
AronAztek of Youtube.;\
[KokoHekumatiaru](https://www.reddit.com/user/KokoHekumatiaru/) of Reddit;\
Soulmask Wiki

<figure><img src="https://772063455-files.gitbook.io/~/files/v0/b/gitbook-x-prod.appspot.com/o/spaces%2F-Lgje1lBxKKWXwqycB-v%2Fuploads%2FILTLLvQSw1W3RpB7FhXM%2Fyou%20tube%20links.png?alt=media&amp;token=94c5b46f-e365-4b7c-812c-e9d68da93c1c" alt="" width="375"><figcaption></figcaption></figure>

This link is a play list of several Soulmask "HOW TOOS" from GosuNoob

<<https://www.youtube.com/playlist?list=PLN6gm7vJs30eti2OWzhka2PxqKbGnWYuZ>>

<figure><img src="https://772063455-files.gitbook.io/~/files/v0/b/gitbook-x-prod.appspot.com/o/spaces%2F-Lgje1lBxKKWXwqycB-v%2Fuploads%2FyE95SPKKkVS1Pcf4vyRY%2FGusnoob.png?alt=media&amp;token=2977f42a-14bb-42e5-b2ff-4a7960bbb1da" alt=""><figcaption></figcaption></figure>


# The PACK Valheim PvE-P Server

VALHEIM \~ YOUR VIKING ADVENTURE AWAITS!

## **Navigation of Pages:**

<table data-view="cards"><thead><tr><th></th><th></th></tr></thead><tbody><tr><td><strong>Left side of the page</strong> <span data-gb-custom-inline data-tag="emoji" data-code="25c0">◀️</span></td><td>Use the <strong>></strong> to open any pages in that section when the Header shows a <strong>></strong>.</td></tr><tr><td><strong>Right Side</strong> of the page <span data-gb-custom-inline data-tag="emoji" data-code="25b6">▶️</span></td><td>Click a header to go to that section of this page.</td></tr><tr><td><strong>Features of the page.</strong></td><td>are in an <strong>expandable box</strong>, please click the <strong>></strong> to open the expandable dropdown.</td></tr><tr><td><strong>Hyperlink</strong>s are often in a <strong>card form</strong> in the website.</td><td>So <strong>clicking an image</strong> will often take you to a specific page for information. </td></tr><tr><td><strong>Steam-link</strong>s are often in a <strong>card form</strong> in the website.</td><td>So <strong>clicking on a server card</strong> will take you to the Server.</td></tr></tbody></table>

### **VALHEIM \~ YOUR VIKING ADVENTURE AWAITS!** <a href="#n6aqnhjvki2c" id="n6aqnhjvki2c"></a>

<figure><img src="https://772063455-files.gitbook.io/~/files/v0/b/gitbook-x-prod.appspot.com/o/spaces%2F-Lgje1lBxKKWXwqycB-v%2Fuploads%2FyqrIFEsRkySlgkHtbEJY%2Fimage.png?alt=media&amp;token=49edf330-d4e1-48bc-9c8c-547ed9111ce7" alt=""><figcaption></figcaption></figure>

<table data-card-size="large" data-view="cards" data-full-width="true"><thead><tr><th align="center"></th><th align="center"></th><th align="center"></th><th data-hidden data-card-cover data-type="files"></th></tr></thead><tbody><tr><td align="center"><img src="https://772063455-files.gitbook.io/~/files/v0/b/gitbook-x-prod.appspot.com/o/spaces%2F-Lgje1lBxKKWXwqycB-v%2Fuploads%2FyaLp67SlBFVtdo7NnerE%2Fimage.png?alt=media&amp;token=0256df2a-b5cd-4e2b-962c-e904f5d5ff80" alt=""></td><td align="center"><em><strong>"Slain in battle, you have been carried to the tenth world. Here, in Valheim, you must conquer the realm and slay the monsters which Odin banished here long ago. Explore deep forest and freezing mountains, and build new settlements on the other side of vast seas – and gain the Allfather’s favour to become worthy of Valhalla!"</strong></em></td><td align="center">Valheim is a game about exploring a huge fantasy world inspired by Norse mythology and Viking culture. You start your adventure at the relatively peaceful center of Valheim. The further from the center you travel, the more challenging the world becomes.</td><td></td></tr><tr><td align="center"><img src="https://772063455-files.gitbook.io/~/files/v0/b/gitbook-x-prod.appspot.com/o/spaces%2F-Lgje1lBxKKWXwqycB-v%2Fuploads%2FvnfRDKZbx4sAYFnKlNx3%2Fimage.png?alt=media&amp;token=2ec95f67-feca-4bac-97ed-4f899b01d44e" alt=""></td><td align="center"><em><strong>"Raise your own viking mead halls, houses, castles, and more with our powerful construction interface. From knarrs to imposing warships, build legendary vessels to conquer the seas and discover new lands."</strong></em></td><td align="center">Valheim has a rich build menu which can be used to create impressive structures to satisfy the needs of any discerning warrior. Not only can players build houses and outposts, but players have been seen using this building interface to create massive bridges, works of art, defense's from the Creatures of Valheim</td><td></td></tr><tr><td align="center"><img src="https://772063455-files.gitbook.io/~/files/v0/b/gitbook-x-prod.appspot.com/o/spaces%2F-Lgje1lBxKKWXwqycB-v%2Fuploads%2FkXZHucQLUgtw7nQorGiX%2Fimage.png?alt=media&amp;token=21898f26-6603-40d2-b2a3-5f8ac29576e2" alt=""></td><td align="center">You can build many different workbenches and crafting stations like kilns, smelters and windmills that you can use for refining raw materials. Use the materials you have gathered to craft an array of different armors, weapons and tools. You can also build boats and bases.</td><td align="center"></td><td></td></tr><tr><td align="center"><img src="https://772063455-files.gitbook.io/~/files/v0/b/gitbook-x-prod.appspot.com/o/spaces%2F-Lgje1lBxKKWXwqycB-v%2Fuploads%2FGtkjaxtx4PHpSxVNtP4s%2Fimage.png?alt=media&amp;token=d5e1ad83-35cf-46dd-8208-b7cdf453a908" alt=""></td><td align="center">This brutal exploration and survival game can be played by 1-10 players at a time.</td><td align="center">Its vast, rich world allows you to battle, build, and conquer your way to a saga worthy of Odin's patronage! </td><td></td></tr><tr><td align="center"><img src="https://772063455-files.gitbook.io/~/files/v0/b/gitbook-x-prod.appspot.com/o/spaces%2F-Lgje1lBxKKWXwqycB-v%2Fuploads%2FFGLyKYqEYFFynZwJyEuq%2Fimage.png?alt=media&amp;token=da19aeb9-d5aa-499b-847f-256e641ae96b" alt=""></td><td align="center"><em>Valheim</em> is a complex game with tons of features. If you are just starting out as an adventurer, we have you covered! Start with our summary of the lore of the game, and then check out our <a href="https://faq.thepackgaming.com/valheim/info/guide">complete walkthrough!</a></td><td align="center"></td><td></td></tr></tbody></table>

<figure><img src="https://772063455-files.gitbook.io/~/files/v0/b/gitbook-x-prod.appspot.com/o/spaces%2F-Lgje1lBxKKWXwqycB-v%2Fuploads%2Fi0j32mn4AxTXfpxF4G5p%2Fimage.png?alt=media&amp;token=f1b3ec23-9260-48a4-abed-58f8591eb229" alt=""><figcaption></figcaption></figure>

## **Welcome to The PACKS VALHEIM PvE-P Server.** <a href="#id-2ur657zhc98g" id="id-2ur657zhc98g"></a>

<table data-card-size="large" data-view="cards" data-full-width="true"><thead><tr><th align="center"></th><th align="center"></th><th align="center"></th><th align="center"></th><th data-hidden data-card-cover data-type="files"></th><th data-hidden data-card-target data-type="content-ref"></th></tr></thead><tbody><tr><td align="center">▬▬▬▬▬▬▬▬▬▬▬▬▬▬▬▬▬▬▬▬ <br>⚫ 🟡 🔴<strong>𝐕𝐀𝐋𝐇𝐄𝐈𝐌 𝐒𝐄𝐑𝐕𝐄𝐑</strong>🔴 🟡 ⚫ <br>server to join: valheim.thepackgaming.com:2466 <br>password to join: thepackgaming <br>▬▬▬▬▬▬▬▬▬▬▬▬▬▬▬▬▬▬▬▬</td><td align="center"><em><strong>LOGGING INTO THE PACK'S VALHEIM:</strong></em></td><td align="center"><span data-gb-custom-inline data-tag="emoji" data-code="1f449">👉</span> Click the Join Game. <span data-gb-custom-inline data-tag="emoji" data-code="1f449">👉</span> Make sure Community is clicked on. <span data-gb-custom-inline data-tag="emoji" data-code="1f449">👉</span> Now Click Join IP and wait for a new popup. <span data-gb-custom-inline data-tag="emoji" data-code="1f449">👉</span> Now input the IP of the server you want to use. (Ours is shown.)<br> <span data-gb-custom-inline data-tag="emoji" data-code="1f449">👉</span> Click Connect and wait for a new screen.<br> <span data-gb-custom-inline data-tag="emoji" data-code="1f449">👉</span> Enter Password shown.</td><td align="center">After the first time you have logged in, the Auto Host mod should auto populate your IP address bar and will request the Password. Password Bypass has been disabled due to those that grief servers.</td><td></td><td></td></tr><tr><td align="center"><img src="https://772063455-files.gitbook.io/~/files/v0/b/gitbook-x-prod.appspot.com/o/spaces%2F-Lgje1lBxKKWXwqycB-v%2Fuploads%2FOXIjYu27s2p53DeLuSWO%2Fimage.png?alt=media&amp;token=62a09672-2fd4-461b-9b4a-5d1a2f555ced" alt="">   <em><strong>Valheim Rules:</strong></em></td><td align="center">We have decided that we need a few GENERAL RULES for all players of all expertise on our Server(s). Rules are subject to common sense! These rules are not comprehensive and use of loopholes to violate the spirit of these rules is subject to enforcement.</td><td align="center">Although the main focus of Valheim is PVE, we support consensual PVP. Players that wish to bash each other over the head have to turn on the friendly fire setting from the Inventory-screen.</td><td align="center"><em><strong>CLICK HERE TO SEE OUR RULES</strong></em></td><td></td><td><a href="https://faq.thepackgaming.com/rules/valheim">https://faq.thepackgaming.com/rules/valheim</a></td></tr><tr><td align="center">If you are new to our Group </td><td align="center"><em><strong>PLEASE JOIN OUR DISCORD.</strong></em> <br></td><td align="center">Click here to JOIN!</td><td align="center"></td><td><a href="https://772063455-files.gitbook.io/~/files/v0/b/gitbook-x-prod.appspot.com/o/spaces%2F-Lgje1lBxKKWXwqycB-v%2Fuploads%2FXGGaAiC0uMLbzD7KXwwo%2FDISCORD_CARD..png?alt=media&amp;token=0a846744-6f0e-419a-a05f-ec5a37d845cc">DISCORD_CARD..png</a></td><td><a href="https://discord.gg/thepackgaming.com">https://discord.gg/thepackgaming.com</a></td></tr><tr><td align="center"><img src="https://772063455-files.gitbook.io/~/files/v0/b/gitbook-x-prod.appspot.com/o/spaces%2F-Lgje1lBxKKWXwqycB-v%2Fuploads%2FY2aeBwqa4zeJBVbqoQH4%2Fimage.png?alt=media&amp;token=a0a78edd-72d9-4d8a-b986-da9e1ad3c106" alt=""></td><td align="center"><em><strong>COMMUNICATION:</strong></em></td><td align="center"><strong>Valheim supports in-game chat, but you’ll have to use dedicated software such as Discord for voice communication.</strong></td><td align="center"><p><strong>Global Chat use:</strong></p><p>/s - Shouts a chat message. (Server wide)</p><p>/say - Says a chat message. (Local Chat)</p><p>/W [player name] - Whispers a chat message to a player. (Message to just one other player)</p></td><td></td><td></td></tr></tbody></table>

<figure><img src="https://772063455-files.gitbook.io/~/files/v0/b/gitbook-x-prod.appspot.com/o/spaces%2F-Lgje1lBxKKWXwqycB-v%2Fuploads%2F7U9vM0vYGZcBUBFmHvdq%2Fvalheim%20div.png?alt=media&amp;token=4b5559b7-656f-4e51-835f-c768ffa115cd" alt=""><figcaption></figcaption></figure>

Development Blog: Rock On!

Hello vikings and Rocky-fans!\
\
It’s April, and you might have noticed that we were a bit mischievous earlier this month… For clarity, we did a repost of our old April Fools jokes, and as funny as these videos may be they will remain only jokes. But the video that was brand new – the trailer for [Rocky the Pet Rock](steam://openurl_external/https://steamcommunity.com/linkfilter/?u=https%3A%2F%2Fwww.youtube.com%2Fwatch%3Fv%3D75n4gxQ0RfE) – was no joke at all! Rocky is very much a real thing in the game, though we won’t go into detail about how to make your Rocky happy…

{% embed url="<https://www.youtube.com/watch?v=75n4gxQ0RfE>" %}

<figure><img src="https://772063455-files.gitbook.io/~/files/v0/b/gitbook-x-prod.appspot.com/o/spaces%2F-Lgje1lBxKKWXwqycB-v%2Fuploads%2F7U9vM0vYGZcBUBFmHvdq%2Fvalheim%20div.png?alt=media&amp;token=4b5559b7-656f-4e51-835f-c768ffa115cd" alt=""><figcaption></figcaption></figure>

Patch 0.220.5

We've gone digging deep into our archives today, vikings! We found some old stuff that you will recognize already (but we're putting it all here anyway so no one misses it), but we also found something that's been gathering dust for ages, perhaps even since the 90s! We made sure to digitize the old cassette for you, for your convenience.

#### Patch Notes:

#### \* New build piece: Rock (it’s a friend!) \* New game mode: Haldor (become the best merchant ever) \* New weapon: Shotgun (extra damage against deer) \* New weapon: Deer Raiser (raise mighty deer to fight for you) \* New body type: Deer (when playing as a deer, other deer will not become frightened of you)

<figure><img src="https://772063455-files.gitbook.io/~/files/v0/b/gitbook-x-prod.appspot.com/o/spaces%2F-Lgje1lBxKKWXwqycB-v%2Fuploads%2F7U9vM0vYGZcBUBFmHvdq%2Fvalheim%20div.png?alt=media&amp;token=4b5559b7-656f-4e51-835f-c768ffa115cd" alt=""><figcaption></figcaption></figure>

## Valheim Steam News Hub

{% embed url="<https://store.steampowered.com/news/app/892970/view/>" %}

{% embed url="<https://www.valheimgame.com/news/patch-0-217-4-hildir-s-request-public-test/>" %}

<figure><img src="https://772063455-files.gitbook.io/~/files/v0/b/gitbook-x-prod.appspot.com/o/spaces%2F-Lgje1lBxKKWXwqycB-v%2Fuploads%2FdcYkAauZWV4RDQapU07J%2Fimage.png?alt=media&amp;token=5b0f6efa-023b-4000-8b24-0cc711c9f3e7" alt="" width="375"><figcaption></figcaption></figure>

### BUG REPORTING

&#x20;Valheim developer Iron Gate runs an official bug page where you can report issues you have, as well as upvote existing issues and let them know which ones are the bugs to squish first.

{% embed url="<https://valheimbugs.featureupvote.com/suggestions/158466/fix-the-crashing>" %}

<figure><img src="https://772063455-files.gitbook.io/~/files/v0/b/gitbook-x-prod.appspot.com/o/spaces%2F-Lgje1lBxKKWXwqycB-v%2Fuploads%2Fgo9TBxXeonzNsWX94y9l%2Firon-gate-logo_blk-bkg.png?alt=media&amp;token=c8e00ac8-c6f5-4904-ae9d-34fd9ceea3b1" alt="" width="263"><figcaption></figcaption></figure>

### IRON GATE STUDIO \~ VALHEIM DEVELOPERS

Everyone at Iron Gate has really been appreciating all the messages, love, questions and thoughts from all of you, so please keep them coming! And again, a big thank you to all of you for helping us reach this ridiculous milestone in under two weeks of sailing onto Early Access. We’re so excited to continue working with you all to reach Asgard together, and we’ll be sharing more soon on what’s next. Praise Odin! The Iron Gate Team \_\_ Follow us on social media to not miss out on any news!&#x20;

<figure><img src="https://772063455-files.gitbook.io/~/files/v0/b/gitbook-x-prod.appspot.com/o/spaces%2F-Lgje1lBxKKWXwqycB-v%2Fuploads%2F6S1SayoE7goMKHy8OZMN%2FWEBSITE_DIV_SOCIAL%20MEDIA.png?alt=media&amp;token=ca3bf939-5623-47e9-b598-dadef9c84aac" alt="" width="375"><figcaption></figcaption></figure>

<table data-view="cards"><thead><tr><th align="center"></th><th data-hidden></th><th data-hidden data-card-target data-type="content-ref"></th></tr></thead><tbody><tr><td align="center"><img src="https://772063455-files.gitbook.io/~/files/v0/b/gitbook-x-prod.appspot.com/o/spaces%2F-Lgje1lBxKKWXwqycB-v%2Fuploads%2FgQlsYYWLOITgX2uu1bgf%2Fimage.png?alt=media&amp;token=7145294a-f20a-4c1c-a406-c638aab056e6" alt=""></td><td></td><td><a href="https://store.steampowered.com/news/app/892970/view/">https://store.steampowered.com/news/app/892970/view/</a></td></tr><tr><td align="center"><img src="https://772063455-files.gitbook.io/~/files/v0/b/gitbook-x-prod.appspot.com/o/spaces%2F-Lgje1lBxKKWXwqycB-v%2Fuploads%2FjVTqBhDCcpeOZe1nsTlf%2Fimage.png?alt=media&amp;token=f78e8e4f-7fbe-4117-a65c-8d3009f04431" alt=""></td><td></td><td><a href="https://discord.com/invite/valheim">https://discord.com/invite/valheim</a></td></tr><tr><td align="center"><img src="https://772063455-files.gitbook.io/~/files/v0/b/gitbook-x-prod.appspot.com/o/spaces%2F-Lgje1lBxKKWXwqycB-v%2Fuploads%2F2aD7cp5XZ8vCqFut4o2G%2Fimage.png?alt=media&amp;token=6098af6a-8885-4f21-ba6b-266e03a6e270" alt=""></td><td></td><td><a href="https://www.reddit.com/r/valheim/">https://www.reddit.com/r/valheim/</a></td></tr><tr><td align="center"><img src="https://772063455-files.gitbook.io/~/files/v0/b/gitbook-x-prod.appspot.com/o/spaces%2F-Lgje1lBxKKWXwqycB-v%2Fuploads%2FqwJbF5OXWCtBQfya570g%2Fimage.png?alt=media&amp;token=406fe310-b77d-42df-850c-fc64f75a13e4" alt=""></td><td></td><td><a href="https://twitter.com/Valheimgame?ref_src=twsrc%5Egoogle%7Ctwcamp%5Eserp%7Ctwgr%5Eauthor">https://twitter.com/Valheimgame?ref_src=twsrc%5Egoogle%7Ctwcamp%5Eserp%7Ctwgr%5Eauthor</a></td></tr><tr><td align="center"><img src="https://772063455-files.gitbook.io/~/files/v0/b/gitbook-x-prod.appspot.com/o/spaces%2F-Lgje1lBxKKWXwqycB-v%2Fuploads%2FUDLjB2LZYDAK9b8svKsv%2Fimage.png?alt=media&amp;token=03f78112-b03d-4059-b2dd-27fa79f875b0" alt=""></td><td></td><td><a href="https://www.youtube.com/channel/UCr3Yfz4Ts_K4bAyMCoVXeyA">https://www.youtube.com/channel/UCr3Yfz4Ts_K4bAyMCoVXeyA</a></td></tr><tr><td align="center"><img src="https://772063455-files.gitbook.io/~/files/v0/b/gitbook-x-prod.appspot.com/o/spaces%2F-Lgje1lBxKKWXwqycB-v%2Fuploads%2FWn23Ftc7ayMqrDN7RFw2%2Fimage.png?alt=media&amp;token=36ffb415-5570-4cb9-a122-7e56aad46598" alt=""></td><td></td><td><a href="https://www.facebook.com/valheimgame/">https://www.facebook.com/valheimgame/</a></td></tr></tbody></table>

<figure><img src="https://772063455-files.gitbook.io/~/files/v0/b/gitbook-x-prod.appspot.com/o/spaces%2F-Lgje1lBxKKWXwqycB-v%2Fuploads%2F8osfcqZfN3jIQRgVs7Kh%2Fimage.png?alt=media&amp;token=81b57603-ec16-4fe1-81ce-761eea4f7d65" alt=""><figcaption></figcaption></figure>


# Valheim Guides

## **Navigation of Pages:**

<table data-view="cards"><thead><tr><th></th><th></th></tr></thead><tbody><tr><td><strong>Left side of the page</strong> <span data-gb-custom-inline data-tag="emoji" data-code="25c0">◀️</span></td><td>Use the <strong>></strong> to open any pages in that section when the Header shows a <strong>></strong>.</td></tr><tr><td><strong>Right Side</strong> of the page <span data-gb-custom-inline data-tag="emoji" data-code="25b6">▶️</span></td><td>Click a header to go to that section of this page.</td></tr><tr><td><strong>Features of the page.</strong></td><td>are in an <strong>expandable box</strong>, please click the <strong>></strong> to open the expandable dropdown.</td></tr><tr><td><strong>Hyperlink</strong>s are often in a <strong>card form</strong> in the website.</td><td>So <strong>clicking an image</strong> will often take you to a specific page for information. </td></tr><tr><td><strong>Steam-link</strong>s are often in a <strong>card form</strong> in the website.</td><td>So <strong>clicking on a server card</strong> will take you to the Server.</td></tr></tbody></table>

<figure><img src="https://772063455-files.gitbook.io/~/files/v0/b/gitbook-x-prod.appspot.com/o/spaces%2F-Lgje1lBxKKWXwqycB-v%2Fuploads%2Fxy3yOLL35gXoJS4p4eOm%2Fimage.png?alt=media&amp;token=8ec6cfdd-1536-4b9c-9433-fb7a3abb1bde" alt=""><figcaption></figcaption></figure>

## Walkthroughs, Wikis & Troubleshooting.

<table data-view="cards"><thead><tr><th align="center"></th><th align="center"></th><th align="center"></th><th data-hidden data-card-target data-type="content-ref"></th></tr></thead><tbody><tr><td align="center"><img src="https://772063455-files.gitbook.io/~/files/v0/b/gitbook-x-prod.appspot.com/o/spaces%2F-Lgje1lBxKKWXwqycB-v%2Fuploads%2FqJOES8gLygnhhYvIjPEn%2Fimage.png?alt=media&amp;token=7a48c24f-136a-4328-a6bc-f0f131ca66d1" alt=""></td><td align="center"><strong>The PACK Valheim Gameplay Guide</strong></td><td align="center">Click here!</td><td><a href="https://faq.thepackgaming.com/valheim/info/guide">https://faq.thepackgaming.com/valheim/info/guide</a></td></tr><tr><td align="center"><img src="https://772063455-files.gitbook.io/~/files/v0/b/gitbook-x-prod.appspot.com/o/spaces%2F-Lgje1lBxKKWXwqycB-v%2Fuploads%2Frex2syGFAvFGKA73IGkw%2Fimage.png?alt=media&amp;token=bed84afa-0e14-4d29-909f-73f9607d09d6" alt=""></td><td align="center"><strong>Valheim Wiki | Fandom</strong></td><td align="center">Click here!</td><td><a href="https://valheim.fandom.com/wiki/Valheim_Wiki">https://valheim.fandom.com/wiki/Valheim_Wiki</a></td></tr><tr><td align="center"><img src="https://772063455-files.gitbook.io/~/files/v0/b/gitbook-x-prod.appspot.com/o/spaces%2F-Lgje1lBxKKWXwqycB-v%2Fuploads%2F893n6y1oUYXQOJtXpnyT%2Fimage.png?alt=media&amp;token=0b58ebf7-7464-46ee-bdd7-2ff9f6d4d1b2" alt=""><img src="https://772063455-files.gitbook.io/~/files/v0/b/gitbook-x-prod.appspot.com/o/spaces%2F-Lgje1lBxKKWXwqycB-v%2Fuploads%2FpiwLi63Bj22RZJGyOiDg%2Fimage.png?alt=media&amp;token=80c1a866-4e8c-4cf3-aa1b-1667bdb21151" alt=""></td><td align="center"><p><strong>Valheim Wiki Guide –</strong> </p><p><strong>Locations, Collectibles, How-To’s &#x26; More</strong></p></td><td align="center">Click here!</td><td><a href="https://gamertweak.com/valheim-wiki-guide/">https://gamertweak.com/valheim-wiki-guide/</a></td></tr><tr><td align="center"><img src="https://772063455-files.gitbook.io/~/files/v0/b/gitbook-x-prod.appspot.com/o/spaces%2F-Lgje1lBxKKWXwqycB-v%2Fuploads%2FYzNDiRjFiUVB5WzlxKqs%2Fimage.png?alt=media&amp;token=902a6794-088f-4c2b-b2c5-5f201fa23eb5" alt=""></td><td align="center"><strong>Valheim Wiki Guide</strong></td><td align="center">Click here!</td><td><a href="https://www.ign.com/wikis/valheim/">https://www.ign.com/wikis/valheim/</a></td></tr><tr><td align="center"><img src="https://772063455-files.gitbook.io/~/files/v0/b/gitbook-x-prod.appspot.com/o/spaces%2F-Lgje1lBxKKWXwqycB-v%2Fuploads%2FYjLt8aLtqoFtJ5MaoyPs%2Fimage.png?alt=media&amp;token=04b0bfdb-8d94-45fe-88a5-98c56a5a29d0" alt=""><img src="https://772063455-files.gitbook.io/~/files/v0/b/gitbook-x-prod.appspot.com/o/spaces%2F-Lgje1lBxKKWXwqycB-v%2Fuploads%2Fhy0lXvNgqC6wXM7UZO7B%2Fimage.png?alt=media&amp;token=666a77db-3584-4f5d-a5af-e28206057618" alt=""></td><td align="center"><strong>Valheim - Wiki Guide &#x26; Walkthrough</strong></td><td align="center">Click here!</td><td><a href="https://gamewith.net/valheim/">https://gamewith.net/valheim/</a></td></tr><tr><td align="center"><img src="https://772063455-files.gitbook.io/~/files/v0/b/gitbook-x-prod.appspot.com/o/spaces%2F-Lgje1lBxKKWXwqycB-v%2Fuploads%2FS4SD2KjYJPsU2SozVPPV%2Fimage.png?alt=media&amp;token=c95ca4ee-d6c7-4d89-b83e-78efc99008fb" alt=""></td><td align="center"><strong>VALHEIM</strong> </td><td align="center"><img src="https://772063455-files.gitbook.io/~/files/v0/b/gitbook-x-prod.appspot.com/o/spaces%2F-Lgje1lBxKKWXwqycB-v%2Fuploads%2Fa7DDkPlHyURzt5MCnZAg%2Fimage.png?alt=media&amp;token=d7000921-3f7b-4422-99fd-29d5d3348dce" alt=""></td><td><a href="https://faq.thepackgaming.com/alphys-help-desk/directory/valheim">https://faq.thepackgaming.com/alphys-help-desk/directory/valheim</a></td></tr></tbody></table>

<figure><img src="https://772063455-files.gitbook.io/~/files/v0/b/gitbook-x-prod.appspot.com/o/spaces%2F-Lgje1lBxKKWXwqycB-v%2Fuploads%2FC1YfG7bKbajWvxiJMDU2%2Fimage.png?alt=media&amp;token=5ff1a738-3838-4be1-b2e7-65ad8217ca97" alt="" width="375"><figcaption></figcaption></figure>

<table data-view="cards"><thead><tr><th align="center"></th><th align="center"></th><th align="center"></th><th data-hidden data-card-target data-type="content-ref"></th></tr></thead><tbody><tr><td align="center"><img src="https://772063455-files.gitbook.io/~/files/v0/b/gitbook-x-prod.appspot.com/o/spaces%2F-Lgje1lBxKKWXwqycB-v%2Fuploads%2FihBogjtTEXS5cIY20WgM%2Fimage.png?alt=media&amp;token=3e6f966e-3303-42e6-83a8-a3512b77e444" alt=""></td><td align="center"><strong>Valheim: The Homestead Starter Base (Build Guide; No Mods)</strong></td><td align="center">ZomZero@ZomZeroBuilds</td><td><a href="https://youtu.be/5Z6HUmKnE7I">https://youtu.be/5Z6HUmKnE7I</a></td></tr><tr><td align="center"><img src="https://772063455-files.gitbook.io/~/files/v0/b/gitbook-x-prod.appspot.com/o/spaces%2F-Lgje1lBxKKWXwqycB-v%2Fuploads%2FssX4XjEujsq6f2vP5zFu%2Fimage.png?alt=media&amp;token=73c405a6-e19b-4a74-a93d-8b7bc828b572" alt=""></td><td align="center"><strong>The FASTEST Way to Get Through the Bronze Age (EASY)</strong></td><td align="center">SlipSlopTV@slipsloptv</td><td><a href="https://youtu.be/WHYqCA6p39k">https://youtu.be/WHYqCA6p39k</a></td></tr><tr><td align="center"><img src="https://772063455-files.gitbook.io/~/files/v0/b/gitbook-x-prod.appspot.com/o/spaces%2F-Lgje1lBxKKWXwqycB-v%2Fuploads%2F1mNBkdW4PZoT7mWut2Nj%2Fimage.png?alt=media&amp;token=04cd2f08-9b03-45e2-aa0f-5e6ca9999566" alt=""></td><td align="center"><strong>The Most Efficient Long House Valheim Build Guide</strong></td><td align="center">FireSpark81 @Firespark81</td><td><a href="https://www.youtube.com/watch?v=FATF7mWvmdQ">https://www.youtube.com/watch?v=FATF7mWvmdQ</a></td></tr><tr><td align="center"><img src="https://772063455-files.gitbook.io/~/files/v0/b/gitbook-x-prod.appspot.com/o/spaces%2F-Lgje1lBxKKWXwqycB-v%2Fuploads%2FI411oP9369NTyDFo1s6q%2Fimage.png?alt=media&amp;token=c93a30e6-5ce0-4151-b919-43ec8b3bf604" alt=""></td><td align="center"><strong>Valheim: Top 10 Tips and tricks - Vetlive</strong></td><td align="center">Vetlive@vetlive3669</td><td><a href="https://www.youtube.com/watch?v=UDx2x3AgZA8">https://www.youtube.com/watch?v=UDx2x3AgZA8</a></td></tr><tr><td align="center"><img src="https://772063455-files.gitbook.io/~/files/v0/b/gitbook-x-prod.appspot.com/o/spaces%2F-Lgje1lBxKKWXwqycB-v%2Fuploads%2FtYiXpt9x7Mi9dljvRDua%2Fimage.png?alt=media&amp;token=dcf87e95-d518-40d0-99bd-f89d1f6f6f01" alt=""></td><td align="center"><strong>Valheim: Wooden Castle Starter Base (Build Guide No Mods)</strong></td><td align="center">ZomZero@ZomZeroBuilds</td><td><a href="https://www.youtube.com/watch?v=pC8mo_DbCBg">https://www.youtube.com/watch?v=pC8mo_DbCBg</a></td></tr><tr><td align="center"><img src="https://772063455-files.gitbook.io/~/files/v0/b/gitbook-x-prod.appspot.com/o/spaces%2F-Lgje1lBxKKWXwqycB-v%2Fuploads%2FZdcmANjENcmnzN54xsVh%2Fimage.png?alt=media&amp;token=ce87a5c8-f572-42c7-8faf-f66cc6f6c64b" alt=""></td><td align="center"><strong>Valheim: Wooden Castle Starter Base (Build Guide No Mods)</strong></td><td align="center">Kysen@Kysen</td><td><a href="https://www.youtube.com/watch?v=pC8mo_DbCBg">https://www.youtube.com/watch?v=pC8mo_DbCBg</a></td></tr></tbody></table>

<figure><img src="https://772063455-files.gitbook.io/~/files/v0/b/gitbook-x-prod.appspot.com/o/spaces%2F-Lgje1lBxKKWXwqycB-v%2Fuploads%2FoLiHbI9KBxzWwL8H8sG2%2Fimage.png?alt=media&amp;token=0d0687d2-37c4-49ee-860a-9306805fef3b" alt=""><figcaption></figcaption></figure>


# ALPHY'S HELP DESK Directory Page

GAME PLAY ENHANCEMENTS AND FIXES.

## **Navigation of Pages:**

<table data-view="cards"><thead><tr><th></th><th></th></tr></thead><tbody><tr><td><strong>Left side of the page</strong> <span data-gb-custom-inline data-tag="emoji" data-code="25c0">◀️</span></td><td>Use the <strong>></strong> to open any pages in that section when the Header shows a <strong>></strong>.</td></tr><tr><td><strong>Right Side</strong> of the page <span data-gb-custom-inline data-tag="emoji" data-code="25b6">▶️</span></td><td>Click a header to go to that section of this page.</td></tr><tr><td><strong>Features of the page.</strong></td><td>are in an <strong>expandable box</strong>, please click the <strong>></strong> to open the expandable dropdown.</td></tr><tr><td><strong>Hyperlink</strong>s are often in a <strong>card form</strong> in the website.</td><td>So <strong>clicking an image</strong> will often take you to a specific page for information. </td></tr><tr><td><strong>Steam-link</strong>s are often in a <strong>card form</strong> in the website.</td><td>So <strong>clicking on a server card</strong> will take you to the Server.</td></tr></tbody></table>

![](https://772063455-files.gitbook.io/~/files/v0/b/gitbook-legacy-files/o/assets%2F-Lgje1lBxKKWXwqycB-v%2F-MSvQ_Q4ICbc-ndRUn4u%2F-MSvRbBrOT3AY2DPg_Iq%2FGaming%20Splash%20ALPHYS%20HELP%20DESK.png?alt=media\&token=9d192e87-a1f6-4376-ab42-89406ad38ce9)

Here you will find most of the things "Alphy" has found over the last four years, working with players that are having some sort of a game play issue. They are divided by those most common to Steam itself, and then to the specific games we offer here on The PACK Gaming Group.

<table data-view="cards"><thead><tr><th align="center"></th><th></th><th data-hidden data-card-target data-type="content-ref"></th><th data-hidden data-card-cover data-type="files"></th></tr></thead><tbody><tr><td align="center"><img src="https://772063455-files.gitbook.io/~/files/v0/b/gitbook-x-prod.appspot.com/o/spaces%2F-Lgje1lBxKKWXwqycB-v%2Fuploads%2FKcdR7fG01jcH7iUb3gN0%2Fimage.png?alt=media&amp;token=9803004f-d4e8-4f69-9dbe-8276a9636629" alt=""></td><td><h3>How to Boost FPS and Optimize Your Windows 10/11 for Gaming (2023)</h3></td><td><a href="https://faq.thepackgaming.com/alphys-help-desk/directory/optimize">https://faq.thepackgaming.com/alphys-help-desk/directory/optimize</a></td><td></td></tr><tr><td align="center"><img src="https://772063455-files.gitbook.io/~/files/v0/b/gitbook-x-prod.appspot.com/o/spaces%2F-Lgje1lBxKKWXwqycB-v%2Fuploads%2FCQeIm8sXWM2hMn9Q95cz%2Fimage.png?alt=media&amp;token=a9e38ab2-59cc-4ae4-8759-e6b2e1419577" alt=""></td><td><h3>Common STEAM ISSUES</h3></td><td><a href="https://faq.thepackgaming.com/alphys-help-desk/directory/steam">https://faq.thepackgaming.com/alphys-help-desk/directory/steam</a></td><td></td></tr><tr><td align="center"><img src="https://772063455-files.gitbook.io/~/files/v0/b/gitbook-x-prod.appspot.com/o/spaces%2F-Lgje1lBxKKWXwqycB-v%2Fuploads%2FtH3oJ5RWdLcKVWQ3DvDo%2Fimage.png?alt=media&amp;token=3b38cf59-df12-4d4f-904a-c527f77a1e68" alt=""></td><td><h3>Common EPIC ISSUES</h3></td><td><a href="https://faq.thepackgaming.com/alphys-help-desk/directory/epic">https://faq.thepackgaming.com/alphys-help-desk/directory/epic</a></td><td></td></tr><tr><td align="center"></td><td><h3>ASA Graphic and PC Enhancements</h3></td><td><a href="https://faq.thepackgaming.com/alphys-help-desk/directory/asa">https://faq.thepackgaming.com/alphys-help-desk/directory/asa</a></td><td><a href="https://772063455-files.gitbook.io/~/files/v0/b/gitbook-x-prod.appspot.com/o/spaces%2F-Lgje1lBxKKWXwqycB-v%2Fuploads%2FyAtEApDHHQKA28pMwh77%2FASA_SPLASH_GREENERY.png?alt=media&amp;token=4bb98c96-71d9-4761-95e2-072e9e4c6d1c">ASA_SPLASH_GREENERY.png</a></td></tr><tr><td align="center"></td><td><h3>ASE Graphic and PC Enhancements</h3></td><td><a href="https://faq.thepackgaming.com/alphys-help-desk/directory/ase">https://faq.thepackgaming.com/alphys-help-desk/directory/ase</a></td><td><a href="https://772063455-files.gitbook.io/~/files/v0/b/gitbook-x-prod.appspot.com/o/spaces%2F-Lgje1lBxKKWXwqycB-v%2Fuploads%2FbRIKTJ7la2AItloYUCpk%2FASE_ISL.png?alt=media&amp;token=ac056eb3-b65a-4678-8720-f4d949d77279">ASE_ISL.png</a></td></tr><tr><td align="center"></td><td><h3>Conan Exiles Graphic and PC Enhancements</h3></td><td><a href="https://faq.thepackgaming.com/alphys-help-desk/directory/conan">https://faq.thepackgaming.com/alphys-help-desk/directory/conan</a></td><td><a href="https://772063455-files.gitbook.io/~/files/v0/b/gitbook-x-prod.appspot.com/o/spaces%2F-Lgje1lBxKKWXwqycB-v%2Fuploads%2FFAut801fcFCZePcskLVX%2FCE_AOW_2.png?alt=media&amp;token=76a296ae-7b80-4410-bf83-3bc301f1d245">CE_AOW_2.png</a></td></tr><tr><td align="center"></td><td><h3>Dark and Light Graphic and PC Enhancements</h3></td><td><a href="https://faq.thepackgaming.com/alphys-help-desk/directory/dnl">https://faq.thepackgaming.com/alphys-help-desk/directory/dnl</a></td><td><a href="https://772063455-files.gitbook.io/~/files/v0/b/gitbook-x-prod.appspot.com/o/spaces%2F-Lgje1lBxKKWXwqycB-v%2Fuploads%2Flo50oOQruLRqiOoewAXO%2Fgame%20flash%202.jfif?alt=media&amp;token=8d3e9171-5a0f-4218-bee0-3d63ab5fcba5">game flash 2.jfif</a></td></tr><tr><td align="center"></td><td><h3>Palworld Graphic and PC Enhancements</h3></td><td><a href="https://faq.thepackgaming.com/alphys-help-desk/directory/palworld">https://faq.thepackgaming.com/alphys-help-desk/directory/palworld</a></td><td><a href="https://772063455-files.gitbook.io/~/files/v0/b/gitbook-x-prod.appspot.com/o/spaces%2F-Lgje1lBxKKWXwqycB-v%2Fuploads%2FxUj7YmhgjRZYzLYQpn5W%2Fpalworld.webp?alt=media&amp;token=94aae11f-5cea-4442-9fa8-4061b18290b6">palworld.webp</a></td></tr><tr><td align="center"></td><td><h3>7DtD Graphic and PC Enhancements</h3></td><td><a href="https://faq.thepackgaming.com/alphys-help-desk/directory/7dtd">https://faq.thepackgaming.com/alphys-help-desk/directory/7dtd</a></td><td><a href="https://772063455-files.gitbook.io/~/files/v0/b/gitbook-x-prod.appspot.com/o/spaces%2F-Lgje1lBxKKWXwqycB-v%2Fuploads%2FUGBIRO2s13C5KaoA0nYn%2F7DTD_1.png?alt=media&amp;token=18ce7dee-2bc5-4cdf-98eb-2b7d8211a349">7DTD_1.png</a></td></tr><tr><td align="center"></td><td><strong>Soulmask Optimization Guide</strong></td><td><a href="https://faq.thepackgaming.com/alphys-help-desk/directory/soulmask">https://faq.thepackgaming.com/alphys-help-desk/directory/soulmask</a></td><td><a href="https://772063455-files.gitbook.io/~/files/v0/b/gitbook-x-prod.appspot.com/o/spaces%2F-Lgje1lBxKKWXwqycB-v%2Fuploads%2FVwUxcDSGR7TQr6JR0U3e%2FSoulmask%20Optimization%20guide.png?alt=media&amp;token=8c05e383-c871-4004-b193-f3cf2cfd4eeb">Soulmask Optimization guide.png</a></td></tr><tr><td align="center"></td><td><h3>Valheim Graphic and PC Enhancements</h3></td><td><a href="https://faq.thepackgaming.com/alphys-help-desk/directory/subsistence">https://faq.thepackgaming.com/alphys-help-desk/directory/subsistence</a></td><td><a href="https://772063455-files.gitbook.io/~/files/v0/b/gitbook-legacy-files/o/assets%2F-Lgje1lBxKKWXwqycB-v%2F-MTmmM9IWMIaMPl9CIOW%2F-MTmmSD56wFF-IwE0CVu%2FVALHEIM_SPLASH.png?alt=media&amp;token=0fb72f3e-2a7d-4e0d-80ce-5d8466da2e5e">VALHEIM_SPLASH.png</a></td></tr></tbody></table>

<figure><img src="https://772063455-files.gitbook.io/~/files/v0/b/gitbook-x-prod.appspot.com/o/spaces%2F-Lgje1lBxKKWXwqycB-v%2Fuploads%2F6BD6uJ1WDKO426ijPtkp%2Fimage.png?alt=media&amp;token=894ba391-9e3c-485b-a7f4-688718511f2c" alt=""><figcaption></figcaption></figure>


# How to Boost FPS and Optimize Your Windows 10 /11 PC for Gaming

This article will show you how to optimize your PC for gaming, increase FPS, and improve your GPU’s performance.

<figure><img src="https://772063455-files.gitbook.io/~/files/v0/b/gitbook-x-prod.appspot.com/o/spaces%2F-Lgje1lBxKKWXwqycB-v%2Fuploads%2FtLYJUFHLjBwCwSD3ahrN%2FGaming%20Splash%20ALPHYS%20HELP%20DESK.png?alt=media&amp;token=3bf390e4-8536-4ec4-af9d-521f87124f22" alt="" width="375"><figcaption></figcaption></figure>

PC gaming isn't as simple as console gaming. Instead of plug and play, it's more plug and pray that your games run smoothly.&#x20;

## What is a low FPS and what causes it?

Low FPS, or frames per second, is when your game slows down because your computer doesn’t have enough power or memory to run it properly. Common causes of low FPS are a weak graphics card, old graphics drivers, an outdated CPU, or insufficient RAM. The number of frames shown on your monitor each second is known as your frame rate and is measured in FPS — frames per second. If your computer isn’t powerful enough to keep generating all these frames, the frame rate will fall. This results in the game looking and feeling as though it were running in slow motion.

### How much FPS can a human eye see?

![Human Eye FPS vs AI: Why AI is Better | Sighthound, Inc.](https://encrypted-tbn0.gstatic.com/images?q=tbn:ANd9GcTsg1FuI9-uKZAU_ws2MCm4BLlQXsJL_3ucQI8KoNQKxQ\&s)Between 30 and 120 frames per second.

But our eyes can only perceive the visual clues in the environment around us at a certain rate due to how quickly they move. With most people being able to detect changes in smoothness in a screen around 90 frames per second maximum. Although experts find it difficult to agree on a precise number, the general consensus is that the human eye FPS for most individuals is between 30 and 120 frames per second.

## How to Optimize Windows 10 for gaming

* **Enable Game Mode in Windows 10**&#x20;
* **Lower your resolution**
* **Remove unused programs and bloatware**

<details>

<summary>How to Optimize Windows 10 for gaming</summary>

**Enable Game Mode in Windows 10**&#x20;

Game Mode is a built-in tool designed to optimize Windows 10 for gaming — whether you’re gaming on a prehistoric museum antique or a custom-built, bleeding-edge powerhouse. Game Mode deactivates background activities like Windows updates and app notifications to help your computer boost FPS in your games.&#x20;

Open your Settings by clicking the cog icon in the Start menu.&#x20;

1\. Open your Settings by clicking the cog icon in the Start menu. \
2\. Select the Gaming category. \
3\. Select Game Mode from the menu on the left and confirm that the Game Mode switch is toggled On&#x20;

Now the gaming mode will help boost FPS and improve performance any time you play a game in Windows 10.

**Lower your resolution**&#x20;

Unless you have a super-high-end gaming PC, you may need to make some sacrifices in the graphics department for higher FPS. An average computer simply can’t run modern games at ultra-high resolutions while also putting out a constant 60 FPS. As resolution increases, the number of pixels on your screen goes up — and so does the strain on your GPU.&#x20;

Lowering your game’s resolution can improve FPS by making your GPU’s job easier.

Find the resolution settings within your game’s options menu. \
Experiment to see what your machine can handle and find the optimal balance of clear graphics and better FPS for your Windows 10 gaming.

#### Remove unused programs and bloatware&#x20;

Does Windows get increasingly slower with each program you install on your PC or laptop — directly impacting all your games? *This is because a lot of programs run background activities even when they’re not being used*, which waste your computer’s valuable memory.&#x20;

#### How to Uninstall the bloatware apps&#x20;

The best thing to do is uninstall these apps. In the search box, start typing **`"add"`** and the add or remove programs option will come up. Click it. Scroll on down to the **offending app, click it**, and then **click Uninstall**. Do this for each bloatware application.\
**If you don't see the app listed under settings...**\
Sometimes, you won't find the app listed in the settings apps & features panel. In those cases, you might be able to **right-click on the menu item and select Uninstall.**

</details>

## How to Optimize Windows 11 for gaming

* **Uncheck 'Enhance pointer precision'**
* **Enable 'Game Mode'**
* **Disable 'Record what happened'**
* **Disable unnecessary apps in Startup**
* **Check GPU priorities on games**
* **Check 'Power Plan'**

<details>

<summary>How to Optimize Windows 11 for gaming</summary>

### Uncheck 'Enhance pointer precision'&#x20;

Whether or not you have acceleration disabled in the bundled software of your chosen gaming mouse, it's possible that Windows is still adding a little into the mix. The 'Enhance pointer precision' feature is handy to have enabled on a laptop, keeping your trackpad usable, but on a desktop gaming setup it's worth turning off to make sure there is no acceleration in any of your games. Hit the Win key on your keyboard, type Mouse, and it will bring up the relevant screen from Settings. From here click on Additional mouse settings and it will open up one of those ancient Windows dialogue boxes that haven't been redesigned since forever. Click on the Pointer Options tab and uncheck the Enable pointer precision box at the top.

### Enable 'Game Mode'&#x20;

Yes, you read that right. You should enable Game Mode. Microsoft has worked hard on the feature over the last six months or so to ensure any of the previous stuttering or input lag that has plagued it in the past is a fading memory. Now you can enable it without impacting performance, and avoid Windows trying to pop up with notifications, or driver updates, or deciding to restart on a whim. `Hit the Win key, type Game Mode, and then make sure the feature is enabled.` It likely will be on by default, but I do know some people will disable it almost because of muscle memory at this point.

### Check GPU priorities on games

&#x20;A feature that Windows 11 now surfaces is the ability to assign GPU priorities on a per-application basis. On a desktop rig, with a single graphics card that's maybe not such a big deal, as the High performance and Power saving modes only have one GPU option anyway. But, for a gaming laptop, which will have both, ensuring you're definitely using the right graphics silicon for the job is useful. Hit the Win key and type `Graphics`. Then you can either go through the list of apps on the screen, or browse your PC to add a particular app on your system. Then click the app you want to prioritise in the list, hit `Options`, and then check whichever GPU option you would like that app to use and click `Save.`

### Disable 'Record what happened'&#x20;

If you're into your game capture shenanigans then chances are that you've already got a favorite app for that. Whether you're a die-hard OBS fan, or happy to go with AMD or Nvidia's driver-based capture settings, you can probably ignore the one baked into Windows. `Hit the Win key, type Capture and that will take you to the Gaming > Captures dialogue in settings.` The main thing to do is make sure ***Record what happened is disabled*** as that will ensure Windows isn't recording things in the background along with Nvidia or AMD.

### Disable unnecessary apps in Startup&#x20;

A classic part of getting Windows running nicely, whether you're talking about gaming or just general system performance, is ensuring the bloatware is managed. On a fresh install you probably won't have a huge number of apps running on startup, but a few months down the line, after different drivers and peripheral apps are added to your system, it starts to fill up. `Right-click the Windows 'start' button and hit Task Manager. Then click the Startup tab and disable any software that you don't want to launch when you login to Windows. To do that you simply have to highlight the relevant app (or irrelevant app, maybe) and click the big Disable button.`

### Check 'Power Plan'&#x20;

Finally, altering your Power Plan settings might help. Though, honestly, I'm not convinced on a desktop gaming PC that it's that useful a setting to toy with. It's another one of those old menus, but if you `hit the Win key, type Power plan, and click Choose a power plan,` it'll allow you to pick which plan you want. It can unleash a little extra power from your system, but in these days of dynamic, thermal-based component performance, there's a chance that letting a specific chip draw as much power as it wants could mean it hits a thermal limit quicker and throttles performance sooner.

</details>

### Change the game’s video settings

While you’re fiddling with your game’s resolution, tweak the other video settings as well for an additional FPS boost. Some games will have simple settings that you can adjust by level: ultra, high, medium, low, and so on. Other games will have sliders, numerical settings, or more nuanced controls.

<details>

<summary>Change the game’s video settings</summary>

We’ll walk you through every option as many of them can impact FPS or boost/lower overall game performance: Please note that these options will not be the most optimal setup for all computers, but about 80% of them will see a huge increase in FPS from changing these settings. (NOTE Not all games have the same options, but use all of the below that you can find.)\
**Explore some of the following settings to try and get more FPS from your game.**

**Graphical details:** Reduce the quality of things like shadows, lighting, textures, and reflections. Your game will look a bit less lifelike, but it should run more smoothly in return.

**Anti-aliasing:** Anti-aliasing smooths out the edges of the various objects in your game. Turn it off, then slowly increase it to the point where it’s making a difference in your graphics but not negatively impacting FPS. If the game offers different types of anti-aliasing, try each one and see what happens.

**Draw distance:** If you can, reduce draw distance to prevent the game from rendering far-off objects. With fewer things to render at once, your GPU can focus its available resources on your immediate environment.

**Graphical effects:** Tone down or get rid of motion blur, lens flares, and other types of graphical flare. It’s one less thing for your GPU to worry about.

**VSync:** Designed to prevent screen tearing — when your monitor shows portions of multiple frames at the same time — VSync synchronizes the game’s frame rate with the refresh rate of your monitor. It sounds helpful, and often is, but it can sometimes bring down FPS. Turn it off and see what happens. If you notice screen tearing, turn it back on.

**Resolution** – change this depending on your device and CPU/GPU, desktop computers should not have any problems running 1920×1080 but on a Laptop it’s recommended to use the 1280×768 resolution.&#x20;

**Window Mode**– ALWAYS have this in full screen, Windowed or WindowedFullscreen will decrease your FPS and cause lag and/or frame tearing. Note full window is NOT compatible with alt tabbing.

**Sky Quality, Ground Clutter Density, Ground Clutter Distance and Mesh Level of Detail** – set these between lowest-middle, these will most certainly lower your overall FPS if you have them on max.

**High-Quality Anisotropic Filtering** – ON This feature creates smoother looking objects from various points of view.

**Distance Field Ambient Occlusion** – OFF Triggers soft shadows for distant objects.

**Screen Space Ambient Occlusion (SSAO)** – OFF Triggers soft shadows for nearby objects.

**Sub Surface Scattering** – ON It affects light behavior and makes foliage more realistic.

**High-Quality Materials** – OFF This option improves textures of in-game materials.

**High-Quality VFX** – OFF It affects all in-game water effects.

**Simple Distance Character Movement** – ON It relieves CPU from animations of distant characters.&#x20;

**High-Quality LODs** – ON Improves the level of detail.

**Extra Level Streaming Distance** – OFF This will make map loading faster while moving fast.

**Color Grading** – ON Slightly improves colors. It won’t affect FPS.

**Mesh Level of Detail (LOD)** – Again. you can choose to disable/enable it by your own preferences. It affects GPU VRAM marginally.

**Please see our Game pages following this guides page,  on a per platform basis. These will guide you in setting up the best settings per game.**

</details>

### Update your graphics card drivers&#x20;

Your graphics card is the centerpiece of your gaming experience, but you can’t unleash its true performance without the right graphics driver. Updating your graphics card driver can be a huge FPS booster.

<details>

<summary>Update your graphics card drivers </summary>

#### Here’s how to update the drivers for the Nvidia GeForce, ATI Radeon, and Intel HD graphics cards:

**Nvidia GeForce:** Go to the GeForce driver website, select your graphics card and Windows version from the list, and hit the Start Search button. Drivers marked as beta aren’t quite finished, but they should all run as smoothly as the final release — and they’ll likely increase FPS even more. If you have the GeForce Experience tool installed, you’ll get an automatic notification whenever Nvidia releases a new driver.

**ATI Radeon:** Go to the AMD software downloads website and select the appropriate device. This will give you access to the latest official driver that you can download and install. You can also install the beta driver to get more performance improvements or features.

**Intel HD Graphics:** Mostly found on ultra-books or tablets, the Intel graphics chipsets are the weakest of the bunch. We don’t recommend doing any sort of gaming on the HD 3000 or earlier, but Intel’s latest graphics chipsets can handle current games — though not at the highest possible resolution or with all the bells and whistles turned on. To get updated drivers, go to the Intel Download Center’s graphics page.

</details>

### Setting your Graphics card for optimal performance for your computer setup.

Graphics cards are unique in how you set them up for the most optimal use for games. The following two sections are  for NVIDIA, and AMD graphic settings. These are the most popular two graphic options. Though others can be looked up on the internet. These settings are optimal for mid-grade pcs and will help in most cases to increase the Latency (FPS)

### Best Nvidia Control Panel Settings:  \[2023]

<details>

<summary>Best Nvidia Control Panel Settings: [2023]</summary>

#### This guide will cover the best Nvidia Control Panel settings for maximum gaming performance in 2023. These work on Laptops and Desktops.

Whether you own the latest Nvidia flagship RTX card or have an older GTX one, you’ll still need to optimize control panel settings. Using the best Nvidia Control Panel settings is guaranteed to boost general PC and gaming performance.

Key Highlights

* Make sure to update your Nvidia GPU drivers for the latest performance improvements and new settings in the Nvidia Control Panel.
* Access the Nvidia Control Panel by right-clicking on the desktop and selecting the Nvidia Control Panel option.
* The most important settings to configure are in the 3D settings section.
* In the 3D settings, select the “Use the Advanced 3D image settings” option and apply changes.
* In the detailed 3D settings, turn off Image Sharpening, Anisotropic Filtering, FXAA, and Gamma Correction-Anti Aliasing for best performance.

To properly utilize the horsepower of your GPU, the Nvidia Control Panel offers several features that you can play around with. Each feature in the Nvidia Control Panel has its own use and figuring out the right combination is a bit tiresome.&#x20;

Lucky for you, we did a bit of research of our own and a heck of a lot of testing to bring you the best Nvidia Control Panel settings there are. So whichever Nvidia card you might be rocking, this guide is sure to unlock your GPU’s hidden potential and allow it to perform noticeably better in games.&#x20;

Table of Contents

* Install The Latest Nvidia Drivers
* Best Nvidia Control Panel Settings
* Summary

### Install The Latest Nvidia Drivers

![](https://772063455-files.gitbook.io/~/files/v0/b/gitbook-x-prod.appspot.com/o/spaces%2F-Lgje1lBxKKWXwqycB-v%2Fuploads%2F1yh9aPcwWwWrJj8AP83s%2Fimage.png?alt=media\&token=d13ad7a5-ce5c-49a9-8bdc-efa9d5d333de)<br>

Before we start tinkering with the Nvidia Control Panel settings, we need to make sure that your GPU drivers are up-to-date. New updates from Nvidia pack a host of fixes and performance improvements while also adding a new setting or two in the Nvidia Control Panel sometimes.

To check for updates, you’ll need to open up the Nvidia GeForce Experience Application on your PC. Here’s how you can do that.

* Click on the taskbar and expand it by clicking on the “^” icon.
* Right, Click on the Nvidia Logo and select “Nvidia GeForce Experience” from the context menu.

![](https://772063455-files.gitbook.io/~/files/v0/b/gitbook-x-prod.appspot.com/o/spaces%2F-Lgje1lBxKKWXwqycB-v%2Fuploads%2FY1uKg1fA0iaMGJfMMzPW%2Fimage.png?alt=media\&token=23f40476-8efa-40c6-b649-d627e29e141e)<br>

* Once you open Nvidia Geforce Experience, open the “Driver” tab. This will take you to the driver updating section of the GeForce Experience.
* Here, click on the “Check for Updates” option to see if you have any new updates for your Nvidia GPU. If you have updates, a button will prompt you to download it and later “Express Install” it. If it doesn’t show any new updates after the scan, it means you’ve already got the latest drivers.

![](https://772063455-files.gitbook.io/~/files/v0/b/gitbook-x-prod.appspot.com/o/spaces%2F-Lgje1lBxKKWXwqycB-v%2Fuploads%2FDD43GOz8ljAy8mM9wsYK%2Fimage.png?alt=media\&token=8a2efb0b-780a-4e8a-965f-f5a14c1e93da)

After you’re done updating your Nvidia GPU drivers, let’s now start applying the other Control Panel settings.&#x20;

### Best Nvidia Control Panel Settings

Now that we’ve updated the GPU driver to the latest version, it’s time to go through each setting in Nvidia Control Panel and select the best ones. To access the Nvidia Control Panel, simply follow the steps below.&#x20;

* To access the Nvidia Control Panel, all you have to do is “Right-Click” anywhere on the desktop.
* After the context menu has opened, select the Nvidia Control Panel option.

![](https://772063455-files.gitbook.io/~/files/v0/b/gitbook-x-prod.appspot.com/o/spaces%2F-Lgje1lBxKKWXwqycB-v%2Fuploads%2FbVZCWO7pkAeN6nMEPsKg%2Fimage.png?alt=media\&token=06a0aa6d-edc2-4862-98d0-886bb1d2c041)<br>

Doing so will open the Nvidia Control Panel. As you can see, there are several settings we need to cover. I’ll go through each and help you configure the Nvidia Control Panel settings for all sections.&#x20;

![](https://772063455-files.gitbook.io/~/files/v0/b/gitbook-x-prod.appspot.com/o/spaces%2F-Lgje1lBxKKWXwqycB-v%2Fuploads%2FSvT7yWre0ud14xMZXauZ%2Fimage.png?alt=media\&token=1d2e6b13-c65e-4080-a21b-4a7e97d47d85)

NOTE: Depending on if you’re on a laptop or desktop, some settings might be available to you while some won’t. So don’t worry if you can’t find a specific setting in your Nvidia Control Panel.

#### 3D Settings

When you’ll open the Nvidia Control Panel, 3D settings are the first row of settings that you’ll need to configure. This is the most important section that will help you achieve optimal graphical performance in games.

![](https://772063455-files.gitbook.io/~/files/v0/b/gitbook-x-prod.appspot.com/o/spaces%2F-Lgje1lBxKKWXwqycB-v%2Fuploads%2FNB7mfrkgXDnqGwvbxGyE%2Fimage.png?alt=media\&token=bfc66b12-5df2-4793-bc75-5be0f26aa890)

1. Here, click on the first tab, and on the right, you’ll see Nvidia Icon spinning.&#x20;
2. Select the second option that says, “Use the Advanced 3D image settings.”
3. After selecting the second option, apply the changes.&#x20;
4. Once you're done, click on the “Take Me There” option right next to the second option to open detailed 3D settings.&#x20;

![](https://772063455-files.gitbook.io/~/files/v0/b/gitbook-x-prod.appspot.com/o/spaces%2F-Lgje1lBxKKWXwqycB-v%2Fuploads%2F9hBOeX4diAgCFeyBYZ8J%2Fimage.png?alt=media\&token=192a8236-dfc5-429c-807a-333e65e8ecf7)<br>

Here’s where things start to get serious. There are a lot of settings that can be confusing and overwhelming. However, I’ll walk you through each setting one at a time and show you how to configure them for optimum performance. So let’s get started.

#### Image Sharpening: Off

Since we’re setting up a global setting, we don’t need to apply image sharpening across the board. If you want, you can individually apply sharpening to the games you want through program settings.

#### Anisotropic Filtering: Off

Anisotropic Filtering is an option that’s configured in the in-game settings. So there’s no point turning it on in the global settings.&#x20;

#### FXAA – Anti Aliasing: Off

Fast approximate anti-aliasing or FXAA is a great mode of anti-aliasing that helps you improve textures in-game at a lower cost. However, we don’t need to turn it on across the board. So, best to keep it off.

#### Gamma Correction – Anti Aliasing: Off

Turn Gamma Corrections off. It helps you improve image quality, specifically in OpenGL programs which is why turning it on globally is a waste.&#x20;

#### Mode – Antialiasing: Off

Similar to FXAA, set Antialiasing Mode to off as well as these settings are best configured within the in-game settings.

#### Background Max Frame Rate: 20

If you Alt+Tab out of your games more often and want to save up some GPU power, then turn Background Max Frames to 20. This helps you limit the resource dedicated to your game when you minimize it, giving breathing room to the other tasks you’re doing.&#x20;

#### CUDA – GPUS: ALL

You should select all CUDA GPUs here.&#x20;

#### Low Latency Mode: Ultra

Low Latency Mode is one of the most amazing features Nvidia provides to its GPU owners. It helps reduce latency in competitive games significantly without affecting FPS negatively. However, not every game requires this feature so it’s best not to enable it globally.&#x20;

#### Max Frame Rate: Desired Value or Off

If you want to cap your framerate in every application, then use the Max Frame Rate feature. It’s a good alternative to V-Sync and simply caps your frame to your desired value which reduces tearing. It also helps you avoid pushing your GPU more than needed. You could disable it if you don’t want to cap your FPS in games.&#x20;

#### Open GL Rendering GPU: Select GPU here

Select your GPU here if you’d ever want to run any OpenGL games. This way, all OpenGL games will run through your GPU for the best performance.&#x20;

#### Power Management Mode: Prefer Max Performance

If you own a laptop then leave this option as it is to avoid maxing out your GPU at all times. Instead, set power management to max only for individual games. However, if you want the best performance and all other concerns are secondary, then set Power Management Mode to Prefer Maximum Performance. It’ll ramp up your GPU and give you a noticeable boost in FPS. This will also solve any FPS drops that you’re experiencing.

#### Shader Cache: Driver Default

Leave this selection as it is. Compiling and storing the game’s shader data on your PC requires Shader Cache.

#### Monitor Technology: Depends on Monitor

If you have a monitor with variable refresh rate technology, select G-sync here. If you don’t see this option and you’re on a laptop, chances are Intel Optimus is blocking this option and there’s nothing much you can do to use G Sync. Unless your laptop has a MUX switch or Advanced Optimus that will let you activate G-sync.

#### Multi-Frame Sampled AA (MFAA): Off

MFAA is Nvidia’s proprietary anti-aliasing technology that’s not very useful in most games. Turning it globally might negatively affect your PC’s performance so best keep it off.&#x20;

#### Anisotropic Sample Optimization – Texture Filtering: On

Anisotropic Sample Optimization drastically improves the visual quality in games with no major performance impact. Turn it on for the best visual clarity and optimized game performance.

#### Negative LOD Bias – Texture Filtering: Allow

Set Negative LOD Bias – Texture Filtering to Allow for texture sharpening in games.&#x20;

#### Quality – Texture Filtering: High Performance

Set the Texture Filtering – Quality option to high performance. As you could already tell, this will result in better performance in exchange for minor visual clarity. If you have a high-end PC, you can set this to Quality.&#x20;

#### Trilinear Optimization – Texture Filtering: On

Turn on Texture Filtering – Trilinear Optimization to make textures sharper. This won’t only make textures better but also positively affect your gaming performance.

#### Threaded Optimization: Auto

The setting for Threaded Optimization is Auto. Maintain it that way to utilize multiple CPU cores. This guarantees reliable performance in video games.

#### Triple Buffering: Off

Since we’re not using V-Sync, we don’t need to activate Triple Buffering. So simply turn it off.&#x20;

#### Vertical Sync: Off

Here, disable V-Sync because it limits the in-game frame rate to the refresh rate of your monitor. Turn on V-Sync in the game’s settings rather than the Nvidia Control Panel if you are experiencing screen tearing.

In the end, make sure to click on the “Apply” button to save all the settings.

Now that wraps up the best Nvidia Control Panel Settings for managing the 3D settings section. These settings will give you improved performance on your PC. Other than these, there aren’t any more settings in the Control Panel you can tweak to increase performance.

If you’re on a desktop or using a laptop with a [mux switch](https://www.nvidia.com/en-us/geforce/forums/geforce-graphics-cards/5/173493/nvidia-optimus-and-multiplexers/), then you’ll have access to the following settings. Even though these settings don’t essentially give you better FPS in games, they’re essential to optimize nonetheless.

These settings can give you the best performance, but there might be game errors that you might need to tackle.

#### Changing Resolution In Nvidia Control Panel

![](https://772063455-files.gitbook.io/~/files/v0/b/gitbook-x-prod.appspot.com/o/spaces%2F-Lgje1lBxKKWXwqycB-v%2Fuploads%2FVCB11By5G82IyKQ9cSNm%2Fimage.png?alt=media\&token=f95da4d5-80b3-4139-9ff9-aa66c018747b)<br>

Here, you have the option to set your resolution and other display settings. The settings you need to configure are:

1. Change the resolution to your monitor’s native resolution e.g. 1920×1080, 2560×1440, etc.&#x20;
2. In the refresh rate section, choose the highest value available.&#x20;
3. The “Customize” button will allow you to create custom resolutions. Leave this option for now unless you specifically need it.&#x20;
4. In the color settings, select “Use Nvidia Color Settings.”
5. Select the “Highest (32-bit)” option in the Desktop Color Depth option.
6. Set Output Color Depth to 10bpc.&#x20;
7. Click Apply to save changes.

These settings will mainly improve your display’s visual quality and improve color depth.&#x20;

#### Set-Up G-Sync In Nvidia Control Panel

![](https://772063455-files.gitbook.io/~/files/v0/b/gitbook-x-prod.appspot.com/o/spaces%2F-Lgje1lBxKKWXwqycB-v%2Fuploads%2Fd3hahiABNPmPNZIkyXPB%2Fimage.png?alt=media\&token=bb3c076a-2f7e-4f85-aa7d-d8550aa7bd24)<br>

If you have a variable refresh rate monitor or laptop display that’s compatible with G-Sync, here’s how you can set up G-Sync in the Nvidia Control Panel.&#x20;

1. Go to the Set-Up G-Sync tab on the Nvidia Control Panel sidebar.&#x20;
2. Select the “Enable G-Sync, G-Sync Compatible” option.&#x20;
3. If you mostly play your games in exclusive Fullscreen mode, select the “Enable for Full-Screen Mode” option. If you’re also playing games in windowed or borderless windowed modes, select “Enable for windowed or full-screen mode.” This second option will enable G-Sync for all applications.&#x20;
4. Click Apply to save changes.

### Summary

Nvidia Control Panel is an amazing place where you can freely tweak several settings according to your preferences. The settings conveyed in this guide were thoroughly tested and results showed visible FPS improvement in games. However, your mileage may vary.

We hope that our best Nvidia Control Panel settings guide was able to help you gain better performance in games.&#x20;

#### FAQs About Nvidia Control Panel Settings

How to get an Nvidia Control Panel?

You don’t have to download the Nvidia Control Panel separately as it comes packaged with your Nvidia GPU driver package. After you install drivers, simply restart your PC and right-click on the desktop to see the Nvidia Control Panel option.

**I only see manage 3D settings in the Nvidia Control Panel.** Where are the others? And what’s this Mux switch?

The reason you see limited Nvidia Control Panel settings is that you’re on a laptop whose display is connected to an integrated GPU (i.e. Intel UHD 6xx etc.) You’ll have access to other settings only if either you’re on a PC or your laptop has a mux switch. A Multiplexer (MUX) switch disables Optimus and connects your laptop’s display directly to Nvidia GPU. This not only gives you a 15-20% boost in performance but also gives you complete control of Nvidia Control Panel settings

**Is the Nvidia Control Panel and GeForce Experience the same thing?**

Not at all. Nvidia Control Panel and GeForce Experience are two separate software that comes with your GPU drivers.

</details>

### Best AMD Control Panel Settings: \[2023]

<details>

<summary>Best AMD Settings: FPS &#x26; Performance [2023]</summary>

#### This is a complete guide covering all the best AMD settings you can apply in the Radeon Control Panel to boost performance in games.

There are two of the biggest PC GPU manufacturers to date, well, that is until Intel's GPUs are any good. One’s the green tank Nvidia and the other’s the red beast AMD. We’ve already done a detailed best Nvidia settings guide before. Now it’s time to cover the best AMD settings you can tweak in the Radeon Control Panel to get your performance numbers pumping.

***Key Takeaways***

* The first thing you should do is update the device drivers of your AMD GPU using the AMD Adrenaline Radeon Software.
* To optimize AMD global settings, enable Radeon Anti-Lag, disable AMD Radeon Chill along with Radeon Boost, and turn on Radeon Enhanced Sync.
* Put Wait for Vertical Refresh to always off, disable Frame Rate Target Control, use application settings for Antialiasing, and multisampling for Antialiasing Method.
* Disable both Morphological Antialiasing and Anisotropic Filtering, use performance for Texture Filtering Quality, and enable Surface Format Optimization.
* Additionally, Tessellation Mode should override application settings, Maximum Tessellation Level should be off, and OpenGL Triple Buffering should be disabled.
* Ultimately, you should clean Shader Cache by performing a full reset.

### Update Your AMD Drivers First

![](https://772063455-files.gitbook.io/~/files/v0/b/gitbook-x-prod.appspot.com/o/spaces%2F-Lgje1lBxKKWXwqycB-v%2Fuploads%2Fukzl8txLyxSjPOl60Oun%2Fimage.png?alt=media\&token=466e2524-fd0d-4e79-9aea-4f13d3af34e4)

Updating AMD Drivers

Now before we go diving into the [Radeon Software](https://www.amd.com/en/support) and start tweaking some settings, let’s make sure your GPU drivers are up to date.&#x20;

AMD releases crucial GPU updates almost every month. These updated packages contain crucial fixes and performance improvements for the latest games. Sometimes AMD adds a feature or two geared towards improving gaming and productivity. So, let’s start this AMD settings guide by updating your GPU drivers first.&#x20;

![](https://772063455-files.gitbook.io/~/files/v0/b/gitbook-x-prod.appspot.com/o/spaces%2F-Lgje1lBxKKWXwqycB-v%2Fuploads%2FDqLrNUbEeubCuGodQ3xt%2Fimage.png?alt=media\&token=874623e6-1f42-430d-a024-16d3a4d6ef5d)

Update your AMD GPU Drivers

1. Open AMD Adrenaline Radeon Software from the desktop or Windows Search.
2. Once opening it, check out the “Drivers & Software's” section on the top right. Click on the “Check for Updates” button under it.
3. If you’ll have updated, it’ll inform you. Then, you can proceed to download the required updates.
4. Once the drivers finish downloading, click on the install button and an AMD utility will take you through the installation process.
5. After you’re done, simply reboot your PC.

Now you’re all locked and loaded to tweak their settings and get the most out of your AMD GPU. Let’s start optimizing the best AMD settings for the Radeon Control Panel.&#x20;

### Best AMD Settings In 2023

![](https://772063455-files.gitbook.io/~/files/v0/b/gitbook-x-prod.appspot.com/o/spaces%2F-Lgje1lBxKKWXwqycB-v%2Fuploads%2FHaNPQ4CK0gCgO2Y8WzVJ%2Fimage.png?alt=media\&token=2cd9dd7d-1b3b-4fc9-a7a7-72cbc701e941)

Best AMD Radeon Settings

Now that we’re rocking the latest AMD drivers, it’s time to start tweaking the best AMD settings in the Radeon Control Panel. We’ll be tweaking the global settings so these take effect across every game you play. However, you can also apply the same settings in any particular game you like instead of enforcing them across the board in global settings.

Alright, let’s get to it then!

![](https://772063455-files.gitbook.io/~/files/v0/b/gitbook-x-prod.appspot.com/o/spaces%2F-Lgje1lBxKKWXwqycB-v%2Fuploads%2FZnLdyjvpPvMNR2ej2mBZ%2Fimage.png?alt=media\&token=aa2ea7dc-1657-459e-bc68-ac6aa9462489)

Optimizing AMD Radeon Global Settings

#### Radeon Anti-Lag: Enabled

Radeon Anti-Lag is an AMD feature that works similarly to Nvidia’s Reflex or Low-Latency Mode. You should keep Anti-Lag enabled to reduce input lag and have better latency in games. This feature works best in competitive FPS shooters like CSGO, DOTA, or Valorant.&#x20;

#### AMD Radeon Chill: Disabled

AMD Radeon Chill isn’t a “Chill” setting to turn on at all. It drastically reduces your GPU output to favor cooler temperatures. Less GPU output means worse gaming performance. If you’re struggling with high temperatures, I suggest checking for alternate solutions before resorting to this setting.

#### Radeon Boost: Disabled

As good as Radeon Boost sounds, it isn’t something you want to turn on. How Radeon Boost “Boosts” your FPS is dynamically lowering your resolution to favor higher FPS. It’s definitely not worth it as graphics become a mess and you can barely make out characters in-game. That said, this setting does work great in very few titles so keep an eye out.

#### Image Sharpening: Your Call

Image Sharpening is a nifty little tool by AMD that lets you sharpen the textures of in-game scenes. It’s particularly great if you’re using TAA antialiasing as it helps restore the crispness to textures. However, in some games, this can make things look worse. So check first before committing to applying sharpness to your games.

#### Radeon Enhanced Sync: Enable

You can keep Radeon Enhanced Sync enabled if you don’t want to use V-sync. Vsync introduces input lag to your game and makes it choppy in many cases. However, using Enhanced sync will reduce screen tearing in games without really increasing input lag like traditional V-sync.

#### Wait for Vertical Refresh: Always off

Wait for Vertical Refresh is basically turning on V-sync across all your games. It caps your FPS to your monitor’s refresh rate and introduces input lag and latency issues in games. I don’t recommend turning it on.&#x20;

Apply the following in the advanced settings section:

#### Frame Rate Target Control: Disabled

Frame Rate Target Control caps your in-game FPS to a particular value you set here. Unless you need to cap FPS for a particular game, keep it disabled to avoid reducing your game’s performance unnecessarily.&#x20;

#### Antialiasing: Use Application Settings

Driver-Level antialiasing isn’t really worth it. The in-game options work great so no need for any other AA from Radeon Settings. Use Application Settings is the best option to select here.&#x20;

#### Antialiasing Method: Multisampling

Even though we won’t be using any driver-level antialiasing, here you can set the Antialiasing Method to Multisampling. Multisampling improves graphics quality significantly while keeping the performance impact to a minimum.&#x20;

Morphological Antialiasing: Disabled

Morphological Antialiasing causes stuttering and FPS drops in games. Not many people are a fan of this setting and for good reason. Steer clear of it and keep it disabled.

#### Anisotropic Filtering: Disabled

Almost every DX11 onwards game takes care of Anisotropic Filtering natively so there’s no need to enable it in Radeon Settings.

#### Texture Filtering Quality: Performance

Texture Filtering Quality is the best set to Performance mode. This is a good mix between visuals and performance and makes the best use of your AMD GPU powers.&#x20;

#### Surface Format Optimization: Enabled

Surface Format Optimization you can enable to smoothen in-game textures. However, it can break some games’ textures and make them muddily. Instead of keeping it enabled globally, I recommend enabling it for particular games in the Radeon Panel.&#x20;

#### Tessellation Mode: Override Application Settings

We’ll need to override Tessellation Mode from the Radeon settings to unlock Tessellation Level settings.&#x20;

#### Maximum Tessellation Level: Off

Disabling driver-level Tessellation will have a major impact on the performance of games. It’ll disable any sort of driver-level tessellation from making performance noticeably better in games.

#### OpenGL Triple Buffering: Disabled&#x20;

OpenGL Triple Buffering should be disabled to avoid any issues with performance. Since it’s also a part of V-Sync, there’s no use enabling it here.

#### Reset Shader Cache: Perform Reset

Reset Shader Cache is a great utility available inside the Radeon Settings. It helps clear out shader cache that builds up over time and helps improve performance in games. However, sometimes older shader cache can get corrupted causing problems. So it’s great to reset it every now and then to ensure games run buttery smooth.&#x20;

### Summary

And there you have it, folks. This was our dedicated and definitive guide to using the best AMD settings in the Radeon control panel. Every tweak made above is focused on getting you the best performance possible without compromising visuals. So, I hope it helps you squeeze that extra bit of performance out of your AMD GPU.&#x20;

#### Frequently Asked Questions

**How to download AMD Radeon Software?**

Go [here](https://www.amd.com/en/support). Select your GPU from the drop-down list and download the GPU driver the website recommends.

**I messed up while tweaking AMD settings, how do I revert?**

In AMD Software, go to settings and select System from the sub-menu. Here you’ll find Factory Reset and then click on Perform Reset. A warning message will appear, click Proceed to begin the reset or Cancel to back out. This will reset any settings that might be problematic so you can start fresh.

**How much performance boost will I get by following the above guide?**

The best AMD settings above aren’t just effective in terms of mere FPS count. They’ll ensure your games run smoothly without any stutter or crashes. However, you may observe a 10-15% performance boost depending on your GPU.

</details>

### Upgrade to an SSD

Upgrading to an SSD (solid state drive) won’t boost your game’s frame rate, but it will speed up your computer and reduce loading times while you play.

<details>

<summary>Upgrade to an SSD</summary>

**SSDs** are much faster than mechanical hard disks, making them a great way to optimize your Windows 10 computer for gaming. Upgrading to an SSD (solid state drive) won’t boost your game’s frame rate, but it will speed up your computer and reduce loading times while you play. Choose an SSD with at least 800 GB of storage, though this is more like an absolute minimum than an effective starting point.

</details>

### Upgrade your computer’s RAM

Upgrading your PC’s RAM will not only optimize your computer for gaming, but make it more powerful in general.

<details>

<summary>Upgrade your computer’s RAM</summary>

**RAM** (random access memory) is your computer’s resource pool for all current tasks. The more RAM you have, the more your computer can do at once. Upgrading your PC’s RAM will not only optimize your computer for gaming, but make it more powerful in general. Adding RAM can give you a significant FPS boost, though not as much as upgrading your GPU or CPU. Still, if you can afford the new RAM, it won’t hurt. If you’re adding RAM, make sure your new RAM modules match whatever you currently have. You don’t want to mix and match RAM types, confirm which types of RAM your motherboard can support. Then, buy one or more of the same RAM module.

</details>

### Defrag or optimize your HDD or SSD.

As data is written to or deleted from your HDD hard disk, files become fragmented and will physically spread out all over the disk. Disk fragmentation will lead to a significant performance hit — especially with games — as the hard disk will need to collect all of the fragmented portions before it can process the entire file.

<details>

<summary>Defrag or optimize your HDD or SSD.</summary>

*Whether you’re using a **HDD** or an **SSD**, clean up your drive now to boost your computer and optimize Windows 10 for gaming.*&#x20;

Open the Start menu and begin typing the word defragment. Choose Defragment and Optimize Drives from the search results. Select your Windows disk and hit Optimize. This will either **defragment your HDD,** ***or optimize your SSD via TRIM.***&#x20;

**SSDs** also benefit from regular cleanup with the **TRIM** function which tells your SSD to erase any data blocks that aren’t being used, which speeds up read and write speeds with more efficient data management. TRIM should be enabled by default for your SSD. But it can accidentally get switched off, which means your SSD won’t benefit from regular optimization.&#x20;

Here’s how to enable **SSD TRIM** on your computer if necessary: Open Command Prompt: click the Start menu and type `cmd` into the search bar. Choose `Run as administrator` from the Command Prompt options and click `Yes` when prompted. Type in the command `Fsutil behavior query disabledeletenotify`, and hit `Enter`. If this returns the `result = 0`, you’re good to go! Otherwise, TRIM isn’t supported and needs to be enabled. Try entering the command `fsutil behavior set DisableDeleteNotify 0`. If that doesn’t help, you might need to upgrade your firmware to enable TRIM.

</details>

### Increasing Virtual Memory in Windows 10, 11

Increasing your virtual memory if you are running a machine with 4 or 8 gigabytes of ram will help with Downloading and installing mods, as well as the game will run the mods at a higher speed.

<details>

<summary>Increasing Virtual Memory in Windows 10, 11</summary>

* Go to the **Start** Menu and click on **Settings**.
* Type *performance*.
* Choose **Adjust the appearance and performance of Windows**.
* In the new window, go to the **Advanced** tab and under the **Virtual memory** section, click on **Change.**
* At the bottom of the new window, check what the **Recommended** value is and how it compares to **Currently allocated**.
* If the current setting is significantly less than the recommended, uncheck the **Automatically manage paging file size for all drives** box at the top of the same windows and then click on **Custom size**.
* Enter the Recommended value in the **Initial Size** box, and a larger figure in the **Maximum size** box.
* Click OK to save the new settings.\
  I usually set mine to 3 times the recommended. Usually somewhere around 3 gigs of extra virtural ram.  But I use the the memory from one of my slaved storage discs. NOT my SSD.

</details>

### Increasing Virtual Memory in Linux

When a Linux system is initially set up, a swap partition is created on the hard drive that will be used as virtual memory in Linux, along with other partitions used for data. Unfortunately, partitions on the hard drive cannot be re-sized without the loss of data. However, not all is lost if more swap is needed. If there is remaining space on a file system that can be used as swap, a swap file can be created that is used exclusively as additional virtual memory in Linux.

<details>

<summary>Increasing Virtual Memory in Linux</summary>

**Step #1**

Determine the amount of free space available with the "df" command. Decide upon the size of the swap file based upon the amount of free space.

**Step #2**

Create a swap file of the size decided upon earlier with the command "sudo dd if=/dev/zero of=/mnt/swapfile bs=1M count=1024" where 1024 is the size of the swap file in megabytes and the full name of the swapfile is /mnt/swapfile.

</details>

### Boost your Wi-Fi.

A slow internet connection can cause extra lag in games. So though it won’t increase your FPS, boosting your Wi-Fi signal can help to reduce lag and increase gaming performance.

<details>

<summary>Boosting your Wi-Fi.</summary>

One of the best ways to boost your Wi-Fi signal at home is to reposition your router to a more central location. This helps your router provide Wi-Fi coverage to as much of your home as possible, while avoiding Wi-Fi blockers like thick walls, doors, and electrical interference from household appliances. The best place for your router will generally be in the center of your home, possibly in a corridor, and away from any thick walls or doors.

**Update your router firmware**

Your router’s firmware can quickly become outdated if you aren’t updating it regularly. In addition to helping boost your Wi-Fi signal, updating your router’s firmware can also prevent router hacks — many types of router malware are built to exploit vulnerabilities in older firmware. To update your router’s firmware, visit your router manufacturer’s website and download and install the most current software.

**Switch your router to 5 GHz**

Your router’s settings should allow you to choose between 2.4 GHz, 5 GHz, or both. A 5 GHz network is faster than a 2.4 GHz network, but 2.4 GHz is better at penetrating through obstacles. Enable both 5 GHz and 2.4 GHz so that you’ll get optimum coverage no matter where in your home you are. You need to log into your router’s admin menu to enable 5 GHz. To do that, you need your router’s IP address. Your router’s IP address may be written somewhere on your router.&#x20;

**If not, you can find your router’s IP address in your Windows settings.**&#x20;

* Click the Settings cog in the Start menu to open your settings.&#x20;
* Click Network & Internet.&#x20;
* In the Status menu, click View hardware and connection properties.&#x20;
* The Default gateway entry is your router’s IP address.&#x20;
* Copy your router’s IP address — you’ll need it to log into your router’s menu.&#x20;

**Here’s how to enable 5 GHz on your router to boost your Wi-Fi signal:**&#x20;

* Log into your router menu.&#x20;
* Enter your router’s IP address into your browser, press Enter, and type in your username and password to log in.&#x20;
* Find your wireless settings options.&#x20;
* Change your settings to 5 GHz, or enable both 5 GHz and 2.4 GHz (recommended).&#x20;

Some routers allow you to create separate 5 GHz and 2.4 GHz networks. By doing so, you'll ensure that your 5 GHz–capable devices are all using the faster network.

</details>

## Check the results:&#x20;

### Enable an in-game FPS counter&#x20;

By now, you’ve spent a lot of time on all these performance tweaks to optimize your computer for gaming. It’s time to check how much you’ve actually achieved. \
**To Find your current FPS Some games have a built-in FPS counter.** \
**If you use Steam, press Alt + Tab to enable it using the overlay.**\
**I use this tool for finding current FPS:** [**MSI Afterburner**](https://www.msi.com/Landing/afterburner)

<figure><img src="https://772063455-files.gitbook.io/~/files/v0/b/gitbook-x-prod.appspot.com/o/spaces%2F-Lgje1lBxKKWXwqycB-v%2Fuploads%2FjrxnlhmXQGZ7V2hejXKG%2Fimage.png?alt=media&amp;token=d263f92c-a658-416b-b677-3cde434a9d9c" alt=""><figcaption></figcaption></figure>


# Common STEAM ISSUES

Basic Steam Troubleshooting.

<figure><img src="https://772063455-files.gitbook.io/~/files/v0/b/gitbook-x-prod.appspot.com/o/spaces%2F-Lgje1lBxKKWXwqycB-v%2Fuploads%2FCNOHrl1agE7FHxwAJYPF%2FSteam%20logo.png?alt=media&amp;token=2ca37750-12c7-4737-845b-c865c43e8cfc" alt=""><figcaption></figcaption></figure>

## Update & Installation Issues

Disk Write Errors, Corrupted Files, Reinstalling Steam and other fixes for Steam.

<details>

<summary>How to Fix the Steam Disk Write Error</summary>

If you experience the Steam disk write error, try these fixes:

1. **Restart Steam**. The easiest way to rule out a temporary issue is to close the Steam client, reopen it, and then download or play it again.
2. **Restart the computer.** If closing and reopening Steam doesn't resolve the issue, rebooting the PC could fix it by closing ongoing processes that might interfere with Steam.
3. **Remove write protection from the drive.** Write protection prevents a computer from altering or adding files to a folder or an entire drive. If you believe this to be the source of the problem, verify which drive your Steam games are stored on, and then remove write protection from that drive.
4. **Turn off the read-only setting for the Steam folder**. If the Steam directory is set to read-only, then the whole directory is write-protected. Go to the Steam folder properties and make sure the **read-only** setting isn't selected.
5. **Run Steam as an administrator.** Running software as an administrator gives it extra permissions and can fix several odd problems.
6. **Delete corrupted files**. When something goes wrong while Steam is downloading a game, it may create a corrupted file that causes the Steam disk write error. To fix this problem, go to the main Steam folder and open the `steamapps/common` directory. If you see a file with the same name as the game you're trying to play that is 0 KB in size, delete it and attempt to download or launch the game again.
7. **Verify the integrity of the game files**. In your Steam library, right-click the game and select **Properties**. Then, go to the **Local Files** tab and select **Verify Integrity of Game Files**. If Steam finds any corrupt files, it automatically replaces those files.

   Do not complete this step if your game uses a launcher that downloads additional updates. Doing so will replace your updated game with the base launcher, and you will then need to re-download the updates through the launcher.
8. **Clear the Steam download cache**. If the Steam download cache is corrupted, it can cause disk write errors. To fix this problem, open Steam and navigate to **Steam** > **Settings** > **Downloads** > **Clear Download Cache**.
9. **Move Steam to a different drive.** In some cases, there may be a problem with the drive that prevents Steam from writing to it. If you have multiple drives or partitions, move the Steam installation folder to a different drive.

   If this step resolves the Steam disk write error, check the original drive for errors.
10. **Check the drive for errors.** In some cases, this process can identify bad sectors and tell Windows to ignore those sectors in the future. If the problem persists or gets worse, you may need to replace the hard drive.
11. **Turn off the antivirus program or add exceptions**. In rare instances, antivirus programs can incorrectly identify Steam as a threat and prevent it from downloading and saving game data. If the Steam disk write error goes away with the antivirus turned off, add an exception for Steam in the antivirus scans.
12. **Turn off the firewall or add exceptions**. If temporarily turning off the firewall fixes the problem, add an exception to the Windows firewall.
13. [Contact Steam for help](https://help.steampowered.com/). Steam's technical support team can walk you through potential solutions for your specific problem. You can also find help in the [Steam Community forum](https://steamcommunity.com/discussions/).

</details>

<details>

<summary>ALWAYS RESTART your PC.</summary>

It's always a good first step to make sure that you restart your computer.\
Restarting the computer flushes all kinds of system states and caches, while resetting other programs and releasing locks on files and other resources. And will trigger hidden updates that are not shown in your que!

</details>

<details>

<summary>Restarting Steam</summary>

Restarting Steam can often help resolve problems with Internet connectivity when trying to load or play games. You can restart Steam by closing and reopening the client, or refresh your Steam files in the event you feel that Steam's files may be modified, corrupted, missing, or mis-configured on your operating system. If none of these solutions work, try contacting[ Steam.](https://help.steampowered.com/en/)

#### Method 1 Restarting Steam

1\. Click on “Steam” in the toolbar at the top left corner of your Steam session. \
2\. Select “Exit” or “Exit Steam.” Your current session of Steam will close. Alternately, right-click on the Steam icon in the notification tray on your desktop, and select “Exit.” In Windows, the notification tray is located at the bottom right corner of the desktop; in Mac OS X, the notification tray is located at the top right corner of the desktop. \
3\. Double-click on the Steam icon on your desktop to relaunch Steam. If the Steam shortcut icon is not located on your desktop, search for Steam in the “Start” menu in Windows, or in the Applications folder on Mac OS X.

</details>

<details>

<summary>Reinstall Steam</summary>

The Steam installer can be downloaded here: (<http://store.steampowered.com/about/>) and reinstalled to the same location where it is already installed.\
This may fix potential issues with Steam client and service files. By Installing into the same location will preserve all installed games.\
WARNING! Uninstalling Steam will delete all game content.

</details>

<details>

<summary>Reinstalling games.</summary>

If Steam does not recognize your games after completing the instructions that are listed above, it is recommended that you completely reinstall the games in question.

#### How to do a fresh install.

1\. Unsubscribe from all mods.\
2\. Shut down Steam\
3\. Remove mod and .mod in question from your Mods folder. (Default Locations below)\
4\. Clear mod cache (Delete the contents of the folder titled (YOUR GAMES ID Number)\
5\. Restart Steam\
6\. Re-subscribe to your mods.\
7\. Start YOUR GAME and VERIFY your game files.(Instructions above)\
8\. Wait for mods to finish installing before joining any server or private game. (This is very Important)\
***Mod file default locations***\
*C:\Program Files (x86)\Steam\steamapps\common\ARK\ShooterGame\Content\Mods*\
*C:\Program Files (x86)\Steam\steamapps\workshop\content\\*\
*346110 is ARK* \
*440900 is CONAN* \
*529180 is DARK AND LIGHT* \
*834910 is ATLAS*

</details>

<details>

<summary>Clear your Steam Caches:</summary>

Clearing the Steam download cache will cause the Steam client to flush locally cached configuration data and acquire it from the Steam servers again.

#### ‌PART ONE - 1 Clearing your Download CACHE

From your Steam Client, open the Settings panel by selecting “Steam > Settings” from the top left client menu.

In the Settings panel, select the Downloads tab and you’ll find the “Clear Download Cache” button at the bottom.\
Then select “OK” to confirm and acknowledge that you’ll need to login to Steam again.

#### Part TWO - Clearing your MOD CACHE.

Follow the file path below, and delete the whole file of "insert GAME file here",\
and make sure you empty your trashcan after it is done.\
After you have cleaned the trashcan.\
Log back into steam and then your GAME and run a re-verify.\
Where to find the cache: "Your storage disc":\Program Files (x86)\Steam\steamapps\workshop\content\GAME NUMBER HERE\
346110 is ARK \
440900 is CONAN \
529180 is DARK AND LIGHT&#x20;

</details>

<details>

<summary>Deleting Corrupted Mods</summary>

To resolve this issue you must access the game’s hidden !Workshop folder and delete all broken mods from there. After doing so and forcing steam to scan for file integrity, most users have reported that the issue has been resolved.

1. Make sure that the steam client is completely closed.
2. Open-File Explorer and go to the ribbon bar at the top of the screen. Then, click on the View tab and ensure that the box associated with Hidden items is checked.
3. Once you are able to see hidden items, use File Explorer to navigate to the following location:\
   "Your Storage Drive"\Program Files (x86)\Steam\steamapps\common\\\*Game Name\*\\!Workshop\
   Note: Keep in mind that \*Game Name\* is simply a placeholder. Replace it with the name of the game you’re having mod issues with.
4. Once you get there, double-click on each mod individually and see which one is triggering the “Location is not available” issue. You will get a "Location not available" error popup.
5. If one or more mods are triggering the “Location is not available” error or a different error message, it’s clear that the issue is caused by corruption. In this case, you can proceed to delete every broken mod until you ensure that you only leave healthy ones.
6. Next, open Steam and go to the Library tab. Then, right-click on the game that uses the mods and choose Properties. Then, go to the Local Files tab and click on Verify Integrity of Game Files.

Once the process is complete, attempt to download a new mod and see if the procedure completes successfully.

</details>

<details>

<summary>"Clean Reverify" | Sometimes called |"0" Reverify </summary>

Sometimes files on hard-disks and other storage devices become corrupted because of bad hardware, software crashes, power surges etc. Steam can verify the correctness over installed game files and fix them if necessary.

1. Navigate to your Steam page.
2. Right click the Game Title.
3. In the box that opens: Click on the tabs on the top (Local Files).
4. In the last box in the list: Verify integrity of Game Files… : Click this.
5. When the process finishes, ***DO NOT*** restart the Game to re-acquire any lost files.
6. You will repeat the Step 4. until the count of files found to replace is 0.
7. Wait for the process to complete. (May be lengthy). And require several times of running a verify.
8. Start your game back up and after all files are re-acquired and DOWNLOADED(shown in the lower left corner of the games lobby page).&#x20;
9. Try the Game again.

</details>

### **Corrupted Steam Installation –**&#x20;

<details>

<summary>Launching from a desktop icon</summary>

**For any steam game,** ***Using the Desktop ICON bypasses the auto updates for the game,*** when you unsub and resub it will allow you to connect to the server IF you have the same version as the server. The Server in some cases will receive an updated mod before the Clients do. (ARK Updates for example) and create some issues in version matches. Please go the listed mod packaged for your platform and unsub to the mods pac. and then re sub to them one by one. This will trigger a new download of the mods and instead of fully downloading they will repair the files.

</details>

<details>

<summary>Connection error on Steam</summary>

If you can't connect to Steam, restart your Steam connection, check the Steam server status, update the Steam client, and try running Steam as an admin. If you still have problems, restart your device, close background apps, and troubleshoot your internet connection.

</details>

<details>

<summary>Steam.dll not found or missing errors</summary>

To fix Steam.dll not found or missing errors, copy **steam.dll** from the main installation directory and paste it into the folder of the game the error message says it's missing from. If you still have trouble, you may need to reinstall Steam.

</details>

<details>

<summary>Fixing a Steam Cloud error:</summary>

If you encounter the Steam Cloud error, your game files need to be synchronized. Restart Steam and select **Retry Sync** next to the **Play** button to force sync your Steam files.

</details>

<details>

<summary>Getting Steam to recognize existing files.</summary>

Games may appear uninstalled when Steam no longer recognizes the installation files. As long as the game folders are still in the proper location, attempting to launch a game will prompt a download. This will allow Steam to recognize the installation files during the download process. You can ensure that the game folders are in the proper location by navigating to your default Steam installation: C:\Program Files (x86)\Steam\Steamapps\Common Now start a VERIFY. (Instructions Below)

</details>

<details>

<summary>Add previously existing or alternate installation libraries/folders to Steam.</summary>

If you had previously installed the games to an alternate location outside of your main Steam folder please try the following:

1. Launch Steam and go to Steam > Settings > Downloads and click the Steam Library Folders button. This will open a window with all your current Steam Library folders.
2. Click the "Add Library Folder" button and select the folder with your installed games.
3. Once you have added the new Library folder your installed games should appear in your Steam Library.

</details>

<details>

<summary>Repair Library Folder</summary>

The Steam library folder contains all of your installed games on disk. These folders need to be writable by all users in order to update properly. Sometimes these user permissions break and need to be refreshed.\
\
Navigate to your Steam -> Settings -> Downloads -> Steam Library Folders -> Right click on folder -> Repair Folder.

</details>

### Downloading Troubleshooting Steps

<details>

<summary>Empty Session List (Empty Lobby page)</summary>

When you can not join a server through a game lobby page. This is called Empty Session List.  There are a couple Solutions. **Game History** if you have been on the server before, and if its New IP **Adding a server to your Favorites**.

***How to find your Server History in Steam***

1. Select YOUR GAME in the Steam Game Library
2. Go to View top menu
3. Select Servers option
4. Click on the internet tab
5. You will see all GAME servers listed in the Steam window.&#x20;
6. Just choose any one you like by double-clicking it. &#x20;
7. ![](https://772063455-files.gitbook.io/~/files/v0/b/gitbook-x-prod.appspot.com/o/spaces%2F-Lgje1lBxKKWXwqycB-v%2Fuploads%2FNtOIal0Cn9n5pcZLkA2Y%2Fimage.png?alt=media\&token=3a221c7f-50d5-4b7a-ba74-9f4eb0178a21)Click image to enlarge.

***How to Add a Server To Steam Favorites.***

1. Select YOUR GAME in the Steam Game Library&#x20;
2. Go to View top menu&#x20;
3. Select Servers option C
4. lick on the FAVORITES tab&#x20;
5. You will see all GAME servers listed in the Steam window.
6. In the box that opens, ENTER THE IP ADDRESS ONLY
7. Now click the ADD THIS ADDRESS TO FAVORITES button and your done.
8. ![](https://772063455-files.gitbook.io/~/files/v0/b/gitbook-x-prod.appspot.com/o/spaces%2F-Lgje1lBxKKWXwqycB-v%2Fuploads%2Fiy0IPfgoFxeH1At4Vcv0%2Fimage.png?alt=media\&token=38a30a63-0bc3-4165-978a-0b5c0fd6ee58)Click image to enlarge.

**Lastly, if neither of the two methods helped you, then you need to reset your network settings:**

1. Go to Start menu in Windows 10
2. Type CMD in Search
3. Right-click Command Prompt
4. Select Run as Administrator
5. In the CMD window type: netsh winsock reset
6. Press Enter
7. Restart your PC

</details>

<details>

<summary>Steam Workshop Mods Mismatch</summary>

Some Steam users that are trying to download mods from Steam’s Workshop are having problems with updating mods. In most cases, the mod update is not getting registered for download or does not appear inside the download queue. For some users, the issue only occurs with a couple of mods while other reports that the issue is happening to an extent where they can’t download and use any new mods.

**How to fix this Error**

* Unsubscribe from the mod via the workshop page
* Close and completely exit Steam (Right Click Steams Icon, and click "Exit Steam")
* Open Windows Explorer
* Navigate to -> \steamapps\workshop\content\GameID#(Mod Id Number.)
  * 346110 is ARK&#x20;
  * 440900 is CONAN&#x20;
  * 529180 is DARK AND LIGHT&#x20;
* If found, delete this folder. If not found, continue to the next step.
* Start Steam again
* Subscribe to the mod

</details>

<details>

<summary>Computer Hangs/Lags When Downloading From Steam (bcedit)</summary>

In order to fix this issue, all that needs to be done is to reset the **bcedit** value causing this problem back to **false**. In order to do so, you need to follow steps as stated below.

1. Right-click on the Start Menu button to open the WinX Menu.
2. ‌Click on Command Prompt (Admin).
3. ‌Type the following into the elevated Command Prompt and then press Enter:
4. ‌`bcdedit /set useplatformclock false`

**Restart** your computer, and try downloading something from Steam once it boots up. You should no longer experience any lagging/hanging or high CPU usage when downloading content from Steam or any other application on your computer.

Also, it is recommended to disable the Antivirus or add an exception for the folder in which the game is being downloaded. For that:

1. Click on the Antivirus’ icon in the system tray.
2. Click on the settings option and then select Scan.
3. Click on “Add an Exception” and add the folder where the game is being downloaded.
4. Check to see if the issue persists.

</details>

<details>

<summary>Missing Download Files Error</summary>

If you encounter a "Missing Download Files Error" with one or more of your mods, follow the instructions below.

* Open Windows Explorer
* Navigate to ----> \SteamLibrary\steamapps\workshop\downloads
* Delete anything found in here.
* If necessary, re-download the mod(s) from there, though your issue should be resolved now. If that doesn't solve the issue, this is from Valve support directly. Not directly quoted but summarized below.&#x20;
  * *"If this issue continues to occur, the user must re-install Steam. This means they will have to uninstall the game completely, deleting all data files associated with the Steam GAME, and re-install Steam.*

It is a sync issue that has happened between Steam and the game." It is highly advisable you backup any single-player save game data before proceeding with this step! Conan Exiles does not have any cloud saving.

</details>

<figure><img src="https://772063455-files.gitbook.io/~/files/v0/b/gitbook-x-prod.appspot.com/o/spaces%2F-Lgje1lBxKKWXwqycB-v%2Fuploads%2FqA6afu7u3tg7NYyAKTwz%2Fimage.png?alt=media&amp;token=42698de6-e7f9-4ec8-85f9-cb192793836a" alt="" width="325"><figcaption></figcaption></figure>

## Unusual Steam Errors:

### Problems with BattlEye Service:

<details>

<summary>Problems with BattlEye Service:</summary>

If you are seeing one of the following problems, it might be due to the BattlEye service:

* Game hangs at launch or fails to load
* BattlEye failed to initialize
* Kicked from the game
* Stuttering/freezing when launching

You can troubleshoot those errors using the BattlEye FAQ here:[ **http://www.battleye.com/support/faq/**](http://www.battleye.com/support/faq/)

Additionally, you can try deleting the BattlEye folder by following the following:

1. Please close the game all the way out.
2. Then, go to C:\Program Files (x86)\Steam\steamapps\common\H1Z1 and delete the BattlEye folder.
3. Then, verify the integrity of the game cache through Steam.

If none of these fixes work for you, please visit H1Z1 website and the following troubleshooting guide.[ https://help.daybreakgames.com/hc/en-us/articles/218088717](https://help.daybreakgames.com/hc/en-us/articles/218088717)

</details>

### Help for Failed to create D3D issues.

<details>

<summary>Help for Failed to create D3D issues.</summary>

DeviceD3D errors typically occur if you are running the game at settings which your machine does not adequately support or if you are running outdated video drivers. Other potential causes include outdated Windows installs or larger video card issues.\
\
Reduce your video resolutionIf you have recently increased or changed your game's video resolution, a good first step is to revert your resolution to a setting that previously worked and re-test the issue. If you are able to play at a lower resolution we recommend using that going forward.\
Use the -autoconfig launch option, if you would like the game to automatically choose appropriate settings for your machine, please use the -autoconfig [launch option](https://help.steampowered.com/en/faqs/view/2542-790F-14F8-D66A#autoconfig).\
Update your video drivers. Before updating your drivers, please visit the [Windows Update FAQ](https://steamcommunity.com/linkfilter/?url=http://www.update.microsoft.com/microsoftupdate/v6/default.aspx?ln=en-us) and make sure you have all of the critical updates and the .NET Framework installed.\
\
To update your video drivers, please follow the instructions below for your current operating system:

* [Windows 10](https://steamcommunity.com/linkfilter/?url=https://support.microsoft.com/en-us/help/4028443/windows-10-update-drivers)
* [Windows 8](https://steamcommunity.com/linkfilter/?url=https://support.microsoft.com/en-us/help/15046/windows-8-download-install-drivers)
* [macOS](https://help.steampowered.com/en/faqs/view/6073-E74C-A033-48A4)

None of these solutions worked. What can I do now?If you have reduced your video resolution, are running the game using settings your machine can adequately support, and have the latest drivers for your video card and are still receiving D3D errors it's possible that your system has gotten into an unusual state. Please restart your machine and re-test the issue.\
\
If the issue persists, please set the following launch option for the affected game: \
-dxlevel 81<br>

</details>

<details>

<summary>DX11 feature level 10.0 is required to run the engine.</summary>

This is a common error message that users experience when they’re playing games like ARK: \
You see the error DX11 feature level 10.0 is required to run the engine when your computer doesn’t have the required Direct3D hardware feature level. This means that your game is unable to use Direct3D feature level 10.0.

Another reason why you might see this error is an issue with the graphics card driver, so you should make sure that your graphics card driver is working properly.

#### Fix 1: Install the latest patch.

Since many technical problems can be resolved by restarting, it never hurts to restart your computer and your game. Often this will be enough to fix the error.

Game developers always keep releasing patches to improve their games and fix any issues, so you should check for updates of your game in Steam or from the official website. Then install the latest patch to keep it up to date.&#x20;

#### Fix 2: Update your graphics card driver.

A missing or outdated graphic card driver can cause the error. So you should update your graphics card driver or reinstall it to fix the DX11 error.

#### Fix 3: Install the latest DirectX.

As the error message suggested: DX11 is required to run the engine, you should install the latest DirectX in your Windows to support the game, if you don’t know how to check the DirectX version, you can try this:

1\) On your keyboard, press the **Windows logo key and R** at the same time, to start the **Run box**.\
2\) Type dxdiag and click OK.\
3\) You can see the DirectX Version under the System tab.

4\) You can check the feature levels by clicking Display.\
5\) While you’re in the Display tab, make sure DirectDraw Acceleration, Direct3D Acceleration, and AGP Texture Acceleration are enabled.

#### **How do you update DirectX and Feature Level?**

**DirectX version**

Generally speaking, for Windows 10, Windows 8 and Windows 8.1, you can directly update your Windows to the latest version to install the latest DirectX on your computer. However, for Windows 7, Windows Vista and Windows XP, you may need to install an update package to install the latest DirectX in your computer. You can go to the[ Microsoft website](https://support.microsoft.com/help/179113/how-to-install-the-latest-version-of-directx) for more information about how to install the latest version of DirectX for different versions of Windows.  After installing the latest Windows update or update package, restart your computer and try the game again to see if the error disappears.&#x20;

**Feature Levels**

You should make sure that you see the Feature Level your graphics card driver requires. If the Feature Levels displayed in the DirectX Diagnostic Tool don’t meet the requirement, or they’re blank, there are two possible reasons:\
1\) Your graphics card doesn’t support the required Feature Level. In that case, you should double check that with the manufacturer, or buy another graphics card that supports Feature Level 10.0; or\
2\) Your graphics card driver has an issue, or may be missing or outdated. In that case, you should update your graphics card driver as mentioned in **Fix 2.**

#### Fix 4: Update Windows

A lot of the time, updating Windows will resolve this issue. You should check for Windows updates on your computer, and install the latest available updates. After updating Windows, restart your computer and launch your game to see if the problem is resolved.\
These are the best solutions to fix DX11 feature errors.

</details>

### GeForce NOW Launcher:

<details>

<summary>GeForce NOW Launcher:<img src="https://772063455-files.gitbook.io/~/files/v0/b/gitbook-x-prod.appspot.com/o/spaces%2F-Lgje1lBxKKWXwqycB-v%2Fuploads%2FKtIhpD4tzWXnHgjjemNB%2Fimage.png?alt=media&amp;token=59ae9c3f-0666-4315-a843-0499d8d735c7" alt="" data-size="original"></summary>

If you are launching the game directly from the *GeForce NOW application* (clicking on the game image), then the game will boot up before the mods will have a chance to download.

I think you will find more success by opening those specific games in the 'Manage Steam' mode.

To do this, open the *GeForce NOW application* and click on your username in the upper right hand corner. From there you will see a drop down menu, and select 'Manage Steam.'

Once you have started a session and have an instance of Steam launched, make sure you install the game you want to play. Once installed, the mods should start downloading.

**Do note that you will need to GO to 'Manage Steam' each and every time you want to launch a game with Steam Workshop mods.**

</details>

### REPCMD\_PropertyObject ERROR. (The BLACK HOLE)

<details>

<summary>Assertion failed: Cmd.Type==REPCMD_PropertyObject ERROR.</summary>

#### NON Modded Client side fix, temporary:

1\. SOMETIMES this is only resolved by back to back multiple reverifying of the integrity of your game files by right clicking the game in the steam library and going to the tab for that. \
2\. Verify once, let it redo any files. Then verify again(don't go in game), if more files have to be redone then you to a third verify. Etc. etc. etc. rinse and repeat until you have 0 files to be redone then try again. \
3\. Again don't attempt to get in the game before you get 0 files needing to be redone. This can make you have to start all over again.

**Modded Client Side Fix.**

1\. Unsubscribe from all mods, or just the suspected mod if you know which one is causing the issue.\
2\. Shut down Steam\
3\. Remove mod and .mod in question from your Mods folder. (Default Locations below)\
4\. Clear mod cache (Delete the contents of the folder titled (YOUR GAMES ID Number)\
5\. Restart Steam\
6\. Re-subscribe to your mods.\
7\. Start YOUR GAME and VERIFY your game files.(Instructions above)\
8\. Wait for mods to finish installing before joining any server or private game. ***(This is very Important)***\
***Mod file default locations***\
*C:\Program Files (x86)\Steam\steamapps\common\ARK\ShooterGame\Content\Mods*\
*C:\Program Files (x86)\Steam\steamapps\workshop\content\\*\
*346110 is ARK* \
*440900 is CONAN* \
*529180 is DARK AND LIGHT* \
*834910 is ATLAS*

</details>

<figure><img src="https://772063455-files.gitbook.io/~/files/v0/b/gitbook-x-prod.appspot.com/o/spaces%2F-Lgje1lBxKKWXwqycB-v%2Fuploads%2FrlqX4M9MCu6dVUfCnhWe%2FNEW-PAGE_GENERIC_BANNER.png?alt=media&amp;token=9d073148-393e-4dac-ae13-e88d3519e959" alt=""><figcaption></figcaption></figure>


# Common EPIC ISSUES

Basic Epic Troubleshooting.

<figure><img src="https://772063455-files.gitbook.io/~/files/v0/b/gitbook-x-prod.appspot.com/o/spaces%2F-Lgje1lBxKKWXwqycB-v%2Fuploads%2Fy8DxEqKEvHeRmykgyKQw%2Fepic%20games.png?alt=media&amp;token=ce802ec8-9788-43bc-b4c8-bbd40c3f9d03" alt=""><figcaption></figcaption></figure>

## Troubleshooting the Epic Games Launcher

If the Epic Games Launcher is crashing, not downloading or launching games, or otherwise not working as expected, here are some troubleshooting steps that often fix common problems:

### Check the Epic Games server status <a href="#server-status" id="server-status"></a>

<details>

<summary>Check the Epic Games server status</summary>

Check the [Epic Games Server Status](https://status.epicgames.com/) page to make sure all systems are operational. If the Epic Games Launcher is affected by an outage or system-wide failure, your issue may be fixed when the outage is resolved.

</details>

### Check for updates <a href="#updates" id="updates"></a>

<details>

<summary>Check for updates</summary>

Check to see if there is an update for the Launcher. To do this, click your profile icon in the top right corner of the Launcher and select **Settings**.

If you see a **RESTART AND UPDATE** button select it to update the Launcher.

</details>

### Verify system requirements <a href="#system-reqs" id="system-reqs"></a>

<details>

<summary>System requirements for the Epic Games Launcher</summary>

Make sure your computer meets the system requirements to run the Epic Games Launcher. The system requirements for the Epic Games Launcher are:

**OS:** Windows 7 or higher, macOS 10.11 or higher

**The launcher doesn't support beta versions of MacOS.**

**Processor:** Intel Core 2 Duo / AMD Athlon 2x2

**Memory:** 2GB

**Video card:** DirectX 9.0c Compatible GPU; NVIDIA Geforce 7800 (512mb)/AMD Radeon HD 4600 (512MB)/Intel HD 4000

**Hard drive:** 1.5GB

</details>

### Disable fullscreen optimization <a href="#disable-fullscreen-optimization" id="disable-fullscreen-optimization"></a>

<details>

<summary>Disable fullscreen optimization</summary>

If you're seeing low frames per second (FPS), try disabling fullscreen optimization:

1. Shut down the Epic Games Launcher completely.
2. Go into the directory where it is installed, right-click on the launcher .exe file, and click **Properties** (Epic Games\Launcher\Engine\Binaries\Win64\EpicGamesLauncher.exe).
3. Go to the **Compatibility** tab.
4. Click to check the **Disable fullscreen optimizations** box.
5. (Optional) You can also click to check the **Run this program as an administrator** box.
6. Click **Apply** and **Ok**.

</details>

### Clear the Epic Games Launcher’s webcache <a href="#clear-cache" id="clear-cache"></a>

<details>

<summary>Clear the Epic Games Launcher’s webcache</summary>

Clearing the webcache often resolves display issues that may prevent you from using the Launcher. Follow these steps to clear your webcache:

#### On Windows:

1. Exit the Epic Games Launcher by right-clicking the system tray icon in the bottom-right corner, and then clicking **Exit.**
2. Press **Windows key + R**, type “%localappdata%”, and then press **Enter** to open a **File Explorer** window.
3. Open the **Epic Games Launcher** folder.
4. Open the **Saved** folder.
5. Click the **webcache** folder, and then delete it.
   * (Optional) If there is a folder called **webcache\_4147** and/or **webcache\_4430**, delete that as well.
6. Restart your computer, and then relaunch the Epic Games Launcher.

#### On Mac:

1. Exit the Epic Games Launcher.
2. Open **Finder**.
3. Click on **Go** then **Go to Folder...**
4. Type "\~/Library/Caches/com.epicgames.EpicGamesLauncher" and press **Enter**.
5. Drag the **webcache** folder to the **Trash**.
6. Press **control** and click on **Trash**.
7. Click on **Empty Trash**.
8. Relaunch the Epic Games Launcher.

</details>

### Run the Epic Games Launcher as an administrator <a href="#run-as-admin" id="run-as-admin"></a>

<details>

<summary>Run the Epic Games Launcher as an administrator</summary>

Running the Launcher as an administrator elevates its permissions to avoid problems with downloading games, for example.

Follow these steps to run the Launcher as an administrator:

1. Right-click your Epic Games Launcher shortcut.
2. Click **Run as Administrator**.

</details>

### Update graphics card drivers <a href="#update-drivers" id="update-drivers"></a>

<details>

<summary>Update graphics card drivers</summary>

Making sure you're using the latest graphics card drivers may resolve the launcher crashing. Review this [article](https://www.epicgames.com/help/en-US/epic-games-store-c5719341124379/launcher-support-c5719357217435/a5720505001371) for steps on how to update graphics drivers.

</details>

### Reinstall the Epic Games Launcher <a href="#reinstall" id="reinstall"></a>

<details>

<summary>Reinstall the Epic Games Launcher</summary>

**Note:** The following process will remove all of your installed games.

#### On Windows:

Follow these steps to run the system file checker then reinstall the Epic Games Launcher:

1. Close the Epic Games launcher by right-clicking the system tray icon in the bottom right corner and then clicking **Exit**.
2. Click **Start**.
3. Type "cmd", right-click **Command Prompt**, and then click **Run as administrator**.
4. In the window that opens, type "sfc /scannow", and then press **Enter**.\
   This may take a little while.
5. Restart your computer.
6. Click **Start**.
7. Type "Add or Remove Programs", and then press **Enter**.
8. Select **Epic Games Launcher** from the list of programs.
9. Click **Uninstall**.
10. Go to [www.epicgames.com](https://www.epicgames.com/) and click **Get Epic Games** in the top right corner to download the latest installer.

#### On Mac:

**Note:** If your Launcher is freezing on macOS 10.15.1 or earlier, reinstalling the Launcher often fixes the issue. Please note that macOS 10.12 and earlier are no longer supported.

1. Close the Epic Games Launcher.
2. Verify there are no processes associated with the Epic Games Launcher by checking **Activity Monitor**.
3. Open the **Applications** folder.
4. Click and drag the Epic Games Launcher application to the **Trash**.
5. Verify all the following directories no longer have any Epic Games Launcher folders or files:
   * **\~/Library/Application Support**
   * **\~/Library/Caches**
   * **\~/Library/Preferences**
   * **\~/Library/Logs**
   * **\~/Library/Cookies**
6. Go to [www.epicgames.com](https://www.epicgames.com/) and click **Get Epic Games** in the top right corner to download the latest installer.

</details>

## How to troubleshoot connection issues

A connection issue is anything that prevents you from being able to use the Epic Games Launcher or any other Epic Games product. This could happen while attempting to login to the Epic Games Launcher or using any Epic Games product.

Some things that may occur if you're having trouble with your connection:

* Unable to login to the Epic Games Launcher
* Unable to download or update games in the Epic Games Launcher
* Receiving an error code using the Epic Games Launcher

### Use a wired connection <a href="#wired" id="wired"></a>

<details>

<summary>Use a wired connection</summary>

Wireless connections are not as stable as a wired connection. This means that the signal can be unreliable and result in packet loss, connection problems, or higher latency or ping. Connect directly to your modem or router with an ethernet cable to eliminate this possibility and have the fastest connection possible.

</details>

### Disable your firewalls <a href="#firewall" id="firewall"></a>

<details>

<summary>Disable your firewalls</summary>

Often the quickest way to fix connection problems due to firewalls is to temporarily uninstall and/or disable it.

**Note:** This process is only for troubleshooting. If the connection issue is fixed after removing or disabling your firewall, make sure to manually add our products as exceptions to the firewall and try again.

**Disable Windows Firewall**

1. Click on **Start**.
2. Click on **Control Panel**.
3. Click on **System and Security**.
4. Click on **Windows Firewall**.
5. Click on Turn Windows Firewall on or off (You might need to provide the Administrator password at this step)
6. Under each Network location, select the Turn off Windows Firewall option

**Uninstall any other firewalls**

Using a third party firewall may prevent you from being able to connect to the Epic Games Launcher, Fortnite, or another Epic Games product. We recommend removing any third party firewalls temporarily to see if this resolves your issue. If it does resolve the problem, make sure to add the following executables as exceptions to your firewall:

**Epic Games Launcher**

* C:\Program Files (x86)\Epic Games\Launcher\Engine\Binaries\Win64\EpicGamesLauncher.exe
* C:\Program Files (x86)\Epic Games\Launcher\Engine\Binaries\Win32\EpicGamesLauncher.exe

**Note:** Contact your firewall manufacturer for instructions on how to add these as exceptions to it as this varies between them.

</details>

### Unblock your network ports <a href="#ports" id="ports"></a>

<details>

<summary>Unblock your network ports</summary>

Network ports allow certain types of data to be successfully sent over a network that are used by our services. If you have any of these blocked, it may result in you being unable to connect to our games or use our services properly. To unblock your ports on you router do the following:

#### **Windows**

First, you will need to get your default gateway and internal IP address:

1. Click on **Start**.
2. Type **cmd** and press **Enter**.
3. Type **ipconfig** and press Enter.
4. Take note of your **Default Gateway** and **IPv4**.

**Configuring your router to unblock the ports**

1. Open your web browser.
2. Type your **Default Gateway** into the address bar and press Enter. (A common Default Gateway is 192.168.1.1)
3. You may be asked for a username and password. This varies for each router. Before entering anything, try just hitting OK. If that doesn't work, try the common default username and password below:\
   **Username: admin**\
   **Password: password**\
   If these don't work, you can check [this](https://portforward.com/router-password/) website for a list of usernames and passwords based on your router model.
4. Locate the **Port Forwarding** page in the administration tool and click on it.
5. Make sure you have **Port Forwarding** selected and not Port Triggering as this is completely different.
6. On this screen you will need to enter the ports and port ranges below with the correct protocol and local IP of which you took note of above: **80 (TCP/UDP), 433 (TCP), 443 (TCP), 3478 (TCP/UDP), 3479 (TCP/UDP), 5060 (TCP/UDP), 5062 (TCP/UDP), 5222 (TCP), 6250 (TCP/UDP),** and **12000-65000 (TCP/UDP).**

If you have any trouble doing the above on your router, make sure to check out the router manufacturer's support site for additional instructions as these will vary router to router.

</details>

### VPN and Proxy Servers <a href="#proxy" id="proxy"></a>

<details>

<summary>VPN and Proxy Servers</summary>

Do **NOT** use VPN or Proxy Servers. These cause issues that can't be resolved by us without having you disable them. Check out [this](https://www.epicgames.com/help/en-US/technical-support-c5719357686683/general-support-c5719341627163/a5720247213339) article for information on how to disable your proxy server.

</details>

### Switch Domain Name Systems (DNS) <a href="#dns" id="dns"></a>

<details>

<summary>Switch Domain Name Systems (DNS)</summary>

Switching your DNS can result in better connectivity and performance for your internet connection. There are two different DNS services we recommend to have you try if you are having issues with your connection. Below are the followings links with instructions on how to change your DNS:

* [GoogleDNS](https://developers.google.com/speed/public-dns/docs/using)
* [CloudflareDNS](https://1.1.1.1/dns/)

</details>

### Epic Games Launcher: Edit your Engine.ini file (Windows only) <a href="#engine" id="engine"></a>

<details>

<summary>Edit your Engine.ini file (Windows only)</summary>

Editing these settings can result in better download speeds using the Epic Games Launcher:

1. Click on **Start**.
2. Type **%localappdata%** and press **Enter**.
3. Open the **EpicGamesLauncher** folder.
4. Open the **Saved** folder.
5. Open the **Config** folder.
6. Open the **Windows** folder.
7. Open **Engine.ini** and add the following lines to it:\
   **\[HTTP]**\
   **HttpTimeout=10**\
   **HttpConnectionTimeout=10**\
   **HttpReceiveTimeout=10**\
   **HttpSendTimeout=10**\
   \
   **\[Portal.BuildPatch]**\
   **ChunkDownloads=3**\
   **ChunkRetries=20**\
   **RetryTime=0.5**
8. Save the file and open the Epic Games Launcher.

</details>

### How to Contact Epic Games Tech Support

<details>

<summary>How to Contact Epic Games Tech Support</summary>

If you’ve tried all of these things and you’re still having connection issues, click [**Contact Us**](https://www.epicgames.com/help/en-US/epic-games-store-c5719341124379) to open a support ticket. So we can assist you as quickly as possible, be sure to include the following:

* Steps you've already performed to troubleshoot your issue
* [DxDiag](https://www.epicgames.com/help/en-US/technical-support-c5719357686683/general-support-c5719341627163/a5720393727899)
* [MSInfo](https://www.epicgames.com/help/en-US/technical-support-c5719357686683/general-support-c5719341627163/a5720352945307)
* [Launcher Logs (For Epic Games Launcher issues)](https://www.epicgames.com/help/en-US/technical-support-c5719357686683/general-support-c5719341627163/a5720254436891)

</details>

## How to change your Epic Games display name

If you are a child and your parent hasn't helped you set up your account, you may have a Cabined Account with different features. Visit [this page](http://epicgames.com/site/cabinedaccounts) if you think you might have a Cabined Account to learn more.

### What is an Epic Games display name?

<details>

<summary>What is an Epic Games display name?</summary>

Your Epic Games display name is the name that appears on your account on the Epic Games Launcher, our official forum, AnswerHub, and when you play any of our games on PC/Mac, Switch, or mobile.

If you’ve only played on console (PSN, Xbox, or Switch) and you want to create a display name for your Epic Games account, you will need to upgrade your account to a full Epic Games account. You can find instructions on how to do that [here](https://www.epicgames.com/help/en-US/epic-accounts-c5719348850459/general-support-c5719341353627/a5720301034907).\
**Note**: You can change your display name **once every two weeks.**

</details>

### Why is my display name different when playing on a console?

<details>

<summary>Why is my display name different when playing on a console?</summary>

Changing your Epic Games display name will not affect your PSN or Xbox gamertags/display names, which means that your in-game display name may be different depending on the console platform you're playing on.\
\
To change your PSN ID or Xbox Gamertag, you will need to update it directly on the platform website:

* [How to change your Xbox Gamertag](https://support.xbox.com/en-US/help/account-profile/profile/change-xbox-live-gamertag#:~:text=On%20Xbox%20console\&text=Select%20My%20profile%20%3E%20Customize%20profile,and%20then%20select%20Check%20availability.)
* [How to change your PSN Online ID](https://www.playstation.com/en-us/support/account/change-psn-online-id/)

</details>

### How to change your Epic Games display name

<details>

<summary>How to change your Epic Games display name</summary>

Your email address must be verified before you can change your display name. Go [here](https://www.epicgames.com/help/en-US/epic-accounts-c5719348850459/general-support-c5719341353627/a5720294511003) to learn how to verify it, if you haven't done so.

1. Visit your account's [ACCOUNT INFO](https://www.epicgames.com/account/personal) page.
2. In the box labeled **DISPLAY NAME**, enter your desired new display name.
3. Scroll to the bottom of the page and click **SAVE CHANGES**.\
   ![How to change your Epic Games display name](https://static-assets-prod-origin.epicgames.com/help/en-US/epic-accounts-c5719348850459/general-support-c5719341353627/attachments/7941216394395/__s__69gUNnm4xQLtYWOaKvEBNhQ6YiusnDcaL9WEAs7lYN4__s__3X4eNy6d50M_RsPk2iCYjF2ZiDCLt9IltT8_q7GJCPQ__s__how-to-change-your-epic-games-display-name-hzY.png)

</details>

### How do I change the country on my Epic Games account?

<details>

<summary>How do I change the country on my Epic Games account?</summary>

The country on your Epic account can affect certain features and services, so it’s important that it matches the country where you currently reside.

You can update your country once every 6 months, and in order to make any changes, you will need to be logged in and have access to the email registered to your account.

It’s not possible to update the country on your Epic account to certain regions, you can find more information on these regions [here](https://www.epicgames.com/help/en-US/billing-support-c5719364845851/general-support-c5719348744091/a5720356862235).

Before starting the country change process you must disable any active VPN or hosting services and if you use an Epic wallet as one of your payment methods then the balance must be under $10 USD (or local currency equivalent). Please note that the Epic Wallet may not be available in the new country you are changing your account to.

#### Click [here](https://www.epicgames.com/help/en-US/wizards/w3) to start the country change process.

Use your Account Management Page [here](https://www.epicgames.com/account/personal?productName=epicgames\&lang=en) only if you have not made any purchases (redeeming free games will be counted as a purchase too).

**Exception for players in South Korea**

If you are changing your country to or from South Korea then you are required to use the Real ID system, and will need to contact us by submitting a support request.

</details>

## Easy Anti-Cheat Game Troubleshooting Guide

Follow these steps to ensure your game runs without issues.

While testing, make sure to always launch the game from the official launcher. A common cause for errors is when the game is launched from custom shortcuts and such.

<details>

<summary>Game Errors Solution Guide</summary>

### 1. Verify connectivity to Easy Anti-Cheat

Ensure you can access our Content Distribution Network by following these links.

* <https://download.eac-cdn.com/>
* <https://download-alt.easyanticheat.net/>

You should see the message: '200 - HTTP OK'

If neither of the links display the expected message, make sure that nothing is blocking your Internet connection. If necessary, add Easy Anti-Cheat and the game folder to your firewall exception list or temporarily disable your firewall. Sometimes connection issues are caused by incorrect network router settings. For further assistance, contact your Internet Service Provider.

### 2. Update Windows

System files that the game relies on may be missing. First, make sure all the latest updates for your operating system are installed.

Secondly, install the latest Microsoft Visual C++ Redistributables. <https://support.microsoft.com/en-gb/help/2977003/the-latest-supported-visual-c-downloads>

Lastly, run the following command with Administrator rights to repair corrupted system files. `sfc /scannow`

Follow this guide for instructions on running a command with administrative rights. The guide for instructions on running a command with administrative rights is below in this section .

### 3. Update the game

Errors may also be caused by a corrupted EasyAntiCheat installation. Directions for Installing, Uninstalling, Or Repairing Easy Anti-Cheat follow this guide.

### 4. Close all unnecessary programs

Some programs on your computer may interfere with the game you're playing or Easy Anti-Cheat. Close all other programs not related to Windows. A 'cold reboot' may be required. Follow the guide for instructions on performing a cold reboot.

### 5. Manage your anti-virus

A common cause for errors is related to a virus infection on your system. Performing a full-system scan is highly recommended. If you don't have an anti-virus or it has been out of date for a while, you can use the software listed in the below section.

If the scan does not surface any issues, it may be so that the error is related to anti-virus or similar software being corrupted and falsely blocking Easy Anti-Cheat. Simply disabling it may not entirely stop the software from interfering with . Please uninstall any such software temporarily to verify that the game launches without it. If the game otherwise starts without issues, proceed to add its installation folder to the exception list. Instructions on how to do so can usually be found on the software developer's website.

### 6. Virus And Rootkit Removal

One cause for EasyAntiCheat to fail is incompatibility with certain rootkits and viruses.

First of all, make sure your anti-virus is up-to-date.

If problems persist we recommend to run a full system scan with an anti-malware tool such as any of the following freely available options.

* [Malwarebytes Anti–Rootkit Beta](https://www.malwarebytes.com/antirootkit/)

### If all else fails...  Request Tech Support

Support is only available in English. Please write us in English whenever possible. The general response time may vary from 3 to 14 days.

Before submitting a ticket, we highly recommend to perform all the actions listed in this guide.

***To Reach EAC Tech Support go to*** [***https://www.easy.ac/en-us/support/game/contact/tech/***](https://www.easy.ac/en-us/support/game/contact/tech/)

</details>

## Verify The Easy Anti-Cheat Installation

It may be so that an external third-party software has modified the Easy Anti-Cheat service installation, preventing it from functioning properly on . Verify that the Easy Anti-Cheat service on your computer is enabled as following.

<details>

<summary>Verify The Easy Anti-Cheat Installation</summary>

1. Open the command-line. You may need administrator rights. The guide for instructions on running a command with administrative rights is below in this section .
2. Type in the following command and press Enter. `services.msc`
3. Among the listed services find Easy Anti-Cheat and double-click it.

   ![](https://www.easy.ac/static/img/support/msc-services.png)
4. If the Startup type for the service is 'Disabled' - change it to 'Manual' and Apply the settings.

   ![](https://www.easy.ac/static/img/support/msc-service-enable.png)
5. The menu can now be closed.

</details>

## Install, Uninstall, Or Repair Easy Anti-Cheat

<details>

<summary>Install, Uninstall, Or Repair Easy Anti-Cheat</summary>

The Easy Anti-Cheat service is typically installed automatically with each game, and uninstalled automatically when the last game using Easy Anti-Cheat is removed from your system.

You can also install the service manually. To do so navigate to the "EasyAntiCheat" folder inside of the game's installation folder and locate "EasyAntiCheat\_Setup.exe". Launch it as administrator and choose 'Install'.

If your Easy Anti-Cheat installation becomes corrupted somehow, you can repair it by following the same steps and choosing 'Repair' at the end.

Easy Anti-Cheat service is uninstalled together with the game. You can also manually remove the service from the system by following the above steps and choosing 'Uninstall' at the end.

</details>

### Cold reboot

<details>

<summary>Cold reboot</summary>

Some of the actions required to troubleshoot and repair your system may require a cold reboot.

Run the following command in the command-line as an administrator. `shutdown /s /f /t 0`

</details>

### Update

<details>

<summary>Update</summary>

* Instructions for games in Steam: <https://support.steampowered.com/kb_article.php?ref=2037-QEUH-3335>
* Instructions for games in Uplay: <https://support.ubi.com/en-Us/Faqs/000019000/Install-Uninstall-Verify-A-Game-in-Uplay>

</details>

### Administrative rights for commandline

<details>

<summary>Administrative rights for commandline</summary>

Some of the actions required to troubleshoot and repair your system may require administrative rights.

Instructions for Windows 8 and 10: <https://www.howtogeek.com/194041/how-to-open-the-command-prompt-as-administrator-in-windows-8.1/>

Instructions for earlier versions: <https://www.askvg.com/guide-different-ways-to-open-command-prompt-as-administrator-in-windows/>

Should your user account not have administrative priviledges, please contact your system administrator.

</details>

## Specific Errors

This page details solutions for highly specific error scenarios. Head over to the solution guide should your issue not be listed here.

### Corrupted Memory

<details>

<summary>Corrupted Memory</summary>

The in-memory game code was detected to have been corrupted. The error is very rare and can occur if the physically installed RAMs are defective and are actively cause runtime memory corruptions.

#### Verify the condition of your hardware and game installation.

* [Follow this guide to check the condition of the installed RAM using hardware verification tools.](https://www.easy.ac/en-us/support/game/guides/hardware/)
* Follow the ***Cold Reboot*** and ***Update*** sections to verify that your game installation is up-to-date.

</details>

### Unknown Game File

<details>

<summary>Unknown Game File</summary>

An unknown file that is not part of the game installation was found to be loaded from the game directory.

#### Remove the conflicting file from the game installation directory.

First close the game if is running and then delete the file from inside the game directory. After deleting the file launch again.

</details>

### Unknown File Version

<details>

<summary>Unknown File Version</summary>

An unknown version of a file that is part of the game installation has been loaded from the game directory.

This means the file's current contents don't match with what we're expecting. It's recommended to remove the file, followed by validating the game installation through the used distribution platform, e.g. Steam. This results in the file being redownloaded.

Should this not help, doing the same for the catalogue itself helps. The catalogue is stored under `<GameRoot>/EasyAntiCheat/Certificates/` for most games. For games which don't follow this convention you should look for the Certificates directory through search. Note that the directory should only contain one `game.bin` and `game.cer` file, if multiple files exist remove them, followed by the install validation mentioned above.

If you keep encountering these issues for different files it's recommended to reinstall the game instead of going through the files one by one. Note that when uninstalling a game it's likely that some files will get left behind. Therefore it's recommended to remove the game's directory to ensure problematic files won't be present after the reinstall is complete.

</details>

### Untrusted System File

<details>

<summary>Untrusted System File</summary>

The game loaded a system .dll that failed an integrity check. This error indicates a system level corruption.

#### Repair missing or corrupted system files.

Run the following command with Administrator rights to repair corrupted system files. `sfc /scannow`

For further instructions on how to do this, please visit this link. <https://support.microsoft.com/en-us/help/929833/use-the-system-file-checker-tool-to-repair-missing-or-corrupted-system-files>

Follow this guide for instructions on running a command with administrative rights. The guide for instructions on running a command with administrative rights is above ***Install, Uninstall, Or Repair Easy Anti-Cheat Section.***

#### Update Windows.

Make sure that all available Windows updates have been installed.

#### Resolve virus infections.

This error may possibly indicate a virus infection in the system. If the error persists, we highly recommend running a full anti-virus system scan. Follow this guide for instructions on removing malware from your system.

</details>

### Debugger detected

<details>

<summary>Debugger detected</summary>

This error is triggered when the game launcher is started with a debugger. Easy Anti-Cheat requires that the game launcher is not debugged.

</details>

### '.local' Redirection Detected

<details>

<summary>'.local' Redirection Detected</summary>

This error is triggered if the game folder has a DotLocal (.local) redirecting file for the game executable. Removing it will fix this.

</details>

### Driver Signature Enforcement Disabled

<details>

<summary>Driver Signature Enforcement Disabled</summary>

Easy Anti-Cheat requires Driver Signature Enforcement to be enabled.

#### Enable Driver Signature Enforcement

To enable Driver Signature Enforcement run the following commands with administrator rights and restart Windows.

* `bcdedit -set TESTSIGNING OFF`
* `bcdedit -set NOINTEGRITYCHECKS OFF`

Follow this guide for instructions on running a command with administrative rights. The guide for instructions on running a command with administrative rights is above ***Install, Uninstall, Or Repair Easy Anti-Cheat Section.***

#### Executing the commands didn't work?

If these command do not work for some reason, you can also follow these steps instead to enable DSE.

1. Select the "Start" button.
2. Type "Startup".
3. Select "Change advanced startup settings".
4. Select "Restart now" under the "advanced startup" area.
5. Select "Troubleshoot".
6. Select "Advanced Options".
7. Select "Startup Options".
8. Select "Restart".
9. A menu will appear where you can press "7" on your keyboard to choose "Enable driver signing enforcement".

</details>

### Kernel Debugging Enabled

<details>

<summary>Kernel Debugging Enabled</summary>

Easy Anti-Cheat will not initialize when kernel debugging is enabled.

#### Disable Kernel Debugging.

To disable Kernel Debugging run the following command with administrator rights and restart Windows. `bcdedit -set DEBUG OFF`

Follow this guide for instructions on running a command with administrative rights. The guide for instructions on running a command with administrative rights is above ***Install, Uninstall, Or Repair Easy Anti-Cheat Section.***

</details>

### Kernel Patch Protection Disabled

<details>

<summary>Kernel Patch Protection Disabled</summary>

The Kernel Patch Protection is a security mechanism on 64-bit Windows and it is not possible to manually disable it, so the only cause for this error is a rootkit virus infection. If you encountered this error, we strongly recommend reinstalling Windows.

</details>

### Windows Safe Mode detected

<details>

<summary>Windows Safe Mode detected</summary>

Easy Anti-Cheat cannot run in Windows Safe Mode. Please use the Standard Windows boot mode.

</details>

### CSC Validation Failed

<details>

<summary>CSC Validation Failed</summary>

To fix this, install all available updates and restart Windows. If the issue persists, ensure that your anti-virus software is up to date.

#### Manually import the certificates.

If the above instructions didn't help, you may also manually import the GlobalSign "CodeSign" and "EV CodeSign" Root Certificates as a final resort.

* <https://support.globalsign.com/customer/portal/articles/1426602-globalsign-root-certificates>
* <https://technet.microsoft.com/en-us/library/cc754841(v=ws.11).aspx#BKMK_addlocal>

</details>

### Hacking Tool Loaded

<details>

<summary>Hacking Tool Loaded</summary>

A hacking tool has been loaded into the system. Close the program specified in the error message and try launching the game again.\
If the error persists perform a 'cold reboot' of Windows.

#### Perform a 'cold reboot'.

The guide for instructions on running a **'cold reboot'** is above ***Install, Uninstall, Or Repair Easy Anti-Cheat Section.***

</details>

### Game Security Violation

<details>

<summary>Game Security Violation</summary>

The game process or system's integrity has been compromised and the game will exit. This is usually caused by outdated or insecure background third party software. To resolve this, update or disable background third party software and restart your PC.

</details>

***All information provided in this guide is from © 2004-2023, Epic Games, Inc.***&#x20;

<figure><img src="https://772063455-files.gitbook.io/~/files/v0/b/gitbook-x-prod.appspot.com/o/spaces%2F-Lgje1lBxKKWXwqycB-v%2Fuploads%2FrlqX4M9MCu6dVUfCnhWe%2FNEW-PAGE_GENERIC_BANNER.png?alt=media&amp;token=9d073148-393e-4dac-ae13-e88d3519e959" alt=""><figcaption></figcaption></figure>


# ASE: Graphic and PC Enhancements

Post of helpful Optimizations and Client side bug fixes for our ARK Players:

<figure><img src="https://772063455-files.gitbook.io/~/files/v0/b/gitbook-x-prod.appspot.com/o/spaces%2F-Lgje1lBxKKWXwqycB-v%2Fuploads%2FzvHBWJdBbjNfuicGioPo%2FALPHYS%20HELP%20DESK_ASE.png?alt=media&amp;token=76b25822-6155-4033-b725-698584f699bf" alt="" width="563"><figcaption></figcaption></figure>

## Why is ASE(ARK) so poorly optimized?&#x20;

Many users struggle with Ark’s performance stutters, low FPS (frames per second), and graphical glitches. Ark is a highly unoptimized game, as even high-end hardware often isn’t able to achieve a smooth 60 FPS or even a stable 30 FPS. So what gives? Ark’s poor performance stems from problems in its code, as it’s not optimized enough to run smoother. Unfortunately, there’s nothing you can do about it other than fine-tune the settings, which is what we’re here for!

### POST - Aquatica Launch OPTION:

The PACK has a mod package that you should subscribe to before joining one of our ASA servers, this is found HERE:&#x20;

{% embed url="<https://steamcommunity.com/sharedfiles/filedetails/?id=1829354252>" %}

## ARK: Aquatica and A.S.E. announcement

We have enabled a public branch of the game that was the previous build before the update at launch (7/15). Players will be able to opt into that branch and continue to play A.S.E. pre-Aquatica release

The branch is called "preaquatica". To navigate to the branch:

* Right Click ARK: Survival Evolved in your Steam Library
* Click Properties
* Click Betas then Beta participation.
* Click on "preaquatica" branch
* If you are unable to see this branch, please exit Steam. And restart the app.
* You can access Aquatica by reverting the opt in process. But to play any map with mods, you will have to Opt in to the Pre-aquatica beta.

<div><figure><img src="https://772063455-files.gitbook.io/~/files/v0/b/gitbook-x-prod.appspot.com/o/spaces%2F-Lgje1lBxKKWXwqycB-v%2Fuploads%2FOQL8ODGo8KIItdBC9s6Z%2FOPT%20IN%20AQUATICA.png?alt=media&amp;token=c57f02f3-83e8-45aa-b27d-833a90bb73bc" alt=""><figcaption></figcaption></figure> <figure><img src="https://772063455-files.gitbook.io/~/files/v0/b/gitbook-x-prod.appspot.com/o/spaces%2F-Lgje1lBxKKWXwqycB-v%2Fuploads%2FmZ0b5i3rTQPT6BCvJRmo%2Fpreaquatica_enabled.png?alt=media&amp;token=7713400b-f974-47f8-a136-3a452c9cae72" alt=""><figcaption></figcaption></figure></div>

### ASE(ARK) Launch Options&#x20;

<details>

<summary><img src="https://772063455-files.gitbook.io/~/files/v0/b/gitbook-x-prod.appspot.com/o/spaces%2F-Lgje1lBxKKWXwqycB-v%2Fuploads%2FIzhBeXFsK9IjcUbQ2nRq%2Fimage.png?alt=media&amp;token=c806a4c4-1a94-42cc-83a3-8d14332bb686" alt=""></summary>

You can squeeze more performance or fidelity out of Ark by using some command options. Add them to the game using the various game launchers and platforms:

*On Steam, go to your library, right-click on ARK: SA and, select Properties and click on Set Launch Options.*

![](https://772063455-files.gitbook.io/~/files/v0/b/gitbook-x-prod.appspot.com/o/spaces%2F-Lgje1lBxKKWXwqycB-v%2Fuploads%2FrbWhH8Ymye6CkQ3NHLTa%2Fimage.png?alt=media\&token=b58446f8-51cf-4e4b-bd4c-89a003c6d8b4)

![](https://772063455-files.gitbook.io/~/files/v0/b/gitbook-x-prod.appspot.com/o/spaces%2F-Lgje1lBxKKWXwqycB-v%2Fuploads%2FGCTlYy32hEsGPHmeBJjm%2Fimage.png?alt=media\&token=070c0ad8-c247-43c7-944f-be999e8adb3a)

***Here’s a list of the best ones you can and should use:***\
-high -lowmemory -sm4 -d3d10 -nomansky -window (-w 1860 -h 980  set this to your preferred window size)

*On Epic, click the little Settings cog under ARK:SA to open the settings. Scroll all the way down until you see Advanced Command Line Arguments.*

#### Many Console Commands can function as a launch option by adding a "-" in front of the console command, but some cannot be used in this fashion. The most common launch options are listed below.

***Here’s a list of the most popular launch options:***

***-Sm4:*** Forces a simpler shade model that lowers the graphical fidelity. In our tests, this improved the frame rate by about 25%, but it also made the game look significantly worse. This command also weakens the lighting effect of torches and other elements in the game. Use this only if you have no choice, and use it along with the d3d10 switch below.

**-d3d10**: Forces the game to use DirectX 10 instead of 11 to boost performance at the cost of graphics.

**-high**: Forces high CPU priority, which might give you extra FPS. However, as discussed in this article, Ark isn’t a CPU-bound game, so unless you’re running tons of background applications, this command won’t do much. But it doesn’t hurt to have it on!

**-nomansky**: Removes sky details, which will make the heavens look quite bland while possibly squeezing out more FPS. In our tests, this gave us a boost of 1–2 FPS, but we’re running it on a higher-end PC. Your mileage may vary.

**-lowmemory**: Lowers a few settings to make the game run on PCs with “only” 4 GB of RAM.

**-USEALLAVAILABLECORES:**(the game will use all your CPU cores)&#x20;

**List of the all useful launch options with descriptions:**

-USEALLAVAILABLECORES - (the game will use all your CPU cores)\
-sm4 and -d3d10 - (runs game with DirectX 10)\
-nomansky (removes clouds and some sky effects)\
-lowmemory (the game will use only 4gb of your RAM)\
-w 640 -h 480 - (runs game in 640x480 resolution)\
-full - (fullscreen mode)\
&#x20;-window - (windowed mode with borders)\
-noborder - (windowed mode without borders)\
-low - (runs ARK as a low-priority process)\
-high - (runs ARK as a high-priority process)\
-noaafonts - (removes fonts anitalising)\
-autoconfig - (return default settings)\
-novid (turns off some cinematics)\
-console - turns on the developer console (ark doesn't use this)\
-noeac - turns off the easy anti-cheat software. (ark doesn't use this)\
-dx10 - toggles dx10 use\
-dx11 - toggles dx11 use\
-dx12 - toggles dx12 use<br>

</details>

### ASE(ARK) SURVIVAL OPTIONS PANEL CONFIGURATIONS:

<details>

<summary><img src="https://772063455-files.gitbook.io/~/files/v0/b/gitbook-x-prod.appspot.com/o/spaces%2F-Lgje1lBxKKWXwqycB-v%2Fuploads%2FotJOSDJF3m4jmuyf6dVm%2Fimage.png?alt=media&amp;token=42c139fb-96c3-4906-ac30-8e9818922ed7" alt="">  Click image to enlarge!</summary>

***Open the Options Screen from your ARK Lobby Screen. After altering all of these settings, remember to save them!***

**For HIGH/EPIC Settings.**

resolution scale = 100 \
World tile Buffer = EPIC \
View distance = HIGH \
Anti-aliasing = EPIC \
Post Processing = EPIC \
General Shadows = LOW \
Terrain Shadows = LOW \
Textures = EPIC

#### For MEDIUM/HIGH Settings.

resolution scale = 100\
World tile Buffer = HIGH\
View distance = MEDIUM\
Anti-aliasing = EPIC\
Post Processing = EPIC\
General Shadows = LOW\
Terrain Shadows = LOW\
Textures = HIGH

#### For LOW Settings.

resolution scale = meter all the way to left\
World tile Buffer = LOW\
View distance = LOW\
Anti-aliasing = EPIC\
Post Processing = LOW\
General Shadows = LOW\
Terrain Shadows = LOW\
Textures = LOW<br>

We will now walk you through every option as many of them can impact FPS or boost/lower overall game performance: Please note that these options will not be the most optimal setup for all computers, but about 80% of them will see a huge increase in FPS from changing these settings.

**Resolution** – change this depending on your device and CPU/GPU, desktop computers should not have any problems running 1920×1080 but on a Laptop it’s recommended to use the 1280×768 resolution. \
**Window Mode**– ALWAYS have this in full screen, Windowed or WindowedFullscreen will decrease your FPS and cause lag and/or frame tearing. Note full window is NOT compatible with alt tabbing. \
**Resolution Scale** – lowering it down will decrease resolution but increase FPS, only lower this as a last resort if you have lag even with other settings optimized. \
**World Tile Buffers, View Distance, Anti-Aliasing and Post Processing** – set these to medium or low depending on your computer. \
**General Shadows, Terrain Shadows, Ambient Lightning** – configuring these to the lowest setting will provide you with a nice increase to FPS and overall performance. \
**Sky Quality, Ground Clutter Density, Ground Clutter Distance and Mesh Level of Detail** – set these between lowest-middle, these will most certainly lower your overall FPS if you have them on max. \
**High-Quality Anisotropic Filtering** – ON This feature creates smoother looking objects from various points of view. \
**Motion Blur** – OFF An unimportant aesthetic. \
**Film Grain** – OFF Another unimportant feature. \
**Distance Field Ambient Occlusion** – OFF Triggers soft shadows for distant objects. \
**Screen Space Ambient Occlusion** (SSAO) – OFF Triggers soft shadows for nearby objects. \
**Dynamic Tessellation** – OFF \
**Distance Field Shadowing** – OFF Another shadows-related feature. \
**High-Quality Materials** – OFF This option improves textures of in-game materials. \
**Sub Surface Scattering** – ON It affects light behavior and makes foliage more realistic. \
**High-Quality VFX** – OFF It affects all in-game water effects. \
**Simple Distance Character Movement** – ON It relieves CPU from animations of distant characters. \
**High-Quality LODs** – ON Improves the level of details. \
**Extra Level Streaming Distance** – OFF This will make map loading faster while moving fast. \
**Color Grading** – ON Slightly improves colors. It won’t affect FPS. \
**Light Bloom** – Personal Choice.  Won’t affect performance. Can cause blinding bright spots.\
**Light Shafts** – Personal Choice.  It doesn’t affect performance. Can cause bright Shafts of light.\
**Mesh Level of Detail (LOD)** – Again. you can choose to disable/enable it by your own preferences. It affects GPU VRAM marginally.

***Alternative INI settings for Graphic improvements in ARK:S.E.***

In order to do this, you’ll be messing around with .ini files in ARK’s installation directory. So keep that in mind, and proceed at your own risk. It’s probably a good idea to make backups of the files you’re poking around at, but also make sure you know how to verify files in Steam. That’s generally the easiest way to restore a game to its official state.

***So your first step is to navigate to the following folder, first by right-clicking ARK in your library, clicking “Manage,” then “Browse Local Files.”***

`\steamapps\common\ARK\ShooterGame\Saved\Config\WindowsNoEditor\`

There are two files we’re interested in. Those files are named `“Engine.ini” and “GameUserSettings.ini.”`&#x20;

You want to open them with Notepad or a similar basic text editor in order to edit them. Now, you’ll be replacing everything written in those files with a new list of directions for ARK. Make sure all the original text has been fully replaced.&#x20;

Make sure to save both of these files once you drop the new text in.&#x20;

Now, your mileage may vary based on your PC’s specs of course. But most folks seem to be reporting anywhere from a 10 to 20 FPS bump after doing this.

***For Engine.ini, use this:***&#x20;

\[/script/engine.renderersettings] r.DefaultFeature.Bloom=False r.DefaultFeature.AmbientOcclusion=False r.DefaultFeature.AutoExposure=False r.DefaultFeature.MotionBlur=False r.DefaultFeature.LensFlare=False r.EarlyZPass=0 r.SSAOSmartBlur=0 r.HZBOcclusion=0 r.AmbientOcclusionLevels=0 r.BloomQuality=0 r.DepthOfFieldQuality=0 r.SSR.Quality=0 r.SSS.Scale=0 r.SSS.SampleSet=0 r.DetailMode=0 r.LensFlareQuality=0 r.MaxAnisotropy=0 r.oneframethreadlag=1 r.LightShaftQuality=0 r.RefractionQuality=0 r.ExposureOffset=0.3 r.ReflectionEnvironment=0 r.Atmosphere=0 r.Shadow\.MaxResolution=2 r.SimpleDynamicLighting=1 r.UpsampleQuality=0 r.ViewDistanceScale=0.4 r.TrueSkyQuality=0

\[/script/shootergame.shooterengine] bFirstRun=False FrameRateCap=200 FrameRateMinimum=200

\[Core.System] Paths=../../../Engine/Content Paths=../../../ShooterGame/Content Paths=../../../Engine/Plugins/Experimental/CharacterAI/Content Paths=../../../Engine/Plugins/TrueSkyPlugin/Content

\[SystemSettings] TEXTUREGROUP\_World=(MinLODSize=1,MaxLODSize=2,LODBias=0,MinMagFilter=aniso,MipFilter=point) TEXTUREGROUP\_WorldNormalMap=(MinLODSize=1,MaxLODSize=2,LODBias=0,MinMagFilter=aniso,MipFilter=point) TEXTUREGROUP\_WorldSpecular=(MinLODSize=1,MaxLODSize=2,LODBias=0,MinMagFilter=aniso,MipFilter=point) TEXTUREGROUP\_Character=(MinLODSize=1,MaxLODSize=4,LODBias=0,MinMagFilter=aniso,MipFilter=point) TEXTUREGROUP\_CharacterNormalMap=(MinLODSize=1,MaxLODSize=4,LODBias=0,MinMagFilter=aniso,MipFilter=point) TEXTUREGROUP\_CharacterSpecular=(MinLODSize=1,MaxLODSize=4,LODBias=0,MinMagFilter=aniso,MipFilter=point) TEXTUREGROUP\_Weapon=(MinLODSize=1,MaxLODSize=64,LODBias=0,MinMagFilter=aniso,MipFilter=point) TEXTUREGROUP\_WeaponNormalMap=(MinLODSize=1,MaxLODSize=64,LODBias=0,MinMagFilter=aniso,MipFilter=point) TEXTUREGROUP\_WeaponSpecular=(MinLODSize=1,MaxLODSize=64,LODBias=0,MinMagFilter=aniso,MipFilter=point) TEXTUREGROUP\_Vehicle=(MinLODSize=1,MaxLODSize=256,LODBias=0,MinMagFilter=aniso,MipFilter=point) TEXTUREGROUP\_VehicleNormalMap=(MinLODSize=1,MaxLODSize=256,LODBias=0,MinMagFilter=aniso,MipFilter=point) TEXTUREGROUP\_VehicleSpecular=(MinLODSize=1,MaxLODSize=256,LODBias=0,MinMagFilter=aniso,MipFilter=point) TEXTUREGROUP\_Cinematic=(MinLODSize=1,MaxLODSize=128,LODBias=0,MinMagFilter=aniso,MipFilter=point) TEXTUREGROUP\_Effects=(MinLODSize=1,MaxLODSize=128,LODBias=0,MinMagFilter=linear,MipFilter=point) TEXTUREGROUP\_EffectsNotFiltered=(MinLODSize=1,MaxLODSize=128,LODBias=0,MinMagFilter=aniso,MipFilter=point) TEXTUREGROUP\_Skybox=(MinLODSize=1,MaxLODSize=256,LODBias=0,MinMagFilter=aniso,MipFilter=point) TEXTUREGROUP\_UI=(MinLODSize=1,MaxLODSize=256,LODBias=0,MinMagFilter=aniso,MipFilter=point) TEXTUREGROUP\_Lightmap=(MinLODSize=1,MaxLODSize=8,LODBias=0,MinMagFilter=aniso,MipFilter=point) TEXTUREGROUP\_Shadowmap=(MinLODSize=1,MaxLODSize=2,LODBias=0,MinMagFilter=aniso,MipFilter=point,NumStreamedMips=3) TEXTUREGROUP\_RenderTarget=(MinLODSize=1,MaxLODSize=128,LODBias=0,MinMagFilter=aniso,MipFilter=point) TEXTUREGROUP\_MobileFlattened=(MinLODSize=1,MaxLODSize=2,LODBias=0,MinMagFilter=aniso,MipFilter=point) TEXTUREGROUP\_Terrain\_Heightmap=(MinLODSize=1,MaxLODSize=2,LODBias=0,MinMagFilter=aniso,MipFilter=point) TEXTUREGROUP\_Terrain\_Weightmap=(MinLODSize=1,MaxLODSize=2,LODBias=0,MinMagFilter=aniso,MipFilter=point)

\[Oculus.Settings] bChromaAbCorrectionEnabled=True bYawDriftCorrectionEnabled=True bDevSettingsEnabled=False bOverrideIPD=False bOverrideStereo=False bOverrideVSync=True VSync=True bOverrideScreenPercentage=False bAllowFinishCurrentFrame=True bLowPersistenceMode=True bUpdateOnRT=False FarClippingPlane=0.000000 NearClippingPlane=0.000000

\[WindowsApplication.Accessibility] StickyKeysHotkey=False ToggleKeysHotkey=False FilterKeysHotkey=False StickyKeysConfirmation=False ToggleKeysConfirmation=False FilterKeysConfirmation=False

***And for GameUserSettings.ini use this:***&#x20;

\[/script/shootergame.shootergameusersettings]

MasterAudioVolume=0.107143

MusicAudioVolume=0.039683

SFXAudioVolume=0.409387

CameraShakeScale=0.037899

bFirstPersonRiding=False

bThirdPersonPlayer=False

bShowStatusNotificationMessages=True

TrueSkyQuality=0.000000

FOVMultiplier=1.250000

GroundClutterDensity=0.000000

bFilmGrain=False

bMotionBlur=False

bUseDFAO=False

bUseSSAO=False

bShowChatBox=False

bCameraViewBob=False

bInvertLookY=False

bFloatingNames=True

bChatBubbles=True

bJoinNotifications=False

bCraftablesShowAllItems=True

LookLeftRightSensitivity=1.000000

LookUpDownSensitivity=1.000000

GraphicsQuality=4

ActiveLingeringWorldTiles=10

bUseVSync=False

ResolutionSizeX=1920

ResolutionSizeY=1080

LastUserConfirmedResolutionSizeX=1920

LastUserConfirmedResolutionSizeY=1080

WindowPosX=-1

WindowPosY=-1

bUseDesktopResolutionForFullscreen=False

FullscreenMode=0

LastConfirmedFullscreenMode=1

Version=5

bHideServerInfo=False

LastServerSearchType=2

LastServerSearchHideFull=False

LastServerSearchProtected=False

HideItemTextOverlay=False

bDistanceFieldShadowing=False

LODScalar=0.000000

HighQualityMaterials=False

HighQualitySurfaces=False

bTemperatureF=False

bDisableTorporEffect=True

\[ScalabilityGroups]&#x20;

sg.ResolutionQuality=100 sg.ViewDistanceQuality=2 sg.AntiAliasingQuality=0 sg.ShadowQuality=2 sg.PostProcessQuality=2 sg.TextureQuality=2 sg.EffectsQuality=0 sg.TrueSkyQuality=0 sg.GroundClutterQuality=0 sg.IBLQuality=0 sg.HeightFieldShadowQuality=2

\[SessionSettings] SessionName=ARK #563569

\[/script/engine.gamesession] MaxPlayers=120

\[AdminPassword] Password= ServerPassword=

</details>

## GAME ERRORS and FIXES

### **What to do if your Client cannot connect to our servers!**

<details>

<summary>Client Connection Errors</summary>

**Are you able to directly connect to all the servers in a cluster?**\
Make sure you can directly connect to all the servers. It can take longer for some maps to load up than others. Make sure you are allowing 5-10 minutes for all the servers to fully load up.

**To Use Direct connect...**\
Go to your Steam page> view> servers> when the box pops up, along the top are tabs, select "History" and there will be all the servers you have joined in the last two months.\
To join a server from one of them: right click the servers line, in the box that opens select "add server IP" add the ip address (use just the number from the steam link) and hit the "join this server" button.  It will take a few seconds to minutes to load up.\
\
**Double Check the filter settings in the server browser of the obelisk**\
Make sure your filters do not filter out the servers. For example, the option "Show Passworded Servers" will filter out all servers except Passworded servers.\
\
**Are all the mods updated?**\
Mods will take time to update. Not only do they need to download they also need to install. This can take several minutes for some mods. They will show white type in the bottom right hand corner of the lobby.

#### Snapshot\_ # Fatal error Load.

Windows 11 doesn't handle Ark like other programs, by automatically increasing the swap file size so it can unload more stuff to let Ark load. That's why Ark can usually join a clean server, but not one with heavy mods. And if you fail to load Ark fast enough when trying to log in, you timeout your login and generate the Snapshot\_# error.

One fix for this is, if possible, moving your ARK mods to a SSD. The SSD will then load the mods much faster and you should not time out. But as most SSD are small in size this is not always a possibility. Try following the steps outlined below, and if they do not work , Our next step would be to make a larger Virtual Memory Allotment.

Find the DefaultEngine.ini file, \
\ARK\ShooterGame\Config on the client \
Make a backup of these file(s). \
Locate the lines\
&#x20;`[/Script/OnlineSubsystemUtils.IpNetDriver]` \
`InitialConnectTimeout=300.0` \
`ConnectionTimeout=300.0` \
and change "300" to "600".

Consider using the launch options mentioned in the Launch Options section and try ARK again.

Launch ARK in Low Memory 4GB mode and try again.

Launch ARK in Extremely Low Memory mode&#x20;

</details>

<details>

<summary>SETTING UP YOUR LOBBY WINDOW</summary>

![](https://772063455-files.gitbook.io/~/files/v0/b/gitbook-x-prod.appspot.com/o/spaces%2F-Lgje1lBxKKWXwqycB-v%2Fuploads%2Fh8YZ12kNt5ywNdcSdLWf%2Fimage.png?alt=media\&token=551e5abd-eec2-48eb-be52-28a5603e6fcf) **Click image to enlarge!**

Make sure all the boxes in the top row are on default settings. At the bottom left you need to check With Mods, and Survivors Also when you are Downloading a mod... WAIT till that box in the bottom right ... Marked with a RED BOX here. IS done doing the mod updates. YOU will be disconnected over and over till the mod is done Downloading and Installing.

</details>

<details>

<summary>How to Join from Steam History!</summary>

![](https://772063455-files.gitbook.io/~/files/v0/b/gitbook-x-prod.appspot.com/o/spaces%2F-Lgje1lBxKKWXwqycB-v%2Fuploads%2Fyv8VdwSRmoXjCE0sj0mQ%2Fimage.png?alt=media\&token=c673112a-00a6-4ea3-92dd-9dd9768bf5b3) **Click image to enlarge!**

Go to your Steam page> view> servers> when the box pops up, along the top are tabs, select "History" and there will be all the servers you have joined in the last two months.\
To join a server from one of them: right click the servers line, in the box that opens select "Join this Server?" and there you have it.

</details>

<details>

<summary>Mod Installation Problems</summary>

When mod installation freezes or slows down or the mods do not install properly or are errored and a Verify does not fix the issue.

1. Close ARK Unsubscribe from all your ARK mods at <http://steamcommunity.com/id/YOUR\\_ID/myworkshopfiles/?appid=346110\\&browsefilter=mysubscriptions\\>
   (Feel free to favorite them to keep them in a list)&#x20;
2. Delete your \steamapps\common\ARK\ShooterGame\Content\Mods folder&#x20;
3. Delete your \steamapps\workshop\content\346110 folder
4. Use the launch option "Launch ARK (Reset Total Conversion) "
5. Reconnect to your server (You will be timed out while the mods are re-subscribed and re-downloaded)&#x20;
6. Return to the main menu&#x20;
7. Wait until all messages on bottom right of your screen go away&#x20;
8. Try playing again - otherwise Try Increasing Virtual Memory on your OS. Instructions follow in the next section.

</details>

<details>

<summary>Increasing Virtual Memory on your OS.</summary>

#### Method #1   You can compress the installation folder.

Go to the ark directory, find "content" and "seekfreecontent", \
and enable NTFS file compression from the "properties" menu. \
It can take an hour or two to complete depending on your CPU speed.\
Most games come pre-compressed. \
ARK does not, because the devs are inept.

#### Method #2    Unsubscribe and clean Mod Files out.

Unsubscribe from all your mods, (while doing this "favorite" any of the mods you do want to keep or you are intrested in, so you do not loose them.)\
delete all workshop folders in this location:\
ARK>ShooterGame>Content>Mods\
Then resubscribe to the mods that you actually use now, and then exit steam and restart it. \
This should trigger the steam download to start.

#### Method #3  Using a third party application to compress files.

Use this Third party app if you are on win10: \
Visual Interface for the Windows 10 Compact Function\
<https://github.com/ImminentFate/CompactGUI>\
You can cut a brand new install by 60GB with zero perceptible change by compressing the filesystem (e.g. removing duplication)

</details>

<details>

<summary>Black Screens -Dual Monitors</summary>

Sometimes your graphic card will overheat when running two monitors, while in ARK Survivor. This applies where one monitor is 144mhz and the other is 59-60mhz. Set the newer monitor to 60mhz to stop the black screen issues. Then in ARK Survivor, open your tab bar and type `t.maxfps 60`. This command limits the FPS to 60FPS which in turn keeps the graphic much more stable and much cooler. And the plus, NO MORE BLACK SCREENS.

</details>

<details>

<summary>Too Bright Screens - Map Specific in ARK: Survivor</summary>

You can also fix the weird shininess/everything is too bright bug by going into settings while in game and going to options.&#x20;

Next turn reflections to low, hit apply, then turn them off and hit apply again. &#x20;

Use of the  Launch Parameter -sm4 will reduce brightness on some Video Cards.

</details>

<details>

<summary>Various Graphic Resets with EACH Patch.</summary>

1\. Using -SM4 into set **launch options** \
2\. Tab to open up console ingame and type `R.Shadowquality` 0. This one will turn off shadows completly and give you a huge FPS boost. \
3\. Change some INI Files in your CLIENT SIDE settings. \
You will find the files here: `\SteamApps\common\ARK\ShooterGame\Config` LOOK FOR `DefaultEngine.ini` file "make a copy of this one So you always have it somewhere."

#### Find this section below:

\[/Script/Engine.RendererSettings] \
r.MobileHDR=True \
r.AllowOcclusionQueries=True \
r.MinScreenRadiusForLights=0.030000 \
r.MinScreenRadiusForDepthPrepass=0.030000 \
r.PrecomputedVisibilityWarning=False \
r.TextureStreaming=True \
Compat.UseDXT5NormalMaps=True \
r.AllowStaticLighting=False \
r.NormalMapsForStaticLighting=False \
r.GBuffer=True \
r.GenerateMeshDistanceFields=True \
r.Shadow\.DistanceFieldPenumbraSize=0.050000 \
r.TessellationAdaptivePixelsPerTriangle=8.000000 \
r.SeparateTranslucency=True \
r.CustomDepth=0 \
r.DefaultFeature.Bloom=False \
r.DefaultFeature.AmbientOcclusion=True \
r.DefaultFeature.AutoExposure=True \
r.DefaultFeature.MotionBlur=False \
r.DefaultFeature.LensFlare=False \
r.DefaultFeature.AntiAliasing=1 \
r.EarlyZPass=2 \
r.EarlyZPassMovable=True \
r.ClearSceneMethod=1 \
r.MSAA.CompositingSampleCount=0 \
r.WireframeCullThreshold=5.000000 \
;PRIMAL - DS \
r.SSAOSmartBlur=0

**Second option:**

You can change the majority in the game settings menu but we offer you a whole settings list of edited values. You can change GameUserSettings.ini file this way:

Go to the Steam client. \
Open Library and right-click Ark: Survival Evolved. \
In the Local Files tab open Browse Local Files. \
Open Shooter game folder. \
Click Saved, then Config and finally open `WindowsNoEditor.` \
Find `GameUserSettings.ini file`. \
Open with Notepad and delete all. \
Copy and paste these values:

\[/Script/ShooterGame.ShooterGameUserSettings]\
MasterAudioVolume=0.75\
MusicAudioVolume=0.25\
SFXAudioVolume=0.25\
CameraShakeScale=0.000000\
bFirstPersonRiding=False\
bThirdPersonPlayer=True\
bShowStatusNotificationMessages=True\
TrueSkyQuality=0.000000\
FOVMultiplier=1.250000\
GroundClutterDensity=0.000000\
bFilmGrain=False\
bMotionBlur=False\
bUseDFAO=False\
bUseSSAO=True\
bShowChatBox=False\
bCameraViewBob=False\
bInvertLookY=False\
bFloatingNames=True\
bChatBubbles=true\
bJoinNotifications=True\
bCraftablesShowAllItems=True\
LookLeftRightSensitivity=1.000000\
LookUpDownSensitivity=1.000000\
GraphicsQuality=3\
ActiveLingeringWorldTiles=12\
bUseVSync=False\
ResolutionSizeX=1768\
ResolutionSizeY=992\
LastUserConfirmedResolutionSizeX=1920\
LastUserConfirmedResolutionSizeY=1080\
WindowPosX=-1\
WindowPosY=-1\
bUseDesktopResolutionForFullscreen=False\
FullscreenMode=1\
LastConfirmedFullscreenMode=1\
Version=5\
bHideServerInfo=False\
LastServerSearchType=2\
LastServerSearchHideFull=False\
LastServerSearchProtected=False\
HideItemTextOverlay=True\
bDistanceFieldShadowing=True\
LODScalar=1.000000\
HighQualityMaterials=False\
HighQualitySurfaces=False\
bTemperatureF=False\
bDisableTorporEffect=True\
VoiceAudioVolume=1.277778\
bLocalInventoryShowAllItems=False\
bRemoteInventoryShowAllItems=False\
ClientNetQuality=3\
bToggleToTalk=False\
bChatShowSteamName=True\
bChatShowTribeName=True\
EmoteKeyBind1=0\
EmoteKeyBind2=0\
bNoBloodEffects=False\
bLowQualityVFX=True\
MacroCtrl0=\
MacroCtrl1=\
MacroCtrl2=\
MacroCtrl3=\
MacroCtrl4=\
MacroCtrl5=\
MacroCtrl6=\
MacroCtrl7=\
MacroCtrl8=\
MacroCtrl9=\
bSpectatorManualFloatingNames=False

\[ScalabilityGroups]\
sg.ResolutionQuality=100\
sg.ViewDistanceQuality=3\
sg.AntiAliasingQuality=0\
sg.ShadowQuality=2\
sg.PostProcessQuality=0\
sg.TextureQuality=2\
sg.EffectsQuality=0\
sg.TrueSkyQuality=0\
sg.GroundClutterQuality=0\
sg.IBLQuality=0\
sg.HeightFieldShadowQuality=2

</details>

<details>

<summary>When you need to reset your Last played Maps</summary>

When you need to reset your Last played Maps for THE PACK CLUSTER\
Go to the Steam client. \
Open Library and right-click Ark: Survival Evolved. \
In the Local Files tab open Browse Local Files. \
Open Shooter game folder. \
Click Saved, \
then Config and finally open \
`WindowsNoEditor.` \
Find `GameUserSettings.ini file`. \
Open with Notepad \
Search for (Ctrl +F)  - \[/Script/ShooterGame.ShooterGameUserSettings]\
and Copy and paste these values at the end of the \[/Script/ShooterGame.ShooterGameUserSettings] section.&#x20;

\[/Script/ShooterGame.ShooterGameUserSettings] \
LastJoinedSessionPerCategory="The PACK Island PvE Cluster(3xH, 4xXP, 8xT)" LastJoinedSessionPerCategory="The PACK Center PvE Cluster(3xH, 4xXP, 8xT)" LastJoinedSessionPerCategory="The PACK Scorched Earth PvE Cluster(3xH, 4xXP, 8xT)" \
LastJoinedSessionPerCategory="The PACK Aberration PvE Cluster(3xH, 4xXP, 8xT)" LastJoinedSessionPerCategory="The PACK Ragnarok PvE Cluster(3xH, 4xXP, 8xT)" LastJoinedSessionPerCategory="The PACK Extinction PvE Cluster(3xH, 4xXP, 8xT)" LastJoinedSessionPerCategory="The PACK Valguero PvE Cluster(3xH, 4xXP, 8xT)" LastJoinedSessionPerCategory="The PACK Genesis PvE Cluster(3xH, 4xXP, 8xT)" LastJoinedSessionPerCategory="The PACK CrystalIsles PvE Cluster(3xH, 4xXP, 8xT)" LastJoinedSessionPerCategory="The PACK Genesis2 PvE Cluster(3xH, 4xXP, 8xT)" LastJoinedSessionPerCategory="The PACK Amissa PvE Cluster(3xH, 4xXP, 8xT)" LastJoinedSessionPerCategory="The PACK EbenusAstrum PvE Cluster(3xH, 4xXP, 8xT)" \
LastJoinedSessionPerCategory="The PACK Fjordur PvE Cluster(3xH, 4xXP, 8xT)" LastJoinedSessionPerCategory="The PACK Hope PvE Cluster(3xH, 4xXP, 8xT)" LastJoinedSessionPerCategory="The PACK Olympus PvE Cluster(3xH, 4xXP, 8xT)" LastJoinedSessionPerCategory="The PACK Event Map PvE Cluster(3xH, 4xXP, 8xT)"

NOW search for \[Player.Info] \
And copy and paste the following at the bottom of that section.

\[Player.Info] \
LastMapPlayed=CrystalIsles \
PlayedMaps=Genesis \
PlayedMaps=Ragnarok \
PlayedMaps=TheCenter \
PlayedMaps=Amissa \
PlayedMaps=TheIsland \
PlayedMaps=ScorchedEarth\_P \
PlayedMaps=Extinction \
PlayedMaps=EbenusAstrum \
PlayedMaps=Valguero\_P \
PlayedMaps=Olympus \
PlayedMaps=Hope \
PlayedMaps=Aberration\_P \
PlayedMaps=Arkforum\_Eventmap \
PlayedMaps=CrystalIsles \
PlayedMaps=Viking\_P \
PlayedMaps=Gen2\
\
Now SAVE and close the Wordpad File.

YOU have just added THE PACK to your Current played maps history and this will show up in the steam window on your next restart of Steam.

</details>

<figure><img src="https://772063455-files.gitbook.io/~/files/v0/b/gitbook-x-prod.appspot.com/o/spaces%2F-Lgje1lBxKKWXwqycB-v%2Fuploads%2FLUyGuxw39uGPp7KrOokX%2Fimage.png?alt=media&amp;token=849f4ba7-0bbc-4534-b5c3-aed0d72b7ad5" alt=""><figcaption></figcaption></figure>


# ASA: Graphic and PC Enhancements

Post of helpful Optimizations and Client side bug fixes for our ARK Players:

<figure><img src="https://772063455-files.gitbook.io/~/files/v0/b/gitbook-x-prod.appspot.com/o/spaces%2F-Lgje1lBxKKWXwqycB-v%2Fuploads%2FM9tOGGQwOxWvaoZuj3TH%2FALPHYS%20HELP%20DESK_ASA.png?alt=media&amp;token=ea9ebf67-0967-4ff4-9687-5848101aa011" alt="" width="563"><figcaption></figcaption></figure>

<figure><img src="https://772063455-files.gitbook.io/~/files/v0/b/gitbook-x-prod.appspot.com/o/spaces%2F-Lgje1lBxKKWXwqycB-v%2Fuploads%2F7clFgU8OtRHe65OYgapq%2FASA_SPLASH_GREENERY.png?alt=media&amp;token=477a5b11-19b6-495f-8cf9-bbbf118a1aec" alt=""><figcaption></figcaption></figure>

## How to improve ARK Survival Ascended (ASA) performance

Many users struggle with ARK:SA's performance stutters, low FPS (frames per second), and graphical glitches. ASA is a STILL a highly unoptimized game, as even high-end hardware often isn’t able to achieve a smooth 60 FPS or even a stable 30 FPS. Unfortunately, there’s nothing you can do about it other than fine-tune the settings, which is what we’re here for!

The first thing to do is **verify your graphics drivers is up-to-date**. ARK: Survival Ascended is a demanding game, and if your drivers aren't updated, you'll encounter more issues. Here is where you can check for updates:

* [Nvidia](https://www.nvidia.com/en-us/geforce/drivers/)
* [AMD](https://www.amd.com/en/support)

### BEST AMD settings in ARK: Survival Ascended

For the best AMD settings in ARK: Survival Ascended, prioritize enabling AMD FidelityFX Super Resolution (FSR), setting the in-game resolution slightly lower than your native monitor resolution, turning on AMD Anti-Lag, and adjusting other graphics settings to "Medium" or "High" depending on your hardware, with a focus on lowering settings that heavily impact performance like foliage interaction and advanced graphics, while maintaining important visual elements like global illumination at a higher setting if possible.&#x20;

Key points to remember:

* **AMD FSR:** Activate this feature in your AMD Radeon Software to upscale the game's resolution, potentially boosting FPS significantly.&#x20;
* **Resolution Scaling:** Set the in-game resolution slightly lower than your native monitor resolution to gain performance.&#x20;
* **Anti-Lag:** Enable AMD Anti-Lag in your Radeon settings for quicker response times.&#x20;
* **Graphics Preset:** Choose a "Medium" or "High" preset depending on your hardware.&#x20;
* **Important Settings to Adjust:**
  * **Foliage Interaction:** Set to "Low" or "Off" to significantly improve performance.&#x20;
  * **Advanced Graphics:** Adjust based on your system, but consider lowering it to "Medium" for better FPS.&#x20;
  * **View Distance:** Set to a moderate level depending on your preference and hardware&#x20;
  * **Global Illumination:** Try to keep this setting at "Medium" or higher for better lighting effects.&#x20;

Other considerations:

* **Check AMD Radeon Software:** Always check the latest AMD Radeon Software settings for optimal game optimization.&#x20;
* **Experiment with settings:** Test different configurations to find the perfect balance between visual quality and performance for your system.&#x20;
* **Monitor your GPU usage:** Use the in-game FPS counter and GPU monitoring tools to see how your system is performing and identify potential bottlenecks.&#x20;

## BEST Nvidia settings in "ARK: Survival Ascended

For the best Nvidia settings in "ARK: Survival Ascended," prioritize enabling DLSS (Deep Learning Super Sampling) in "Performance" mode, turn on Nvidia Low Latency mode, and adjust in-game graphics settings to prioritize medium-range quality with lower foliage density, focusing on lowering view distance and effects quality to maximize FPS while maintaining visual fidelity; if you have a high-end PC, you can push settings higher, but always consider utilizing DLSS for the best performance boost.&#x20;

#### ***Nvidia Control Panel:***

* **Manage 3D Settings:**
  * **Program Settings:** Select "ARK: Survival Ascended"
  * **DLSS:** Enable, set to "Auto" mode
  * **Low Latency Mode:** Enable
  * **Power Management:** Set to "Prefer maximum performance"&#x20;

### **ARK In-game graphics settings to tweak:**

***Open the Options Screen from your ASA Lobby Screen. After altering all of these settings, remember to save them.***

For a stable experience with an Nvidia 4000 - 5000 series card, in ARK: Survival Ascended, aim for a balance of visual quality and performance by setting your graphics preset to "Medium," keeping DLSS on "Balanced," and lowering less impactful settings like view distance and effects to low, while high settings for Global Illumination and Textures maintain visual fidelity. Disable motion blur, light bloom, and light shafts, and turn off volumetric clouds and fog via console commands for a significant FPS boost. In-Game Settings

1. **Graphics Preset**: Start with the "Medium" preset as a baseline.&#x20;
2. **NVIDIA DLSS**: Set this to "Balanced" for good visual quality and a performance boost.&#x20;
3. **Resolution Scale**: Keep this at 100% or slightly lower if needed for performance.&#x20;
4. **View Distance**: Set to "Low" or "Medium" to improve performance, as higher settings are demanding.&#x20;
5. **Texture Quality**: "High" is a good starting point, but adjust to your preference; "Epic" can be used without significant visual impact if you have available VRAM.&#x20;
6. **Post-Processing**: Set this to "Medium".&#x20;
7. **General Shadows**: "High" is recommended for good quality.&#x20;
8. **Global Illumination Quality**: "Epic" or "High" if you want the best look, but "Medium" is a good balance for performance.&#x20;
9. **Effects Quality**: "Medium" is a good starting point.&#x20;
10. **Foliage Quality**: "Medium" or "High" is a good balance; "Epic" creates tall grass.&#x20;
11. **Motion Blur**: Turn this "Off".&#x20;
12. **Light Bloom & Light Shafts**: Turn these "Off" to reduce graphical artifacts.&#x20;
13. **Low Light Enhancement**: Turn this "Off".&#x20;
14. **Foliage & Fluid Interaction**: Disable both settings and set their associated sliders all the way to the left.&#x20;
15. **Footstep Particles & Decals**: Turn these "Off" to save performance.&#x20;
16. **Frame Rate Limit**: Set this to your monitor's refresh rate (e.g., 60, 144).&#x20;

Console Commands (Enter in game console)

* **Volumetric Clouds**: Type `VolumetricCloud 0` to disable clouds and significantly boost your FPS.&#x20;
* **Dynamic Global Illumination**: If you experience overly bright highlights, type `r.DynamicGlobalIlluminationMethod 2` to get a less intense effect.&#x20;

#### Important considerations:

* **Resolution Scale:** If needed for extra performance, lower the resolution scale slightly.&#x20;
* **Anti-Aliasing:** Adjust based on preference, but lower settings can improve performance&#x20;
* **Texture Quality:** Depending on your VRAM, you might need to adjust texture quality &#x20;

## Other settings for improved PC performance in ARK Survival Ascended.

<figure><img src="https://772063455-files.gitbook.io/~/files/v0/b/gitbook-x-prod.appspot.com/o/spaces%2F-Lgje1lBxKKWXwqycB-v%2Fuploads%2FL5fxbCbMe2K0cmClCX8x%2Fimage.png?alt=media&amp;token=e47c7485-2b80-4622-a399-c4721869e989" alt=""><figcaption></figcaption></figure>

### Set your Launch options!

#### You can squeeze more performance or fidelity out of ASA by using some command options. Add them to the game using the various game launchers and platforms:

*On Steam, go to your library, right-click on ARK: SA and, select Properties and click on Set Launch Options.*

![](https://772063455-files.gitbook.io/~/files/v0/b/gitbook-x-prod.appspot.com/o/spaces%2F-Lgje1lBxKKWXwqycB-v%2Fuploads%2FrbWhH8Ymye6CkQ3NHLTa%2Fimage.png?alt=media\&token=b58446f8-51cf-4e4b-bd4c-89a003c6d8b4)

![](https://772063455-files.gitbook.io/~/files/v0/b/gitbook-x-prod.appspot.com/o/spaces%2F-Lgje1lBxKKWXwqycB-v%2Fuploads%2FGCTlYy32hEsGPHmeBJjm%2Fimage.png?alt=media\&token=070c0ad8-c247-43c7-944f-be999e8adb3a)

***Here’s a list of the best ones you can and should use:***\
-high -lowmemory -sm4 -d3d11 -nomansky -window (-w 1860 -h 980  set this to your prefered window size)

*On Epic, click the little Settings cog under ARK:SA to open the settings. Scroll all the way down until you see Advanced Command Line Arguments.*

## Console Commands&#x20;

Use these commands either in your Console Command Bar (Make a Cut and paste of the whole set)!

r.ContactShadows 0 (Disables Small Shadows) (Low FPS Impact) r.DynamicGlobalIlluminationMethod 0 (Disables Lumen) (High FPS Impact) r.Lumen.Reflections.Allow 0 (Disables Lumen Reflections) (Medium FPS Impact) r.MaterialQualityLevel 0 (Disables Textures) (High FPS Impact) \
r.Nanite.MaxPixelsPerEdge 4 (Reduces Triangles For Nanite Meshes) (Medium FPS Impact) \
r.Shadow\.CSM.MaxCascades 0 (Disables Shadow Cascades) (Medium FPS Impact) r.ShadowQuality 0 (Disables All Shadows) (High FPS Impact) \
r.VolumetricCloud 0 (Disables Clouds) (High FPS Impact) \
r.Water.SingleLayer.Reflection 0 (Disables Water Reflections) (Low FPS Impact) r.volumetricfog 0 (Disables Fog) (Low FPS Impact)\
ark.VertexCountScaling 1 (helps with the inventory bug)\
Grass.sizescale 0  (Reduces the scale of the giant grass)\
fx.MaxNiagaraGPUParticlesSpawnPerFrame 0  (Aberration; fixes the Glow Particles)

### Optimized Command Presets:&#x20;

Use the presets below to help with fps/ graphics/stutters.\
Go to single player or multiplayer and press the " \~ " key to open the console.\
Copy and Paste the commands from below as one message to the console and apply (enter)&#x20;

**Ultra (5% - 15% FPS Gain)** \
r.Lumen.Reflections.Allow 0 | r.Shadow\.CSM.MaxCascades 0 | r.VolumetricCloud 0|ark.VertexCountScaling 1

High (15% - 25% FPS Gain) \
r.DynamicGlobalIlluminationMethod 0 | r.Shadow\.CSM.MaxCascades 0 | r.VolumetricCloud 0|ark.VertexCountScaling 1

**Medium (35% - 45% FPS Gain)** \
r.DynamicGlobalIlluminationMethod 2 | r.Nanite.MaxPixelsPerEdge 4 | r.Shadow\.CSM.MaxCascades 0 | r.VolumetricCloud 0|ark.VertexCountScaling 1|Grass.sizescale 0|fx.MaxNiagaraGPUParticlesSpawnPerFrame 0&#x20;

**Low (45% - 55% FPS Gain)** \
r.ContactShadows 0 | r.DynamicGlobalIlluminationMethod 2 | r.Nanite.MaxPixelsPerEdge 4 | r.Shadow\.CSM.MaxCascades 0 | r.VolumetricCloud 0 | r.volumetricfog 0 | r.Water.SingleLayer.Reflection 0|ark.VertexCountScaling 1|Grass.sizescale 0|fx.MaxNiagaraGPUParticlesSpawnPerFrame 0 &#x20;

**Potato (95% - 105% FPS Gain)** \
r.ContactShadows 0 | r.DynamicGlobalIlluminationMethod 2 | r.Nanite.MaxPixelsPerEdge 4 | r.Shadow\.CSM.MaxCascades 0 | r.ShadowQuality 0 | r.VolumetricCloud 0 | r.volumetricfog 0 | r.Water.SingleLayer.Reflection 0|ark.VertexCountScaling 1|Grass.sizescale 0|fx.MaxNiagaraGPUParticlesSpawnPerFrame 0&#x20;

**NEW EXTINCTION PRESET!**\
Grass.SizeScale 0 | Grass.DensityScale 0 | r.VolumetricCloud 0 | r.VolumetricFog 0 | r.ContactShadows 1 | r.DynamicGlobalIlluminationMethod 0 | r.SkylightIntensityMultiplier 3 | r.Nanite.MaxPixelsPerEdge 2 | r.Shadow\.CSM.MaxCascades 1 | r.ShadowQuality 1 | r.Shadow\.Virtual.Enable 1 | r.DistanceFieldShadowing 1 | r.Streaming.PoolSize 0 | r.Lumen.ScreenProbeGather.RadianceCache.ProbeResolution 16 | r.Water.SingleLayer.Reflection 0 | r.Lumen.DiffuseIndirect.Allow 0 | r.Lumen.Reflections.Allow 0 | r.Fog 0 | r.BloomQuality 0 | r.LensFlareQuality 0 | r.MaxAnisotropy 1 | r.ViewTextureMipBias.Offset 2 | r.LightFunctionQuality 0 | r.SkyLightingQuality 1

### Make sure you have Battleye installed if you are going to play a Multiplayer game!

If you are seeing one of the following problems, it might be due to the BattlEye service:

* Game hangs at launch or fails to load
* BattlEye failed to initialize
* Kicked from the game
* Stuttering/freezing when launching

You can troubleshoot those errors using the BattlEye FAQ here:[ **http://www.battleye.com/support/faq/**](http://www.battleye.com/support/faq/)

Additionally, you can try deleting the BattlEye folder by following the following:

1. Please close the game all the way out.
2. Then, go to C:\Program Files (x86)\Steam\steamapps\common\H1Z1 and delete the BattlEye folder.
3. Then, verify the integrity of the game cache through Steam.

If none of these fixes work for you, please visit H1Z1 website and the following troubleshooting guide.[ https://help.daybreakgames.com/hc/en-us/articles/218088717](https://help.daybreakgames.com/hc/en-us/articles/218088717)

## ASA GLITCHES and WORKAROUNDS

## How to Install or Uninstall a map in ASA.,

* Step 1. Open your steam page and *right click* on **Ark Survival Ascended.**&#x20;
* Step 2. Click on the menu selection "DLC".&#x20;
* Step 3. Chose the map you wish to install or uninstall from this list. (Check or uncheck the box)&#x20;
* Step 4. (INSTALLING) Close your Steam App and reopen it and wait for the map to download, unpack and finish. Then proceed to Join the server.&#x20;
* Step 4 (UNINSTALLING) Wait for the Steam app to finish uninstalling the DLC. Then Join the server you wish to play on.

### How to Fix the DXGI\_ERROR\_DEVICE\_HUNG Error&#x20;

After researching this topic we found some workaround that works for some users. Apply the following methods to fix the DXGI\_ERROR\_DEVICE\_HUNG error.

#### Method 1: Update your Graphic Drivers

<details>

<summary>Graphic Drivers</summary>

You can start troubleshooting the DXGI\_ERROR\_DEVICE\_HUNG error by updating your graphic drivers. Below we have mentioned steps for Nvidia and AMD drivers:

For Nvidia: Visit <https://www.nvidia.com/en-us/software/nvidia-app/> > Download Now > open the app > sign up or log in > Drivers > Download.

For AMD: Visit <https://www.amd.com/en/support/download/drivers.html> > Download > open the app > follow the on-screen instructions to update your graphics card.

</details>

#### Method 2: Verify the Integrity Of the Game File

<details>

<summary>Verify the Integrity</summary>

If updating the drivers does not fix your problem then you should verify the ARK Survival Ascended game files. If you don’t know how to do it then don’t worry you can do it by using the steps mentioned below.

* &#x20;Open Steam Client and log in with your account.&#x20;
* Click on Library and find the ARK Survival Ascended game.&#x20;
* Right-click on the game profile and select Properties.&#x20;
* Go to the Installed Files tab.&#x20;
* Click on the “Verify integrity of game files” option.&#x20;
* Wait

</details>

#### Method 3: Add Launch Parameter

<details>

<summary>Launch Parameters for Digi_Device_Hung</summary>

* Go to your Steam Select Library and right-click “ARK Survival Ascended”.&#x20;
* From the drop-down menu, select “Properties”.&#x20;
* Now go to “General”.&#x20;
* Under “Launch Options”.
* Paste `-USEALLAVAILABLECORES -norhithread -sm4 -d3d10 -nomansky -lowmemory -novsync -high`&#x20;
* Now close the Steam window, and restart your device.&#x20;

If you're getting more crashes with the latest update, \
Remove `-useallavailablecores ,`\
try ONLY using `-norhithread` in the properties.&#x20;

</details>

#### Method 4: Set Nvidia PhysX to Your Graphics Card

<details>

<summary>Nvidia PhysX</summary>

Some players have mentioned that they can fix this error by setting the Nvidia PhysX to their graphics card. Here is how you can do that:

* Click on Windows Search Bar and search for “Nvidia Control Panel”.&#x20;
* On the control panel select “Configure Surround, PhysX”.&#x20;
* Under “Processor”, select your graphics card.
* Close the Control Panel, that's it.

</details>

#### Method 5: Turn off Nvidia DLSS and Frame Generation

<details>

<summary>Nvidia DLSS and Frame Generation</summary>

At last, you can try turning off Nvidia DLLS and Frame Generation. Here is how you can do that:

* Launch the ARK Survival Ascended game.&#x20;
* Go to Settings > General > RTX.&#x20;
* Here turn off “Nvidia DLSS” and “Frame Generation”.&#x20;
* Now, save the change and restart the game to check if your problem is fixed or not.
*

```
<figure><img src="/files/64AgAtZL99TTcG8uQa9v" alt="" width="350"><figcaption></figcaption></figure>
```

</details>

#### **Method 6: Registry Edit**

<details>

<summary><strong>Registry Edit</strong></summary>

* Open the Windows Menu.
* Type `run` into the search bar.&#x20;
  * Navigate to the Graphic Drivers section of the navigation on the left side of the Registry Edit tool.&#x20;
  * (The location for this is `Computer\HKEY_LOCAL_MACHINE\SYSTEM\CurrentControlSet\Control\GraphicsDrivers`
* The registry key you need is called `TdrDelay`&#x20;
  * If this registry key already exists, double-click to edit it.&#x20;
  * If it does not already exist, right-click in the pane on the right and select `New > DWORD` (32-bit) Value.&#x20;
  * Set the Base to Decimal.&#x20;
  * Set the Value of `TdrDelay` to 60.&#x20;
  * Click OK to finish.
* You need a second registry key called `TdrDdiDelay`&#x20;
  * If this registry already exists, double-click to edit it.&#x20;
  * If it does not already exist, right-click in the right hand pane and select `New > DWORD` (32-bit) Value to create it.
  * Set the Base to Decimal.&#x20;
  * Set the Value of TdrDdiDelay to 60.&#x20;
  * Click OK to finish.
* Your registry should now include both `TdrDelay` and `TdrDdiDelay`.
* Close the Registry Editor.&#x20;
* Restart your computer for these changes to take effect.

By adding these registry keys, Windows will now wait for 60 seconds prior to determining that the application has taken too long for its process.

Although this is a good way to curb GPU crashes based on rendering, this will not resolve all crashes. If you try to process too much data at once, the GPU may time out regardless of how long you set the timeout delay. This solution is only designed to give your graphics card a little extra time.

![](https://772063455-files.gitbook.io/~/files/v0/b/gitbook-x-prod.appspot.com/o/spaces%2F-Lgje1lBxKKWXwqycB-v%2Fuploads%2FTNWBEJxEAF2b01jGMP1Q%2Fimage.png?alt=media\&token=28b1e936-b2cb-4fd2-9eed-c89501c7496f)

</details>

### Failure to Load Content or the Boolean Overload

<details>

<summary>Failure to Load Content</summary>

Is caused by slow connection, or too many mods downloading.&#x20;

If you are a high level character, use a mindwipe before transfer. This reduces the engrams to relearn on the new map.&#x20;

If mods do not complete in the 120 second time frame for connection. You can change that in settings>advanced but longest time is 3 mins.&#x20;

Too Many Mods subscribed. When your client must check and update more than 10-15 mods it slows your connection times down. Which often exceeds the 120 sec. Limit. (See section above)&#x20;

Recent changes in Custom Cosmetics This change creates a bulk of info in your client, which slows connection times. ASA automaticly subs you to any cosmetics you see in game. But you do not see them in the download panel. To find them, go to game open Mods panel, > my mods (top of page) and scroll though mods there. Any you see without the blue banner are dynamic downloads. You have to fully install it then uninstall it to get rid of it. Or just delete your mods file monthly and re-download your chosen mods. Instructions below 👇

</details>

<details>

<summary>Boolean Overload</summary>

The crash is related to the game processing Boolean variables which are not synching properly. Most often this is caused by added cosmetic mods to the client (your pc not the server). Also, check at the bottom of the inventory screen, there's a small menu, choose " all items " This may be the culprit in many complaints.&#x20;

**Work Arounds**

1. **In pregame Settings under UI Disable Menu Transitions. (restart game after)**
2. **In pregame Settings. Disable&#x20;*****Give Default Survivor Items***
3. **Ingame, only access inventory when in 3rd person.**
4. **Ingame, place two or more beds in your base and name them. Now Fasttravel from bed #1 to bed #2. Run back over and look for your bag by the first bed, and recover those things you definitely want! Leave the skins and such to decay.**
5. **Harvest a handful of berries and log out of game & steam When you log back in, you have berries and all missing things**
6. **Suicide, chop up your body and get the bag, all items will be in it.**
7. **Transfer your whole inventory (including your cosmetics panel items) into a box. Log out of game and restart ARK. Log back in, you have all the missing things.**
8. **Empty all items out of your cosmetics panel.**&#x20;

   It has to be done with the cursor and "t" key. No transfer all button. Things that can be dyed or have skins will show up in the left panel. Dyes and skins show up in the right panel. Dye has weight . As does the tools and gear. Skins take up slots. Which can slot cap you.&#x20;

**Nanite setting that helps with the Glitch** \
*Launch Param* - `-ark.VertexCountScaling 1` \
*Command Prompt* - `ark.VertexCountScaling 1` \
Go to single player or multiplayer and press the " \~ " key to open the console. \
Copy and Paste the command as one message to the console and apply (enter) \
*With in your gameusersetting.ini* - `ark.VertexCountScaling=1` \
File to put them in: `....\shootergame\saved\config\windows\enigine.ini` use header `[ConsoleVariables]` at the bottom of the engine.ini and then single line put your commands.

</details>

**Delete your mod Folder.**

Close ARK and Steam. Follow : `...\...\steamapps\common\ARK Survival Ascended\ShooterGame\Binaries\Win64\ShooterGame\Mods` Delete the `MODS folder`. Then empty your trash. Restart Steam and then ARK. Log into a server and wait for all the current mods to down load. Do not add any other mods or custom cosmetics for now. Do this after you have confirmed you can enter the server first and that you are able to see your inventory.

<figure><img src="https://772063455-files.gitbook.io/~/files/v0/b/gitbook-x-prod.appspot.com/o/spaces%2F-Lgje1lBxKKWXwqycB-v%2Fuploads%2FHNHes4mBO0gF8BLASWbi%2Fimage.png?alt=media&amp;token=eae9106d-d35a-4a69-9b9b-4bee6e3162d1" alt=""><figcaption><p>Image of the MOD folder in Alphy's PC files.</p></figcaption></figure>

### Frequent Login Issues on all Servers

#### General Login Issues.

Go to the cosmetic panel and empty all your cosmetics and Chibis in the first right side panel into a vault. And then relog in. (The second right side panel is your subscribed cosmetics.) I would suggest you reduce your cosmetic subscriptions to three mod packs or less. And then reverify your game.

* Type `Reconnect` in the tilde key bar.
* When you log in and have 2 implants and are black weighed, \
  Commit Suicide, respawning your character often fixes this.\
  (To Suicide - hover over your implant till the counter turns green, then hit your E Key.)
* When you log in and you are tribeless and no base, **LOG OUT IMMEDIATELY!** Restart your Steam application, and then relog in.
* When you log in and you are unable to interact with your base. **LOG OUT IMMEDIATELY!** Restart your Steam application, and then relog in.
* If you crash with a Boolean error, **LOG OUT IMMEDIATELY!** Restart your Steam application, and then relog in.

#### "Connection Timeout" error in ARK: Survival Ascended

#### `Game-Specific Issues:`

* Check for game updates: Make sure your ARK: Survival Ascended game and any mods you're using are up to date.
* Check for mods: If you're using mods, ensure they are fully loaded before trying to download/load into a map. (Updating and Patching Mods will Show in the Top Right corner of the Lobby Window in ( ) )
* Restart your game: Sometimes a simple restart can resolve minor glitches.
* Clear the game cache: Some players have reported success by clearing the game's cache.
* Try joining a different server: If possible, try joining a different official or unofficial server to see if the issue is server-specific.
* Full player inventory or too many dinos: A full inventory or excessive number of dinosaurs on your server can sometimes cause timeout errors.
* Verify game files: Use the game's verification tool to ensure your game files haven't become corrupted.
* Reinstall the game: A fresh installation can sometimes fix corrupted files.

#### `Low-Spec Machine Issues:`

* Lower your graphics settings: Reduce the visual complexity of the game to see if it helps. Turn all settings to the lowest to test your graphics.
* Hardware limitations: If your computer is struggling to run the game at the chosen graphics settings, it can lead to connection issues. Consider following the below guide for rolling back your Nvidia Driver.&#x20;

## ASA graphics issues.

One of three Nvidia Drivers have proven the best for ARK Ascended as of September 2025. After the 5.5 Update, and the recent One time reset of Graphic values (Patch. V72. 7)

The Nvidia GeForce Game Ready Driver version 561.09, released on Sept. 11, 2024, \
The Nvidia GeForce Game Ready Driver version 566.36, released on December 5, 2024, or\
The Nvidia GeForce Game Ready Driver version 576.52, released on May 19, 2025<br>

`User experiences:` \
Newer drivers may have issues: Newer driver versions (like the 572.xx series) have been reported to cause problems for some users with 30 and 40 series cards in ASA. Some users have reported that **driver 566.36** is a relatively stable driver version, particularly for users with RTX 30 and 40 series GPUs, who have experienced crashes and stutters with newer drivers.

`Driver compatibility varies:`

* The performance of a driver can differ significantly based on individual system configurations. **If you're experiencing issues with ASA, it's recommended to:**
* Try different driver versions (like 566.36 or older ones).
* Perform a clean installation of the driver using DDU (Display Driver Uninstaller).
* **Consider disabling Frame Generation on RTX 40 series cards, as there are known issues.**
* Submit feedback to Nvidia if you encounter driver-related problems.

`To uninstall NVIDIA drivers` You can either use the NVIDIA Cleanup Tool or the standard Windows uninstall process. `Using Windows Uninstall Process`

1. Open Control Panel.
2. Navigate to "Programs and Features" (or "Uninstall a program"). Find the NVIDIA display drivers and select them.
3. Click "Uninstall" or "Remove".
4. Follow the prompts to complete the uninstallation.

`To install or update NVIDIA drivers`

1. Download the Driver:
2. <https://www.nvidia.com/en-us/geforce/drivers/>
3. Install the Driver: Using the Installer: Double-click the downloaded driver file to start the installation process. Follow the on-screen instructions in the installation wizard.

`Disabling Frame Generation and other Unneeded ASA PRE-Set settings on RTX 40 series cards`&#x20;

Below is the graphics Settings in your NVIDIA GeForce APP.<br>

<figure><img src="https://772063455-files.gitbook.io/~/files/v0/b/gitbook-x-prod.appspot.com/o/spaces%2F-Lgje1lBxKKWXwqycB-v%2Fuploads%2F2Y23mcmlZc11oy7jLlwn%2Fimage.png?alt=media&amp;token=c75bb4b2-e99e-44f4-8d28-30257f0d9d99" alt=""><figcaption></figcaption></figure>

<figure><img src="https://772063455-files.gitbook.io/~/files/v0/b/gitbook-x-prod.appspot.com/o/spaces%2F-Lgje1lBxKKWXwqycB-v%2Fuploads%2FCwzKfaom93BqaMqQOVr0%2Fimage.png?alt=media&amp;token=69fc9737-68f3-4e2b-9409-65757c143559" alt=""><figcaption></figcaption></figure>

<figure><img src="https://772063455-files.gitbook.io/~/files/v0/b/gitbook-x-prod.appspot.com/o/spaces%2F-Lgje1lBxKKWXwqycB-v%2Fuploads%2FhgDoJb9nkbcWZ03ETWJn%2Fimage.png?alt=media&amp;token=12f1aee8-02a2-4b04-8e7e-5a5019df451b" alt=""><figcaption></figcaption></figure>

## ASA - How to Uninstall Your Mods on the PC.,

*Uninstall the mod, delete the file in the mod folder, then restart the game, and then download the mod again.* &#x20;

`Unsubscribe from Mods in the Game Client:` Open ASA and navigate to the Mod Selection page for ARK: Ascended. Go to "Installed mods" in the top bar. Then Click the "Unsubscribe from All" in the far right hand top corner.&#x20;

&#x20;`Remove the files:`

* Find the ARK: Ascended game directory `(usually in Steam\steamapps\common\ARK Survival Ascended)`.,
* Navigate to the "ShooterGame" folder.,
* Open `"ShooterGame\Binaries\Win64\ShooterGame\Mods\{Number}"`.,
* Delete the mod folder(s) associated with the mods you unsubscribed from.,

`Reinstalling mods.` \
Each server will present you a pane with the mods to download when you log in.&#x20;

* Join the server and let it download mods from the server listing.,
* You will get a failed to join message. Don't close this.,
* There will be a mod counter in the top right saying x/0 mods updated. Wait until x=the number of mods actually on the server,
* Close the error and back out to main menu. BUT Don't close the application.
* Go to the Lobby and choose your map and rejoin as usual.

## Console Mod Loading,

Work around For console players:&#x20;

&#x20;`Unsubscribe from Mods in the Game Client:` Open ASA and navigate to the Mod Selection page for ARK: Ascended. Go to "Installed mods" in the top bar. Then Click the "Unsubscribe from All" in the far right hand top corner. &#x20;

`Remove the files:`

* Find the ARK: Ascended game directory `(usually in Steam\steamapps\common\ARK Survival Ascended)`.,
* Navigate to the "ShooterGame" folder.,
* Open `"ShooterGame\Binaries\Win64\ShooterGame\Mods\{Number}"`.,
* Delete the mod folder(s) associated with the mods you unsubscribed from.,

`Reinstalling mods.`&#x20;

**Each server will present you a pane with the mods to download when you log in.**

* Join the server and let it download mods from the server listing.,
* You will get a failed to join message. Don't close this.,
* There will be a mod counter in the top right saying x/0 mods updated. Wait until x=the number of mods actually on the server,
* Close the error and back out to main menu. BUT Don't close the application,
* Attempt to join the server again. It will download the mods again but faster,

Cross your fingers you don't black screen. If you crash or black screen, restart app and start at step 3 again.

## Character Loss and Deletion.

*The majority of the character deletion is caused by the player client crashing and reloading an outdated server player save.*&#x20;

We often tell the players to Go back to map 1 and they should find their character. Not always now in ASA.&#x20;

**Preventative tips:**

* Make sure you stay on the map for at least 15 minutes before logging on/off.
* Doing "something to progress" can be as small as picking up berries from a bush to beating a boss.
* Do Not Alt+tab during transfers or you will crash and potentially lose your .savefile
* If you are crashing a lot, it might be smart to lower your settings to help prevent character loss.
* Make sure you stay on the map for at least 15 minutes before logging on/off.
* Doing "something to progress" can be as small as picking up berries from a bush to beating a boss.
* Do Not Alt+tab during transfers or you will crash and potentially lose your .savefile
* Verify after EVERY crash.
* If you are crashing a lot, it might be smart to lower your settings to help prevent character loss.

The .savefile that is used in Data transfers is inaccessible to server owners. So we can not parse the data in the Server saves and find the specific player transfer .savefile.&#x20;

<figure><img src="https://772063455-files.gitbook.io/~/files/v0/b/gitbook-x-prod.appspot.com/o/spaces%2F-Lgje1lBxKKWXwqycB-v%2Fuploads%2FrH2JfAe0eC2NzVecphge%2Fimage.png?alt=media&amp;token=26855e20-f5b9-4612-a937-6d9958fb7c93" alt=""><figcaption></figcaption></figure>


# CONAN Graphic and PC Enhancements

Post of helpful Optimizations and Client side bug fixes for our Conan Exiles Players:

<figure><img src="https://772063455-files.gitbook.io/~/files/v0/b/gitbook-x-prod.appspot.com/o/spaces%2F-Lgje1lBxKKWXwqycB-v%2Fuploads%2FODbxuBS8k4fxQxaSTn2a%2FALPHYS%20HELP%20DESK_Conan.png?alt=media&amp;token=4a8d3463-6113-40c6-8887-9a65b534e2af" alt="" width="563"><figcaption></figcaption></figure>

## Launch Options&#x20;

<details>

<summary><img src="https://772063455-files.gitbook.io/~/files/v0/b/gitbook-x-prod.appspot.com/o/spaces%2F-Lgje1lBxKKWXwqycB-v%2Fuploads%2FIzhBeXFsK9IjcUbQ2nRq%2Fimage.png?alt=media&amp;token=c806a4c4-1a94-42cc-83a3-8d14332bb686" alt=""></summary>

On Steam, go to your library, right-click on Conan Exiles, select Properties and click on Set Launch Options.

On Epic, click the little Settings cog under Conan Exiles to open the settings. Scroll all the way down until you see Advanced Command Line Arguments.

***Here’s a list of the best ones you can and should use:***

**-USEALLAVAILABLECORES:** (the game will use all your CPU cores)&#x20;

**-lowmemory**: Lowers a few settings to make the game run on PCs with “only” 4 GB of RAM.

**-high**: Forces high CPU priority, which might give you extra FPS. However, as discussed in this article, Ark isn’t a CPU-bound game, so unless you’re running tons of background applications, this command won’t do much. But it doesn’t hurt to have it on!

**-window** (Note: the -window, will make your game start in windowed mode. This can slow your fps rate down on some Pc's.) It is not required and you may remove it.

**List of the all useful launch options with descriptions:**

-USEALLAVAILABLECORES - (the game will use all your CPU cores)\
-sm4 and -d3d10 - (runs game with DirectX 10)\
-nomansky (removes clouds and some sky effects)\
-lowmemory (the game will use only 4gb of your RAM)\
-w 640 -h 480 - (runs game in 640x480 resolution)\
-full - (fullscreen mode)\
&#x20;-window - (windowed mode with borders)\
-noborder - (windowed mode without borders)\
-low - (runs ARK as a low-priority process)\
-high - (runs ARK as a high-priority process)\
-noaafonts - (removes fonts anitalising)\
-autoconfig - (return default settings)\
-novid (turns off some cinematics)\
-console - turns on the developer console (ark doesn't use this)\
-noeac - turns off the easy anti-cheat software. (ark doesn't use this)\
-dx10 - toggles dx10 use\
-dx11 - toggles dx11 use\
-dx12 - toggles dx12 use<br>

</details>

## OPTIONS PANEL CONFIGURATIONS

<details>

<summary>BEST Video Settings for HIGH FPS and Quality Video</summary>

Go to Conan Settings Screen Before entering game and click on Video Tab:\
Set Max FPS to 60 for Desk Tops with a 960 or better Card\
Set Max FPS to 30 for a Lap Top\
View Distance: Medium\
Post Processing: Ultra\
General Shadows: Low\
Effects Quality: Low\
Texture Quality: Medium\
Foliage Quality: Medium\
Anti-Aliasing: Off

### UE4 settings for CONAN EXILES

UE4 is a very flexible engine which allows changing many settings outside the game--even those which don't appear in the in-game options menu. In this guide, we'll examine how to configure a handful of these settings which may be of particular interest to Players. First, you must know that CE can look much better than it is in the present state. Game is built on Unreal engine 4 and with proper knowledge you can add effects that are not implemented by devs. So, first of all, CE does not have Anisotropic filtering. (Yes, it has x4 on High and x8 on ultra in Texture quality settings) And because of that game textures are very blurry, when you look at them from different angles.

#### UE4 settings for CONAN EXILES are stored in a series of .ini files located at: Steam\steamapps\common\Conan Exiles\ConanSandbox\Saved\Config\WindowsNoEditor

This folder contains several .ini files, many of which are empty. However, for our purposes we only need three: Engine.ini, Scalability.ini, and GameUserSettings.ini.

The first file contains explicit engine settings, while the last two handle user-level options instead. To edit the most basic settings, open GameUserSettings.ini and look for the header *ScalabilityGroups*.

`[ScalabilityGroups]` \
`sg.ResolutionQuality=100.000000` \
`sg.ViewDistanceQuality=3` \
`sg.AntiAliasingQuality=3` \
`sg.ShadowQuality=3` \
`sg.PostProcessQuality=3` \
`sg.TextureQuality=3` \
`sg.EffectsQuality=3` \
`sg.FoliageQuality=3`

Most of these settings are directly configurable from the in-game options menu, and have a range of 0-3, where 0 is low/off and 3 is ultra. But note the term "scalability groups". Each of these settings actually modifies an entire group of settings. While it's a nice way to simplify things, it's entirely possible you only want to disable one or two features while keeping the rest.

That's where Scalability.ini comes in. In this file, it is possible to modify individual settings affected by scalability groups and even determine which quality setting to apply them to. In other words, instead of permanently overriding the in-game options menu, you can completely customize how the in-game options menu behaves!

Below are Some Recommended changes to the Scalability.ini. Only choose ONE Texture Quality setting. (0-1-2-3 numbers here are equal to low\medium\high\ultra settings in game)

`[TextureQuality@0]` \
`r.MaxAnisotropy=16`

`[TextureQuality@1]` \
`r.MaxAnisotropy=16`

`[TextureQuality@2]` \
`r.MaxAnisotropy=16` \
`r.Streaming.PoolSize=5000`

`[TextureQuality@3]` \
`r.MaxAnisotropy=16` \
`r.Streaming.PoolSize=5000`

`[ShadowQuality@2]` \
`r.DistanceFieldAO=1`

`[ViewDistanceQuality@3]` \
`r.ViewDistanceScale=2.0`

`[ShadowQuality@3]` \
`r.LightFunctionQuality=1` \
`r.ShadowQuality=5` \
`r.Shadow.CSM.MaxCascades=4` \
`r.Shadow.MaxResolution=2048` \
`r.Shadow.RadiusThreshold=0.03` \
`r.Shadow.DistanceScale=2.0` \
`r.Shadow.CSM.TransitionScale=2.0` \
`r.DistanceFieldShadowing=1` \
`r.DistanceFieldAO=1` \
`r.Shadow.CachedShadowsCastFromMovablePrimitives=0 r.Shadow.AdaptiveLODDistanceScale.Max=1`

`[PostProcessQuality@3]` \
`r.AmbientOcclusionLevels=3` \
`r.FastBlurThreshold=7` \
`r.ScreenSpaceReflections=1`

Paste the above into your Scalability.ini, Save! AND don't forget to flag it to Read only so the game won't change it.

### Engine Settings&#x20;

To apply engine settings, edit Engine.ini and add the header:

`[SystemSettings]`

Almost any custom engine settings should be added under this header to function.

UE4 uses a method of anti-aliasing known as FXAA by default. FXAA is a very fast, shader-based approach to anti-aliasing, but as a post-process effect it is unable to truly eliminate jaggies at the source. Temporal anti-aliasing is a newer alternative built directly into UE4 which works by jittering pixels and sampling color data from a variety of positions to create a smoother final image.

To enable TAA in CONAN EXILES, \
add the following settings under the \
\[SystemSettings] header: \
`Go to Steam\steamapps\common\Conan Exiles\ConanSandbox\Saved\Config\WindowsNoEditor`

Open Engine.ini

Add the text below existing (don't replace, just add from a new line!)

`[Core.System]` \
`Paths=../../../Engine/Content Paths=%GAMEDIR%Content Paths=../../../Engine/Plugins/2D/Paper2D/Content Paths=../../../Engine/Plugins/Runtime/HoudiniEngine/Content Paths=../../../ConanSandbox/Plugins/DialoguePlugin/Content Paths=../../../ConanSandbox/Plugins/FuncomLiveServices/Content`

`[OnlineSubsystem]` \
`bUseBuildIdOverride=True` \
`BuildIdOverride=140332832`

`[SystemSettings]` \
`r.DefaultFeature.AntiAliasing=2` \
`r.TemporalAACurrentFrameWeight=0.2` \
`r.TemporalAASamples=32` \
`r.TemporalAASharpness=0.5` \
`r.Tonemapper.Sharpen=1`

`[WindowsApplication.Accessibility]` \
`StickyKeysHotkey=True` \
`ToggleKeysHotkey=True` \
`FilterKeysHotkey=True` \
`StickyKeysConfirmation=True` \
`ToggleKeysConfirmation=True` \
`FilterKeysConfirmation=True`

That's all, save file, AND don't forget to flag it to Read only so the game won't change it. Then ingame when you will use game AA you will have TXAA instead of x2\x4\x6 AA.

#### CONFIGURED PRESET PRESENTED IN THIS GUIDE:&#x20;

What it changes: \
`-improved shadows draw distance` \
`-more crisp and clear image`\
`-distance field AO` \
`-draw distance for land and grass and objects are x2 higher` \
`-more complex shadowing`\
`-added 16xAF (to all texture settings)` \
`-and more minor tweaks.`

\*notice that you must set your game settings to ULTRA for shadows\draw distance\postprocess\effects vegetation and textures can be set on any setting.

</details>

## GAME ERRORS and FIXES

#### Please SEE Common STEAM ISSUES for MOD MISMATCH ERRORS.

<details>

<summary>FUNCOM Post 3.0.2 Auth. Crash Errors:</summary>

* Delete files for Conan Exiles in the Steam Library. In any %appdata% too.
* Reverify in Steam and it will fully download the game again.
* After its done downloading and installing. Reverify again till you get "0" lost files.
* Apply the pinned ModControllerCache.json  IF you are getting "Spear\_2h\_C" crash errors.

Go to your install directory (Steam > steamapps > common > Conan Exiles > ConanSandbox > Saved) and find the file ModControllerCache.json  DOWN load this corrected copy (Make it READ ONLY in the properties tab.) DROP this into the above mentioned FILE. Save to a Notepas  as ModControllerCache.json

```javascript
{
    "modControllerCaches":
    {
        "Endgame Extended Weapon Arsenal (EEWA) v0.29.8":
        {
            "mD5Hash": "b8c112067518ec56ec2c1e7f3e9f4ebb",
            "modControllerPaths": [
                "/Game/Mods/Tutorial/bp_ModController"
            ]
        }
    }
}
```

* Apply the pinned Pack UniversalModList.txt.

Navigate to Steam > steamapps > common > Conan Exiles > ConanSandbox DROP this file in the ConanSandbox file!  Save to a Notepad as servermodlist.txt

```
..\..\..\..\workshop\content\440900\880454836/Pippi.pak
..\..\..\..\workshop\content\440900\1823412793/ModControlPanel.pak
..\..\..\..\workshop\content\440900\1396310739/StacksizePlus.pak
..\..\..\..\workshop\content\440900\2411388528/SandAndStone.pak
..\..\..\..\workshop\content\440900\1928978003/NorthernTimber.pak
..\..\..\..\workshop\content\440900\1966733568/immersivearmor.pak
..\..\..\..\workshop\content\440900\1113901982/TheColdEmbrace-Main.pak
..\..\..\..\workshop\content\440900\1734383367/Tutorial.pak
..\..\..\..\workshop\content\440900\1629644846/KerozardsParagonLeveling.pak
..\..\..\..\workshop\content\440900\2644416526/Beyond_Stations.pak
..\..\..\..\workshop\content\440900\1159180273/StylistPlus.pak
..\..\..\..\workshop\content\440900\2275543723/Improved_Quality_of_Life.pak
..\..\..\..\workshop\content\440900\1444947329/LBPR_Collision_Update_Add_On.pak
..\..\..\..\workshop\content\440900\1369743238/No_Building_Placement_Restrictions.pak
..\..\..\..\workshop\content\440900\2704153181/Decay_Away.pak
..\..\..\..\workshop\content\440900\877108545/UnlockableContainers.pak
..\..\..\..\workshop\content\440900\2377569193/Savage_Wilds.pak
```

* Apply any changes like screen size and graphics changes to your files. (I keep copies of the different changed .ini in a seperate folder outside conan. So the game does not erase them.)
* Make sure any changed file is set to "READ ONLY"
* Start Conan and PRAY to CROM! LOL.

</details>

<details>

<summary>Keybindings won’t save:</summary>

1. Go to C:Program Files (x86)/Steam/steamapps/common/ConanExiles/ConanSandbox/Config
2. Open the **DefaultInput.ini** file with Notepad
3. Find the lines that have **PreviousMessage** and **NextMessage**
4. Where it says **Key=** , change the assigned key to whatever other key you would prefer to use.

This temporary solution involves editing a vital game file. Avoid changing and deleting any characters in any of the lines in the file as this can be game breaking.

</details>

<details>

<summary>UE4 Prerequisites errors</summary>

Conan Exiles C++ errors are most likely due to out-of-date Windows versions. Make sure that your computer is running the latest Windows version:

1. Run Windows Update > install the available updates > restart your computer
2. Install the [Visual C++ Redistributable](https://www.microsoft.com/en-us/download/details.aspx?id=53587) for Visual Studio 2015
3. Install Conan Exiles

</details>

<details>

<summary>Long Load Time / Fatal Errors / Black Screen on load:</summary>

Anytime you experience either Exceptional long loading times or Fatal errors on loading. EXIT GAME, EXIT STEAM, and then re-enter to the game lobby and try again. If it repeatedly loads slowly or errors, or if the game is hanging on the loading screen and is not progressing beyond a black screen, wait a little longer. If nothing happens after a few minutes, end the task by pressing CTRL+SHIFT+ESC. Restart the game and then try to launch it again.

It is good to know that this issue may be caused by hardware that is close to the minimum specifications. Also, try running the Steam client’s built-in integrity checker. OR try doing a Re-Verify of your game files.&#x20;

</details>

<details>

<summary>STOP ALT TAB FREEZES:</summary>

For everyone with AMD CPUs who are having issues with Alt + Tab alt-tabbing causing freezes, please do the following to eliminate the problem.

If you have followed any of the previous workarounds posted in the forums, revert those changes. (For example restoring `XAudio2_7.dll` if you have removed it)

Locate your Engine.ini file, which should be found in your `ConanExilesInstallPath>/ConanSandbox/Saved/Config/WindowsNoEditor/Engine.ini` folder.

`C:/Program Files (x86)/Steam/steamapps/common/ConanExiles/ConanSandbox/Saved/Config/WindowsNoEditor/Engine.ini`

Edit it in notepad, and add the following to the end of the file:

`[/script/engine.audiosettings] bDisableMasterEQ=True` Save the file, and start the game. You should no longer experience freezes when alt tabbing. Save the file, and start the game. You should no longer experience freezes when alt tabbing.

</details>

<details>

<summary>STOP THE CINEMATIC</summary>

If you do not want to edit files, just hit the \[ESC] key when the Funcom logo comes up.                         Otherwise, this is correct:                                                                                                                                             IN STEAM LIBRARY PAGE, Right click : Conan Exiles\properties\local files\browse local files\ConanSandbox\Config                                                                                                                                    open "DefaultGame.ini and set:                                                                                                                                  \[/script/movieplayer.movieplayersettings] (these will be + insted of - so reset them all to the -) -StartupMovies=StartupUE4                                                                                                      -StartupMovies=StartupNvidia                                                                                        -StartupMovies=CinematicIntroV2                                                                                                                             SAVE the file. Close the File.                                                                                                                                          In the File manager, find the file you just opened, and right click on it.                                                                           Go down to properties and click that.                                                                                                                          In the box that shows please go to the bottom of the box and click the box that says Attributes and click the Read only box and then click ok.                                                                                                                            This will save the file in a way that when the game updates the files the file will not be reset to the previous settings.

</details>

<figure><img src="https://772063455-files.gitbook.io/~/files/v0/b/gitbook-x-prod.appspot.com/o/spaces%2F-Lgje1lBxKKWXwqycB-v%2Fuploads%2F0lEmkKfoDvMQfVmrhu0R%2Fimage.png?alt=media&amp;token=a0cfc12f-a6bc-4c43-8976-ca55e41fd023" alt=""><figcaption></figcaption></figure>


# Dark and Light Graphic and PC Enhancements

Post of helpful Optimizations and Client side bug fixes for our DnL Players:

<figure><img src="https://772063455-files.gitbook.io/~/files/v0/b/gitbook-x-prod.appspot.com/o/spaces%2F-Lgje1lBxKKWXwqycB-v%2Fuploads%2FujT5YqaS5gBUTU9m0C4B%2FALPHYS%20HELP%20DESK_Dark%26Light.png?alt=media&amp;token=dfd71784-8367-4fe5-9886-6ee01cd1e79c" alt="" width="563"><figcaption></figcaption></figure>

## GAME OPTIMIZATIONS

Here you will find a cool way to increase your Graphics Quality and make it look Trailer-Like and even a little bit more better!&#x20;

<details>

<summary>Default Resolution</summary>

CAUTION: The Default Resolution is&#x20;

1920x1080 *(1080p)*

*To change it to your resolution please change the following:*\
ResolutionSizeX=1920 \
ResolutionSizeY=1080

Before everyone jumps in the comment saying that those options are also available in the game, no they are not... for now. Trust me!

HDR is permanently disabled even if you click it.

</details>

<details>

<summary>How to get the maximum FPS in Dark and Light. <br>(Best Balanced version for all pcs.) Warning this is a INI method! Only use if your comfortable editing files.</summary>

Go to your Dark and Light folder that was installed and open **"GameUserSettings.ini"**\
(`..\steamapps\common\Dark and Light\DNL\Saved\Config\WindowsNoEditor\`)\
and edit the file with Notepad++ (Recommended) or Notepad and paste the following:

\[/script/dnl.shootergameusersettings]&#x20;

FullscreenMode=1 \
MasterAudioVolume=0.600000 MusicAudioVolume=1.000000 SFXAudioVolume=1.000000 VoiceAudioVolume=1.000000 UIScaling=0.859225 CameraShakeScale=1.000000 bFirstPersonRiding=False bDoubleClickToEvade=True bShowStatusNotificationMessages=True TrueSkyQuality=1.000000 FOVMultiplier=1.000000 GroundClutterDensity=1.000000 bFilmGrain=False bAllowHDR=True bMotionBlur=False bUseDFAO=True bUseSSAO=True bShowChatBox=True bCameraViewBob=False bInvertLookY=False bFloatingNames=True bChatBubbles=True bHideServerInfo=False bJoinNotifications=True bCraftablesShowAllItems=True bLocalInventoryShowAllItems=False bRemoteInventoryShowAllItems=False LookLeftRightSensitivity=1.000000 LookUpDownSensitivity=1.000000 GraphicsQuality=4 ActiveLingeringWorldTiles=10 ClientNetQuality=3 LastServerSearchType=3 LastServerSearchHideFull=False LastServerSearchProtected=False HideItemTextOverlay=True bDistanceFieldShadowing=True LODScalar=1.000000 bToggleToTalk=False HighQualityMaterials=True HighQualitySurfaces=True bTemperatureF=False bDisableTorporEffect=False bChatShowSteamName=True bChatShowTribeName=True EmoteKeyBind1=0 EmoteKeyBind2=0 EmoteKeyBindLaughing=0 EmoteKeyBindSorry=0 bNoBloodEffects=False bLowQualityVFX=False bSpectatorManualFloatingNames=False bSuppressAdminIcon=False bUseSimpleDistanceMovement=False bDisableMeleeCameraSwingAnims=False LastPVESearchType=-1 LastDLCTypeSearchType=-1 bUseVSync=False MacroCtrl0= MacroCtrl1= MacroCtrl2= MacroCtrl3= MacroCtrl4= MacroCtrl5= MacroCtrl6= MacroCtrl7= MacroCtrl8= MacroCtrl9= ResolutionSizeX=1920 ResolutionSizeY=1080 LastUserConfirmedResolutionSizeX=1600 LastUserConfirmedResolutionSizeY=900 WindowPosX=-1 WindowPosY=-1 bUseDesktopResolutionForFullscreen=False LastConfirmedFullscreenMode=0 Version=5

\[ScalabilityGroups] \
sg.ResolutionQuality=100 sg.ViewDistanceQuality=3 sg.AntiAliasingQuality=3 sg.ShadowQuality=3 sg.PostProcessQuality=3 sg.TextureQuality=3 sg.EffectsQuality=3 sg.TrueSkyQuality=3 sg.GroundClutterQuality=3 sg.IBLQuality=3 sg.HeightFieldShadowQuality=3 r.MotionBlurQuality=4 r.BlurGBuffer=-1 r.AmbientOcclusionLevels=3 r.AmbientOcclusionRadiusScale=1.0 r.DepthOfFieldQuality=3 r.RenderTargetPoolMin=400 r.LensFlareQuality=3 r.SceneColorFringeQuality=1 r.EyeAdaptationQuality=3 r.BloomQuality=5 r.FastBlurThreshold=7 r.Upscale.Quality=3 r.Tonemapper.GrainQuantization=1 r.PostProcessAAQuality=6

After doing so you might wanna fix your Sound and some other stuff. If your HDR Resets you can always enable it back \
by finding: bAllowHDR=False \
and changing it to bAllowHDR=True

Ground Clutter: \
GroundClutterDensity=1.000000 \
for Low Ground Clutter use this: \
GroundClutterDensity=0.100000

Let's clarify some options though. \
There is a First Person Riding Camera for whoever is interested in such! bFirstPersonRiding=False \
To activate the First Person Riding \
change it to: bFirstPersonRiding=True&#x20;

Also for those who hate double tapping A, D or S to evade there is an option to disable it: bDoubleClickToEvade=True \
To disable the Evade option just replace it with: \
bDoubleClickToEvade=False

***Note: Some pcs can and do handle UE4 games on Epic and High. Though not all can.. the above tips and tricks help anyone with the repeated crashing and time outs.. and those that have a lower FPS than the median point of 25 FPS.***

</details>

### OPTIONS PANEL CONFIGURATIONS:

<details>

<summary>OPTIONS PANEL CONFIGURATIONS:</summary>

***Open the Options Screen from your DNL Lobby Screen. After altering all of these settings, remember to save them!***

**For HIGH/EPIC Settings.**

resolution scale = 100 \
World tile Buffer = EPIC \
View distance = HIGH \
Anti-aliasing = EPIC \
Post Processing = EPIC \
General Shadows = LOW \
Terrain Shadows = LOW \
Textures = EPIC

#### For MEDIUM/HIGH Settings.

resolution scale = 100\
World tile Buffer = HIGH\
View distance = MEDIUM\
Anti-aliasing = EPIC\
Post Processing = EPIC\
General Shadows = LOW\
Terrain Shadows = LOW\
Textures = HIGH

#### For LOW Settings.

resolution scale = meter all the way to left\
World tile Buffer = LOW\
View distance = LOW\
Anti-aliasing = EPIC\
Post Processing = LOW\
General Shadows = LOW\
Terrain Shadows = LOW\
Textures = LOW<br>

We will now walk you through every option as many of them can impact FPS or boost/lower overall game performance: Please note that these options will not be the most optimal setup for all computers, but about 80% of them will see a huge increase in FPS from changing these settings.

**Resolution** – change this depending on your device and CPU/GPU, desktop computers should not have any problems running 1920×1080 but on a Laptop it’s recommended to use the 1280×768 resolution. \
**Window Mode**– ALWAYS have this in full screen, Windowed or WindowedFullscreen will decrease your FPS and cause lag and/or frame tearing. Note full window is NOT compatible with alt tabbing. \
**Resolution Scale** – lowering it down will decrease resolution but increase FPS, only lower this as a last resort if you have lag even with other settings optimized. \
**World Tile Buffers, View Distance, Anti-Aliasing and Post Processing** – set these to medium or low depending on your computer. \
**General Shadows, Terrain Shadows, Ambient Lightning** – configuring these to the lowest setting will provide you with a nice increase to FPS and overall performance. \
**Sky Quality, Ground Clutter Density, Ground Clutter Distance and Mesh Level of Detail** – set these between lowest-middle, these will most certainly lower your overall FPS if you have them on max. \
**High-Quality Anisotropic Filtering** – ON This feature creates smoother looking objects from various points of view. \
**Motion Blur** – OFF An unimportant aesthetic. \
**Film Grain** – OFF Another unimportant feature. \
**Distance Field Ambient Occlusion** – OFF Triggers soft shadows for distant objects. \
**Screen Space Ambient Occlusion** (SSAO) – OFF Triggers soft shadows for nearby objects. \
**Dynamic Tessellation** – OFF \
**Distance Field Shadowing** – OFF Another shadows-related feature. \
**High-Quality Materials** – OFF This option improves textures of in-game materials. \
**Sub Surface Scattering** – ON It affects light behavior and makes foliage more realistic. \
**High-Quality VFX** – OFF It affects all in-game water effects. \
**Simple Distance Character Movement** – ON It relieves CPU from animations of distant characters. \
**High-Quality LODs** – ON Improves the level of details. \
**Extra Level Streaming Distance** – OFF This will make map loading faster while moving fast. \
**Color Grading** – ON Slightly improves colors. It won’t affect FPS. \
**Light Bloom** – Personal Choice.  Won’t affect performance. Can cause blinding bright spots.\
**Light Shafts** – Personal Choice.  It doesn’t affect performance. Can cause bright Shafts of light.\
**Mesh Level of Detail (LOD)** – Again. you can choose to disable/enable it by your own preferences. It affects GPU VRAM marginally.

</details>

<details>

<summary>  <img src="https://772063455-files.gitbook.io/~/files/v0/b/gitbook-x-prod.appspot.com/o/spaces%2F-Lgje1lBxKKWXwqycB-v%2Fuploads%2FXCblbWgRPEG6IyMma44x%2Fimage.png?alt=media&amp;token=0e778386-7f26-4d49-83c0-c48d3a963934" alt=""></summary>

In the Launch Options box paste these launch options and click OK: `-USEALLAVAILABLECORES -sm4 -d3d10 -nomansky -lowmemory -high`

For FPS on very LOW END PCs or those that are BOTTLE NECKED\
&#x20;You can also add those to your Launch Options:\
CAUTION: Your game will look awful.\
`-lowmemory -high -sm4 -d3d10 -novsync -USEALLAVAILABLECORES -malloc=system +r_waterforcereflectentities 0 +r_shadowrendertotexture 0 +mat_hdr_level 0 +vt_maxPPF 16`

</details>

<details>

<summary>ARK KEYBINDINGS IN DNL! Warning this is a INI method! Only use if your comfortable editing files.</summary>

G*o to your Dark and* Light folder that was installed and open **"Input.ini"** (`..\steamapps\common\Dark and Light\DNL\Saved\Config\WindowsNoEditor`) and edit the file with Notepad++ (Recommended) or Notepad and paste the following:

\[/script/engine.inputsettings] \
AxisConfig=(AxisKeyName="Gamepad\_LeftX",AxisProperties=(DeadZone=0.250000,Sensitivity=1.000000,Exponent=1.000000,bInvert=False)) AxisConfig=(AxisKeyName="Gamepad\_LeftY",AxisProperties=(DeadZone=0.250000,Sensitivity=1.000000,Exponent=1.000000,bInvert=False)) AxisConfig=(AxisKeyName="Gamepad\_RightX",AxisProperties=(DeadZone=0.250000,Sensitivity=1.000000,Exponent=1.000000,bInvert=False)) AxisConfig=(AxisKeyName="Gamepad\_RightY",AxisProperties=(DeadZone=0.250000,Sensitivity=1.000000,Exponent=1.000000,bInvert=False)) AxisConfig=(AxisKeyName="MouseX",AxisProperties=(DeadZone=0.000000,Sensitivity=0.070000,Exponent=1.000000,bInvert=False)) AxisConfig=(AxisKeyName="MouseY",AxisProperties=(DeadZone=0.000000,Sensitivity=0.070000,Exponent=1.000000,bInvert=False)) AxisConfig=(AxisKeyName="Gamepad\_LeftX",AxisProperties=(DeadZone=0.200000,Sensitivity=1.000000,Exponent=1.000000,bInvert=False)) AxisConfig=(AxisKeyName="Gamepad\_LeftY",AxisProperties=(DeadZone=0.200000,Sensitivity=1.000000,Exponent=1.000000,bInvert=False)) AxisConfig=(AxisKeyName="Gamepad\_RightX",AxisProperties=(DeadZone=0.200000,Sensitivity=5.555555,Exponent=2.500000,bInvert=False)) AxisConfig=(AxisKeyName="Gamepad\_RightY",AxisProperties=(DeadZone=0.200000,Sensitivity=2.777777,Exponent=2.000000,bInvert=False)) AxisConfig=(AxisKeyName="MouseX",AxisProperties=(DeadZone=0.000000,Sensitivity=0.175000,Exponent=1.000000,bInvert=False)) AxisConfig=(AxisKeyName="MouseY",AxisProperties=(DeadZone=0.000000,Sensitivity=0.112500,Exponent=1.000000,bInvert=False)) ActionMappings=(ActionName="AccessInventory",Key=F,bShift=False,bCtrl=False,bAlt=False,bCmd=False) ActionMappings=(ActionName="AltFire",Key=Gamepad\_RightShoulder,bShift=False,bCtrl=False,bAlt=False,bCmd=False) ActionMappings=(ActionName="BackEvade",Key=S,bShift=False,bCtrl=False,bAlt=False,bCmd=False) ActionMappings=(ActionName="CableAttach",Key=R,bShift=False,bCtrl=False,bAlt=False,bCmd=False) ActionMappings=(ActionName="CallFollow",Key=None,bShift=False,bCtrl=False,bAlt=False,bCmd=False) ActionMappings=(ActionName="CallFollowOne",Key=T,bShift=False,bCtrl=False,bAlt=False,bCmd=False) ActionMappings=(ActionName="CallJustFollow",Key=None,bShift=False,bCtrl=False,bAlt=False,bCmd=False) ActionMappings=(ActionName="CallMoveTo",Key=None,bShift=False,bCtrl=False,bAlt=False,bCmd=False) ActionMappings=(ActionName="CallStay",Key=U,bShift=False,bCtrl=False,bAlt=False,bCmd=False) ActionMappings=(ActionName="CallStayOne",Key=Y,bShift=False,bCtrl=False,bAlt=False,bCmd=False) ActionMappings=(ActionName="CharacterActionWheel",Key=Comma,bShift=False,bCtrl=False,bAlt=False,bCmd=False) ActionMappings=(ActionName="CloseNpckDialog",Key=BackSpace,bShift=False,bCtrl=False,bAlt=False,bCmd=False) ActionMappings=(ActionName="Crouch",Key=LeftControl,bShift=False,bCtrl=False,bAlt=False,bCmd=False) ActionMappings=(ActionName="Drag",Key=G,bShift=False,bCtrl=False,bAlt=False,bCmd=False) ActionMappings=(ActionName="DropItem",Key=O,bShift=False,bCtrl=False,bAlt=False,bCmd=False) ActionMappings=(ActionName="EmoteKey1",Key=Semicolon,bShift=False,bCtrl=False,bAlt=False,bCmd=False) ActionMappings=(ActionName="EmoteKey2",Key=Apostrophe,bShift=False,bCtrl=False,bAlt=False,bCmd=False) ActionMappings=(ActionName="EmoteKeyLaughing",Key=Period,bShift=False,bCtrl=False,bAlt=False,bCmd=False) ActionMappings=(ActionName="EmoteKeySorry",Key=None,bShift=False,bCtrl=False,bAlt=False,bCmd=False) ActionMappings=(ActionName="Fire",Key=LeftMouseButton,bShift=False,bCtrl=False,bAlt=False,bCmd=False) ActionMappings=(ActionName="GamepadRightThumbstick",Key=Gamepad\_RightThumbstick,bShift=False,bCtrl=False,bAlt=False,bCmd=False) ActionMappings=(ActionName="GamepadUse",Key=Gamepad\_FaceButton\_Top,bShift=False,bCtrl=False,bAlt=False,bCmd=False) ActionMappings=(ActionName="InGameMenu",Key=Escape,bShift=False,bCtrl=False,bAlt=False,bCmd=False) ActionMappings=(ActionName="InGameMenu",Key=Gamepad\_Special\_Right,bShift=False,bCtrl=False,bAlt=False,bCmd=False) ActionMappings=(ActionName="InGameMenu",Key=Global\_Menu,bShift=False,bCtrl=False,bAlt=False,bCmd=False) ActionMappings=(ActionName="InGameMenu",Key=Global\_Pause,bShift=False,bCtrl=False,bAlt=False,bCmd=False) ActionMappings=(ActionName="InventoryRadialSelector",Key=Gamepad\_LeftShoulder,bShift=False,bCtrl=False,bAlt=False,bCmd=False) ActionMappings=(ActionName="Jump",Key=Gamepad\_FaceButton\_Bottom,bShift=False,bCtrl=False,bAlt=False,bCmd=False) ActionMappings=(ActionName="Jump",Key=SpaceBar,bShift=False,bCtrl=False,bAlt=False,bCmd=False) ActionMappings=(ActionName="LeftEvade",Key=A,bShift=False,bCtrl=False,bAlt=False,bCmd=False) ActionMappings=(ActionName="LoadSpectatorPos0",Key=F1,bShift=False,bCtrl=False,bAlt=False,bCmd=False) ActionMappings=(ActionName="LoadSpectatorPos1",Key=F2,bShift=False,bCtrl=False,bAlt=False,bCmd=False) ActionMappings=(ActionName="LoadSpectatorPos10",Key=F11,bShift=False,bCtrl=False,bAlt=False,bCmd=False) ActionMappings=(ActionName="LoadSpectatorPos11",Key=F12,bShift=False,bCtrl=False,bAlt=False,bCmd=False) ActionMappings=(ActionName="LoadSpectatorPos12",Key=F1,bShift=False,bCtrl=True,bAlt=False,bCmd=False) ActionMappings=(ActionName="LoadSpectatorPos2",Key=F3,bShift=False,bCtrl=False,bAlt=False,bCmd=False) ActionMappings=(ActionName="LoadSpectatorPos3",Key=F4,bShift=False,bCtrl=False,bAlt=False,bCmd=False) ActionMappings=(ActionName="LoadSpectatorPos4",Key=F5,bShift=False,bCtrl=False,bAlt=False,bCmd=False) ActionMappings=(ActionName="LoadSpectatorPos5",Key=F6,bShift=False,bCtrl=False,bAlt=False,bCmd=False) ActionMappings=(ActionName="LoadSpectatorPos6",Key=F7,bShift=False,bCtrl=False,bAlt=False,bCmd=False) ActionMappings=(ActionName="LoadSpectatorPos7",Key=F8,bShift=False,bCtrl=False,bAlt=False,bCmd=False) ActionMappings=(ActionName="LoadSpectatorPos8",Key=F9,bShift=False,bCtrl=False,bAlt=False,bCmd=False) ActionMappings=(ActionName="LoadSpectatorPos9",Key=F10,bShift=False,bCtrl=False,bAlt=False,bCmd=False) ActionMappings=(ActionName="OnPressHandleBtnA",Key=Gamepad\_FaceButton\_Bottom,bShift=False,bCtrl=False,bAlt=False,bCmd=False) ActionMappings=(ActionName="OnPressHandleBtnB",Key=Gamepad\_FaceButton\_Right,bShift=False,bCtrl=False,bAlt=False,bCmd=False) ActionMappings=(ActionName="OnPressHandleBtnBack",Key=Gamepad\_Special\_Left,bShift=False,bCtrl=False,bAlt=False,bCmd=False) ActionMappings=(ActionName="OnPressHandleBtnDown",Key=Gamepad\_DPad\_Down,bShift=False,bCtrl=False,bAlt=False,bCmd=False) ActionMappings=(ActionName="OnPressHandleBtnLB",Key=Gamepad\_LeftShoulder,bShift=False,bCtrl=False,bAlt=False,bCmd=False) ActionMappings=(ActionName="OnPressHandleBtnLeft",Key=Gamepad\_DPad\_Left,bShift=False,bCtrl=False,bAlt=False,bCmd=False) ActionMappings=(ActionName="OnPressHandleBtnLT",Key=Gamepad\_LeftTrigger,bShift=False,bCtrl=False,bAlt=False,bCmd=False) ActionMappings=(ActionName="OnPressHandleBtnRB",Key=Gamepad\_RightShoulder,bShift=False,bCtrl=False,bAlt=False,bCmd=False) ActionMappings=(ActionName="OnPressHandleBtnRight",Key=Gamepad\_DPad\_Right,bShift=False,bCtrl=False,bAlt=False,bCmd=False) ActionMappings=(ActionName="OnPressHandleBtnRT",Key=Gamepad\_RightTrigger,bShift=False,bCtrl=False,bAlt=False,bCmd=False) ActionMappings=(ActionName="OnPressHandleBtnStart",Key=Gamepad\_Special\_Right,bShift=False,bCtrl=False,bAlt=False,bCmd=False) ActionMappings=(ActionName="OnPressHandleBtnUp",Key=Gamepad\_DPad\_Up,bShift=False,bCtrl=False,bAlt=False,bCmd=False) ActionMappings=(ActionName="OnPressHandleBtnX",Key=Gamepad\_FaceButton\_Left,bShift=False,bCtrl=False,bAlt=False,bCmd=False) ActionMappings=(ActionName="OnPressHandleBtnY",Key=Gamepad\_FaceButton\_Top,bShift=False,bCtrl=False,bAlt=False,bCmd=False) ActionMappings=(ActionName="OnPressHandleLeftStickClick",Key=Gamepad\_LeftThumbstick,bShift=False,bCtrl=False,bAlt=False,bCmd=False) ActionMappings=(ActionName="OnPressHandleLeftStickDown",Key=Gamepad\_LeftStick\_Down,bShift=False,bCtrl=False,bAlt=False,bCmd=False) ActionMappings=(ActionName="OnPressHandleLeftStickLeft",Key=Gamepad\_LeftStick\_Left,bShift=False,bCtrl=False,bAlt=False,bCmd=False) ActionMappings=(ActionName="OnPressHandleLeftStickRight",Key=Gamepad\_LeftStick\_Right,bShift=False,bCtrl=False,bAlt=False,bCmd=False) ActionMappings=(ActionName="OnPressHandleLeftStickUp",Key=Gamepad\_LeftStick\_Up,bShift=False,bCtrl=False,bAlt=False,bCmd=False) ActionMappings=(ActionName="OnPressHandleRightStickClick",Key=Gamepad\_RightThumbstick,bShift=False,bCtrl=False,bAlt=False,bCmd=False) ActionMappings=(ActionName="OnPressHandleRightStickDown",Key=Gamepad\_RightStick\_Down,bShift=False,bCtrl=False,bAlt=False,bCmd=False) ActionMappings=(ActionName="OnPressHandleRightStickLeft",Key=Gamepad\_RightStick\_Left,bShift=False,bCtrl=False,bAlt=False,bCmd=False) ActionMappings=(ActionName="OnPressHandleRightStickRight",Key=Gamepad\_RightStick\_Right,bShift=False,bCtrl=False,bAlt=False,bCmd=False) ActionMappings=(ActionName="OnPressHandleRightStickUp",Key=Gamepad\_RightStick\_Up,bShift=False,bCtrl=False,bAlt=False,bCmd=False) ActionMappings=(ActionName="OrbitCamToggle",Key=K,bShift=False,bCtrl=False,bAlt=False,bCmd=False) ActionMappings=(ActionName="Prone",Key=X,bShift=False,bCtrl=False,bAlt=False,bCmd=False) ActionMappings=(ActionName="Poop",Key=Z,bShift=False,bCtrl=False,bAlt=False,bCmd=False) ActionMappings=(ActionName="PushToTalk",Key=B,bShift=False,bCtrl=False,bAlt=False,bCmd=False) ActionMappings=(ActionName="Reload",Key=Gamepad\_FaceButton\_Left,bShift=False,bCtrl=False,bAlt=False,bCmd=False) ActionMappings=(ActionName="Reload",Key=R,bShift=False,bCtrl=False,bAlt=False,bCmd=False) ActionMappings=(ActionName="ResetCamera",Key=MiddleMouseButton,bShift=False,bCtrl=False,bAlt=False,bCmd=False) ActionMappings=(ActionName="RightEvade",Key=D,bShift=False,bCtrl=False,bAlt=False,bCmd=False) ActionMappings=(ActionName="Run",Key=LeftShift,bShift=False,bCtrl=False,bAlt=False,bCmd=False) ActionMappings=(ActionName="RunToggle",Key=Gamepad\_LeftThumbstick,bShift=False,bCtrl=False,bAlt=False,bCmd=False) ActionMappings=(ActionName="RunToggle",Key=RightShift,bShift=False,bCtrl=False,bAlt=False,bCmd=False) ActionMappings=(ActionName="SaveSpectatorPos0",Key=F1,bShift=True,bCtrl=False,bAlt=False,bCmd=False) ActionMappings=(ActionName="SaveSpectatorPos1",Key=F2,bShift=True,bCtrl=False,bAlt=False,bCmd=False) ActionMappings=(ActionName="SaveSpectatorPos10",Key=F11,bShift=True,bCtrl=False,bAlt=False,bCmd=False) ActionMappings=(ActionName="SaveSpectatorPos11",Key=F12,bShift=True,bCtrl=False,bAlt=False,bCmd=False) ActionMappings=(ActionName="SaveSpectatorPos2",Key=F3,bShift=True,bCtrl=False,bAlt=False,bCmd=False) ActionMappings=(ActionName="SaveSpectatorPos3",Key=F4,bShift=True,bCtrl=False,bAlt=False,bCmd=False) ActionMappings=(ActionName="SaveSpectatorPos4",Key=F5,bShift=True,bCtrl=False,bAlt=False,bCmd=False) ActionMappings=(ActionName="SaveSpectatorPos5",Key=F6,bShift=True,bCtrl=False,bAlt=False,bCmd=False) ActionMappings=(ActionName="SaveSpectatorPos6",Key=F7,bShift=True,bCtrl=False,bAlt=False,bCmd=False) ActionMappings=(ActionName="SaveSpectatorPos7",Key=F8,bShift=True,bCtrl=False,bAlt=False,bCmd=False) ActionMappings=(ActionName="SaveSpectatorPos8",Key=F9,bShift=True,bCtrl=False,bAlt=False,bCmd=False) ActionMappings=(ActionName="SaveSpectatorPos9",Key=F10,bShift=True,bCtrl=False,bAlt=False,bCmd=False) ActionMappings=(ActionName="ScrollChatDown",Key=PageDown,bShift=False,bCtrl=False,bAlt=False,bCmd=False) ActionMappings=(ActionName="ScrollChatUp",Key=PageUp,bShift=False,bCtrl=False,bAlt=False,bCmd=False) ActionMappings=(ActionName="ScrollUseItemDown",Key=None,bShift=False,bCtrl=False,bAlt=False,bCmd=False) ActionMappings=(ActionName="ScrollUseItemUp",Key=None,bShift=False,bCtrl=False,bAlt=False,bCmd=False) ActionMappings=(ActionName="ShowBattleGameModeHUD",Key=J,bShift=False,bCtrl=True,bAlt=False,bCmd=False) ActionMappings=(ActionName="ShowCampChat",Key=Backslash,bShift=False,bCtrl=False,bAlt=False,bCmd=False) ActionMappings=(ActionName="ShowGlobalChat",Key=Enter,bShift=False,bCtrl=False,bAlt=False,bCmd=False) ActionMappings=(ActionName="ShowLocalChat",Key=Insert,bShift=False,bCtrl=False,bAlt=False,bCmd=False) ActionMappings=(ActionName="ShowMyCraftables",Key=U,bShift=False,bCtrl=False,bAlt=False,bCmd=False) ActionMappings=(ActionName="ShowMyInventory",Key=I,bShift=False,bCtrl=False,bAlt=False,bCmd=False) ActionMappings=(ActionName="ShowTaskDialog",Key=O,bShift=False,bCtrl=False,bAlt=False,bCmd=False) ActionMappings=(ActionName="ShowTribeChat",Key=Slash,bShift=False,bCtrl=False,bAlt=False,bCmd=False) ActionMappings=(ActionName="ShowTribeManager",Key=L,bShift=False,bCtrl=False,bAlt=False,bCmd=False) ActionMappings=(ActionName="SpectatorDecreaseBaseSpeed",Key=MouseScrollDown,bShift=False,bCtrl=False,bAlt=False,bCmd=False) ActionMappings=(ActionName="SpectatorDecreaseBaseSpeedGamePad",Key=Gamepad\_LeftShoulder,bShift=False,bCtrl=False,bAlt=False,bCmd=False) ActionMappings=(ActionName="SpectatorIncreaseBaseSpeed",Key=MouseScrollUp,bShift=False,bCtrl=False,bAlt=False,bCmd=False) ActionMappings=(ActionName="SpectatorIncreaseBaseSpeedGamePad",Key=Gamepad\_RightShoulder,bShift=False,bCtrl=False,bAlt=False,bCmd=False) ActionMappings=(ActionName="SpectatorNextPlayer",Key=Right,bShift=False,bCtrl=False,bAlt=False,bCmd=False) ActionMappings=(ActionName="SpectatorPreviousPlayer",Key=Left,bShift=False,bCtrl=False,bAlt=False,bCmd=False) ActionMappings=(ActionName="SpectatorResetBaseSpeed",Key=Gamepad\_FaceButton\_Top,bShift=False,bCtrl=False,bAlt=False,bCmd=False) ActionMappings=(ActionName="SpectatorResetBaseSpeed",Key=MiddleMouseButton,bShift=False,bCtrl=False,bAlt=False,bCmd=False) ActionMappings=(ActionName="SpectatorResetBaseSpeed",Key=None,bShift=False,bCtrl=False,bAlt=False,bCmd=False) ActionMappings=(ActionName="SuperSkill",Key=MiddleMouseButton,bShift=False,bCtrl=False,bAlt=False,bCmd=False) ActionMappings=(ActionName="Targeting",Key=RightMouseButton,bShift=False,bCtrl=False,bAlt=False,bCmd=False) ActionMappings=(ActionName="ToggleAutoChat",Key=Backslash,bShift=False,bCtrl=False,bAlt=False,bCmd=False) ActionMappings=(ActionName="ToggleBelt",Key=LeftAlt,bShift=False,bCtrl=False,bAlt=False,bCmd=False) ActionMappings=(ActionName="ToggleBelt",Key=RightAlt,bShift=False,bCtrl=False,bAlt=False,bCmd=False) ActionMappings=(ActionName="ToggleHUDHidden",Key=BackSpace,bShift=False,bCtrl=False,bAlt=False,bCmd=False) ActionMappings=(ActionName="ToggleMap",Key=M,bShift=False,bCtrl=False,bAlt=False,bCmd=False) ActionMappings=(ActionName="TransferItem",Key=T,bShift=False,bCtrl=False,bAlt=False,bCmd=False) ActionMappings=(ActionName="UnionDirectionSkill",Key=LeftControl,bShift=False,bCtrl=False,bAlt=False,bCmd=False) ActionMappings=(ActionName="UnionDirectionSkill",Key=RightControl,bShift=False,bCtrl=False,bAlt=False,bCmd=False) ActionMappings=(ActionName="Use",Key=E,bShift=False,bCtrl=False,bAlt=False,bCmd=False) ActionMappings=(ActionName="UseHideItem1",Key=One,bShift=False,bCtrl=True,bAlt=False,bCmd=False) ActionMappings=(ActionName="UseHideItem10",Key=Zero,bShift=False,bCtrl=True,bAlt=False,bCmd=False) ActionMappings=(ActionName="UseHideItem11",Key=Hyphen,bShift=False,bCtrl=True,bAlt=False,bCmd=False) ActionMappings=(ActionName="UseHideItem12",Key=Equals,bShift=False,bCtrl=True,bAlt=False,bCmd=False) ActionMappings=(ActionName="UseHideItem2",Key=Two,bShift=False,bCtrl=True,bAlt=False,bCmd=False) ActionMappings=(ActionName="UseHideItem3",Key=Three,bShift=False,bCtrl=True,bAlt=False,bCmd=False) ActionMappings=(ActionName="UseHideItem4",Key=Four,bShift=False,bCtrl=True,bAlt=False,bCmd=False) ActionMappings=(ActionName="UseHideItem5",Key=Five,bShift=False,bCtrl=True,bAlt=False,bCmd=False) ActionMappings=(ActionName="UseHideItem6",Key=Six,bShift=False,bCtrl=True,bAlt=False,bCmd=False) ActionMappings=(ActionName="UseHideItem7",Key=Seven,bShift=False,bCtrl=True,bAlt=False,bCmd=False) ActionMappings=(ActionName="UseHideItem8",Key=Eight,bShift=False,bCtrl=True,bAlt=False,bCmd=False) ActionMappings=(ActionName="UseHideItem9",Key=Nine,bShift=False,bCtrl=True,bAlt=False,bCmd=False) ActionMappings=(ActionName="UseItem1",Key=Gamepad\_DPad\_Up,bShift=False,bCtrl=False,bAlt=False,bCmd=False) ActionMappings=(ActionName="UseItem1",Key=One,bShift=False,bCtrl=False,bAlt=False,bCmd=False) ActionMappings=(ActionName="UseItem10",Key=Zero,bShift=False,bCtrl=False,bAlt=False,bCmd=False) ActionMappings=(ActionName="UseItem11",Key=Hyphen,bShift=False,bCtrl=False,bAlt=False,bCmd=False) ActionMappings=(ActionName="UseItem12",Key=Equals,bShift=False,bCtrl=False,bAlt=False,bCmd=False) ActionMappings=(ActionName="UseItem2",Key=Gamepad\_DPad\_Down,bShift=False,bCtrl=False,bAlt=False,bCmd=False) ActionMappings=(ActionName="UseItem2",Key=Two,bShift=False,bCtrl=False,bAlt=False,bCmd=False) ActionMappings=(ActionName="UseItem3",Key=Gamepad\_DPad\_Left,bShift=False,bCtrl=False,bAlt=False,bCmd=False) ActionMappings=(ActionName="UseItem3",Key=Three,bShift=False,bCtrl=False,bAlt=False,bCmd=False) ActionMappings=(ActionName="UseItem4",Key=Four,bShift=False,bCtrl=False,bAlt=False,bCmd=False) ActionMappings=(ActionName="UseItem4",Key=Gamepad\_DPad\_Right,bShift=False,bCtrl=False,bAlt=False,bCmd=False) ActionMappings=(ActionName="UseItem5",Key=Five,bShift=False,bCtrl=False,bAlt=False,bCmd=False) ActionMappings=(ActionName="UseItem6",Key=Six,bShift=False,bCtrl=False,bAlt=False,bCmd=False) ActionMappings=(ActionName="UseItem7",Key=Seven,bShift=False,bCtrl=False,bAlt=False,bCmd=False) ActionMappings=(ActionName="UseItem8",Key=Eight,bShift=False,bCtrl=False,bAlt=False,bCmd=False) ActionMappings=(ActionName="UseItem9",Key=Nine,bShift=False,bCtrl=False,bAlt=False,bCmd=False) ActionMappings=(ActionName="UseSlot",Key=C,bShift=False,bCtrl=False,bAlt=False,bCmd=False) ActionMappings=(ActionName="UseSlot2",Key=V,bShift=False,bCtrl=False,bAlt=False,bCmd=False) ActionMappings=(ActionName="WeaponOnBack",Key=Q,bShift=False,bCtrl=False,bAlt=False,bCmd=False) ActionMappings=(ActionName="ZoomIn",Key=MouseScrollUp,bShift=False,bCtrl=False,bAlt=False,bCmd=False) ActionMappings=(ActionName="ZoomOut",Key=MouseScrollDown,bShift=False,bCtrl=False,bAlt=False,bCmd=False)

\[/script/engine.playerinput] \
DebugExecBindings=(Key=Pause,Command="Pause",Control=False,Shift=False,Alt=False,Cmd=False,bIgnoreCtrl=False,bIgnoreShift=False,bIgnoreAlt=False,bIgnoreCmd=False) DebugExecBindings=(Key=F11,Command="LevelEditor.ToggleImmersive",Control=False,Shift=False,Alt=False,Cmd=False,bIgnoreCtrl=False,bIgnoreShift=False,bIgnoreAlt=False,bIgnoreCmd=False) DebugExecBindings=(Key=F11,Command="MainFrame.ToggleFullscreen",Control=False,Shift=True,Alt=False,Cmd=False,bIgnoreCtrl=False,bIgnoreShift=False,bIgnoreAlt=False,bIgnoreCmd=False) DebugExecBindings=(Key=B,Command="ToggleSpeaking true | OnRelease ToggleSpeaking false",Control=False,Shift=False,Alt=False,Cmd=False,bIgnoreCtrl=False,bIgnoreShift=False,bIgnoreAlt=False,bIgnoreCmd=False) DebugExecBindings=(Key=F12,Command="shot showui",Control=False,Shift=False,Alt=False,Cmd=False,bIgnoreCtrl=False,bIgnoreShift=False,bIgnoreAlt=False,bIgnoreCmd=False) DebugExecBindings=(Key=Period,Command="RECOMPILESHADERS CHANGED",Control=True,Shift=True,Alt=False,Cmd=False,bIgnoreCtrl=False,bIgnoreShift=False,bIgnoreAlt=False,bIgnoreCmd=False) DebugExecBindings=(Key=Comma,Command="PROFILEGPU",Control=True,Shift=True,Alt=False,Cmd=False,bIgnoreCtrl=False,bIgnoreShift=False,bIgnoreAlt=False,bIgnoreCmd=False) DebugExecBindings=(Key=Escape,Command="CloseEditorViewport",Control=False,Shift=False,Alt=False,Cmd=False,bIgnoreCtrl=False,bIgnoreShift=False,bIgnoreAlt=False,bIgnoreCmd=False) DebugExecBindings=(Key=Enter,Command="TOGGLE\_FULLSCREEN",Control=False,Shift=False,Alt=True,Cmd=False,bIgnoreCtrl=False,bIgnoreShift=False,bIgnoreAlt=False,bIgnoreCmd=False) DebugExecBindings=(Key=Num+,Command="FocusNextPIEWindow",Control=True,Shift=False,Alt=False,Cmd=False,bIgnoreCtrl=False,bIgnoreShift=False,bIgnoreAlt=False,bIgnoreCmd=False) DebugExecBindings=(Key=Num+,Command="FocusLastPIEWindow",Control=True,Shift=True,Alt=False,Cmd=False,bIgnoreCtrl=False,bIgnoreShift=False,bIgnoreAlt=False,bIgnoreCmd=False)

\[/script/engine.console] \
HistoryBuffer=fps stat HistoryBuffer=stat fps HistoryBuffer=fly HistoryBuffer=cheat giveitem 1 1 1 0 HistoryBuffer=enablecheats pass123 HistoryBuffer=fly HistoryBuffer=fps stat HistoryBuffer=stat fps HistoryBuffer=r.PostProcessAAQuality 6 HistoryBuffer=r.PostProcessAAQuality 1 HistoryBuffer=r.PostProcessAAQuality 6 HistoryBuffer=r.PostProcessAAQuality 2 HistoryBuffer=r.PostProcessAAQuality 6 HistoryBuffer=sg.PostProcessQuality 3 HistoryBuffer=r.AmbientOcclusionRadiusScale=1.0 HistoryBuffer=r.AmbientOcclusionLevels=3 HistoryBuffer=r.BloomQuality=5 HistoryBuffer=r.BloomQuality=5 HistoryBuffer=r.ShadowQuality=2 HistoryBuffer=r.ShadowQuality=6 HistoryBuffer=r.PostProcessAAQuality=6 HistoryBuffer=sg.PostProcessQuality=3 HistoryBuffer=r.PostProcessAAQuality=6 HistoryBuffer=stat fps HistoryBuffer=sg.PostProcessQuality=3 HistoryBuffer=r.PostProcessAAQuality=1 HistoryBuffer=r.PostProcessAAQuality=6 HistoryBuffer=r.ShadowQuality=2 HistoryBuffer=r.BloomQuality=1 HistoryBuffer=stat fps HistoryBuffer=stat fps HistoryBuffer=stat Memory HistoryBuffer=stat Memory HistoryBuffer=stat Particles HistoryBuffer=stat Game HistoryBuffer=stat fps

</details>

<details>

<summary>What to do if your Client cannot connect to our servers!</summary>

### **Launching from a desktop icon**&#x20;

**For any steam game,** ***Using the Desktop ICON bypasses the auto updates for the game,*** when you unsub and resub it will allow you to connect to the server IF you have the same version as the server. The Server in some cases will receive an updated mod before the Clients do. (ARK Updates for example) and create some issues in version matches. Please go the listed mod packaged for your platform and unsub to the mods pac. and then re sub to them one by one. This will trigger a new download of the mods and instead of fully downloading they will repair the files.

### **Steam Joining Bug**

When you cannot join from the lobby page, and joining from the Banners page on the Website is also not working right,  try this fix:\
Go to your Steam page> view> servers> when the box pops up, along the top are tabs, select "History" and there will be all the servers you have joined in the last two months.\
To join a server from one of them: right click the servers line, in the box that opens select "Join this Server?" and there you have it.

### **DNL Workshop Mod Mismatch**

Go to here :<https://steamcommunity.com/sharedfiles/filedetails/?id=1962227173> unsub from the mods package. Wait about a minute,  then resub to the mod pkg.  This will redownload all our standard mods.\
When the Lower righthand section of your lobby page is NOT showing loading of a mod. Your good to attempt to load into the servers.

### "0 Reverify" or Cleaning Caches:

When in doubt about any Workshop files a "0Reverify" will almost always fix the workshop errors. While making the player mad as hell. Steam has trouble with any file size larger than 3 gigs. So often they error or drop files in the download process. [***"0Reverify" instructions:***](https://faq.thepackgaming.com/alphys-help-desk/directory/steam#verify-local-files)\
And lastly always [***clean your caches***](https://faq.thepackgaming.com/alphys-help-desk/directory/steam#clear-your-steam-caches) after each base game update, and after any large mod updates.&#x20;

### **Long Load Time / Fatal Errors on load**&#x20;

Anytime you experience either Exceptional long loading times or Fatal errors on loading. \
[EXIT STEAM](https://faq.thepackgaming.com/gaming-enhancements#restarting-steam), and then re-enter the game lobby and try again. \
If it repeatedly loads slowly or errors, try doing a [Re-Verify](https://faq.thepackgaming.com/gaming-enhancements#verify-your-game-through-steam) of your game files.

</details>

## GAME ERRORS and FIXES

<details>

<summary>Issues attacking/harvesting</summary>

If you are experiencing issues with your mounts only striking once or twice in upwards of 5 to 10 seconds, you may want to reset your maxfps setting. The game is default set to 30 fps instead of 60 fps. \
The game at higher than 30-40 frames per second starts doing strange things with attacks. \
The way to fix this problem is:

1. Go to the console in game (default key is Numpad +)(also called the tab bar)
2. Type:   `t.maxfps 30`
3. Enjoy :)

BTW Your mount attack speed will be better as well. When above 50 fps, most mount attack speed will be at about 3 seconds in between attacks. After this change most will experience at least an increase of 1.2 seconds in attack speed.  (1.2 sec instead of 3 sec)

</details>

<details>

<summary>Creature Slowed after Taming.</summary>

If you are experiencing issues with your mounts after taming with a mix of hooked arrows and cobweb spell. Here are a few options.\
1\. Log out of game and Steam as well.  Restart it all and see if it is gone\
2\. Try hitting it with the cobweb spell again to see if this will cause the first to fail.\
3\. If all else fails, attempt to get the creature tagged by a WILD spider or bear. And hope that it reverses the cobweb spell.

Try to never use more than one Cobweb Spell on a tame per taming attempt. They don't stack right and become a permanent affliction.

</details>

<figure><img src="https://772063455-files.gitbook.io/~/files/v0/b/gitbook-x-prod.appspot.com/o/spaces%2F-Lgje1lBxKKWXwqycB-v%2Fuploads%2FyDgm3YwUI3w8VOWOy5NU%2Fimage.png?alt=media&amp;token=1e15f856-cb97-49d4-a378-5eefedf8e88d" alt=""><figcaption></figcaption></figure>


# Palworld Graphic and PC Enhancements

Post of helpful Optimizations and Client side bug fixes for our Palworld Players:

<figure><img src="https://772063455-files.gitbook.io/~/files/v0/b/gitbook-x-prod.appspot.com/o/spaces%2F-Lgje1lBxKKWXwqycB-v%2Fuploads%2FRPXaJXs980ba5DZhMijr%2FHELPDESK_PALWORLD_2024.png?alt=media&amp;token=6c9cf548-ae0e-4253-9fde-ddc18cc2d437" alt=""><figcaption></figcaption></figure>

## Palworld system requirements

#### Minimum system requirements

* **OS:** Windows 10 or later (64-Bit)
* **Processor:** i5-3570K 3.4 GHz
* **Memory:** 16 GB
* **Graphics:** GeForce GTX 1050 (2GB)
* **DirectX:** DX11
* **Storage:** 40 GB SSD

The minimum system requirements are low enough that any computer from the past five years with *any* kind of graphics card will have no trouble getting this game up and running. We can’t guarantee the performance will be stellar, and the experience will definitely *not* be consistent throughout the game. The only real standout requirement is the need for an SSD. This is absolutely required, according to the developers.

#### Recommended system requirements

* **OS:** Windows 10 or later (64-Bit)
* **Processor:** i9-9900K 3.6 GHz 8 Core
* **Memory:** 32 GB RAM
* **Graphics:** GeForce RTX 2070
* **DirectX:** DX11
* **Storage:** 40 GB SSD

The recommended system requirements are more stringent — an RTX 2070 is still a capable GPU, even if it is several generations old. The 32GB of RAM is arguably the bigger hurdle, however, as while many of the most popular Steam graphics cards can offer comparable performance to that 2070

## The best settings for **Palworld**

### Best Graphics Settings

<details>

<summary>Game Option Settings</summary>

How to set your settings for the best overall gameplay in Palworld.

<img src="https://www.gtxgaming.co.uk/wp-content/uploads/2024/01/pw-graphics.webp" alt="palworld graphics performance optimization" data-size="original">

* **Graphics:** Preset to "Medium" or "Low" for a performance picnic. Fullscreen mode is your friend, ditching windowed like a stale cookie.
* **Screen Resolution:** Lowering this is like finding a turbo-charged carrot for your GPU. Try 1920x1080 or even 1280x720 if you crave lightning-fast frames.
* **Max FPS**: Set a frame rate cap to give your GPU some well-deserved rest. Feel free to experiment to find your Goldilocks zone between visual splendor and smooth performance.
* **VSync:** While it prevents screen tearing, VSync can sometimes introduce input lag, making those crucial capture moments feel a bit sluggish. Consider turning VSync off for more responsive gameplay, especially if you're not experiencing noticeable tearing
* **Motion Blur**: Does motion blur make your Palworld adventures feel like a dizzying roller coaster ride? Turn it off for a clearer, more stable visual experience, especially during those intense action sequences.
* **Anti-Aliasing:** Ditch the demanding TSR and explore TAA or FXAA for smoother gameplay without jaggy edges.
* **View Distance:** High is the default, but venturing into "Medium" or "Low" can reveal hidden performance oases.
* **Grass Details and Shadows:** Like mischievous Pugs, they're adorable but resource-hungry. Lower them to medium or low for a frame rate fiesta.
* **Effects Quality, Texture Quality:** Similar to shadows, lower these settings to unleash your inner frame rate wizard.
* **DLSS:** Nvidia users, remember your AI-powered ally? Set it to "Performance" or "Ultra Performance" and watch your Palworld transform into a butter-smooth paradise.

</details>

### Tweaking Advanced Settings

<details>

<summary>Other Steps to boost framerate</summary>

If you really want to push your frame rate to the max in Palworld, there are a few advanced graphics settings you can adjust. Let's dig in!

* #### Update Video Drivers

  First thing's first: make sure that your drivers are all up to date and ready to handle the latest games. Visit your component manufacturer's driver page, download and install the latest drivers and try running the game afterwards to see the results.
* **Verify Game File Integrity**

  There's a chance your installation has gone awry, and the best way to fix that is to verify game file integrity via Steam. Here's how to do it:

  1. Start Steam and open your game library
  2. Find Enshrouded, right-click the game and click **Properties**.
  3. Click on **Local Files** and select **Verify integrity of game files.**

  Afterwards, launch the game and check for performance improvements.
* **Run the Game as Administrator:** To fix the low FPS issue in Palworld, run the game as an administrator. This method enables the game to overcome the limitations of the system.
* **Turn off Background Apps**

  Programs running in the background take chunks of your RAM and processing power, bogging down your game's performance. Follow these steps to bring down your hardware usage:

  1. Press **Ctrl+Shift+Esc** to open the Task Manager.
  2. Go to the **Processes** tab
  3. Find a CPU/GPU-intensive process, right-click on it and click **End task**.
* **Change Windows to Performance Mode**

  To get the most out of your components and boost your framerate, you'll need to make Windows use the least amount of processing power possible. Let me show you how:

  1. Type **Adjust the appearance and performance of Windows** into the Windows Search bar.
  2. When the **Performance Options** window open, go to the **Visual Effects** tab.
  3. Select **Adjust for best performance** and click **Apply**.

  This lowers the visual fidelity of Windows, but it can significantly increase performance in games like Palworld.
* **Optimize your GPU**

  When you download and install the software accompanying your graphics card, you'll be able to set the graphical fidelity to your choosing. If your framerate keeps dipping in Palworld, open up the GPU control panel and set your Slider Setting to Performance. Your game's visual quality will suffer, but the framerate boost more than makes up for it.
* **Disable Overlays**

  Most of the time overlays use some of your system resources to run, and sometimes they are generating application conflicts. So, by disabling them I ensure that I run Palworld without any FPS drops or low FPS issues.

  1. **Close Overlay Apps:** Check if any overlay apps like **Discord or Steam** are running in the background. If so, close them.
  2. **Check Game Settings:** Open the game’s settings menu and look for any options related to overlays. Disable any overlays that are enabled.
  3. **Verify Performance:** Close the game and relaunch it. Check if the performance has improved.
* **Perform a Clean Boot**

  A clean boot will allow you to play the game without any unnecessary background services, which might either use a substantial amount of resources or cause conflicts between the game and other applications.

  1. **Open System Configuration:** Press the Win + R, type **msconfig** and press **Enter**.
  2. **Click Services:** In the Services tab, check the box next to **Hide all Microsoft services** and click **Disable all.**
  3. **Click Startup:** In the Startup tab, click **Open Task Manager.**
  4. **Disable Startup Items:** In **Task Manager**, disable all startup items.
  5. **Restart Computer:** Close Task Manager and click **Apply** and then **OK** in **System Configuration**. Restart your computer.
  6. **Re-enable Services and Startup Items:** After restarting, go back to **System Configuration**, enable the services and startup items that you disabled earlier.
  7. **Verify Performance:** Launch the game and check if the performance has improved.

</details>

<details>

<summary><img src="https://772063455-files.gitbook.io/~/files/v0/b/gitbook-x-prod.appspot.com/o/spaces%2F-Lgje1lBxKKWXwqycB-v%2Fuploads%2FWLpCGRkTsuUn1zIskVTF%2Fimage.png?alt=media&amp;token=3359d730-4a9b-41c9-ab32-cf829d14cd00" alt=""></summary>

On Steam, go to your library, right-click on Enshrouded, select Properties and click on Set Launch Options.

***Here’s a list of the best ones you can and should use:*** \
-high -lowmemory -dx12 -window

***-dx12 -*** Forces the game to run in the dx12 Graphics Mode.

**-high -** Forces high CPU priority, which might give you extra FPS.

**-full** - (fullscreen mode) (Use -window if you tab out of game for discord etc.)

***ALL LAUNCH OPTIONS Explained.***

-USEALLAVAILABLECORES - (the game will use all your CPU cores)\
-sm4 and -d3d10 - (runs game with DirectX 10)\
-nomansky (removes clouds and some sky effects)\
-lowmemory (the game will use only 4gb of your RAM)\
-w 640 -h 480 - (runs game in 640x480 resolution)(resolution can be changed to your choice)\
-full - (fullscreen mode)\
&#x20;-window - (windowed mode with borders)\
-noborder - (windowed mode without borders)\
-low - (runs ARK as a low-priority process)\
-high - (runs ARK as a high-priority process)\
-noaafonts - (removes fonts anitalising)\
-autoconfig - (return default settings)\
-novid (turns off some cinematics)\
-console - turns on the developer console \
-noeac - turns off the easy anti-cheat software. \
-dx10 - toggles dx10 use\
-dx11 - toggles dx11 use\
-dx12 - toggles dx12 use

</details>

## GAME GLITCHES

### Loss of Map and all Fast Travel points upon crash.

<details>

<summary>Restoring your Map after crash.</summary>

[Jaynnie](https://www.reddit.com/user/Jaynnie/)· From Reddit posted 28 days ago

I did it! got my map back. PEBCAK error with the disabling of steam cloud sync.

Step 1: disable steam cloud sync using steam settings for global, NOT just on the page for Palworld. KEEP THIS WINDOW OPEN

Step 2: go to the place where your local data was saved for the game for me it was at C:\Users\\\<usersname>\AppData\Local\Pal\Saved\SaveGames\ long numbered file that I have data for a local save and a dedicated server save.

Step 3: Determine the one you need by looking at the date modified column, whichever one you were most recently playing will have the most recent date modified.

You should see at least two items here; a backup folder and a LocalData.sav(Some people will have more if you are running your game from your own computer instead of joining a server)

Step 4: Click on the backup folder then again on local

When you open this you will see a bunch of folders with date and time stamps, scroll to a point where you're relatively sure there wont be corruption (I noticed that the last 6 that had saved here were all less than 3 minutes apart from each other). I decided to go to a save that had been three hours prior.

Step 5: Open that folder and COPY the LocalData.sav file that is inside. I say copy because you never know if you're going to need to try this a second time like I did :p

Step 6: go back out to that original spot we saw the LocalData.sav. (if you lost where that was it was this one "C:\Users\\\<usersname>\AppData\Local\Pal\Saved\SaveGames\ long numbered file". Paste the one you copied from your backup folder here and make sure you click "replace" when windows gives you the little pop up saying "are you sure?".

Step 7: open your game, jump on the server and check for your map. If it is there, DO NOT CLOSE THE GAME. First, alt+tab back out to your steam server settings and enable cloud sync.\
This should get steam to push your local file to the server which it may pull from in the future.

I hope my instructions have been helpful to someone out there.

Happy Paling!!

</details>

<figure><img src="https://772063455-files.gitbook.io/~/files/v0/b/gitbook-x-prod.appspot.com/o/spaces%2F-Lgje1lBxKKWXwqycB-v%2Fuploads%2F5BJSwVnxyExmankTbvfE%2Fimage.png?alt=media&amp;token=08304e9f-956c-4c80-8c42-5706ffe769be" alt=""><figcaption></figcaption></figure>


# 7 Days to Die Graphic and PC Enhancements

Post of helpful Optimizations and Client side bug fixes for our 7DtD Players:

<figure><img src="https://772063455-files.gitbook.io/~/files/v0/b/gitbook-x-prod.appspot.com/o/spaces%2F-Lgje1lBxKKWXwqycB-v%2Fuploads%2FAI7pJd9ViPfWBZglemBL%2FALPHYS%20HELP%20DESK_7DTD.png?alt=media&amp;token=338d8e66-abeb-48d9-8273-7cce7362ade6" alt="" width="563"><figcaption></figcaption></figure>

## Compatibility issues.

<details>

<summary>A20|Compatibility</summary>

Alpha 20 is not compatible with A19 saves or A19 maps. For best results remove all saved data from A19.

#### &#x20;Clean out A19 data

&#x20;1\) start the game from your library\
2\) select show game launcher\
3\) click in the tools tab\
4\) click on clean game files and check all circles\
5\) click clean

&#x20;[***Video by Jugginator***](https://youtu.be/IqDHsijAApw)

</details>

## Graphic Tweaks!

The following is a list of tweaks I have found among various posts in the Community Forums that should increase your fps from the 35-50 range into the 60-80 range. Some of these tweaks may do nothing, others may be substantial.&#x20;

<img src="https://772063455-files.gitbook.io/~/files/v0/b/gitbook-legacy-files/o/assets%2F-Lgje1lBxKKWXwqycB-v%2F-MC5Sn8eW3porWU8E_bf%2F-MC5U-H99gYdI_snwPmx%2FA19_Opt_Settings.png?alt=media&amp;token=81e06410-5bde-480e-bb2e-fe61188556bd" alt="Optimal Settings for Alpha 20." width="563">

<details>

<summary>Graphic Tweaks!</summary>

I'd suggest trying them one a time to see what works for you. **These are aside from the obvious: turning down graphics or lowering screen resolution**, (lots of recommendation for 720p) and of course nothing comes without cost, you will be sacrificing graphical quality, but who cares how good it looks if it's too laggy to play?

&#x20;1.) For those with **bad FPS especially outdoors,** you can try this in the console to disable distant terrain:\
gfx dt

&#x20;**2.) Disable post processing for fps gain.**\
gfx pp enable 0

&#x20;**3.) Change storm values.**\
&#x20;In steam right click 7D2D -> Properties > Local files > Browse Local Files -> Data -> Config -> biomes.xml -> Open with text editor.\
Find lines:\
"\<ParticleEffect prefab="ParticleEffects/p\_sandstorm" ChunkMargin="7"/>"\
"\<ParticleEffect prefab="ParticleEffects/p\_smokestorm" ChunkMargin="7"/>"\
"\<ParticleEffect prefab="ParticleEffects/p\_snowstorm1" ChunkMargin="7"/>"\
Update them to 80 or higher, instead of 7.

&#x20;**4.) Running game from launcher instead of 7D2D Shortcut.**\
(To get to Game Location, In steam right click 7D2D -> Properties > Local files > Browse Local Files. Run 7Dlauncher.exe)\
1\. Tick \[X] Exclusive FullScreen Mode\
2\. Tick \[X] Unity Screen Selector\
3\. (Optional) Aditional Paramters(unsure if this works, might be placebo effect): -force-d39d\
4\. When Unity Launcher opens, select the lowest resolution you're comfortable with, you can always raise it later. If your fps was very low, I would suggest trying the lowest graphical settings, you can always raise them individually later if you want.

Disabling **SS Reflections** will also give a huge FPS boost.

### Too Bright Bug

&#x20;You can also fix the weird shininess/everything is too bright bug by going into settings while in game and going to options. Next turn reflections to low, hit apply, then turn them off and hit apply again.

### Anisotropic Filtering issues.

"Anisotropic filtering is a method of taking many samples of a texture to produce a higher quality image. AF is a setting on each texture." \
7DtD has a simple setting matrix for this.\
&#x20;0 disabled\
&#x20;1 enabled (uses texture's value)\
&#x20;2 is force enable, ***which is making AF maxed on every texture***

If you have **NVIDIA and GEFORCE**, set the anisotropic filtering in the settings to 2x or off. And not let the application control it.

You can turn off anisotropic filtering in the console with \
gfx af 0, \
Will help with bottlenecked AMD CPU and GPU.&#x20;

</details>

<figure><img src="https://772063455-files.gitbook.io/~/files/v0/b/gitbook-x-prod.appspot.com/o/spaces%2F-Lgje1lBxKKWXwqycB-v%2Fuploads%2FrFgXy1vMIhcnTGhUZyb0%2Fimage.png?alt=media&amp;token=a3ad1b38-d927-44ea-89eb-4e9066f509b2" alt="" width="375"><figcaption></figcaption></figure>

## **Common Issues.**

### **Constant Crashes and Virtual Memory (Pagefile)**

This is exclusively happens when windows runs out of memory (despite a pagefile). It Often takes the shape of a game crash as you load into a world/join a world.

<details>

<summary>Constant Crashes and Virtual Memory (Pagefile)</summary>

Simply put, every time you open more applications than the RAM on your PC can accommodate, the programs already present in the RAM are automatically transferred to the Pagefile. \
By default, Windows 10 automatically manages the Pagefile according to your computer’s configuration and the RAM present in it. However, if you ever face lagging while playing a game on Windows 10, managing the size of the Pagefile manually is the first thing you should look for.\
Managing the Pagefile size manually in Windows 10 is simple. Here is how:

* Use an administrator account to log on to Windows 10.
* From the desktop screen, right-click the Start button to open its context menu.
* Click **System**.
* From the left pane of the **System** window, click **Advanced system settings**.
* On the **System Properties** box, ensure that you are on the **Advanced** tab.
* Click the **Settings** button from under the **Performance** section.
* On the **Performance Options** box, go to the **Advanced** tab.
* Click the **Change** button from under the **Virtual memory** section.
* On the **Virtual Memory** box, uncheck the **Automatically manage paging file size for all drives checkbox**.
* From the available list, click to select the drive on which Windows 10 is installed. (C: in most cases.)
* From below the list, click to select the **Custom size** radio button.
* In the now-enabled fields, type the minimum and maximum size of the Pagefile in megabytes (MB) according to the physical memory present in your computer.
* Click **Set** and then click **OK**.
* Restart your computer when you're done.

I usually set mine to 3 times the recommended. Usually somewhere around 3 gigs of extra virtual ram.  But I use the the memory from one of my slaved storage discs. NOT my SSD.

</details>

### 7DTD Save Locations:

Locating your ***game save files*** is important in case you ever need to transfer them over to a new computer, back them up, among many other things. If you have an issue with a corrupt file, these locations will be how you fix your Character Saves. ***Included here: Game Saves; Config File; and Mods Folder locations!***

<details>

<summary>7DTD Save Locations:</summary>

See help for your operating system below.

#### &#x20;Windows

Your game saves are located within your `%AppData%` folder on Windows, at the following path:

```
%AppData%\7DaysToDie\Saves
```

To open up that path:

1. Right click your start menu button (bottom left) and click `Run` to open a Run window
2. Inside the Run text field, paste the path
3. Click `OK`, and you will be taken to your 7 Days to Die saves folder!

#### &#x20;Mac

On Mac computers, your 7 Days to Die saves will be in this folder:

```
~/Library/Application Support/7DaysToDie
```

To open up that path, open up a Finder window, press `COMMAND` + `SHIFT` + `G` on your keyboard, paste the path in, and hit `Go`.

#### &#x20;Linux

On Linux based operating systems, 7DTD saves games in the following directory:

```
~/.local/share/7DaysToDie
```

#### 7DTD Config File

Your configuration files for 7DTD will vary based on your operating system. See help for your installation below.

#### &#x20;Windows

On Windows, you can find your 7 Days to Die config files at this folder:

```
%AppData%\7DaysToDie
```

#### &#x20;Mac

Mac 7DTD config files are at this path:

```
~/Library/Application Support/7DaysToDie
```

#### &#x20;Linux

Linux versions of 7DTD save their config files in this folder:

```
~/.local/share/7DaysToDie
```

#### 7DTD Mods Folder

Your 7 Days to Die mods folder location varies based on your operating system, see help for yours below.

#### &#x20;Windows

The default location for your 7DTD mods folder on Windows will be:

```
C:\Program Files (x86)\Steam\steamapps\common\7 Days To Die\Mods
```

#### &#x20;Mac

If you're playing 7 Days to Die on a Mac, you can find your mods folder at:

```
~/Library/Application Support/Steam/steamapps/common/7 Days To Die/Mods
```

#### &#x20;Linux

Linux versions of 7 Days to Die have their mods folder at:

```
~/.steam/steam/steamapps/common/7 Days To Die/Mods
```

</details>

<figure><img src="https://772063455-files.gitbook.io/~/files/v0/b/gitbook-x-prod.appspot.com/o/spaces%2F-Lgje1lBxKKWXwqycB-v%2Fuploads%2F5W5s4UQGOZAxPwPMXbtR%2Fimage.png?alt=media&amp;token=71139bdd-3dd9-4ab1-99b0-207417f32e27" alt=""><figcaption></figcaption></figure>


# Soulmask Optimization Guide

Post of helpful Optimizations and Client side bug fixes for our Enshrouded Players:

## Soulmask system requirements

Firstly, let's take a look at the Soulmask recommended and minimum specs listed on the store page.

### **Minimum Specs**:

* Windows 10 (64 Bit)
* Intel Core i5-8400 or AMD Ryzen 3 3300X
* 16GB RAM
* GTX 970 4GB or AMD RX 580 4GB

### **Recommended Specs**

* Windows 11
* Intel Core i7-9700 or AMD Ryzen 7 3700X
* 24GB RAM
* RTX 3060 or AMD 6700XT
* SSD (With the note that this is 'Highly Recommended')

As such, a good place to start to make sure your performance is the best it can possibly be is to ensure you're rocking at least one set of these specs.

***

## Soulmask graphics settings suggestions

Soulmask is heavily GPU-bound, so having a decent GPU, a solid amount of high-speed RAM, and an SSD to run it from are responsible for the bulk of the performance here. This is, of course, subject to change, thanks to the large amount of NPCs you'll be collecting down the line.

<figure><img src="https://772063455-files.gitbook.io/~/files/v0/b/gitbook-x-prod.appspot.com/o/spaces%2F-Lgje1lBxKKWXwqycB-v%2Fuploads%2FzWnkYKBodrlcLzRe5ox2%2Fimage.png?alt=media&amp;token=8b356906-9fe7-47f9-a5d8-1a2231e9571c" alt=""><figcaption></figcaption></figure>

<figure><img src="https://772063455-files.gitbook.io/~/files/v0/b/gitbook-x-prod.appspot.com/o/spaces%2F-Lgje1lBxKKWXwqycB-v%2Fuploads%2FnXvnyUQu3XGEv0x7FgMs%2Fimage.png?alt=media&amp;token=f586a721-6d84-416e-af5b-18badacc0bf9" alt=""><figcaption></figcaption></figure>

We will go through some of the settings listed above, and break down some of them to explain what might be best for your setup.

#### Display

There are many reasons to use a borderless window as opposed to an exclusive fullscreen in any game, but the simple fact is that using an exclusive fullscreen does impact your performance in a positive way. This is because while in exclusive fullscreen, many background processes on your PC are paused as there's no need to render them directly, but in borderless, any background processes continue to run as normal.

#### Resolution

It's advised to keep your resolution native to what your monitor is running here; and if you intend to upscale using either DLSS or FSR, that will be covered later.

#### Quality Presets

You can use the settings the game suggests, but as with all things, they're only simple checks that figure out what you're running hardware-wise. They can't account for background resource usage, any recording software, or 73 browser tabs. If you're going to be running a lot of stuff in the background during play, it's always best to go a little lower than they would suggest.

**Because the next section of settings can vary depending on the hardware you're running, I'll express whether each setting is high impact and low impact.**

* Shadows - High Impact
* Anti-Aliasing - High Impact
* View Distance - High Impact
* Textures - Low/High Impact (Depending greatly on your GPU)
* Visual Effects - Low/High Impact (Depending greatly on your CPU)
* Post-Processing Effects - Low Impact
* Foliage Quality - High Impact
* Motion Blur - Low Impact
* Depth Of Field - Low Impact
* Point-Light Shadow - Low/High Impact (Depending on your GPU)

#### V-Sync and Frame Rate Limit

V-Sync and Frame Rate Limit are two really important ones to discuss if you're having a lot of stuttering issues. V-Sync is designed to lock your game to the refresh rate of your monitor, and having it on or off incorrectly can lead to stutters and some visual issues.  If you're running a monitor with a refresh rate of 60HZ, and you're getting consistently more than 60FPS, you want to turn this setting on. If you're running a monitor with a 120HZ refresh rate but are getting consistently less than 120FPS, turn the setting off and then lock your framerate to get closer to what you're getting—be that 60FPS or 90FPS. It's also important to note in both situations that you may want to lock your framerate to something your system can achieve..

#### DLSS and FSR

DLSS by NVidia and FSR by AMD are both incredibly complicated pieces of technology that I cannot really begin to understand, but are not all the makers herald them to be. DLSS can perform something called upscaling, which is when DLSS takes your native resolution and, using deep-learning-AI, renders your game to look like it's running at a higher resolution. For example, you might be running your game in 1080P, but DLSS will attempt to make it look like you're running at 1440P. The Quality setting will give you a smaller boost but better visuals, while the Performance setting will give you massively increased performance but noticeably worse visuals, so experiment with this one to find what works for you. Please note however that DLSS is only available on 20+ series NVidia GPU's, and does not work at all on AMD GPU's.

FSR is very much the same thing, however, one notable benefit to this one is that it's available to a much, much wider range of GPU's. This includes even 9 and 10 series NVidia GPU's, giving them a nice new lease of life. Sadly, it appears Soulmask doesn't use FSR 3.0 😞

***

### Soulmask Launch Settings on STEAM

<div align="left"><figure><img src="https://772063455-files.gitbook.io/~/files/v0/b/gitbook-x-prod.appspot.com/o/spaces%2F-Lgje1lBxKKWXwqycB-v%2Fuploads%2FLsftIAVzRBrebjA3f39K%2Fimage.png?alt=media&amp;token=8f760112-e5c9-42d1-ae37-6727fc71fe43" alt="" width="375"><figcaption></figcaption></figure></div>

On Steam, go to your library, right-click on Soulmask, select Properties and click on Set Launch Options.

***Here’s a list of the best ones you can and should use:*** \
-high -lowmemory -dx12 -window

***-dx12 -*** Forces the game to run in the dx12 Graphics Mode.

**-high -** Forces high CPU priority, which might give you extra FPS.

**-full** - (fullscreen mode) (Use -window if you tab out of game for discord etc.)

***ALL LAUNCH OPTIONS Explained.***

-USEALLAVAILABLECORES - (the game will use all your CPU cores)\
-sm4 and -d3d10 - (runs game with DirectX 10)\
-nomansky (removes clouds and some sky effects)\
-lowmemory (the game will use only 4gb of your RAM)\
-w 640 -h 480 - (runs game in 640x480 resolution)(resolution can be changed to your choice)\
-full - (fullscreen mode)\
&#x20;-window - (windowed mode with borders)\
-noborder - (windowed mode without borders)\
-low - (runs ARK as a low-priority process)\
-high - (runs ARK as a high-priority process)\
-noaafonts - (removes fonts anitalising)\
-autoconfig - (return default settings)\
-novid (turns off some cinematics)\
-console - turns on the developer console \
-noeac - turns off the easy anti-cheat software. \
-dx10 - toggles dx10 use\
-dx11 - toggles dx11 use\
-dx12 - toggles dx12 use

***

## Guide to Known Issues & Fixes

### **Save File Locations**

The location of the Player save game file for Soulmask is actually rather simple. If you truly know what you’re searching for, that is.

#### **Single Player Save File Location**

```
C:\Users\YourName\AppData\Local\WS\Saved\AutoGames\
```

**Multiplayer Save File Location**

```
YOUR Disk\Steam\steamapps\common\Soulmask\WS\Config\GameplaySettings\GameXishu.json
```

### **How to Fix Crashing and Black Screen Issues** <a href="#id-1" id="id-1"></a>

#### **Run Soulmask as an Administrator. (Steam)** <a href="#id-2" id="id-2"></a>

I'd be guessing that 90% of Steam users don't know this but you can actually run games as admin from Steam.

* Go to library > right click game > properties > installed files > browse.
* Right-click .exe > run as admin.

#### **Disable or Retune Your Overclock Settings for Soulmask.** <a href="#id-3" id="id-3"></a>

Even if Soulmask isn't your most demanding game you should check your OC settings.

* Turn off any GPU, CPU, or RAM overclocking.
* Launch Soulmask and see if you are still getting a black screen.
* If disabling overclocking resolves the problem, reconsider your overclock settings. Starting with GPU, then CPU, and finally RAM.
* When you get stable settings you should be able to play without any future problems, though future game updates may change things so keep an eye on it.

### **How to Unlock FPS**

About the 60 frame rate lock:

* In the Settings -> Display mode, set to full-screen mode (note that the full-screen mode, not full-screen window mode).
* In the Settings-> Vertical Sync, turn off the Vertical Sync.
* In the Settings-> Frame Rate Limit, set to unlimited.
* Check whether Vertical Sync is enabled in system settings and third-party software. If it is on, please turn it off.

### **If You Encounter the Issue That You Can’t Login or Get Stuck on Loading**

You can try the method stated below:

* Restart Steam.
* Verify the Game and restart Steam.
* Update your graphics card’s drive to the updated version.

### **Trouble with opening the command line console**

If it happens to others, I resolved it by remapping the console key for Soulmask: Go to your Soulmask user folder:

```
C:\Users\<userName>\AppData\Local\WS\Saved\Config\WindowsNoEditor
```

Then edit the input.ini file and add the following lines. Chose which key to bind it to;

```
[/Script/Engine.InputSettings]
ConsoleKey=<input new key here>
```

<figure><img src="https://772063455-files.gitbook.io/~/files/v0/b/gitbook-x-prod.appspot.com/o/spaces%2F-Lgje1lBxKKWXwqycB-v%2Fuploads%2FFlwmRiLy6SY8piRuH3Lo%2Fimage.png?alt=media&amp;token=391d616e-6837-43da-b697-c5ef1b02a88b" alt=""><figcaption></figcaption></figure>


# Valheim Graphic and PC Enhancements

Post of helpful Optimizations and Client side bug fixes for our Valheim Players:

<figure><img src="https://772063455-files.gitbook.io/~/files/v0/b/gitbook-x-prod.appspot.com/o/spaces%2F-Lgje1lBxKKWXwqycB-v%2Fuploads%2F8clds4L5RdNpAUMUAs5e%2FALPHYS%20HELP%20DESK_Valheim.png?alt=media&amp;token=5466568e-883f-4645-a62e-81188997f3c3" alt="" width="563"><figcaption></figcaption></figure>

## Valheim Save Files

<details>

<summary>World save issues; Character/world gone</summary>

Valheim saves both character and worlds in separate folders in: **C:\Users\ \<username> \AppData\LocalLow\IronGate\Valheim**

**Sometimes a save-file gets corrupted**. Go to your above mentioned directory. Your world will have files named with .old rename the files and remove the .old extensions and answer YES, when it prompts you if you want to overwrite a current file with the same name.

If you look in Valheim/Characters, you will see `CharacterName.fch` and `CharacterName.fch.old`

If your character file gets corrupted, `CharacterName.fch` will be the corrupted file, however `CharacterName.fch.old` has a slightly older version of your character. \
What you want to do in this case is BACK THESE FILES UP FIRST. \
Then delete `CharacterName.fch` and rename `CharacterName.fch.old` to `CharacterName.fch` . You got your character back!

Now for worlds, go to Valheim/worlds. You will see 4 files for each world:

* WorldName
* WorldName.db.old
* WorldName.fwl
* WorldName.fwl.old

You will follow the same process here. **Back up these files first**, then delete `WorldName` and `WorldName.fwl`

Rename `WorldName.db.old` to `WorldName` (you’re just removing db.old) and rename `WorldName.fwl.old` to `WorldName.fwl`

***Keep your saves backed up at all times, the game is still buggy and you could lose all progress from a simple crash.***

If you are having sync issues or cannot find your local savefiles, download your Cloud Saves here: [***`https://store.steampowered.com/account/remotestorage`***](https://store.steampowered.com/account/remotestorage).  One easy solution to try is simply to stop Steam Cloud Sync.

If you have some **program or anti-virus** that prevents files from being created and/or edited on C: you will prevent any kind of character/world files from being created or any progress saved on them.

**If you share a computer** (with different logins) with a family member, but you both share Steam account. You can have issues with Steam and Cloud Saves. Example: Player 1 logins on computer, starts Steam. (then Steam Cloud saves will sync files on launch) then when you exit the game, Steam Cloud saves will sync again) if then player 2 launches the game from the shared Steam account, player 2’s local files will be prompted by Steam if player 2 wants to overwrite the files on C: - This can lead to issues if players 1 and 2 do not always have Steam connected and sync every time correctly. (like quickly close the computer for example so Steam does not get the time it needs to sync correctly)

**On a dedicated server, if you do not close the client correctly,** you can get corrupted files. Sometimes, this can happen when you exit the game forcibly by pressing Alt+F4 or using Task Manager in Windows to close the game. Instead of doing that, use the Quit option to leave the game, instead. Other times, players are finding that they'll log into their multiplayer worlds — both locally hosted and dedicated servers — only to find a world with an explored map but no trace of human settlements to be found. Even still, some updates have corrupted worlds during the update process.

</details>

## Graphic Enhancement for Play

Poor performance is often noticed even on the best gaming PCs because those systems normally run games exceedingly well. If your computer is running Valheim poorly, don't fret, as the game is still in very early access and is not yet optimized. That hasn't stopped some folks on Reddit from finding a few tricks to optimize performance though, so follow along with those hints if you're experiencing very poor performance.

<details>

<summary>How To Get More FPS In Valheim</summary>

The major issues in Valheim regarded more FPS ranges from the graphic settings that you have on your PC. You will need to lower the details of things that aren’t that pivotal to the gaming experience so that you get a smoother and better gameplay. To get more FPS in Valheim, here are few things that you should do.

* **Draw Distance/Level of Detail**
* **SSAO**
* **Vegetation Quality**
* **Particle Lights**
* **Resolution**

<img src="https://772063455-files.gitbook.io/~/files/v0/b/gitbook-legacy-files/o/assets%2F-Lgje1lBxKKWXwqycB-v%2F-MU2M00Dh3HHjvp9VODP%2F-MU2P7vI3Ok9LDhxWuLx%2FValheim_graphics.png?alt=media&amp;token=9b1e3ea3-0cc7-4a51-9624-f963a3594b42" alt="" data-size="original">Click Image to enlarge.

The level of detail does not matter as much in Valheim, things aren’t as refined as you would get from a AAA title but that does not rob you out of enjoying the game as you should. It is okay to sacrifice some of the details in the game to earn a bit more FPS.

**Vegetation quality** isn’t artistic nor is it something that will take your breath away, so why waste your GFX card and CPU’s output on it. You should dial down the vegetation quality and it will certainly help to get more FPS.

**Particle Lights** is another field that does not need much focus, turn it down so that your CPU can focus on delivering your better performance with more FPS in Valheim.

**Resolution** is only to be tweaked when you’ve exhausted every other option. While you should not have any problems getting 60 FPS on 1080 resolution, going anything above that will while not having a beast of a PC will result in you not getting the frames that you wish.

The game looks surprisingly great at 60 frames on 1080 resolution and there’s not much that you gain by pushing more. This is all there is to know about how to get more FPS in Valheim.

</details>

### GPU Settings

<details>

<summary>Optimize NVIDIA Settings</summary>

If you have an NVIDIA graphics card, you can do some things to tweak your settings. These tweaks require that you go into your NVIDIA 3D settings, from the NVIDIA Control Panel. \
Tip: Remember to keep your graphics card driver updated! Especially never graphics card will get a lot of performance boosts from just updating the drivers.

Open NVIDIA Control Panel and head over to the Manage 3D Settings tab on the left. If you want to apply these settings to all games, select global settings. \
However, if you want to apply these to only Valheim, select the Program List and look for the game. If you cannot find the game within the list, hit the browse button, navigate to the game’s installation directory, and select the .exe file for it. \
Once you’ve selected the game or global settings, change the power management mode to performance mode. This will ensure that your GPU is working at its maximum pace. \
Turn off Image Sharpening mode. This will turn off the sharpness post-processing that can hog up your resources. \
Disable Low-Latency Mode. \
Set the Max Pre-Rendered Frames value to 1. This will ensure that your GPU is working on the immediate next frame rather than trying to process what’s ahead. \
Enable Threaded Optimization and G-Sync if your monitor supports it. \
Set the Display Mode to Single Display Performance Mode. This can help massively if you have a multi-monitor setup as this tunnels the resources into a single display. \
For Texture Filtering Quality, select the Performance Mode option.

</details>

<details>

<summary>AMD Graphics Card Settings</summary>

If you have an AMD Graphics Card, you can change its settings using AMD’s Radeon Control Panel utility. Just follow these steps:

If you have an AMD Graphics Card, you can change its settings using AMD’s Radeon Control Panel utility. Just follow these steps: \
Right-click an empty desktop space and open up the AMD Radeon Settings Control Panel. \
Now, choose the Global Graphics option to change graphics card settings for your games. Once you’re in, turn off all the proprietary post-processing options that AMD has enabled by default. These include Radeon Anti-Lag, Radeon Chill, and Radeon Boost. \
Also, turn off wait for Vertical Refresh (which will boost performance but can cause screen tearing). Disable Image Sharpening, Anisotropic Filtering, Maximum Tessellation Level, Frame Rate Target Control, and OpenGL Triple Buffering. \
Now, turn on Surface Format Optimization. \
For the GPU Workload setting, select Graphics Mode for the best performance. \
Select Performance Mode under the Texture Filtering Quality option. \
Finally, set both Tessellation and Shader Cache to AMD Optimized mode for the most optimal experience while playing Valheim.

</details>

<details>

<summary>Valheim running CPU/GPU hot</summary>

Even though Valheim has lower polygon graphics, it uses raycasting, physical calculations, point light shadows, post processing, particle effects and many other things that other modern games also use. All of these combine into what may make you experience low FPS in a game like Valheim. In the game settings, there is a setting for Vsync. Enabling this limits the FPS to your monitors’ Hertz; this is something we would recommend high-end computers to use so the game doesn't try to produce the maximum number of FPS it can produce just for the sake of a lot of FPS, which in the end just makes your hardware run very warm when it doesn’t really need to.

</details>

### Steam Launch Parameters

<details>

<summary>Valheim Launch Parameters:</summary>

**`-windowed -lowmemory -high -force-vulkan -screen-width 1800 -screen-height 1050`**

You should set your pc to -window-mode exclusive -screen-fullscreen\
vs my setting for windowed mode. Most games run better in fullscreen.\
The same for setting your Screen width and Height to tailor it to your pc environment.\
"-force-vulkan" - This might increase your FPS!

![](https://772063455-files.gitbook.io/~/files/v0/b/gitbook-x-prod.appspot.com/o/spaces%2F-Lgje1lBxKKWXwqycB-v%2Fuploads%2Fg2Y2VgaOQjihtERGwvZF%2Fimage.png?alt=media\&token=d635a052-7630-47a7-ad2b-87a7f2f727af)Click image to enlarge

</details>

<details>

<summary>Valheim Key-binds:</summary>

Most like ARK or ATlas:

![](https://772063455-files.gitbook.io/~/files/v0/b/gitbook-x-prod.appspot.com/o/spaces%2F-Lgje1lBxKKWXwqycB-v%2Fuploads%2FX2WYqeeRfJbO43GyAo27%2Fimage.png?alt=media\&token=b2b90e0e-8535-4312-a30f-5bb23595af2a) Click image to enlarge

</details>

## Common issues and possible solutions

### BUG REPORTING

&#x20;Valheim developer Iron Gate runs an official bug page where you can report issues you have, as well as upvote existing issues and let them know which ones are the bugs to squish first.

{% embed url="<https://valheimbugs.featureupvote.com/suggestions/158466/fix-the-crashing>" %}

### Connection Issues

<details>

<summary>Very long loading time on worlds (after update)</summary>

The first time you launch an old world after a bigger (biome) update, the client will execute a “generate locations” command automatically and it will generate all those new locations that have been added to the game for players to discover. This can however have the issue of moving already spawned boss locations so the boss-marker on the map can be wrong. This is solved by removing the marker and interacting with a Vegvisir stone again.

</details>

<details>

<summary>Connection Issues - Client Crashing</summary>

### **Crashing**

Some players report that turning down in-game settings and have NVIDIA prioritize performance helps.  Unfortunately, there's not much you can do about this one except to report it on the official bug page and hope there's a fix soon. We don’t have a solution for this right now but we are working on it.&#x20;

Almost all crashes are **caused by mods, or mods that are outdated,** or (after mod uninstall) remaining mod files in the Valheim directory.

* Do you have any mods installed? Fully uninstall them and see if that helps - When you get a Unity crash on launch, this is almost always connected to an update we have done, and the creator of the mod has not pushed an update, or you as player have a mod that is not up-to-date. REMOVE ALL MOD FILES, if that does not help, REINSTALL Valheim. Be sure to MANUALLY delete every file in the installation directory!
* Reinstall the game/verify the game files.
* Some players report that turning down in-game settings and have Nvidia prioritize performance helps them.

### **Connection issue icon**

Closing apps that are Optimizing Your Network might help.

### **Sync issues on multiplayer servers**

Note: The devs are working on improving Valheim's multiplayer experience!

Maybe you're trying to chop down trees or attack enemies only to find that zero damage is being done? Multiplayer sessions, at times, get out of sync and cause weird issues like this to happen. If it's affecting everyone, restarting the server is probably the best option. If it's just affecting one player, that player should restart their client. Don't let this go on for too long as desynced player actions will actually take place once they've disconnected, which could result in quite a bit of havoc.

* Make sure that you are all playing on the same version of the game and if it is a dedicated server, that it is up-to-date.
* A player has reported that the Killer Network software (often found on MSI computers) causes sync issues. Uninstall the software (not the network drivers). To fully rid yourself of the sync issues, you may need to go to killernetworking.com and get their uninstaller.

</details>

<details>

<summary>Can’t find my server in the server list</summary>

#### Method 1

Here are a few simple steps to fix Valheim Dedicated Server not showing up:

* Make sure the ‘Community Server’ option is ON.
* Type the name of the server correctly.
* The host of the server must be online and playing the game on the dedicated server.
* If you are still having the same issue then restart the game and repeat the same steps.

#### Method 2

* Launch Steam client.
* Go to the View menu and select the Servers option.
* This will bring a Steam server browser. You will need to select the favorites tab.
* Click on the add a server button
* Enter the IP address of the dedicated server.
* This will bring the list of your server. Select it and click on Connect and enter the password.
* This will open Valheim.

</details>

<figure><img src="https://772063455-files.gitbook.io/~/files/v0/b/gitbook-x-prod.appspot.com/o/spaces%2F-Lgje1lBxKKWXwqycB-v%2Fuploads%2FG0lUB531j5HAUcxegl4Q%2Fimage.png?alt=media&amp;token=9b12bdbd-f0de-4735-940a-3fbce11b0ec0" alt="" width="375"><figcaption></figcaption></figure>

### Game Play Glitches

#### **Camera- and controls out of control**

Disable game pad.

<details>

<summary>Issues with build menu, cannot interact with chests, weird things are happening</summary>

The usual fix for this is to verify your installed files. Right click Valheim in your Steam Library -> Properties, Local files and click the “verify your gamefiles” option.

</details>

<details>

<summary><strong>No auto-pickup for items!</strong></summary>

We have added the option to toggle auto-pickup so your inventory doesn’t get clogged when you run from point A to B, or while mining and you don’t want to pick up everything while you're pickaxing. The default key for this toggle is “V”, but you can go to keybindings in the settings menu to change this to whatever you like.&#x20;

</details>

<details>

<summary><strong>Cartography table pins</strong></summary>

The last person that updates the table will have their markers on the map. This is so the table doesn’t save every single marker people have placed.

* Updated map
* You will now see every position where you have died, instead of the old one where it only showed the latest death. You can remove them by right-clicking with the mouse on them.
* When you have some copied pins on your map, they will appear dark-gray. But left-click with the mouse on the, they will turn white and they will then be added to your markers.
* You can now toggle which type of markers you will see on the map. Right-click on them on the right side of the map GUI and you can toggle the groups on/off.

</details>

<details>

<summary>The Flying Karve of legend.</summary>

Some players have seen ships flying to and fro in the skies of Valheim, only to realize that it was the very ship they just worked hard to build! Turns out, a bug is causing some of the seabirds to land in a ship and accidentally take control, forcing the boats to take to the skies and move in wholly unnatural ways. There is no fix for this bug at this time and no real way to avoid it.

</details>

<details>

<summary>Flipped boats and mysterious damage</summary>

Something funny can happen when a player uses a portal; the path their character takes can leave a wake of destruction. In Valheim, portals physically move your character across the map during the teleporting process and can sometimes destroy objects and flip boats. To prevent this, make sure there aren't loose player-built objects or boats between portals. Basically, draw a straight line between your portals on the map and keep things clear of that line. This doesn't apply to buildings or other anchored objects like furniture.

</details>

<details>

<summary>Tombstone gone</summary>

When players die in Valheim, everything their character has equipped, as well as everything in a player's inventory, get placed in a gravestone that marks their death site. That, of course, is how it's supposed to work but some players are returning to their point of death only to find no grave marker and no items to retrieve. Sometimes, it occurs when a player jumps and dies in the air. Other times, this happens at the entrance to a crypt — trapping the gravestone between the points where a player is forced to warp in or out of a crypt, making the items irretrievable. Right now, there is no workaround for this issue.

These bugs fall within that annoying category and generally won't do much harm, although they could be problematic if you don't avoid them in the first place.

</details>

<details>

<summary>Seats and Tables</summary>

Players can outfit their lodgings with various pieces of furniture to increase its comfort level, keeping that resting buff around for longer periods of time. One bug is preventing some players from reaching maximum comfort level, and it's caused by stools and benches. These places to sit seem to override the comfort advantages of chairs, lowering your home's overall comfort level by one point. Adding a table to the mix fixes this and even adds an additional comfort level beyond what a chair alone will.

</details>

<details>

<summary>Wards are an INDOOR Pet!</summary>

Wards can be crafted to make a player's home their sanctuary. These decorative statues create a magical barrier that makes it impossible for other players to break any items inside that barrier; that is until this ugly bug reared its head. Wards, apparently, have no magical power over themselves and can be destroyed, thus, rendering their entire purpose pointless in the game. Until this bug is fixed, make sure to place your Ward inside your Buildings for protection from Griefers. Our server is password protected and whitelisted for our protection.

</details>

<details>

<summary>Fire Burn Baby!</summary>

Valheim players will find that just hovering the blueprint of a hearth or a firepit underneath themselves can sometimes feel so real that it actually begins burning the player. Now that's one realistic vision. Until this bug gets fixed, make sure you're placing firepits or hearths at least a few feet away from yourself. If you catch fire, DONT stop drop and roll! Run right out and Jump in the nearest body of water.

</details>

<details>

<summary><strong>Fire related equipment need VENTS.</strong></summary>

The smelter, blast furnace, oven, and charcoal kiln now produce smoke that needs to be ventilated out, just like the brand new bathtub! If it cannot go anywhere, the equipment will stop working in periods or looks like it is flickering.

Build a chimney, or create a raised section of roof right above the fire related Equipment!

</details>

<details>

<summary>Smelted Deer?</summary>

Ever heard a funny sound coming from your smelter? Take a look inside and you might find something wholly disturbing; a deer stuck in the blazing furnace, unable to escape. While it seems horrifying at first, these deer appear to take no damage from the furnace and can even be easily killed to deliver easy deer hides to the player. Chalk this one up to a bug that turned into a bonus.

</details>

<details>

<summary>This Little Piggy. Raising boars in Valheim</summary>

Raising boars in Valheim? Be careful not to leave the gate open, as some boars can escape and make a beeline back to their spawn point. The escaped boars run at maximum speed for as long as it takes to get back to their point of origin in the world — a behavior that's quite abnormal in the game — and cannot be tamed again.

</details>

<details>

<summary>3 Fish + 3 Fish = -5 Fish? Where are my FISH?</summary>

When you break most items in Valheim, particularly pieces like walls and other homely goods, they are supposed to break into the raw materials it costs to craft them. At times, an item broken returns nothing but sadness and loss instead of said raw materials. This doesn't appear to be an intended consequence, thus is, instead, a bug.

</details>

<figure><img src="https://772063455-files.gitbook.io/~/files/v0/b/gitbook-x-prod.appspot.com/o/spaces%2F-Lgje1lBxKKWXwqycB-v%2Fuploads%2FXOCu5xAuLuFYrC4yWgeZ%2Fimage.png?alt=media&amp;token=b5887eda-8b5e-4859-864e-77d31186838f" alt=""><figcaption></figcaption></figure>